With 4K and mirrorless cameras it is no longer a question of if you will get a dust spot, it is when. Here is how to mask them out with Dust & Scratches in Premiere Pro, and the faster After Effects method for when a clip is really filthy.
With 4K and mirrorless cameras it is no longer a question of if you will get a dust spot, it is when. Here is how to mask them out with Dust & Scratches in Premiere Pro, and the faster After Effects method for when a clip is really filthy.
Save time and download my free 4K Export Preset for Premiere Pro!
Way back in 2012 I wrote a blog post about my export settings for high definition videos in Premiere Pro. That post went on to become one of the most popular posts on my site. Wanna know what the second most popular post was? My video export settings for Instagram videos in Premiere Pro.
There’s a trend here, and I realized that with the advent of 4K video, I had the opportunity to create a new text and video tutorial about the settings that I use when shooting with my Sony A7Sii. As I prepared to create this tutorial, I decided that this would be the perfect time to revisit those posts about my high definition and Instagram export settings, and create videos for them as well.
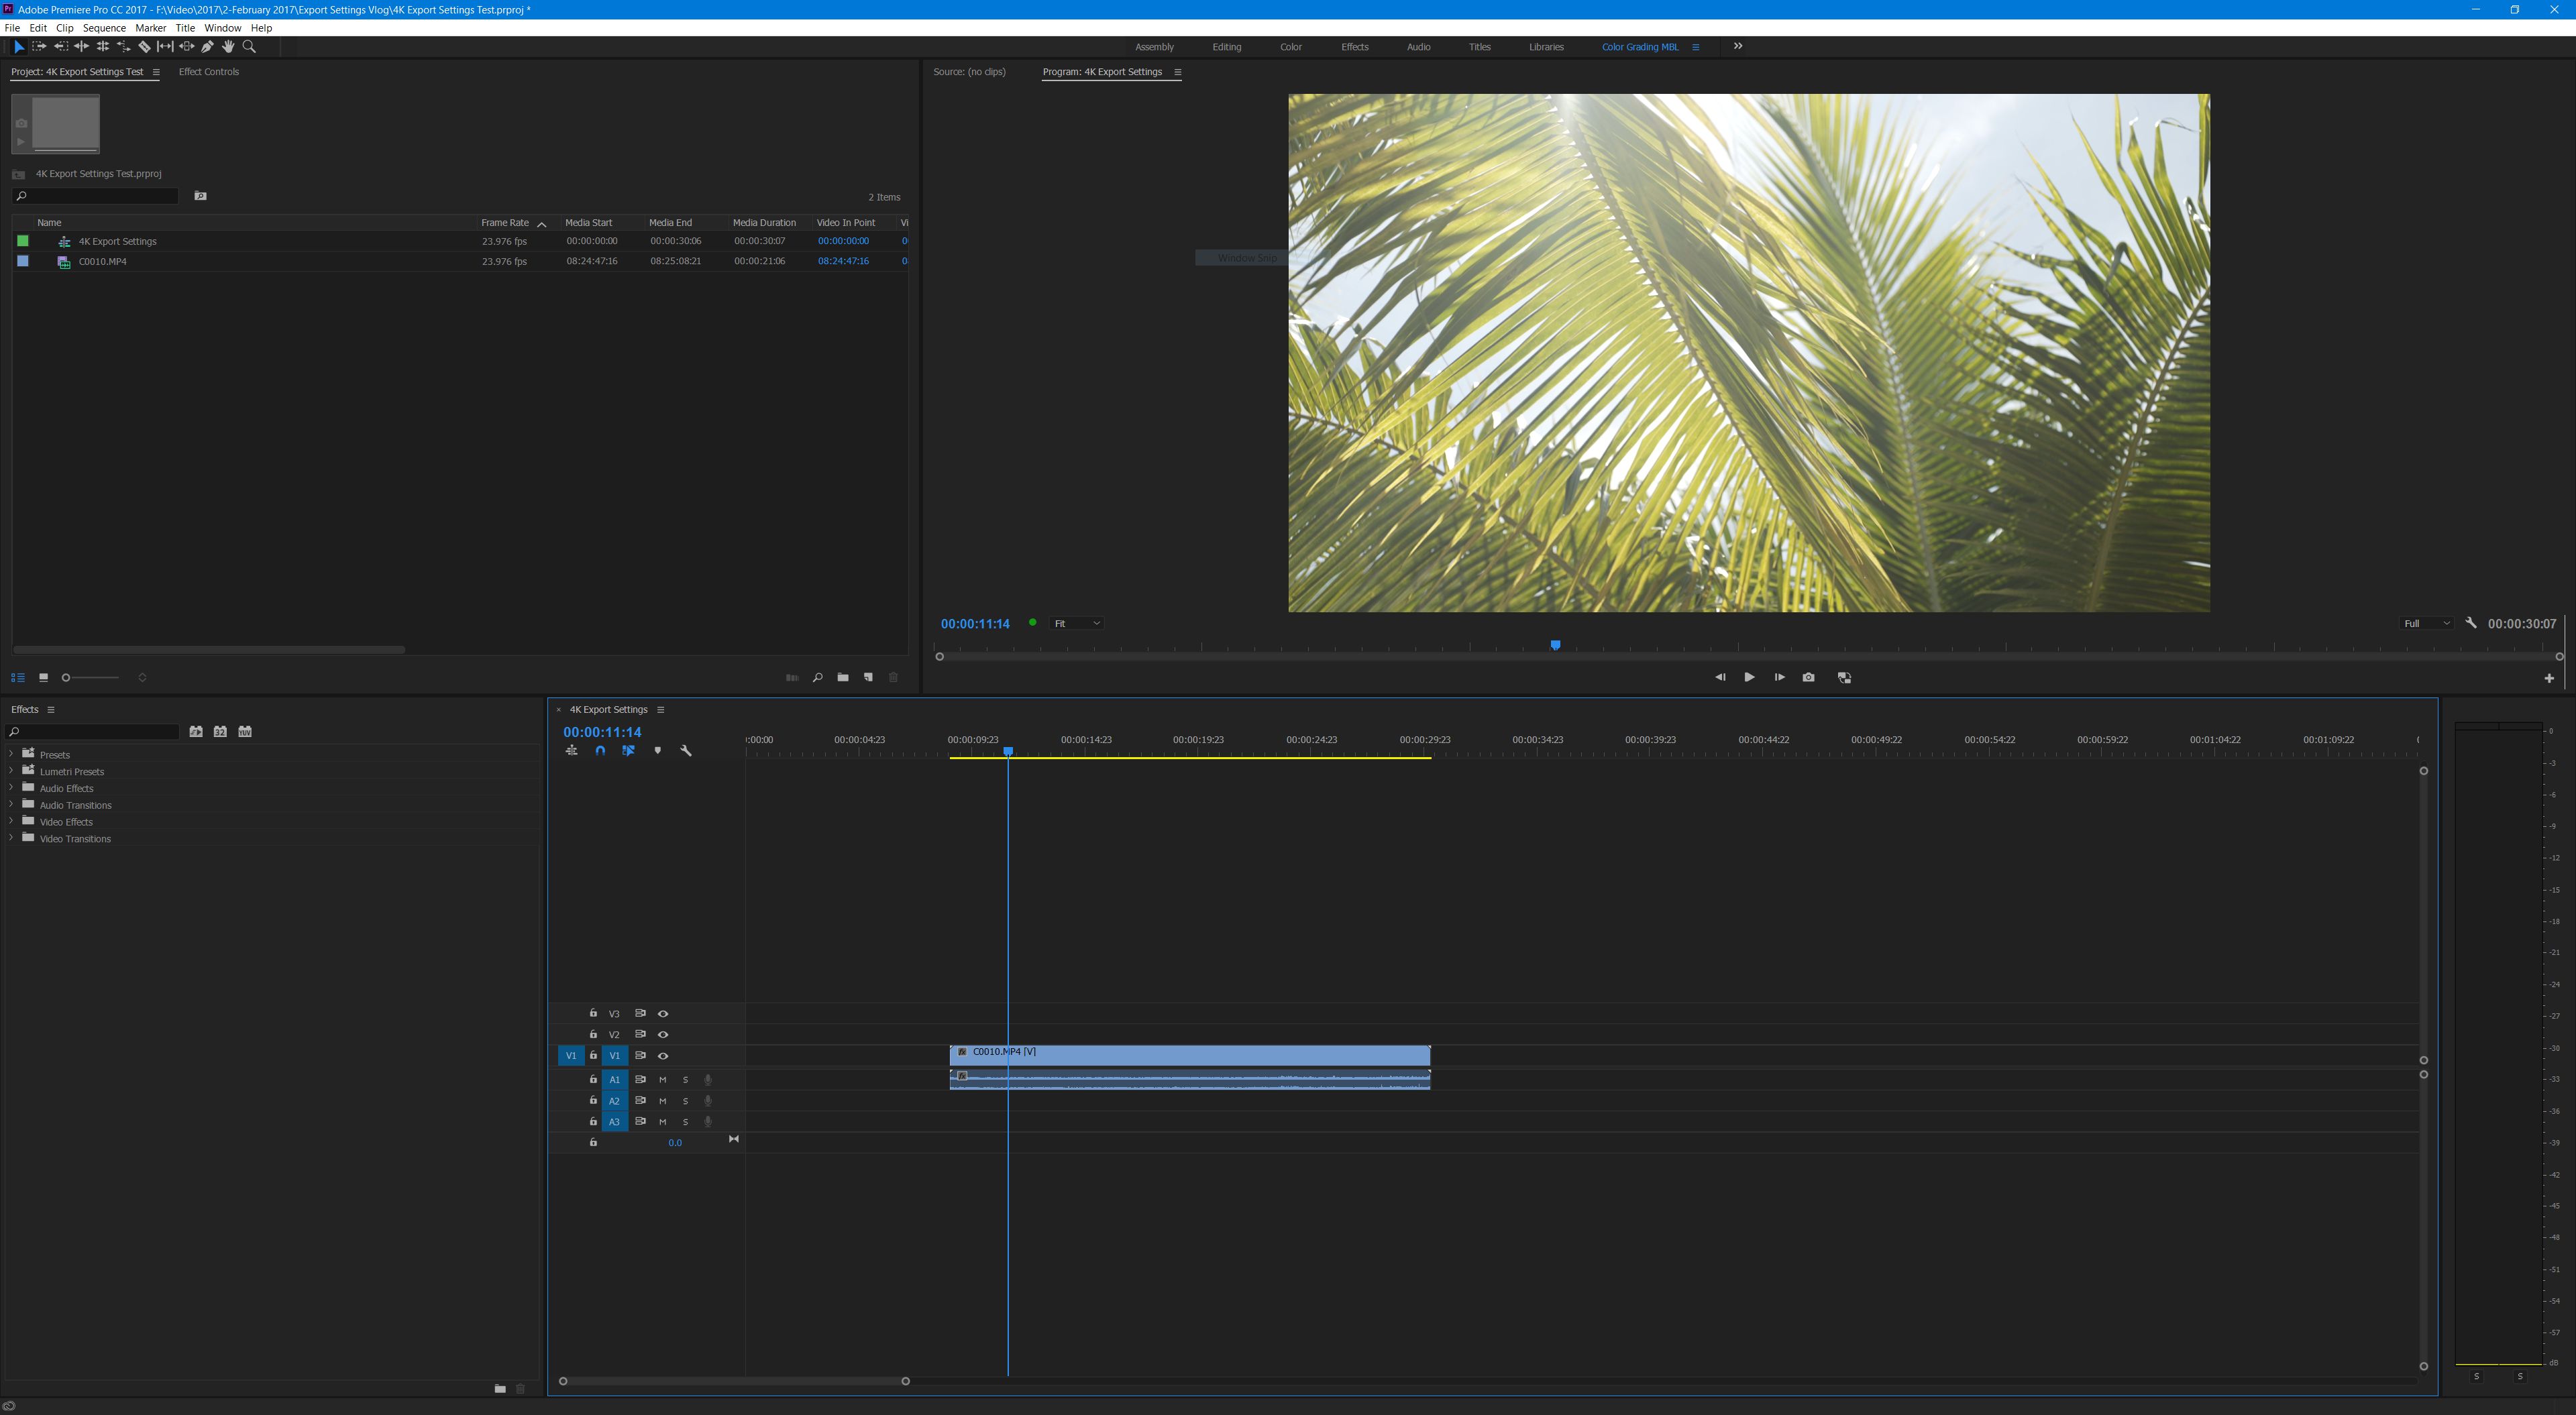
Adobe Premiere Pro CC 2017 doesn’t look very different from CS5.
My text guide for how to export 4K video in Premiere Pro CC for YouTube and Video
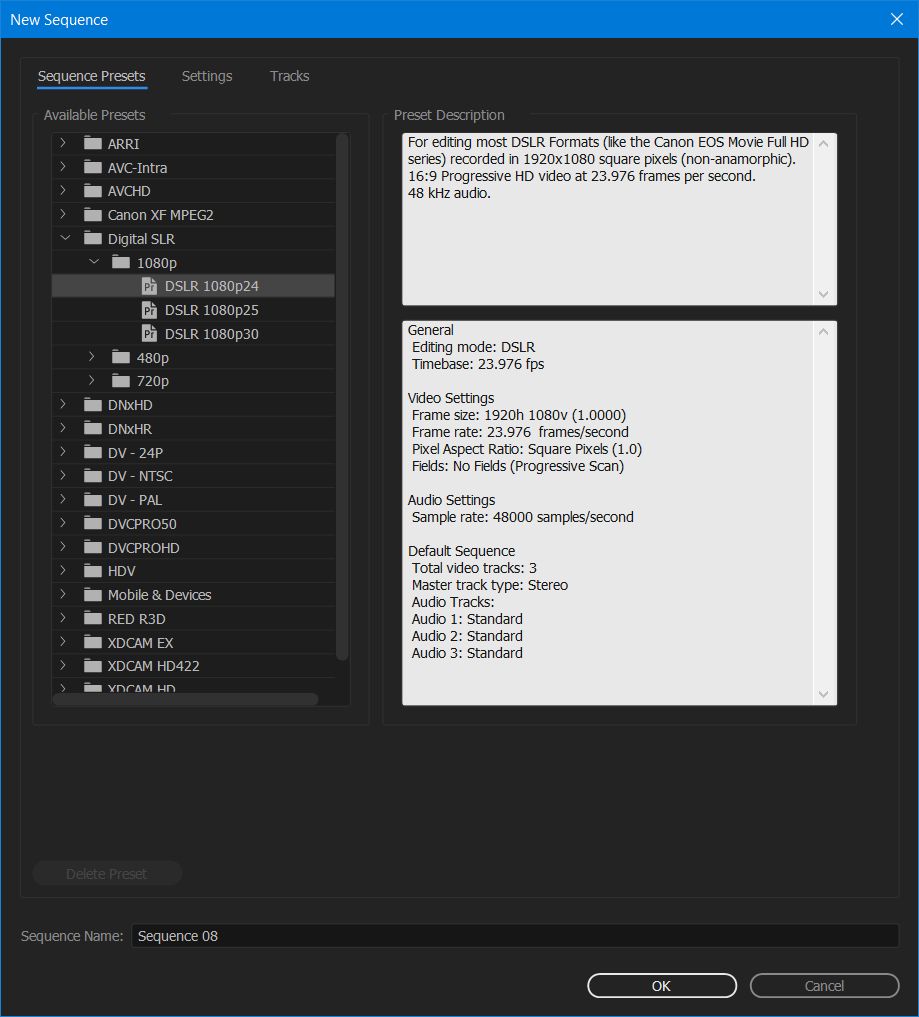
Before I get to my export settings, I need to discuss the sequence preset that I use. Premiere uses the term “sequence” to describe the timeline that you will use when editing your video. It is important to select a sequence preset that is the same as the video settings that you used when filming with your camera. You can use “Ctrl + N” or go to “File > New > Sequence” to open the new sequence dialog box. For the video clip I use in this project, I filmed in 3840×2160 resolution at 23.976 fps with the Sony A7Sii. I need to select a new sequence preset that is the same as these video settings.
The New Sequence Preset Window
SEQUENCE PRESET SETTINGS
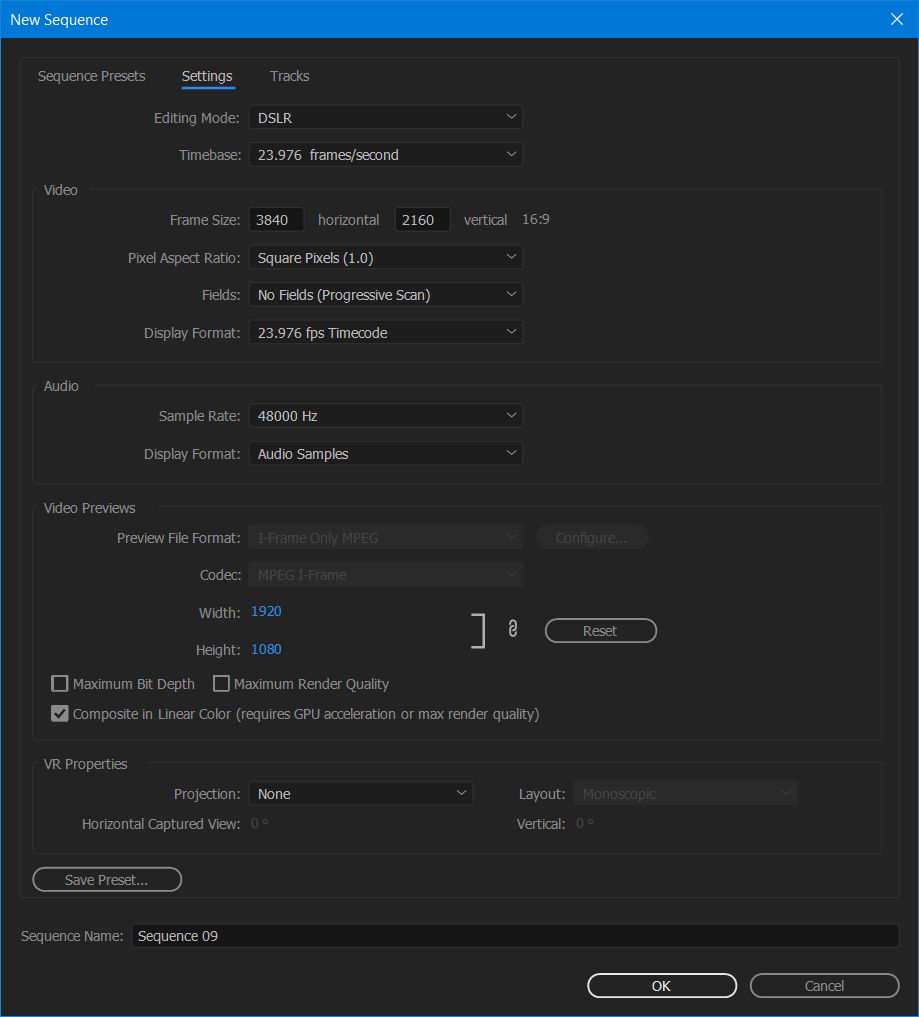
Once you have opened the New Sequence window, you have many presets to choose from. Because there aren’t any available for 3840×2160 footage, I would instead select “Digital SLR > 1080p > DSLR 1080p24” and then select the “Settings” tab at the top of the window. Under the “Video” heading, change the “Frame Size” to “3840 horizontal” and “2160 vertical”. Keep the rest of the settings the same as the preset.
New Sequence Settings
SAVE YOUR NEWLY CREATED PRESET
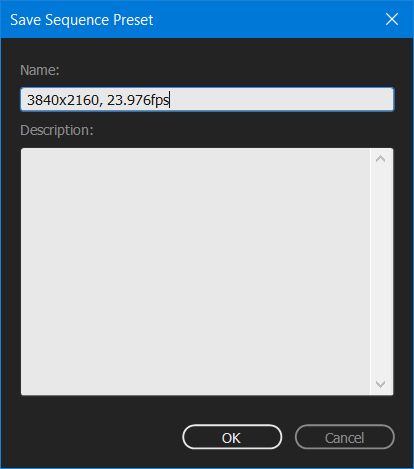
Click “Save Preset” at the bottom and save your settings as a new preset. I named mine “3840×2160 23.976fps” so I can easily remember it when editing future videos. Next select your newly made preset, and edit your video clips on the timeline you have created.
Save your sequence preset.
SET YOUR IN AND OUT POINTS
Once your video is edited and ready to render. You need to set your “In” and “Out” points. Do this by moving the video playhead to where you want the opening frame of your rendered video to begin and press the “I” key on your keyboard. Then move the playhead to the end of your video and select the “O” key on your keyboard. The timeline will turn a darker color where your in and out points are selected. It is now time to export your video! With the timeline selected you can either press “Ctrl + M” on the keyboard, or navigate to “File > Export > Media” in the menu.
Set your “In” and “Out” points.
BEGIN CHANGING YOUR EXPORT SETTINGS
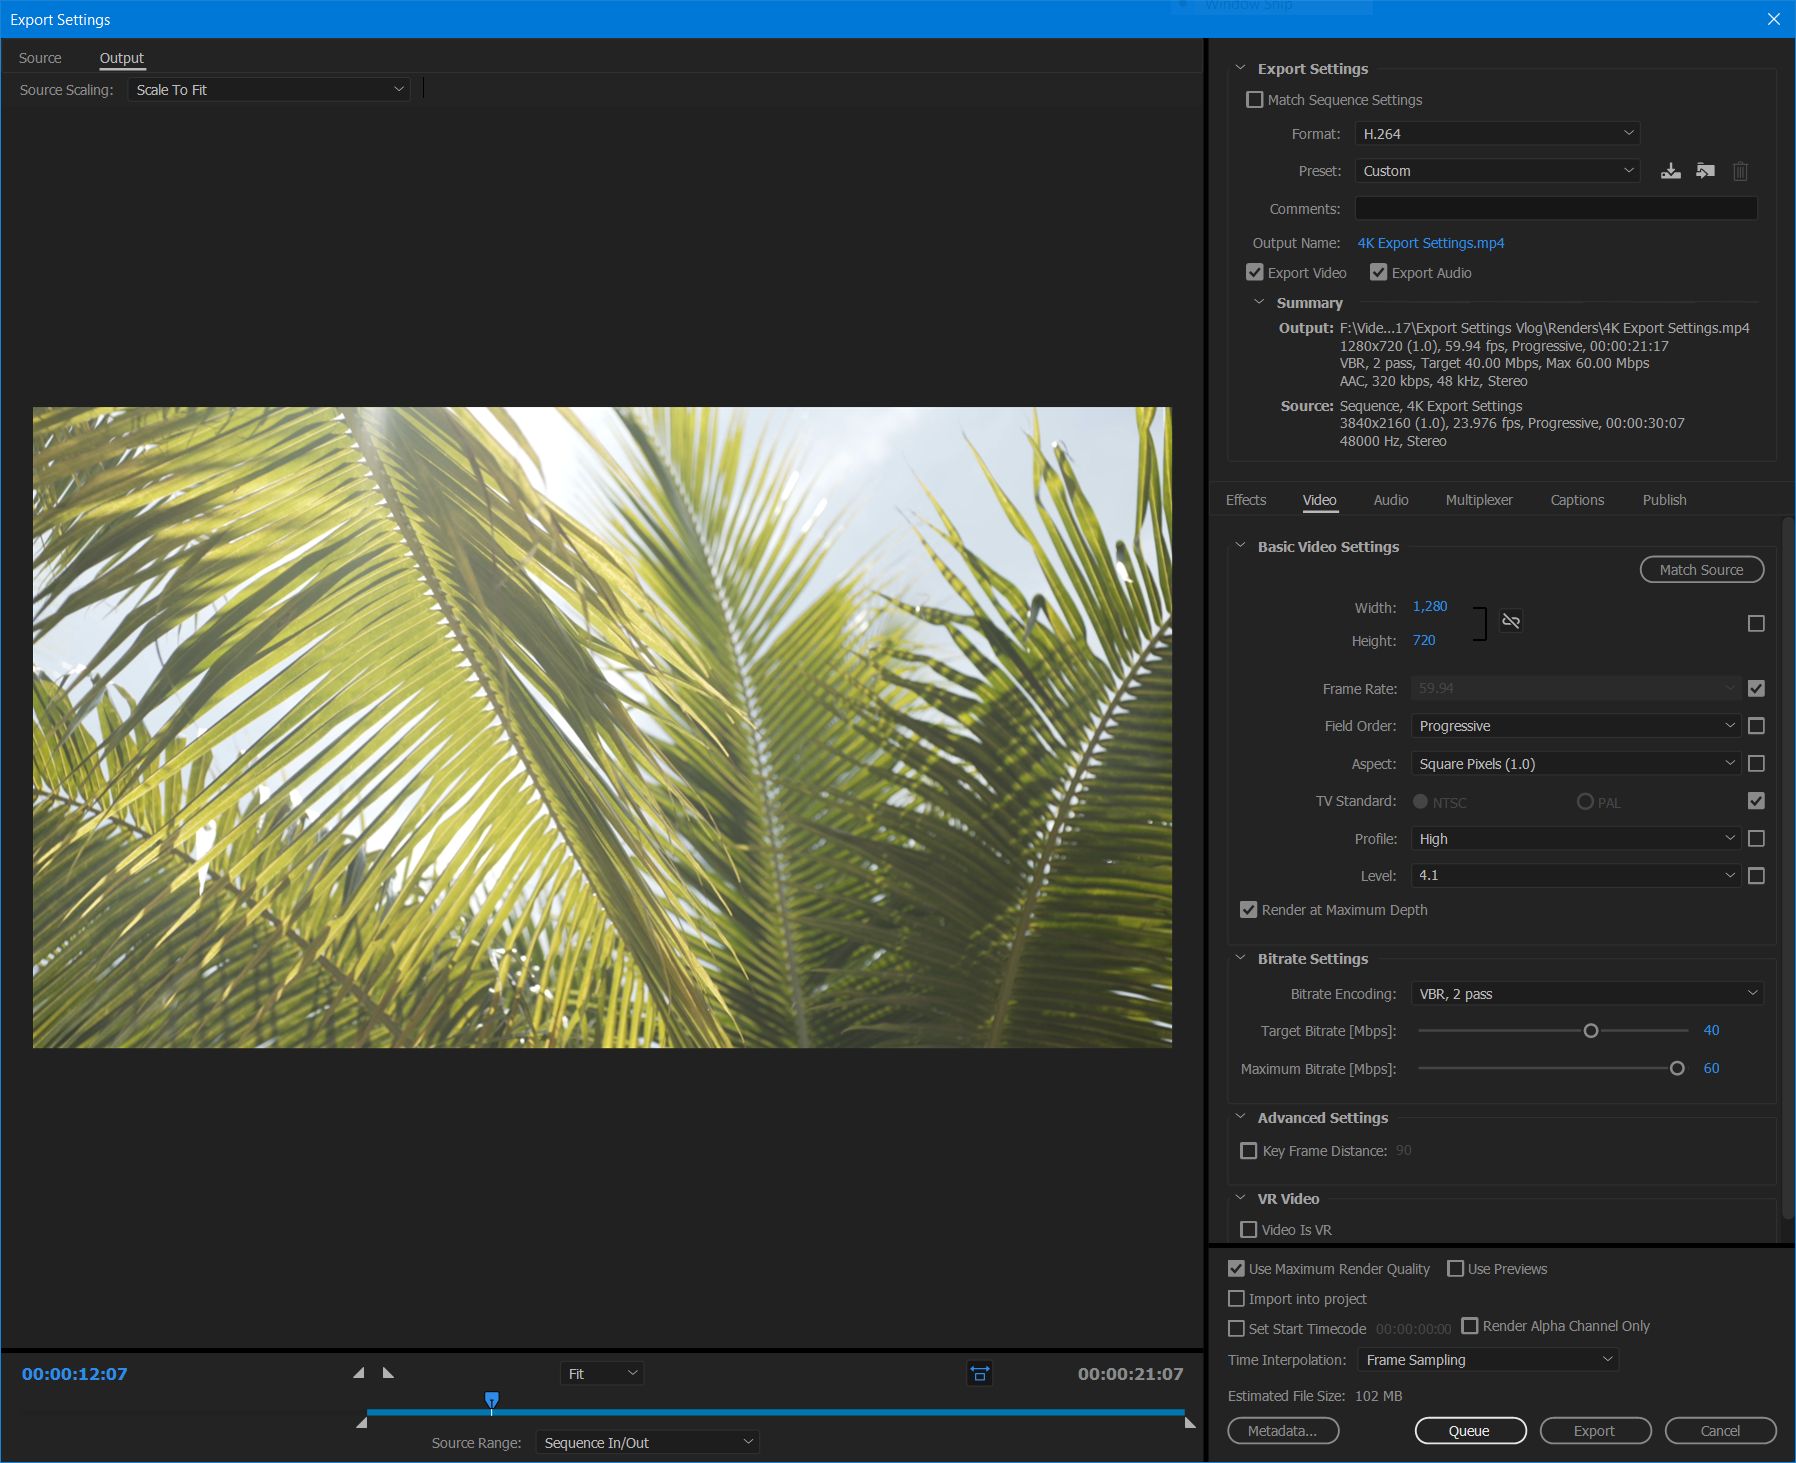
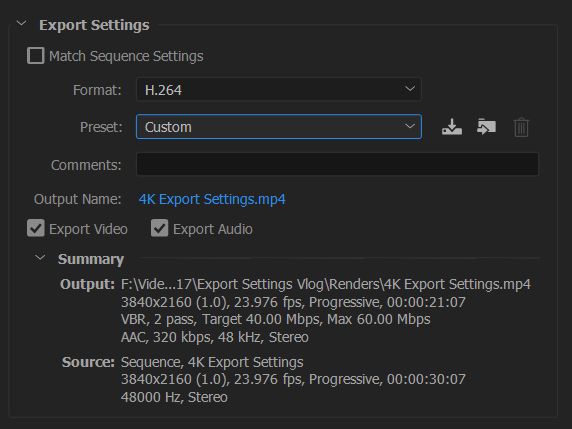
You’ve now opened the “Export Settings” dialog box and there’s approximately 3,000 settings you could change. Don’t freak out though, we’re going to tackle this one section at a time. First, under the “Export Settings” heading on the left, next to “Format” select “H.264” from the drop down menu. For Preset select, “Custom.” Click the blue text next to “Output Name” and select a name and location to save your video file. Make sure both the “Export Video” and “Export Audio” boxes are checked.
How the export settings dialogue box looks upon opening it for the first time.
The export settings heading of the dialog box.
BASIC VIDEO SETTINGS AND BITRATE SETTINGS FOR YOUTUBE, VIMEO, FACEBOOK, AND OTHER VIDEO SITES
If you are uploading your video to YouTube, Vimeo, Facebook, or any other video site that supports 4K, I recommend using the below settings. The file sizes will be quite large, but this will ensure that your video retains its quality when you upload it to these sites and they convert it into different formats and resolutions. Also, if you want to know my reasoning for choosing these settings, please watch the tutorial video.
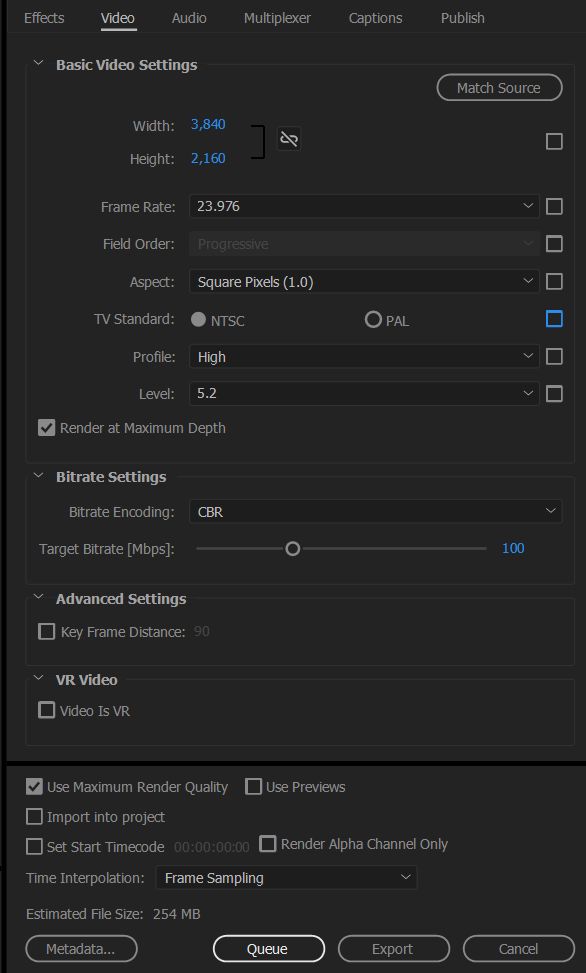
Select the “Video Tab” in the middle of the export settings dialog box and set “Profile” to “High” and “Level” to “5.2”. Then make sure your “Width” is set to “3,840” and your “Height” is set to “2,160”. Set your frame rate to “23.976”, and check the “Render at Maximum Depth.”
Under “Bitrate Settings” set “Bitrate Encoding” to “CBR” and your “Target Bitrate [Mbps] to “100.” Lastly, check “Use Maximum Render Quality” at the bottom.
Basic video settings and Bitrate settings.
BITRATE SETTINGS FOR GIVING YOUR 4K VIDEO TO CLIENTS
If you are not planning on uploading your video to an online video site, and instead are giving it to a client, I would recommend using these bitrate settings because the file size won’t be nearly as large.
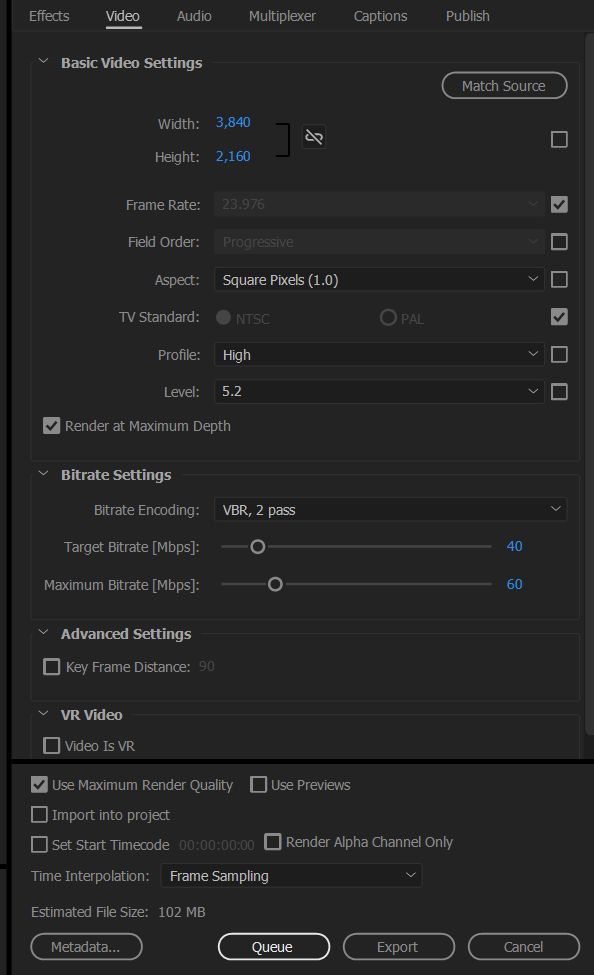
For “Basic Video Settings” use the same settings as you would if you were uploading to an online video site. For “Bitrate Settings,” change “Bitrate Encoding” to “VBR, 2 Pass.” Set “Target Bitrate [Mbps]” to “40” and Maximum Bitrate [Mbps] to “60”. Lastly, check “Use Maximum Render Quality” at the bottom.
Basic Video Settings and Bitrate Settings for clients.
CHANGE YOUR AUDIO EXPORT SETTINGS
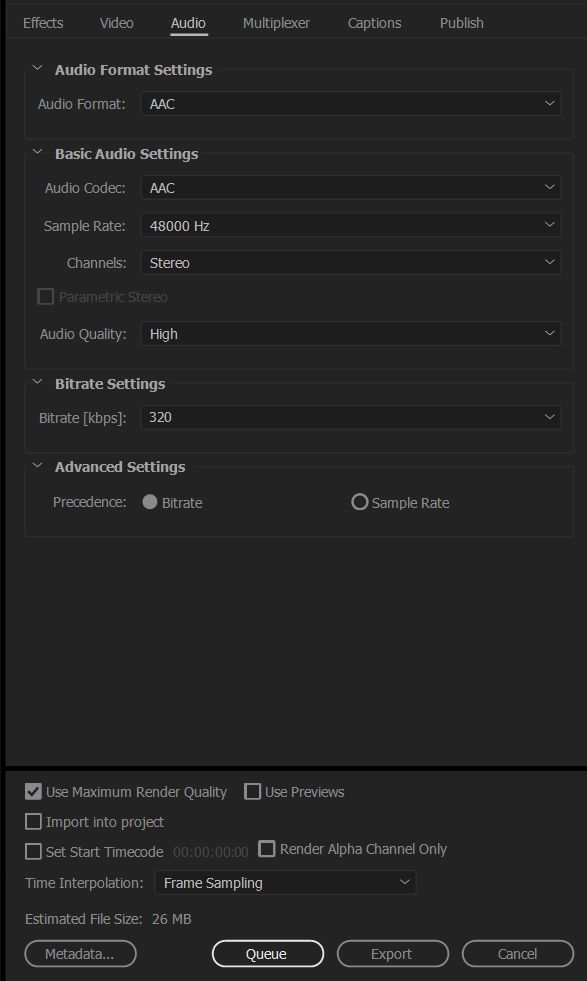
Click the “Audio” tab in the middle of the Export Settings window and for “Audio Format” select “AAC”. Under Basic Audio Settings, set the “Audio Codec” to “AAC”, Sample Rate to “48000 Hz”, “Channels” to “Stereo”, and “Audio Quality” to “High”. Lastly, for “Bitrate Settings” set “Bitrate [kbps]” to “320” and under Advanced Settings set “Precedence” to “Bitrate”.
Audio export settings.
SAVE YOUR VIDEO PRESET
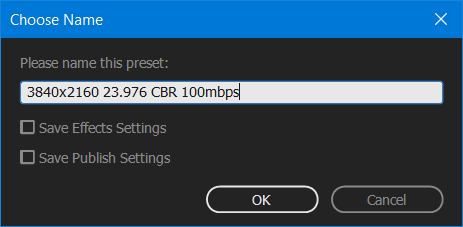
Now that you have created your video settings, click the down arrow icon to the right of your “Preset” at the top, and name your new Export Preset either “3840×2160 23.976 100mbps cbr” or “3840×2160 23.976 40,60 vbr” depending on whether you are saving the 100mbps CBR preset or the 40,60 VBR preset.
Video Export Preset
EXPORT YOUR VIDEO
You are ready to click “Queue” or “Export” at the bottom of the dialog box and render your video!
I hope this video and tutorial has been helpful to you. As always, if you have any questions or comments, please feel free to leave one below or get in touch.
This is a big one. I’m giving all my audio secrets away. For over a year the single most requested topic has been audio: how I approach recording it for a wedding film, the exact gear I use for the notes, the ceremony, and the toasts, and how I make it all sound good. Today’s the day I reveal it all.
Why Audio Matters More Than You Think
Audio is one point of what I’m going to call the triangle of power, which is a completely made up term I invented about four seconds ago.
Point one is your visuals, the beautiful imagery your camera is recording. On its own it’s pretty, but it isn’t compelling. Point two is music, which adds emotion, and now the viewer feels something. Point three is live audio, somebody speaking, somebody telling a story. Put all three together and it becomes genuinely compelling: people see something beautiful, feel something because of the music, and hear a story at the same time.
For a wedding I’d argue audio is the most important of the three. Without it you’ve made a pretty music video montage. With it, your couple gets to relive their day exactly as it happened.
One more thing before the gear. Audio comes in two parts, just like video does. Your recorder captures raw audio the same way your camera captures ungraded footage, and it hasn’t been improved in any way yet. Whenever I was starting out I’d edit the picture until it looked great and then just drop the audio on a track and call it done. Take the time to learn to edit audio as well as you edit picture and suddenly the lows sound better, the highs are clean, and people actually respond to your work. I did eventually make that video, and here it is.
Recorders
Zoom H5
This is what I reach for first on a wedding day. It has a ton of inputs and, more importantly, physical dials, so I can watch and control my levels while I’m recording. Anything I’m monitoring live goes through this: the couple reading their letters, a message one of them wants to record, anything I’ve put a mic on before the ceremony.
The one drawback is that it has no auto gain control. So the H5 is fantastic whenever you can watch it and terrible whenever you can’t. It’s a special-use recorder for me, not a set-and-forget one.
Zoom H4n
You probably recognize this one, because who doesn’t. I’ve owned mine since 2009 and it’s still going strong. It has been the workhorse of my entire audio life and it has auto gain control, so I can press record, walk away, and it handles the levels itself.
Two drawbacks. The nitpicky one: you have to press record twice. The first press just starts monitoring, the second actually records, and I have absolutely stood there having pressed it once. The H5 doesn’t do that. The real one: battery life. This thing sucks down batteries like nothing else, so on a wedding day I bring the AC adapter and keep it plugged in, because I am not risking losing a ceremony to a dead cell.
Why own both? Because I shot a wedding that had two soundboards at the reception, on opposite sides of the room, and they were using both for toasts. I needed a recorder in each one. Now if that happens again I’m covered.
Three Small Voice Recorders
Three little Olympus voice recorders, which I pair with three lav mics as three completely standalone units. No wireless signal, no interference, nothing to go wrong between the mic and the card. Battery life is great, they run for hours and hours, and they take a micro SD card so recording time is basically a non-issue.
(Those exact models are discontinued now. The Sony ICDUX560 is the current stand-in. And yes, people ask why I’m not using one of the fancy Tascam DR-10L systems: at the time of this video I simply hadn’t bought one yet.)
Five Recorders Is Not Crazy
At this point you’re going “Matt, five recorders?” I believe in backups, and I believe in backups for the backups. I have had a DJ tell me he has never once had an audio problem, everything is always perfect, trust him completely, and I say that’s great, I don’t trust you at all. I’ve been at weddings where the entire house system died mid-ceremony and the minister was up there talking to a room that couldn’t hear him.
I want their audio and my audio. Minimum three sources, ideally five, because the quality varies and having options guarantees the film sounds as good as it possibly can. And remember: this is a wedding. There are no do-overs. Nobody is going to run the ceremony again because you weren’t rolling.
Microphones
Sennheiser Wireless Lav
The transmitter and receiver are both small enough to clip onto a belt or drop in a pocket without anybody noticing. Sound quality is great and the battery life is outstanding, hours and hours, straight through the longest ceremony I’ve ever filmed, and I’ve never had to swap one mid-day.
I use it first thing in the morning for the letters, running straight into the Zoom H5 so I’ve got manual gain and can ride the level as they read. During the ceremony it goes into the XLR inputs on my camera, which means audio and video arrive already in sync. Without a camera with XLR in, I’d run it into the H5 and keep that on me so I can keep monitoring while I move.
Microphone Madness Matchstick Lapel Mics
I have three of these, one for each voice recorder. They are about the size of a match, which makes them brilliant for hiding in awkward places.
The connector is an L bracket rather than a straight plug, which means it does not come loose whenever somebody pulls at it sideways. Between that and the hold switch on the recorders, I have never lost a recording to somebody bumping a cable or tangling it in a shirt. One setting to change: these mics are very sensitive, which is good, but set the recorder’s mic sensitivity to low or you’ll peak.
Rycote Stickies (Skip The Clip)
These mics come with a clip. The clip is terrible and flimsy and will break or fall off in roughly ten seconds. Use Rycote Stickies instead, which sound kind of gross and are genuinely great. Peel one off the sheet, press the mic onto the sticky side, peel the backing off the other side, and now you’ve got an adhesive mic.
Stick it just inside the inner lapel of a jacket, where it isn’t visible but is almost visible. You get clean audio without wrestling anybody’s shirt, and nobody in the room can tell the person is wearing a mic at all, unlike a clipped-on lav which is obvious to everybody.
If it’s a windy day, Rycote also makes Overcovers, which go over the other side of the mic and block wind. Sticky on one side, cover on the other, and you’re well protected.
Who Gets Miked At The Ceremony
The groom gets the wireless lav and a voice recorder with a matchstick mic. The recorder backs up the wireless, so if there’s any transmission issue at all I still have clean vows. Both mics are omnidirectional and the bride is standing two or three feet away, so I’ve never had trouble picking her up as well.
The minister gets another recorder and mic, so the message is covered.
Wherever else matters gets the third. A podium if there’s a scripture reading. And at one wedding, a full mariachi band that nobody had thought to mic, presumably because they were already ear-splittingly loud. I set a recorder in front of them and now I have great mariachi audio.
Add the house audio going into the H4n on auto leveling and that’s three sources minimum, four or five if I can get into the board. Yes, it’s probably overkill. Whenever disaster strikes I’m glad I’m prepared.
Cables, And Talking To The DJ First
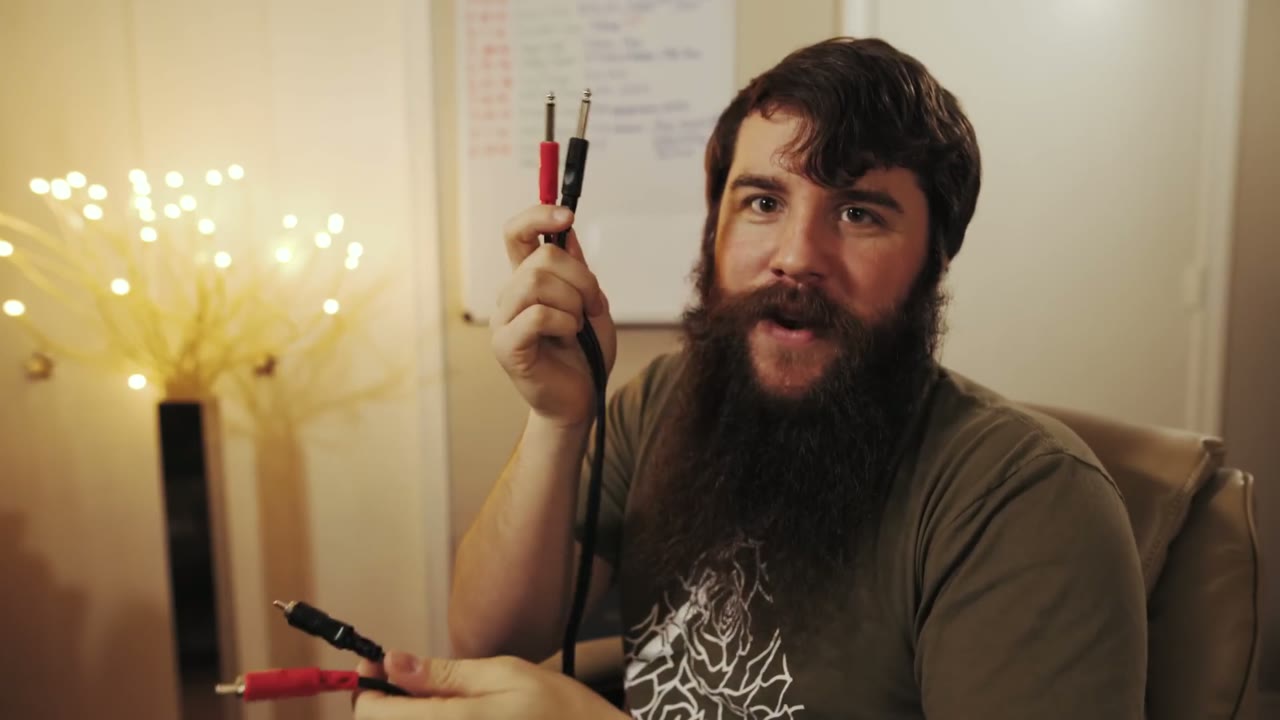
These are all for plugging into somebody else’s soundboard, which is the operative point: it’s their equipment. Exactly like I’ve said about getting along with the photographers, reach out to the venue and the DJ ahead of the day. What board are you running? I have these cables, can I plug in to record the ceremony? Who are you miking, and can I get into it for the toasts?
Once you have the green light, there are really only three cables you need. All of mine are Hosa, bought on Amazon, cheap with good reviews, which are my main criteria for basically anything I have ever purchased.
XLR. The most ubiquitous connector in sound. If your DJ doesn’t have XLR you should seriously question whether he’s just running an iPod. It plugs straight into the bottom of either Zoom. Bear in mind he may already be using all his XLR for speakers.
Quarter inch to quarter inch. Nearly as universal. Most boards have a quarter inch output somewhere, even if it’s only headphone monitoring, which I have absolutely recorded from before.
Quarter inch to RCA. And yes, I just said they might not have quarter inch, but that’s not the point: the RCA end goes into the board, the quarter inch end goes into your recorder. In my experience every DJ has at least one of these three.
Plan B: The XLR Splitter
If none of those three outputs exist, I’m sorry, all hope is lost, you should quit filming weddings. Kidding. I have another option, and honestly it might be better than plugging into the board anyway.
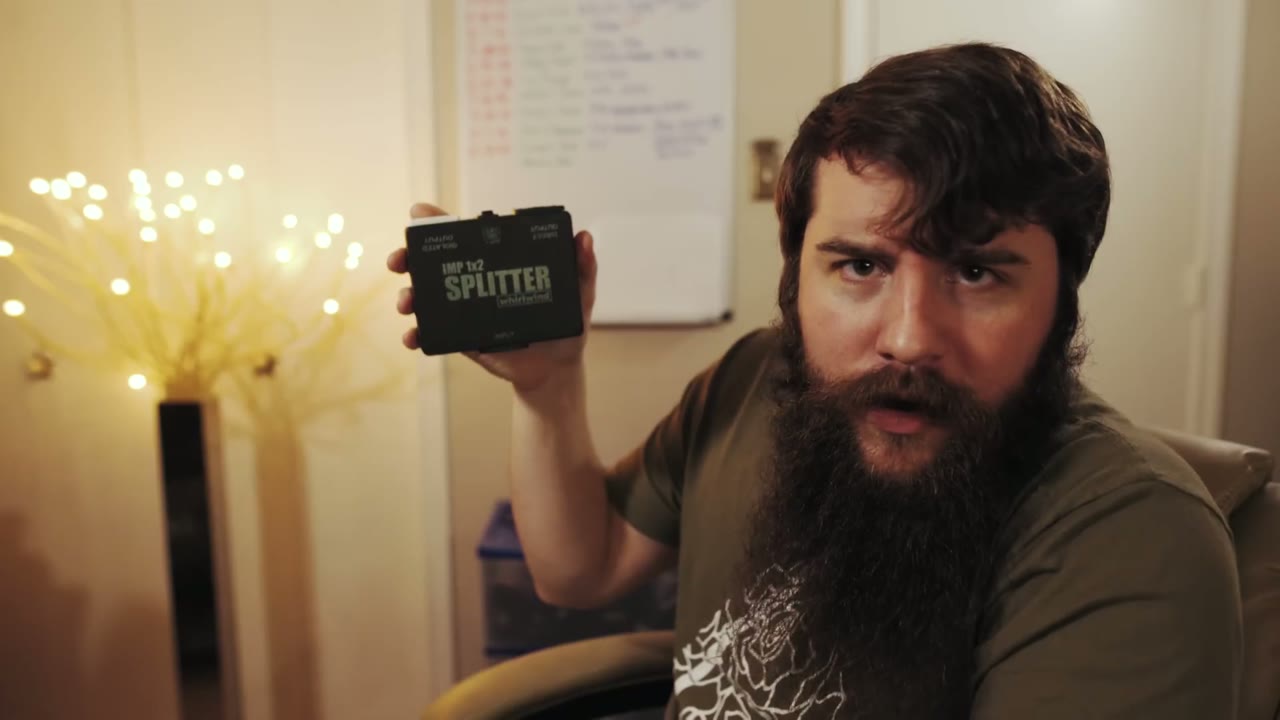
The Whirlwind IMP 1×2 splitter, a name that tells you nothing about what it does. It’s an XLR splitter: one cable in, two out. You put it in between the DJ’s wireless microphone base station and his soundboard.
What that buys you is clean, direct audio straight off the wireless mics, with none of the board’s mixing, none of the reverb, and none of the background music the DJ decides to play under the toasts, which I have absolutely had to deal with. You will need to go beg a little, and bring at least three XLR cables, because this thing needs them.
Plan C: The Trick That Always Works
So the board has no usable output, and the DJ won’t let you near his wireless receiver because it’s weird. Help me, Obi-Matt Kenobi, you’re my only hope.
Don’t worry. This one I can pretty much guarantee, and it has saved my bacon more times than I can count. It’s a microphone sleeve. Get the black one. It works with any microphone, wireless or stationary.
Stretch it, slide it over the handheld mic, and you’ve now created a stretchy pocket around the mic body. Slide one of your voice recorders down into that pocket. It holds both easily.
Now you have your own source, inches from the speaker’s mouth, with almost no room echo or reverb. I’ve filmed weddings out in the Texas countryside where the soundboard was either broken or so ancient you couldn’t plug into it, and this is what got me flawless toast audio. I put it on the mic even whenever everything else is working, because house mics cut out, and it has caught that too.
Power And Headphones
Everything in this kit runs on AA or AAA. Get rechargeable AAs and rechargeable AAAs in the high capacity version, which hold more and last longer. Get a charger, and get a battery case. My system: charged batteries live in the case, used ones go loose in the bottom of the bag, and at the end of the day I fish them out and charge them. Budget about a hundred bucks purely on batteries and chargers and you’re set.
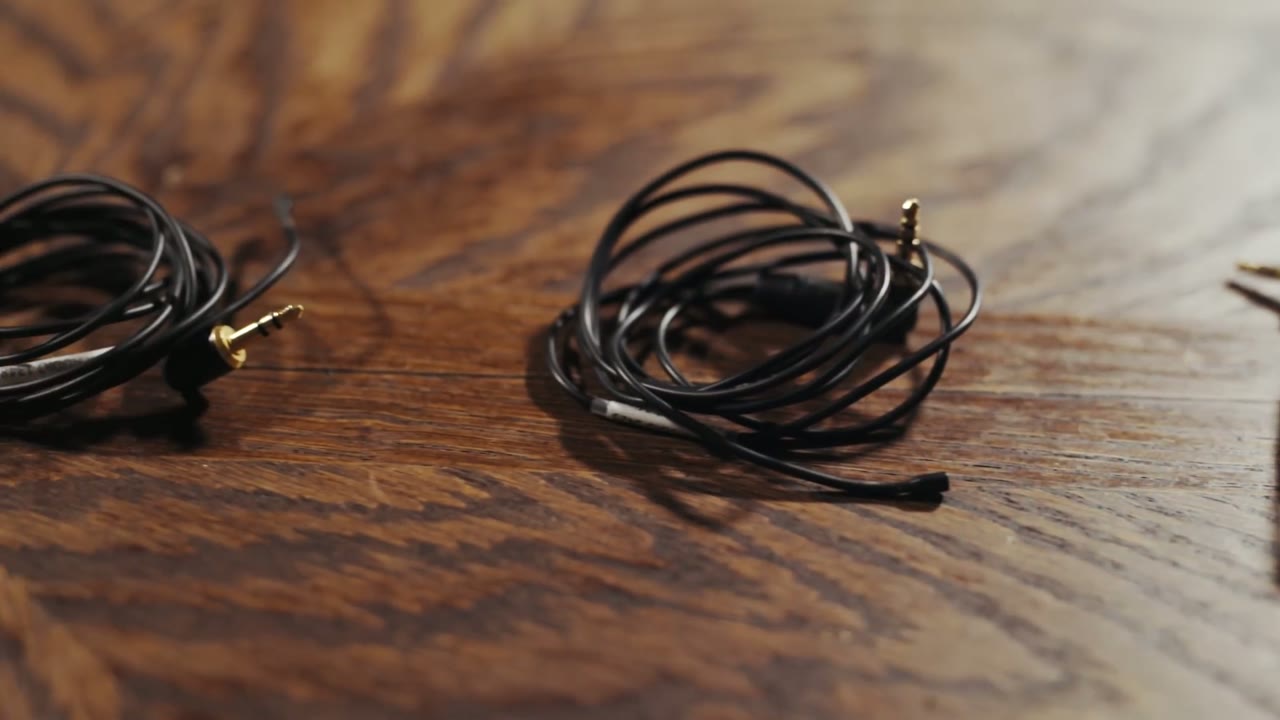
For headphones I use a cheap pair of earbuds, about twenty bucks. They sound fine and, importantly, they’re black. I have plenty of white phone earbuds and they read as unprofessional on a wedding day. These are not studio grade, but they don’t need to be. Their entire job is answering “is this recording, and is it clean?”
I hope my extensive use of backups hasn’t scared you off building an audio kit of your own. I really do believe in them. This kit is versatile enough to handle the wide variety of situations you’ll run into, and whenever you’re walking into a church or a DJ you know nothing about, it is genuinely great to know you can go in blind and still come out with the audio.
I’m also now offering personal one-on-one hourly filmmaker consulting. Want me to critique your latest wedding film? Need recommendations on cameras, lenses, or lighting? Want to chat about beard maintenance for an hour? I would love to talk with you, so please get in touch and schedule a consult.
About 9 years ago, before I was even considering pursuing a career in making videos, I entered a video contest put on by Texas A&M University called “Why I’m an Aggie.” My entry featured students speaking about why they chose Texas A&M and what they enjoyed about the university. Throughout the video, I featured pretty shots of campus that I shot with my trusty Sony HDR-UX1 (recording to mini-DVDs, SD cards weren’t fast or large enough yet).
The shot that set my contest entry apart from the others though, was an aerial video of campus that I filmed from a plane. Yes, I actually rode in a plane over campus to get a shot for my video! This blew away the judges considering that aerial video was still relatively rare (unless you happened to have a pilot father – thanks dad).
Nine years later, aerial video is now mainstream. People are buying Millennium Falcon camera drones, stuffing their dead cats and turning them into quadcopters, and anyone with a cell phone can purchase a flying camera for as little as $20. My aerial video in 2008 that took so much effort and timing, could now be accomplished by any kid with a drone Christmas present. It would probably look smoother and be better colored too.
In August of 2016, the Federal Aviation Administration passed their official rules for commercial drone usage in the United States. Up until this point, if you wanted to make money flying your drone you had to apply for a Section 333 waiver and actually possess a pilot’s license to fly a drone.
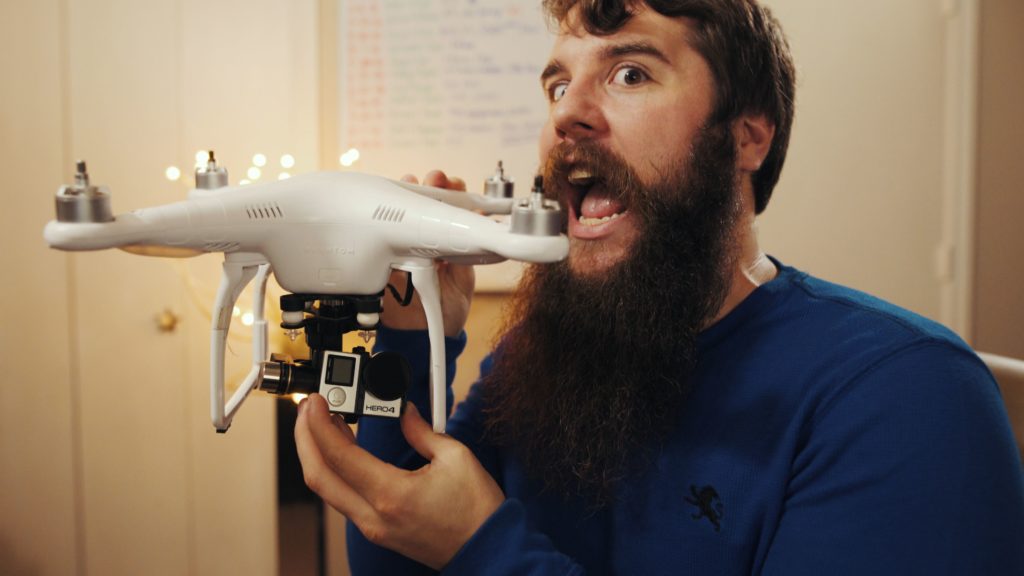
You can eat your drone, but I wouldn’t recommend it.
This all changed with the FAA’s Part 107 ruling, which made getting a license to fly your drone for commercial purposes as easy as taking a knowledge test, no pilot’s license required.
Now when I say easy, I mean easier than getting an actual pilot’s license, not that the test itself is easy. Which brings us to this video that I created today, which is all about why you should take the knowledge test, and how to study for and pass it.
In the video, I detail the exact resources that I used to pass the Part 107 knowledge test. These resources are now listed below in order that I speak about them in the video. If you study these materials, you shouldn’t need to spend any extra money on any courses or classes for the test.
But, if you find that you benefit more from a classroom setting, I would recommend checking out Drone Pilot Ground School and Remote Pilot 101.
Here are the study resources that I listed in the video, in order:
OTHER RESOURCES NOT MENTIONED IN THE VIDEO
– SkyVector
– AIRNAV
That’s it! Read and study these articles, listen to the podcast, take the practice test, and when you’re ready, go and take the real thing. If you take your time and prepare, you’ll pass like I did.
As always, if you have any questions or comments, feel free to leave one below or get in touch.