UPDATE: With the new Instagram 4.1 update, you can now upload videos directly from your iPhone camera roll. I have made an updated tutorial that shows how to edit high quality square videos and copy them to your camera roll for uploading to Instagram. Click here to see the updated tutorial.
Ever sinc e Instagram unveiled video uploading last month, I have been desperate to upload videos that I have previously recorded on my iphone, as well as videos from other cameras and ones that I have edited. With this easy to follow text tutorial, you will be able to upload any video you want to Instagram, even ones that are much higher quality than those you can record with an iPhone camera, such as DSLR videos, or RAW Timelapse clips. The only drawback is that you cannot use a still frame from the video that you are uploading, and your custom video cannot exceed the 15 second length.
You can view an example of a custom uploaded video on my Instagram Page.
WHAT YOU WILL NEED
- an iPhone, iPod, or iPad with Instagram (Does NOT need to be Jailbroken)
- A PC or Mac
- iFunBox (free download)
- Adobe Premiere Pro (free trial download)
That’s it! Once you get everything setup, it only takes around 5 minutes to edit your custom video and render it.
The original idea for this project came from a Google Search I did yesterday and a post on TechEnvy which used Quicktime Pro. The difference between this tutorial and that one is that Adobe Premiere is used which offers much more freedom, customization, and quality when it comes to editing your video.
Step One
Download and install iFunBox and Adobe Premiere Pro.
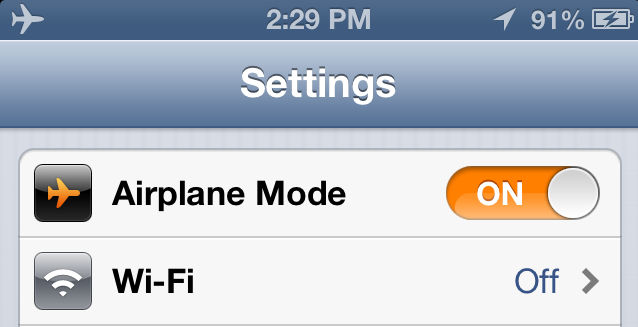
Set your iPhone to “Airplane Mode” so that it is no longer connected to the Internet.
Step Two
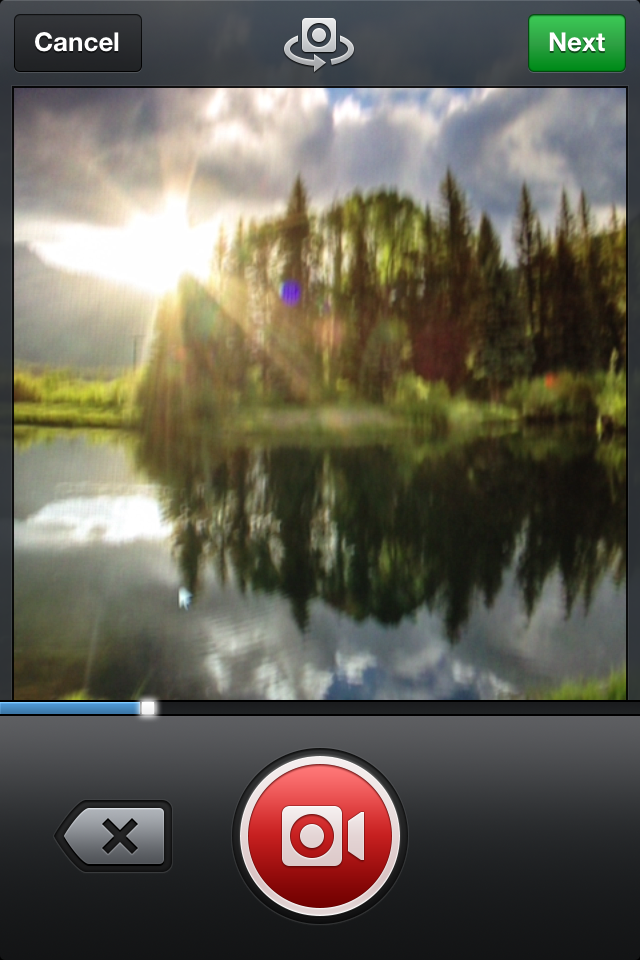
Open Instagram and record a video that is approximately as long as the custom video that you want to upload. Make sure you get the video length as close as possible; your custom video will have to match the length you record exactly so it doesn’t go to black at the end. Remember, you can’t have a video longer than 15 seconds.
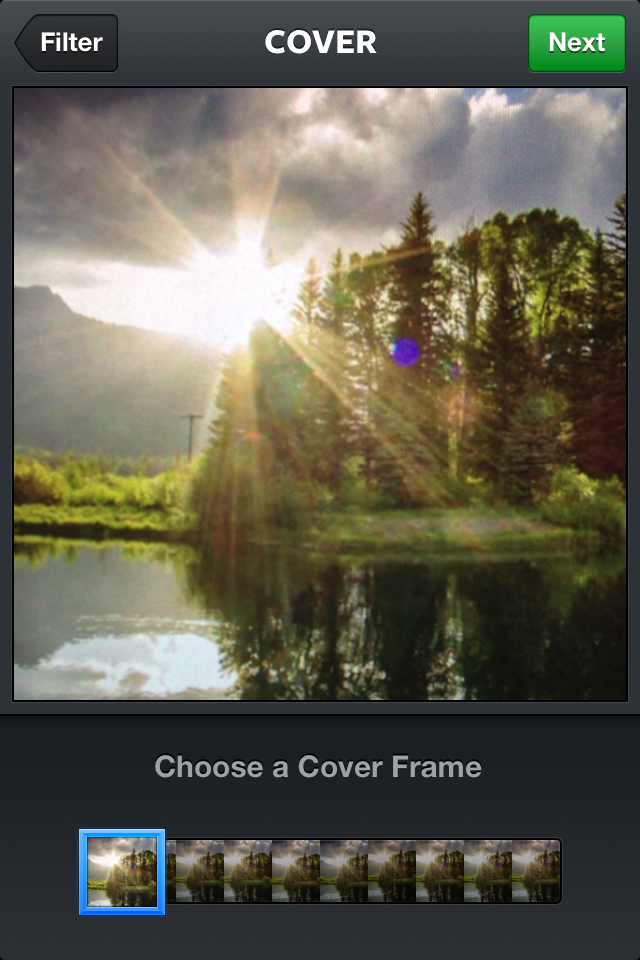
Also, you cannot choose a still frame from your custom video, meaning that you must choose a still frame from the video you record in Instagram. I find that it is easiest to record the computer screen of the video that I want to custom upload, and select a still frame from that recording. That way, the video matches the still frame.
Step Three
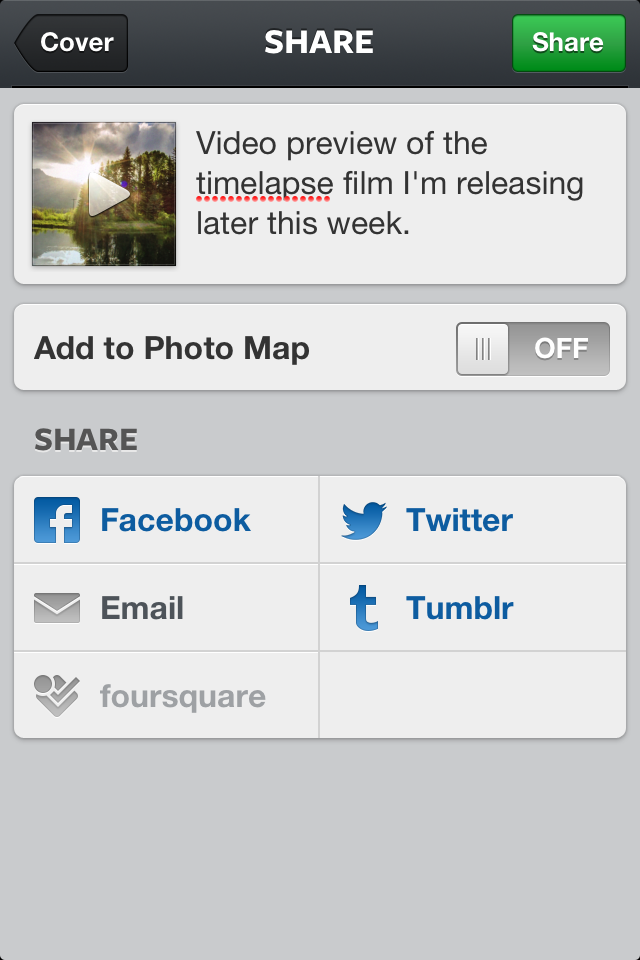
Type in the description for the video and select the services you want to upload it to as well (Facebook, Twitter, FourSquare, etc). Then click “Share”.
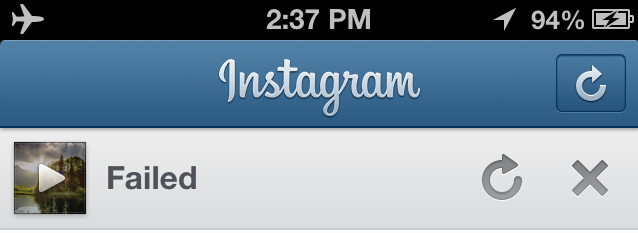
Instagram will immediately say “Failed” due to you not having an Internet connection.
Step Four
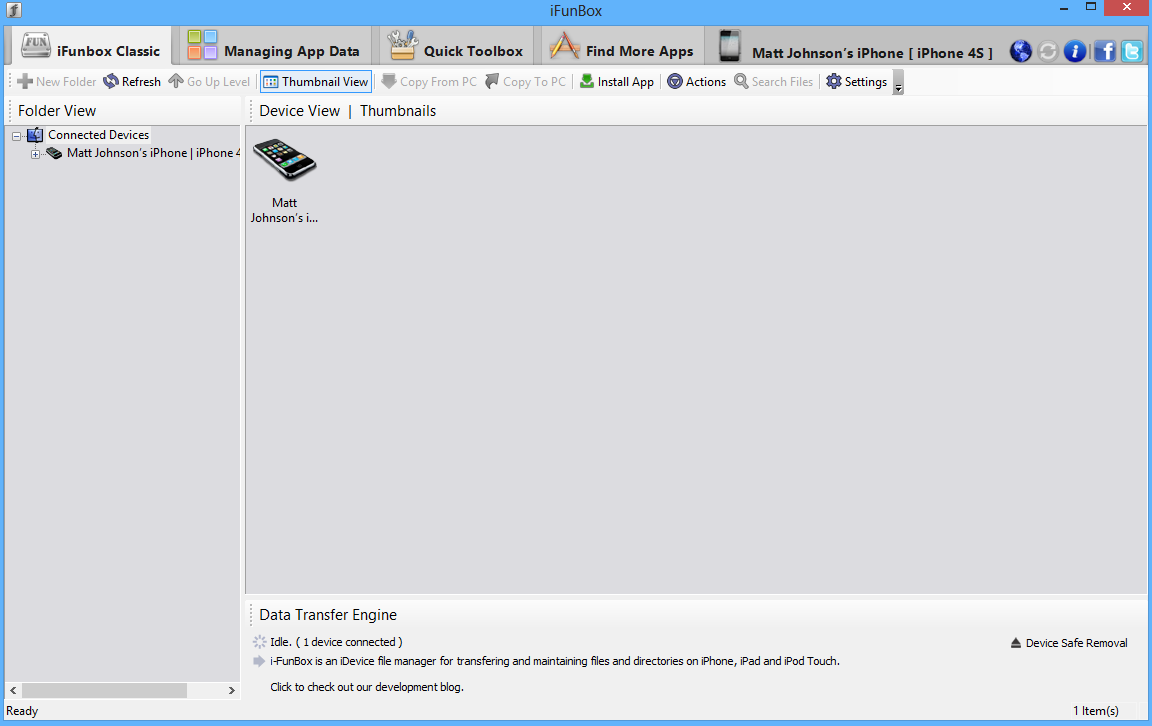
Connect your iOS device to your computer and open iFunBox. The App will recognize that your iPhone is connected.
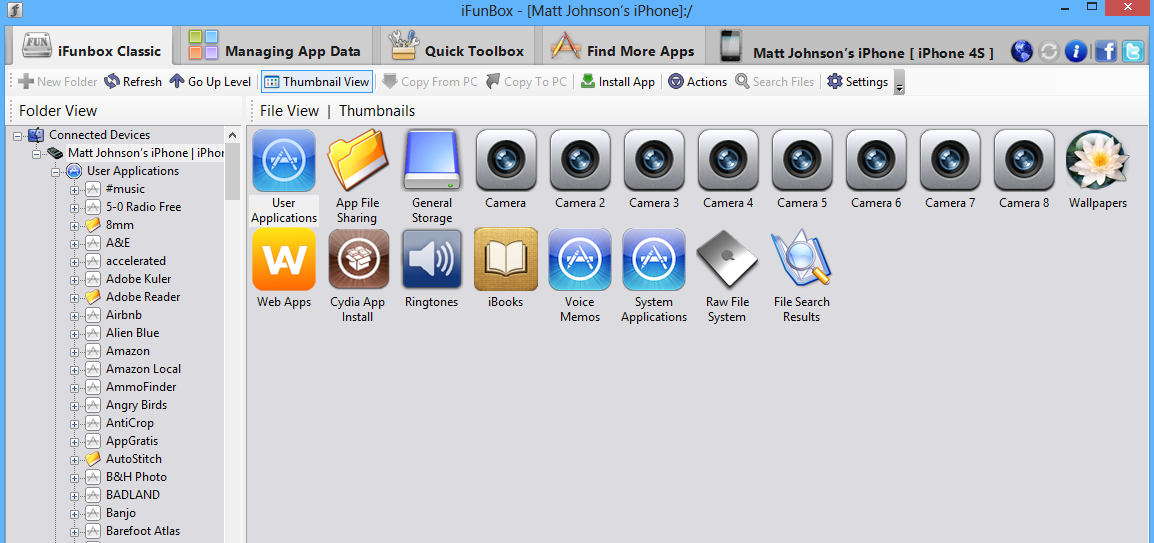
Double Click on your iPhone and you will have options such as User Applications, App File Sharing, General Storage etc.
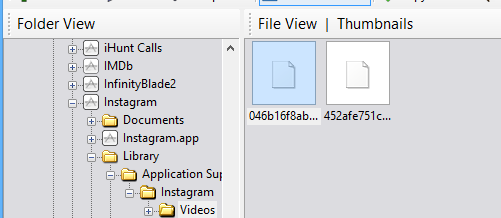
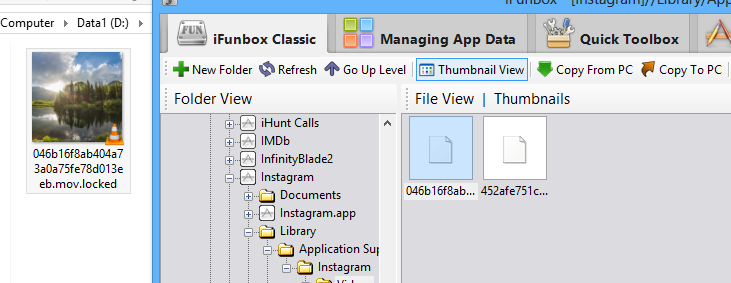
In the “iFunbox Classic” tab, DOUBLE CLICK: User Applications > Instagram > Library > Application Support > Instagram > Videos.
Step Five
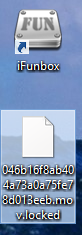
There should be two files that are both just a long sequence of numbers and letters. One of the files will end with the extension “.mov.locked”, that is the one you want. Click and drag it to your desktop. You can then minimize iFunbox.
Step Six
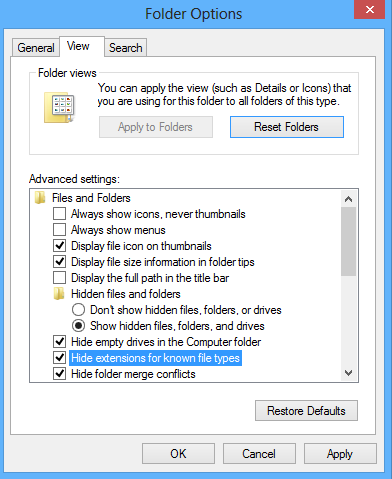
By default, Windows will not let you see the file extensions for files that it recognizes. This is to prevent users from changing them and being unable to open their files. You will need to re-enable this feature to change the file extension. Go to Start > Control Panel > Search: Show File Extensions
Click “Show or Hide File Extensions.” In the window that opens, UNCHECK the “Hide Extensions For Known File Types” box and hit Apply, then OK.
Step Seven
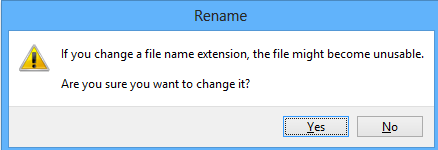
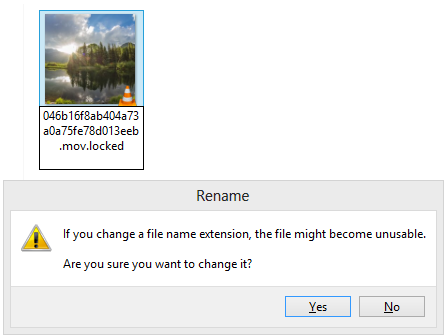
Select the file you copied to the desktop and remove the “.locked” extension from the end of it. A dialogue box should appear asking if you are sure you want to change the file extension.
Step Eight
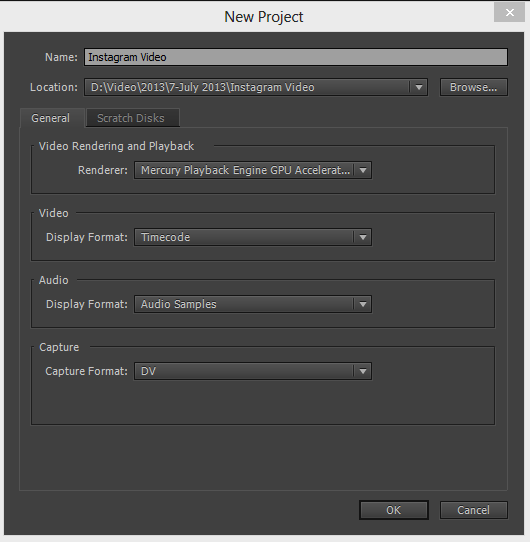
Open Adobe Premiere Pro and choose to create a New Video Project. I find it best to create a folder to keep all the project files inside. Then select “OK”.
Step Nine
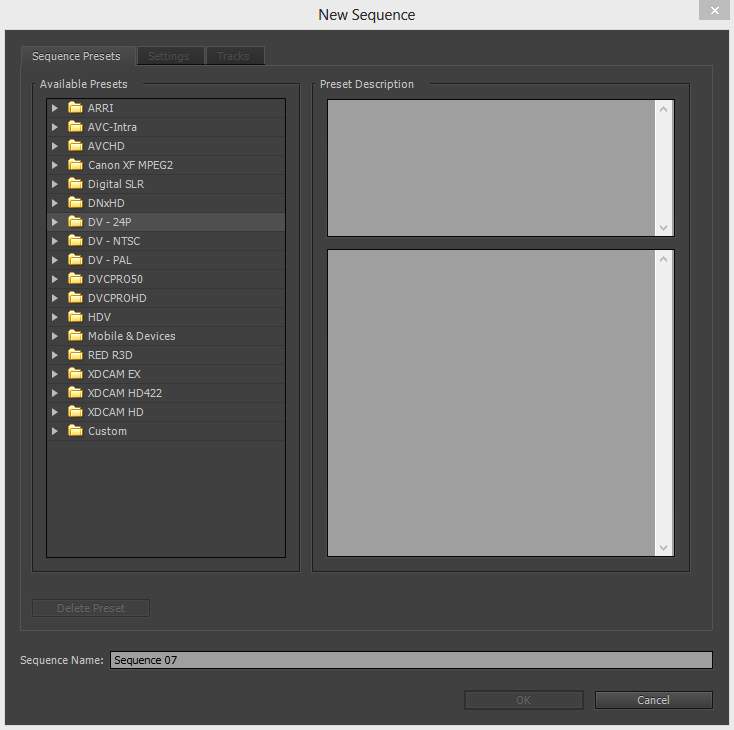
If you are using CS6, a “New Sequence” Dialogue box should appear. If you are using Premiere CC, then you will need to select File > New > Sequence.
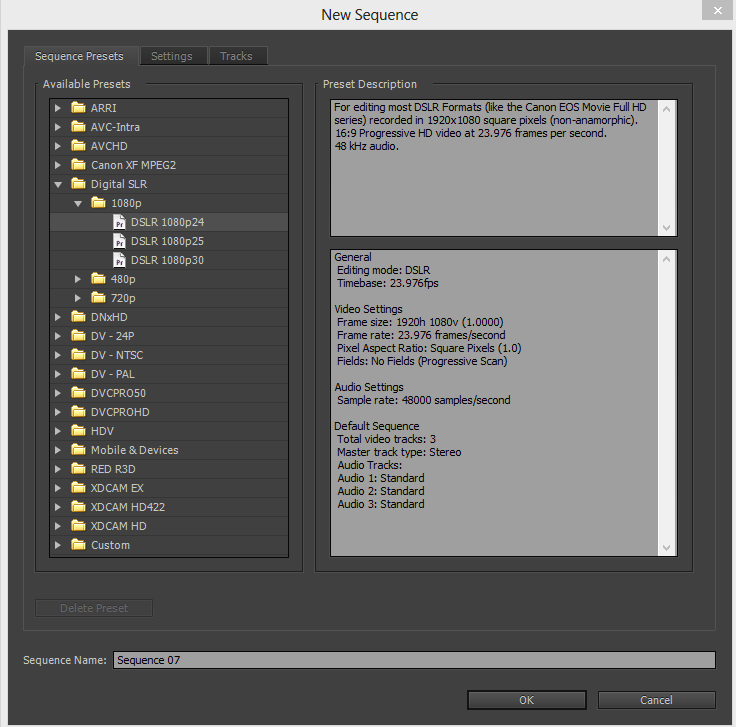
From the Twirly arrow drop down menu, select Digital SLR > 1080P > DSLR 1080p 30.
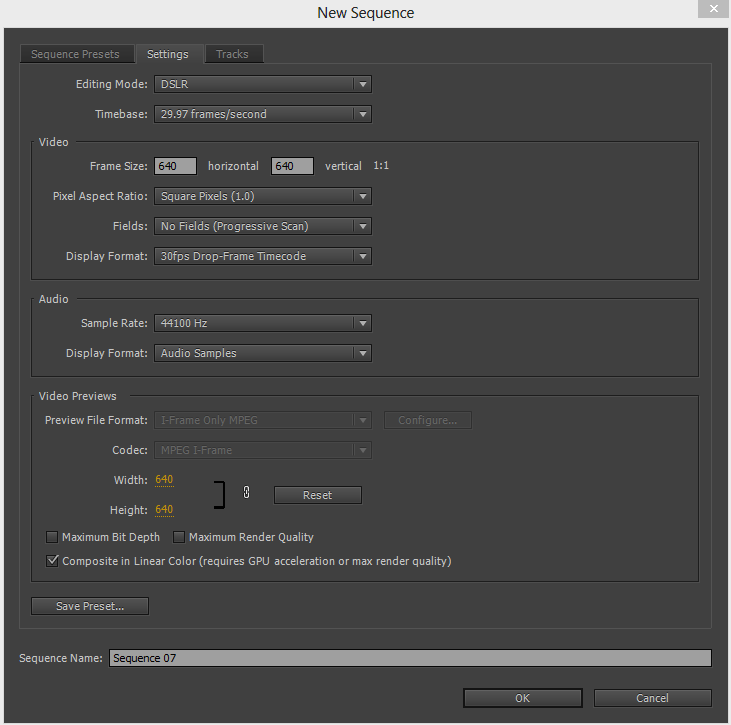
Now select the “Settings” tab at the top, and choose the following options.
- Editing Mode: DSLR
- Timebase: 29.97 Frames/Second
- Frame Size: 640 Horizontal 640 Vertical 1:1
- Pixel Aspect Ratio: Square Pixels (1.0)
- Fields: No Fields (Progressive Scan)
- Display Frame: 30fps Drop-Frame Timecode
- Audio Sample Rate: 44100 Hz
- Display Format: Audio Samples
- Video Previews: Width 640 Height 640
Then choose to save the preset so you can use it again later.
Step Ten
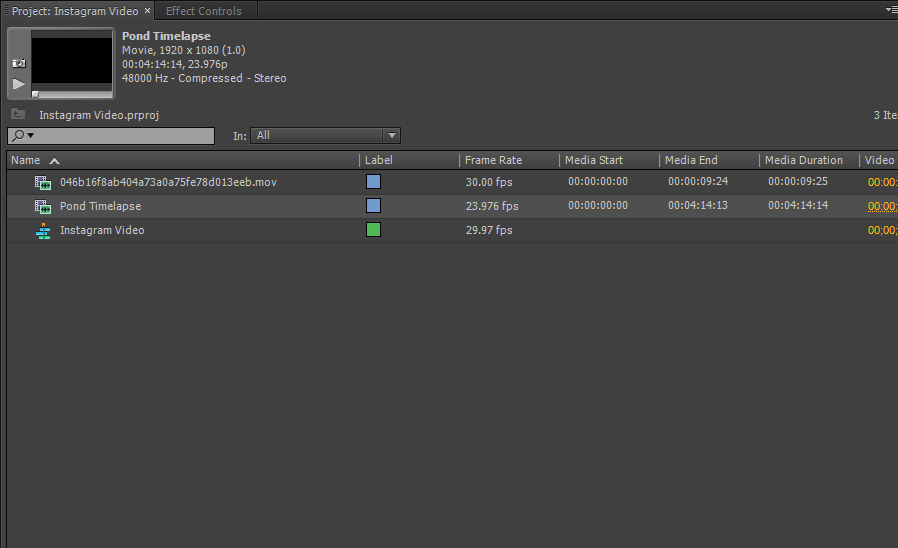
Import the video that you copied from your iPhone to your desktop into Premiere Pro. Also import the custom video you want to use in its place.
Step Eleven
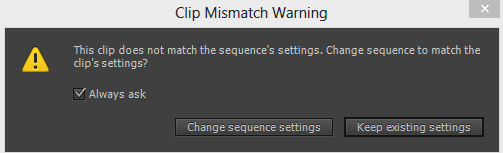
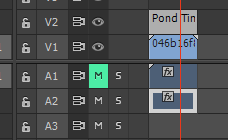
Drag your originally shot Instagram video to the timeline. A “Clip Mismatch” warning might come up but you can ignore it and tell it to “Keep Existing Settings.”
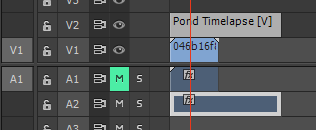
Make sure you MUTE the audio for the Instagram clip, otherwise you will have whatever audio you shot with your iPhone interfering with your custom video audio. Once you have muted the audio, drag the custom clip that you want to use onto the timeline so it sandwiches the original iPhone clip in the middle.
Step Twelve
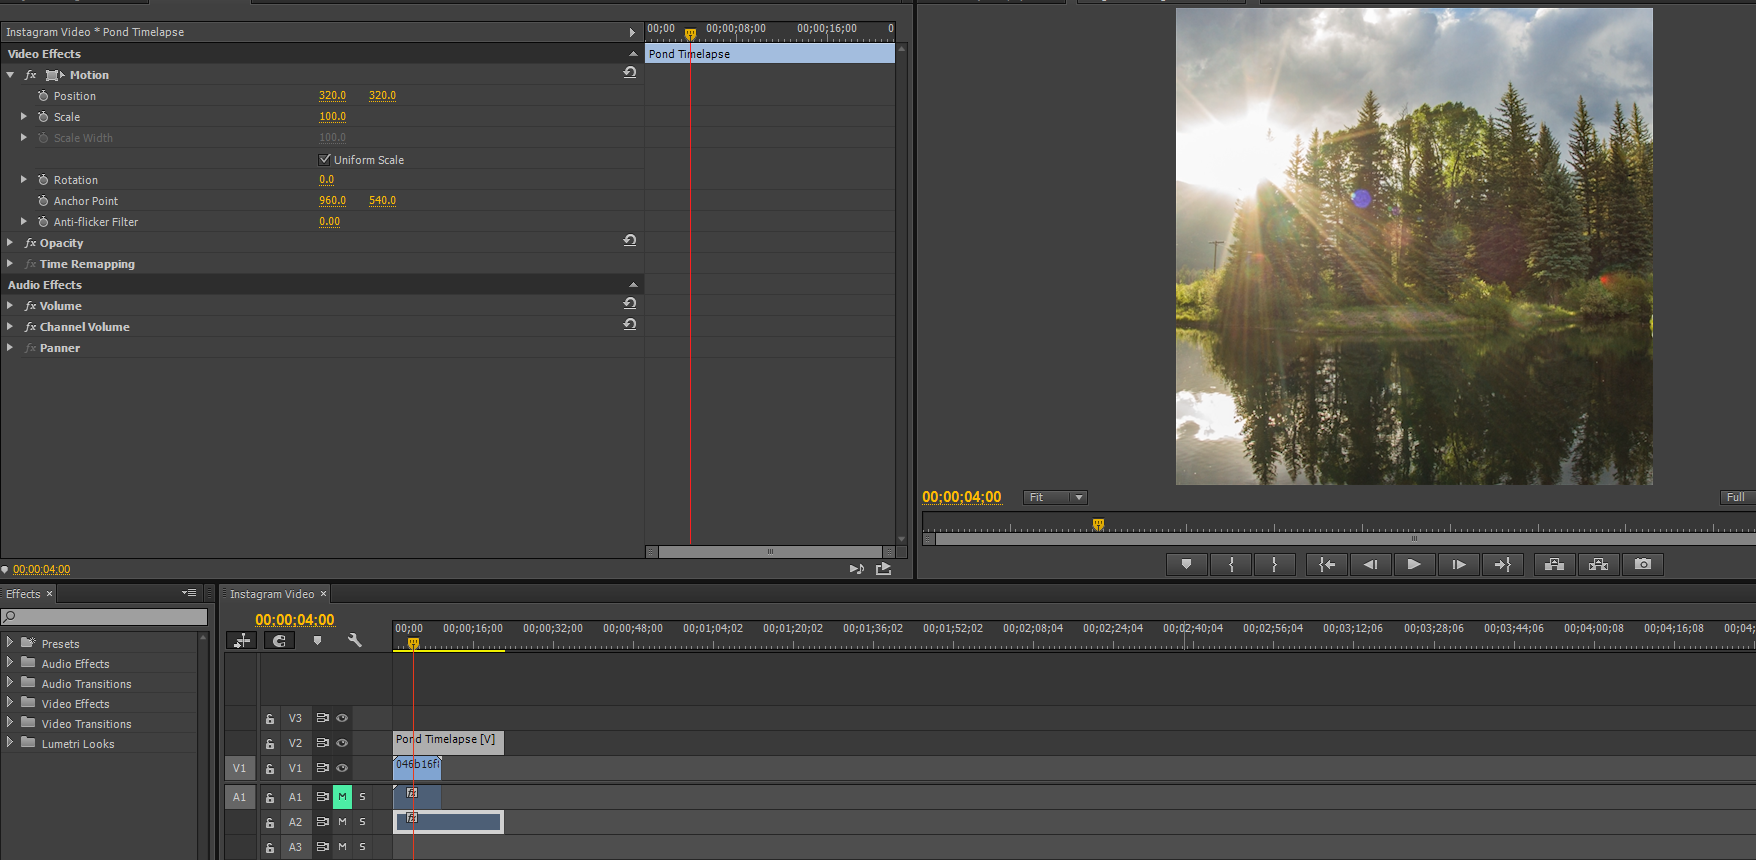
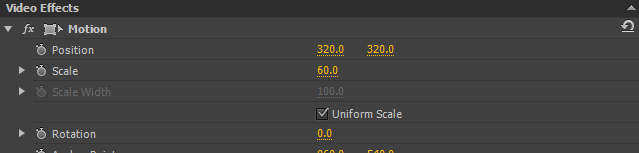
If you are using a 1080p video file, you will notice that it is far bigger than the 640 x 640 clip size that Instagram allows. Select your custom video clip in the timeline and choose “Effect Controls”. So you can adjust the Position and Scale of your custom clip.
Adjust the Scale and Position of your clip so it fits nicely into the 640 x 640 window. If you are using footage that is 16:9, the sides will be cropped off. For a 1080p video clip, the Scale can be set to 60 to make the clip fit vertically in the frame.
If you want to set the scale lower you can, but be prepared for black bars at the top and bottom of the clip. You could remove the bars by placing a white color matte below the clip.
Step Thirteen
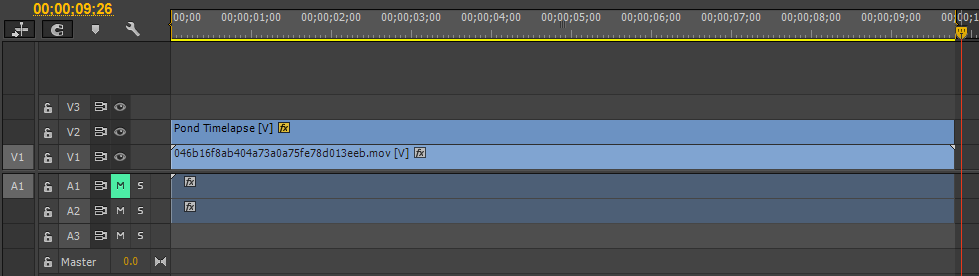
Now adjust the length of your clip so it matches the length of the clip you shot with your iPhone.
Step Fourteen
It’s time to render your clip! Set your in and out points on the clip so it knows where to render. You do this by moving the playback head to the beginning of your clip and hitting “I” and then the end of you clip and hitting “O”.
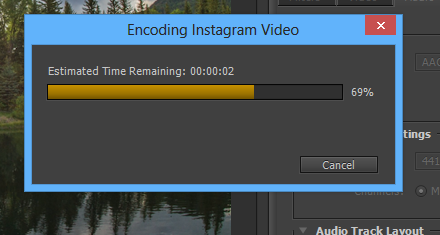
Step Fifteen
Select File > Export >Media, or select your timeline and hit CTRL + M. This will bring up the export dialogue box.
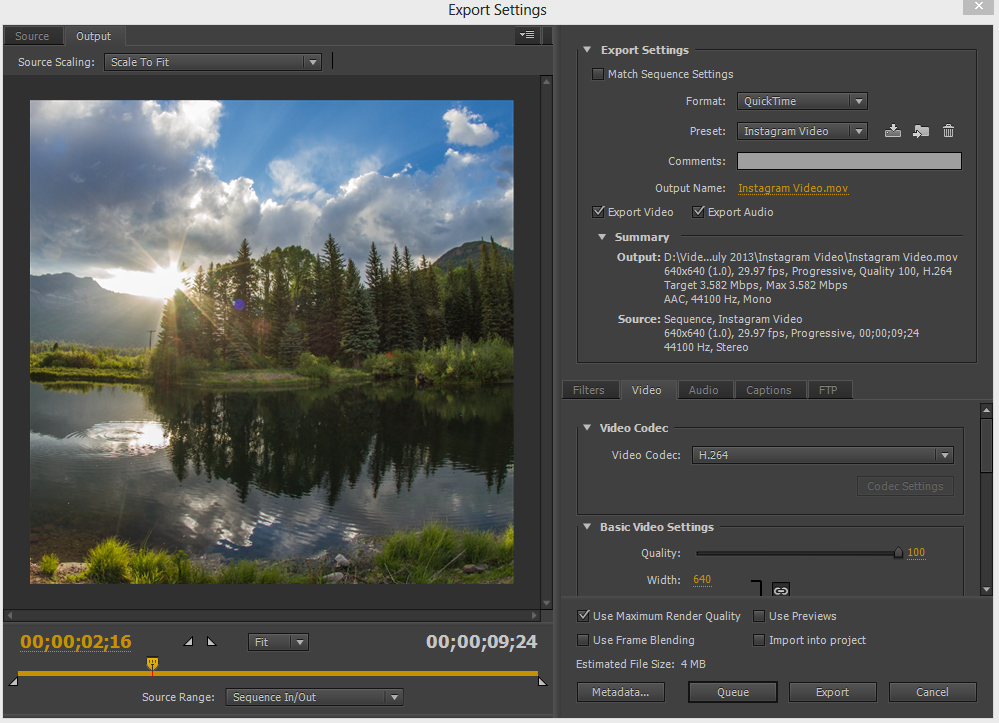
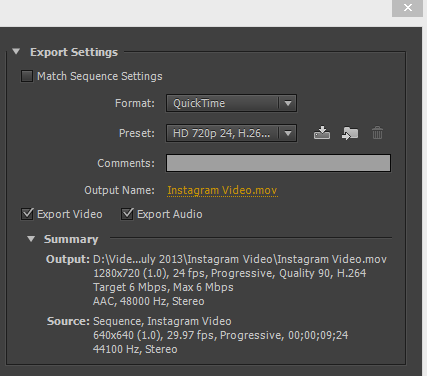
Choose the video format “Quicktime” and choose any preset from the preset dropdown menu (we are going to customize one). Make sure “Export Video” and “Export Audio” are checked, and select the file name and choose where you want the file to be saved to.
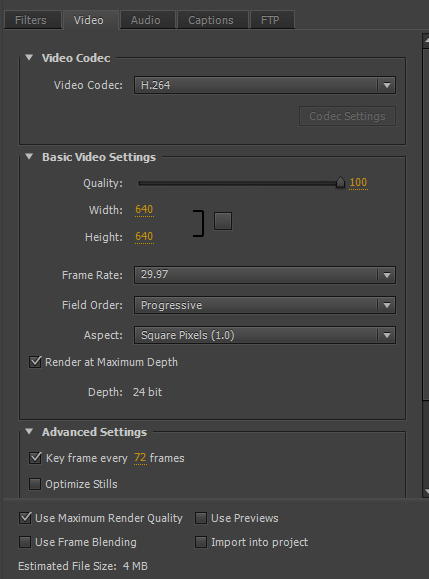
Select the “Video” tab below. Choose the following settings:
- Video Codec: H.264
- Quality 100
- Width 640
- Height 640 (Make sure the little chain link box is unselected)
- Frame Rate: 29.97
- Field Order: Progressive
- Aspect: Square Pixels (1.0)
- Check the Render at Maximum Depth Box
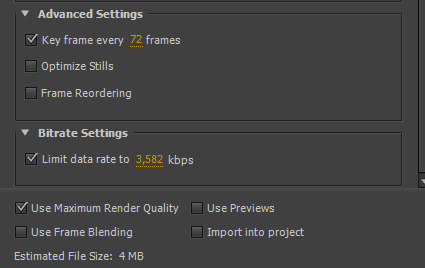
Under “Bitrate Settings” check the box and choose the limit the data rate to “3,582 kbps” and check the “Use Maximum Render Quality” box.
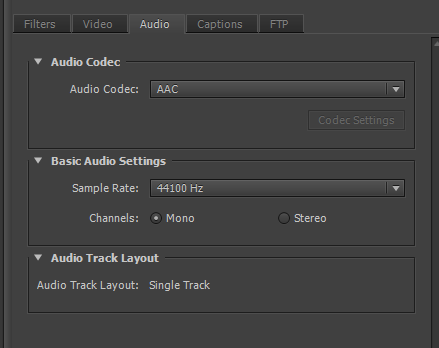
Click the “Audio” tab and choose:
- Audio Codec: AAC
- Sample Rate 44100 Hz
- Channels: Mono
That’s it! Now save these render settings as a preset and click Export.
Step Sixteen
Once it is finished rendering, navigate to your rendered file. Rename the rendered file to the sequence of numbers and letters that the Instagram video you shot was named (copy and paste helps). Then add “.locked” to the end of the file so it looks something like A293FJEOF.mov.locked”.
Step Seventeen
Maximize iFunbox and drag your new video file into the Video folder so it replaces the original video file. iFunbox won’t give you any warnings about copying over the files, so make sure you copy it.
Step Eighteen
Disable Airplane Mode on your iPhone and hit the swirly button on Instagram. Your custom video should begin uploading. Here is my custom uploaded Instagram video. You can also watch it on my Instagram page.
If you enjoyed this tutorial, you may enjoy some of my other tutorials for video editing. Feel free to follow me on Instagram as well, I will be posting more pre-recorded videos in the future.