
Today I want to show you how to export extremely high quality 4K video out of DaVinci Resolve, both for YouTube, Vimeo and Facebook, and for clients you are delivering files to. To save you time I have created a free DaVinci project template you can download, which gets you ready to export 4K without dialing everything in manually.
Project Setup
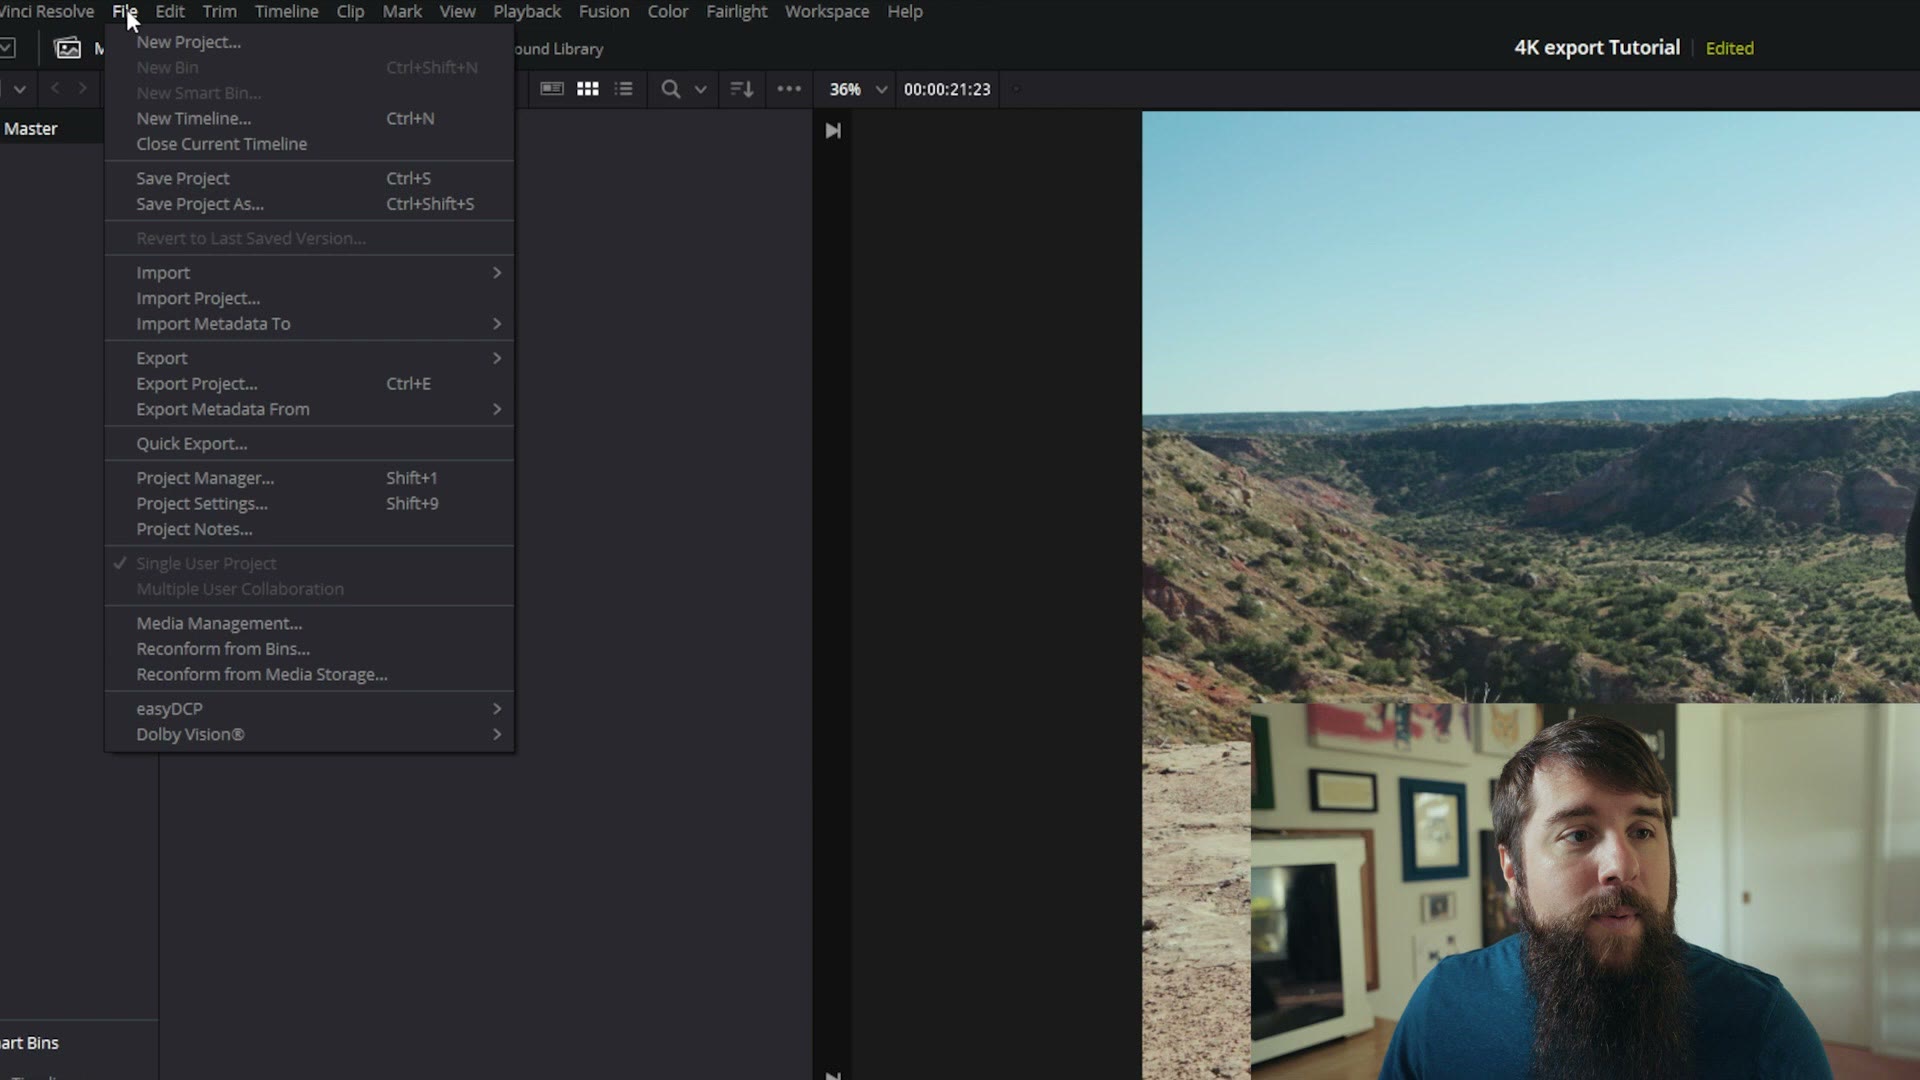
Open Resolve, create a new project, and before you do anything else go up to File, then Project Settings.
Set your Timeline Resolution to 3840 x 2160 Ultra HD, and make sure your frame rate is whatever you want to export at. Mine is 23.976.
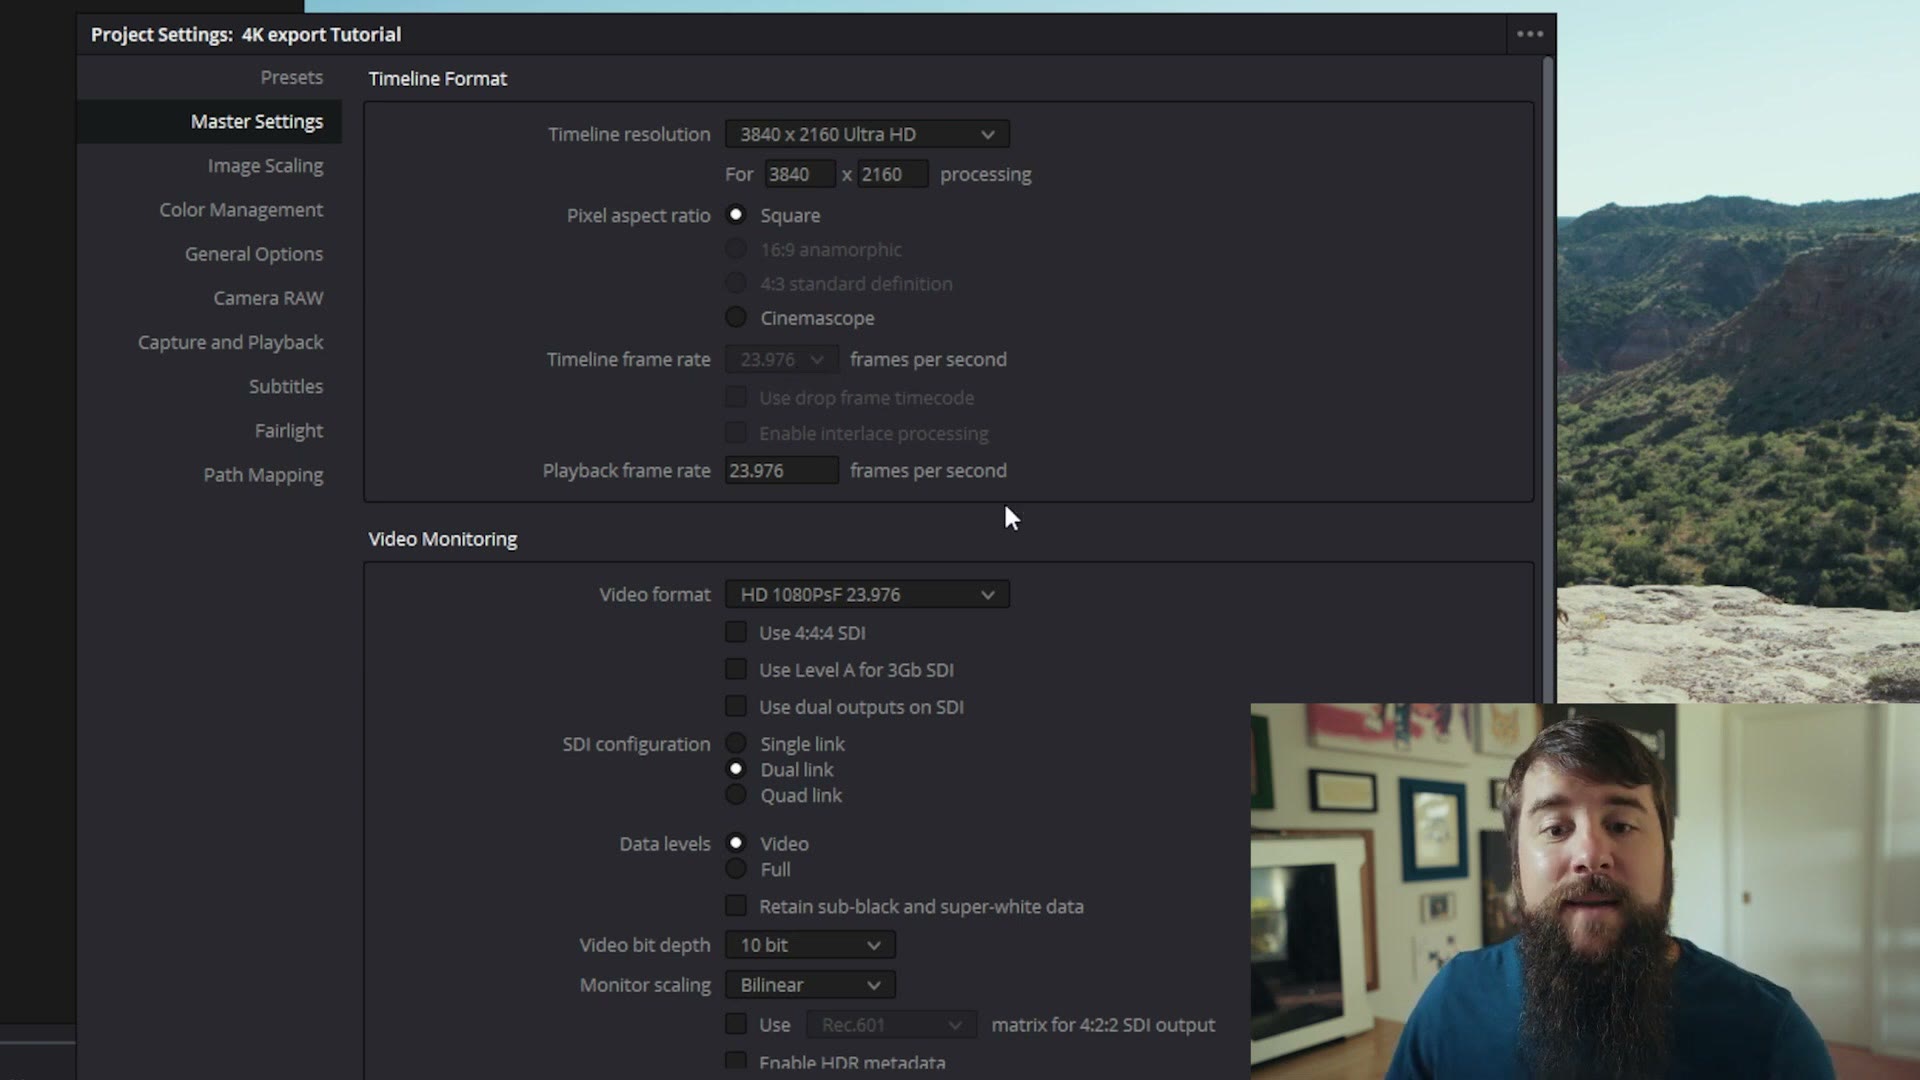
Important: because I have already imported a clip onto the timeline, that frame rate field is grayed out and no longer changeable. So make sure you set this before you import any video clips. Then hit Save at the bottom, and import and edit your footage.
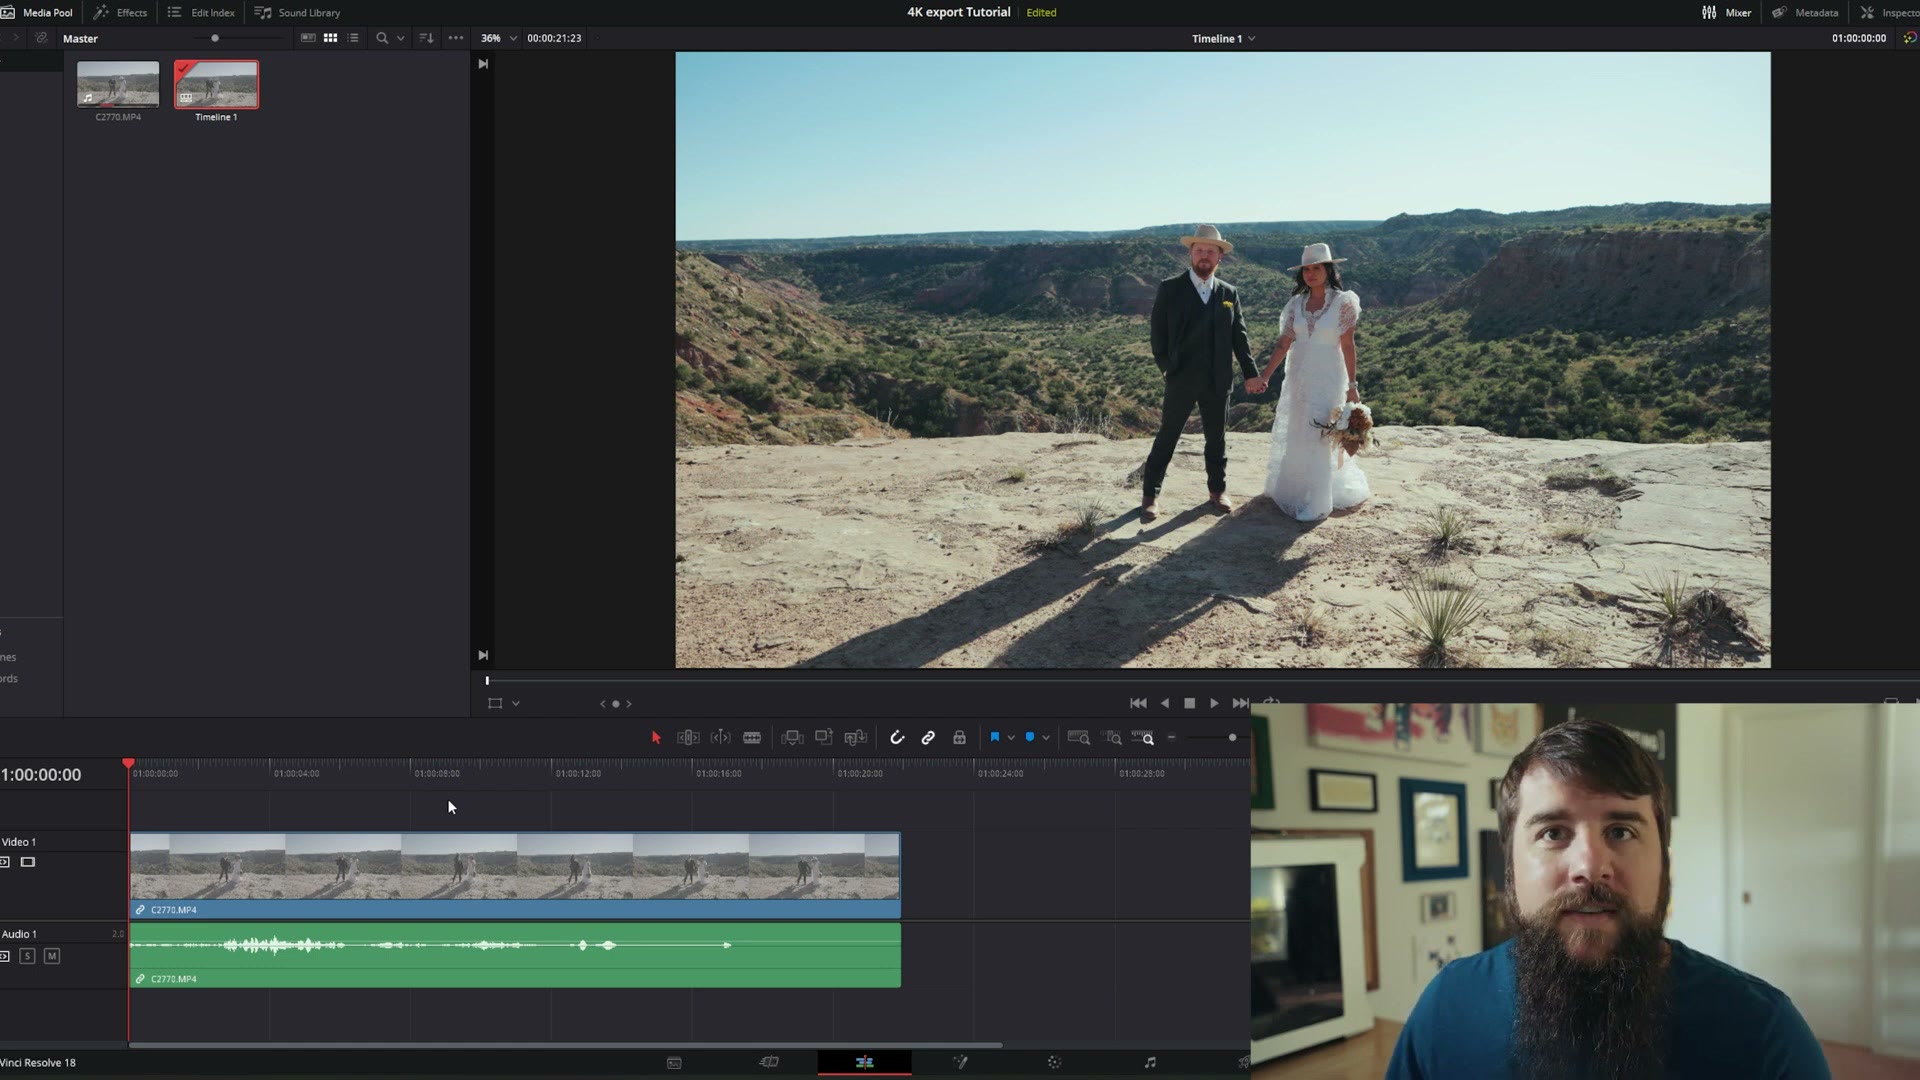
In this case I have a clip I filmed at a wedding recently, which I also colored using my presets.
Export Settings For YouTube, Vimeo And Facebook
Let’s pretend this clip is fully edited and ready to go. Click the rocket ship at the bottom, and over on the left give it a file name.
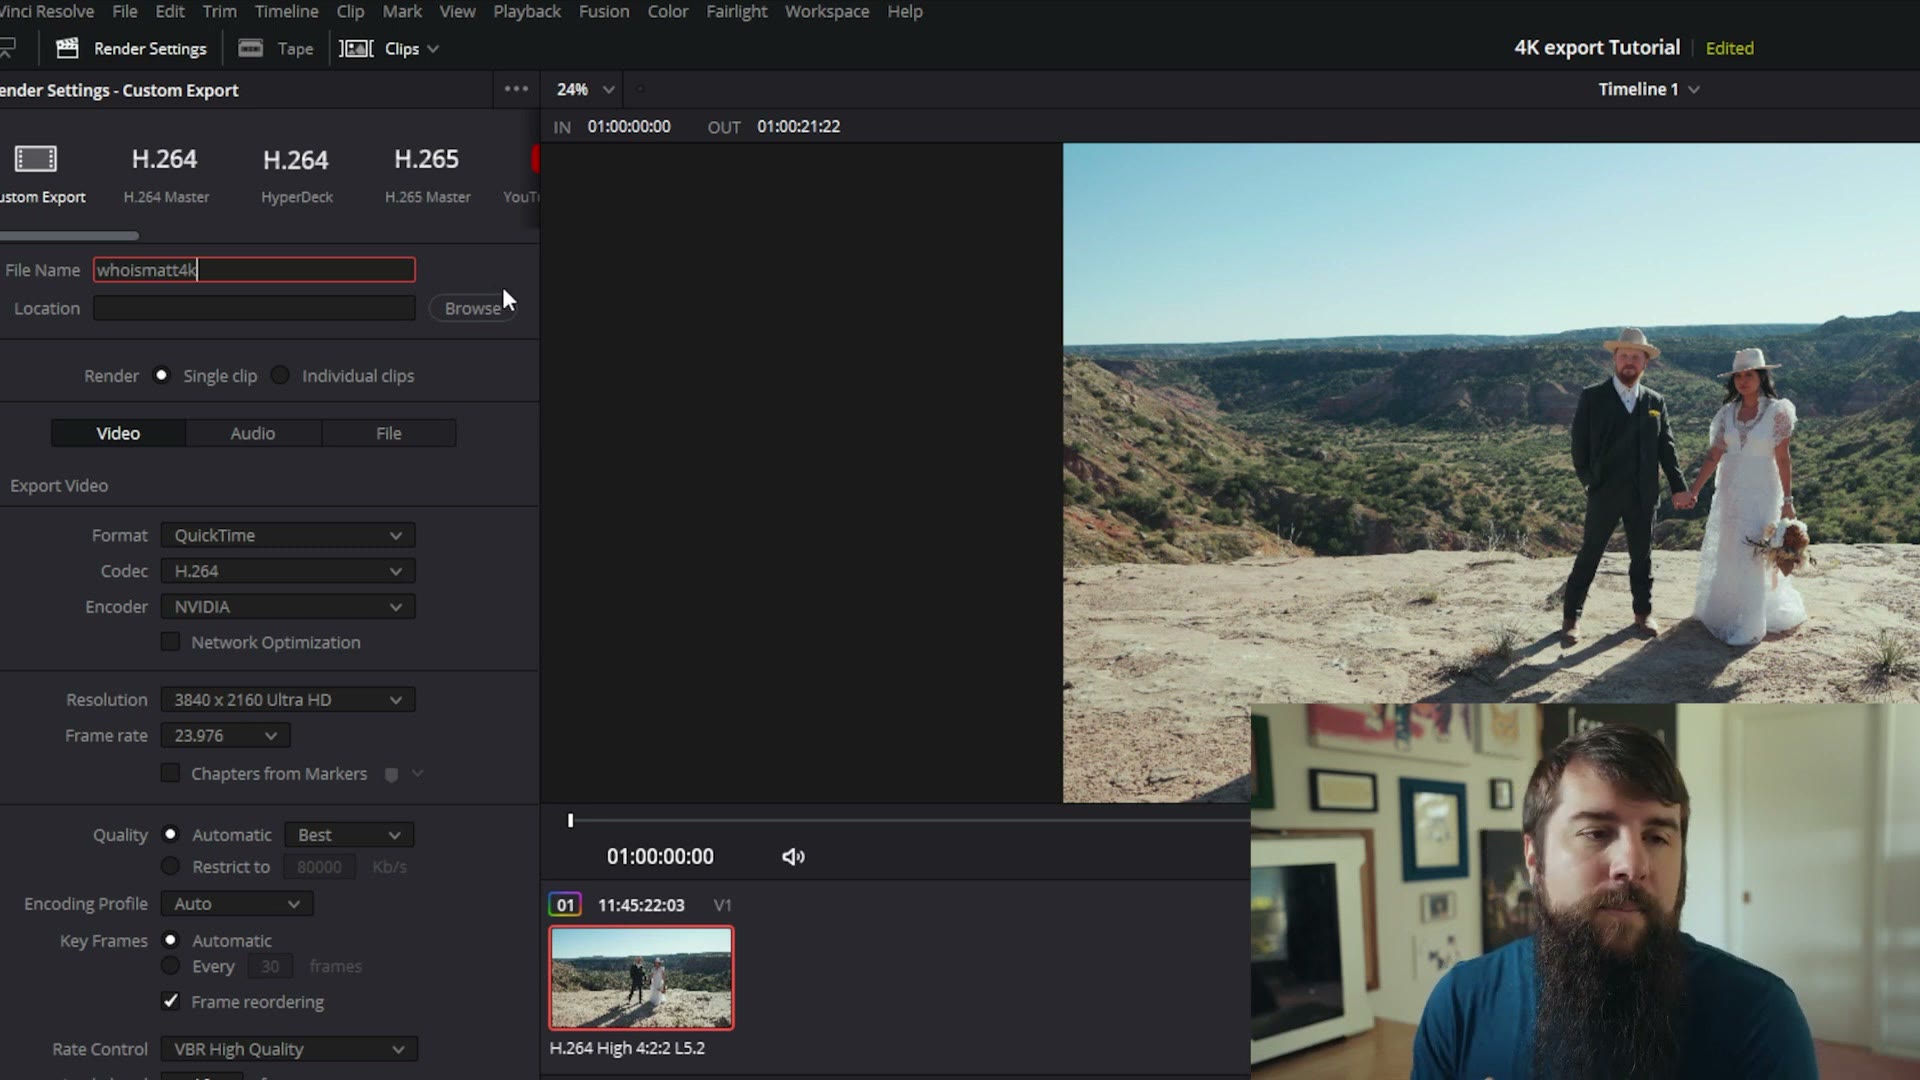
Then select the location where you want it saved, so you can actually find it after it renders. Really important to do that.
For Format select QuickTime, and for Codec change it from H.264 to H.265, which is higher quality. Leave the encoder on whatever default your computer picks. Resolution is 3840 x 2160 Ultra HD, and the frame rate should be whatever you are exporting at, which in my case, and what I would recommend for you, is 23.976.
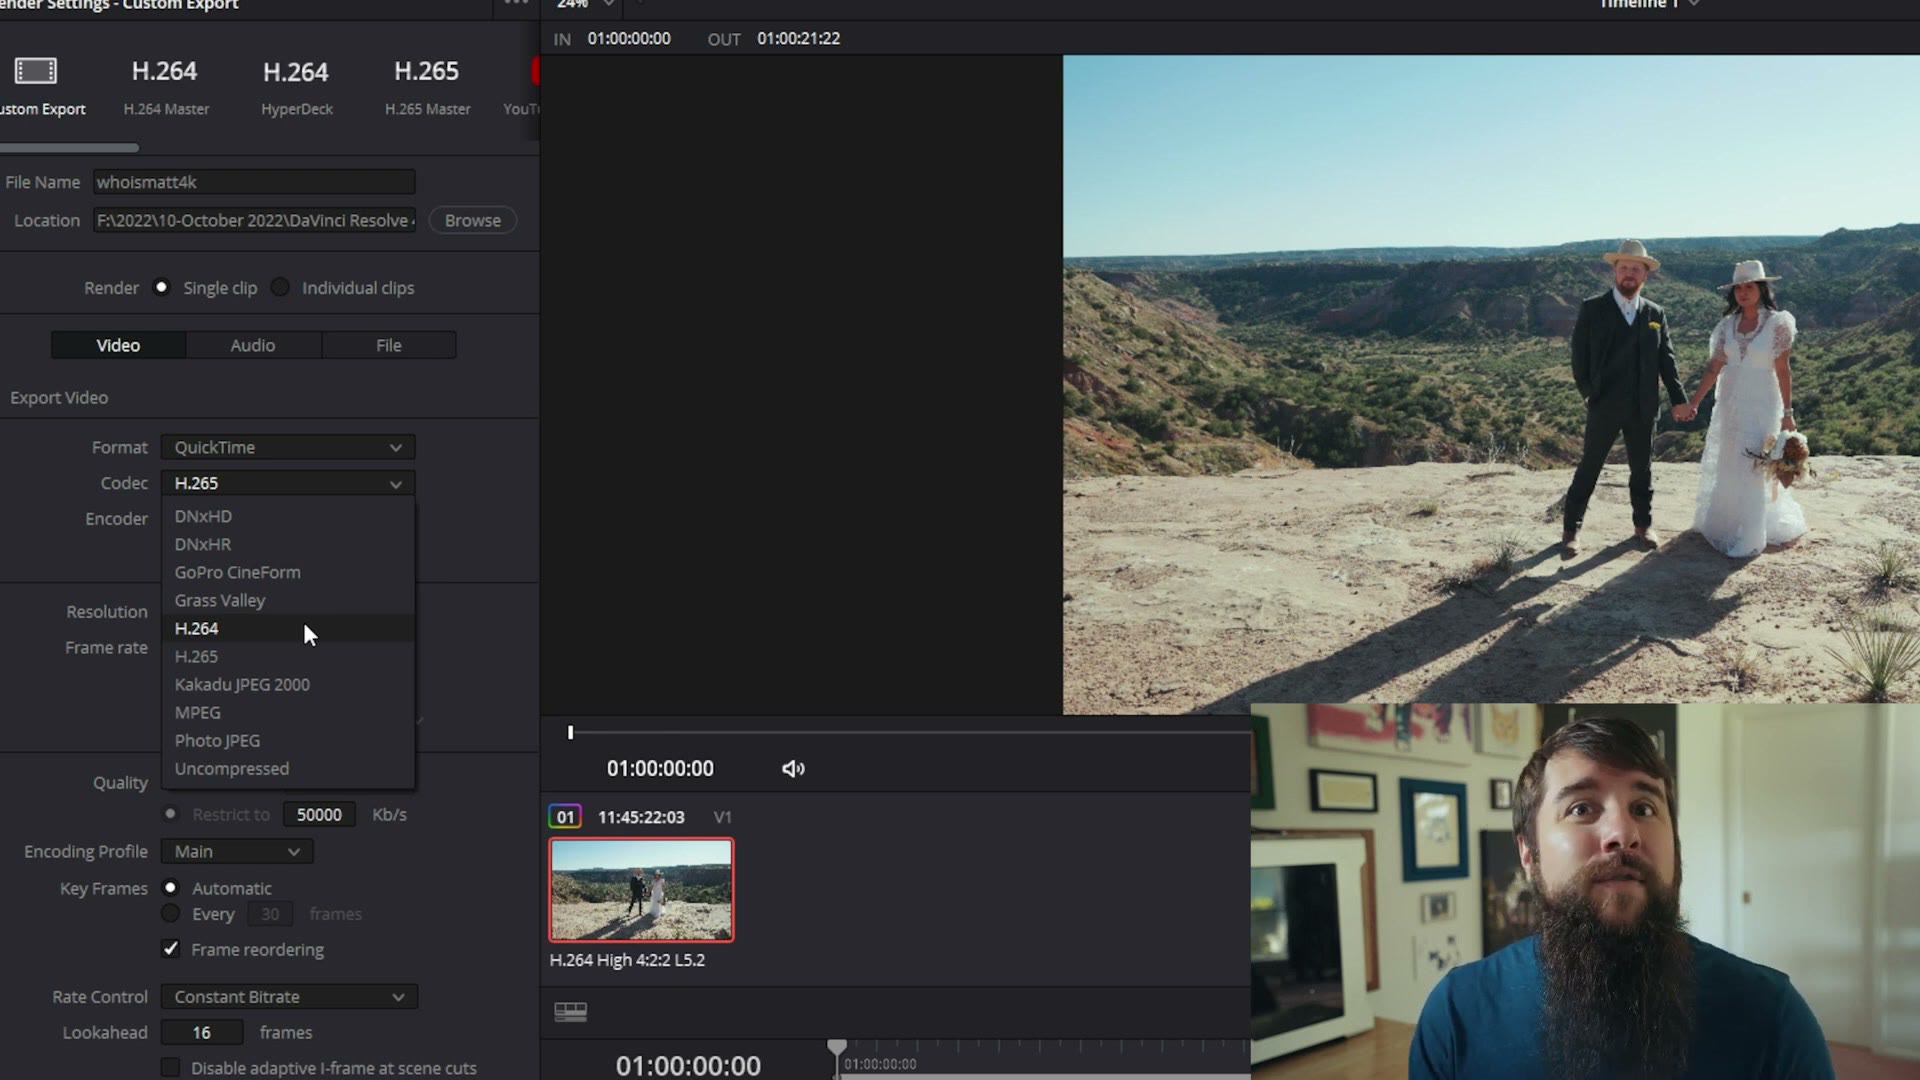
Now for the one really important setting, down next to Quality. First off, a big shout out to Casey Faris and his Resolve tutorials, because I really like his recommendation for how to handle bitrates.
In H.265, set your bitrate to double your frame rate. So because we are exporting at 24 frames per second, click Restrict To and set it to 50,000. I know 24 times two is 48, but 50,000 is a nice round number and a little bit cleaner. Likewise, at 30fps I would use 60,000, and at 60fps I would use 120,000.
Then for Rate Control, change it from VBR High Quality to Constant Bitrate, which basically tells Resolve to always use the maximum bitrate and should give you a super clean, high quality file for whatever site you upload it to.
Side note: if you do not see the Rate Control dropdown at all, that means your graphics card does not support the feature. I would not worry about it, because even without constant bitrate your quality should still be very high.
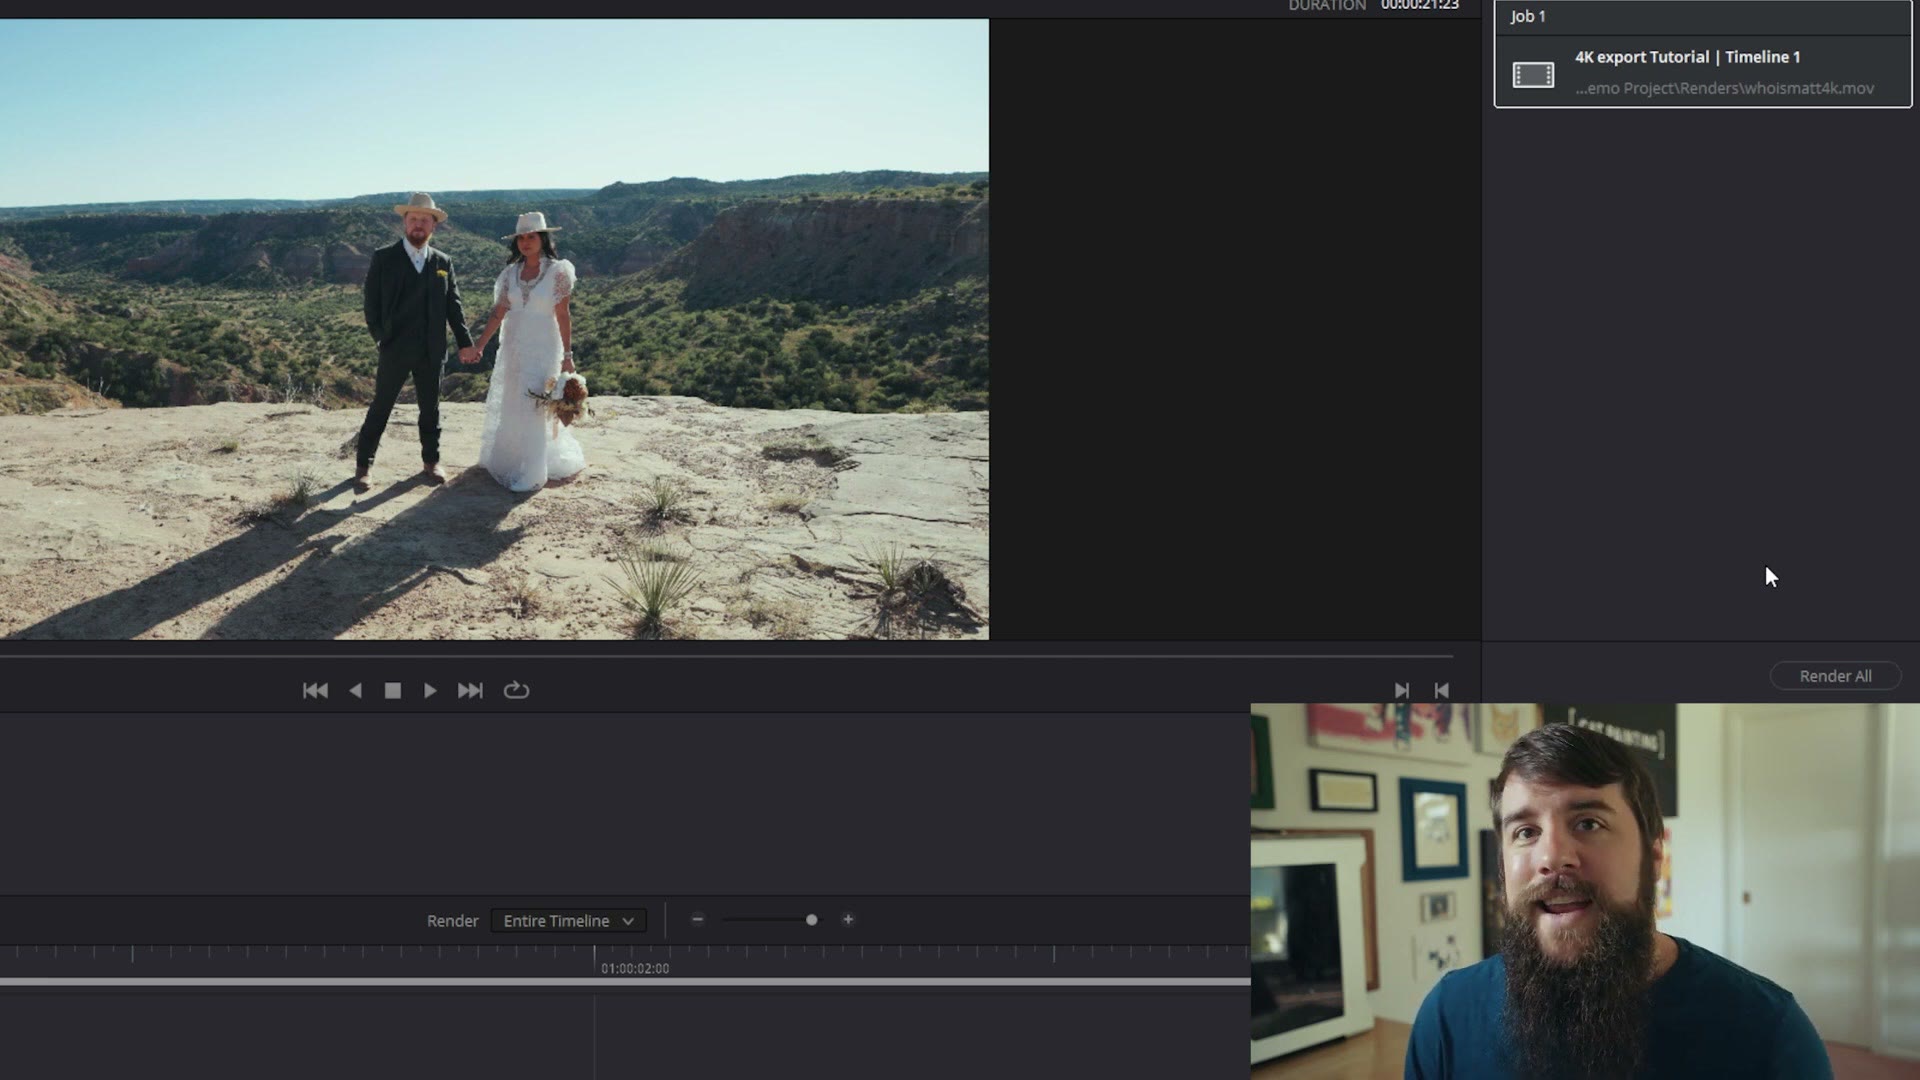
Then click Add to Render Queue, hit Render All over on the right, and you are good to go.
If you’re not using this one, I went through How To Export 4K Video In Premiere Pro CC 2022 For YouTube, Facebook, & Vimeo and How To Export High Quality HD Video In Premiere Pro CC 2022 For YouTube, Facebook, & Vimeo as well.
Export Settings For Clients
Now let’s say you have a different goal. Maybe this is not going up on a video site at all, and instead it is going to a client you are editing for.
Keep in mind that your client’s computer may not be able to play back a video encoded in H.265, because it is more processor intensive. So in that case I have different settings for you.
These are also the settings to use if you are on the free version of DaVinci Resolve and you click that codec dropdown and go, I do not see any H.265, I only get H.264. That is okay. And they are great if your computer is exporting H.265 really slowly, because these will make it much faster.
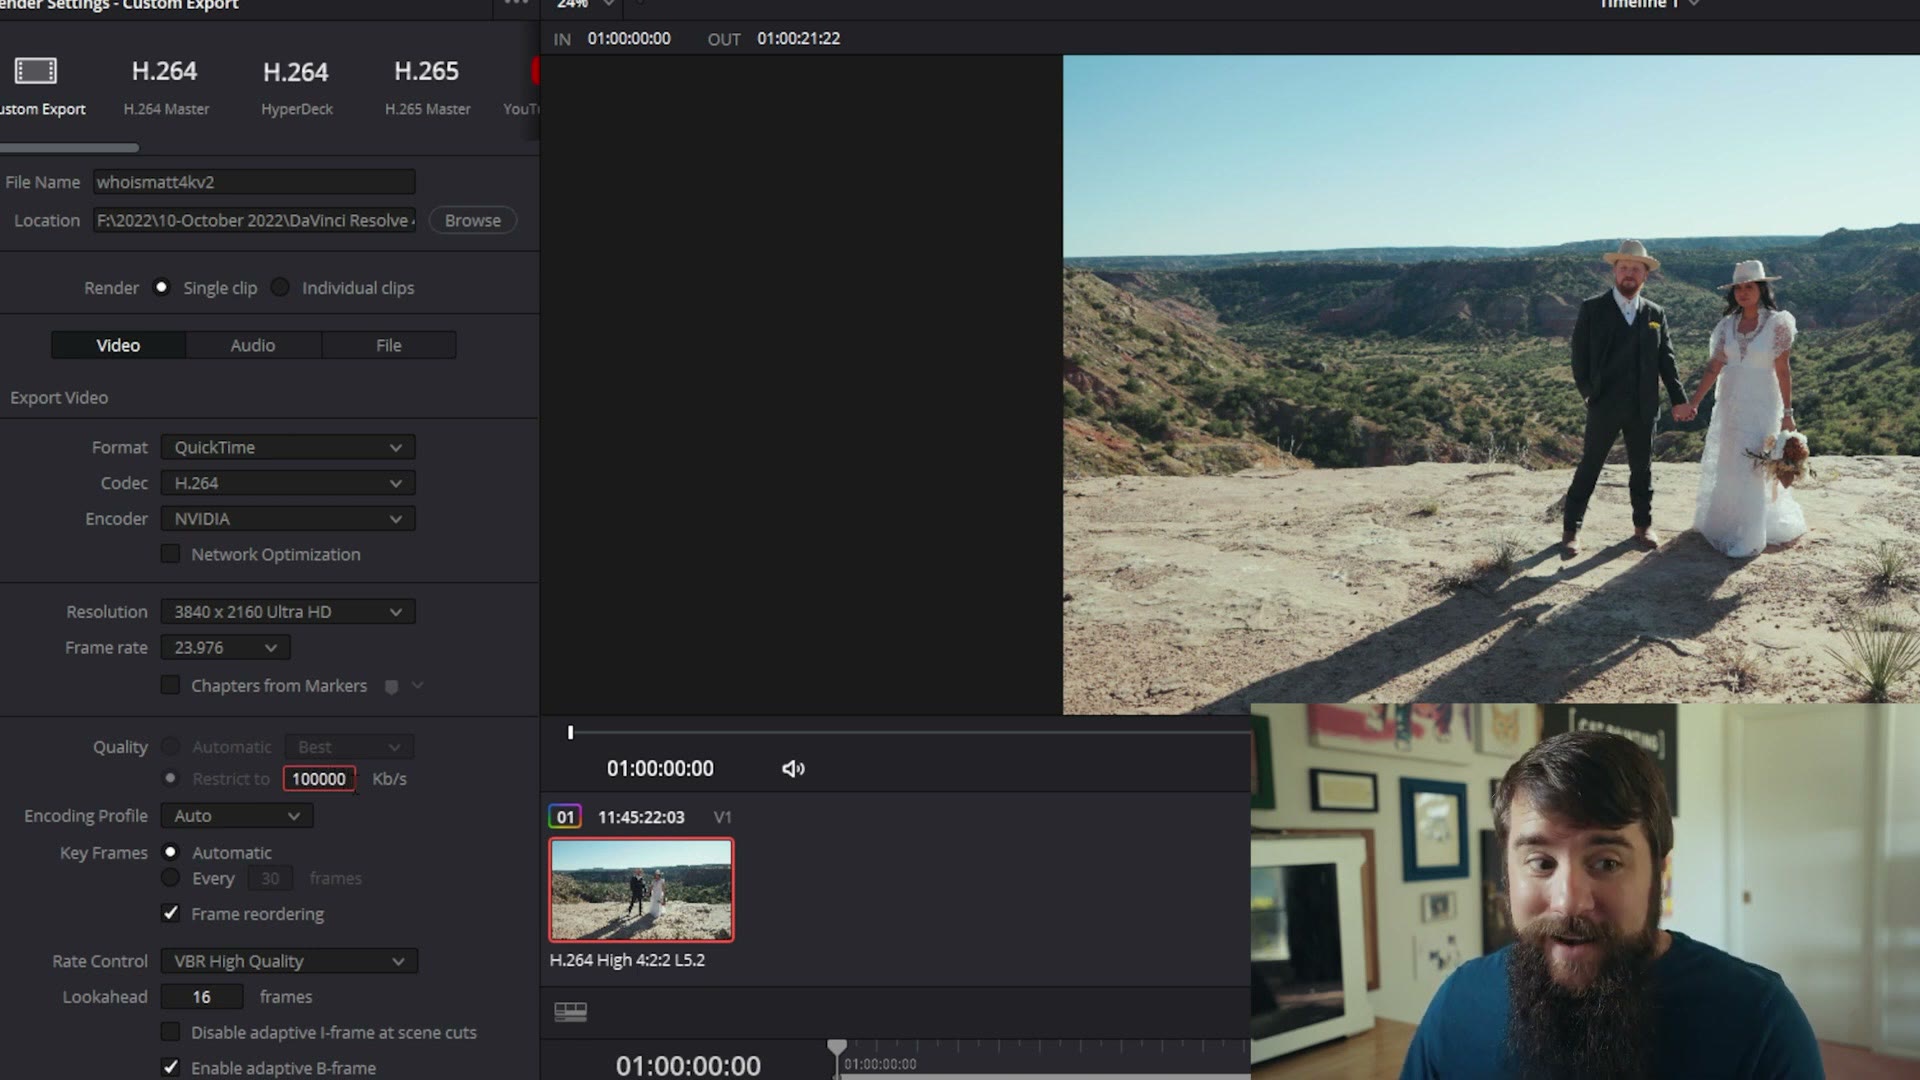
For client delivery I would select the H.264 codec and keep everything else the same. But down under Quality, next to Restrict To, keep in mind that H.264 needs a much higher bitrate to give you similar quality to H.265.
So for a 24fps clip I would set it to 100,000, which is much higher. At 30fps I would use 120,000, and at 60fps I would use 150,000. This results in a really big file, but the quality is going to be very good.
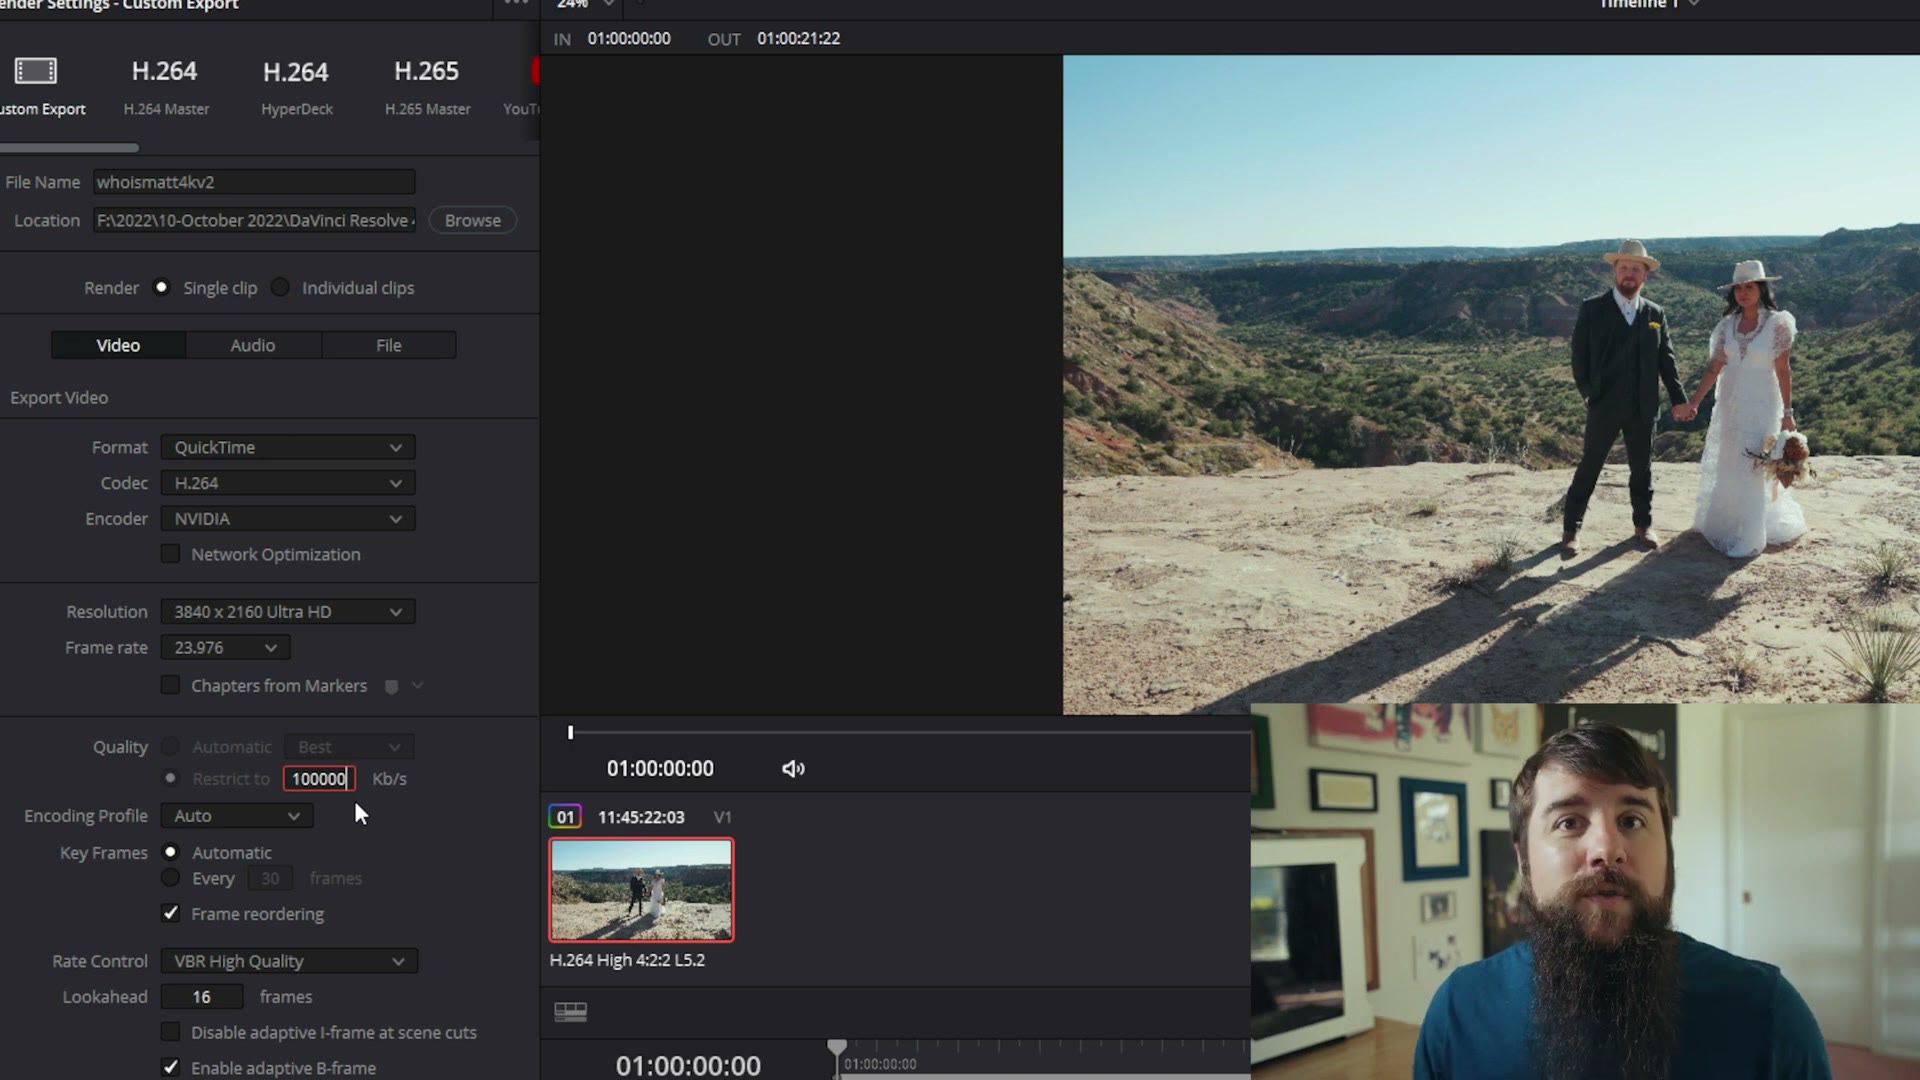
Make sure you select Constant Bitrate down here for your rate control as well, which helps keep that quality up.
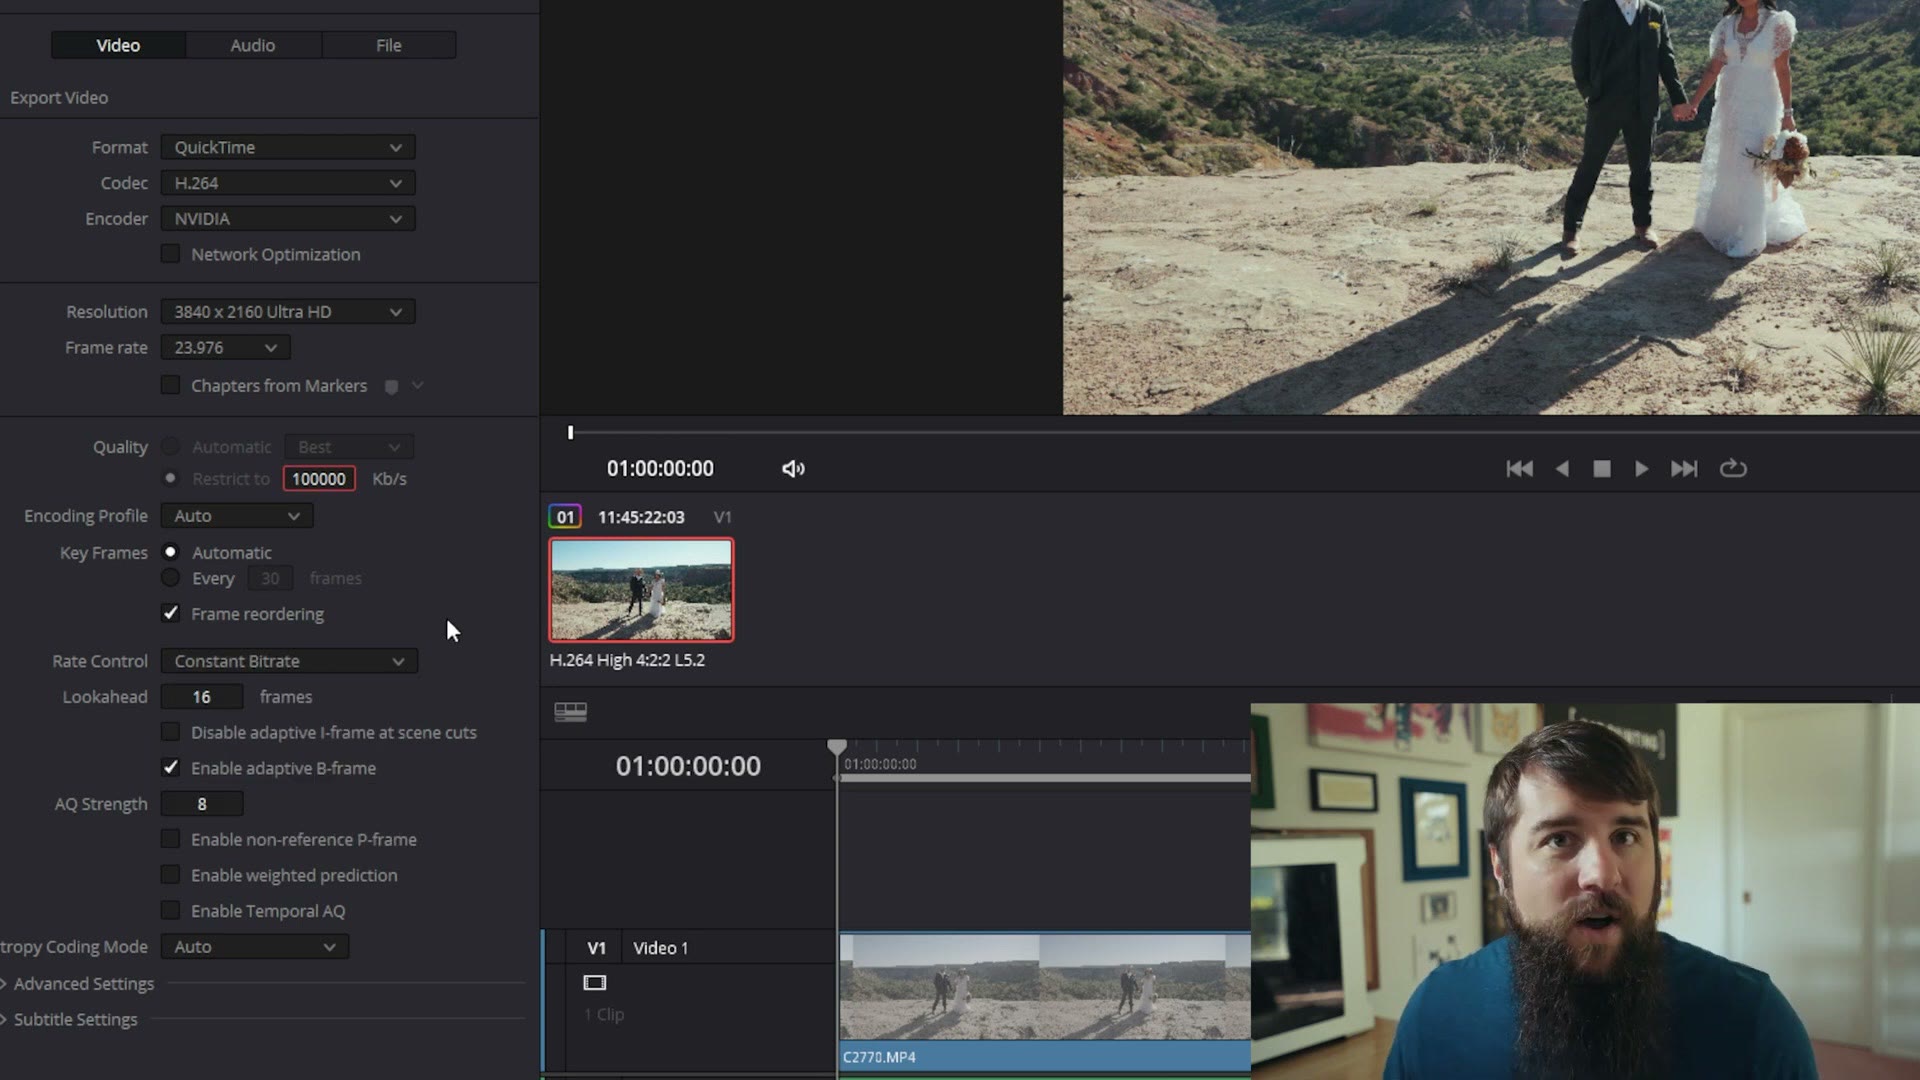
And then, just like exporting for YouTube, click Add to Render Queue and then Render All on the right.
That is how you export very high quality 4K video in DaVinci Resolve, both for uploading and for delivering to clients. If you have not grabbed it yet, my Resolve project template is still free and will get you exporting 4K even faster. And if you are exporting vertical video, I have a separate tutorial for YouTube Shorts in Resolve.
Thanks so much for reading, and have a great day!