
Today I am going to show you my fast filmmaking settings for the Sony FX30, which will give you access to everything you need at your fingertips with very minimal need to dive into the menus. If you film weddings, documentaries, basically anything where you need to be able to shoot very fast, this is for you.

To start, if you want to save time, you can download my FX30 settings file, load it into your camera, and immediately start using all of these settings without following along with any of this. It is completely free. My gift to you. But of course if you do not want to download it, keep reading, because you will hopefully learn a lot about this camera.
This is the first part of a two part series, and it walks you through all of the menus you need to dial in to get this camera working as fast as possible. I split it up because going through the menus takes a while. Part two is comparatively much faster and covers the custom modes, custom buttons and function menu, and you are going to love that one, because it basically keeps you out of the menus 99% of the time.
For now though, we need to talk about the FX30’s menus. So grab your camera and let’s get started.
Set Your FX30 To Video Mode

First, make sure the camera is in video mode by pressing the mode button and navigating to Movie. The FX30 customizes its menus depending on whether you are in video or photo mode, and since this is all about filmmaking settings, the camera needs to be in video mode.
Press menu, and by default the camera opens to the Main 1 menu, which is custom to the FX30 and the FX3. It gives you a lot of controls and it is a touch screen. Really cool. But if you press left twice, you will see the My Menu section at the very top, which is a completely customizable menu that lets you quickly get to the settings you need most. Part two covers setting that up.
The Red Camera Menu
Move down to the red camera icon that says Shooting, and we will start with Image Quality / Rec.
Image Quality And Recording

For File Format I would select XAVC S 4K. Then for Movie Settings, set a recording frame rate of 24p, and for Record Setting, set it as high as you can, 100M 4:2:2 10 bit.
If you want to know more about the video formats on this camera, I have a whole guide to the Sony video formats, and everything in it applies here too.
One other note. I prefer XAVC S because it gives you access to 30p recording. But if you never use 30p, I would recommend switching your file format to XAVC HS 4K instead, because it records in H.265, which gives you a slightly better image. And I mean slightly.
Next you have S&Q Settings. I would only touch these if you want to record 4K at 120 frames per second in the XAVC S-I format. Otherwise I would not use S&Q, because the camera conforms your video to slow motion in camera and you lose your audio, and you always want to be recording audio whenever you are recording.

Then you have Log Shooting Setting, which is another exclusive to the FX30 and FX3, and which turns this camera into a log filmmaking beast with the addition of Cine EI. That is a completely different way of shooting that needs its own tutorial, and I am making one, so subscribe if you want to see it.
The main thing you need to know is that your picture profiles are different now. On the FX30 there is no PP8 or PP9 like on older Sony cameras. S-Log3 is enabled through this Log Shooting Setting menu instead. So if you want your FX30 to behave like an a7S III, or like an FX3 before the 2.0 firmware, or basically like any older Sony camera in regards to S-Log3, go into Log Shooting Setting and choose Flexible ISO, which gives you all of the controls you would normally have. Because I recommend filming in S-Log3, I would recommend Flexible ISO. And for Color Gamut, make sure it is set to S-Gamut3.Cine/S-Log3.
Then there is Embed LUT File, which is on by default, and you want to turn it off. There is a setting later on that governs how you import LUTs into the camera, and once you have them imported you can either use a LUT as a preview, which shows you what your footage will look like on the screen while the file itself stays flat and gray like you expect from S-Log3, or you can have the camera actually bake the LUT into the recording. That can save you a ton of time color grading, because your footage arrives already graded, but it comes at the expense of flexibility in post.
Back out and you have Proxy Settings, which are great for slower computers, and I have a whole tutorial about those.
Lastly, Lens Compensation. The first thing to know is this is only usable with native Sony lenses, so if you are using a dumb adapter and an old vintage lens, all of this is grayed out. If you are on a native lens you will have shading compensation, chromatic aberration compensation and distortion compensation. I would leave all of these on their defaults.
Down at the bottom there is also Breathing Compensation. If you are on a supported native Sony lens and you want to eliminate lens breathing, turn it on, but be aware that it crops in your footage a bit.
Media
First up is Format, which formats the card. Important. You should know where that is.

Next you have Recording Media Settings, and these are super important for anything you never want to risk losing, because the FX30 has dual card slots. I would always recommend recording to both, so go down to Recording Media for video and select Simultaneous Recording. Then set Auto Switch Media to on, so that if you only have one card in the camera it will still start recording rather than throwing an error at you.
Then there is Recover Image Database, which is a great feature if your card ever gets corrupted, and Display Media Info, which just shows how much recording time you have left. I remember on my old Canon, if I wanted to check how much space was left, I had to go into the format card menu, which was terrifying. So I am glad you can just do this instead.
File
Write Serial Number I leave off, but if you turn it on it embeds the camera’s serial number into your file metadata, so if the camera ever gets lost or stolen you could point at the footage and say that is mine. If you want it, turn it on.

File Settings is actually really useful. Set File Number to Series, which keeps the camera counting up file names even after you format a card. Older Sony cameras defaulted to Reset, which restarted the numbering every single time you formatted and made keeping track of files a pain. Definitely leave this on Series.
Down here you can also set the File Name Format to standard, or date, or date plus title, and you can give your clips a custom title. So if you were filming a wedding ceremony, you could label the files on the card ceremony, and then at a glance while editing you would know exactly what everything is. Pretty cool that you can do that in camera.
Shooting Mode
By default a lot of this is grayed out, but if you go down to Exposure Ctrl Type, which is currently on Flexible Exposure Mode, change it to P/A/S/M Mode.
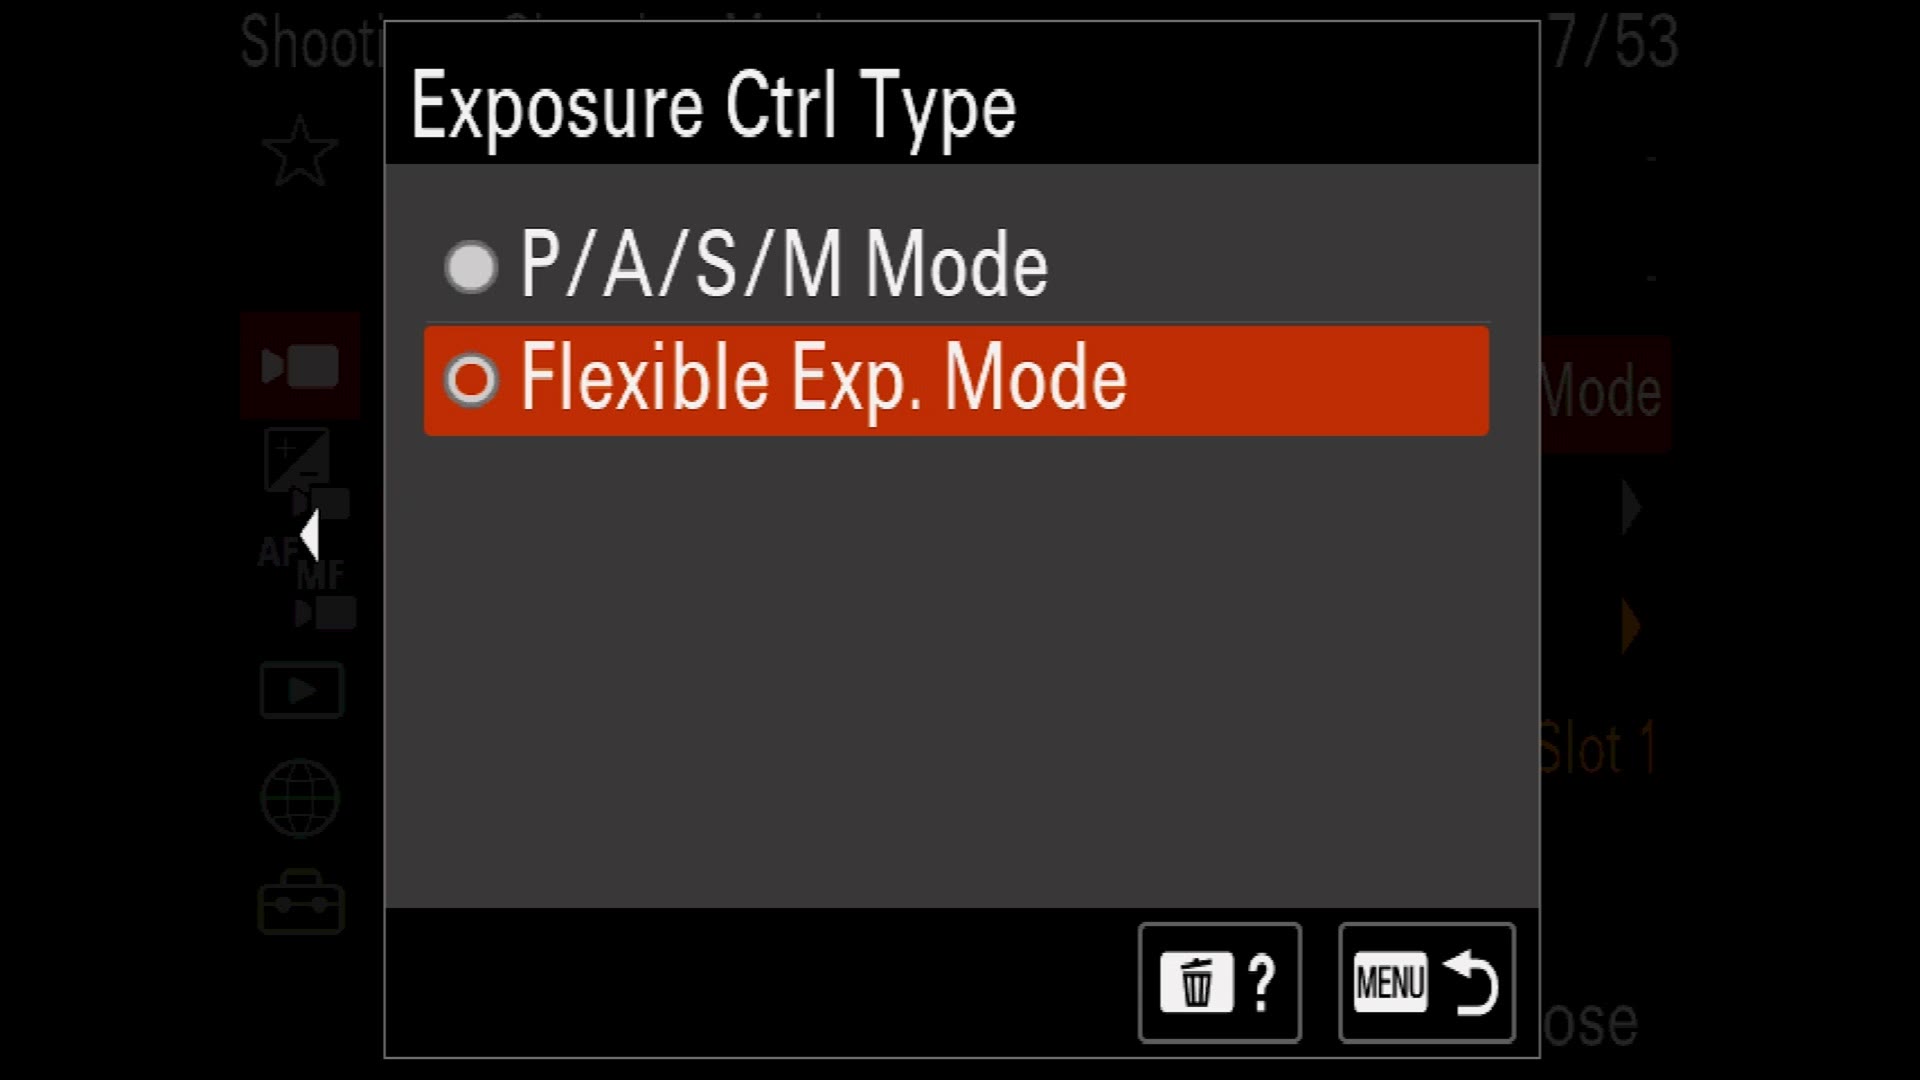
Be aware that once you select P/A/S/M mode, any time you press the mode button from here on the camera is going to ask whether you want to film in P/A/S/M. Just say yes.
Now go up and make sure your Exposure Mode is set to Manual Exposure. The reason this matters so much is that manual mode is what lets you change your aperture and shutter speed yourself, and you really want to be able to do that. You do not want the camera doing things automatically. You want it all manual. S&Q Exposure Mode will be grayed out because you are using manual exposure, which is fine.
Then you have Camera Set. Memory, Recall Camera Setting and Memory / Recall Media. Camera Set. Memory is how you save your current settings as MR1 through MR3, Recall Camera Setting is how you get them back, and Memory / Recall Media is where those presets are stored. Part two covers all of that, so do not stress about them now.
Shutter And Silent
Silent Mode is for photo, not video, so I would not worry about it. Turn it on if you are taking photos and you do not want the shutter moving. Sure.
Release w/o Lens is very important. Make sure this is set to Enable, otherwise you will not be able to record with non-native lenses and the camera will insist there is no lens attached. There is a lens. I promise.

Anti-flicker Settings is genuinely useful if you are dealing with flicker from cheap lighting. Enable variable shutter, then go into Variable Shutter Settings, and down in the bottom left you will see it reads something like 64.0. You can change your shutter speed there in very finely incremented steps, which is amazing for dialing flicker out. Turn it off for now, but know where it is. We are going to set a custom button for it in part two so you can get there faster.
Audio Recording
Set Audio Recording to on. Yeah. You want to record audio.
Audio Rec Level defaults to 26, which is a bit loud. I usually go around 15, but if things are quiet, bump it up a bit. Part two shows you how to change this quickly.
Audio Out Timing is set to Live by default and I would leave it there. But if you are using an external recorder like an Atomos Ninja and you are monitoring on headphones and the audio sounds slightly out of sync, change this to Lip Sync and everything should line up.
Wind Noise Reduction is off by default. It applies a low cut filter to remove some of that really deep wind rumble. I usually leave it off because you can always deal with wind in post, but if you are hearing a lot of it and you want less editing later, turn it on.
MI Shoe Audio Set is the last one here. MI stands for multi interface, and if you have a microphone that works with the digital hot shoe on top of this camera, like Sony’s XLR-K3M or the ECM-B1M, this is where you change those settings. Heads up: this link goes to the newer Sony ECM-M1. Good to know where it lives.
Timecode
All of these settings are great if you use timecode to sync your camera to an audio recorder. I do not personally use it, so I would only go in here if you are planning to. But it is great to have.
Image Stabilization
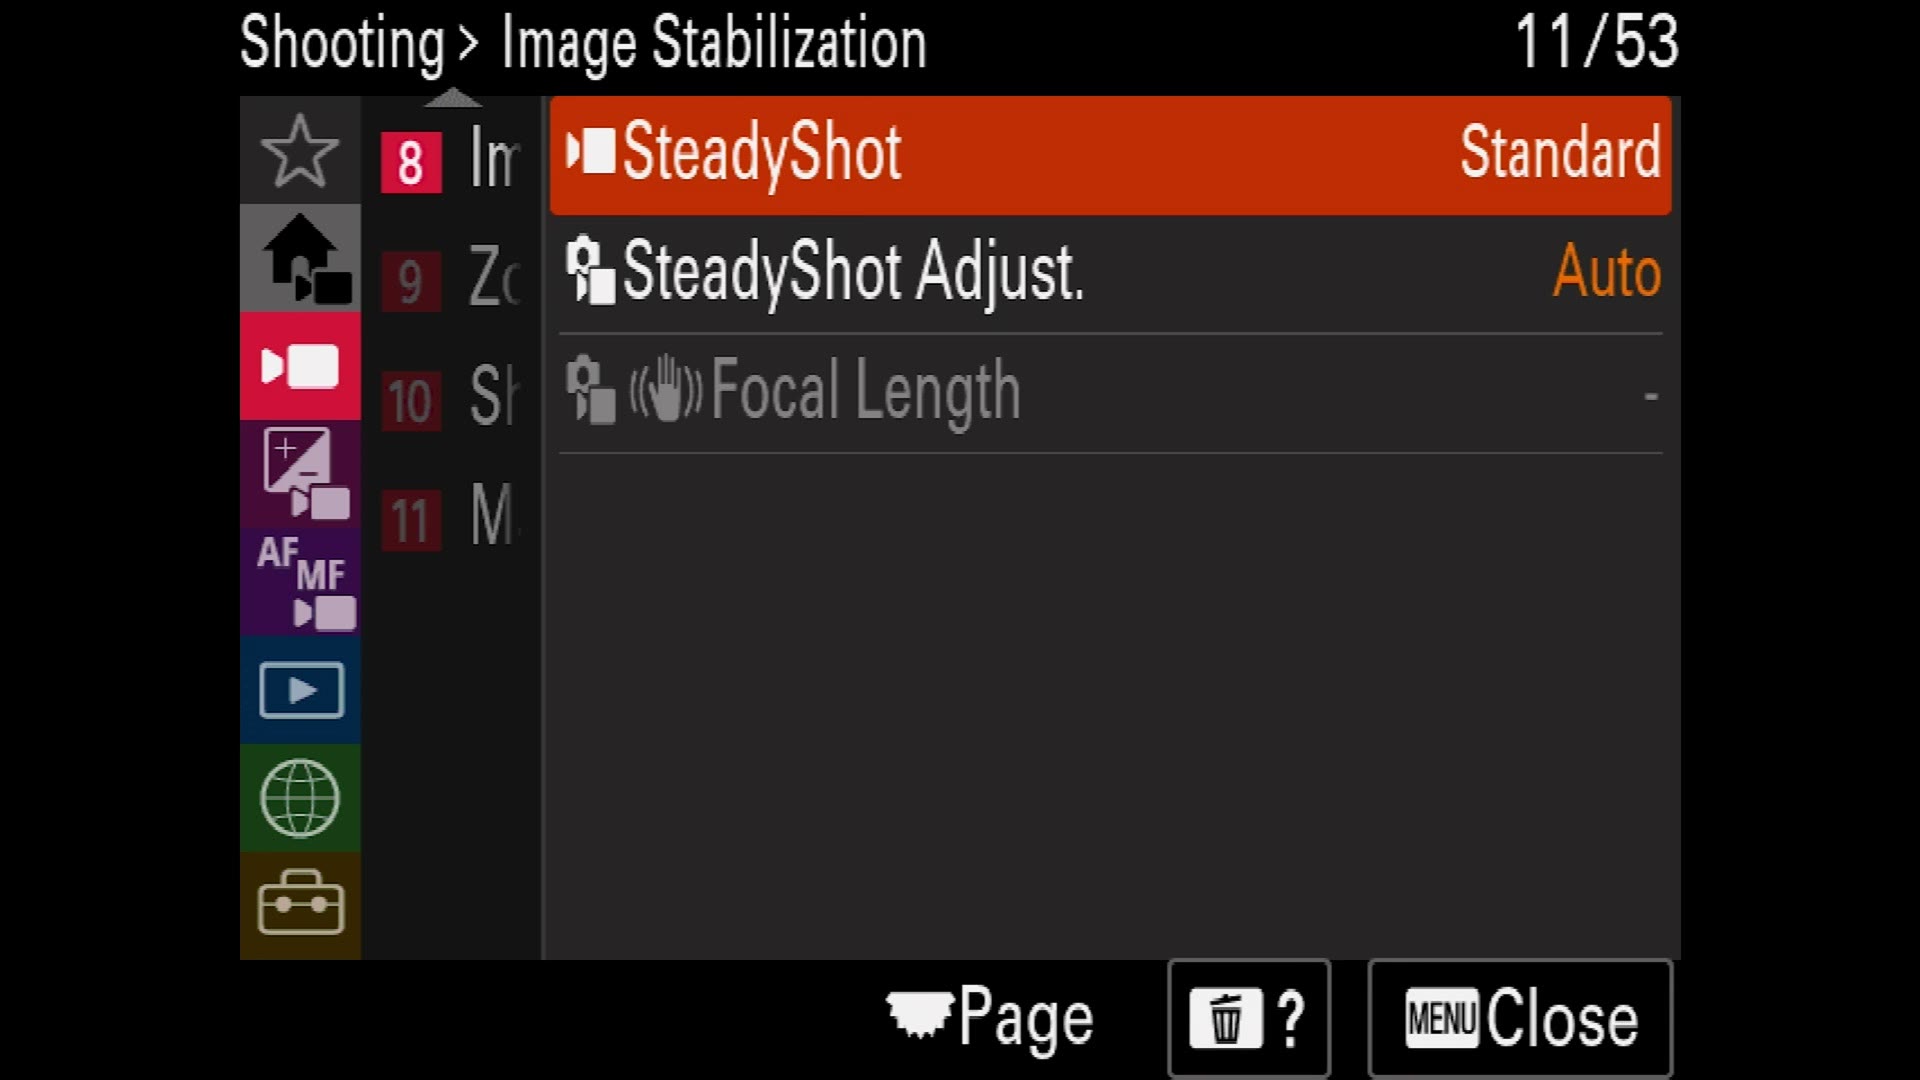
The FX30 has IBIS, and by default SteadyShot is set to Standard, but I bump it up to Active. It gives you a slight 1.1 times crop, which I do not mind, and it stabilizes your footage even more. It is really awesome. Of course if you are on a tripod you can leave it off, but for me it is on Active 90% of the time.
SteadyShot Adjust and Focal Length matter if you are using a non-native lens with no electronic connection to the camera. You can leave the adjustment on Auto, but if you set it to Manual you need to dial in the focal length of the lens you are actually using so the IBIS can compensate properly. If you get this wrong your footage will look shaky, like the sensor is moving more than it should, with these weird jitters. It has happened to me. So make sure you get it right. For now, leave it on Auto.
Zoom
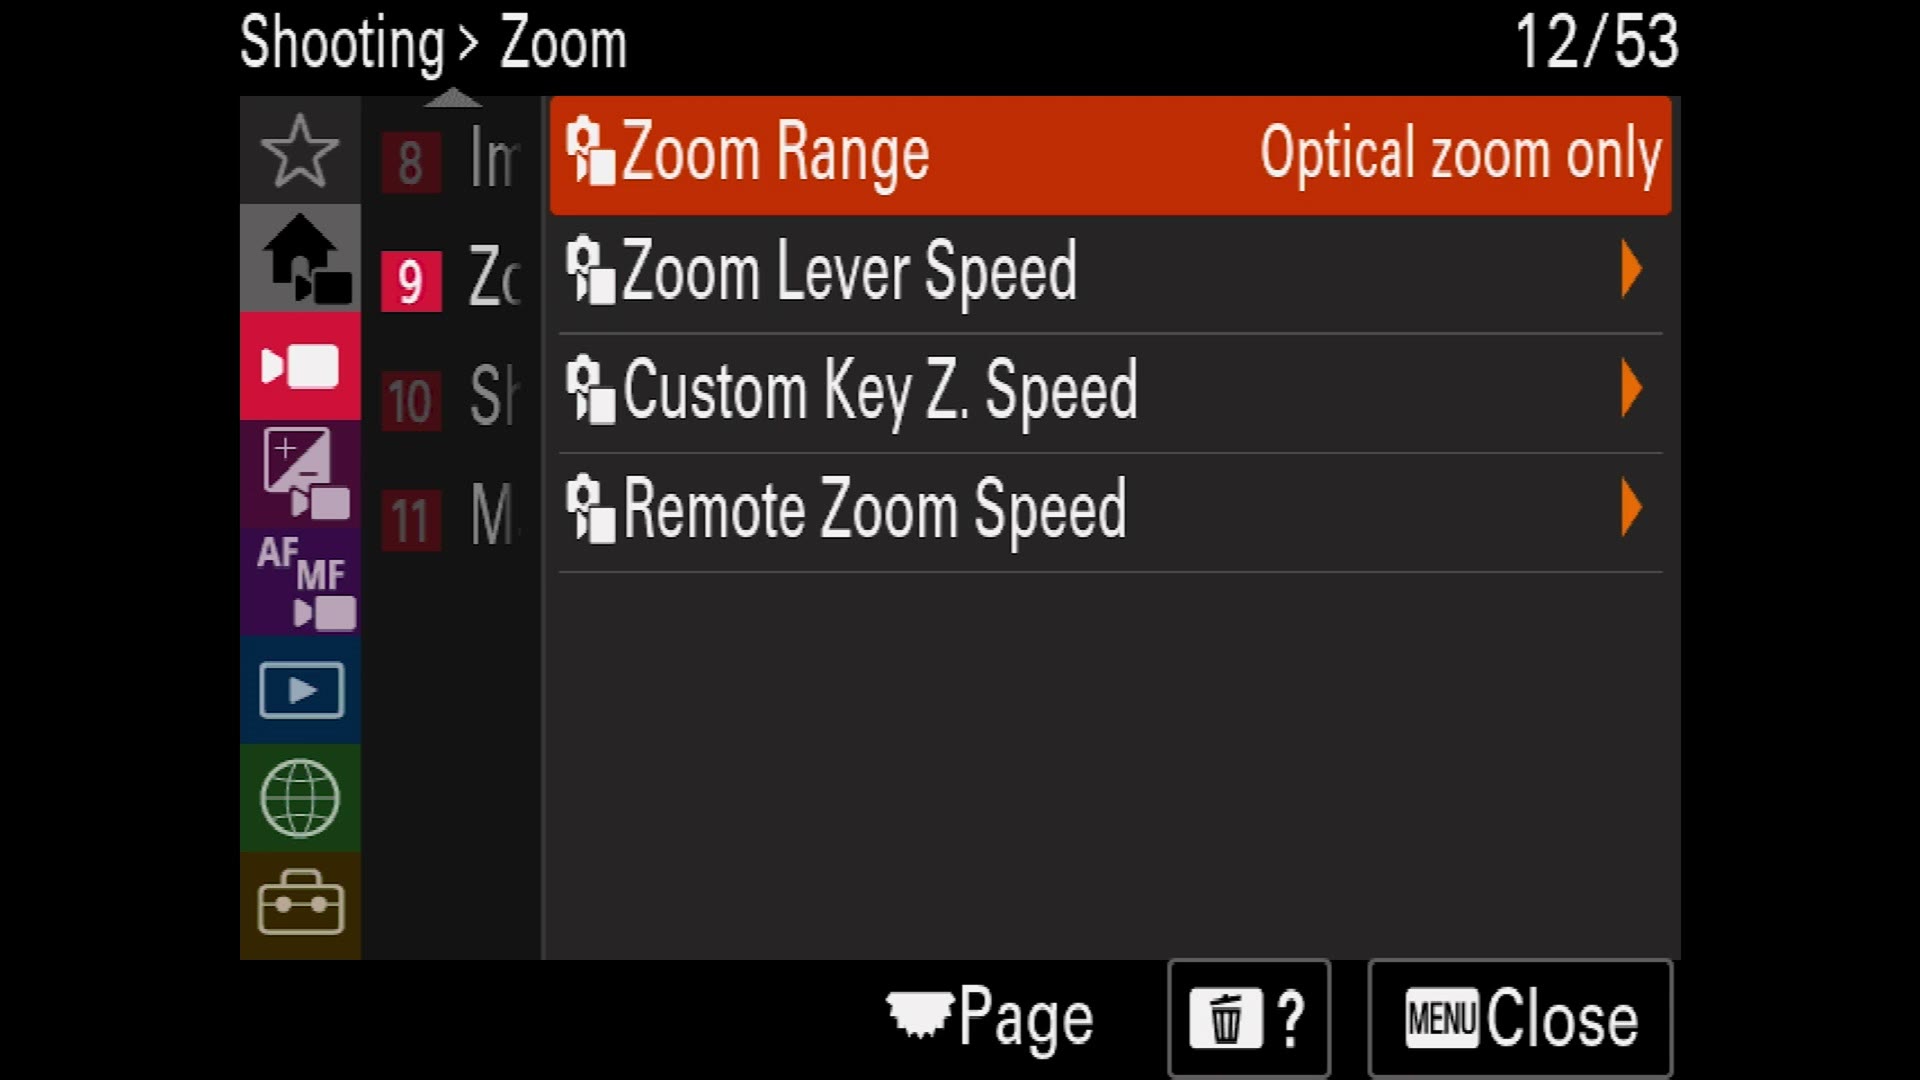
This one is super awesome. By default your Zoom Range says Optical Zoom Only. We do not want that. You want Clear Image Zoom, which is Sony’s fancy proprietary setting that lets you zoom in with the sensor.
Back out to the camera and you will see there is a lever at the top you can use to zoom in and out. Push it right and suddenly you are zooming in 1.5 times. What the heck. So cool. Clear Image Zoom is fantastic. I absolutely love it. It is just cool. Okay? It is just cool.

Then you have Zoom Lever Speed, where you can fine tune that little lever. You get a speed for standby and a speed for recording. I would set the first zoom speed to 1, because you want it slow, change the recording zoom speed to 1 as well, and leave the other one on 8. That way if you barely press the lever it slowly zooms in, real dramatic, real romantic, nobody even notices you are zooming. But if you slam it all the way over, there you go, zooming in real fast. You have versatility with one setting on 1 and one on 8.
There is also Custom Key Zoom Speed and Remote Zoom Speed. We already have the lever so you do not really need the custom key, and the remote one only matters if you are using a remote, but that is where those live.
Shooting Display
Do you like grid lines? Who does not like grid lines? You can turn on a rule of thirds grid, a square grid, or a diagonal and square grid. I am a big fan of the rule of thirds grid personally, so turn it on if you want. I am going to leave it off because it can get a little crazy.
Next is Emphasized REC Display, and oh my goodness, this is fantastic. The FX30 already has a light on the front, a light on the top and a light on the back to tell you it is recording, but you can also have a red line drawn around the whole screen. I love this. Make sure it is enabled.
Marker Display
Remember those grid lines? This is more of those, and there are a lot of really good options. Go into Aspect Marker and you can put 1.85:1 or 2.35:1 markers on your screen, because you want to do that cool cinematic thing where we shrink the video down and it looks more cinematic because you have to squint more to see it. Yeah. That is cinematic, right?
If you want those bars, here is where you get them, and they are great guides for framing your footage properly. Just make sure that after you set your aspect marker you go back up to Marker Display and turn it on, otherwise nothing will show up.
The Pink Exposure And Color Menu
Starting off we have Auto Slow Shutter, which automatically changes your shutter speed depending on how bright the room is. We do not want auto anything. Turn that trash off. Gross.
Next is ISO, which just lets you change the camera’s ISO. Mine is at 800 right now. Do not worry, there is a much faster way to do this that part two covers. Leave it at 800.
ISO Range Limit lets you set a minimum and maximum. Leave it. You do not need to change that.
Then you have Base ISO, Base ISO Switch EI, and Exposure Index. What is all this? Matt, what is happening? These are all for Cine EI mode, which is another video I am making, so subscribe if you want to see it. And at the bottom, Auto / Manual Switch Set, which lets you flip between auto and manual. We are using manual, so who cares.
Exposure Compensation
Another auto thing. You try to select it and the camera tells you it is invalid when ISO is not set to auto. Exposure Step at 0.3EV is useful, because it lets you change exposure more smoothly.
Then there is Exposure Std. Adjust. You do not want to give your camera STDs, okay? You do not want to do that. No, for real, this adjusts the standard for optimum exposure, and the camera itself is warning you right there that you do not need it. Cool. Moving on.
Metering
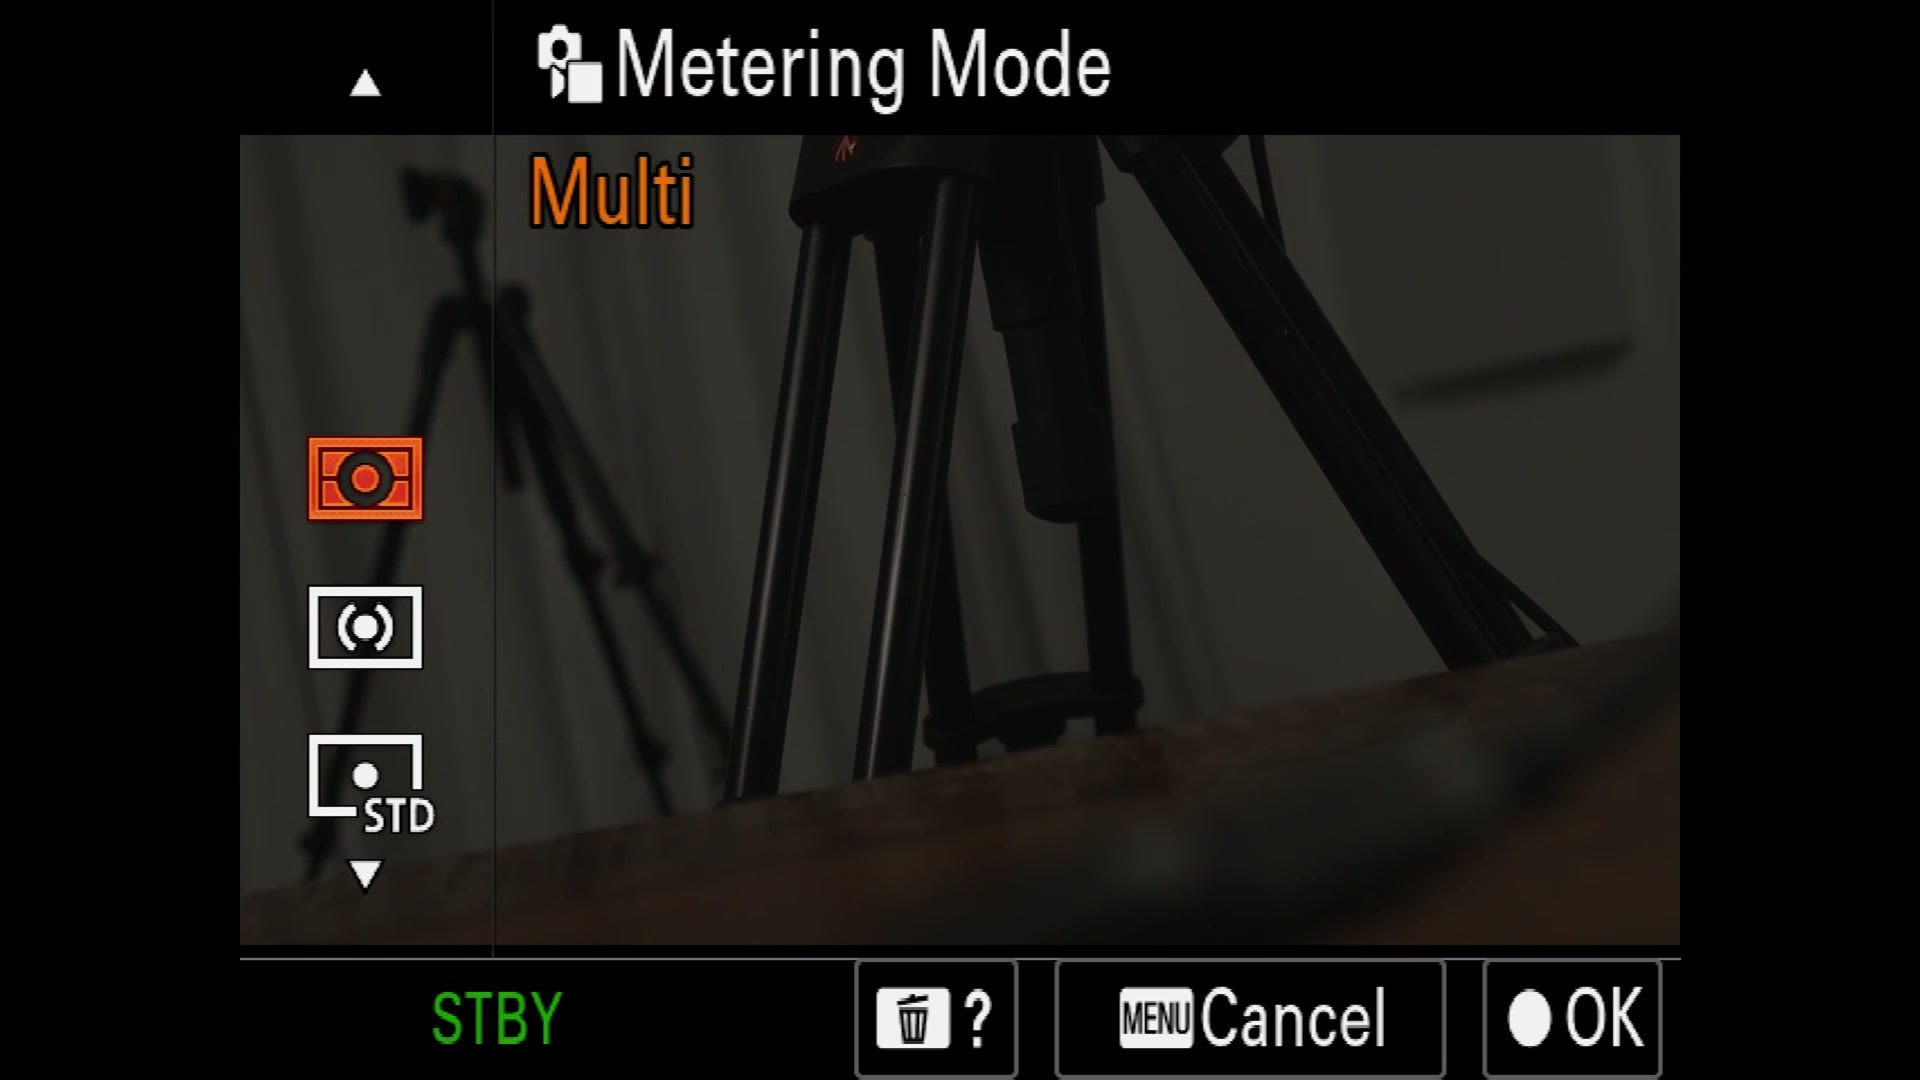
One of my favorite settings in the camera. Metering Mode is set to Multi by default, and that is what you want, because the camera looks at the entire image and works to keep the exposure good and balanced across everything in frame. I would leave it on Multi 99% of the time.
Then you have Face Priority in Multi Metering, where the camera asks itself whether it sees faces and whether it should prioritize their brightness while metering. Yes, you want that. Leave it on.
Spot Metering Point only matters if you switch to spot metering instead of multi, but you can set it to Center or Focus Point Link. Focus Point Link is cool, because then you can tap the screen and the camera will tell you the exposure in that specific part of the frame, which is really useful if you are trying to expose properly. I leave it on Focus Point Link so that if I ever do switch to spot metering, it is already set up the way I want.
White Balance
By default white balance is set to Auto. Oh, gross. We do not want auto anything.

You have presets down here like daylight, shade and cloudy, but I personally prefer and recommend you go all the way down to Kelvin, where we are dialing in specific numbers. Getting real math and science here. Press right and you can dial in your value, and for daylight I leave it at 5000K.
And as a bonus, if you press right again, look at this. You get a whole little chart with red, yellow, blue and pink. So if you are trying to shift the colors of your image you can go over here and say I need more magenta, and the camera goes, here is a lot of magenta, bro. You want some magenta? This is a really nice way to deal with strange color casts and tweak things very specifically. I love it. It is a really cool feature.
Priority Set in AWB you do not need to worry about. Leave it on Standard.
Shockless WB is super cool. If you are ever recording and you want to change the white balance mid-take, set this to 3, which is slow, and I highly recommend it. It slows the adjustment down so you get a very smooth shift instead of a very sharp one, and it really helps keep from freaking out your audience whenever they are watching. Really, really cool.
Color And Tone
Dynamic Range Optimizer stays off, because we are shooting in log. Creative Look, do not even worry about it. Picture Profile, nope, do not need it, because we are shooting in log. If you are not shooting in log, some of these become accessible, and there is a neutral creative look you could use with all your picture profiles turned off, or you can go in and use a profile like PP11, which is S-Cinetone. So if you want that and you do not want to film in log, that is where you get it.
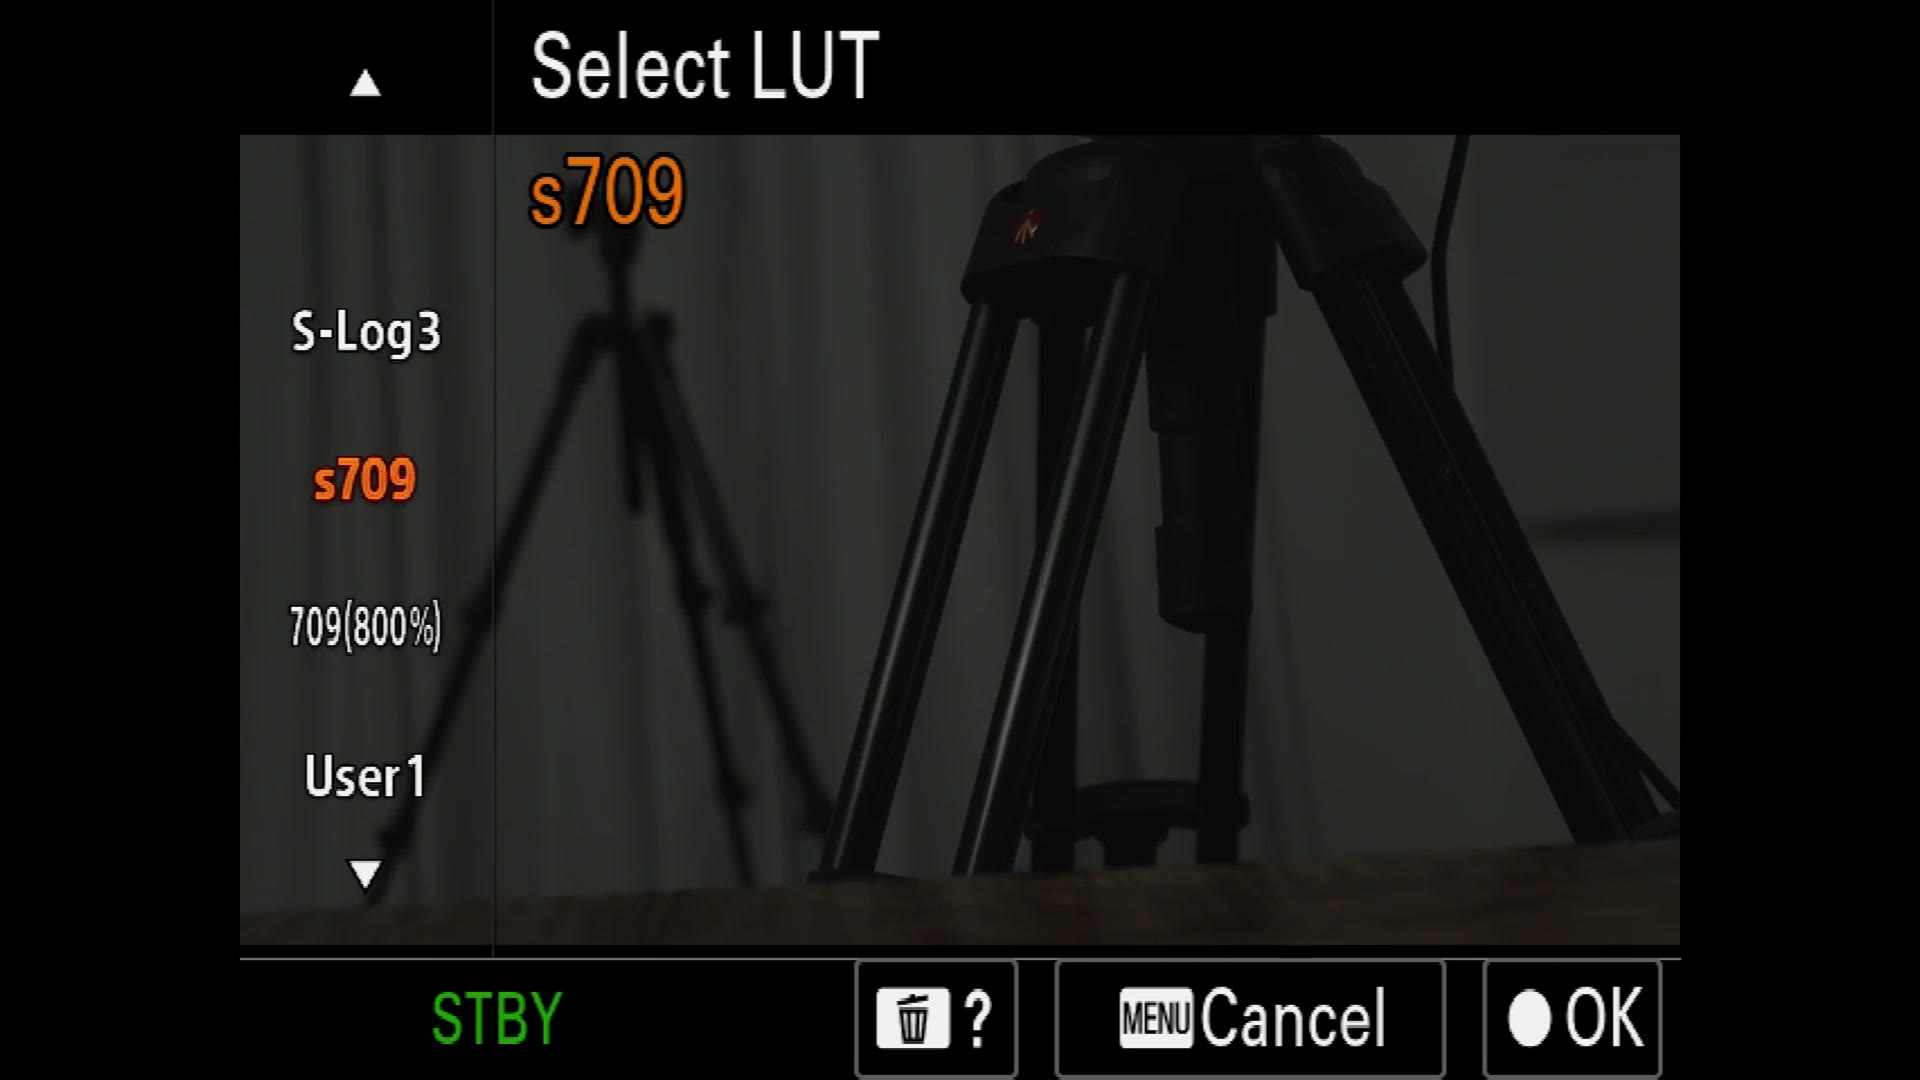
Now down here we have Select LUT. This is where you add a preview LUT to your S-Log3 footage so you can see roughly how it will look in post. By default it adds an s709 LUT, which is a Rec.709 look, and it takes your image from flat log to nicely saturated and contrasty. Switch it back to S-Log3 and you are gray and washed out again.
We are going to put this on a custom button in part two so you can get to it fast. If you ever used the gamma display assist feature on older Sony cameras, which is also in here, I prefer doing it this way instead. Select s709 and you are good to go.
You will also see an s709 800% option. What is that about? It is basically a higher contrast version of the regular s709 LUT, and it is there so that if you are filming alongside a bunch of older Sony broadcast cameras you can get your colors to match up. You are not going to do that. Do not worry about it. Just leave it on s709 and you have got your little preview.
Below that is Manage User LUTs, with an import and edit option. You can copy LUTs onto your memory card, import them here, and then go back up to Select LUT and choose from your own user LUTs. So if you want your own custom colors on the back of the camera, that is how you do it.
Zebras
Zebras, y’all. Lots and lots of zebras. Turn Zebra Display on. I love seeing zebras. Zebras are cool. Actually, you do not want to see them on your camera, but in real life, sure. Ever go to the zoo and see some zebras? That is fun. Try not to think about how sad they are in their enclosures though. Okay. It is very sad.
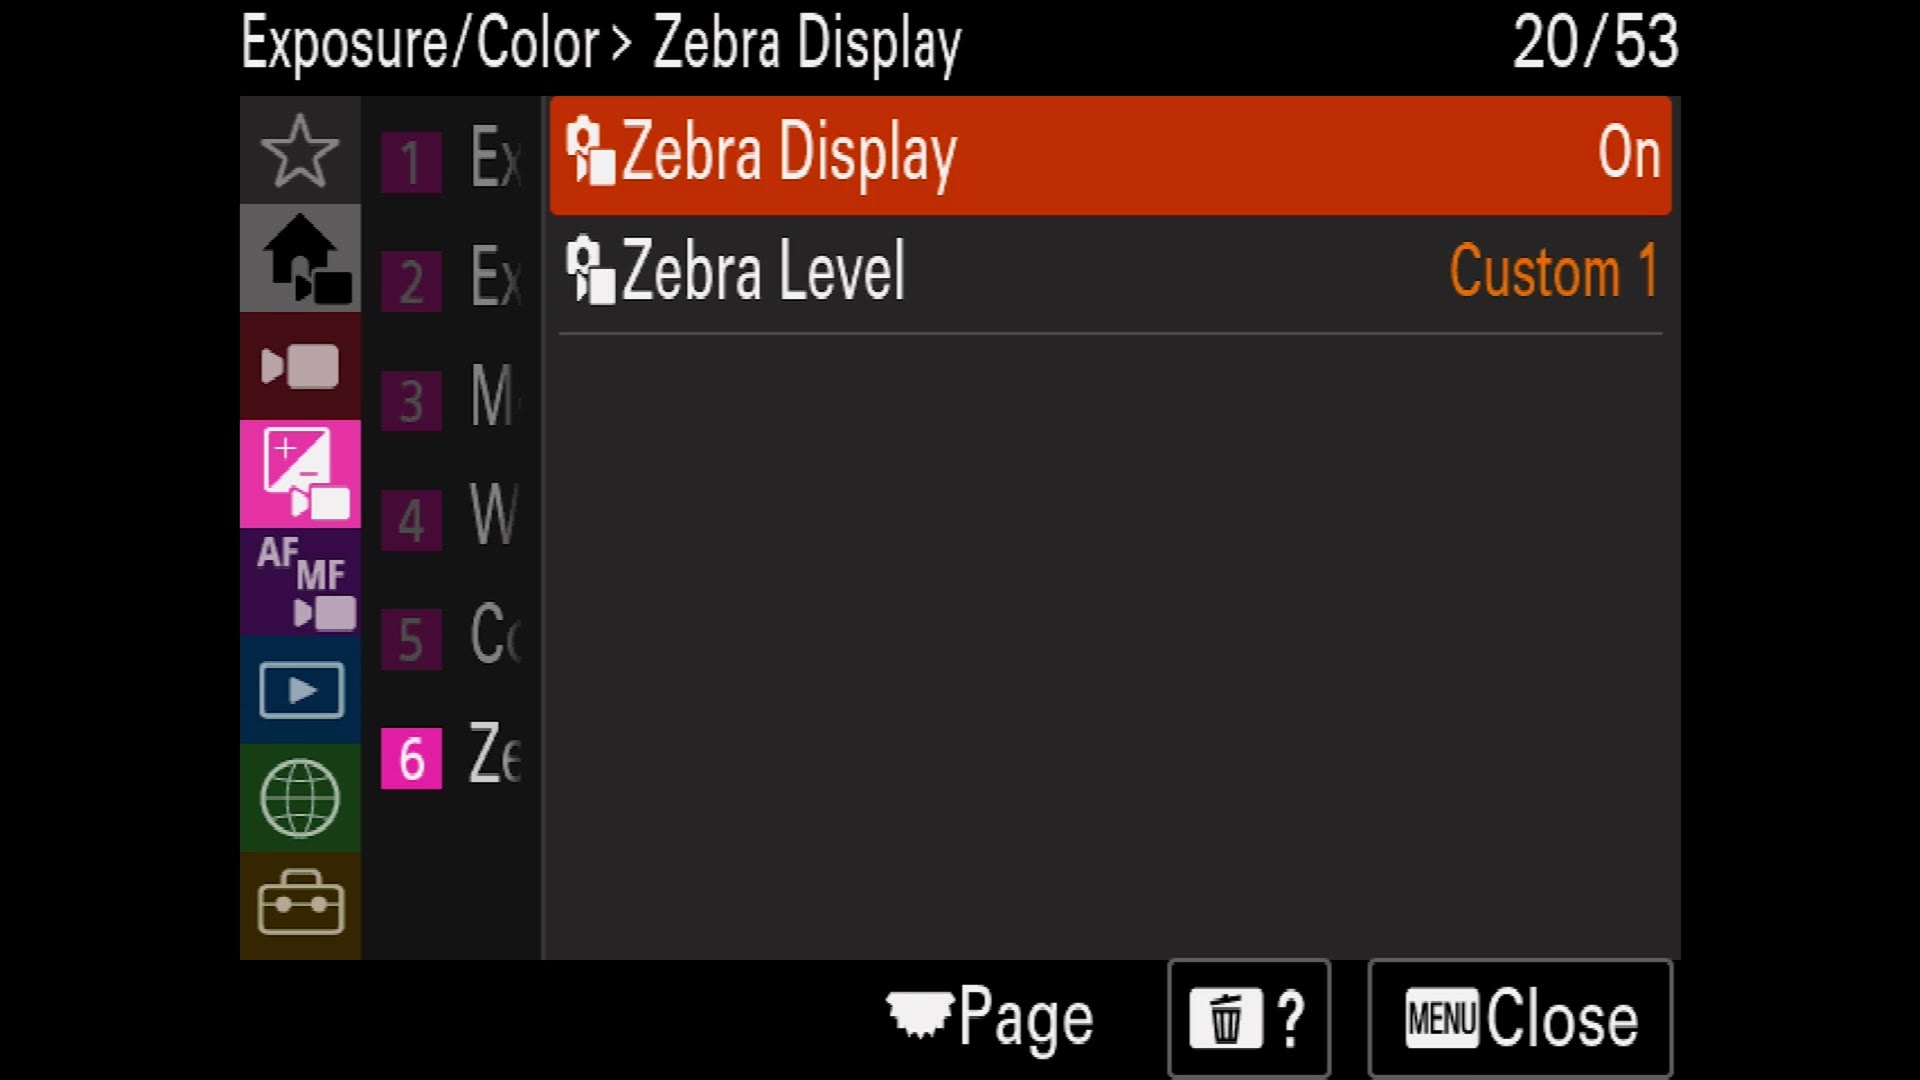
Zebra Level is super important. If you are filming in S-Log3 you want to set the zebra level down to Custom 1, go over to Lower Limit, and set it to 94+. That makes the camera draw zebra lines on the back of your screen exactly whenever the image is about to be overexposed for S-Log3. Super helpful.
The AF/MF Menu
Focus Mode is on Continuous AF by default. Yeah, you want continuous. You can set it to manual if you like, but we are going to put that on a custom button later, so just leave it for now.
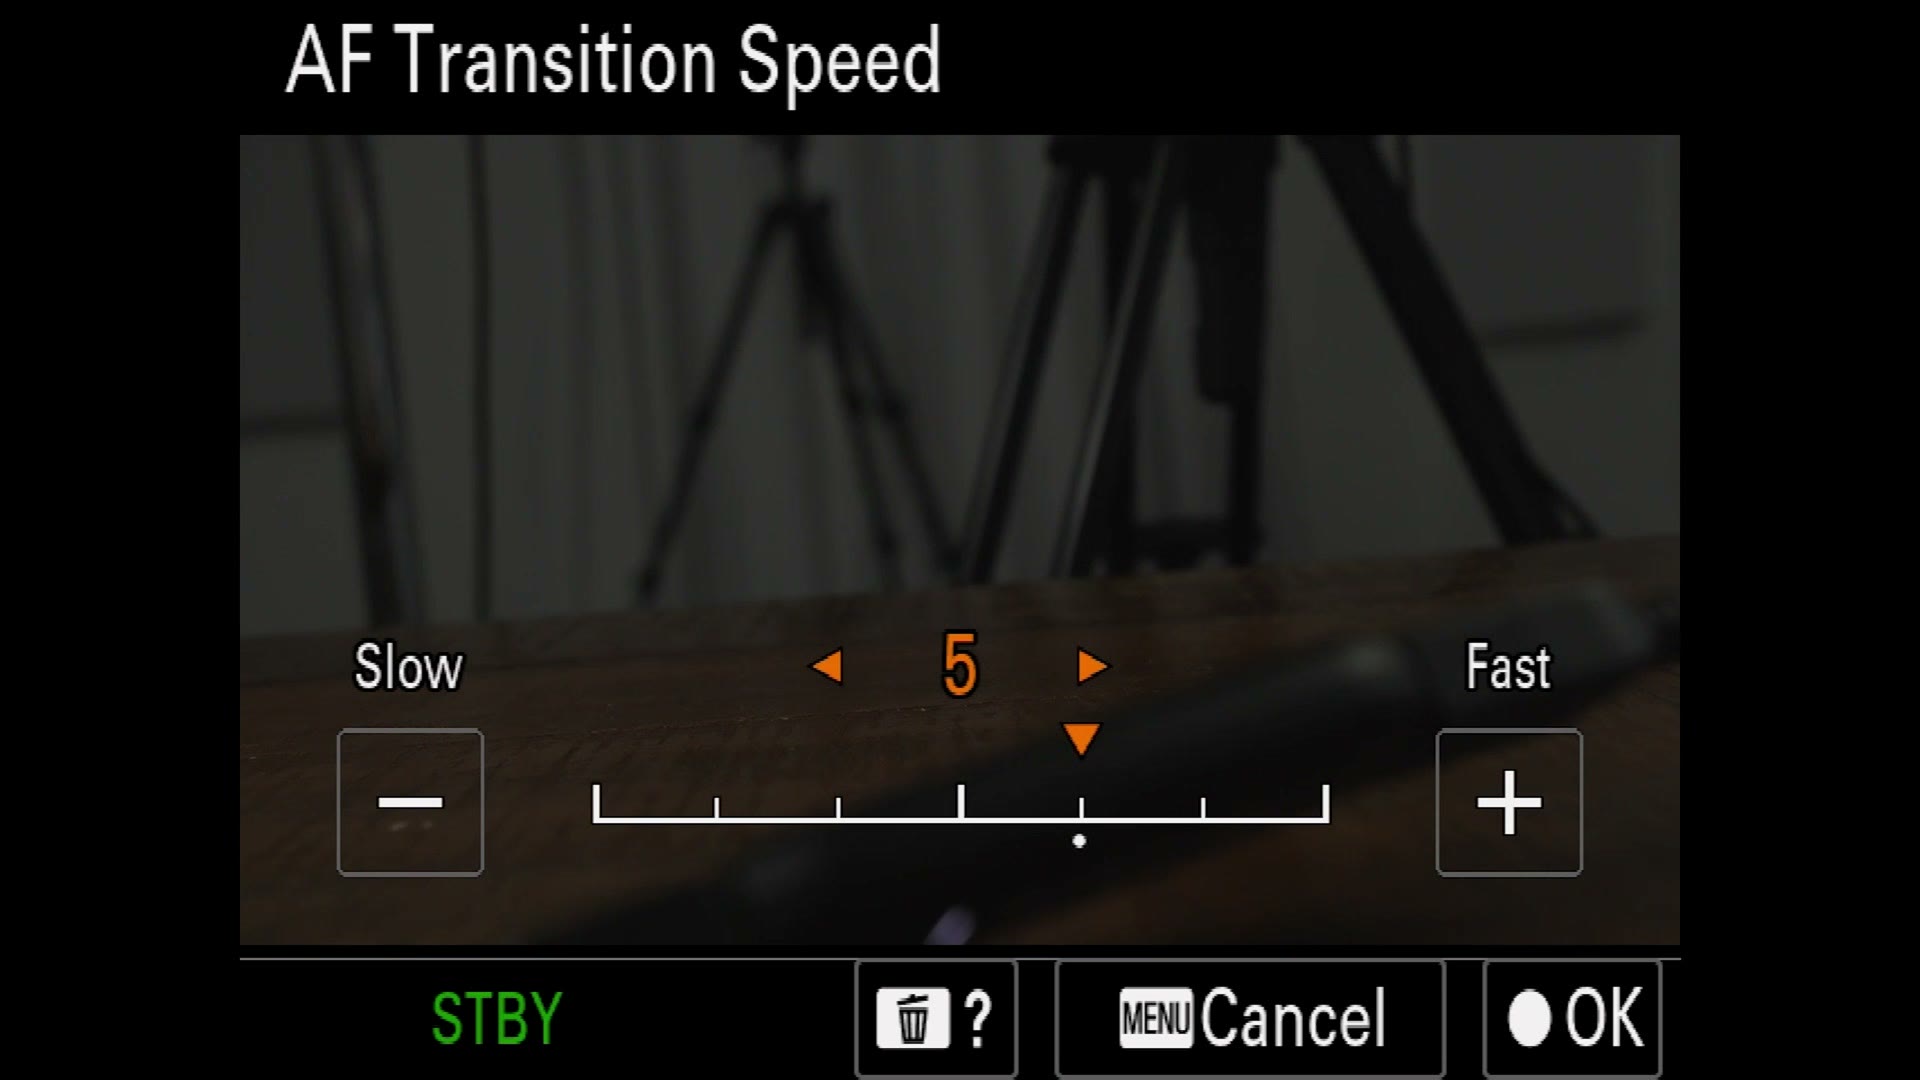
AF Transition Speed is an interesting one. It changes how quickly the camera racks focus from one thing to another whenever it decides to change focus. I would play around with it and see what looks good to you. I found that bringing it down to about 3 is good. The default is 5, and that feels a little fast to me.
AF Subject Shift Sensitivity is basically how sticky the autofocus is. If you want the camera to stay locked on someone even if another person walks into frame, set it to 1. If you want it to jump quickly, set it to 5. I think 3 is a good middle ground. Go with 3, and you can always bring it lower if the autofocus feels too jumpy for you.
AF Assist is actually super cool. If you are filming in autofocus and you think, oh crap, autofocus is working but it is on the wrong thing, turn this on and you can rotate the focus ring while autofocus is still enabled, and the camera will hand control over to you. I recommend having it on.
Focus Area
Lots of good stuff in here. Focus Area is on Wide by default, which is what I would leave it on, because it gives the camera a nice wide area to work out what it should focus on.
Focus Area Limit is where you dial in which options actually show up in your settings. I leave all of these on. You are good.
Focus Area Color can be white or red. There is no blue. If there was red, white and blue that would be very patriotic, but Sony is not an American company, so it makes sense. I still wish there was a blue though. Other people want a1 features on this camera. No. We need blue in the focus area color. That is what we need. In the a1 and the a7S III too. Yeah. Do that, Sony. Please.
Circ. of Focus Point is about what happens whenever you are moving the focus point around with the wheel on the back and you reach the edge of the frame. Set it to circulate and it wraps around to the other side, or leave it on do not circulate. Your call.
AF Frame Move Amt is how finely that little frame moves around. Standard is fine. I would not worry about it.
Face And Eye AF
I am all about the face and eye autofocus on this camera. It is fantastic.

Make sure Face / Eye Priority in AF is on so the camera prioritizes faces and eyes. Then in Face / Eye Subject you can choose human, animal or bird. By default I am usually filming humans, but if you are shooting something else you can change it here, and part two shows you how to switch between them quickly.
Subject Select Setting ties into that. If you know you are only going to film humans and animals, well, who needs birds? Get out of here, birds. Nobody wants to film you. Uncheck birds and the camera will only cycle through human and animal. Leave them all on for now though.
Right / Left Eye Select is for eye detect autofocus, and if you have someone looking at you and you really want a specific eye in focus, you can force it. 99.9% of the time I leave this on Auto.
Face / Eye Frame Display you definitely want on. It puts a nice little white box on screen so you know exactly what you are focused on.
Regd. Faces Priority is a feature where you can register specific faces and the camera will try to focus on only those and ignore everyone else. You can leave it on. It is cool. We are not registering faces here because that would take a while, but that is what it does if you want it.
Focus Map And Focus Magnifier
Focus Map is a newer Sony feature and it is pretty stinking cool. Turn it on and everything goes blue out wide. What the camera is telling you is that anything without color on it is in focus, anything blue is further away than your plane of focus, and anything red or orange is closer. Pretty neat. This is great if you are using manual focus. If you are using autofocus, leave it off.
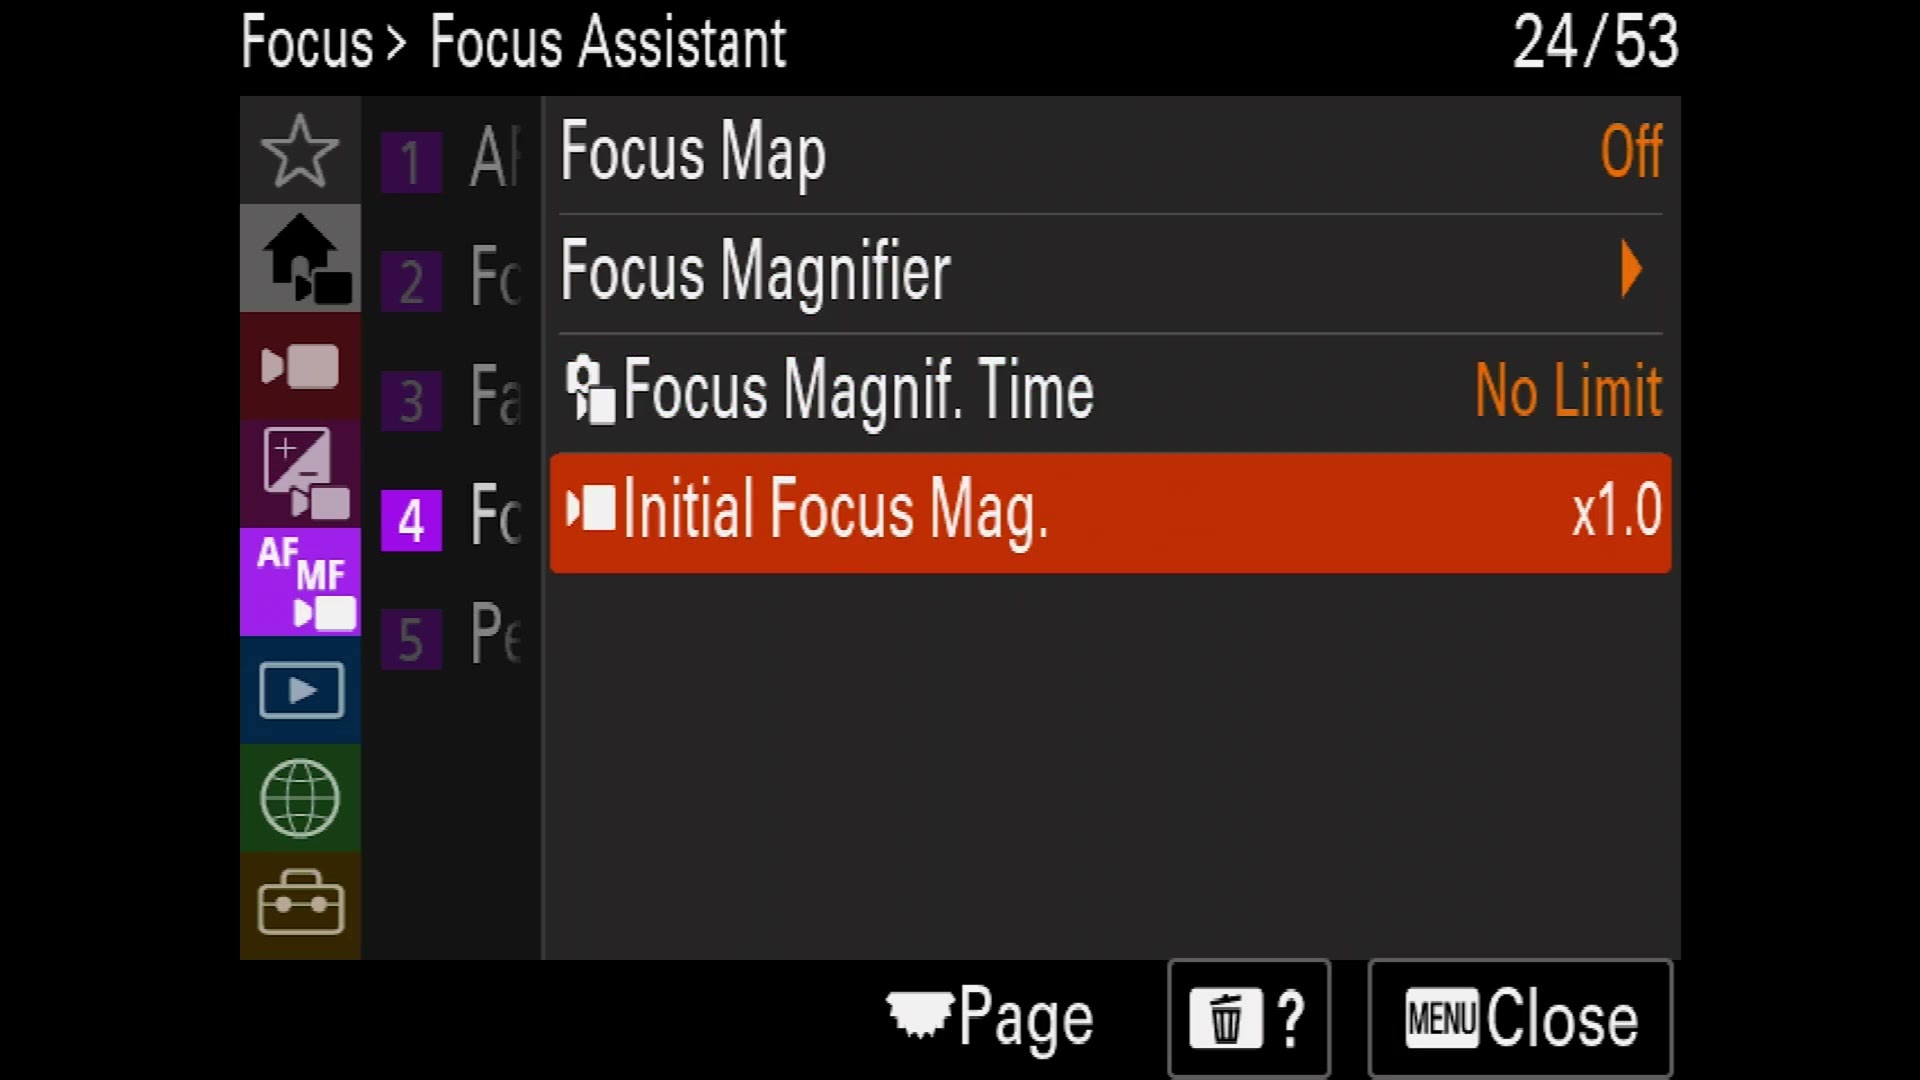
Focus Magnifier magnifies things. Yeah. It is already on a custom button on the back. But one thing you will notice is that you have to press the button, and then press it again to actually zoom, and in between it gives you a little square you can move around. Who wants that? I always just want to punch straight in.
So go down and set Focus Magnif. Time to No Limit, and change Initial Focus Mag. from 1.0 to 4.0. Now when you press the button, bam, you are closer. Bam, further away. Closer, further away. I just love that. So much better.
Peaking Display
Peaking is great if you are using manual focus and you want to be sure your shot is sharp, so turn it on if you want. By default I leave it off because I find it kind of annoying. You can adjust how intense the effect is and change the color, and notice that here you do get red, white and blue, which is cool, and weirdly you do not get that for the focus box we were just talking about. You also get yellow. You want some yellow? You can do some yellow.
The Playback Menu
Select Playback Media is where you pick which card you are playing clips back from, and View Mode is how you want to browse them, by date, by folder, or movies only.
Magnification is great if you want to zoom in on images, but guess what, we are doing video. Forget it. Protect, Rating and Rating Set are all photo things too, so ignore all of that.
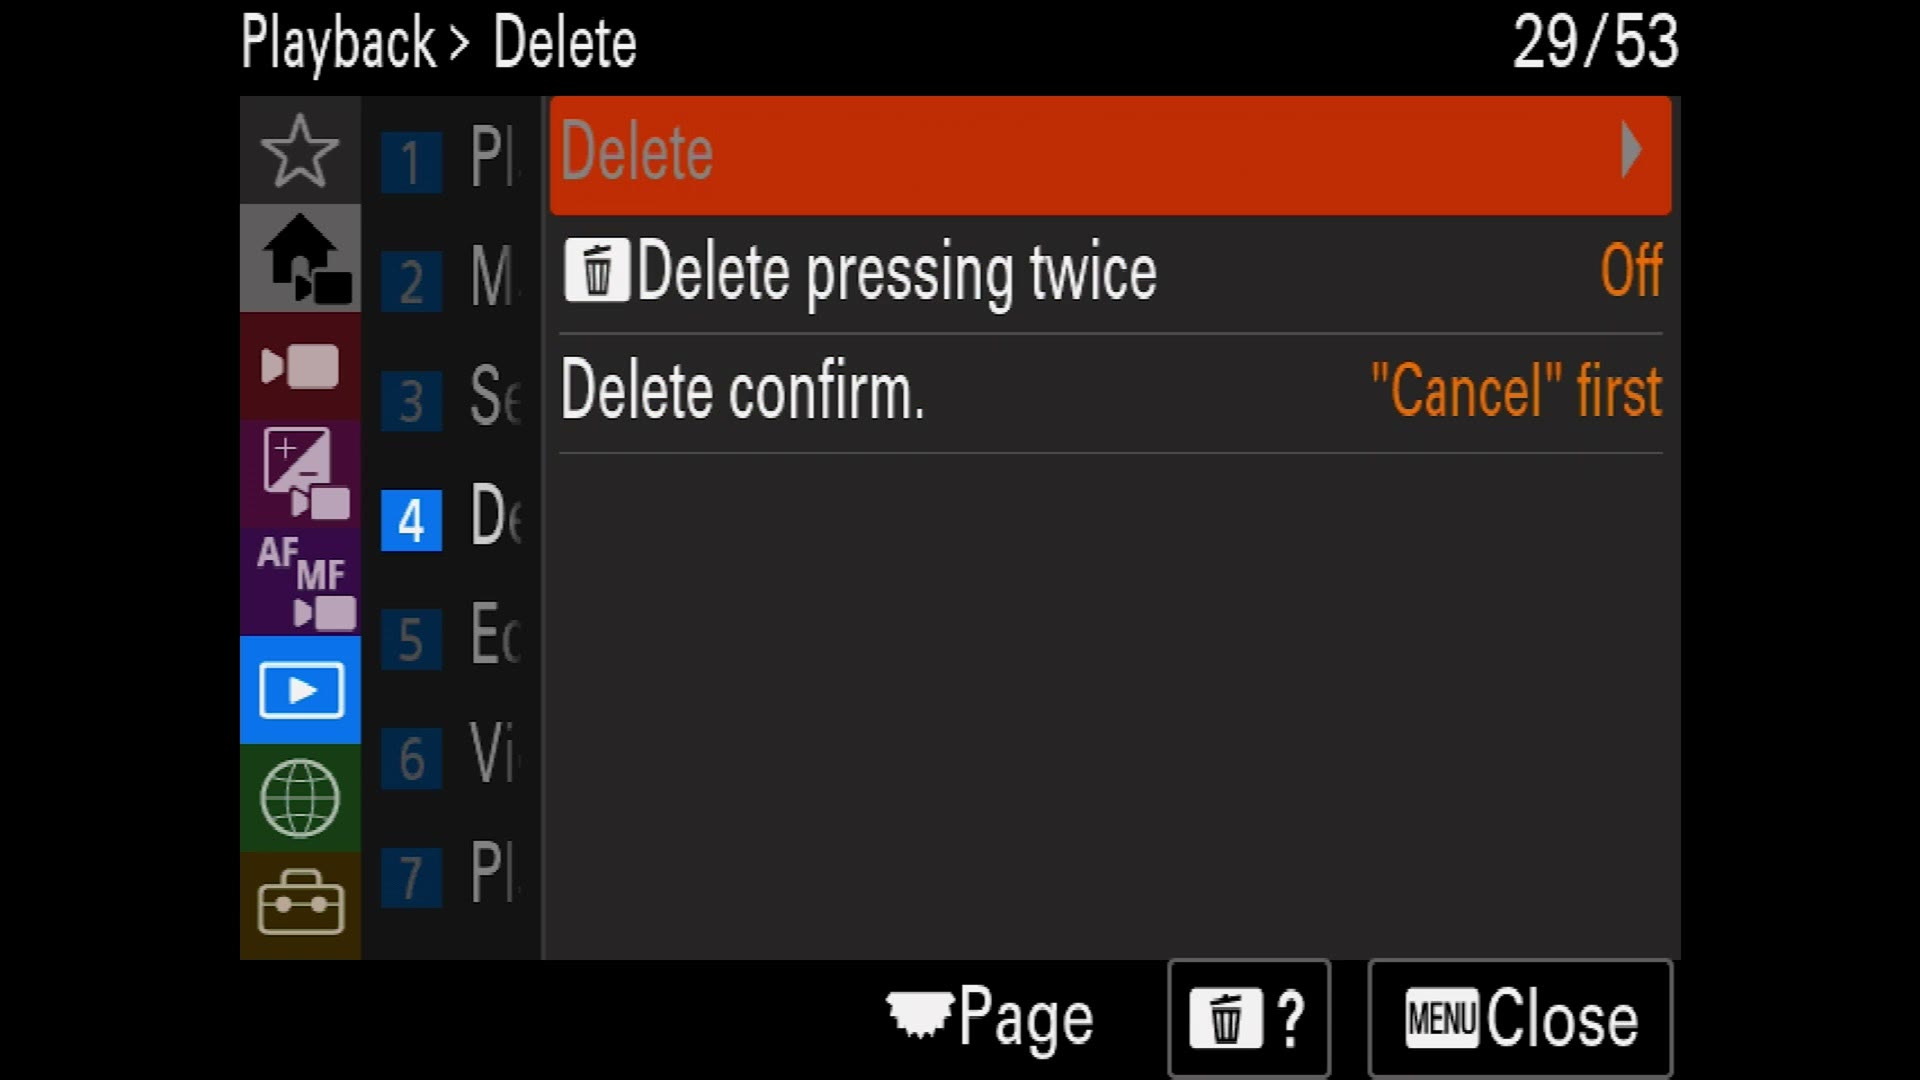
Next is Delete, which you might think is important, but I would actually never recommend using it to remove images or videos from your camera. Use Format instead, because Delete can potentially mess with the folder structure on your card, and I have heard about people having issues with that. So never delete. Only format, and only after you have copied all your files off.
There is also a Delete pressing twice feature, where you mash the delete button twice, bam bam, and your videos are gone. That is terrifying. Leave it off. And set Delete Confirm so Cancel is selected first, so that if you ever do land in there accidentally it is not immediately asking whether to delete. Give yourself a bit more warning.
Under Edit the first thing you see is Rotate, which lets you rotate clips in camera. The FX30 has a gyroscope in it, and I have noticed that if you press record before you bring the camera up to shoot, so it is down at your side and then you lift it, sometimes your clips come out vertical instead of horizontal. That is a bummer. You can use Rotate to put the clip back to horizontal before you copy it to your computer. It is just nice.
Speaking of which, Sony FX30 Review For Wedding Filmmakers – BEST Budget Videography Camera is worth a look too.
JPEG / HEIF Switch lets you pick which format the camera shoots stills in. To be clear, this camera can record raw so you are probably not going to want either, but if you do use it, I would say go HEIF, because you get better image quality and a smaller file size.
The rest of this menu, continuous playback for interval, play speed, slideshow settings, image index, display as group, display rotation, focus frame display and image jump, is all photo or all novelty. Do you want a slideshow on the back of your camera? Cool. Otherwise ignore it and keep moving.
The Network Menu
The little green globe icon. Smartphone Registration is where you connect your phone to the camera, so you can copy video files off it and control the camera from your phone. Register the phone, then pick the clips you want to send and how they get transferred, and there are remote shoot settings down here too, which are mostly a photo thing but still cool.
FTP Transfer and PC Remote Function are for copying files over FTP or tethering the camera to a computer, which you would usually be doing on a photo shoot in a studio. Bluetooth Remote Control is there if you have a Bluetooth remote to pair.
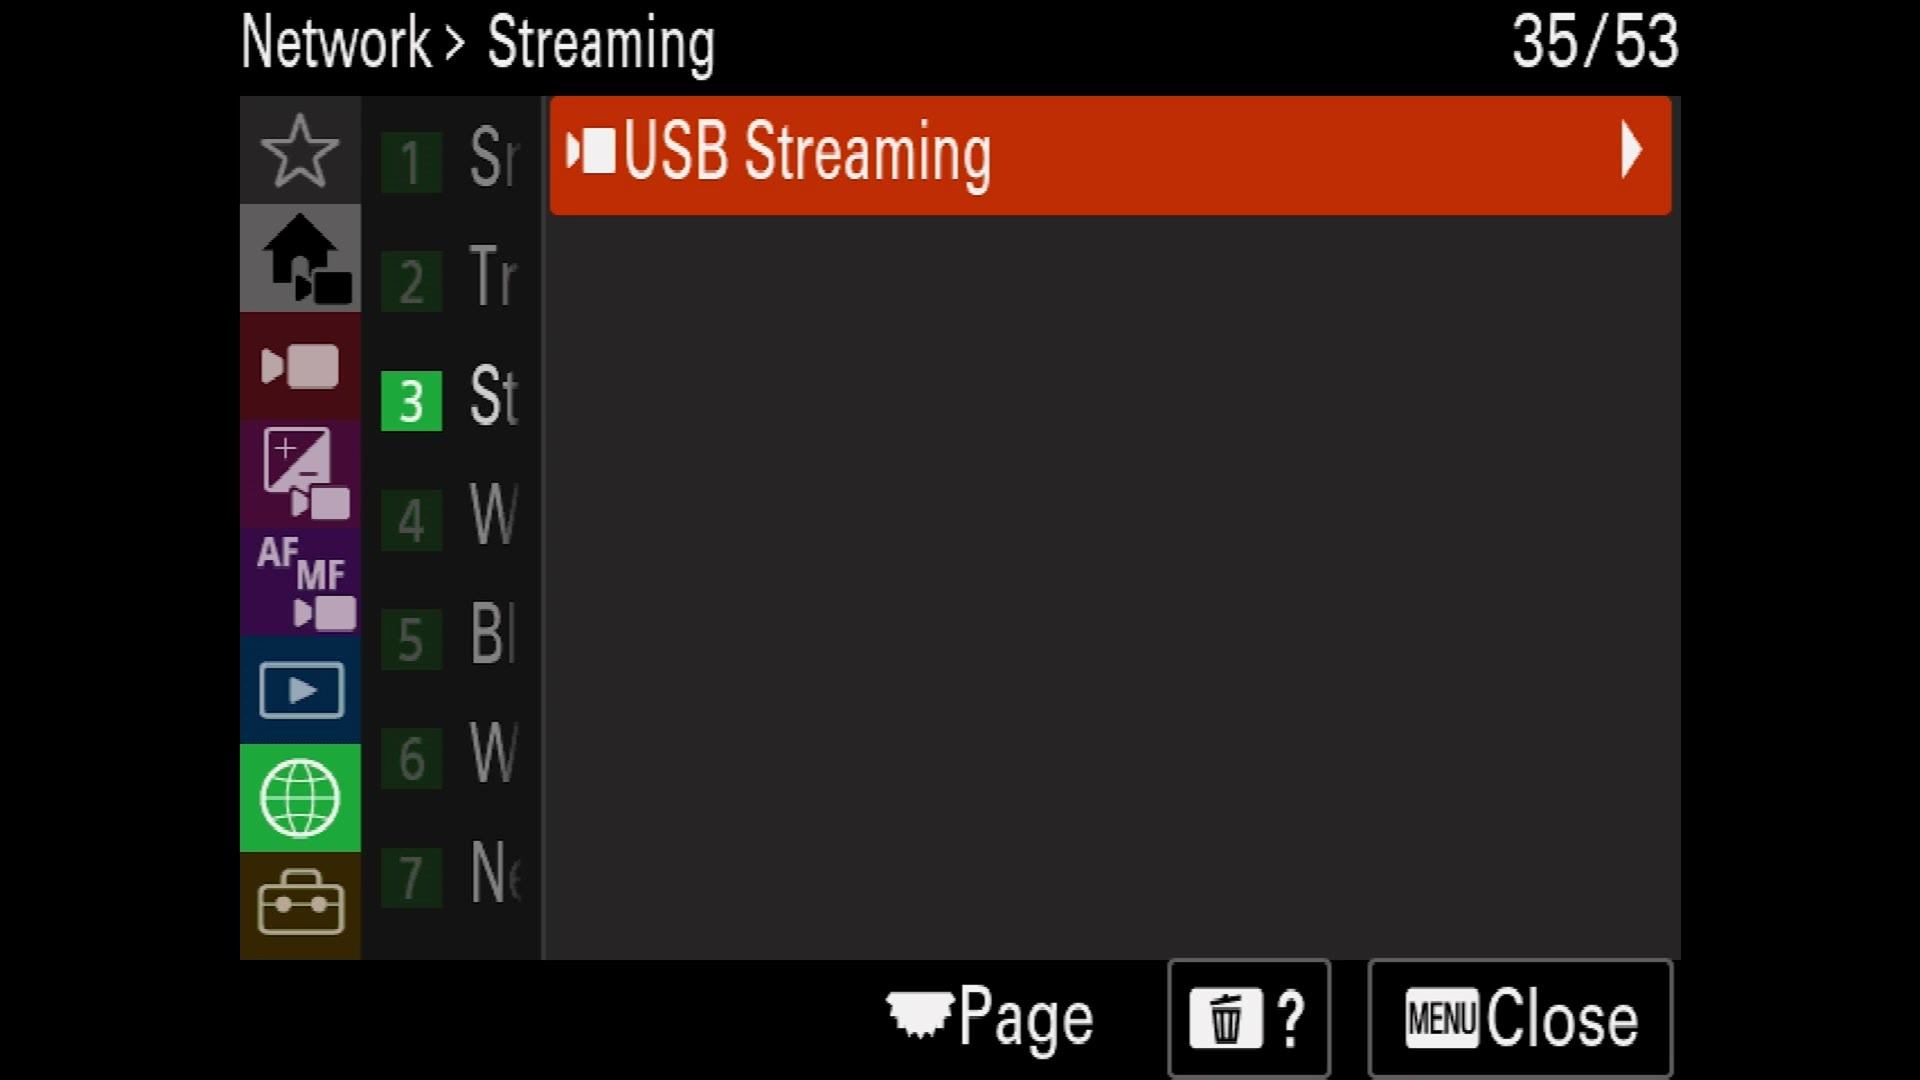
USB Streaming is super useful if you want to use your FX30 as a really expensive webcam. You can select up to 4K, but keep in mind they only give you 15 frames per second at that resolution, so you probably just want HD 1080p30. That is what I would pick. You can also set the camera to record video while it is streaming, so if you are on a video chat you can push a low quality version out to the call while still capturing a high quality version to upload later.
Wi-Fi and Bluetooth are where you connect and pair. Wired LAN is if you want to use a USB-C to Ethernet adapter, which a lot of people do at sporting events, but you are not going to be using this camera at a sporting event. It is not really made for that. It is just another feature Sony included.
The important one here is Airplane Mode, under network options. Turn it on. That shuts off all the radios and you get a bit better battery life.
The Setup Menu
The toolbox, and the last menu, which also happens to be the largest. We are going to be in here for a bit. Sorry about that.
Area And Date
Language, and Area / Date / Time, which you already set up whenever you first turned the camera on, but here is where you change them.
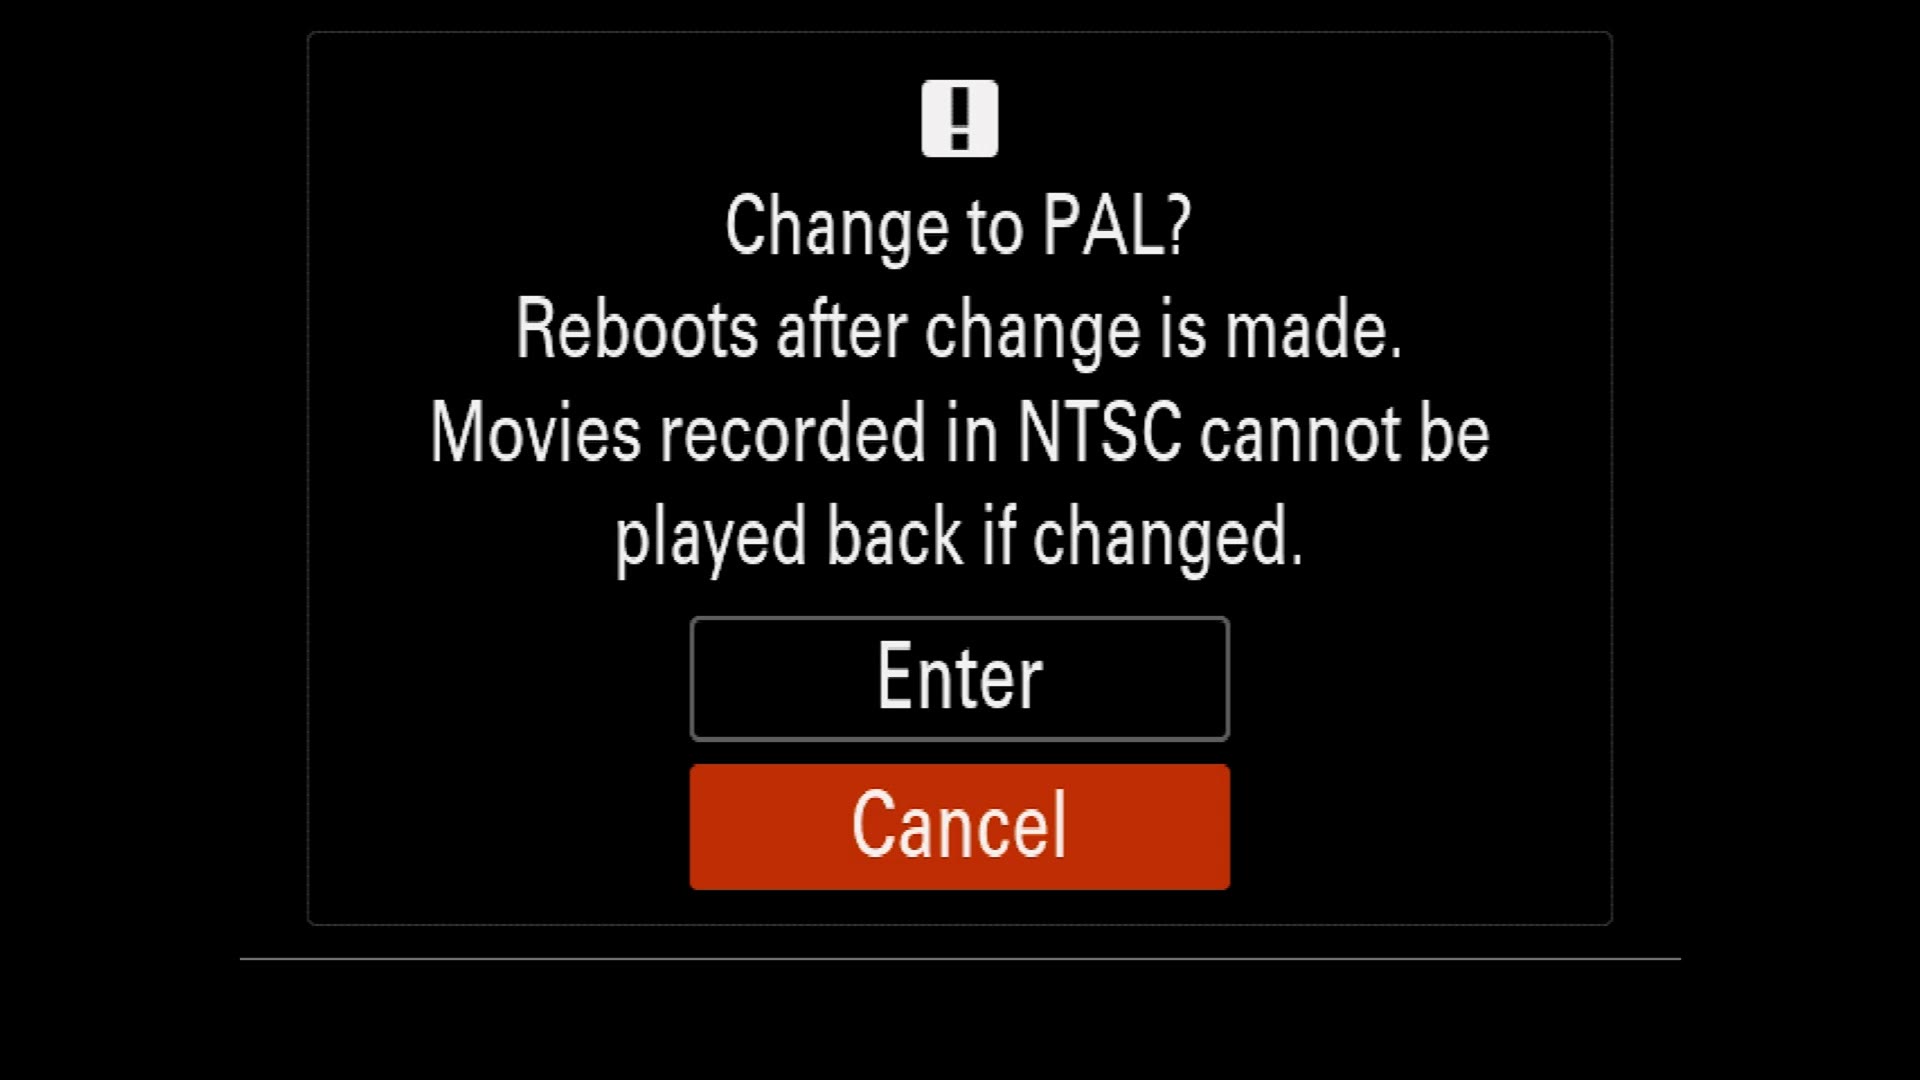
The NTSC / PAL Selector is important, because it dictates which frame rates are available to you. If your camera will only record up to 100 frames per second, come in here and check whether it is set to PAL. On NTSC it will let you record up to 120 frames per second in 4K. If you are in Europe you are going to want PAL. If you are in America, NTSC.
Reset And Save / Load
Setting Reset puts the camera back to defaults. If you ever screw things up and cannot work out how to undo them, resetting and starting from scratch is a good way to go.
Save / Load Setting lets you save and load camera settings to your memory card. I love this feature, and this is exactly where you load my settings file from.
Customize Operation
Custom Key Settings, Function Menu Settings, Different Set for Still / Movie, display screen settings. We are customizing most of these in part two. Under display screen settings you can change which information screens you cycle through, and I would leave that on the default.
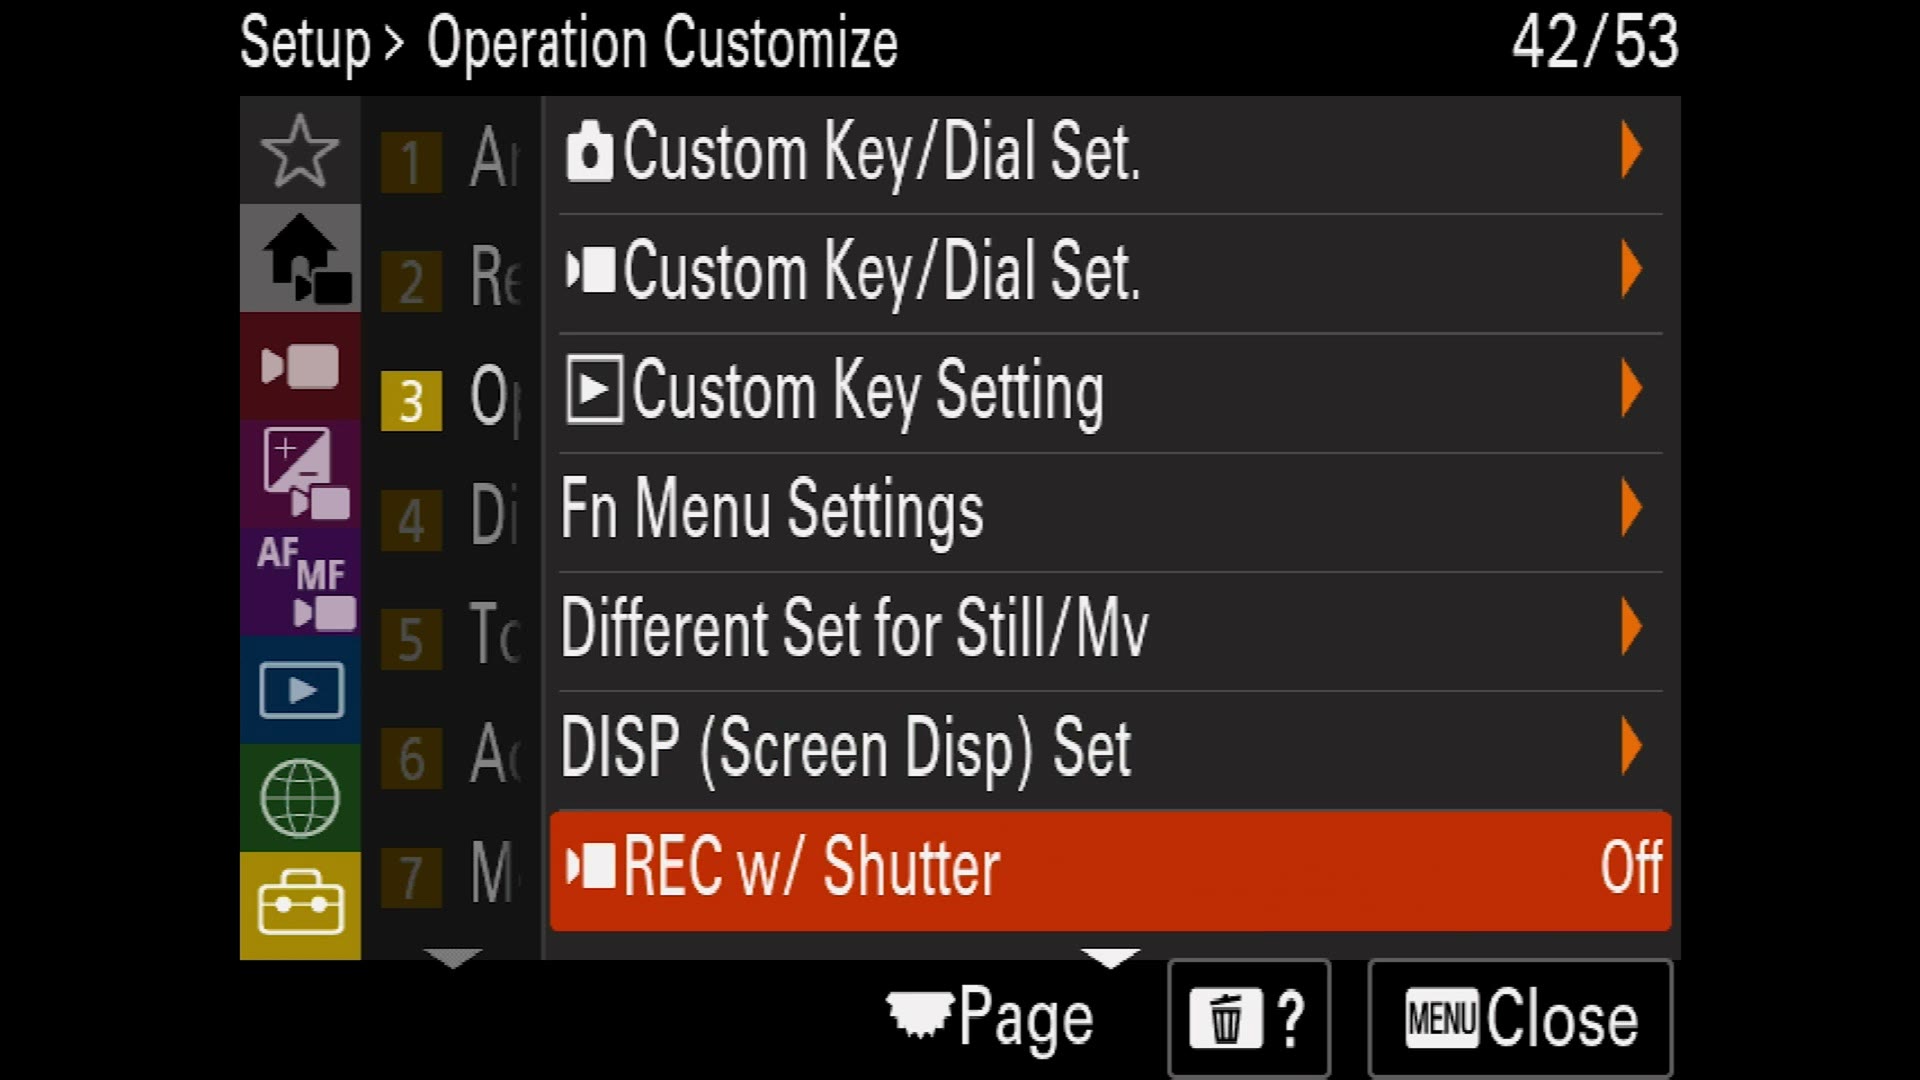
Record with Shutter is a super cool feature and I love it. By default you have the record button, but turn this on and you can use that big pretty shutter button instead. I always turn it on. Highly recommend.
And right at the very bottom there is a hidden setting: Zoom Ring Rotate. If you have one of Sony’s power zoom lenses, this changes which direction you turn the ring to zoom in and out.
Dial Customize
By default I would leave the custom key and dial settings exactly as they are. But if you want the back dial to change aperture and something else to change ISO, you can flip things around here.
My Dial Settings lets you customize how your dials work differently for each of the three custom presets. I would not recommend using it, because you want your dials to behave the same way in every preset.
Av / Tv Rotate is which direction you turn the dials to change aperture and shutter. Leave it on normal, but change it if you want.
Lock Operation Parts is cool if you are worried about your settings getting changed. Turn it on and then holding the function button will lock the mode dial and whatever else you choose, so you cannot bump it. If you want it, use it. I would not bother.
Touch Operation
Do you want touch to work on your camera? Yes you do. Leave it on.
Swipe Up is a cool new feature that lets you get to the function menu by swiping up from the bottom of the screen. Leave it on.
Touch Func. in Shooting should be set to Touch Tracking, so the camera focuses on whatever you tap and keeps tracking it as it moves. If you do not want tracking you can set it to Touch Focus instead, but then the focus is lost as soon as your subject moves.
Monitor

Monitor Brightness is super important. By default it is on manual and you can dial it in, but change it to Sunny Weather if you want the thing bright enough to blind you whenever you look at it. I usually leave all of mine on sunny weather. If you are filming somewhere much darker you can turn it down, but outside, sunny weather makes the screen so much easier to see.
Display Quality gives you standard or high, and you are probably thinking that if you want high quality you should pick high. But all that changes is the refresh rate of the monitor on the back of the camera. It does not affect your video frame rates at all. Do not worry. I keep this on standard, because it helps your battery life a little.
Monitor Flip Direction I love, and I wish it was in every single Sony camera. It gives you manual control over whether the screen goes upside down whenever you flip it around, so you can flip it vertically or horizontally yourself. Great setting.
Display Option
Timecode Display you can change here. Gamma Display Assist you do not need, because we are using the LUTs built into the camera instead. If you have older Sony cameras and gamma display assist is more familiar to you, turn it on and customize it here, but I would leave it off. Remaining Shoot Display is for photo, so turn it off. Who cares.
Power Setting Option
Power Save Start Time I usually set to about two minutes, so the camera turns itself off rather than wasting battery whenever you are not recording. You can turn it off or set it higher if you prefer.
Auto Power OFF Temp. is one the camera asks you about whenever you first power it on, and if you were scared, do not be. Set it to High. It keeps the camera from shutting down on you and makes sure the fan is doing its job.
Sound Option
Volume Settings affects playback from the tiny speaker on the camera, or your headphones.
4ch Audio Monitoring is great if you are using Sony’s XLR-K3M adapter, because you can record up to four channels of audio with this camera. Whenever you are just out shooting though, you probably are not using that, so keep it on the default of channel 1 and channel 2.
And then Audio Signals, which is one of the banes of my existence. Okay. If you first turn on your camera and just start using it, every single time you press record and stop record it goes doo doo doo doo doo doo. I hate it. I just hate this feature. I do not even know why they include it. Turn it off. Please. Make it one of the very first things you turn off. Yeah. It is gross.
USB
USB Connection Mode is what happens whenever you connect the camera to a computer or an external device, and I would leave it on Select When Connect. USB LUN Setting stays on Multi.
And you definitely want USB Power Supply on, because that is what lets you plug a power bank into the camera and run it basically indefinitely. Pretty cool.
External Output
If you are using an external monitor, this is where you change those settings. HDMI Resolution and HDMI Output Settings are where you pick your output resolution and whether you are outputting raw.

HDMI Info. Display is super critical. With it on, all of the camera controls, everything at the top and bottom of your screen, get sent to your external monitor too. Turn it off and all of that disappears.
The main thing to keep in mind is that if you are recording externally, say you are recording raw to an Atomos, make sure HDMI Info. Display is set to off. Otherwise you are recording all of those camera settings burned into the top and bottom of your video, which is kind of terrifying. I know someone who did that and filmed an entire wedding that way, and then had to figure out how to deliver a wedding film with the camera settings on screen. Terrifying.
Control for HDMI passes some of the controls through to the monitor. Leave that on.
The Last Section
We made it. Video Light Mode is for if you have a video light connected electronically to the camera. Leave it on Power Link. You are probably not going to use it.

Recording Lamp is super important. This camera has tally lights everywhere, front, top and back. Lots and lots of recording lamps. By default they are all on, but I prefer setting this to Only Front Off, which kills the light on the front of the camera.
Because the last thing you want, whether you are filming a wedding or literally any subject, is the thing that intimidates people most: a red light pointed right at them. Every layperson knows what that means. Red means recording, and that is burned into everybody’s collective memory. So if you want the people you are interviewing or filming to be more relaxed, set this to Only Front Off. They never see the red light and they have no clue. Super useful.
Fan Control I would leave on Auto unless you are recording in an ultra silent room. The fan on this camera is super quiet, so you do not really need to worry about it.
Sensor Cleaning is useful, and if you want to manually clean your image sensor, use this setting first, because it locks the sensor in place using the IBIS motors so you can clean it more easily.
Pixel Mapping is what you use if your camera ever gets a stuck or hot pixel on the sensor. Otherwise leave it alone and do not freak out.
And lastly Version, which tells you the firmware version of your camera and, if it is a native Sony lens, your lens too. Useful whenever you need to update.
That Is Every Menu
Those are all of the settings you need to change in the menus to get your FX30 up and running. But Matt, there is so much more to do. There are the custom modes, the custom menu, the function menu. Well, do not worry, because part two covers all of it, and you are going to love it, because once your buttons and settings are customized you will basically never need to jump into this maze of menus again.
And do not forget, you can skip that second one entirely if you just download my FX30 settings file. It is completely free, you load it into your camera, and you immediately have all of my settings and custom buttons without digging through any of this.
I will also point you at my memory card guide, which walks you through which cards to buy. Even though it says it is for the a7 IV, it applies to the FX30 as well, because they use the same cards and the same video settings. Super useful if you are trying to work out which card you should buy.
Thanks so much for reading, and have a great day!