
Three wedding filmmakers who have been inspiring me lately: Sara Canducci in Italy, Hello Tomorrow Films in Canada, and Shawn Yang here in Texas.
Continue reading
Three wedding filmmakers who have been inspiring me lately: Sara Canducci in Italy, Hello Tomorrow Films in Canada, and Shawn Yang here in Texas.
Continue reading
Zhiyun sent me the Crane 2S and I filmed two weddings and an elopement with it. The improvements over the Crane 2 are real, but they are not the two improvements I actually wanted, and that is what makes this gimbal a hard sell.
Continue reading
Updated January 11, 2026
❗ Download my FREE Instagram Reels Presets
If you’ve ever uploaded a video to Instagram and thought, “Why does this look worse than it did in Premiere?”, you’re not alone. Instagram is notoriously aggressive with compression, and if your export settings aren’t dialed in correctly, it will absolutely destroy your video quality.
In this post, I’m going to walk you through exactly how I edit and export high quality Instagram Reels using Adobe Premiere Pro, so your videos look as good as possible after Instagram does its thing.
This is the same workflow I use for my own content, and it’s designed to give Instagram the best possible file to work with.
Before we even talk about exporting, the foundation starts in your sequence settings.
Instagram Reels are vertical video, which means your sequence should be set to a 9:16 aspect ratio. Specifically, you want a resolution of 1080 by 1920.
Frame rate matters here too. Instagram prefers 30 frames per second, so if you’re starting a brand new sequence specifically for Reels, set it to 29.97 or 30 fps. If your footage was shot at a higher frame rate, that’s totally fine, just make sure your final sequence matches what Instagram expects.
This alone can prevent unnecessary resampling and compression issues later.
If your footage was shot horizontally, Premiere makes it pretty painless to reframe for vertical.
Once your clip is in the timeline, you can use the Effect Controls panel to adjust scale and position. The key here is to resist the urge to over-scale. The more you blow up the image, the more you’re helping Instagram ruin it later.
If you’re working with 4K footage in a 1080×1920 sequence, you’ve got plenty of room to reframe without losing quality. That’s one of the big advantages of shooting higher resolution video, even if your final delivery is smaller.
For talking head content, I usually keep eyes slightly above center and leave enough headroom so nothing feels cramped on smaller screens.
Instagram compression hates subtle gradients and flat images.
If your footage is extremely flat or low contrast, Instagram will often introduce banding and ugly artifacts once it compresses the video. This doesn’t mean you need to overdo it, but a well-contrasted image with clean color separation tends to survive compression better.
Make sure your footage is properly exposed, your blacks aren’t lifted too high, and your highlights aren’t crushed. A clean, balanced image gives Instagram less to destroy.
This is where most people go wrong.
When exporting from Premiere Pro, start by choosing H.264 as your format. This is exactly what Instagram is going to convert your video into anyway, so you’re better off controlling that process yourself.
Set your preset as a starting point, but do not rely on it blindly.
Here are the key settings you want to double-check:
For bitrate, this is critical.
I recommend using VBR, 2-pass. Set your target bitrate around 10 Mbps and your maximum around 12 Mbps. This gives Instagram a high quality file without being so large that it triggers extra compression.
Cranking the bitrate higher than this does not help. In fact, it can sometimes make things worse.
Under the video tab, make sure your profile is set to High and your level is set to 4.2. This ensures better compatibility and quality across devices.
Also, enable “Render at Maximum Depth” and “Use Maximum Render Quality.” Yes, exports take longer, but this helps preserve fine detail and scaling quality.
If you’re not using this one, I went through How To Edit & Export High Quality Instagram Reels In DaVinci Resolve 18 as well.
If you’re already putting in the work to create good content, waiting a little longer on export is worth it.
Audio is just as important as video, even on Instagram.
Set your audio codec to AAC, sample rate to 48 kHz, and bitrate to 320 kbps if possible. Instagram will compress audio too, but starting with clean, high quality audio makes a noticeable difference.
Bad audio is one of the fastest ways to make a Reel feel low quality, even if the video looks decent.
Once your video is exported, upload it directly from your phone if possible. AirDrop or a direct cable transfer is ideal.
Avoid sending the file through messaging apps, email, or cloud services that might recompress it before it ever reaches Instagram.
When posting, make sure “Upload at Highest Quality” is enabled in Instagram’s settings. It sounds obvious, but a surprising number of people forget this step.
Instagram is always going to compress your videos. You can’t stop that. What you can do is give it the cleanest, most optimized file possible so the final result still looks sharp, professional, and intentional.
If you start with the right sequence settings, avoid unnecessary scaling, export with the correct bitrate, and upload properly, your Reels will look noticeably better than most of what’s on the platform.
Remember, you can download my free Instagram Reels Preset for Adobe Premiere to save time.
And if you want to go deeper into building a complete workflow for filming, editing, and delivering better videos, I’ve got a free filmmaker gear guide that breaks down everything I personally use and recommend.
Thanks for reading, and happy editing.

Sony and Canon have been going back and forth all year. Between the R5, the R6 and the a7S III, filmmakers have a ton of mirrorless choices, and now at the end of 2020 that same competition is showing up in the cinema camera space.
Sony fired first on September 6th with a development announcement for the FX6, a little brother to the very popular full frame FX9. Canon followed on September 24th and pulled the wraps off the C70, their first RF mount cinema camera. Then on November 17th Sony fully unveiled the FX6, which means we finally know what both of these cameras actually do.
So let’s compare them, and I’ll tell you which one I’d recommend buying.
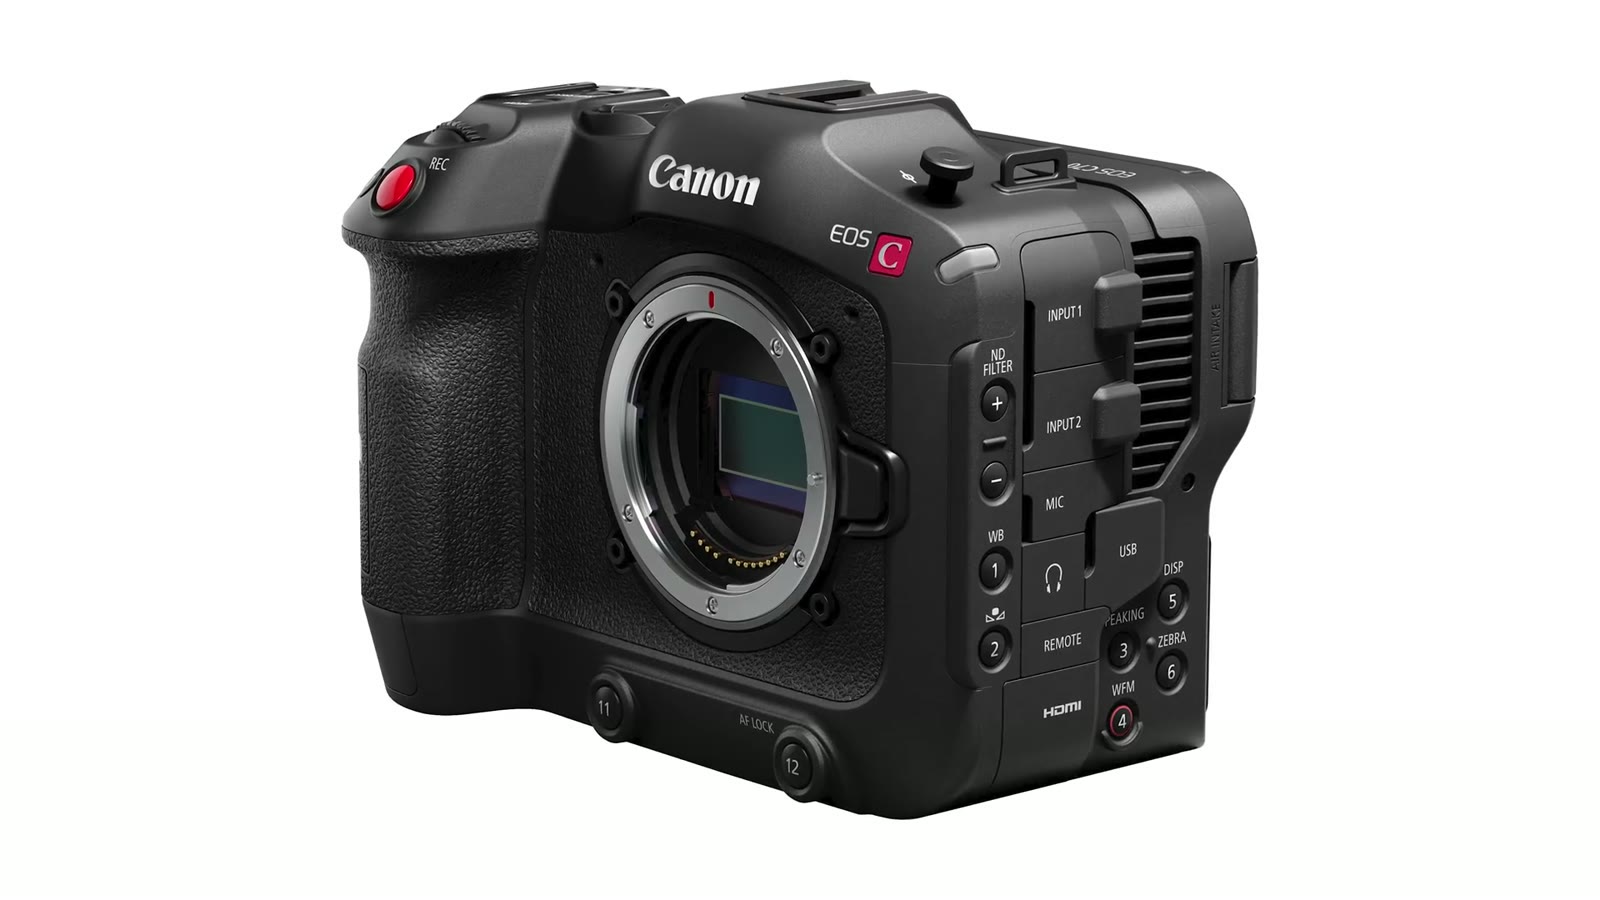
The first thing you notice is how differently these two are built. Canon went with a hybrid DSLR-cinema look, which to me reads as a shorter, slightly overweight 1DX. Sony went with a traditional but shrunken video camera body that looks like a small FX9 or FS7.
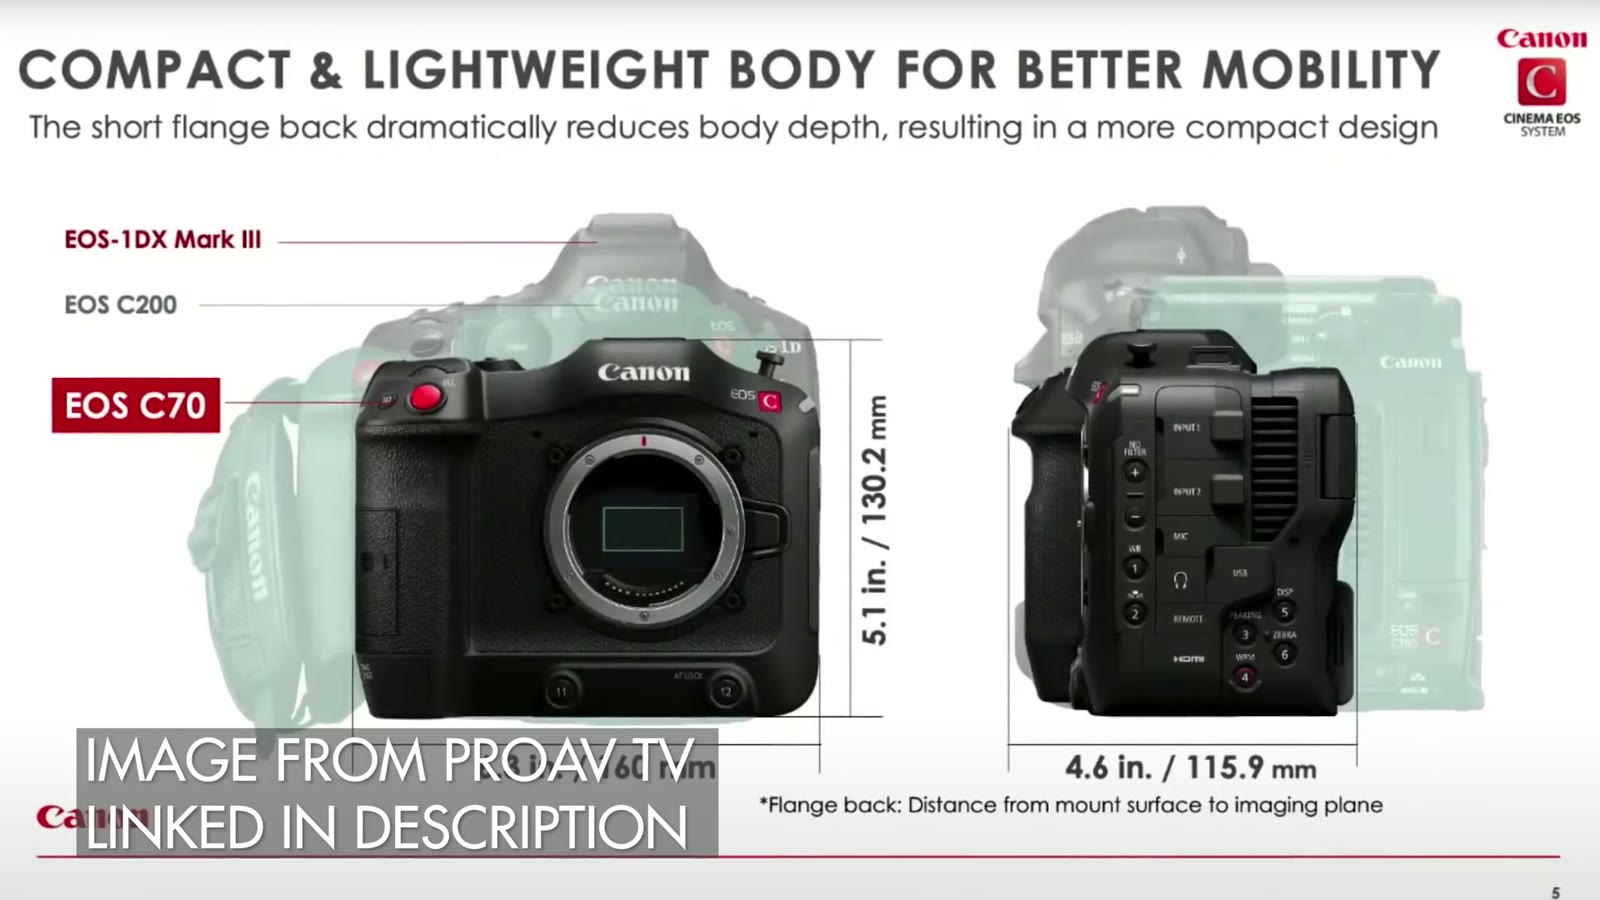
Canon clearly designed the C70 to feel familiar to anyone coming from a DSLR or mirrorless hybrid. It isn’t much bigger and it should sit in your hands the same way. Sticking with that theme, the screen and grip are permanently attached and part of the body, like a 6D or an R5. You can’t move the screen somewhere else.
Unlike a DSLR, though, Canon chose not to include an EVF. If I had to guess it was to save cost, but it’s a bummer given their earlier cinema cameras like the C100 had one.
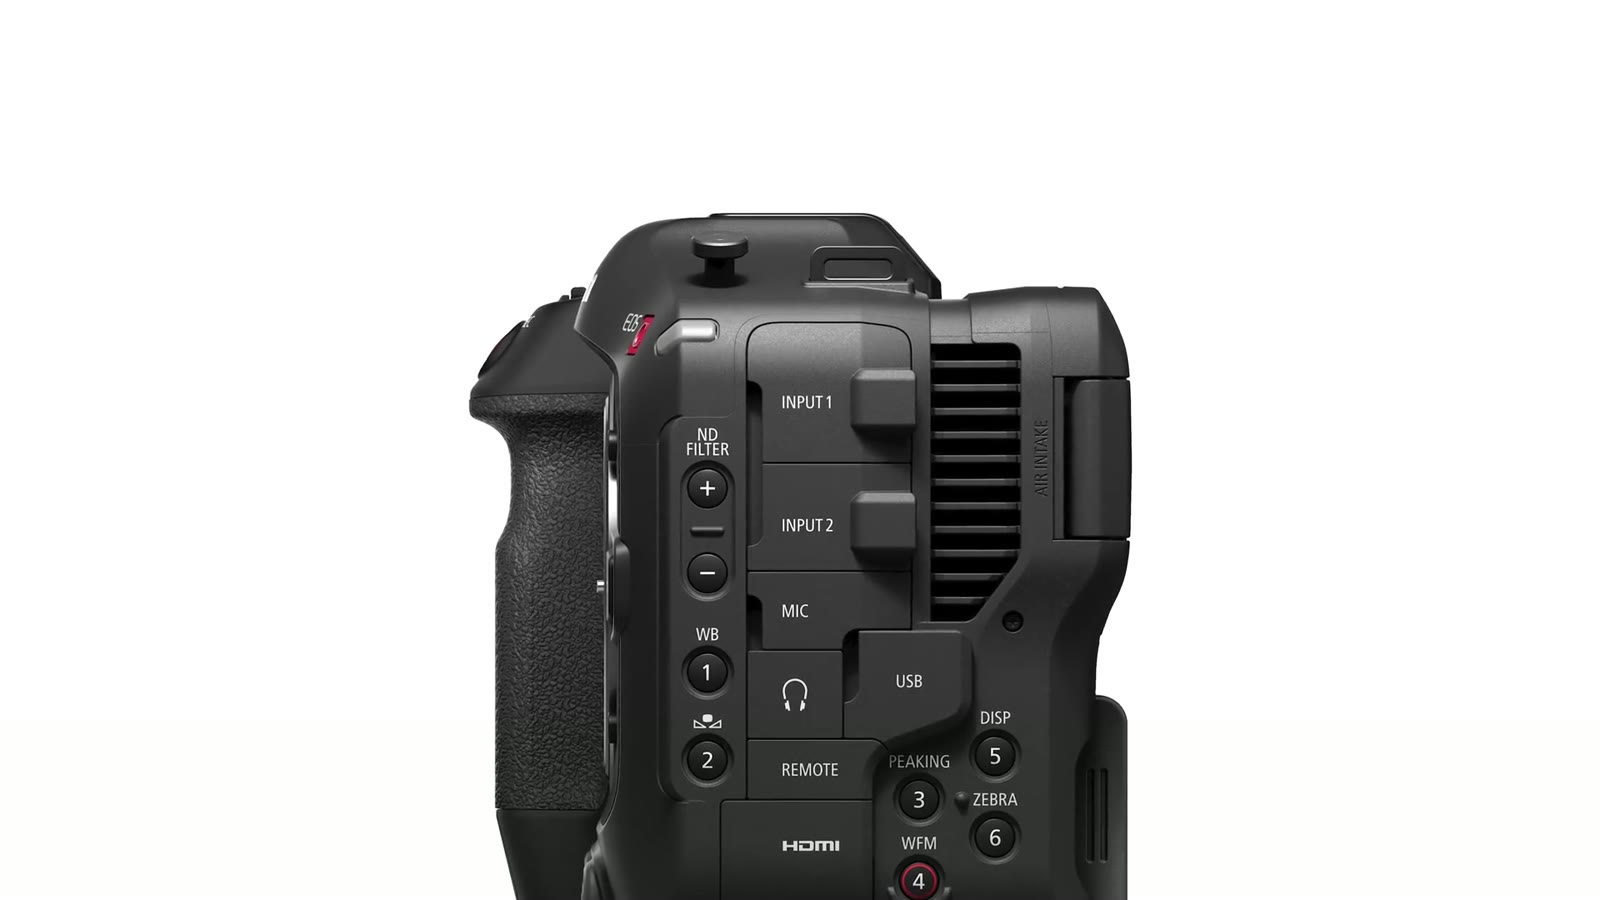
On audio, Canon included two mini XLR inputs plus a 3.5mm stereo input on the body. A lot of filmmakers I know, me included, wish those were full size XLRs, but it makes sense given how small they were trying to keep this thing.
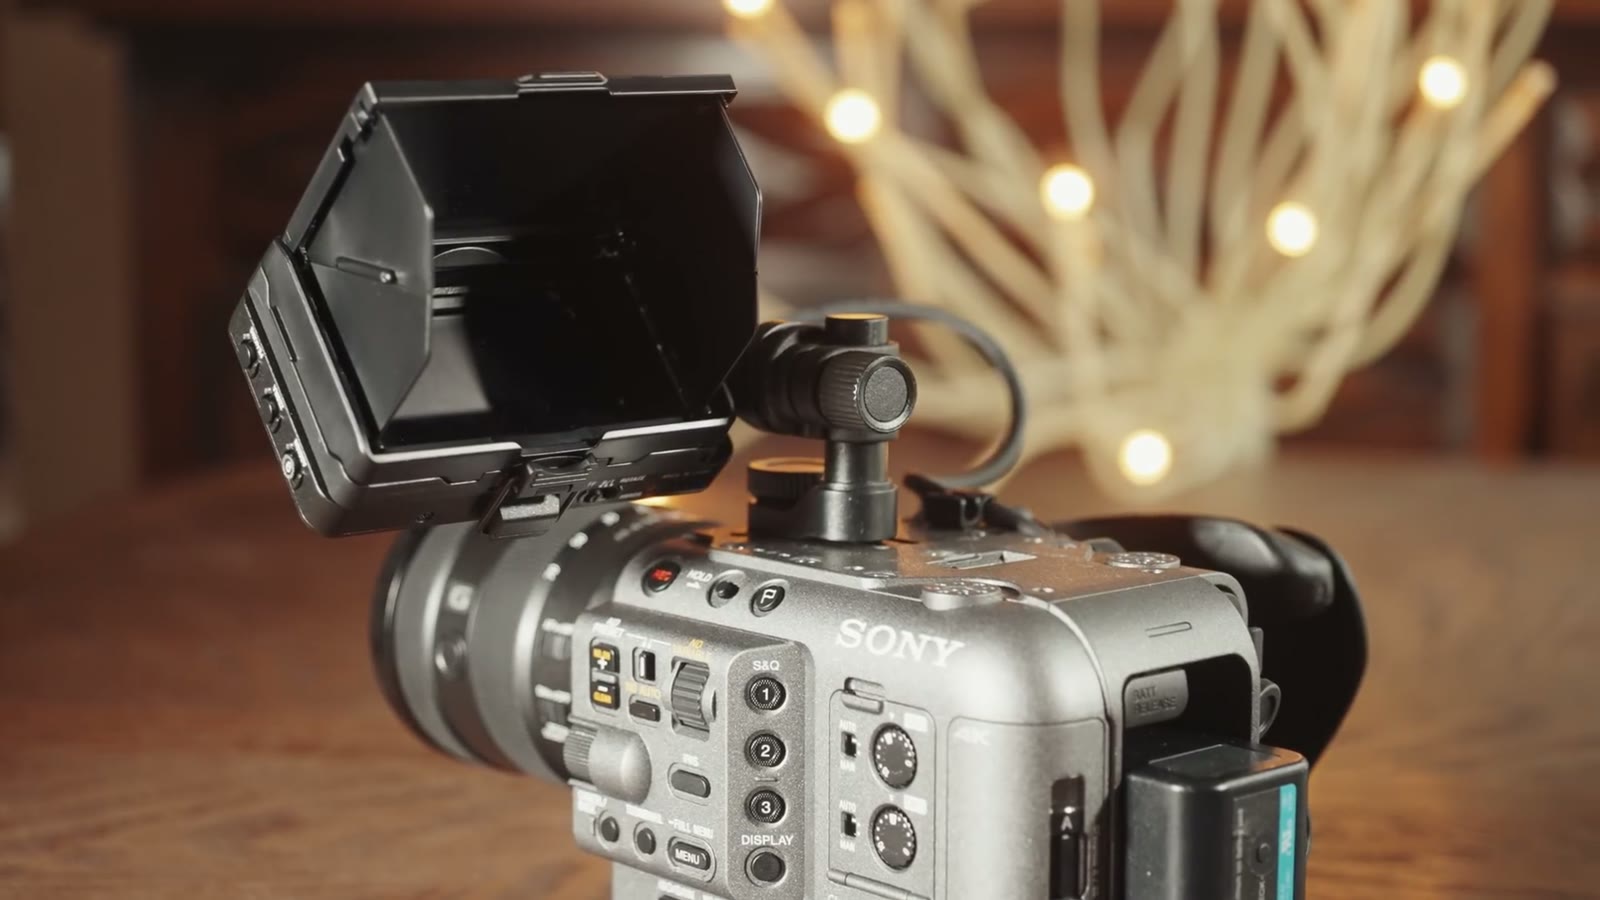
The FX6 is considerably more modular. The monitor isn’t fixed to the camera and can mount a variety of ways, which also makes adding a viewfinder easy, something that may be difficult or impossible on the C70 given how its screen articulates. The top handle and side grip both detach, so the camera can get genuinely small.
But that modularity comes with a catch, and it’s a strange one: Sony put the XLR inputs on the top handle. Take the handle off to slim the camera down and you have no audio inputs at all, just a small internal mic. That’s an oversight worth knowing about. If you want to do a walk and talk interview with the FX6 on a gimbal and record decent audio, you’re reaching for an external recorder.
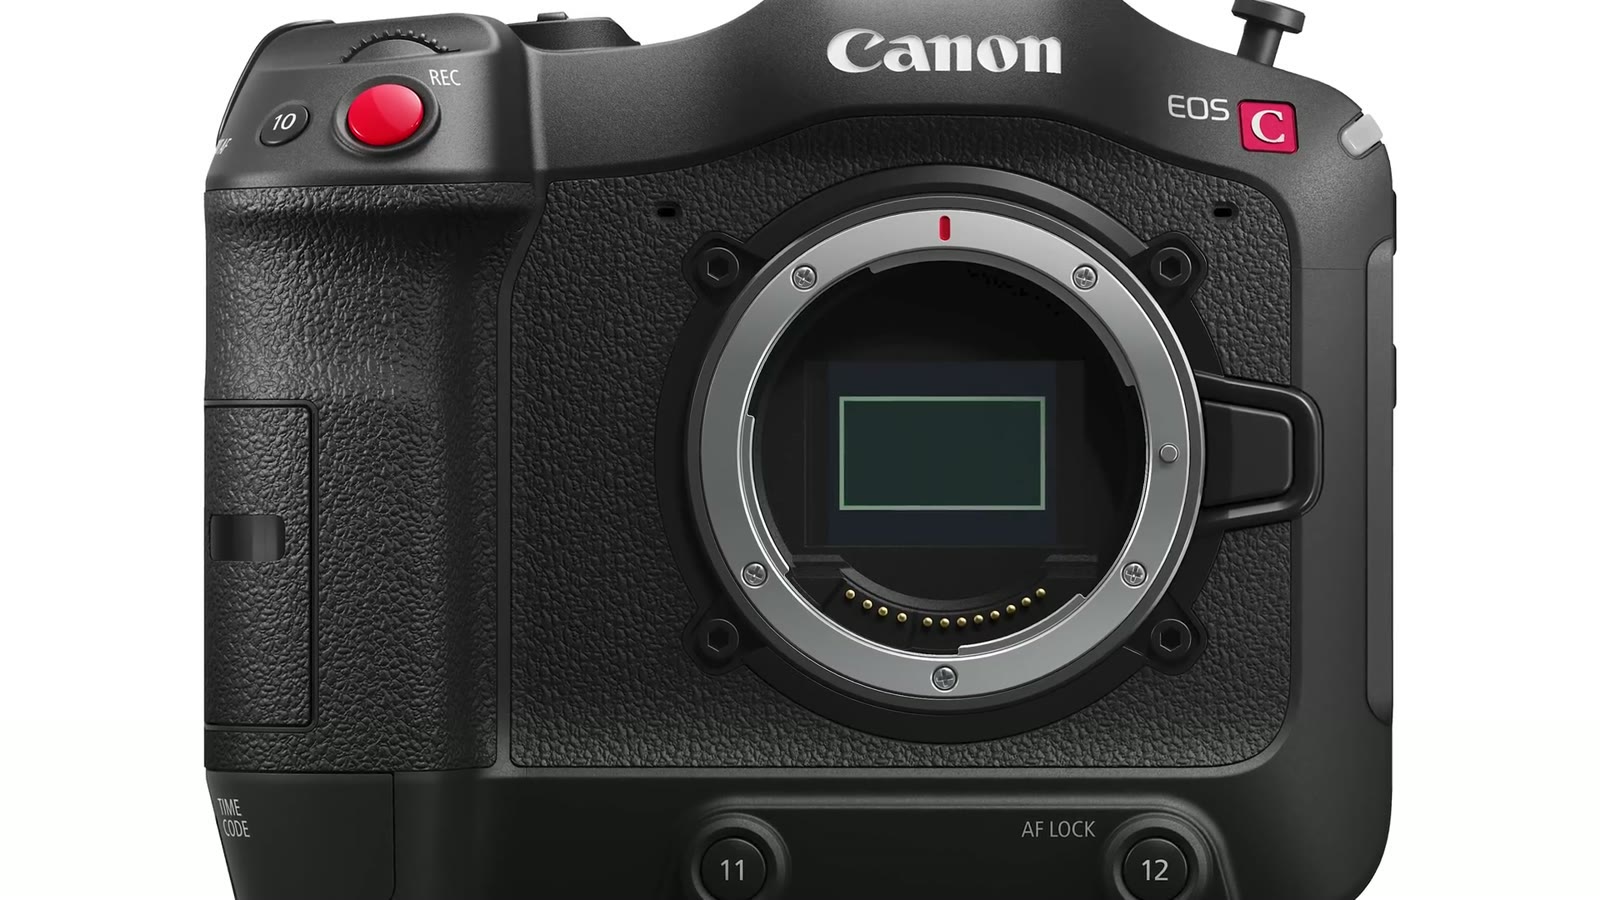
The C70 has a Super 35mm sensor, roughly the same size as an APS-C crop sensor. Canon says it’s the exact same sensor that’s in the significantly more expensive C300 Mark III, which is not bad at all considering that camera costs eleven thousand dollars.
In front of it is Canon’s RF mount. There aren’t a ton of RF lenses yet, but the ones that exist are very impressive and more are coming. Canon also makes an EF to RF adapter that works very well, so their enormous EF lineup is available to you.
The FX6 has a full frame sensor, significantly larger, and I’ve been told by Sony that it’s roughly equivalent to the one in the a7S III. Which makes it a lowlight champ, and I’d expect it to beat the C70 in a high ISO test. E-mount in front of it means a wide choice of glass.
On pure sensor size the win goes to Sony. And this is where it gets interesting.
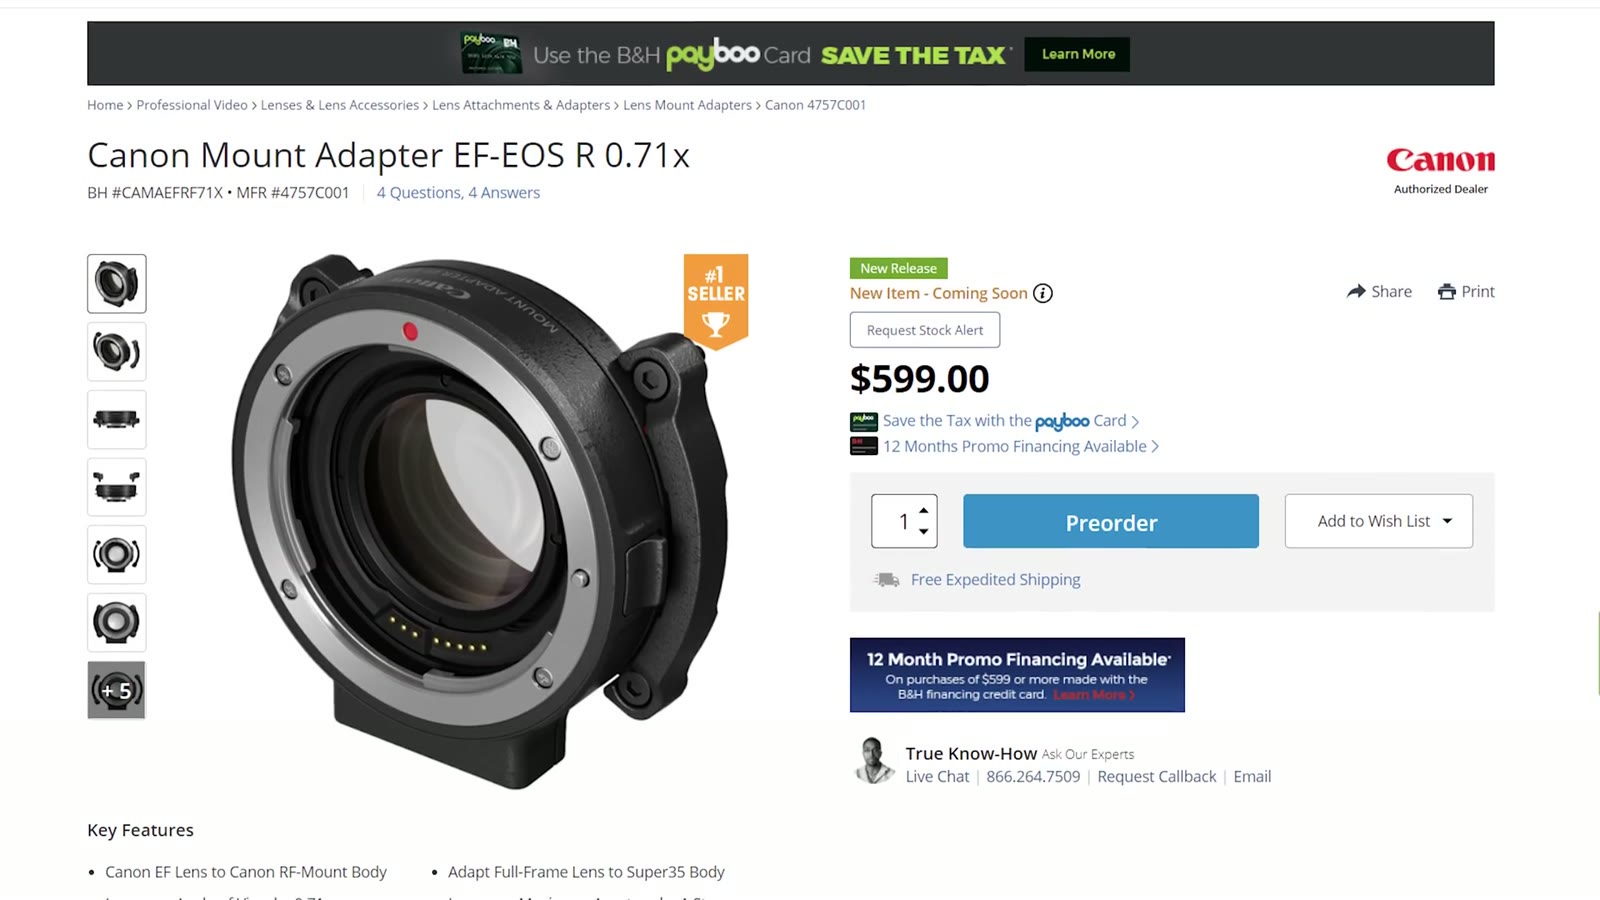
Canon also makes the Mount Adapter EF-EOS R 0.71x. Don’t let the boring name fool you, because this thing is genuinely magical. Put your full frame EF lenses on it, gain an extra stop of light, and it widens the field of view enough that the C70’s Super 35 sensor behaves essentially like a full frame sensor.
It costs $599 and it only works with EF glass, not Canon’s new RF lenses. But it puts these two cameras on a level playing field for sensor size. Hold that thought, because it comes back later and it hurts.
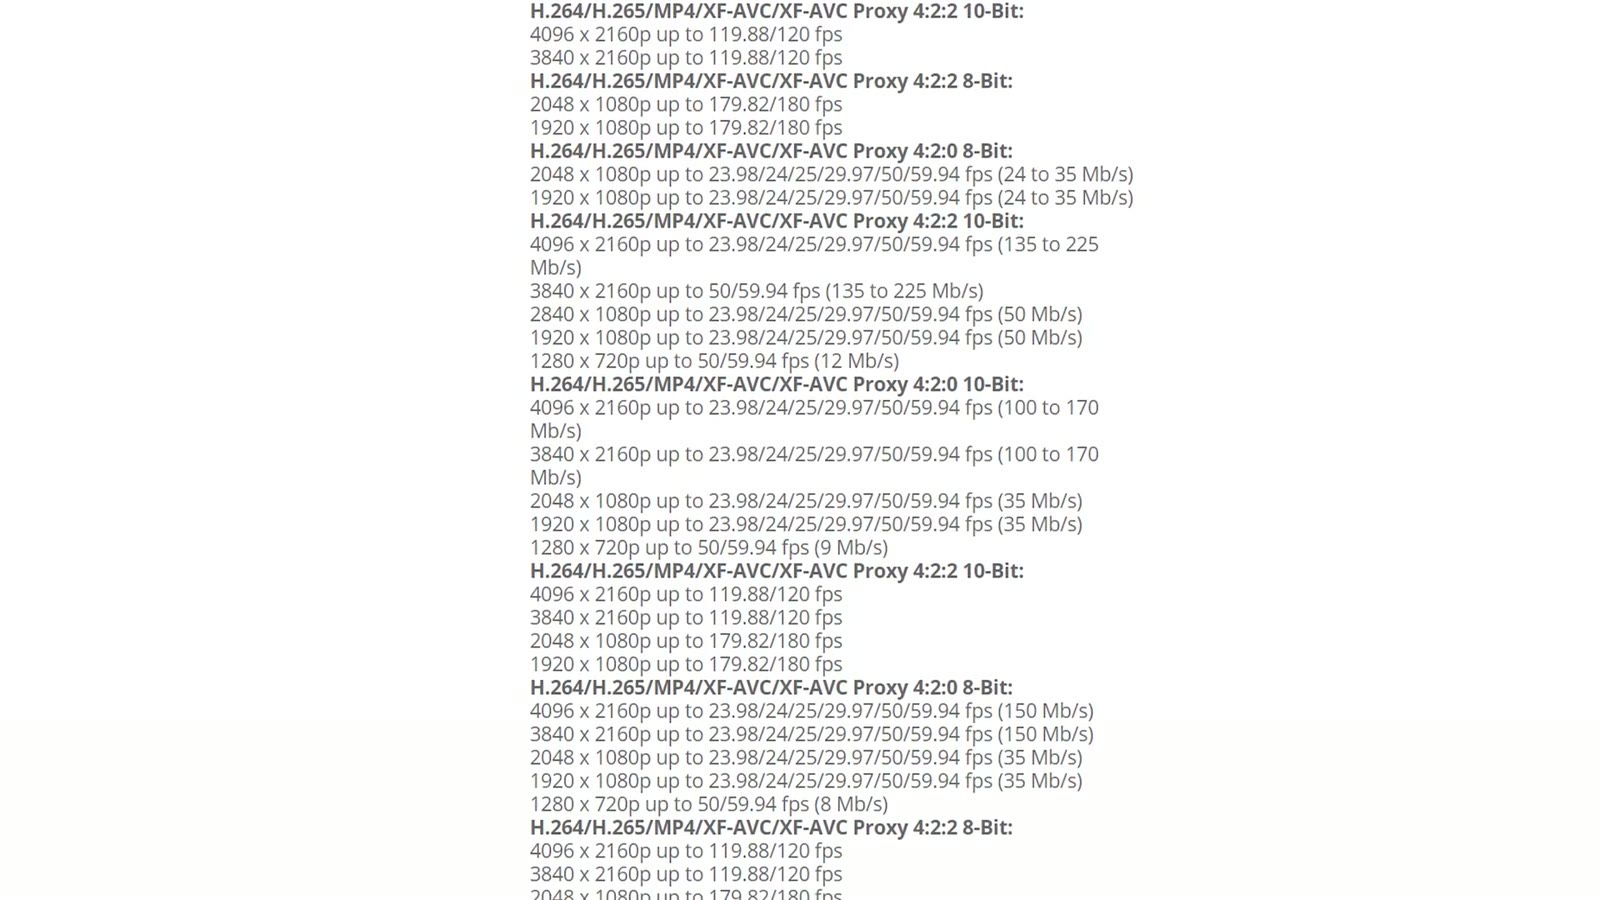
This one is close.
One practical difference: just like the a7S III, the FX6 needs CFexpress Type A cards for 4K All-I at 120fps and 1080p All-I at 240fps. The C70 records every frame rate and bit rate to SD cards, so there’s no second card format to buy into.
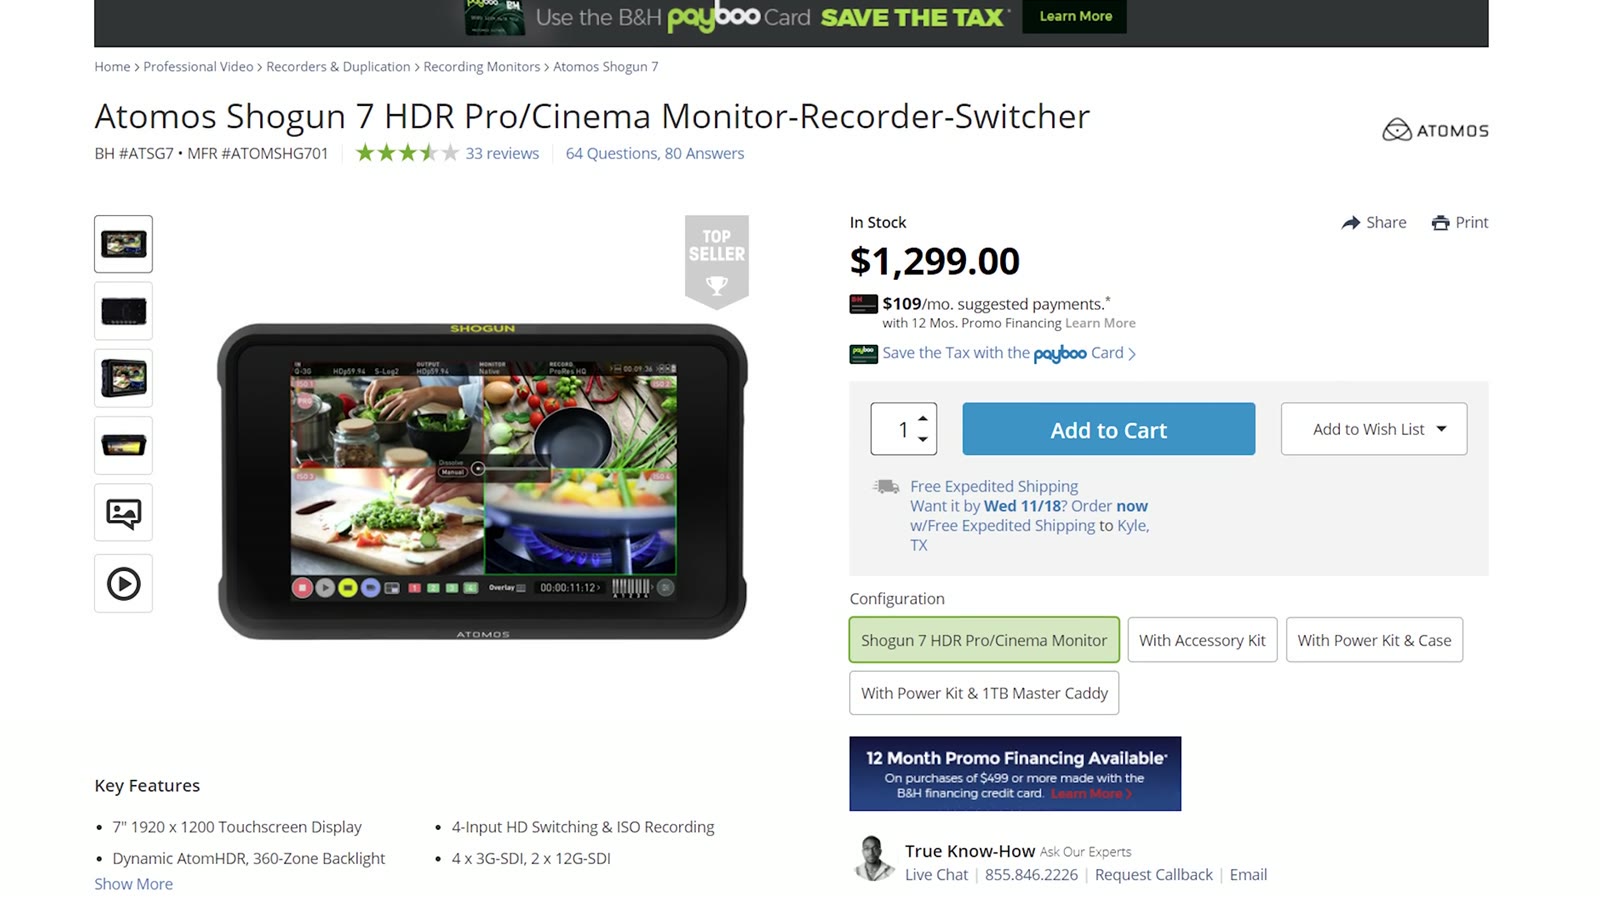
Here they split cleanly. The C70 cannot record RAW at all, internally or externally. The FX6 can record ProRes RAW externally over SDI to a recorder like an Atomos Shogun.
So Canon wins if you want that extra bit of resolution at DCI 4K 120fps. If you want 1080p at 240fps and external ProRes RAW, the FX6 takes it outright.
Canon has led the pack on autofocus for a long time with Dual Pixel, and the good news is the C70 has it, so expect stellar performance. The caveat is that it does face and head tracking but not eye detect. If you’ve been using an R5 and loving eye AF, that isn’t here, and as far as I’m aware there’s no animal eye detect either.
Sony essentially took the a7S III’s autofocus system and put it in the FX6, so you get face and eye detection. At this point the two companies are very close on autofocus and both of these are great.
Great, they’re even, moving on. Except hold on, because here’s where it gets complicated for Canon.
Remember that 0.71x adapter that turns the C70 into a full frame camera? It can enlarge the image being recorded, but it cannot add autofocus points to the sensor. So you’re recording a big beautiful full frame image while autofocus only works in a much smaller Super 35 sized area in the middle of it.
Specifically, in an interview with a Canon rep, ProAV TV was told that with the 0.71x adapter you only get autofocus points covering the middle 60 percent of the image. The FX6 has autofocus points across the entire sensor.
So if what you want is a full frame cinema camera with great autofocus, I have to recommend the FX6.
Everybody loves Canon colors, they’re pretty much universally praised, and the C70 pairs them with wider dynamic range through C-Log 2 and C-Log 3.
Sony has always been praised for dynamic range and not always for colors, but the FX6 has S-Cinetone, which looks gorgeous straight out of camera while still holding a wide range. And you can still shoot S-Log3 if you want more.
I wouldn’t let colors or dynamic range decide this for you. Both should be impressive.
One of the main reasons filmmakers buy a cinema camera over a mirrorless is built in NDs, which is what lets you shoot wide open in bright sun without a bag of screw-on filters.
Impressively, Canon crammed NDs into the C70 despite how narrow it is, giving up to 10 stops of light reduction.
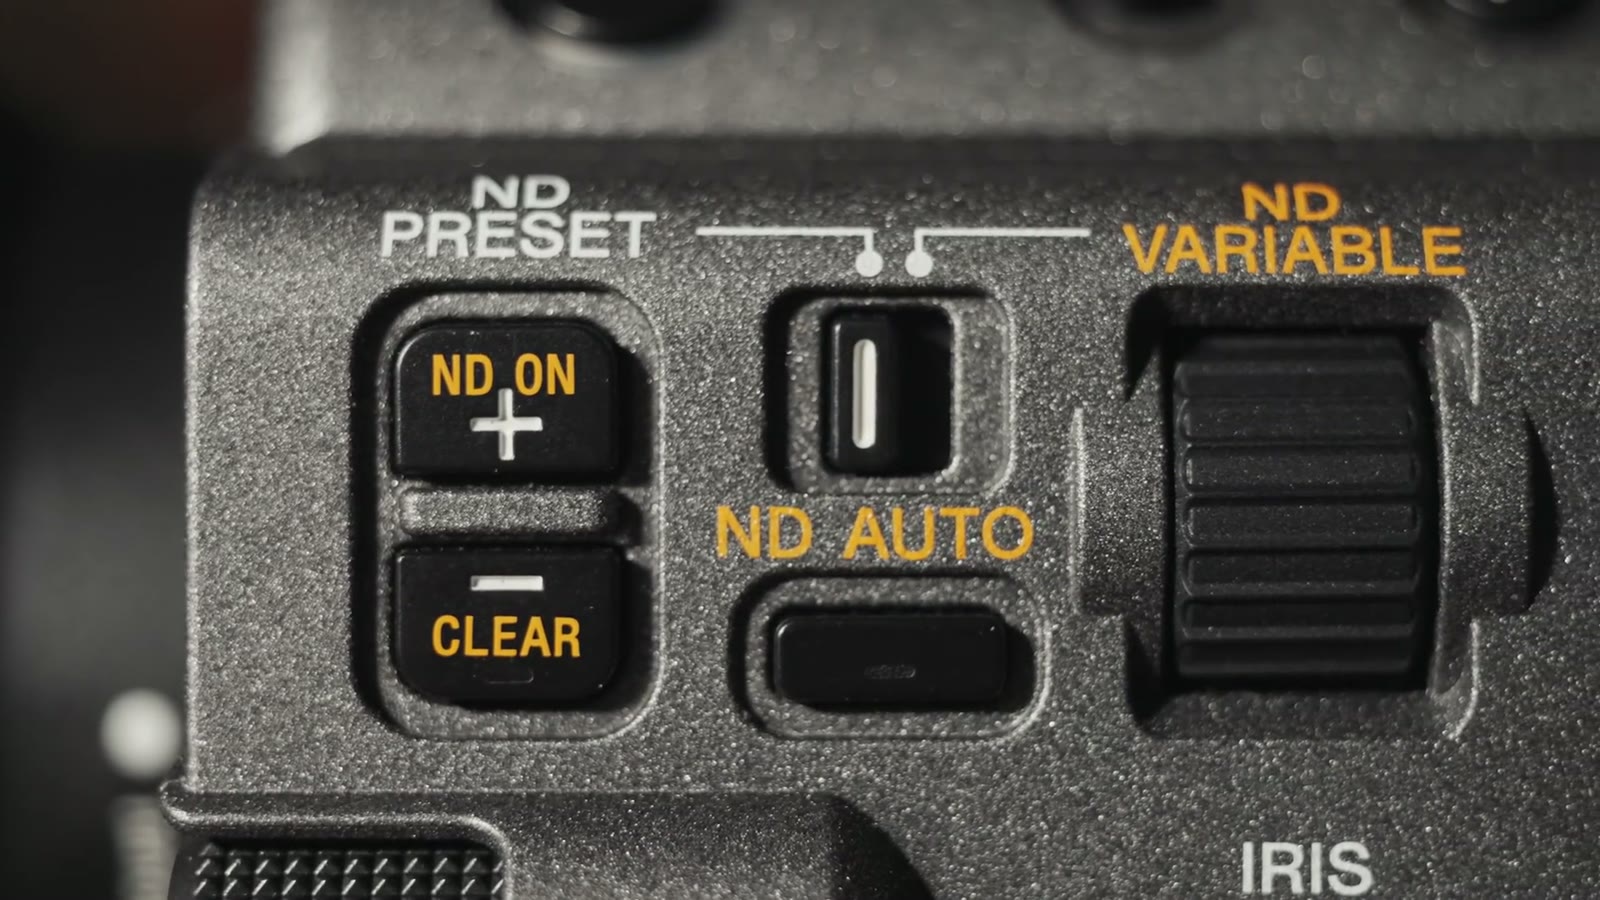
Sony went a different way. The FX6 has an electronic variable ND: one piece of glass that changes its own density rather than several pieces sliding into place, down to 7 stops.
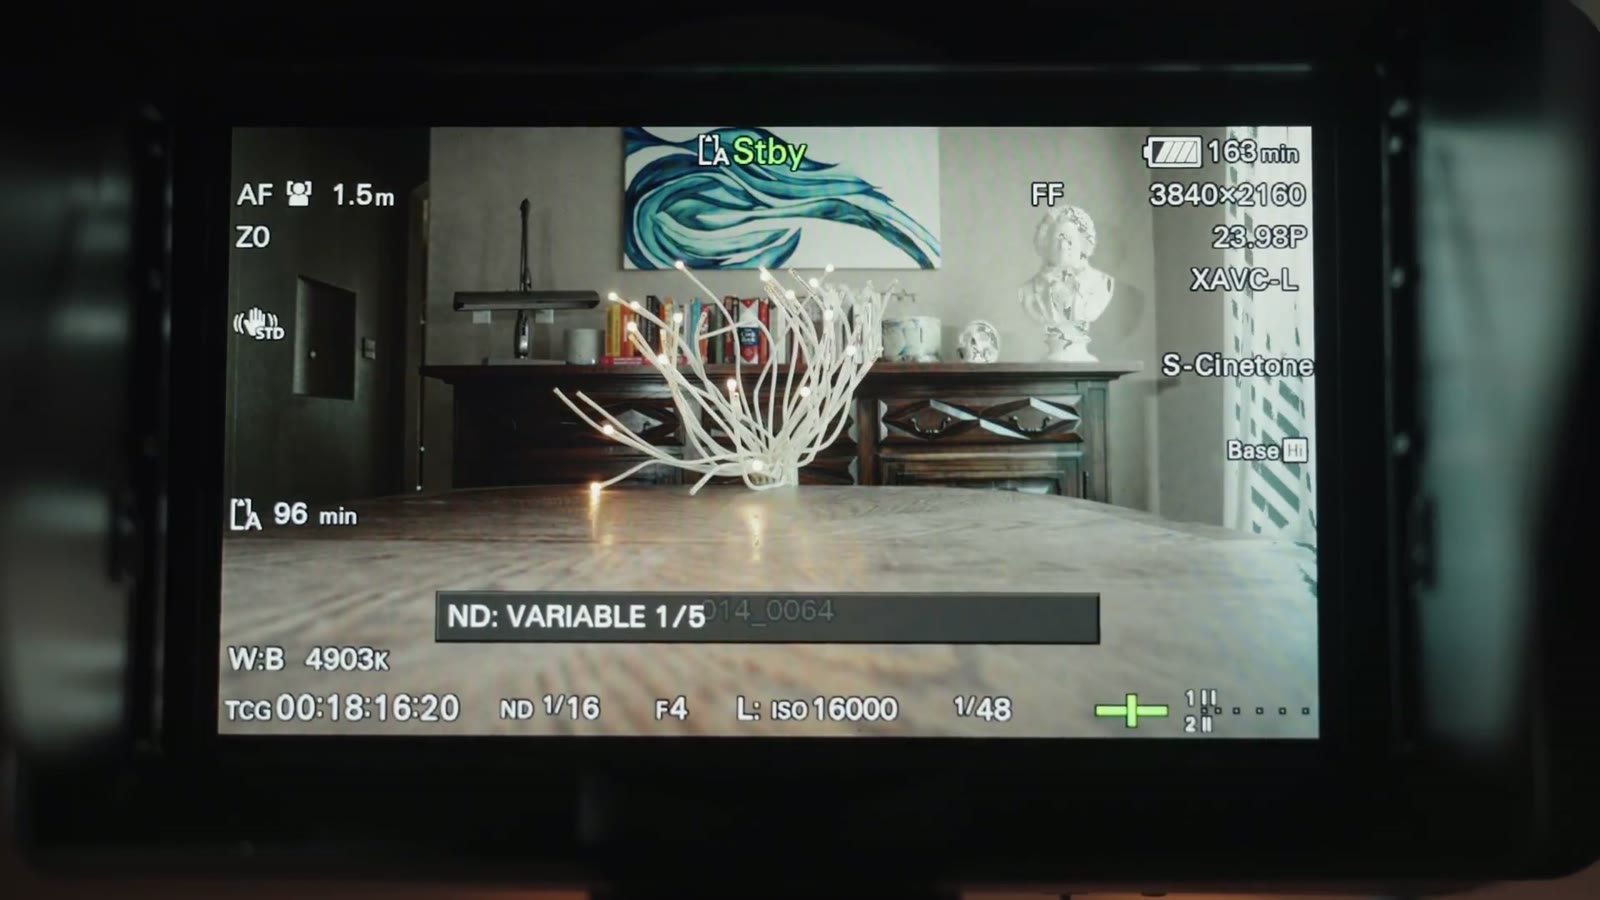
That lets it do things the C70 simply can’t, like automatically adjusting ND to hold your exposure while you never touch shutter or aperture. Once you’ve used it you do not want to go back.
So the C70 wins on pure light reduction, 10 stops against 7, but the FX6’s electronic ND is arguably the more compelling feature.
Otherwise these two are pretty similar. Both take larger batteries for longer runtimes, both record unlimited length, and both are covered in a zillion buttons. Which leaves price.
So the C70 is the cheaper camera. Except if you want it to be full frame you need the 0.71x adapter at $599, which puts the Canon $100 above the Sony.
The first question to ask isn’t about specs at all. It’s how invested are you in the Canon ecosystem? Do you already own a lot of Canon glass, are you comfortable shooting Canon bodies, do you love Canon colors? If so it’s a no-brainer, take the C70, it looks like a fantastic camera and it will serve you very well.
But if you’re not heavily invested in Canon, or you’re considering jumping ship to Sony, and you want a more modular traditional cinema body, more frame rate options, external RAW, autofocus that works across an entire full frame sensor, and one of the coolest ND systems in any camera today, then the FX6 is the obvious choice and the one I’d wholeheartedly recommend.
If you’re a wedding filmmaker and you want to book more couples, my free guide to booking more wedding film clients walks through practical steps you can take right now. My courses are here, the discussion happens in my Facebook group, and everything I shoot is graded with my LUTs.
This comparison went up in December 2020, before either camera shipped, so it’s built on published specs, Canon and Sony’s own material, and the ProAV TV interview rather than on hands-on testing. Prices are what they were at announcement. Both cameras have had firmware updates since, and the C70’s autofocus coverage with the 0.71x adapter is the specific claim most worth re-checking against current firmware.
I’m required to state that I’m part of affiliate programs for Amazon, B&H, Soundstripe, Artlist, Musicbed, and Adobe, and that some of the links above are affiliate links.

Filmmakers kept asking Sony for the a7S III in a real cinema body, with mounting points, XLRs and built-in NDs. The FX6 is that camera. Here is what it adds, what it is missing, and who should actually buy it over the a7S III.
Continue reading
This is the Sony 24mm GM lens, and I’m reviewing it from the perspective of a filmmaker. A lot of people are switching to Sony after the release of the a7S III, possibly you as well, which means you’re probably about to invest in some native Sony glass. And while I’ve seen plenty of reviews of this lens for photography, I haven’t seen many for filmmaking. So here’s that.
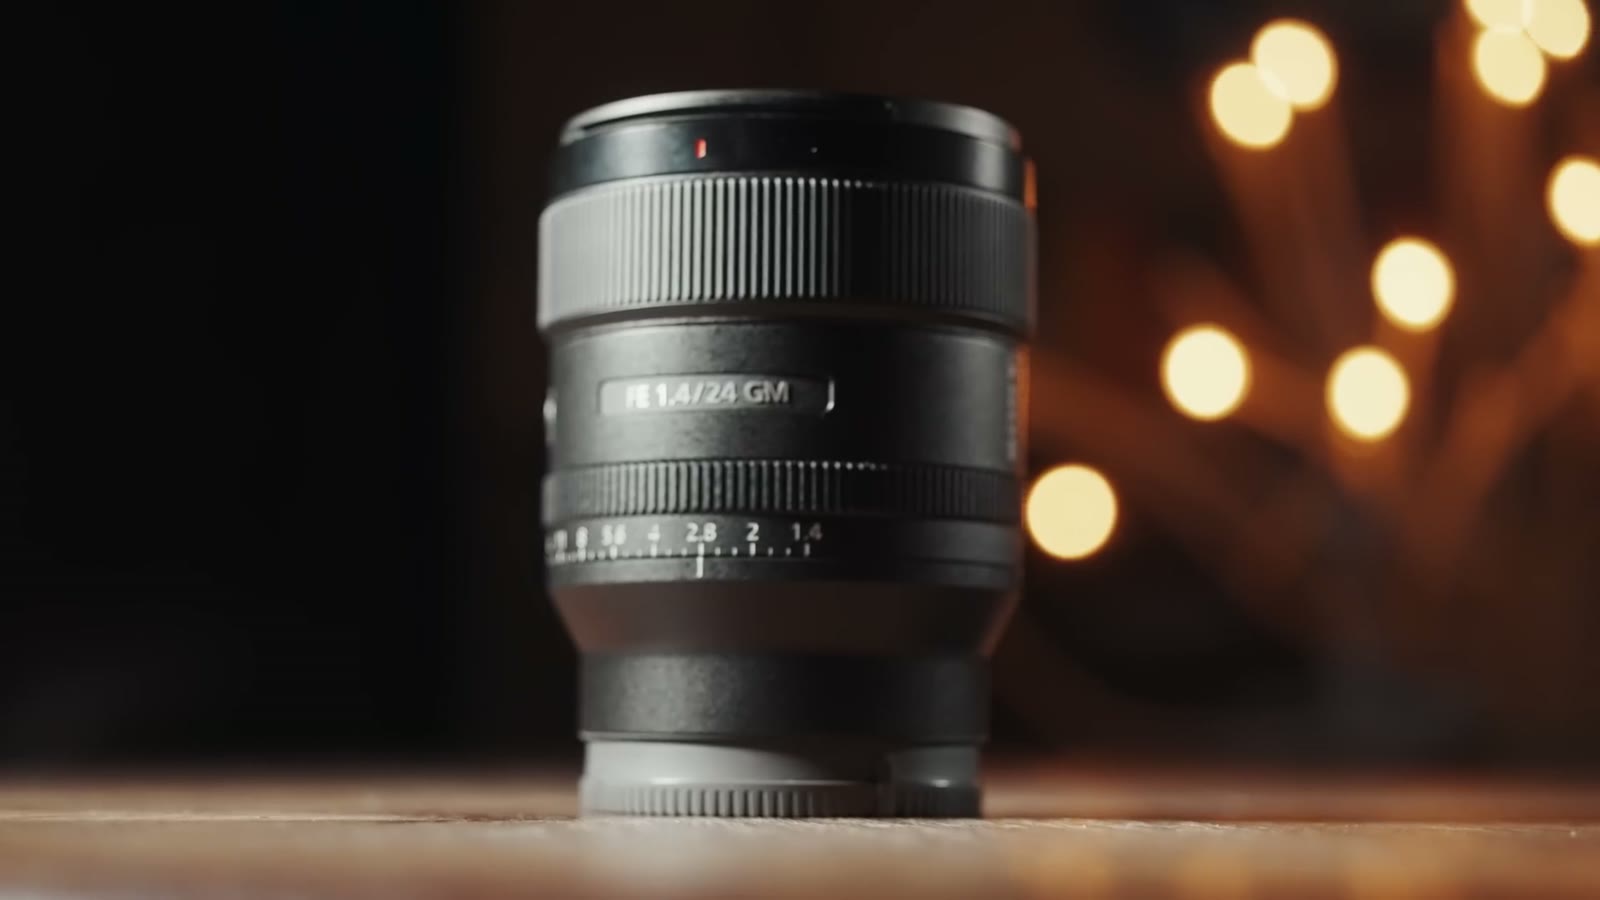
I’m also comparing it to the two other very popular 24mm lenses, the Sigma and the Canon, and telling you why the Sony is my favorite 24mm available today.
Since I’m going to be making claims about all three: I own all three. I’ve had the Canon 24 for nine years and the Sigma 24 for five, and I’ve used all of them extensively. Nobody sent me anything.
24mm is the sweet spot for a wide angle lens, which probably explains why basically every manufacturer makes one.
It’s very wide, but not so wide that you get fisheye distortion. Image quality holds up. And in my opinion it’s the perfect width for a gimbal. Most 24mm lenses also come in at f/1.4, and normally a low f-stop means a lot of heavy glass, but 24mm lenses stay relatively small and light compared to other wide focal lengths. That small size means they still take filters, including ND filters, which I’d call necessary if you’re a filmmaker.
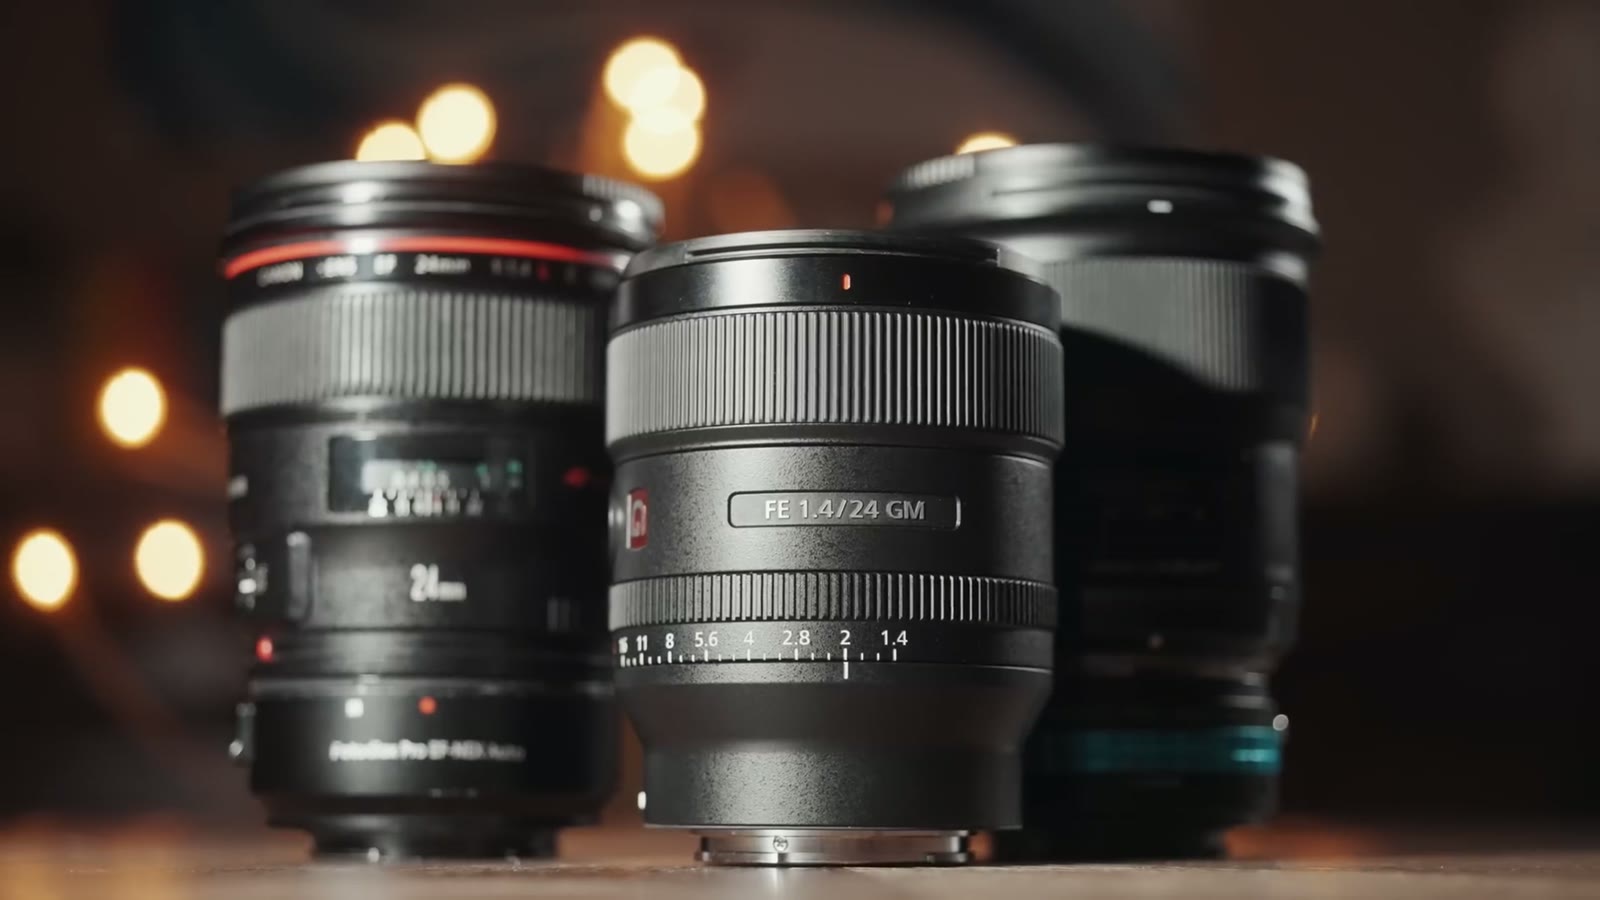
Here they are together. The Canon is small and compact, the Sigma is small too, and then there’s the Sony, which is on another level entirely. I was genuinely shocked the first time I saw it.
One thing to keep in mind on this comparison: these have different mounts. The Canon is EF, my Sigma is the Nikon mount version, and the Sony is E-mount. Put an E-mount adapter on the Canon or the Sigma to use them on a Sony body and they both get noticeably longer.
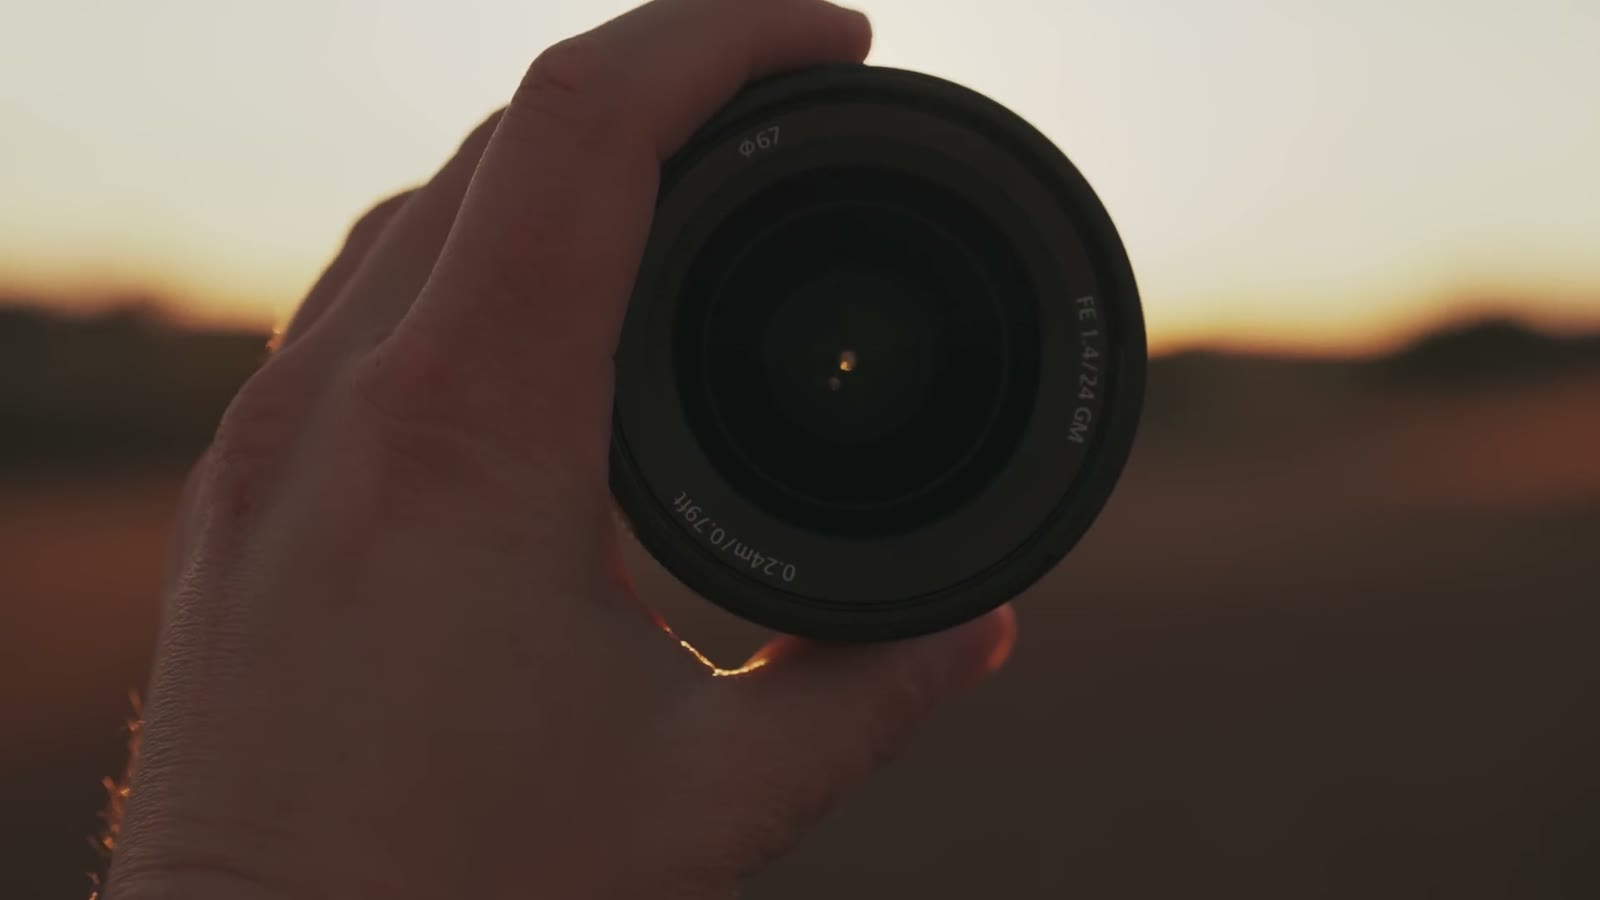
That difference is not academic. Whenever I’m filming a wedding day, which is an all day event where I’m on my feet for eight hours or more, having a small light lens on the camera makes a real difference to how wrecked I am by the end of the night.
You’re thinking there has to be a catch. It’s so light, is the build quality bad, is it all plastic? As far as I can tell it’s weather sealed and built to a very similar standard to the Canon and the Sigma. All three have a plastic housing with metal and glass internals. Sony has clearly just done the engineering work to make it smaller without giving anything up.
“Matt, there’s no way this lens is sharp, it’s tiny, I bet it vignettes a ton and at f/1.4 it’s super blurry, right?” I’m sorry to say you’re wrong on all of it, because Sony did some kind of witchcraft here. It’s very sharp even wide open at f/1.4, and there’s very little vignetting.
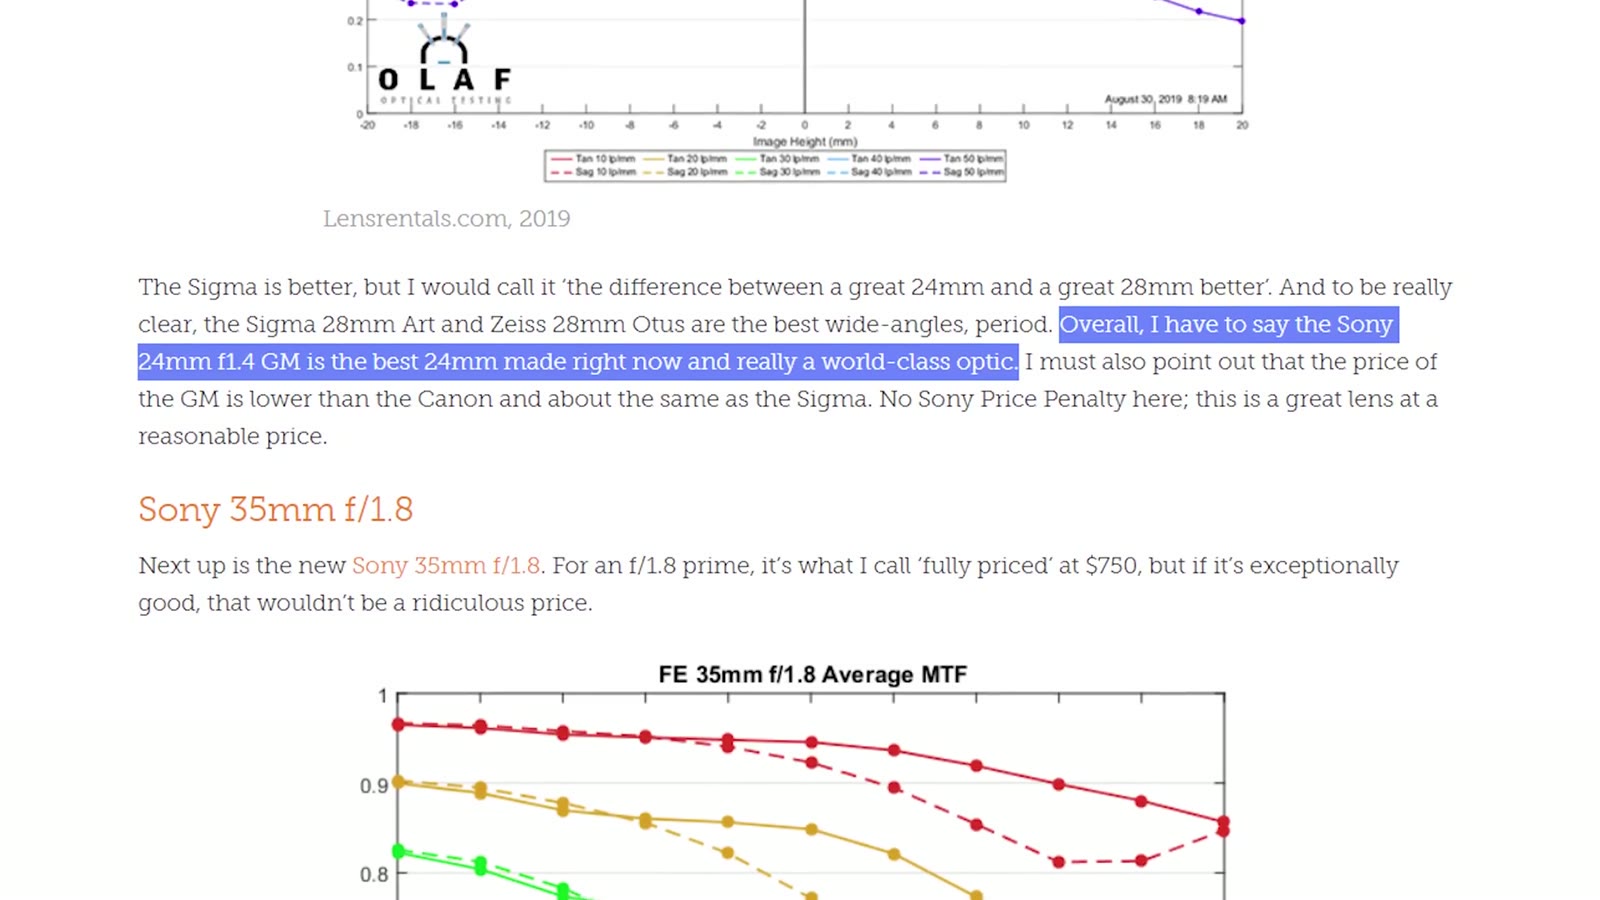
I haven’t run scientific MTF tests, so if you want the numbers, read the Lensrentals deep dive on this lens. Their conclusion was that it’s “the best 24mm made right now” and a world-class optic. That’s high praise from people who look at lenses all day and rent them out for a living.
In my own real world testing across a bunch of scenarios, I agree with them.
To be fair to the competition, I have no complaints about the image quality of the Canon or the Sigma either. Most 24mm lenses give you great image quality and those two are no exception. If you told me to go film a video with any one of these three, I’d say great, easy, they’re all strong performers.
Here’s the biggest reason I’d still take the Sony.
If you’ve watched my stuff before you know I’m a big manual focus guy, and I’ve made a whole video about using manual focus lenses on a gimbal. But the a7S III changed that a little, because its autofocus is a massive upgrade over the a7S II, and paired with this lens it’s a fantastic combination.
This lens has the newer direct drive SSM motors, which means it focuses very fast, and that matters on an f/1.4 lens with a lot of glass that has to move quickly.
But the part I care about more is that it’s virtually silent while it does it. If you’ve ever had audio ruined by the sound of a lens focusing, you know. I’ve had that happen recording with Canon cameras on EF glass. Most EF lenses aren’t loud exactly, but they’re loud enough to get picked up by the on-camera mic I sometimes use for ambience. With this lens I’m confident I can leave autofocus on and never think about it.
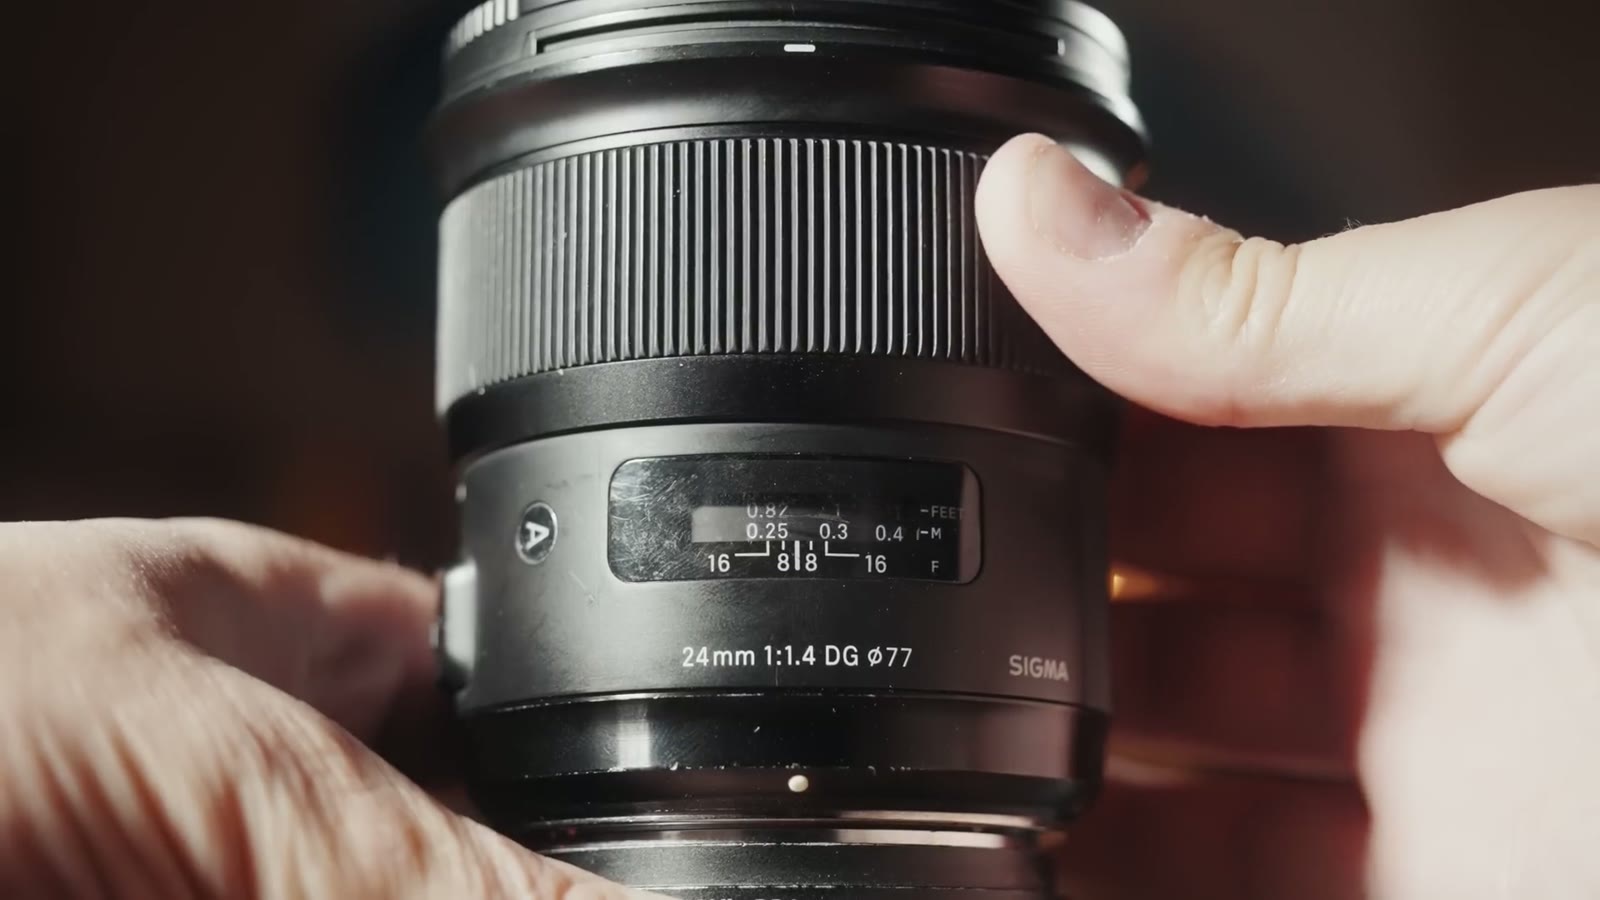
Even with autofocus this good there are times you want to guarantee a shot, so you switch to manual. Or you’re on an older body like the a7S II where the autofocus is mediocre and manual is genuinely the better option, which is what I did for years with the Sigma and the Sony.
Some of you just cringed, because Sony has not historically been known for good manual focus. Sony lenses are all focus by wire. On the Canon or the Sigma, turning the focus ring is a direct physical connection to the focusing element. On a focus by wire lens, turning the ring sends an electronic signal to a motor that then moves the element.
Two things have made that miserable in the past:
The 24mm GM is a massive improvement on both. There’s no focus ramping, and while it is still focus by wire, there’s no lag I can detect between turning the ring and the lens responding. For all practical purposes it manual focuses as well as the Sigma and the Canon. If you’re a manual focus junkie like me, you’ll be happy with it.
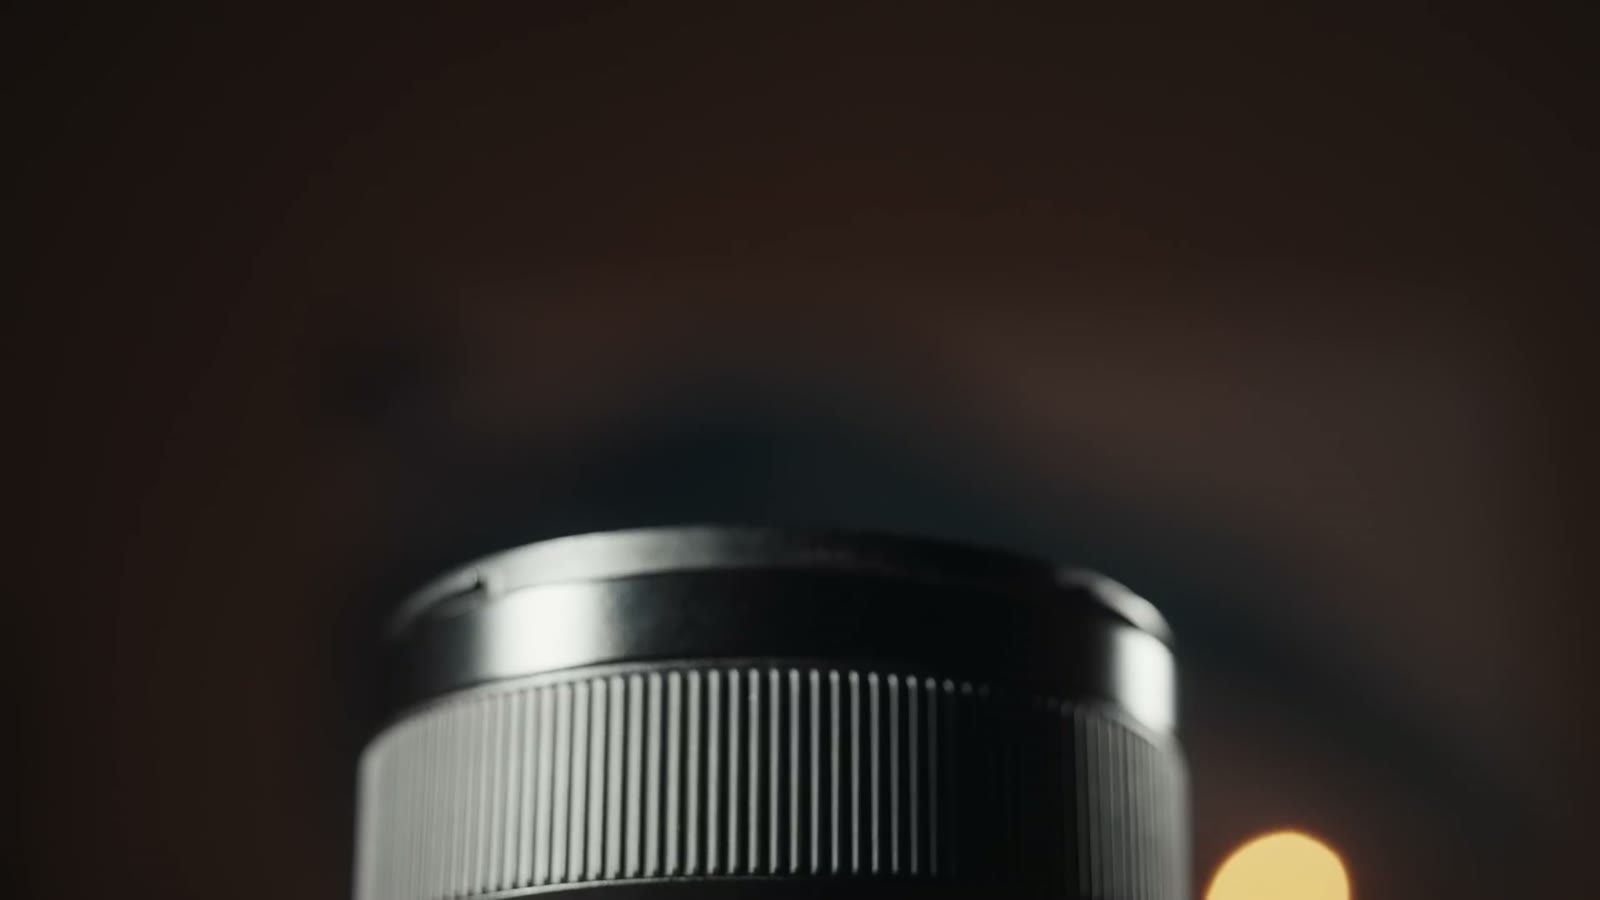
You’ve seen this on plenty of older lenses. My Zeiss Contax glass from 1975 has it. But Sony is the only company I know of putting it on new photography lenses: a manual aperture ring on the lens itself.
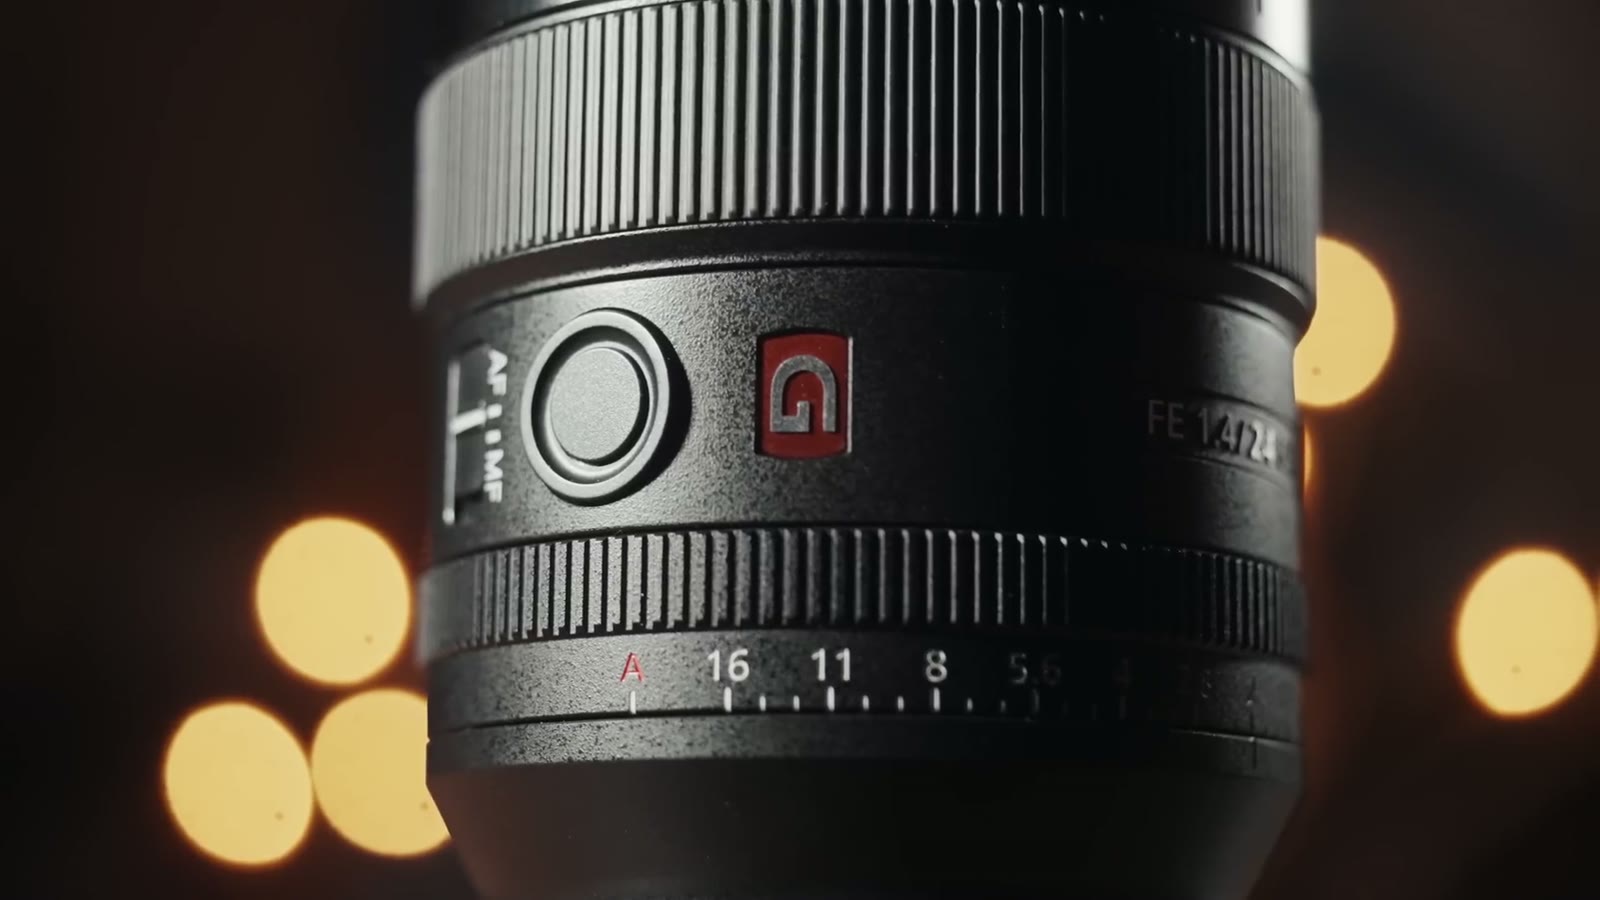
Set the ring to A and you control aperture from the camera dials like normal. Rotate off A and you have full manual control right there on the lens.
Which sounds like more work, until you look at the other side of the lens and find a switch marked Click.
If you want to go deeper, I’ve also got ULTIMATE Gimbal Lens – Sony 16-25 F2.8 G Review For Wedding Filmmakers.

By default it’s on, and the aperture ring clicks into each stop as you turn it. Flip it off and the ring rotates completely smoothly, which is smoother than if I dipped this lens in beard oil.
Here’s why a clickless aperture matters. Have you ever been rolling on an important take and realized the shot was a bit overexposed? On a normal photography lens, adjusting aperture clicks and jumps abruptly to the next stop, and there goes your take. On this one you can change exposure mid-shot completely smoothly and nobody watching will ever notice you did it.
Cinema lenses have had clickless apertures basically forever, and there are companies that will de-click a photography lens for you, but it usually costs real money. I love that Sony just shipped it as a switch.
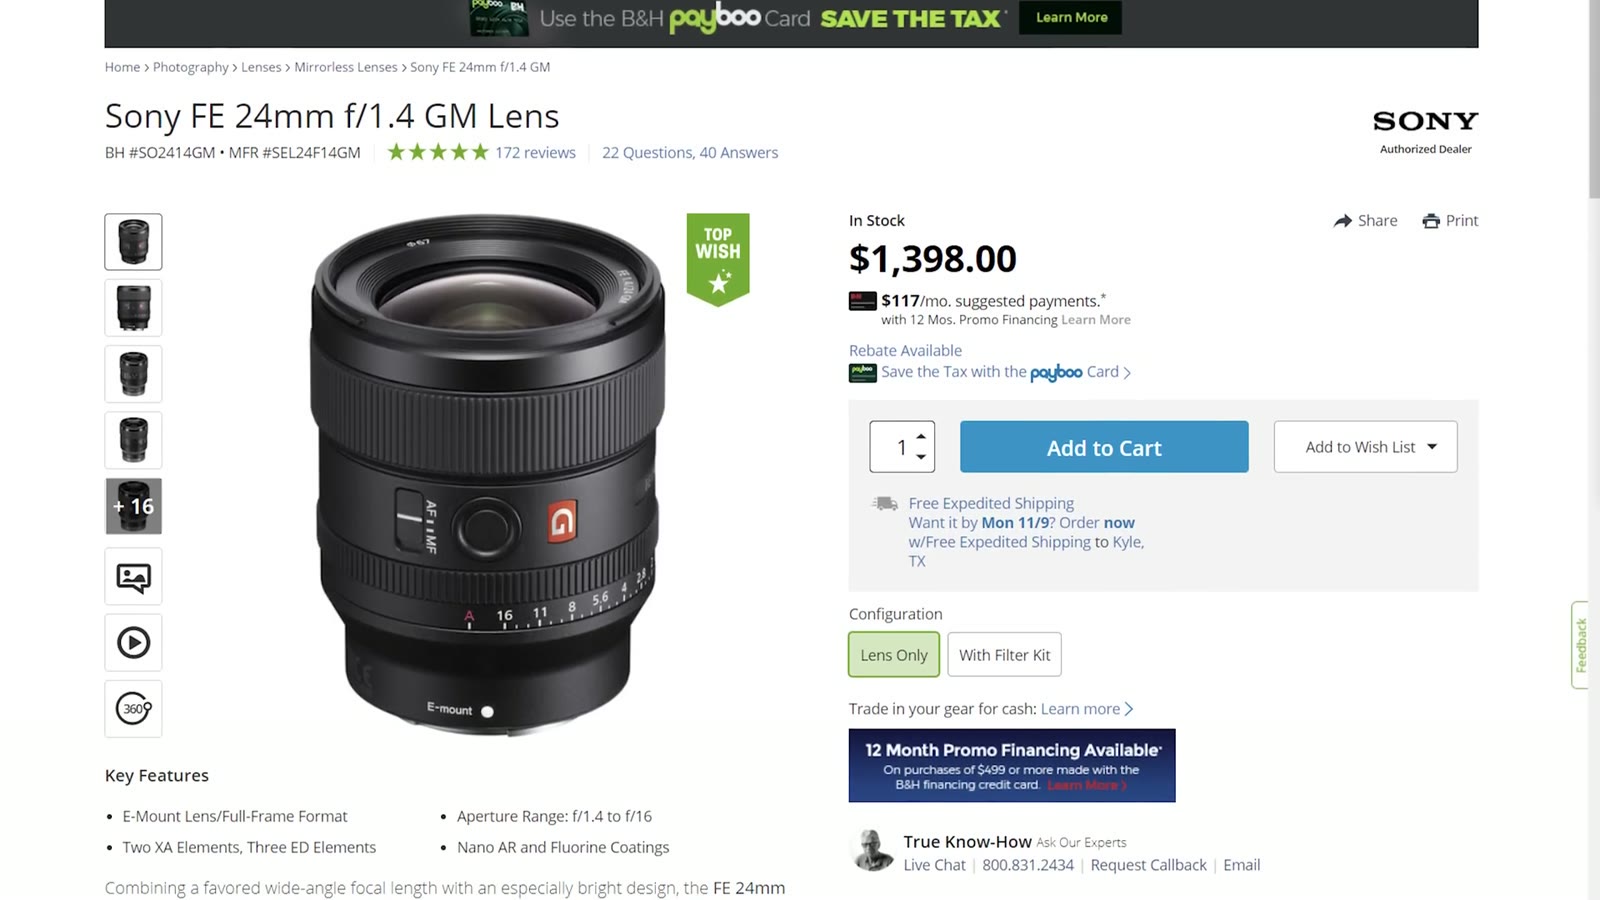
It retails for $1,398, which is definitely not cheap, but for what you get in a package this small I think it’s fairly priced, especially set against how much more expensive other Sony GM glass is.
You really have two options.
On image quality alone, the Sigma. I’ve used it for years and I still love it. At $850 it’s quite a bargain, and if you’re on a budget I’d recommend it in a heartbeat.
For me, the Sony. I wanted the guaranteed best autofocus I could get, which meant going native. And when you put 1.6 pounds next to under a pound, that’s a stark difference when you’re carrying a camera around all day at a wedding.
This was the first lens review I ever made. If it was useful and you want more of them, leave a comment on the video and tell me.
The camera this is paired with: my Sony a7S III review for wedding filmmakers. And here’s my whole Sony filmmaking kit. Everything is graded with my LUTs.
If you’re a wedding filmmaker and you want to book more couples, my free guide to booking more wedding film clients walks through practical steps you can take in your business right now. My courses are here, and the discussion happens in my Facebook group.
This review is from December 2020, so the prices above are what these lenses cost then and all three have moved since. The a7S III was brand new at the time, which is why so much of this is framed around switching to Sony.
I’m required to state that I’m part of affiliate programs for Amazon, B&H, Soundstripe, Artlist, Musicbed, and Adobe, and that some of the links above are affiliate links.