
If you shoot horizontal video with a real camera and then go to turn that footage into an Instagram Reel, you have probably already smacked into the two problems that make this whole thing annoying, which are that your beautiful footage shows up tiny in the middle of the frame with giant black bars above and below it, and then whenever you finally do get it exported, Instagram either throws you an error or plays the thing back looking like garbage. Both of those are fixable, both of them take about five minutes, and that is exactly what I want to walk you through here using DaVinci Resolve.
My name is Matt Johnson, I have been filming weddings for over 15 years, and I am here to help you become a better filmmaker and video editor. And yes, we are using DaVinci, baby.
Before we get into any of it, I built you a free DaVinci Resolve project template for Instagram Reels so you do not have to dial all of these settings in by hand every single time. It is already set to the right resolution and the right frame rate, you just open it and start dropping clips in. You can download the free Instagram Reels template for DaVinci Resolve here.
If you would rather build it yourself so you understand what every setting is doing, keep reading, because that is what the rest of this is.
DaVinci Project Setup
Open up DaVinci Resolve, create a new project, and name it whatever you want. I called mine Instagram Reels Demo. Press Open.
Now here is the part people skip, and skipping it is what causes ninety percent of the pain later. Before you do anything else, before you import a single clip, go up to File and then Project Settings.
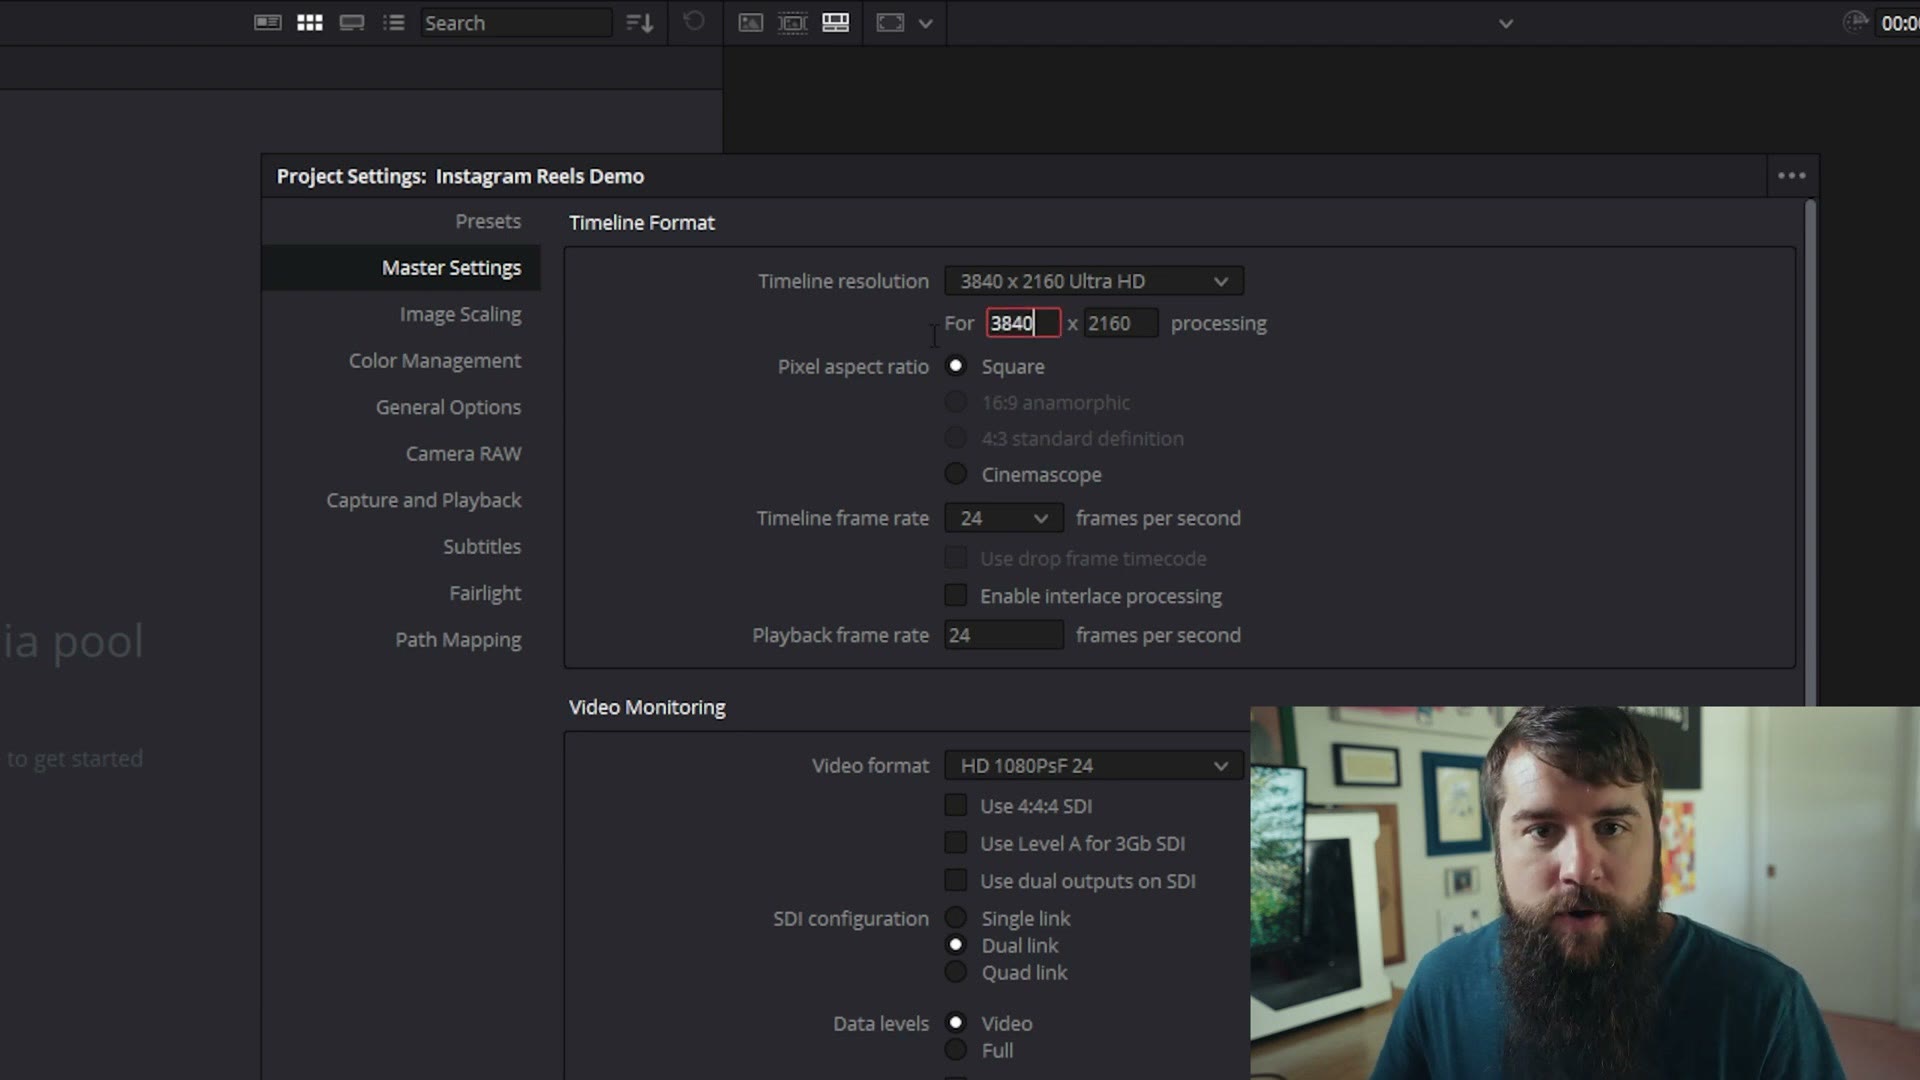
Under Timeline Format you are going to see Timeline resolution, and it is probably sitting at 3840 x 2160 Ultra HD, or whatever your default happens to be. Change those two numbers to 1080 x 1920. That is a vertical 1080p frame, which is what Instagram wants.
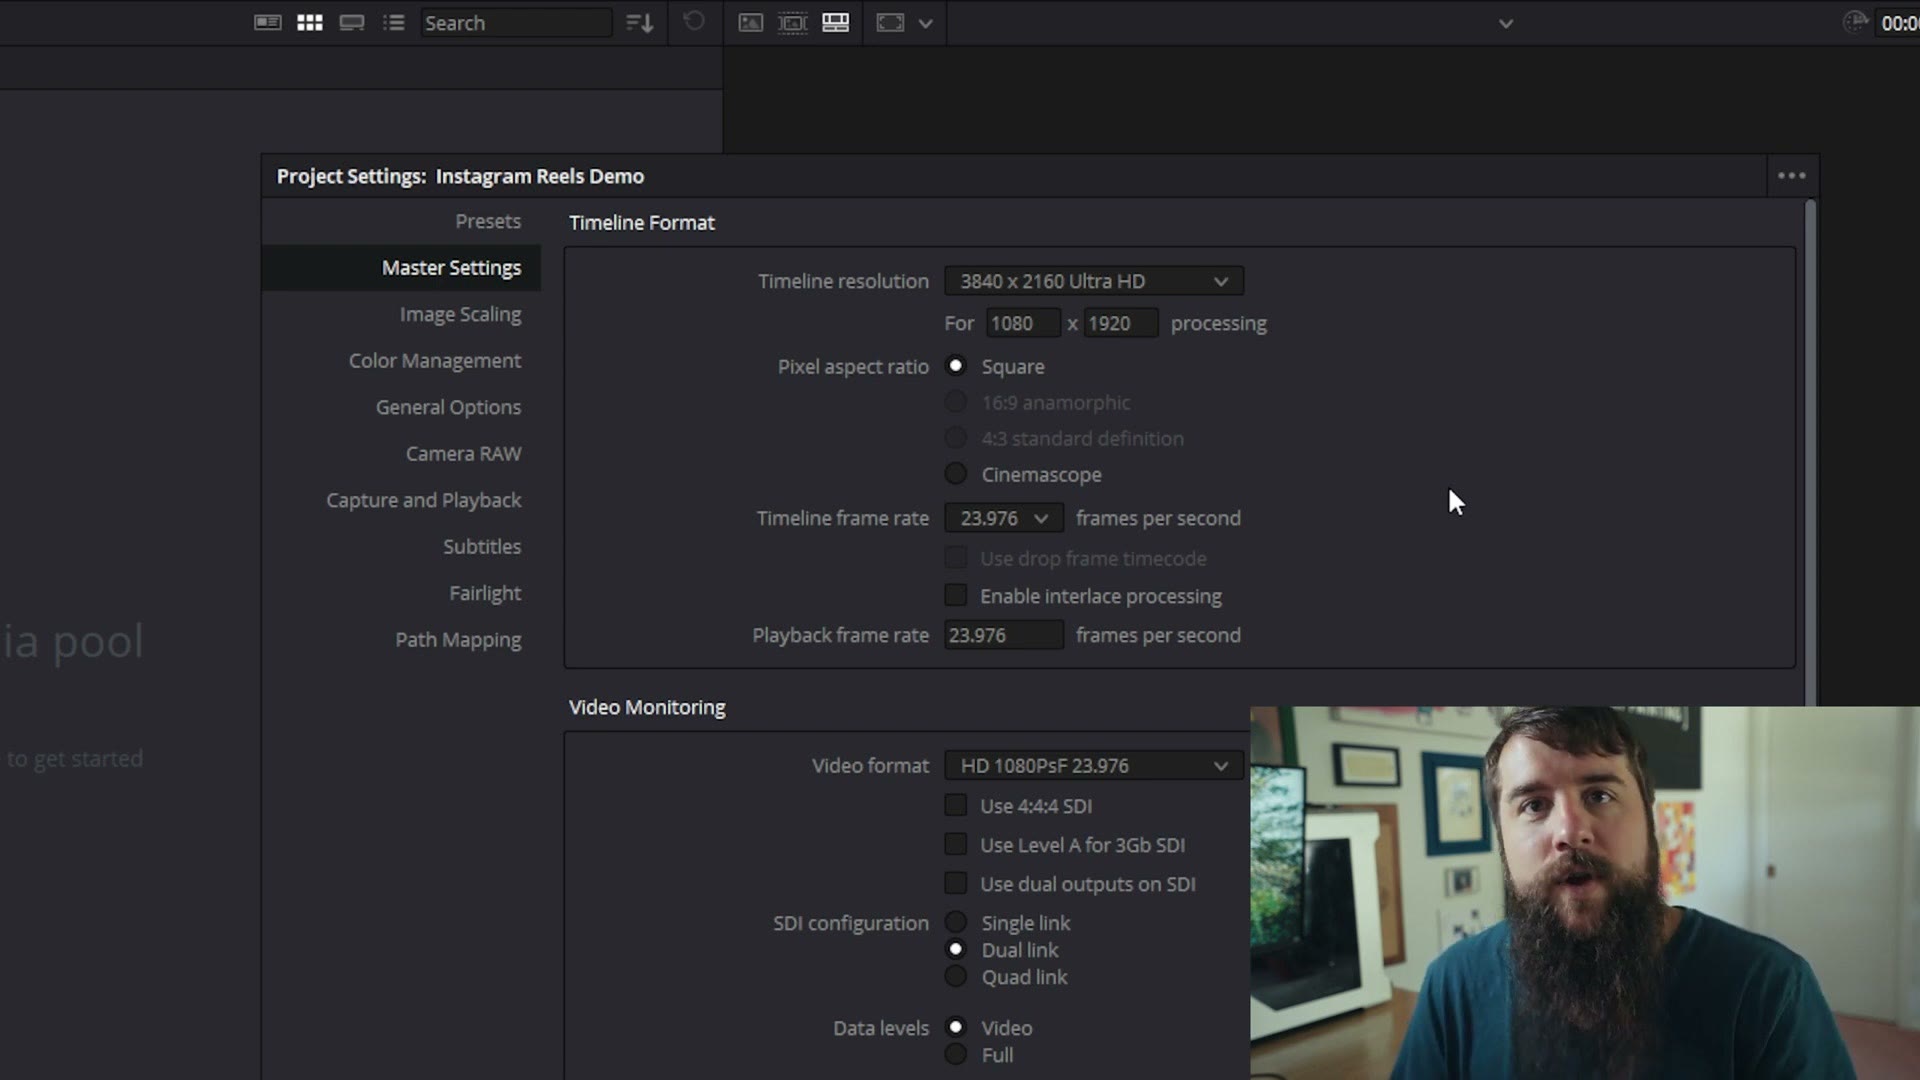
While you are in there, I would also change the Timeline Frame Rate from 24 to 23.976, because that matches the frame rate I actually filmed at. If you happen to film in a different frame rate, pick that one instead. Just make it match your footage. Hit Save.
One thing worth knowing: Resolve gets stubborn about the timeline frame rate once you have media in the project, so if you come back looking for that dropdown later there is a good chance it is grayed out and you are going to be confused. Do it first and save yourself the headache.
Importing & Scaling Video Clips
Head down to the Media Pool tab and drag in the clips you want to use. In this case I am using a clip of my brother in Hawaii that I filmed on my Sony a7S III and colored with my own preset, which you can grab over here if you want your footage to look like mine without doing the grading work yourself.
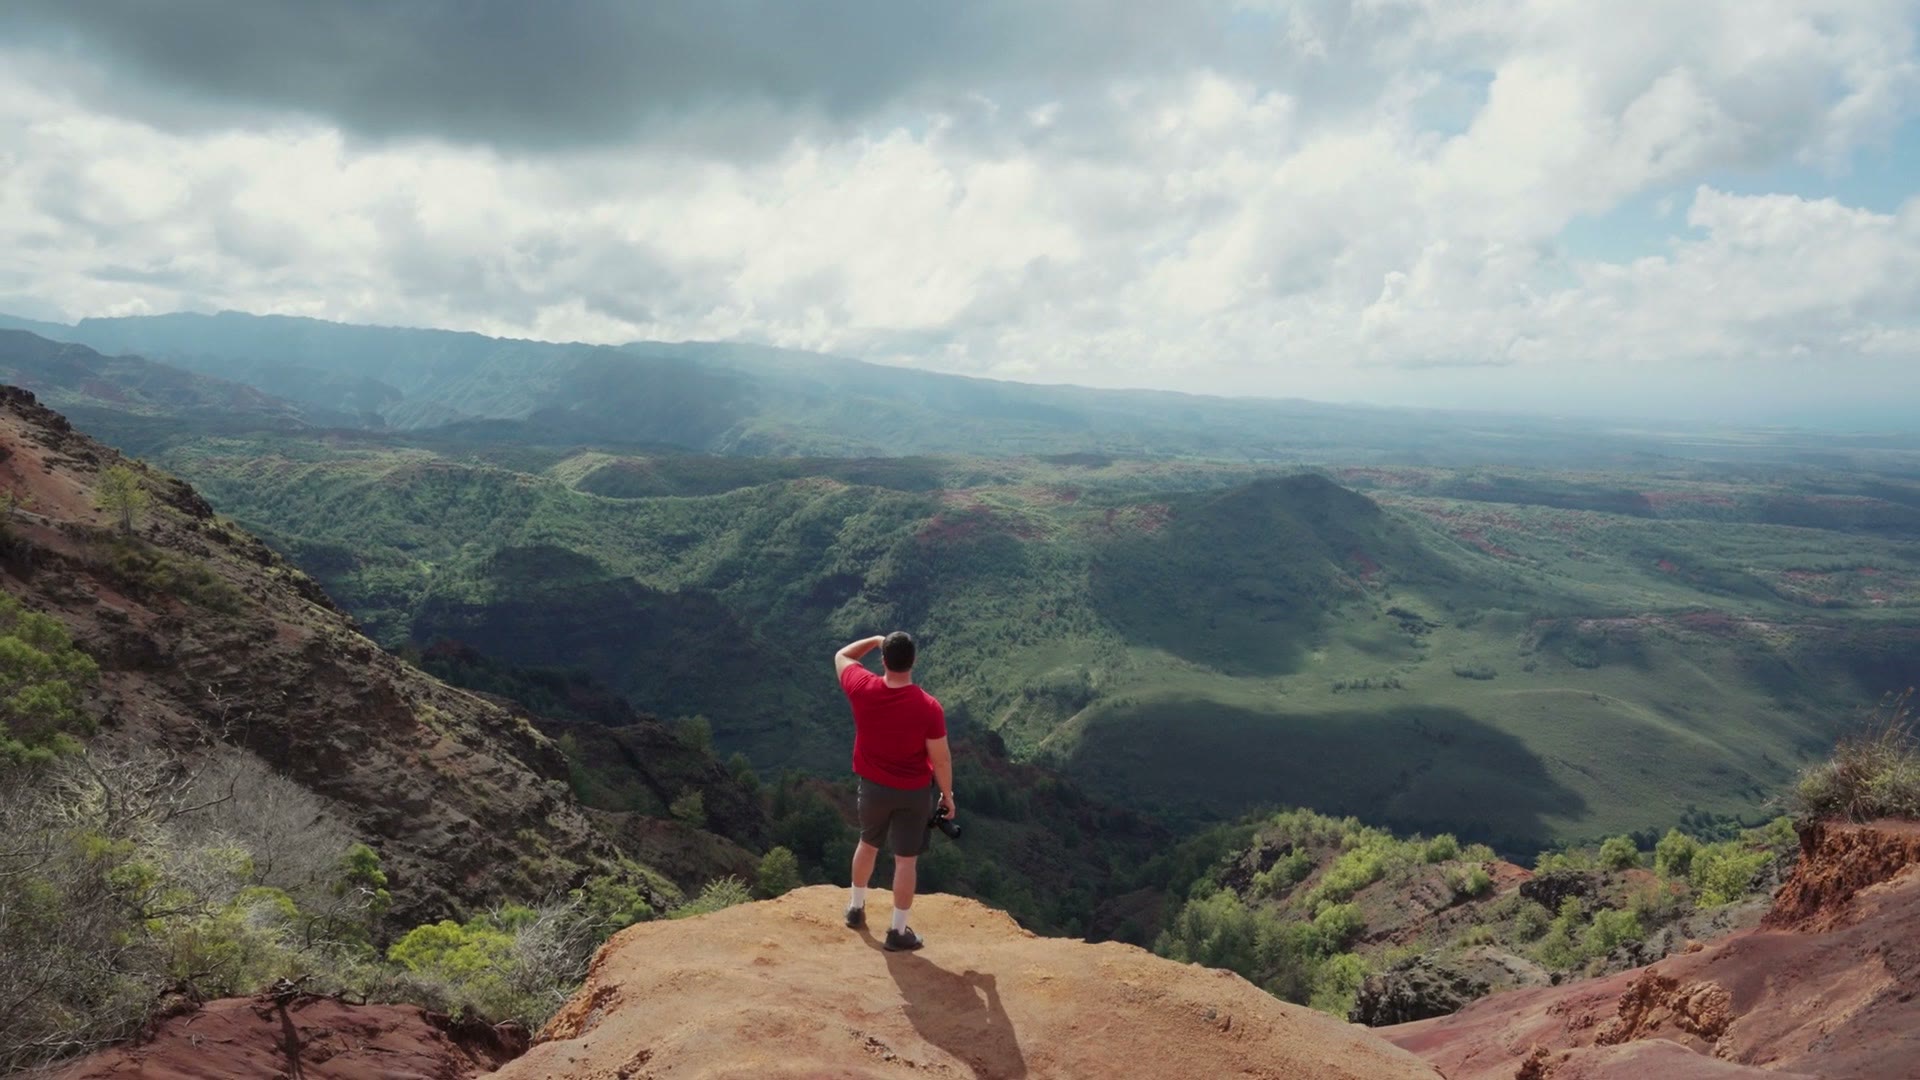
And as you can see, that clip is horizontal. So whenever you drop a horizontal clip onto a vertical timeline, this happens.
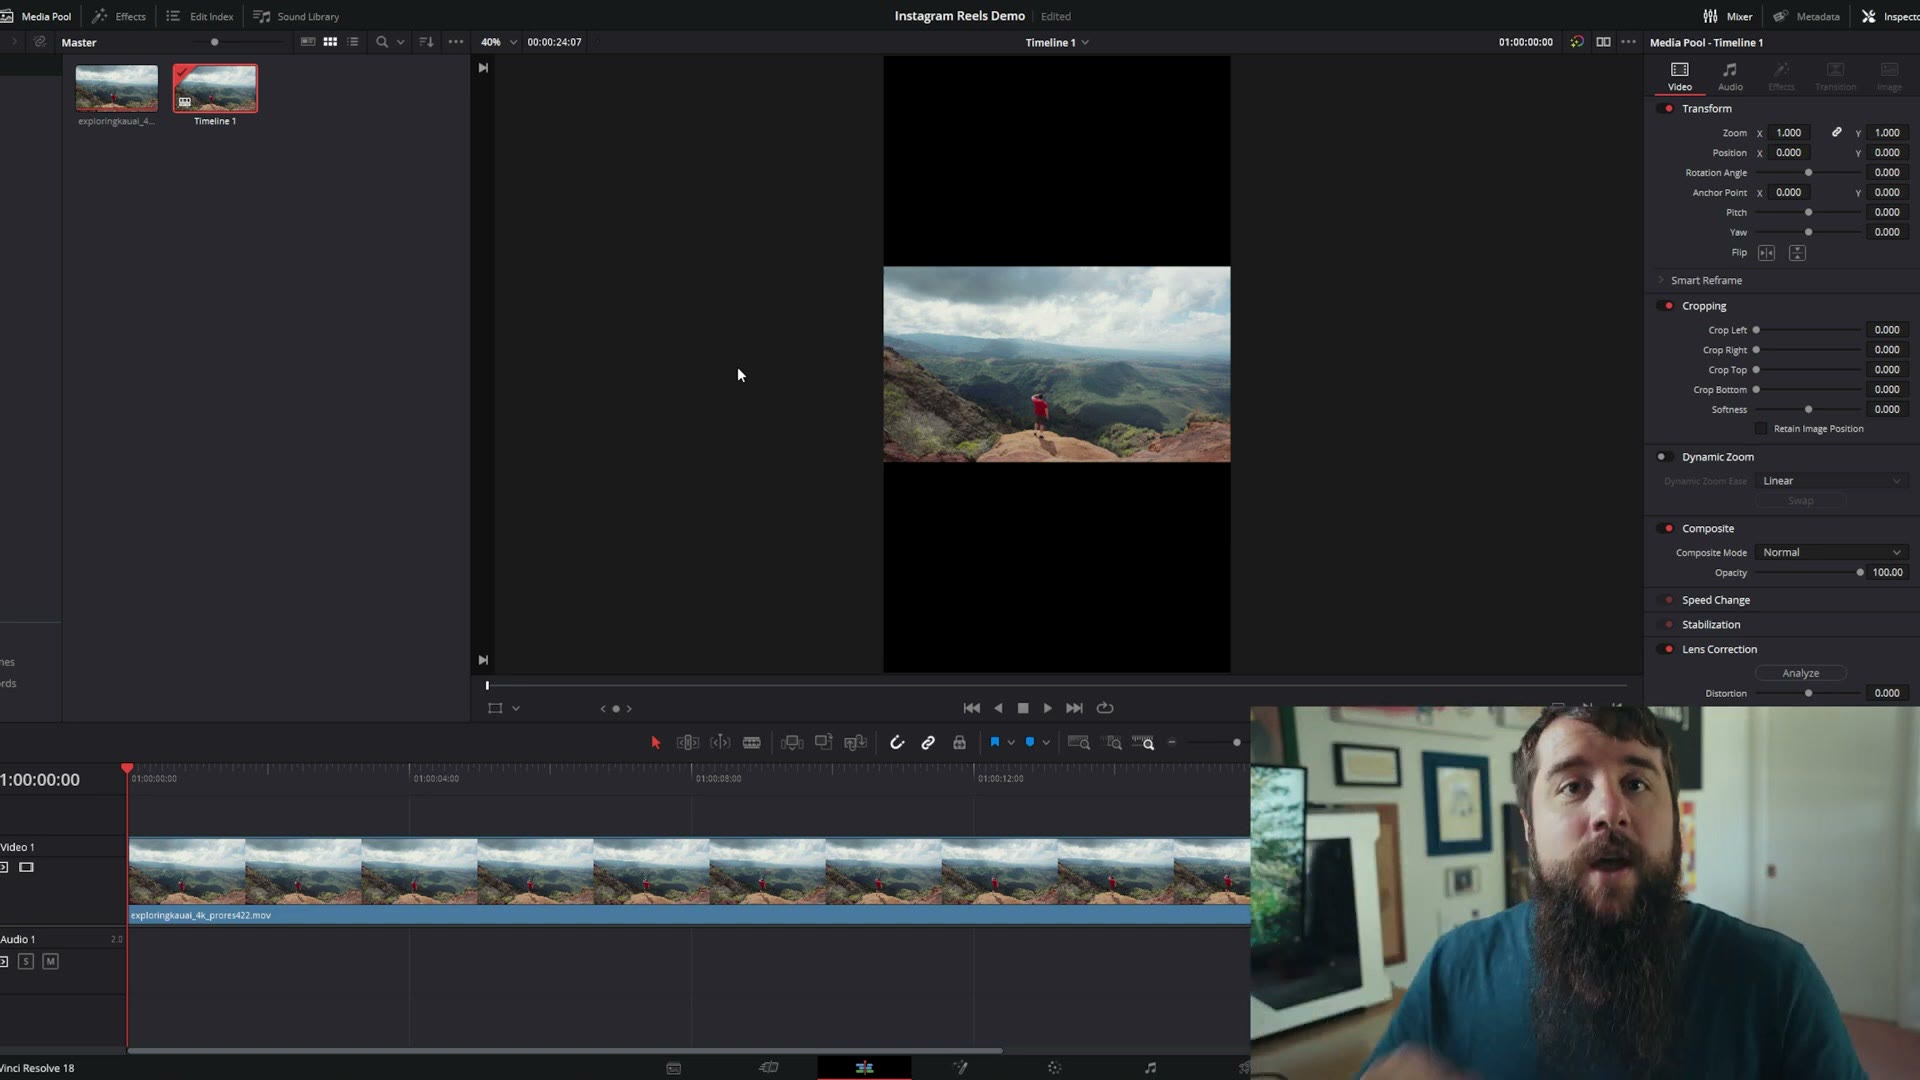
Tiny video, massive black bars on the top and bottom. Not great! There are two ways to fix it, and which one you want depends entirely on how many clips you are dealing with.
Option one: scale each clip by hand
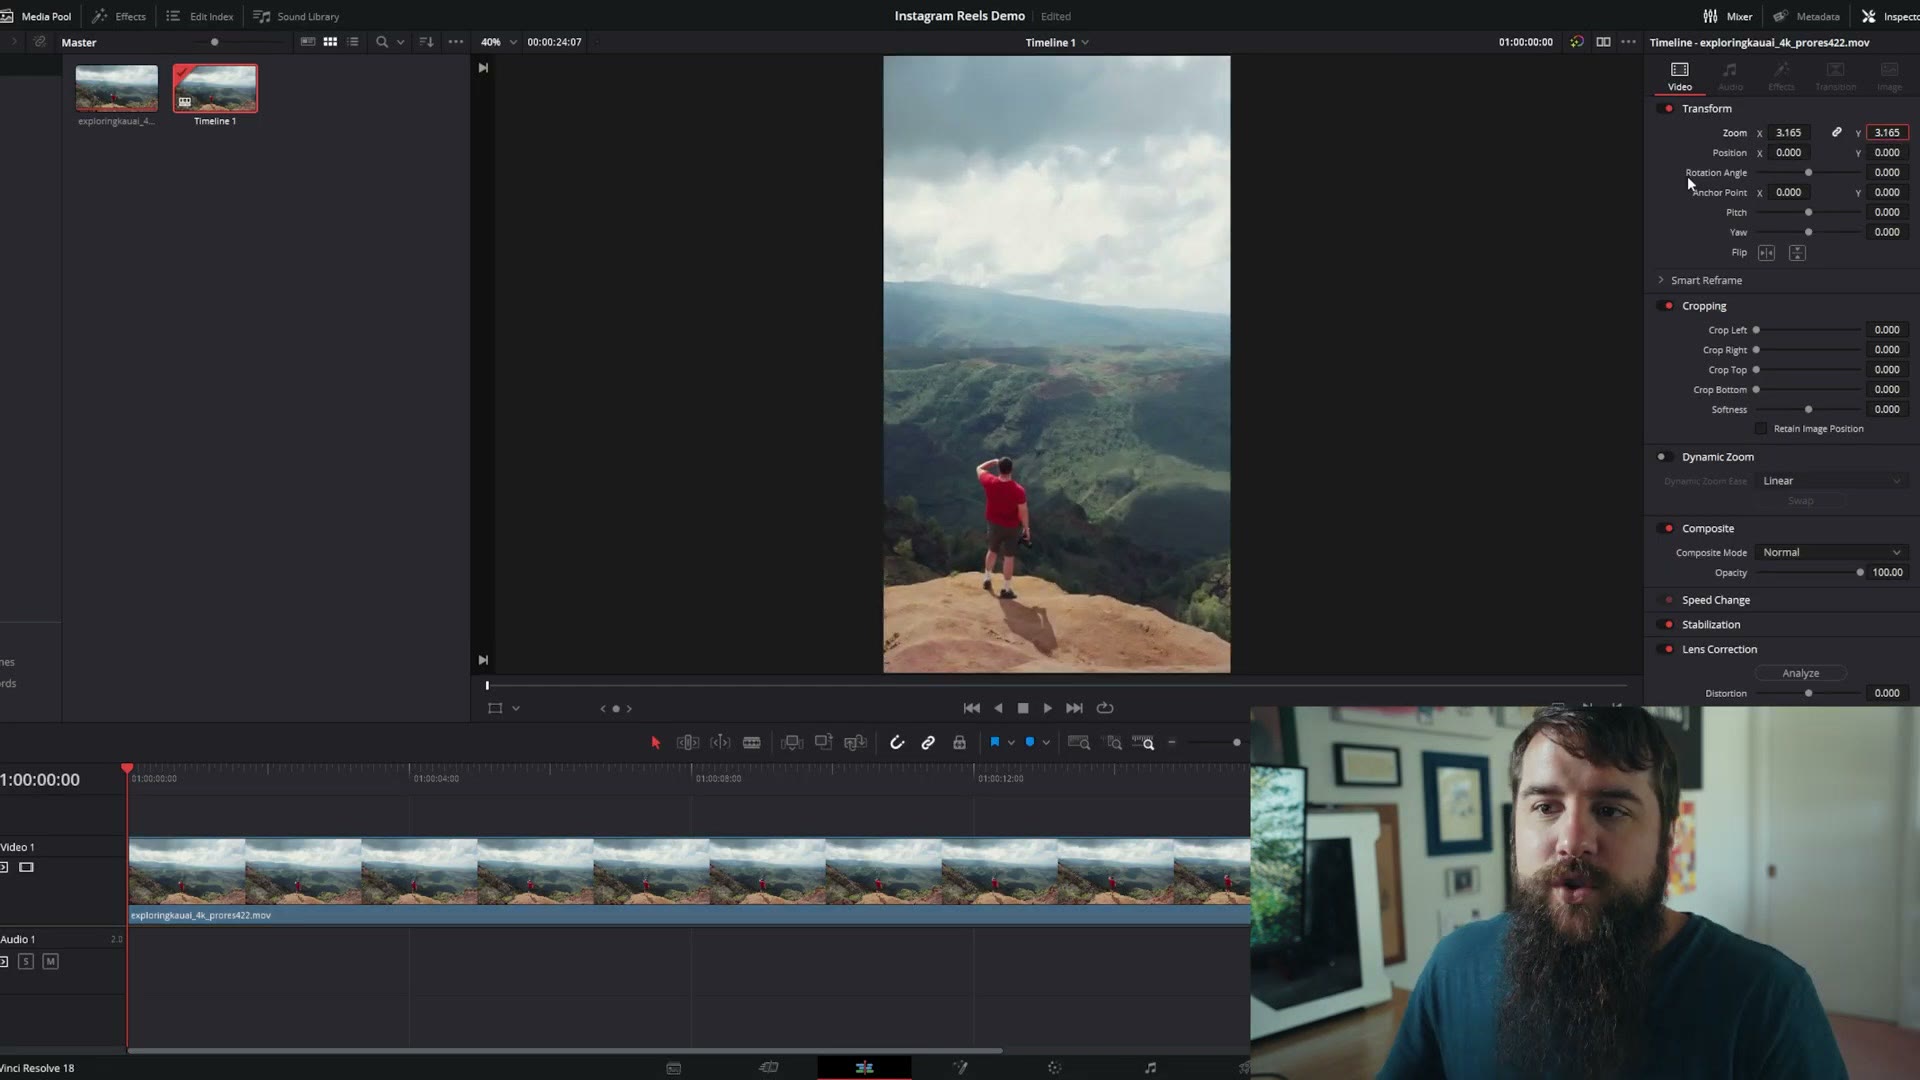
Select your clip, go up to the Inspector in the top right, and under Zoom start clicking and dragging the Y value to the right. That makes the image bigger. Once you get to somewhere around 3.165 it is going to fill the entire vertical frame with nothing left over.
Then use the X Position slider right underneath it to slide the frame left and right until the important part of your shot is where you want it. That is your reframe. Done.
Option two: make DaVinci do it for you
If you have a lot of horizontal clips and the idea of hand scaling every single one of them sounds miserable, and it is miserable, there is a much better way. Press Control Z a few times to undo what you just did and put that clip back where it started.
Go up to your timeline in the top left of the Media Pool, right click on it, go to Timelines, then Timeline Settings. Uncheck the Use Project Settings box at the top, which unlocks everything underneath it.
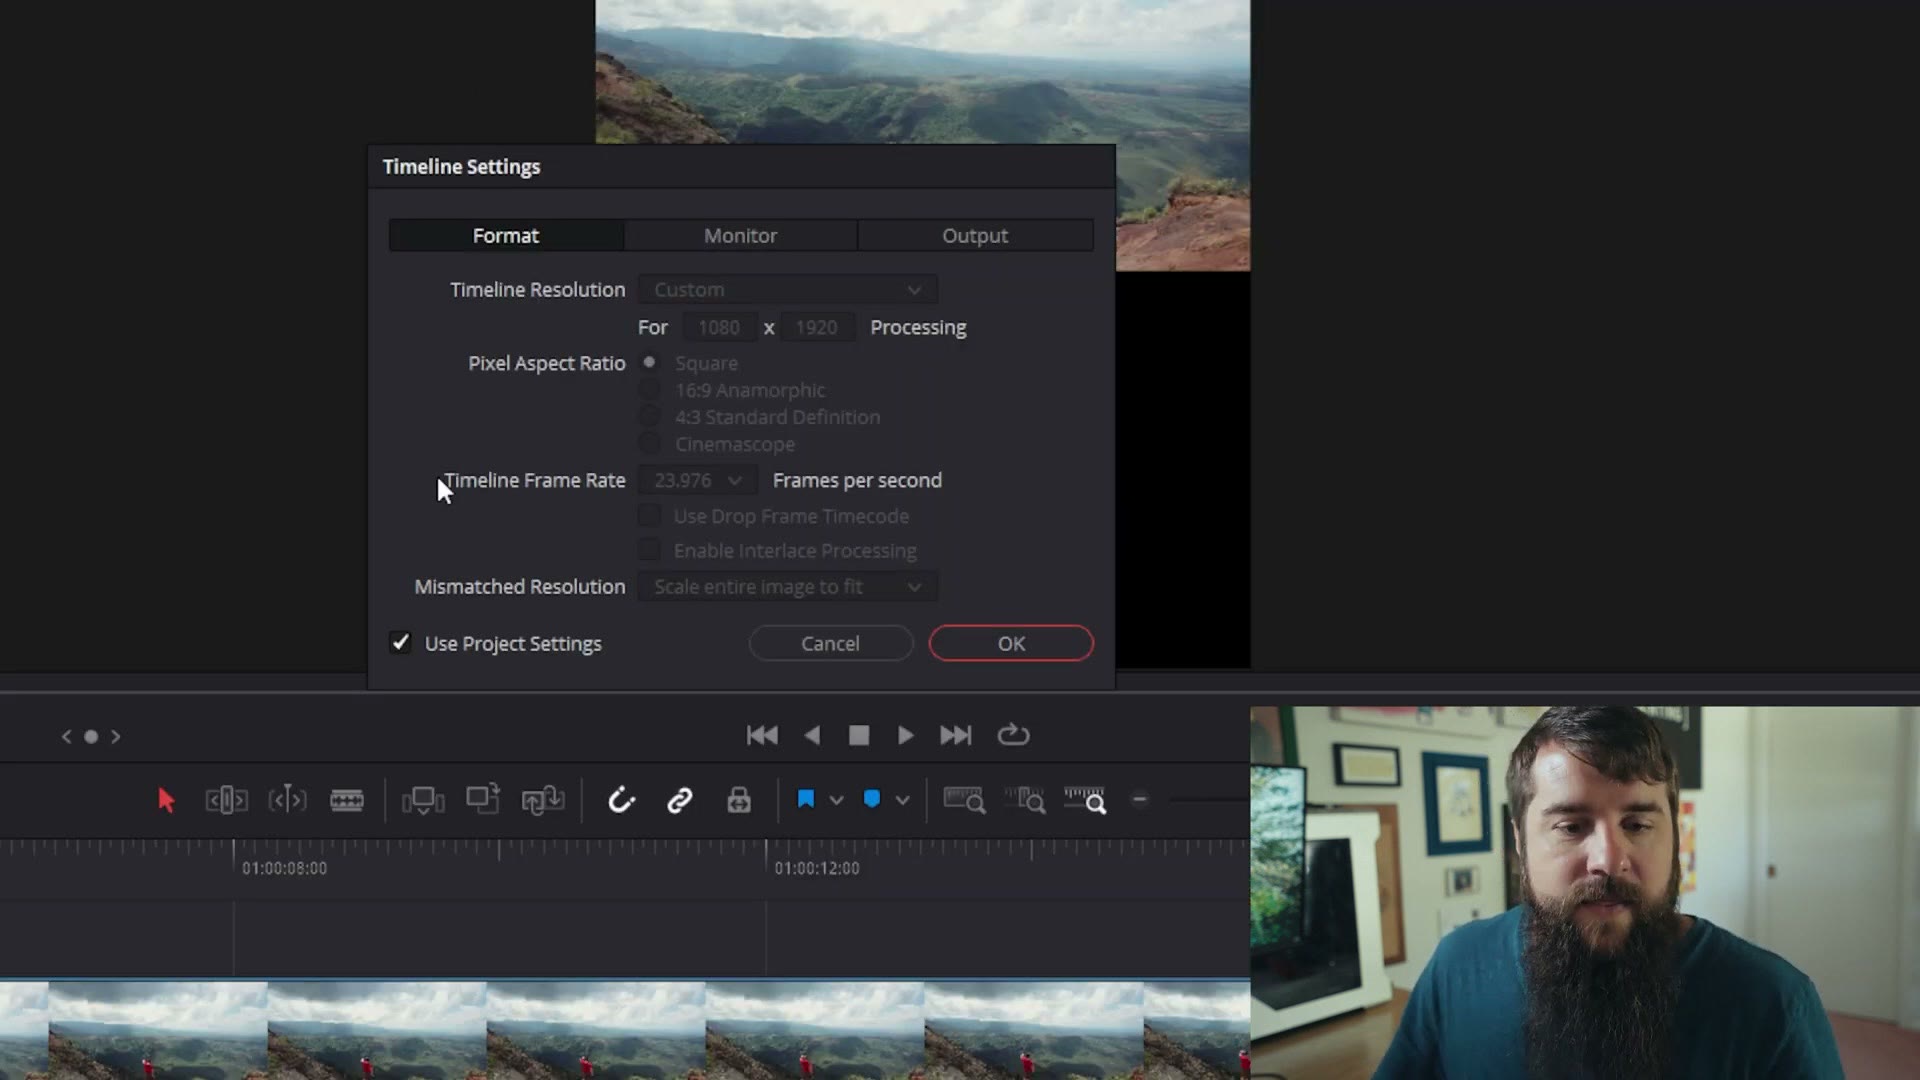
Under Mismatched Resolution, change it to Scale full frame with crop. Then click over to the Output tab and change the Mismatched Resolution there to Scale full frame with crop as well. Both of them. People do the first one, miss the second one, and then wonder why it did not work.
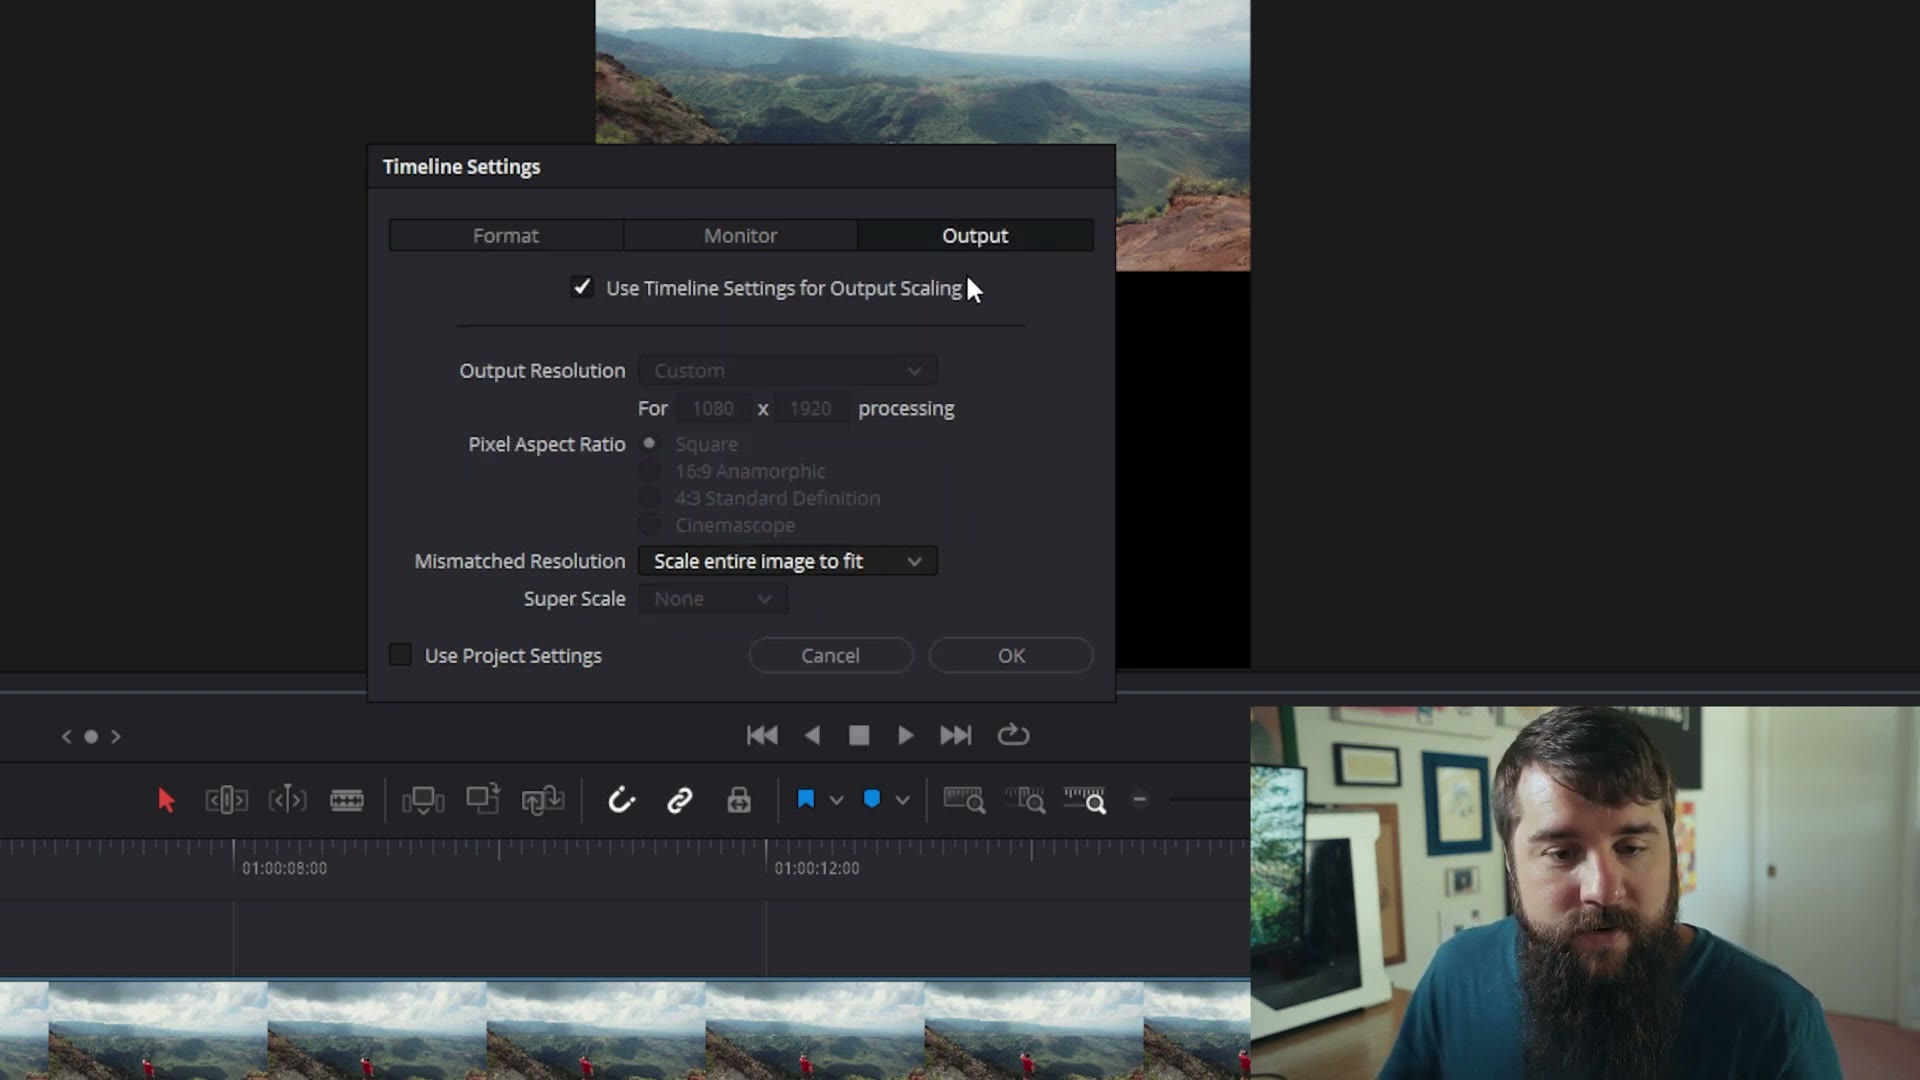
Press OK, and DaVinci is now going to automatically zoom every single horizontal clip on that timeline until it fills the frame completely. Every clip you drag in from here on out gets the same treatment.
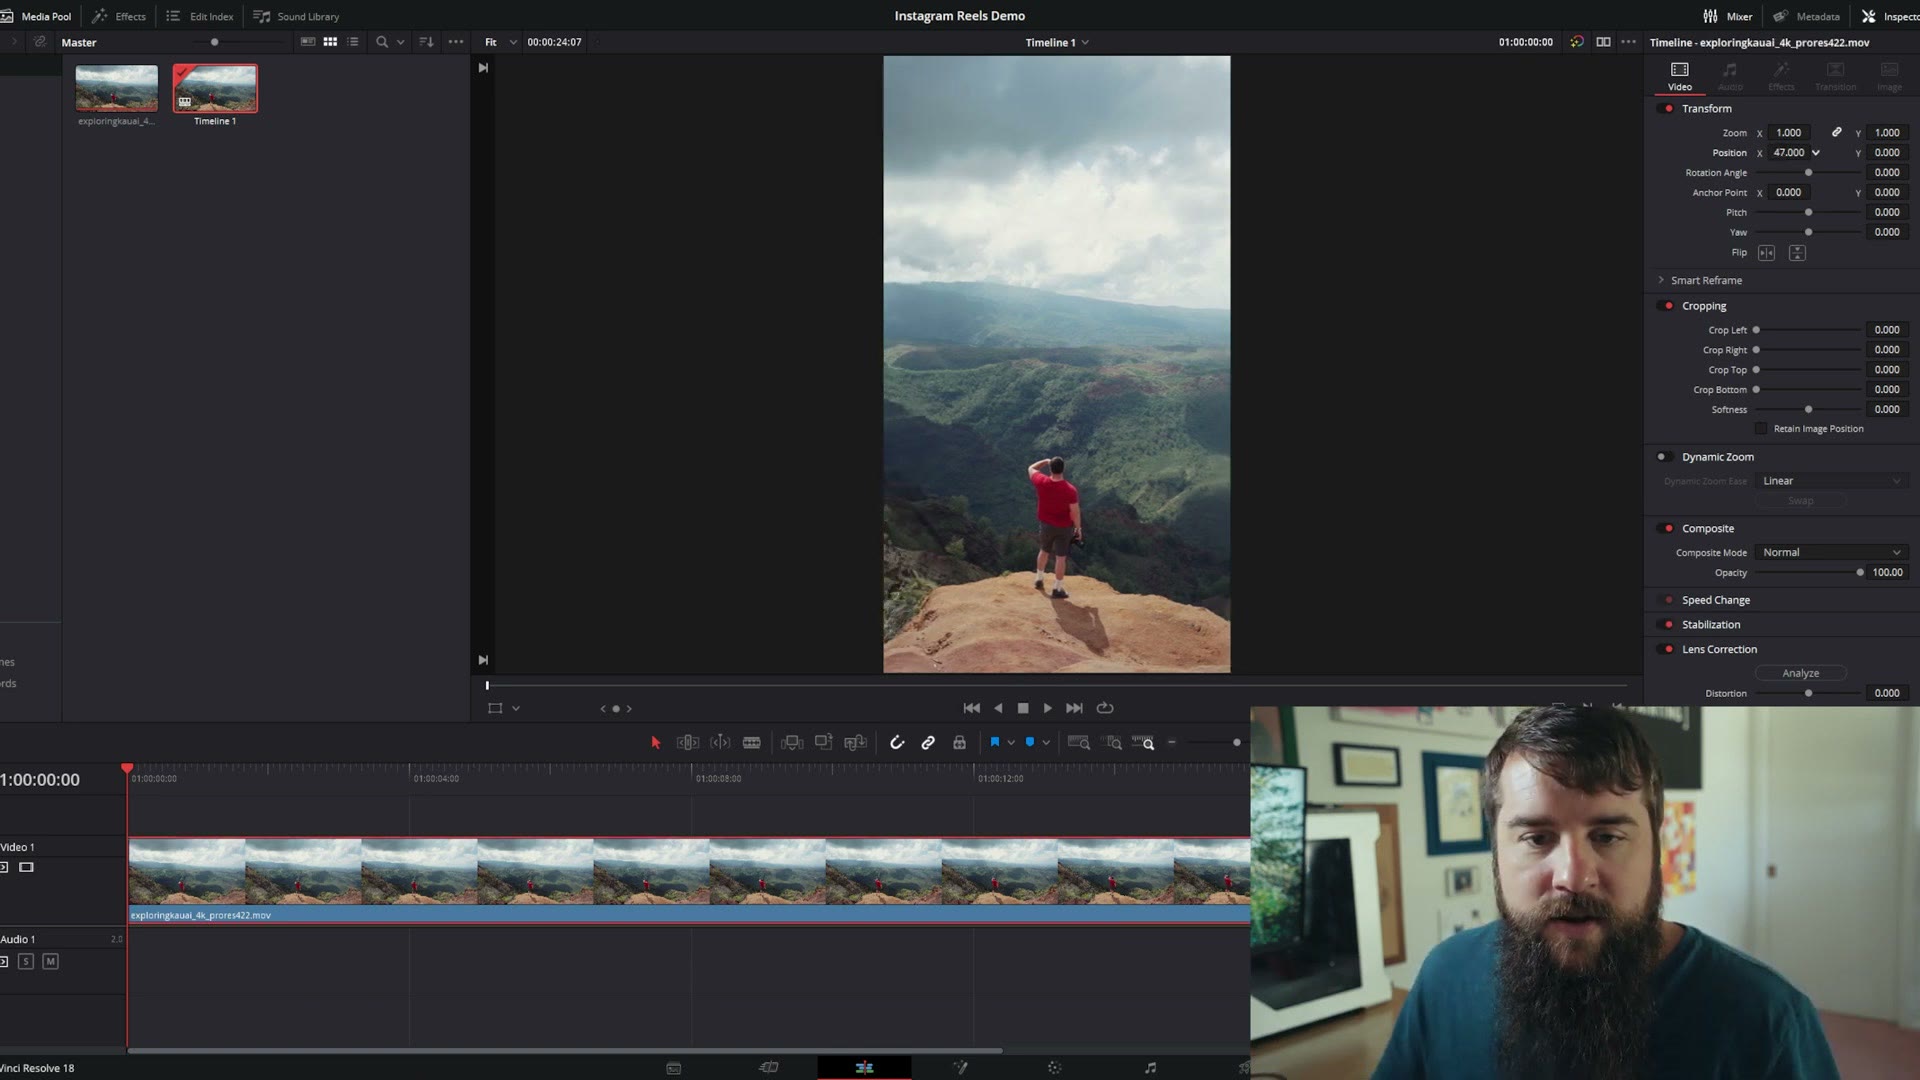
You can still select any individual clip and nudge the X Position over in the Inspector to reframe it, which you are probably going to want to do, because a straight center crop does not always land on the thing you actually filmed. But now you are reframing instead of scaling, and that is a much faster job.
Export Settings
Let’s say you are done editing and it is time to render. Click the rocket ship icon down at the bottom of the screen to get to the Deliver page.
Over on the left in your render settings, under File Name, name the thing. I called mine whoismattreel. Then for Location, click Browse and pick where you want the file to land. This is more important than it sounds, because if you do not pay attention here you are going to render a video and then have absolutely no idea where it went, and you definitely do not want that.
Editing in something else? I covered How To Edit & Export High Quality Instagram Reels in Adobe Premiere Pro too.
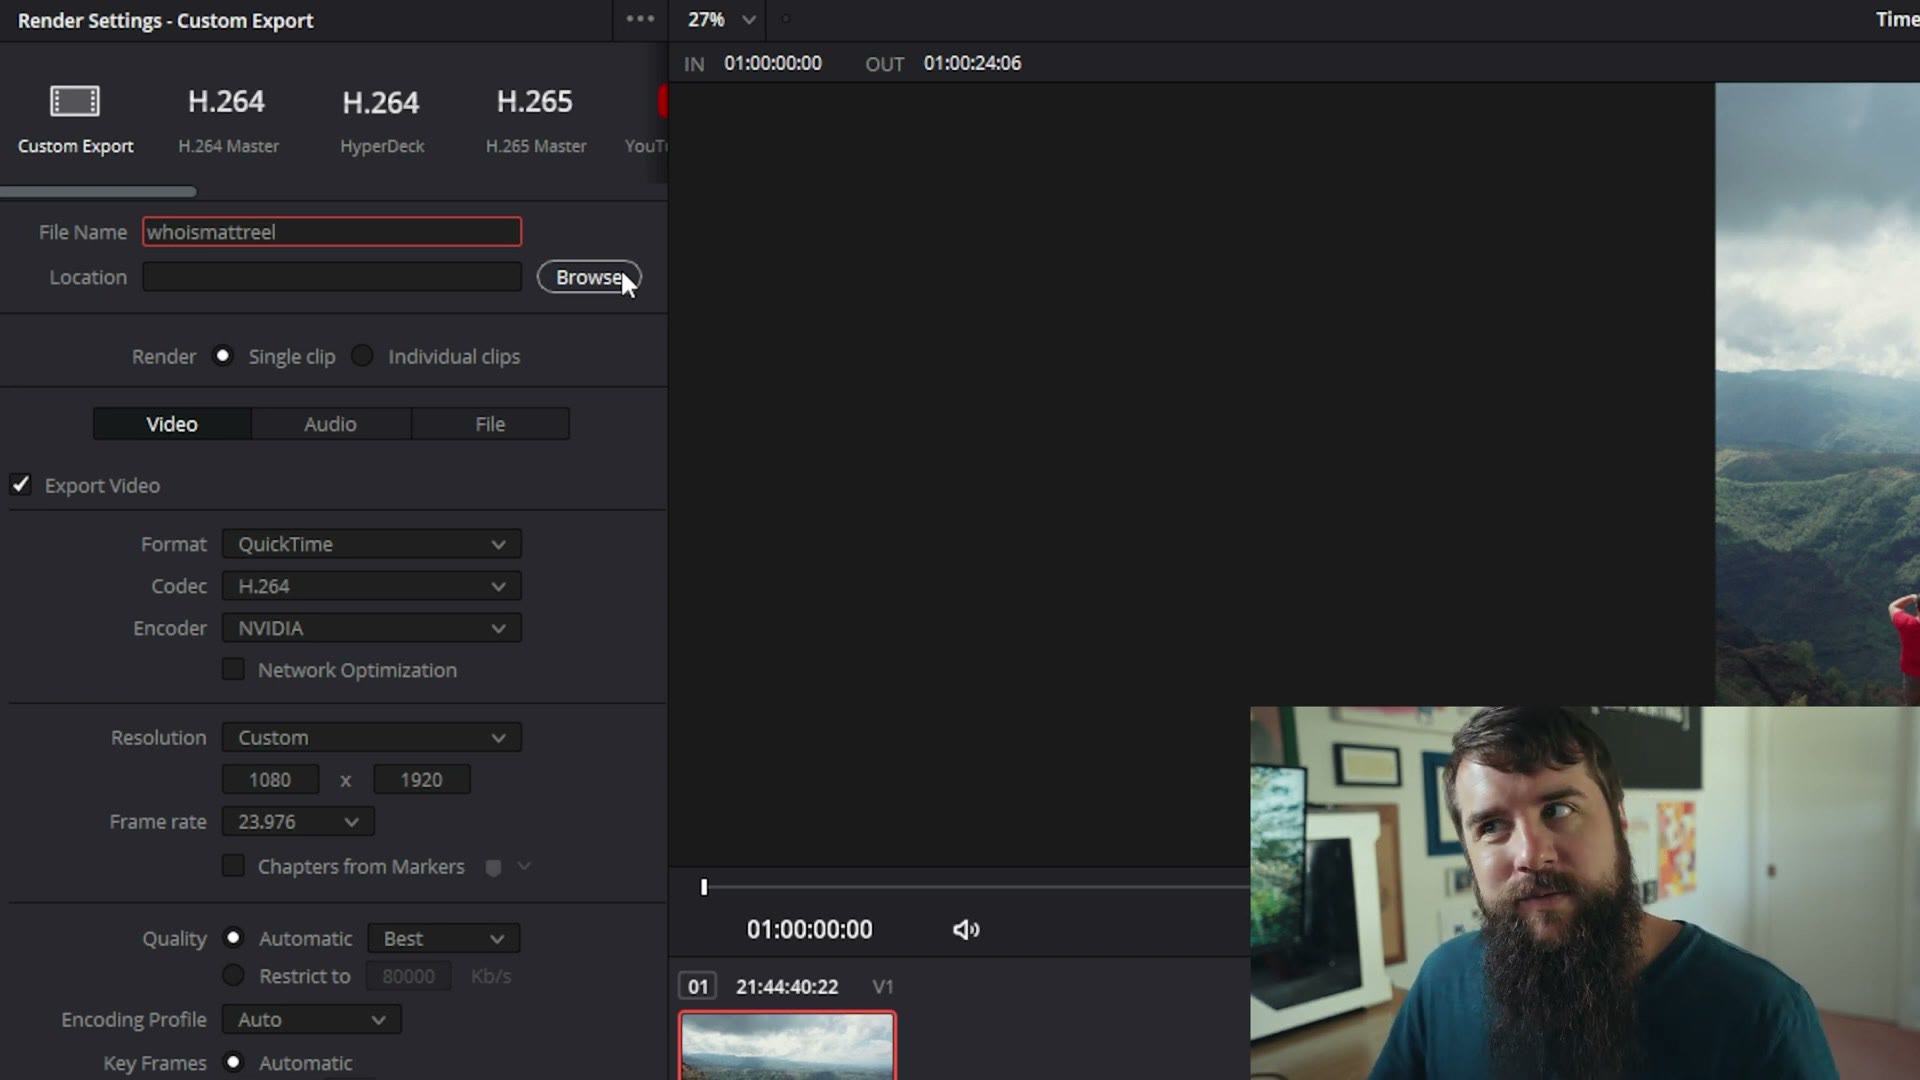
For Format select QuickTime, and for Codec select H.264.
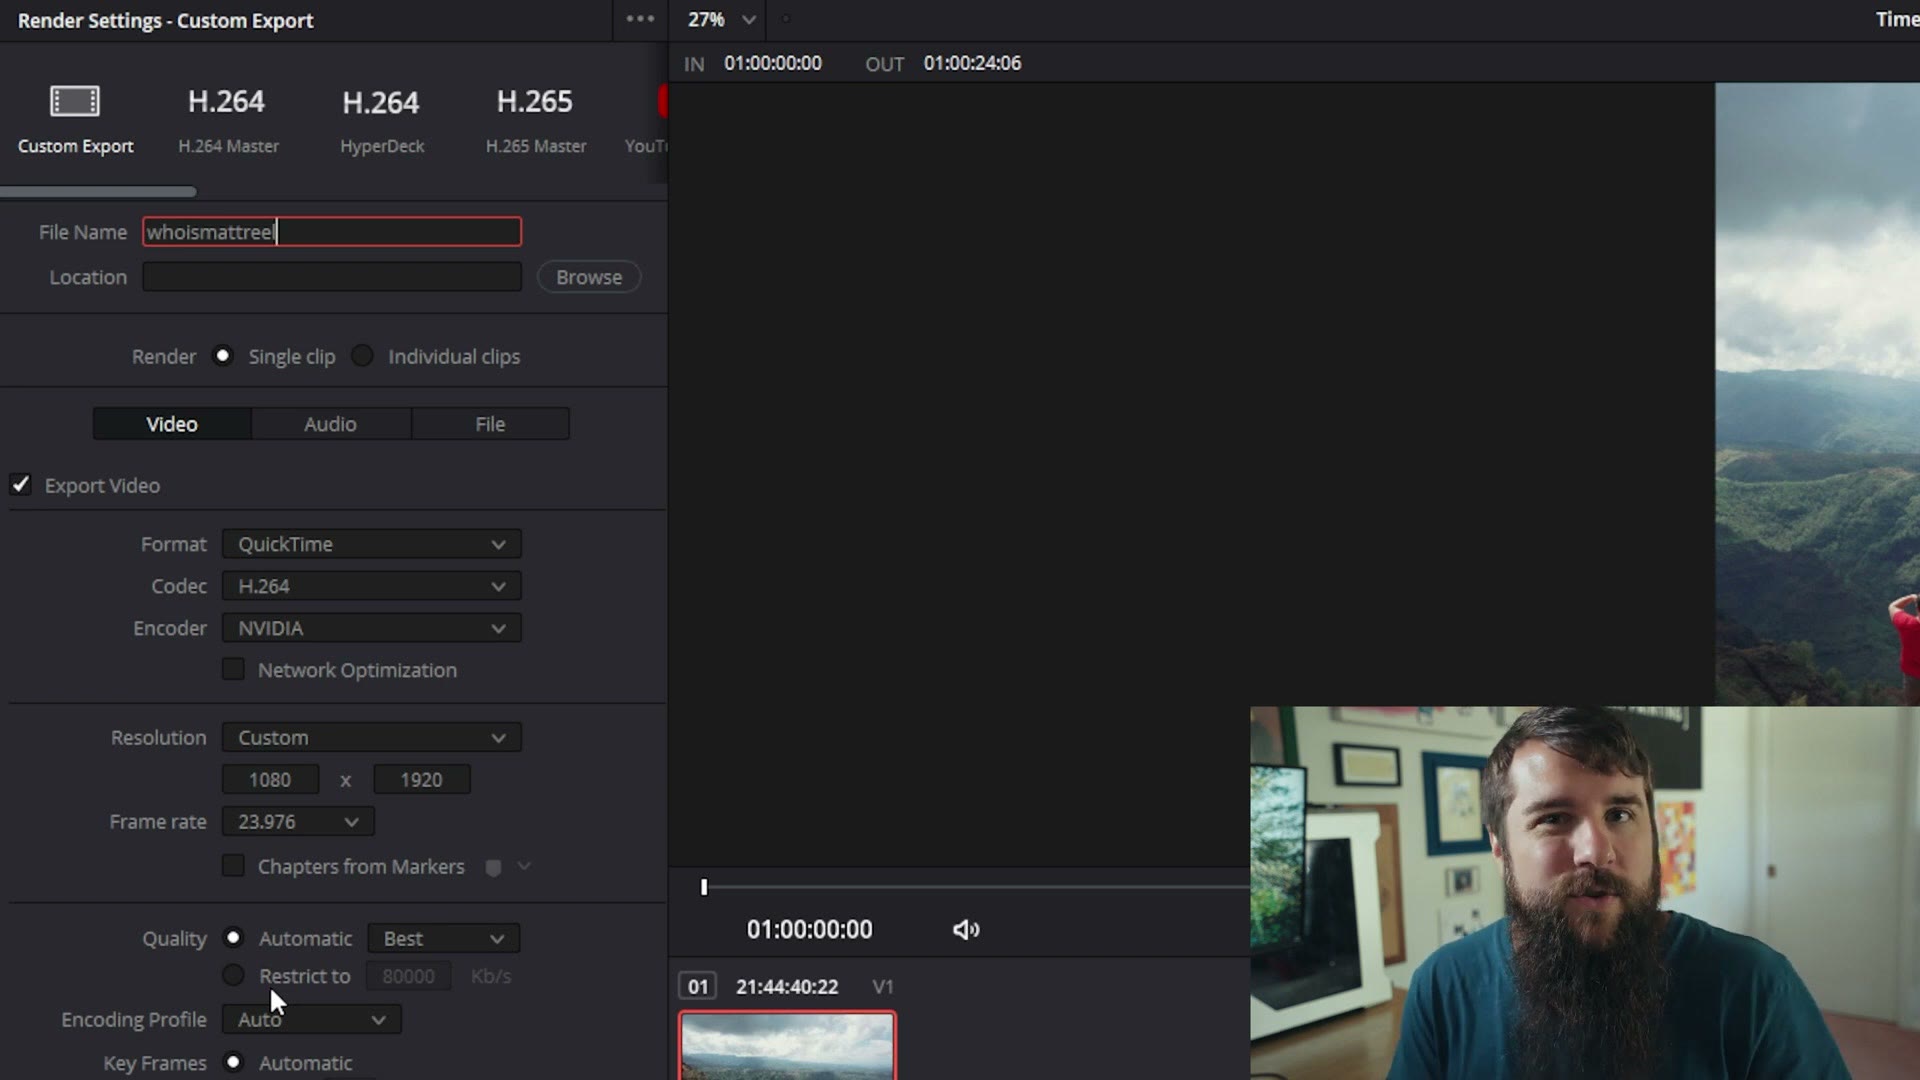
Now we get to the settings that actually matter. Under Resolution, make sure it says 1080 x 1920, so your rendered file matches your timeline and comes out vertical like it is supposed to. And for Frame rate, select 23.976, or again, whatever you filmed in.
The quality setting nobody talks about
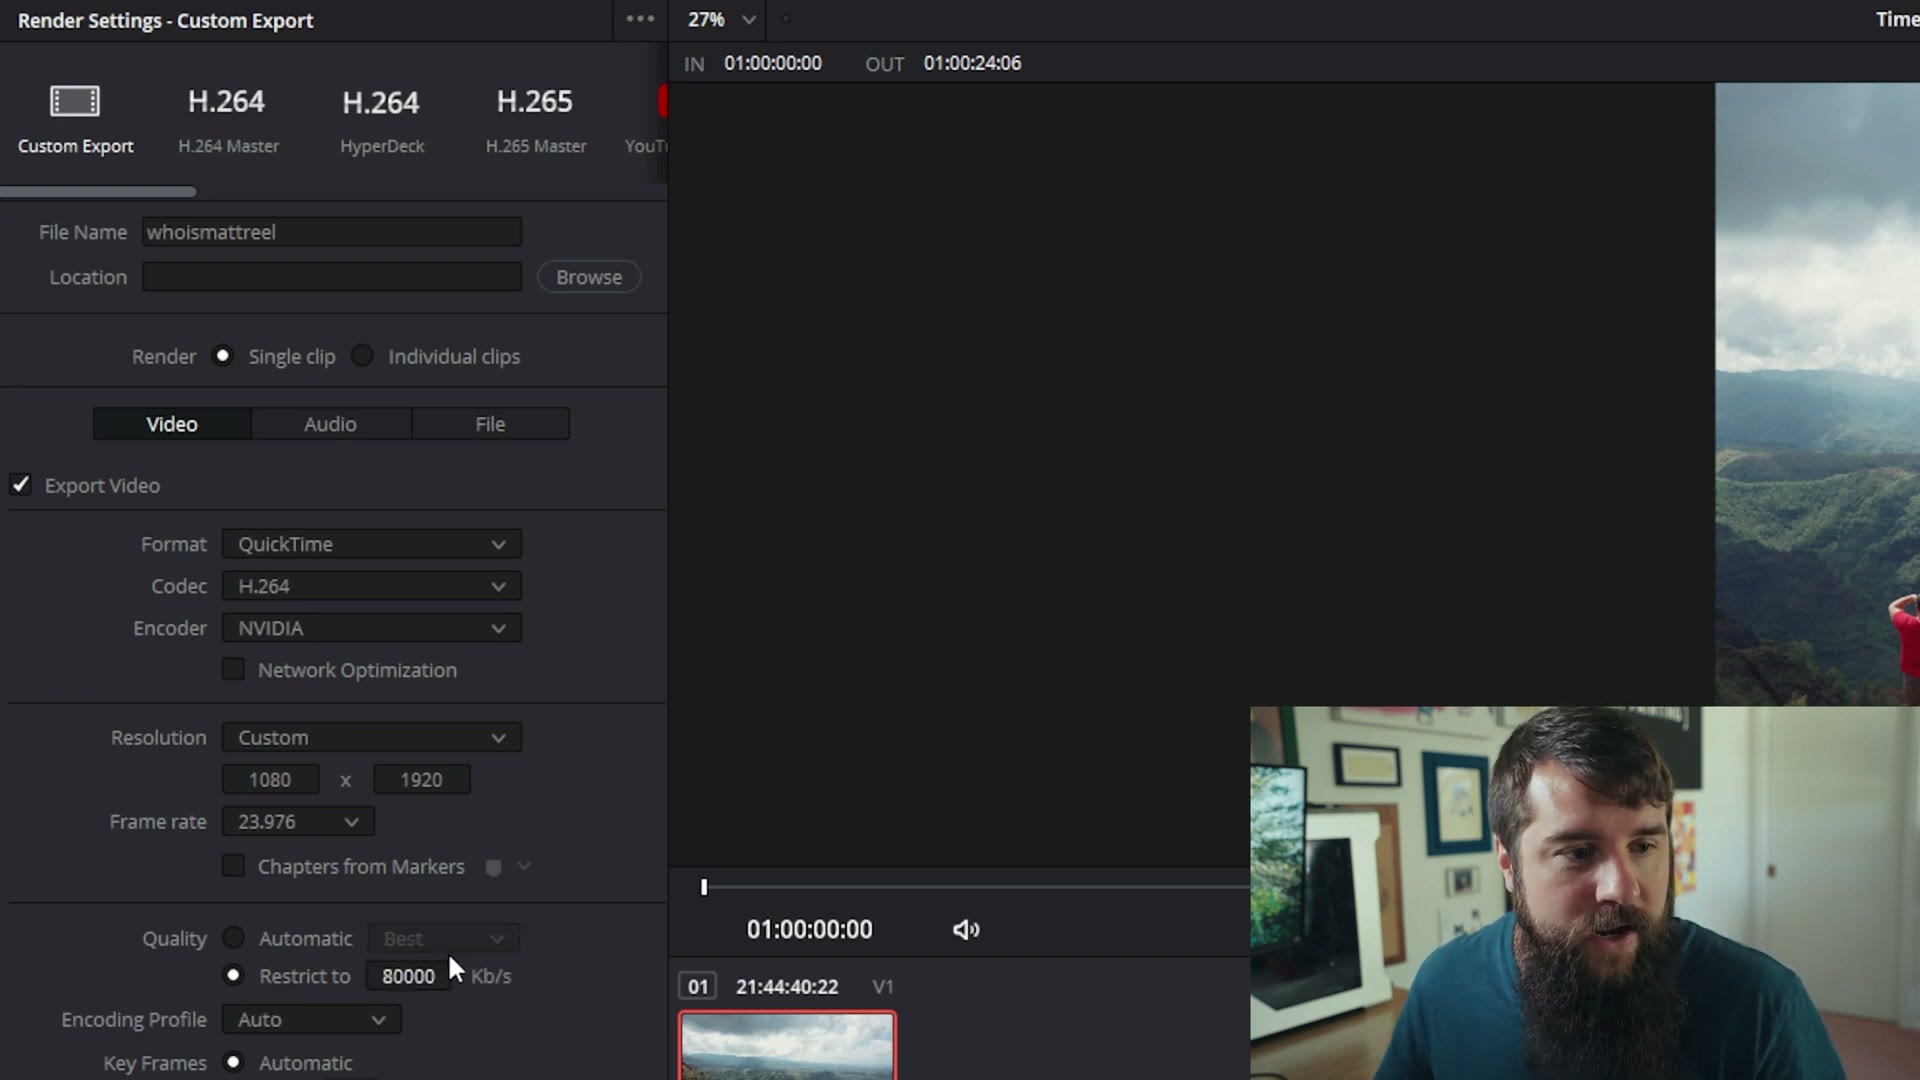
This is the one. By default, Quality is set to Automatic and it picks Best, and Best sounds like the right answer, right? It is not, and here is why.
Instagram does not process a Reel very much before it publishes it. So whenever you hand it an enormous video file, Instagram can throw you an upload error, or take forever, or play your video back looking weird. A giant file is not buying you a better looking Reel, it is just buying you problems.
So instead of Automatic, select Restrict to, double click the number, and type in 3500 Kb/s. That is still plenty of data for a small 1080 vertical video that is going to be watched on a phone screen.
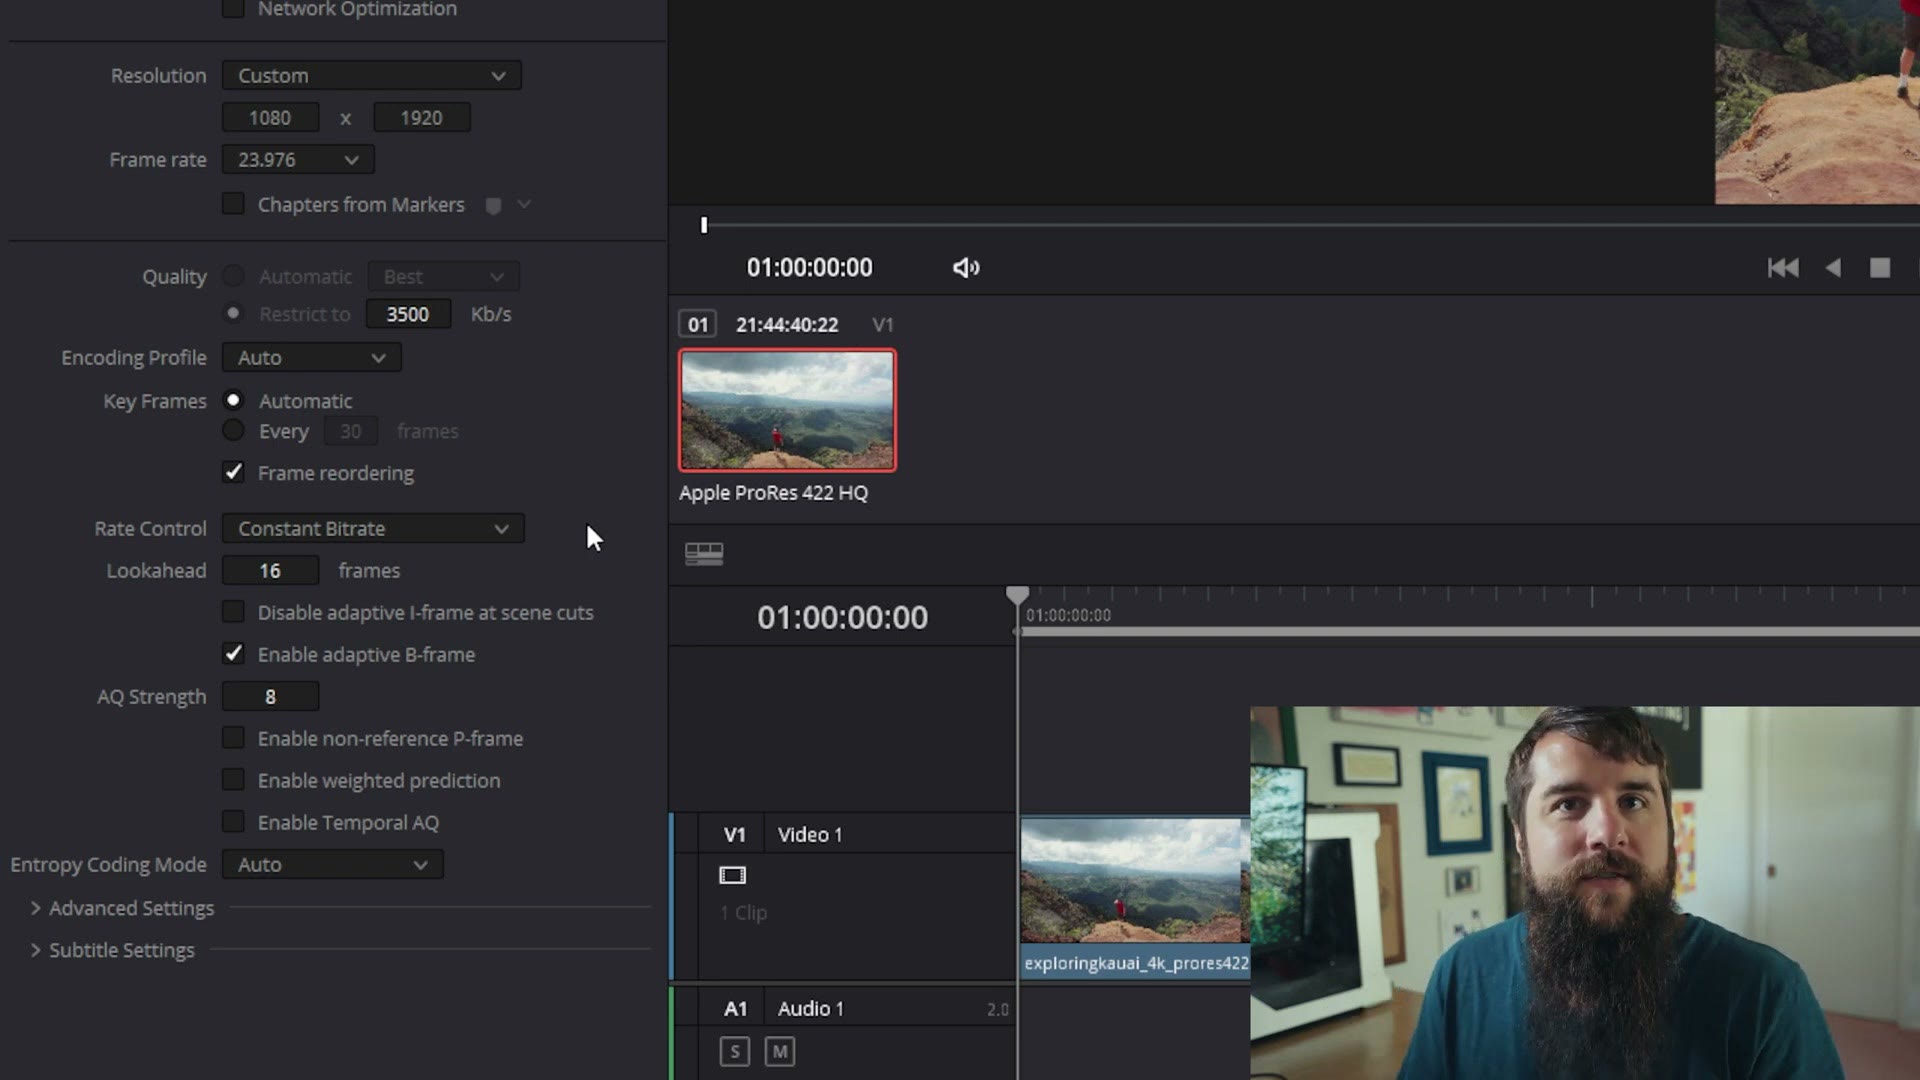
Then down under Rate Control, change it from VBR High Quality to Constant Bitrate. What that does is tell DaVinci to give every part of your video the full amount of data instead of rationing it out, which helps keep compression artifacts from showing up in your busier shots.
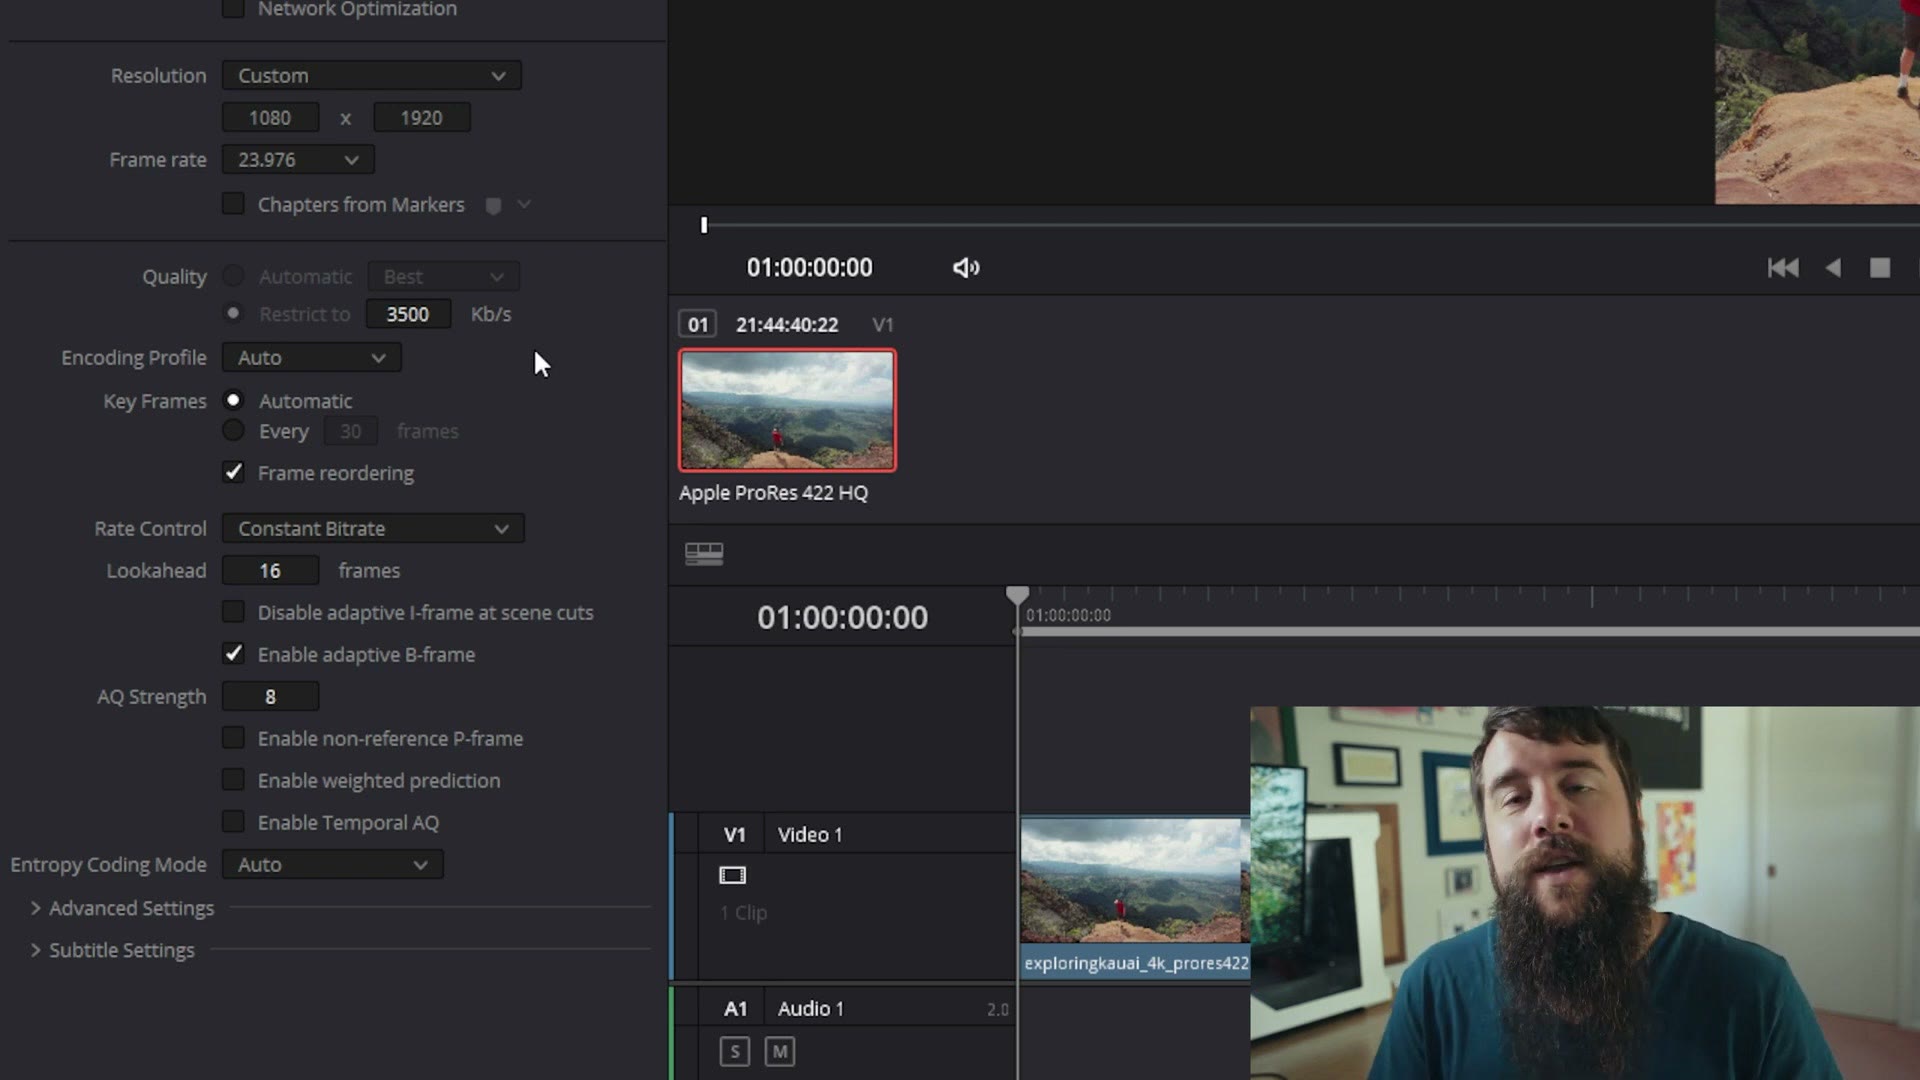
Worst case scenario, you export, you watch it back, and you are still seeing some blockiness you do not like. In that case go ahead and raise that 3500 number up to 5000, or even 10,000. Just keep in mind your file size goes up right along with it, and a bigger file is the exact thing that causes upload issues with Instagram in the first place. That is why 3500 is my default.
Render it
Click Add to Render Queue down at the bottom of the settings panel.
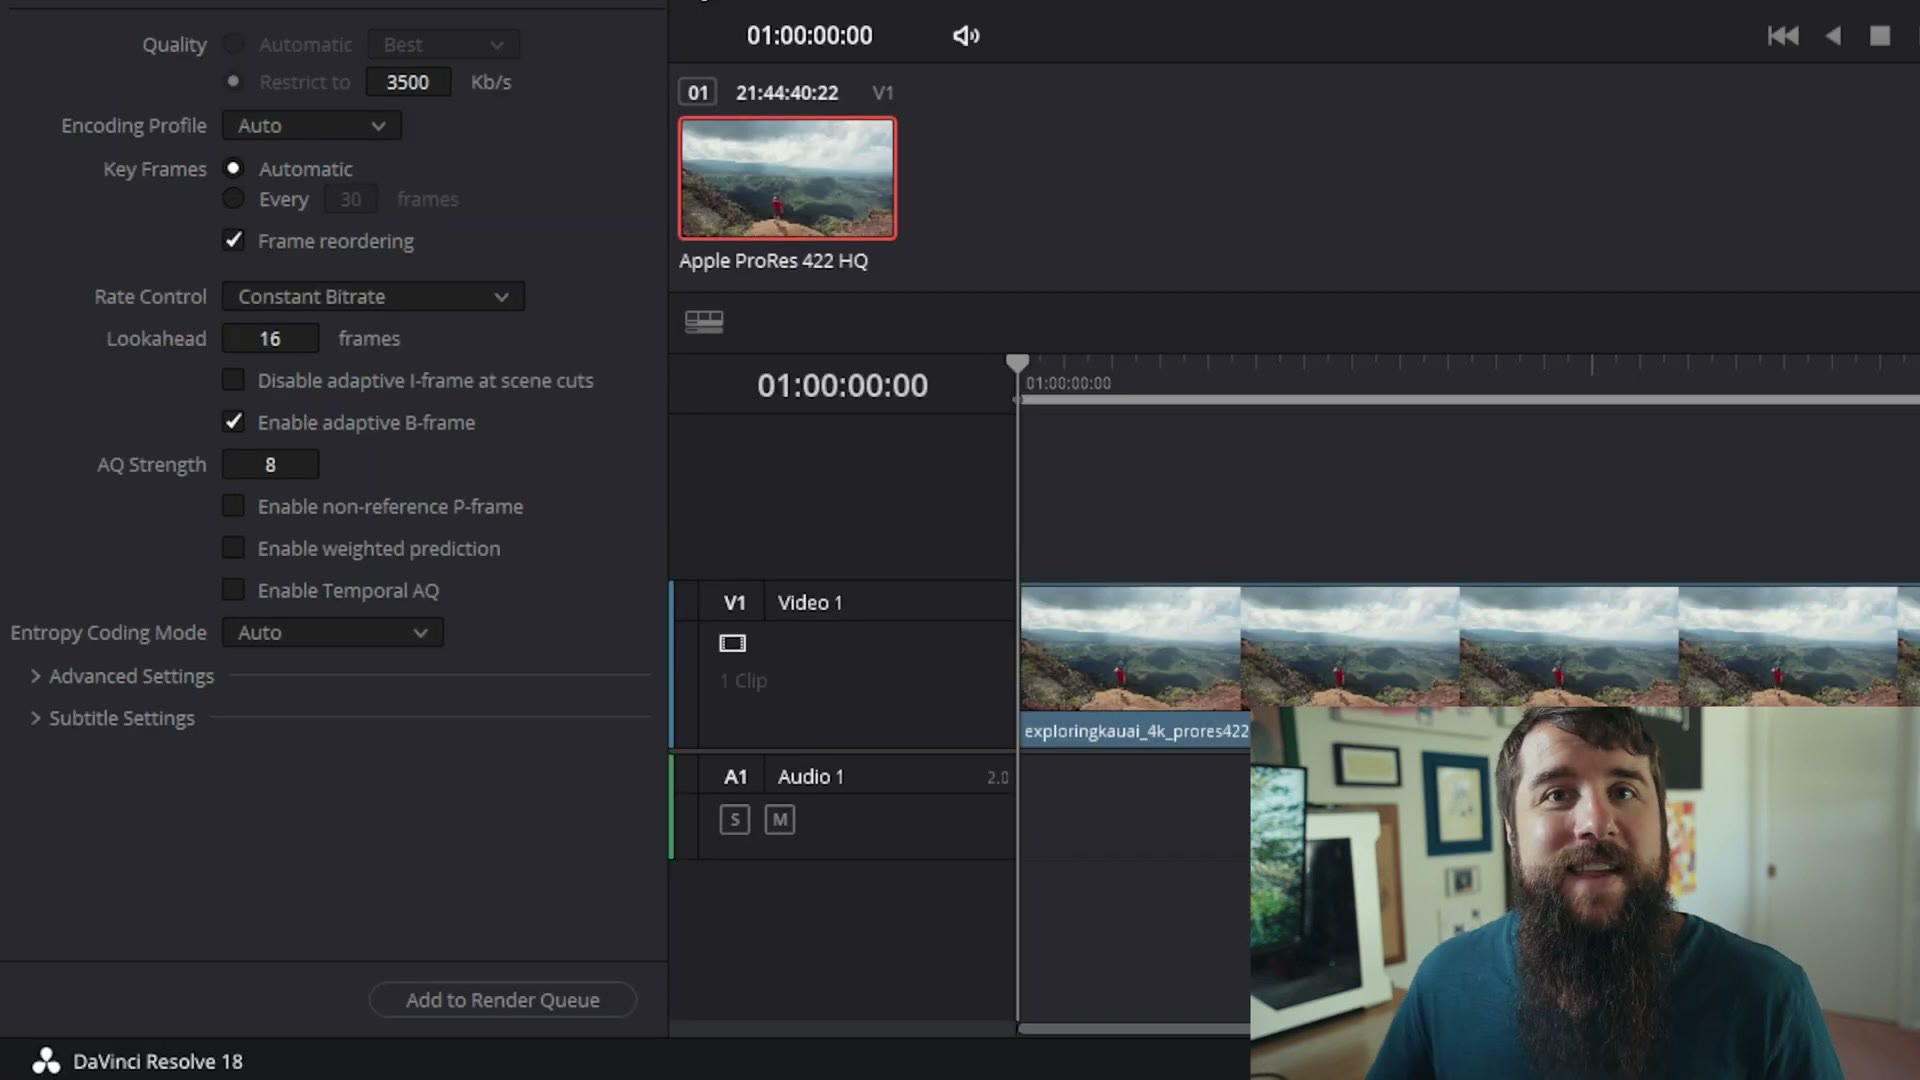
Then over on the right, click Render All.
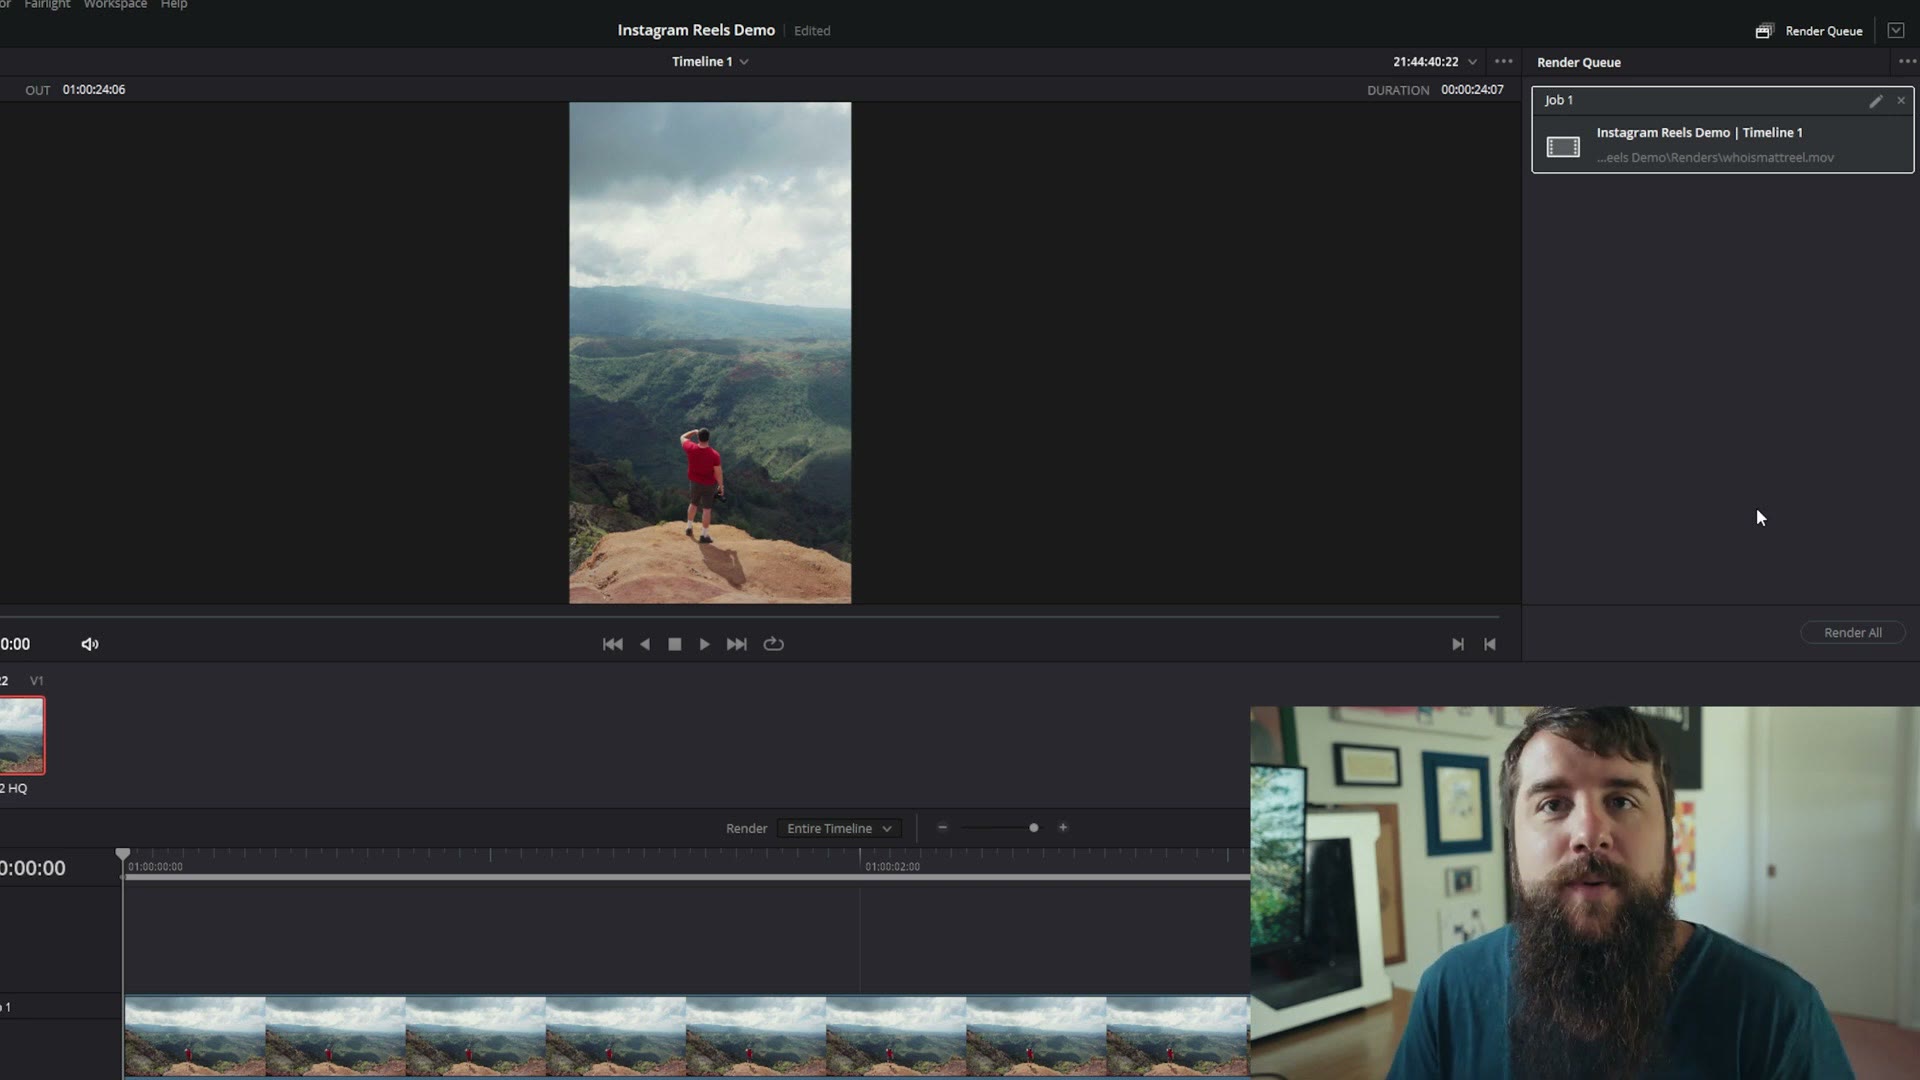
Within a few seconds or a few minutes, depending on how fast your computer is, you have an Instagram Reel sitting on your hard drive ready to go. From there it is a simple matter of using something like Dropbox or AirDrop to move the file from your computer over to your phone, and then you upload it like normal.
What DaVinci Videos Should I Make?
Full disclosure, this is the very first thing I have ever made about DaVinci Resolve, and I am planning on making a lot more of them and branching out into other editing software beyond what I normally use. So if there is something in Resolve that is currently making you want to throw your computer out a window, tell me. What videos do you want to see? How can I actually help you with this program? Leave me a comment and let me know.
A couple of Resolve tutorials that came right after this one, in case they are useful to you:
- How to edit and export high quality YouTube Shorts in DaVinci Resolve 18, which is the same idea as this one but with the settings YouTube wants instead of the ones Instagram wants.
- How to export 4K video in DaVinci Resolve 18 for YouTube, Facebook, Vimeo, and clients.
- And if you are on the other side of the fence, here is how to do Shorts in Adobe Premiere Pro.
One more thing. If you want somebody who lives and breathes this program way more than I do, go follow Casey Faris. He is the guy I point people to for Resolve.
And remember, you can still download the free Instagram Reels project template for DaVinci Resolve down here, which will get you editing Reels a whole lot faster than building all of this from scratch every time.
If you want to see the rest of the gear I use for this stuff, here is my full filmmaking kit, and if you want to go deeper than a single tutorial, my filmmaking courses are over here.
Thanks so much for reading, and have a great day!