How to make your audio sound INCREDIBLE in your wedding films using Adobe Premiere Pro

How to make your audio sound INCREDIBLE in your wedding films using Adobe Premiere Pro

💡 Wanna save time? Download my Multiband Compressor preset and use it on your audio files to make them instantly sound better.

This is how I edit audio in my wedding films. And whenever I say “edit audio,” I mean mixing, EQ, audio sweetening, all the terms people use to describe making your audio sound as good as possible as quickly as possible.

Two things get covered here. First, one audio effect you can apply to anything you recorded on the wedding day that will make it sound incredible. Second, how to mix a person speaking against the music you picked, so one isn’t too loud, the other isn’t too soft, and you can actually hear everything.

Quick note before we start: this was shot in Premiere Pro CC 2018, but nothing here depends on the version. It works the same in whatever Premiere you’re running today.

The Timeline We’re Starting From

Pretend the edit is done and we’re at the audio stage. Video track one is a clip of my friend Noah reading a letter to his bride. Audio track one is that letter, recorded off a Sennheiser G3 lav mic clipped to his lapel and running into a Zoom H5. Audio track two is the WAV file for the song. No effects have been applied to anything, this is straight off the recorder.

Full timeline view with a groom close-up in the preview monitor and Matt's talking head in a picture-in-picture corner

Played back with no mixing at all, you can barely tell what’s going on. Solo the voice track and it actually sounds pretty good on its own: quiet room, no air conditioner, no echo. But it can sound a lot better.

(That letter reading is from Noah and Mallorie’s wedding. If you want to see exactly how I mic’d him and set that shot up, that’s a whole behind-the-scenes video, and here is the finished film.)

Why Lav Audio Needs Help

I use lav mics all day at a wedding, and lavs have two specific weaknesses: bass reproduction and presence. Not Christmas presents under the tree. Presence, as in how close the speaker sounds to the mic. The whole point of a lav is that you’re hiding it, so it usually ends up down on somebody’s chest, out of the shot, which means the person you’re recording sounds far away from the microphone. That’s not what we want.

Whenever I was starting out, my answer to “make the audio sound better” was “make it louder, duh.” So I’d drag the track up three decibels and, honestly, it doesn’t sound much better. Volume is not quality. And on top of that, nobody who isn’t a trained voice actor keeps their voice at a consistent level. Look at the waveform: he takes a breath, gets louder, then trails off quieter and quieter. If you fix that by hand you’re keyframing louder, quieter, louder, quieter for the length of the film, and that is a major pain.

What we want is one effect that adds the bass, adds the clarity, adds the presence, and levels all of that out for us. Good news. There’s a plugin for that.

The Multiband Compressor

A compressor, through a lot of audio witchcraft, takes the quiet parts of your track (somebody nearly whispering) and brings them up, and takes the loud parts (somebody practically yelling into the mic) and brings them down. What you end up with is a track that’s never too loud and never too quiet and mixes in with everything else with very little effort on your part. It’s incredible.

Go to the Effects tab and search for Multiband Compressor. You’ll see one sitting under Obsolete Audio Effects, ignore that, we want the current one. Drag it onto your audio clip.
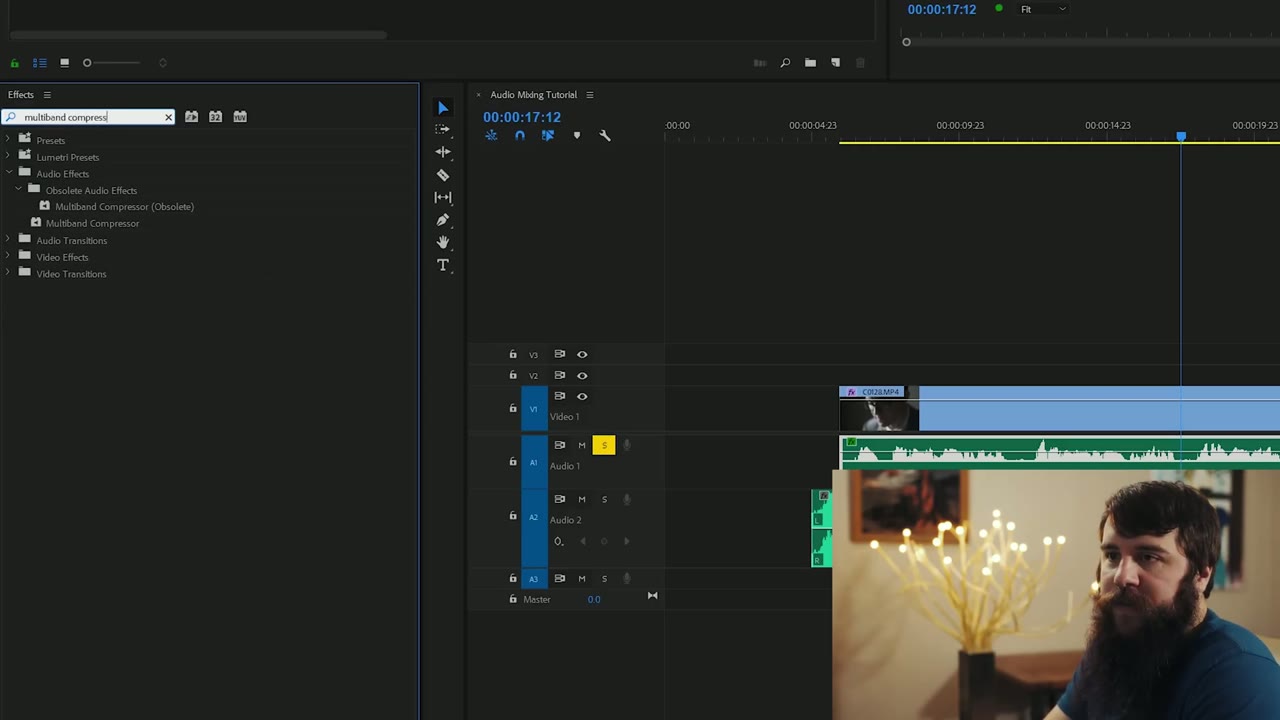
Effects panel search for multiband compressor showing the current effect above the obsolete version in the results list

Now go to Effect Controls, find the Multiband Compressor you just added, and click Edit. That opens the settings window, and my goodness, the first time you see it this thing is intimidating.
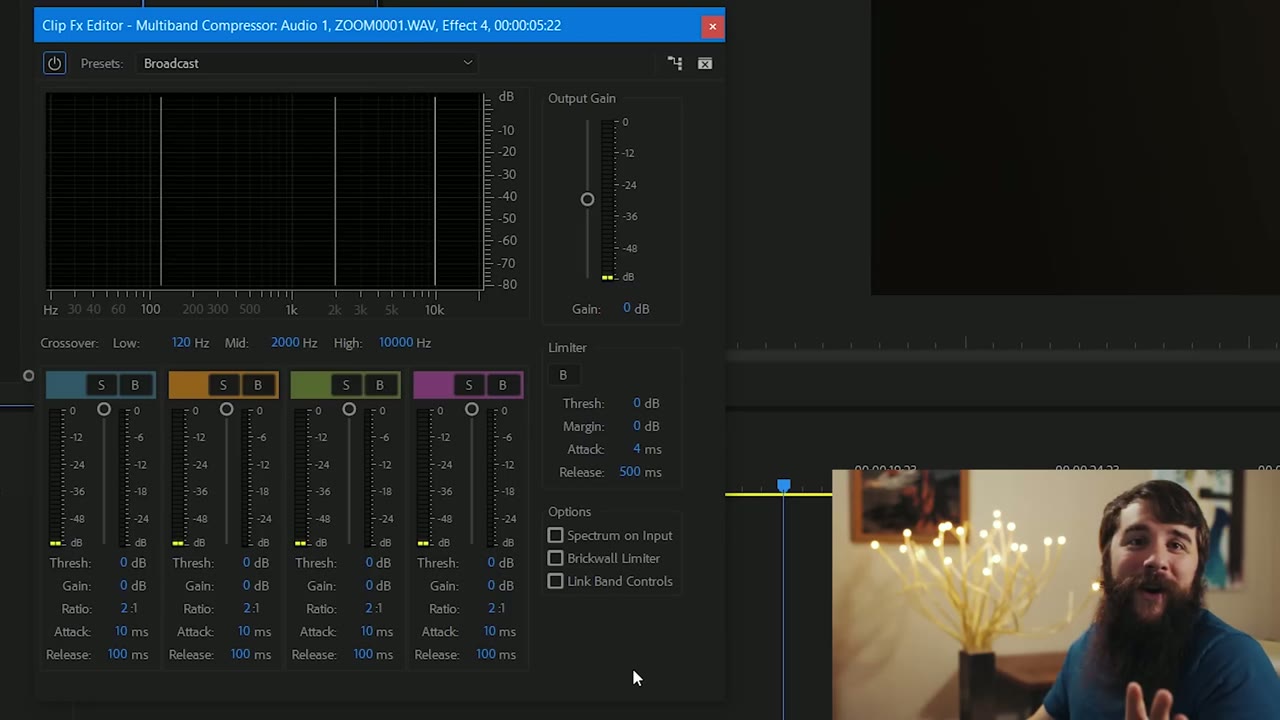
Multiband Compressor editor at default 0 dB band settings with crossover points set to 120 Hz, 2000 Hz, and 10000 Hz

Do not worry about it. You’re going to ignore 99% of what’s on that screen, because Adobe ships presets.

Pick The Broadcast Preset (The Weird Way)

Open the Presets dropdown at the top and you’ll see a pile of options. The one we want is Broadcast. But hold on, isn’t Broadcast already selected?
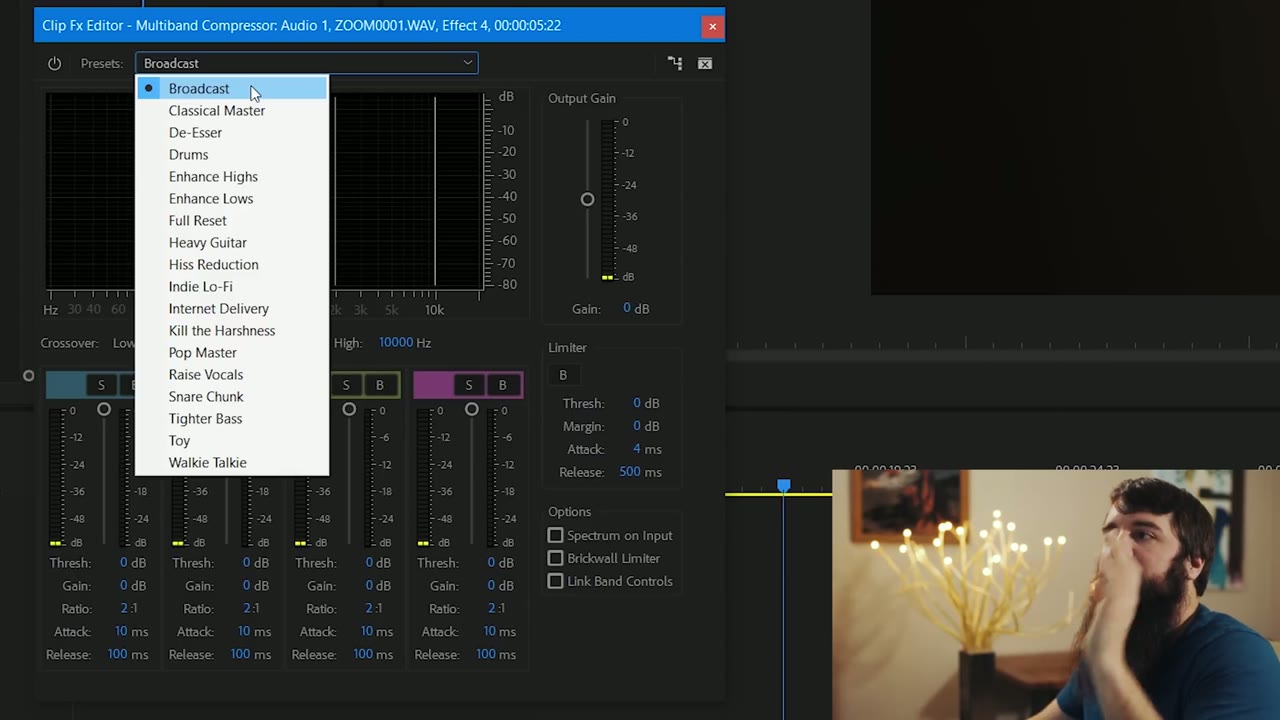
Multiband Compressor Presets dropdown open with Broadcast selected at the top of a list including Pop Master and De-Esser

Premiere is kind of weird here. Whenever you first open the Multiband Compressor it says Broadcast, but Broadcast is not actually applied, no settings are applied at all, it’s just showing you the name. So to genuinely turn it on, click any other random preset first (I use Drums), watch a bunch of settings change, then go back up and select Broadcast. Now it’s real.

Change Attack And Release

Two changes to the Broadcast preset and you’re done. Set Attack to 1 millisecond and Release to 250 milliseconds.
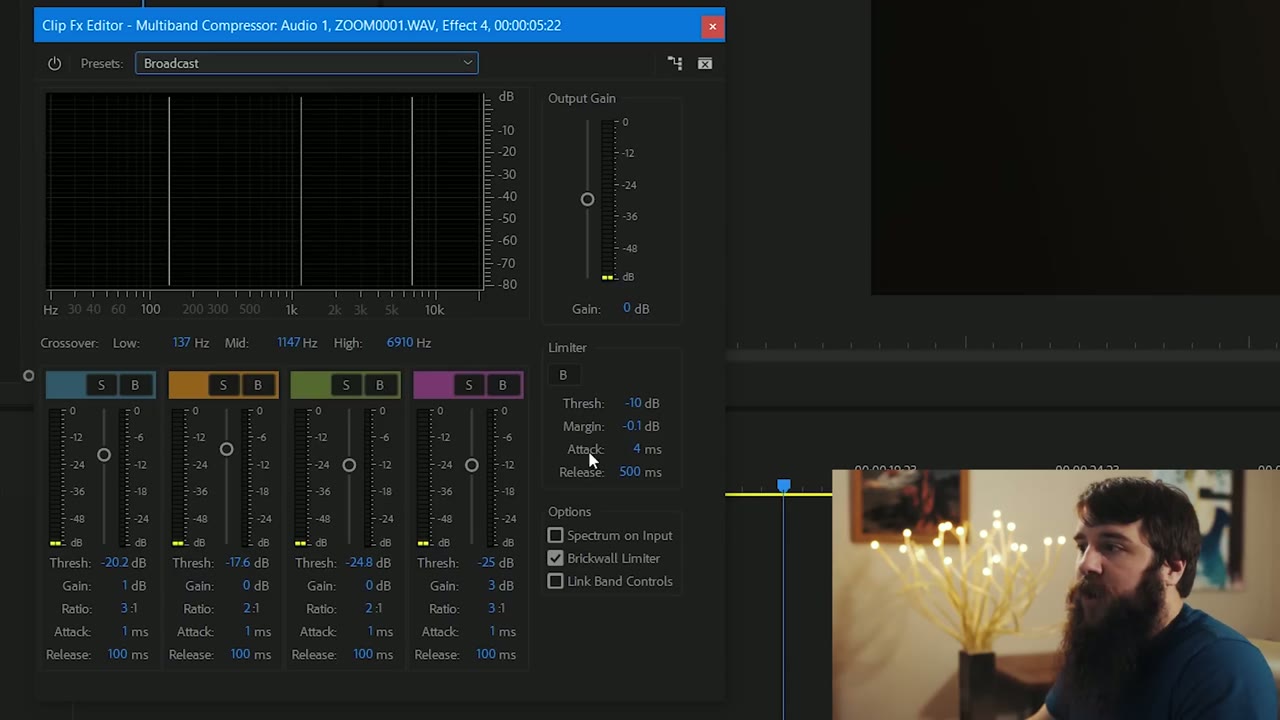
Multiband Compressor editor with the Broadcast preset applied, Limiter Threshold at -10 dB and Release at 500 ms

Are we attacking something? Technically, yes. A compressor is constantly analyzing your audio as it plays and adjusting the level on the fly, and attack and release control how fast it reacts. Attack is how quickly it notices the volume changed and starts doing something about it, which we want basically instant for someone speaking, because a person’s voice jumps around much faster than a song does. Release is what happens after the compressor has done its thing, and there we want a smoother roll-off, just quicker than the default. One millisecond and 250 milliseconds.

That’s it. Those are the only two adjustments you need to make. Your audio is ready to go.

Save It As A Preset So You Never Do This Again

Close the settings window, right click the Multiband Compressor in Effect Controls, and hit Save Preset. Name it something cool. I named mine Matt Multiband Compressor, and you’re welcome to use my name too, it’s cool.
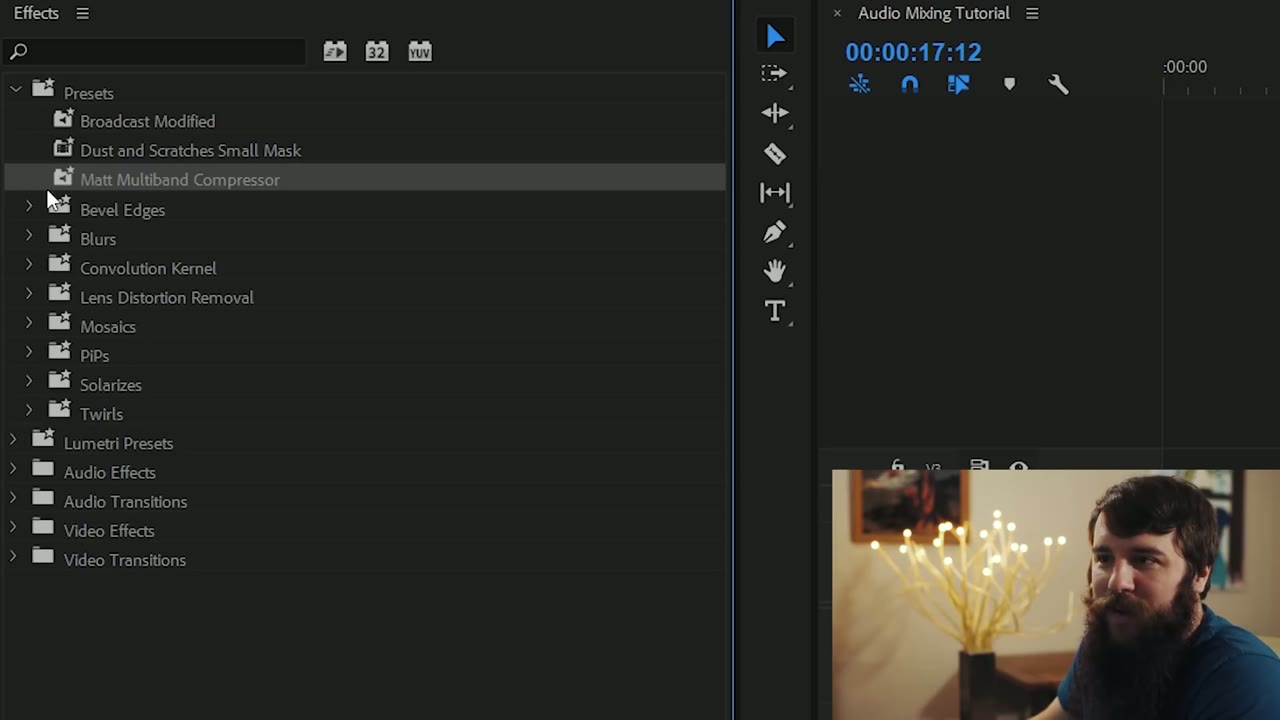
Effects panel Presets list with Matt Multiband Compressor highlighted below Broadcast Modified and Dust and Scratches Small Mask

It now lives under Presets in the Effects tab, and from here on out it’s a single drag onto any clip.

And if you don’t want to go through even those two whole steps, oh my gosh, I know, I’ve made my preset available as a download so you can just grab mine. There is one hoop, which is signing up for my email newsletter. Yes, give me your email. I promise I won’t spam you, I’ll send you camera news and other video news I find interesting.

Toggle the compressor off and back on and listen to the difference. You can hear the extra bass, you can hear the extra presence. It sounds so much better.

I put together Adobe Enhance Speech EXPLAINED – Make Audio Sound Incredible In 1 Click In Premiere Pro as well, which covers the part I skipped over here.

What Volume Should You Actually Hit?

Now check your meters, because after the compressor that voice is close to peaking.

Premiere Pro timeline zoomed into dialogue and music waveforms with the audio meter panel running along the right edge

You have two ways to bring it down: drag the audio level down on the timeline, or go back into the Multiband Compressor and lower Output Gain (I pulled mine to negative 4). I’d think doing it inside the compressor, where all the processing is happening, would be better, but I have honestly never been able to hear a difference, so I just use the level on the timeline.

As for what number to aim at, if you Google this you’ll get about a billion answers and they’ll all disagree, and most of them are talking about broadcast standards. You gotta hit this level, you gotta hit that level, don’t be blowing out grandma’s TV from 1965. In my experience most of that advice is irrelevant for what we’re making, because people are watching on a computer, or on YouTube or Vimeo or Facebook, or, worse, on a phone. All that careful mixing for television speakers goes out the window when it lands on a six-inch screen with a mono speaker.

So to be clear: if you’re making a TV commercial or anything for broadcast, call your contact and ask what levels they need. If you’re making wedding films and YouTube videos, here’s what I use.

Voice: Target Negative 3 dB

Everything I record on a wedding day, letter reading, ceremony, speeches, toasts, I want hitting negative 3 dB after the compressor is applied. I know, that’s loud, that’s really close to peaking. But once you account for people watching on a phone or a small speaker, that’s where it sounds best without them having to touch their volume at all. Setting this particular track to negative 4 gets me averaging around negative 3 on the meters.
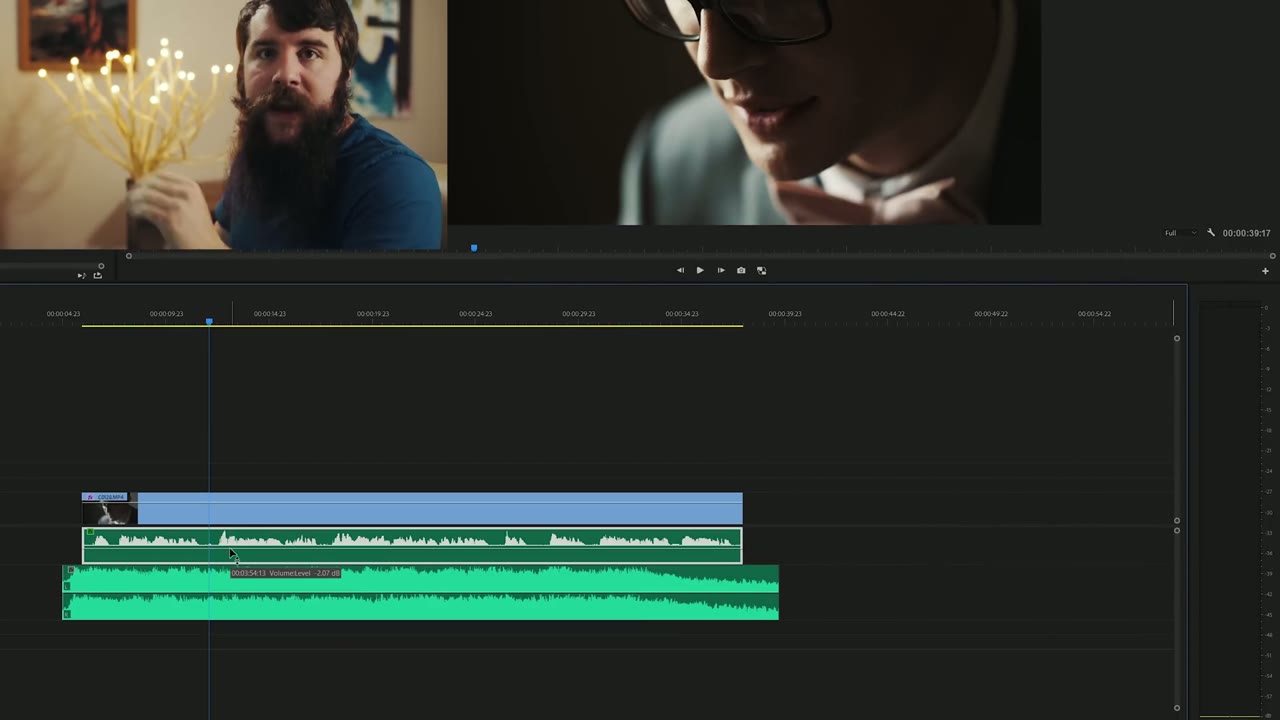
Split preview of Matt talking and a groom close-up above a timeline with dialogue and music tracks stacked

Music: About 10 dB Below The Voice

Music is a different beast entirely, because every song has different instruments and different levels, so there’s no single number to chase. What I use is a rule of thumb instead: for quieter, ambient music, a solo guitar, a piano, soft strings, nothing building to a big moment, I target roughly 10 dB below the voice track. If the speaking is at negative 4, the music goes somewhere around negative 14.

The song in this edit isn’t a quiet one. It has multiple instruments and it builds, so it needs to come down further than that. I dragged it to about negative 17 and played both tracks together, and that got it pretty close.
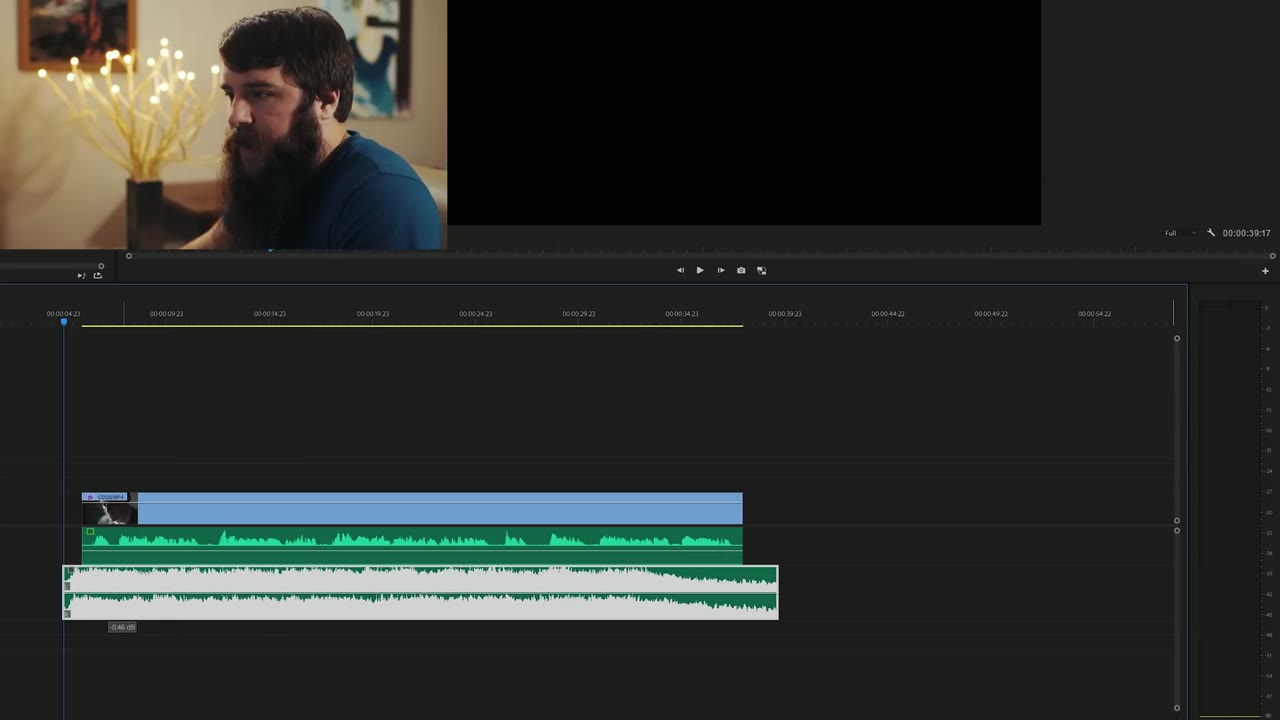
Premiere Pro timeline with a video clip above green dialogue and a ducked white music waveform beneath it

All of this comes down to one thing: the music must never overpower the recorded voice. My top priority whenever I’m mixing is clarity of whoever is speaking. If the song is swelling because the couple is about to kiss and the minister is still talking, the minister still wins, because otherwise your audience gets confused and distracted and starts wondering why they can’t hear what’s being said. You never want that.

Three More Things

Do not peak. Never peak. Keep an eye on your meters and don’t let them go into the red, because the second they do you get distortion on your audience’s speakers, and that’s the last thing you want to hear about.

Premiere Pro audio meter overlay hitting the red zone at 0 dB beside Matt talking to camera

Buy studio monitors. Speakers, to be clear, not screens. They give you clear, crisp sound and show you what your audio actually is. Do not trust your laptop speakers.

Buy real headphones. Do not trust the earbuds that came with your phone. Get a good pair of over-ear headphones, because speakers and headphones are the two ways your audience is most likely to hear this. Then play the finished thing back on your phone too. The more sources you check it on, the better it holds up everywhere.

One Honest Caveat

I do not consider myself an expert on audio mixing or EQ in any sense of the word. There are people whose entire job is mixing audio, and I am not one of them. I’m just showing you how I do it in Premiere. If you have a better way or a different way that works, please leave a comment, because I’m trying to get better at this and I’d love the help.

I also didn’t cover repairing audio that’s genuinely damaged, air conditioners, a truck driving by, dogs barking, birds overhead, because that’s a zillion different variables with a different fix for each one. If there’s a specific one you want covered, leave a comment and I’ll consider it.

Everything Mentioned

I have dreamt and prayed for you | Adventurous Mountain Wedding in Colorado Springs

I have dreamt and prayed for you | Adventurous Mountain Wedding in Colorado Springs

Early in 2017, my wife Rachel and I were visiting her aunt and uncle in Austin. They remarked that their son Henry had recently begun dating a girl, and already the “M word” (marriage) was being thrown about. A few months later we were sitting with Henry and his Fiance Victoria over chips and queso (the best thing to eat at a meeting), talking about filming their wedding in Colorado this November.

Having spent these past months getting to know Victoria, Rachel and I were excited to not only film her and Henry’s wedding, but also to now be related to her. Getting married? We would love to film your wedding, no matter the location. Please get in touch!

P.S., I’m Gonna Marry You | Cute & Tearful Wedding in Dallas, Texas

P.S., I'm Gonna Marry You | Cute & Tearful Wedding in Dallas, Texas

📷 Favorite Wedding Filmmaking Gear
Caitlin and Tanner warned Rachel and me that there would be tears at their wedding. I didn’t know how true this would be until we showed up and Tanner started tearing up while reading a letter that he wrote to Caitlin, to which she soon followed suit when she read hers as well.

This tearful trend continued throughout the day, with the culmination point being when they saw each other for the first time. Even as Tanner heard Caitlin’s footsteps, happy tears began to fall. Looking back, it may be easier to list the parts of their wedding where someone wasn’t crying.

Couples like these two are why Rachel and I film weddings. We are so thankful that they let us share and capture these moments with them.

Getting married? Whether you’re a cryer or not, we would love to film your wedding. Please get in touch!

Want to learn to film weddings? I’m now offering one-on-one filmmaker consulting! Check it out!

My Facebook

My Instagram 

My Wedding Film Company Facebook

Signup for notifications about new videos and news from me.

Edited using Adobe Premiere Pro. Download a free trial!

Music used in this film:
🎵 Write My Name Alt. Version by CHPTRS
Songs licensed from Music Bed

Music licensing sites I recommend:

  • ART LIST – (free extra 2-months when you subscribe using this link!)
  • Sound Stripe –  (use the coupon code “WHOISMATT” for 10% off a yearly or monthly subscription!)
  • Filmstro – (use the coupon code “WHOISMATT20_ANN” for 20% off all yearly licenses)

I’m required to state that I’m a part of affiliate programs for Amazon, B&H, SoundStripe, ArtList, Musicbed, and Adobe and that some of the links above are affiliate links.

A Wedding Filmmaker’s Review Of The Panasonic GH5

A Wedding Filmmaker's Review Of The Panasonic GH5

📷 Favorite GH5 filmmaking gear

The Panasonic GH5 has amazing specs, but is it the best camera for wedding filmmaking? Heads up: this link goes to the newer Panasonic GH7. And how does it compare to the Sony a7S II?

This camera is currently the darling of the wedding filmmaking world, because for the price it has features you genuinely cannot get without spending significantly more money. From a video quality standpoint it’s phenomenal. So it figures I should talk about it.

Worth being upfront: this isn’t my camera, it’s a rental. I shoot with the a7S II and I love it. A few months ago my friend Taylor, who helps run a wedding videography company out of Austin, Texas, asked if I wanted to second shoot a wedding with him on a GH5. In Portugal. I said yes to all of those things very quickly, and now I’ve spent a full wedding day with this camera and have enough to review it honestly.

One note on perspective: I’m reviewing this from a professional wedding filmmaking standpoint. If you shoot weddings, events, or anything run and gun where you only get one chance, this is aimed squarely at you. If you shoot corporate, studio work, or indie films it should still help, but that’s not the lens I’m using.

Build Quality

I really like it. It’s built like a tank, with a ton of buttons and dials, and two things in particular stand out.

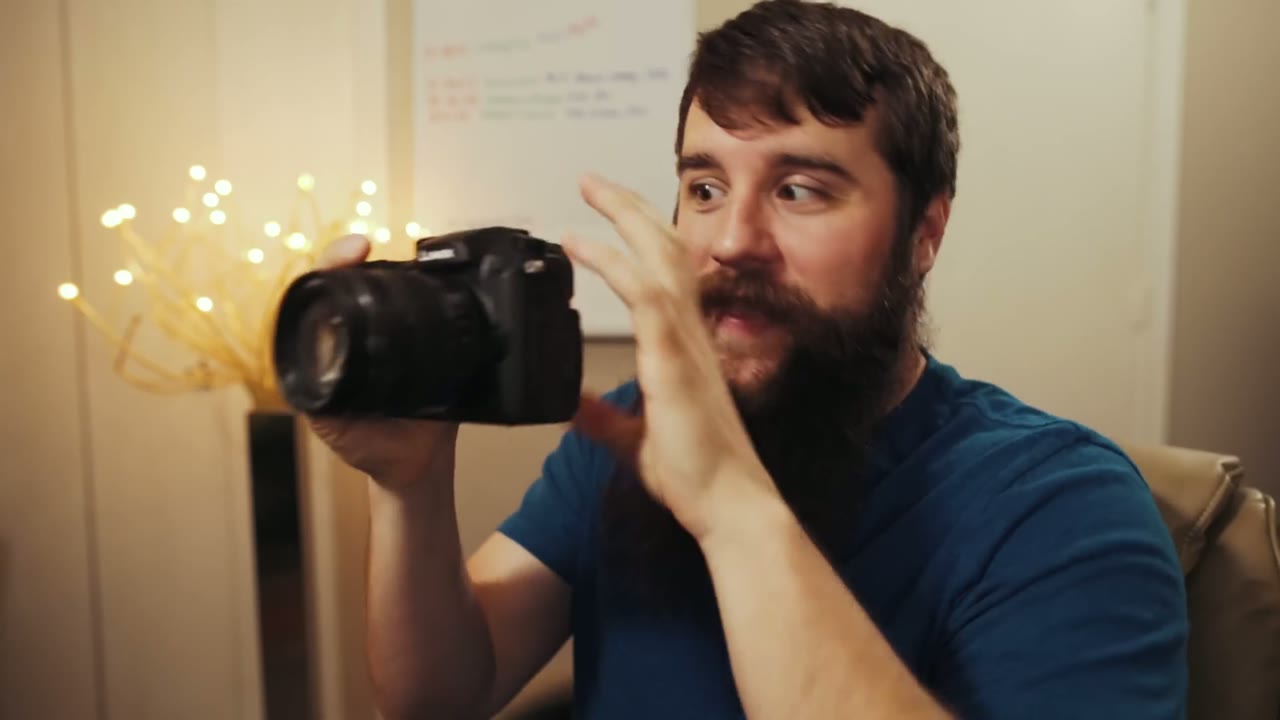
Matt holding a black mirrorless camera at chest height, index and middle fingers raised near his face as he makes a point

First, this camera is built for an adult hand. You can hold it without a battery grip and your pinky isn’t dangling off the bottom. On the a7S II, without the grip, your little finger has nowhere to go and it gets uncomfortable. I buy the grip anyway so I don’t deal with it, but it’s a real point in the GH5’s favor that you don’t have to.

Second, the flip-out screen. Oh my gosh. It rotates all the way around so you can watch yourself while recording, which the a7S II simply cannot do. If you vlog at all, buy this camera for that feature alone.

Matt in near-profile looking down toward the camera's lens as he holds it up close to his face

In-Body Image Stabilization Will Make You Throw Away Your Monopod

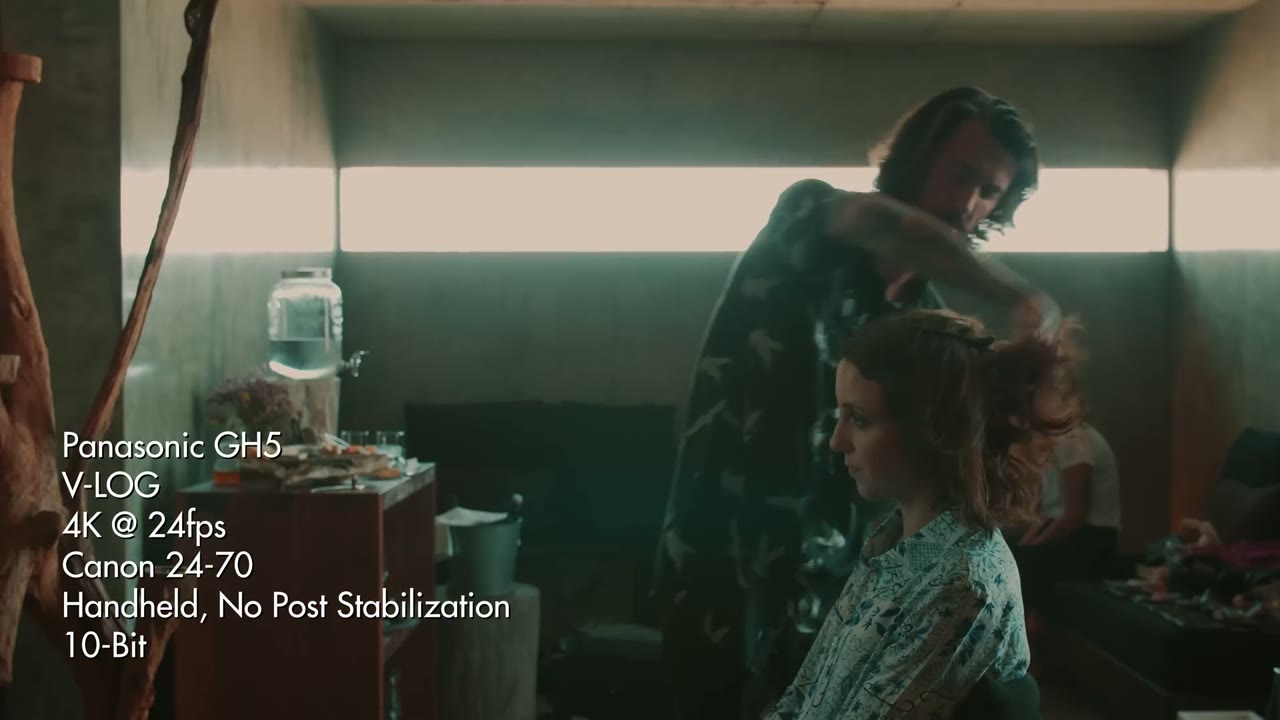
Once you’ve shot on a camera with IBIS you will never willingly go back, because any lens you put on it becomes a stabilized lens.

GH5 handheld sample footage overlay reading V-LOG, 4K at 24fps, Canon 24-70, Handheld No Post Stabilization, 10-Bit, over a bride having her hair styled
  • Need a tripod or monopod shot? Hold the camera still. The camera removes the shake.
  • Forgot your slider? Sway the camera side to side while holding it steady and you get the parallax without the rail.
  • Want a gimbal shot where you’re running after the couple through a field? I’m sorry, that’s too far. It won’t take your footfalls out.

For the record, the a7S II has had IBIS for years and I love it there too. The more cameras that ship with it, the better.

The Menus Don’t Suck

We’re never going to get a perfect menu system, because manufacturers keep adding features and features need somewhere to live. But Panasonic has done one of the best organization jobs I’ve seen. Color coding between sections, a touch screen, and, crucially, dedicated video headings, so all your video settings are in one place and you’re not digging around going “where is the frame rate, I’m missing shots.”

Even better is the custom menu, where you park your most-used settings up front so the obscure ones stop being obscure. And the camera actually explains what settings do, in plain English, or as plain as camera settings ever get.

Sixteen Custom Buttons

Sixteen. That is insane. There’s even one hidden down on the body I didn’t know existed until I went looking.

Matt in profile pressing a button on the back of the camera with his thumb, camera facing away from him

And Panasonic, in their unlimited genius, lets you start recording with the shutter button. Thank goodness. Finally. Meanwhile I’m over here on the a7S II burning a custom button on record because the shutter isn’t available in video mode, which, you know I’m in video mode, just let me press the button.

I only actually assigned four:

  • Fn1: punch in while recording, to check focus, because I pull a lot of focus manually.
  • Fn2: the level, so handheld shots stay straight.
  • Fn3: the teleconverter, which instantly gives you a 1.4x zoom in 4K and a 2.7x zoom in 1080p. Panasonic crops the sensor to do it and claims no image deterioration. In 1080p at the back of a church, you can count the groom’s nose hairs.
  • Fn4: the monitoring LUT, so V-Log doesn’t look flat on the screen and I can actually judge white balance.

Between the custom menu, the function settings, and the dedicated white balance and ISO buttons already on the body, I basically never went into the menus.

Synchro Scan: Never Fight Flickering Lights Again

This one’s buried and it’s brilliant. Normally your shutter speed steps in fixed increments: 1/50, 1/60, up to 1/125 and beyond. Turn on Synchro Scan and suddenly you’re adjusting in tiny fractions: 50.1, 50.2, 50.3.

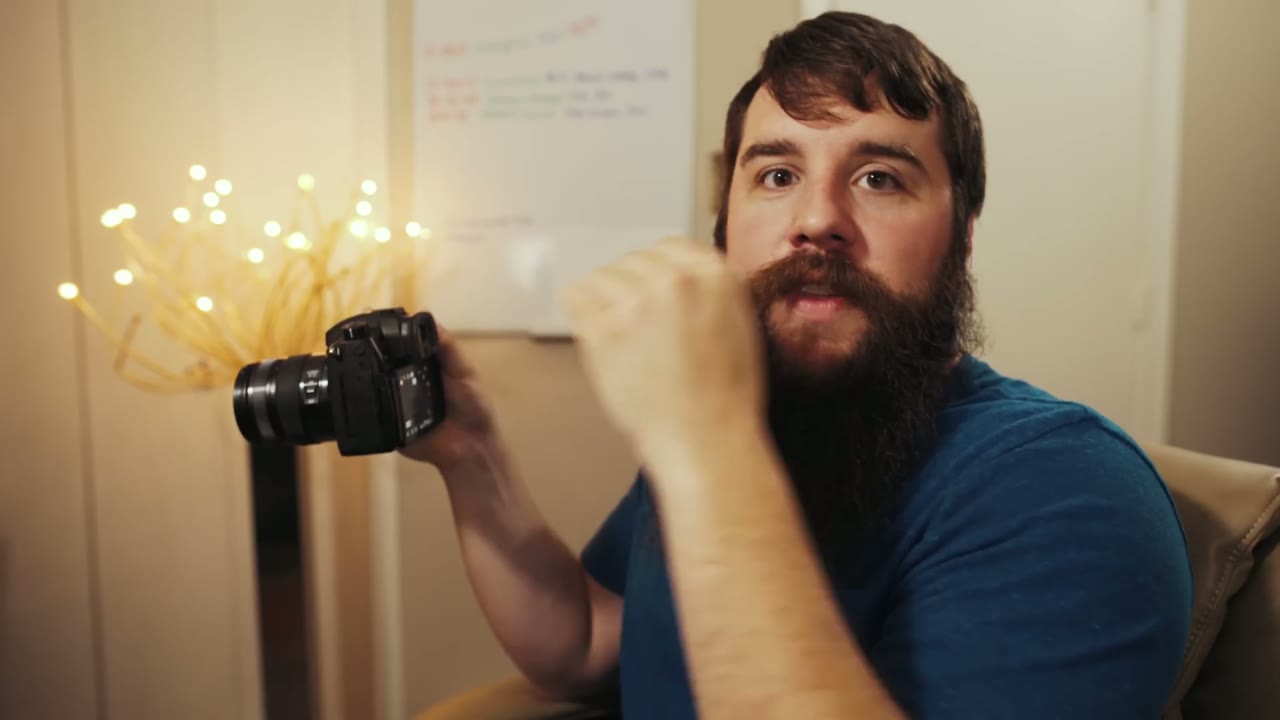
Matt holding the camera to his side with a closed fist raised near his chin, mouth open mid-sentence

Why does that matter? Because if you shoot weddings, at some point in your life you will walk into a room whose cheap lights are out of sync with your camera, and you’ll get flickering or rolling bands across your footage. With Synchro Scan you nudge the shutter until the banding disappears, in camera, on the spot.

My Biggest Frustration With The GH5

I like shooting off saved custom presets: C1 for 4K 24, C2 for 4K 60, and C3 hiding three more slots of its own. At a wedding, flipping between those instantly matters enormously.

Here’s the problem. Whenever you’re on a custom preset and you turn the camera off and back on, it reloads that preset, wiping any changes you made.

At the Portugal wedding the bride and groom were getting ready in adjacent rooms, so we ran back and forth all morning: her makeup, his groomsmen, her hair, him getting dressed. Different white balance, different aperture, different exposure in each room. I’d set the camera for the groom’s room, then switch it off to save battery, then switch it back on still standing in the groom’s room, and my settings had reverted to whatever was saved back in the bride’s room. So I’d be re-dialing white balance and aperture while moments happened in front of me.

Every other camera I have ever used, including the a7S II, remembers the last settings you had. This is the only one that doesn’t. To be fair, it only affects the custom memory presets: in creative video mode the camera remembers everything normally. But if you want presets, you have to remember to overwrite them every single time before powering down.

Battery Life

Good, and better than the a7S II. I’d put a GH5 battery at roughly 1.5 times a Sony one.

But not the mind-blowing figure the internet led me to expect. I’ve read posts from people who shot a whole day on two batteries. Between establishing shots, both prep rooms, and a ceremony of about thirty minutes, I’d burned through three and wasn’t even halfway. Some of that is on me: once I discovered the preset-reset problem I started leaving the camera powered on for five and ten minute stretches rather than risk it, and that has a cost. I’m giving you the context so you can weigh it yourself rather than just taking my word against everyone else’s. The battery grip smooths most of it out.

Resolution, Frame Rate, And 10-Bit Color

This is the good stuff, and it’s the reason most people want this camera. 4K up to 60fps. 1080p up to 180fps. Firmware 2.0 also added 6K, but in anamorphic, so unless you own anamorphic glass you’re capped at 4K.

We shot all the couple’s time together after the ceremony, sun going down behind them, at 4K 60. The crispness blew me away.

To put it in perspective: at the time, a Canon that shoots 4K 60 meant $6,000 for a 1D X Mark II, and a Sony that shoots 4K 60 meant $7,500 for an FS7. This camera is two grand.

GH5 sample footage overlay reading V-LOG, 4K at 24fps, Sigma 18-35, 10-Bit, over a bride having her hair pinned up by a large window

And 4K at 24 and 30 looks even better than the 60, because at those frame rates the GH5 records 10-bit color. More color information means more room to push a grade before anything falls apart, and paired with V-Log it gives you a flat picture that turns genuinely gorgeous once you grade it.

Dual SD Card Slots

Matt holding the camera close to his chest with both hands, mouth open, looking straight at the camera

Two slots, which for a one-shot event is the difference between a bad day and a catastrophe. It also opens up nice workflow options, like sending time lapses to one card and everything else to the other so neither fills up at the wrong moment.

Lenses, And The 2x Crop

The micro four thirds mount takes an absurd variety of glass. Panasonic, Nikon, Canon, Leica, and with adapters, nearly anything. On this wedding I shot Taylor’s Canon lenses, mostly a 24-70 and a 70-200, adapted with a Metabones Speed Booster.

The a7S II’s E-mount is also very adaptable (I run a Sigma Art with a Nikon mount on mine), but in 4K you’re limited to lenses that cover a full frame sensor, unless you drop to 1080p and crop the sensor.

Matt holding the camera near his face with his other hand open beside his cheek, eyebrows raised

Which brings us to the controversial part. The GH5 has a 2x crop sensor. Put a 24mm on it and you have a 48mm. All your wide lenses get tighter, all your tight lenses get way tighter.

Why does everyone get worked up about this? Honestly, I think it’s culture. Most of us start on a crop body, mine was a Canon 7D at 1.6x, and everyone we look up to is shooting full frame telling us the bokeh is better and the low light is better and our camera is trash. The whole industry pushes bigger, bigger, bigger. The GH5 walks in and says buy a smaller sensor, which just sounds wrong the first time you hear it.

I don’t think it’s a big deal, because the lens makers know about the crop and build for it. You don’t go buy an 85mm and get stuck with a 170mm. Panasonic makes a 42.5mm that gives you the full frame equivalent of an 85mm. The system accounts for itself.

The Biggest Con: Low Light

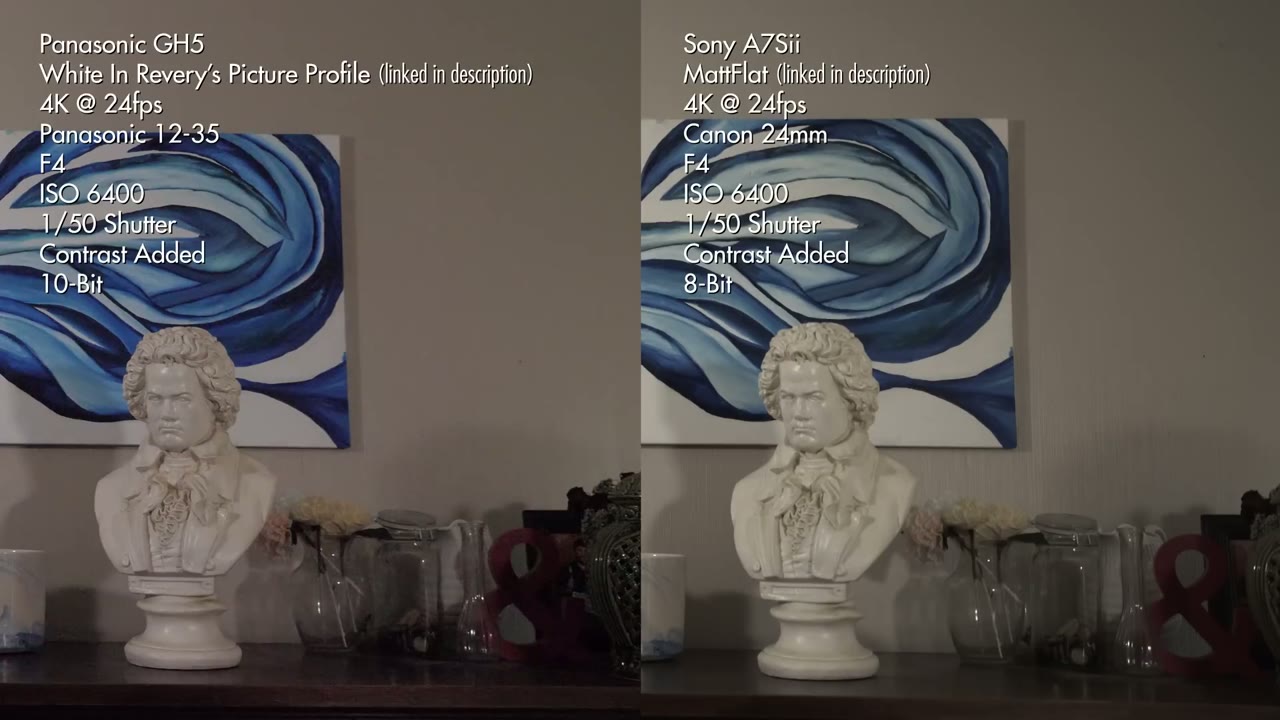
Here’s where it hurts. In my unscientific testing, which amounted to shooting clips at a range of ISOs on both bodies and judging by eye what looked equivalent in noise, ISO 1600 on the GH5 looked about like ISO 32000 on the a7S II.

Side-by-side comparison of a Beethoven bust at ISO 6400, GH5 10-bit on the left and Sony A7Sii 8-bit on the right

That is an enormous gap, and half of filming a wedding happens after the sun goes down. For a wedding filmmaker that is a big issue, not a footnote. If you buy this camera, buy lights to go with it.

So Where Does Each One Win?

Both of these are big upgrades over most of what’s on the market, and either one will shoot a wedding well.

The GH5 beats the a7S II in daylight and well-lit image quality. Prep in a room with sun coming through the windows, an outdoor ceremony, a reception you’ve brought enough lights to cover: the 10-bit image is unreal. It also wins on slow motion, 4K 60 and 1080p 180 against the Sony’s 1080p 60 and 120.

The a7S II beats the GH5 in low light, and it isn’t close.

Am I Selling My a7S II?

No.

I still believe the Sony a7S II is the ultimate camera for filming weddings. It remembers my settings when I power it off, it’s full frame, the low light performance is ridiculous, and it handles anything I throw at it, light or dark. I plan on shooting with it for the foreseeable future.

But Which Should You Buy?

Buy the GH5 if you shoot a variety of work: YouTube videos, interviews, talking heads, music videos, indie films, with weddings as a supplement rather than the core. The colors are gorgeous and it’s a fantastic camera whenever you have enough lights and a more predictable scenario than a wedding.

Buy the a7S II if the majority of your work and income is weddings. It’s the best at run and gun, and the best at handling the sheer variety of situations a wedding day throws at you.

That said, whenever the a7S III shows up, hopefully with 4K 60 and 10-bit, oh my gosh. I would absolutely love for Sony to build an answer to the GH5. Hasn’t happened yet. We can dream.

Everything Mentioned