
Which frame rate to shoot for which moment, why dropping 60fps onto a 24fps timeline looks stuttery, and the four-click Interpret Footage trick that makes an entire project match.
Continue reading
Which frame rate to shoot for which moment, why dropping 60fps onto a 24fps timeline looks stuttery, and the four-click Interpret Footage trick that makes an entire project match.
Continue reading
You’ve got some 4K footage and some 1080p footage and you need it all to be one video at one resolution. Here’s how I handle that in Premiere Pro, and honestly the whole thing comes down to one checkbox that nobody tells you about.
I’m making this because a lot of you have asked. Plenty of people already know this one, but if you’re new to Premiere, or you’ve been editing a while and just never happened to hit mixed resolutions, this should sort you out.
Before you touch anything you have to decide whether you’re exporting in 4K or in 1080p, because everything downstream follows from that.
The way I decide is simple: I look at what I’ve actually got. I shoot far more 4K than 1080p, so I upscale the 1080p up to 4K. If you’re the other way around, maybe you shoot a lot of 60fps slow motion because your camera can’t do 4K60, and you’ve only got a bit of 4K, then downscale the 4K to 1080p instead.
Yes, upscaled 1080p won’t be as sharp as your real 4K, and downscaled 4K will look sharper than your real 1080p. But once it’s rendered and YouTube has had its way with it, the difference is genuinely not a big deal. Pick whichever direction means less of your footage getting messed with and move on.
File, New, Sequence. This is where you tell Premiere the resolution and frame rate you want to edit and export at.
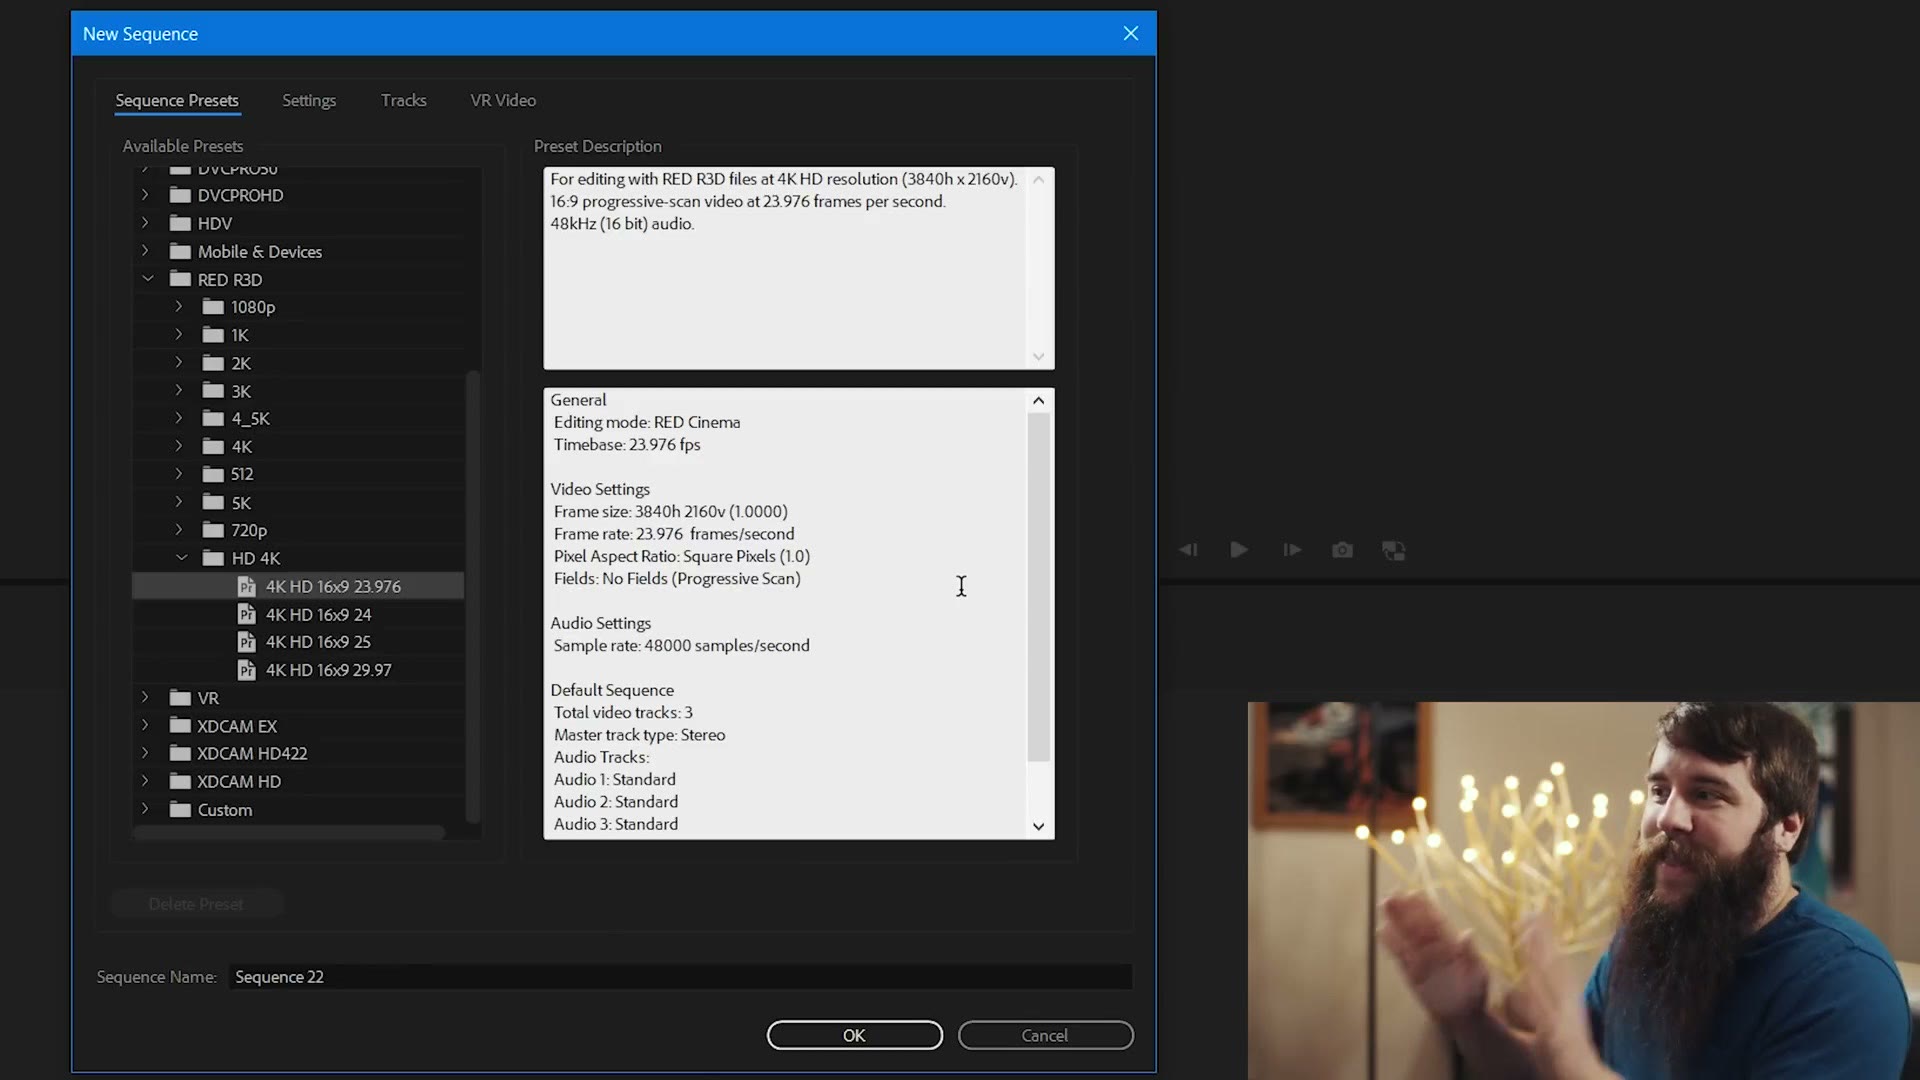
For a 3840 by 2160 timeline at 23.976, go down to the RED presets, then HD 4K, then 4K HD 16×9 23.976. And I know what you’re about to say. No, you do not need a RED camera. I shot this on a Sony a7S II. The preset does not care what camera you own, it only sets a resolution and a frame rate, and that one happens to have exactly the pair I want.
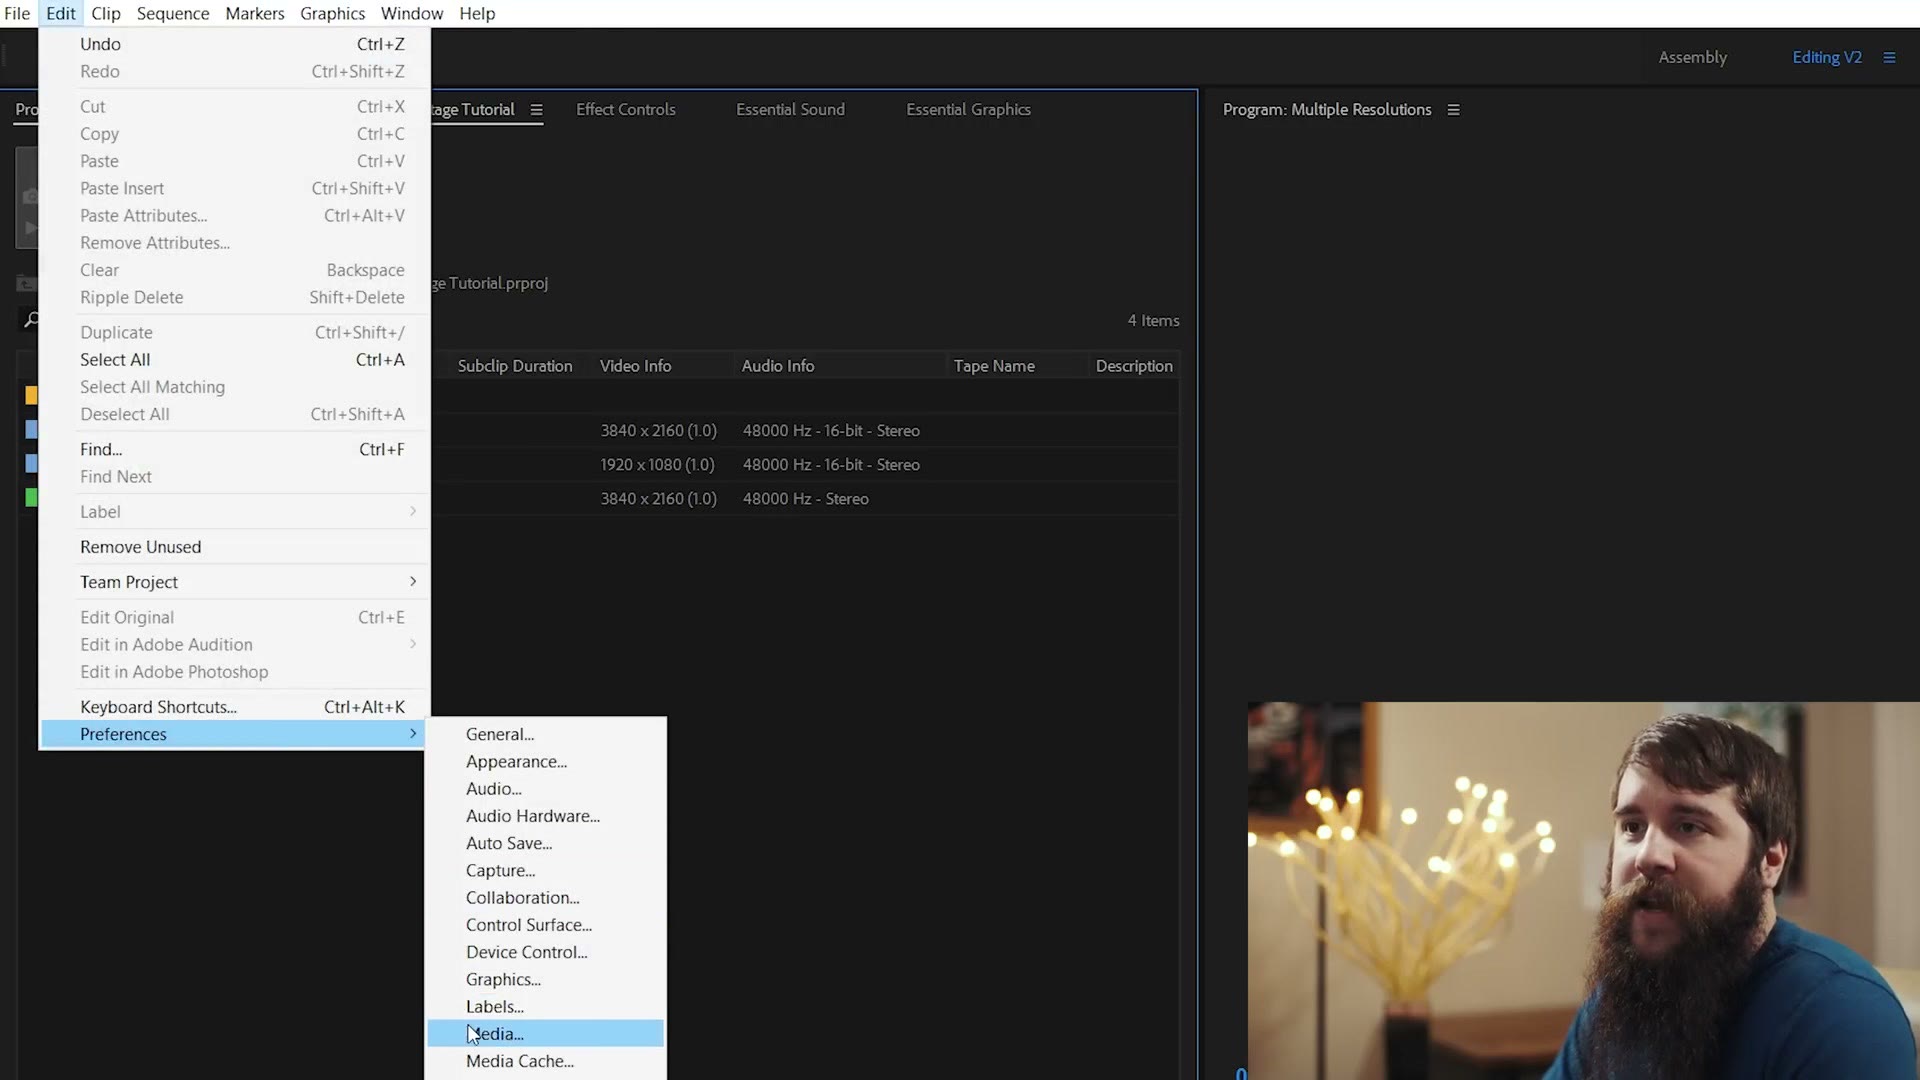
Before you drag a single clip down, go to Edit, Preferences, Media.
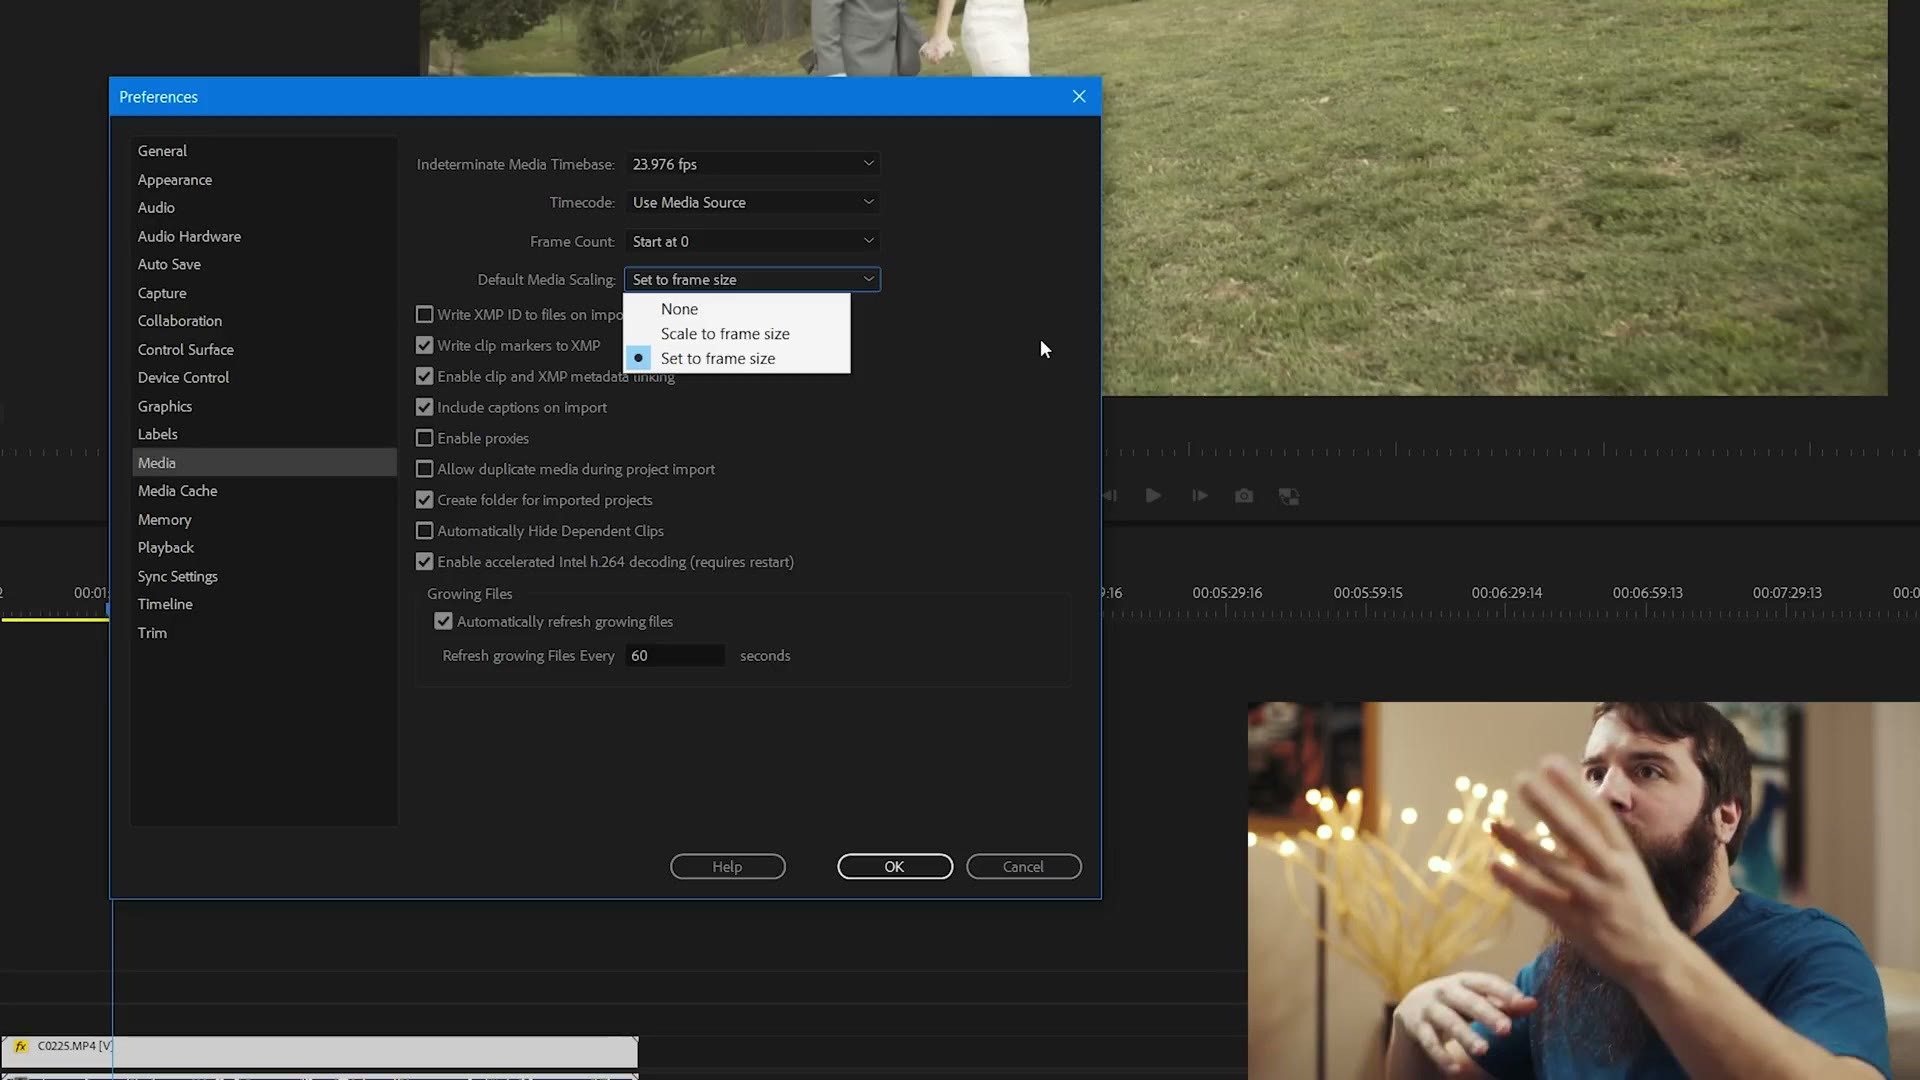
Find Default Media Scaling and set it to Set to Frame Size. That’s it. That’s the whole trick.
Now drag your 4K clip onto the timeline, nice and sharp, looks great. Then drag your 1080p clip down and scrub over it, and it fills the frame properly too. Two different resolutions, both scaled correctly, no thinking required.
So what happens if you don’t change it? Set it back to None, delete the 1080p clip, drag it in again, and there it is.
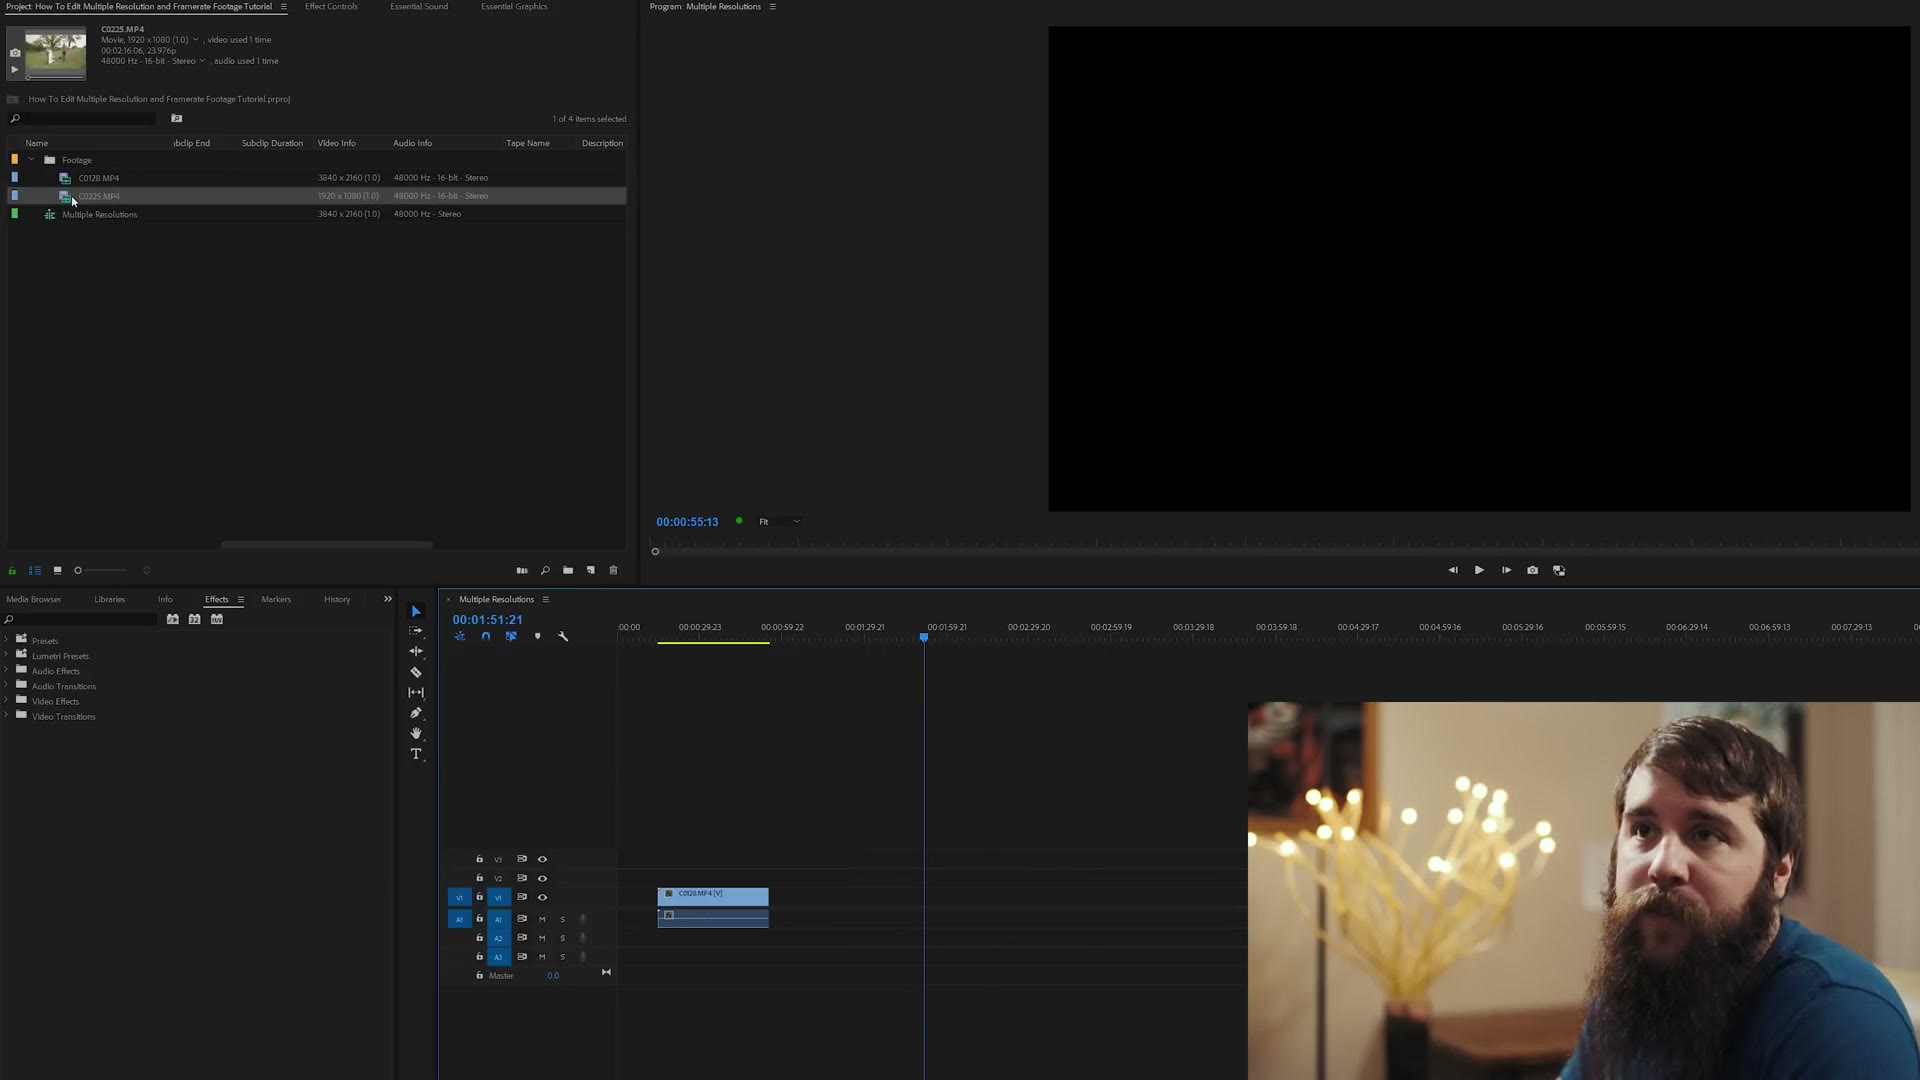
Black bars everywhere, because that is exactly what a 1080p video is in a 4K timeline: a quarter of the frame, sitting there being small. Which is what you’ve been fighting whenever this has happened to you.
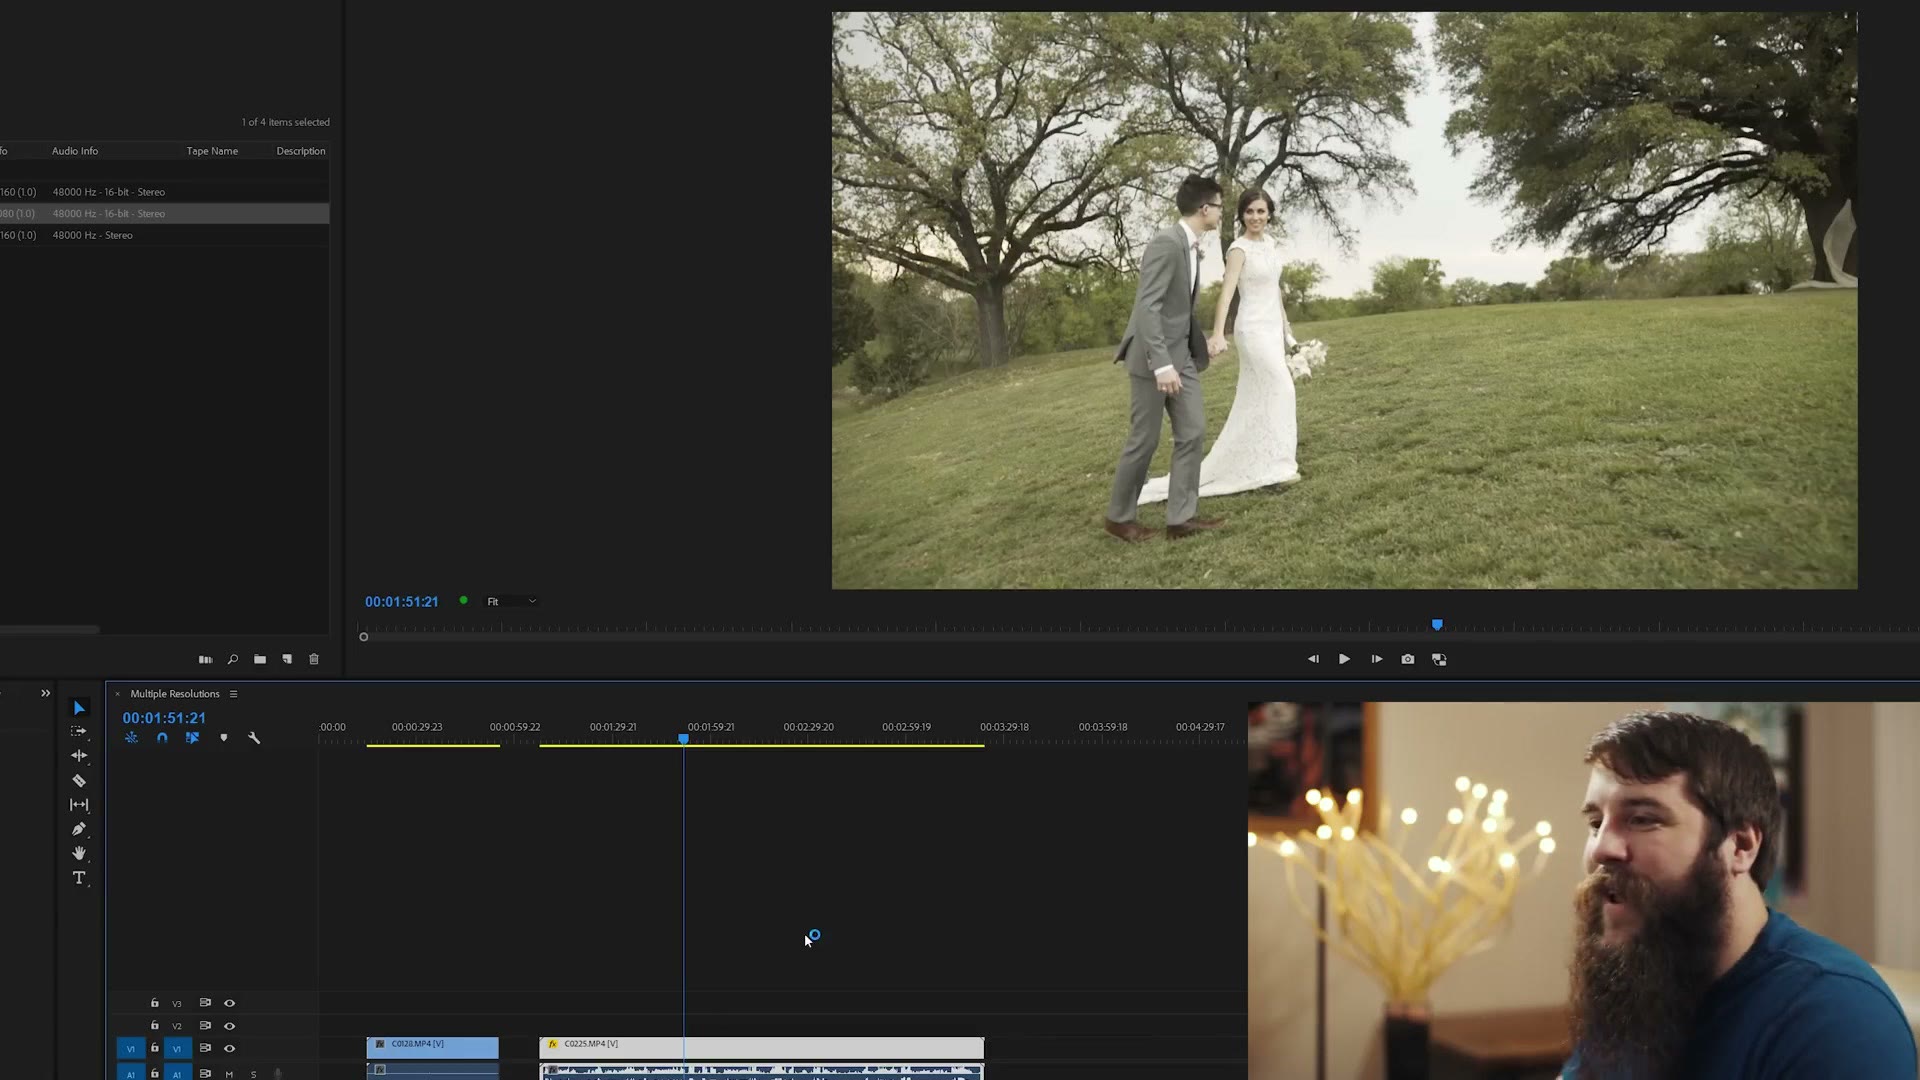
No problem. Right-click any clip on the timeline that isn’t scaled right, choose Set to Frame Size, and it snaps to full frame. That does exactly the same thing as the preferences change, just one clip at a time, which is why I prefer setting the preference and forgetting about it.
You’ll have noticed there’s a third option in that dropdown, and it’s worth explaining why I skip it.
Whenever you use Scale to Frame Size, you lose the ability to tell at a glance which clips are 1080 and which are 4K, because the scale value no longer tells you anything. You have to go dig around in the project window to check. That’s a pain, and it’s the entire reason I use Set to Frame Size instead. Set leaves the scale value visible and honest.
Select a clip and open Effect Controls, where you’ll find Motion, then Position and Scale.
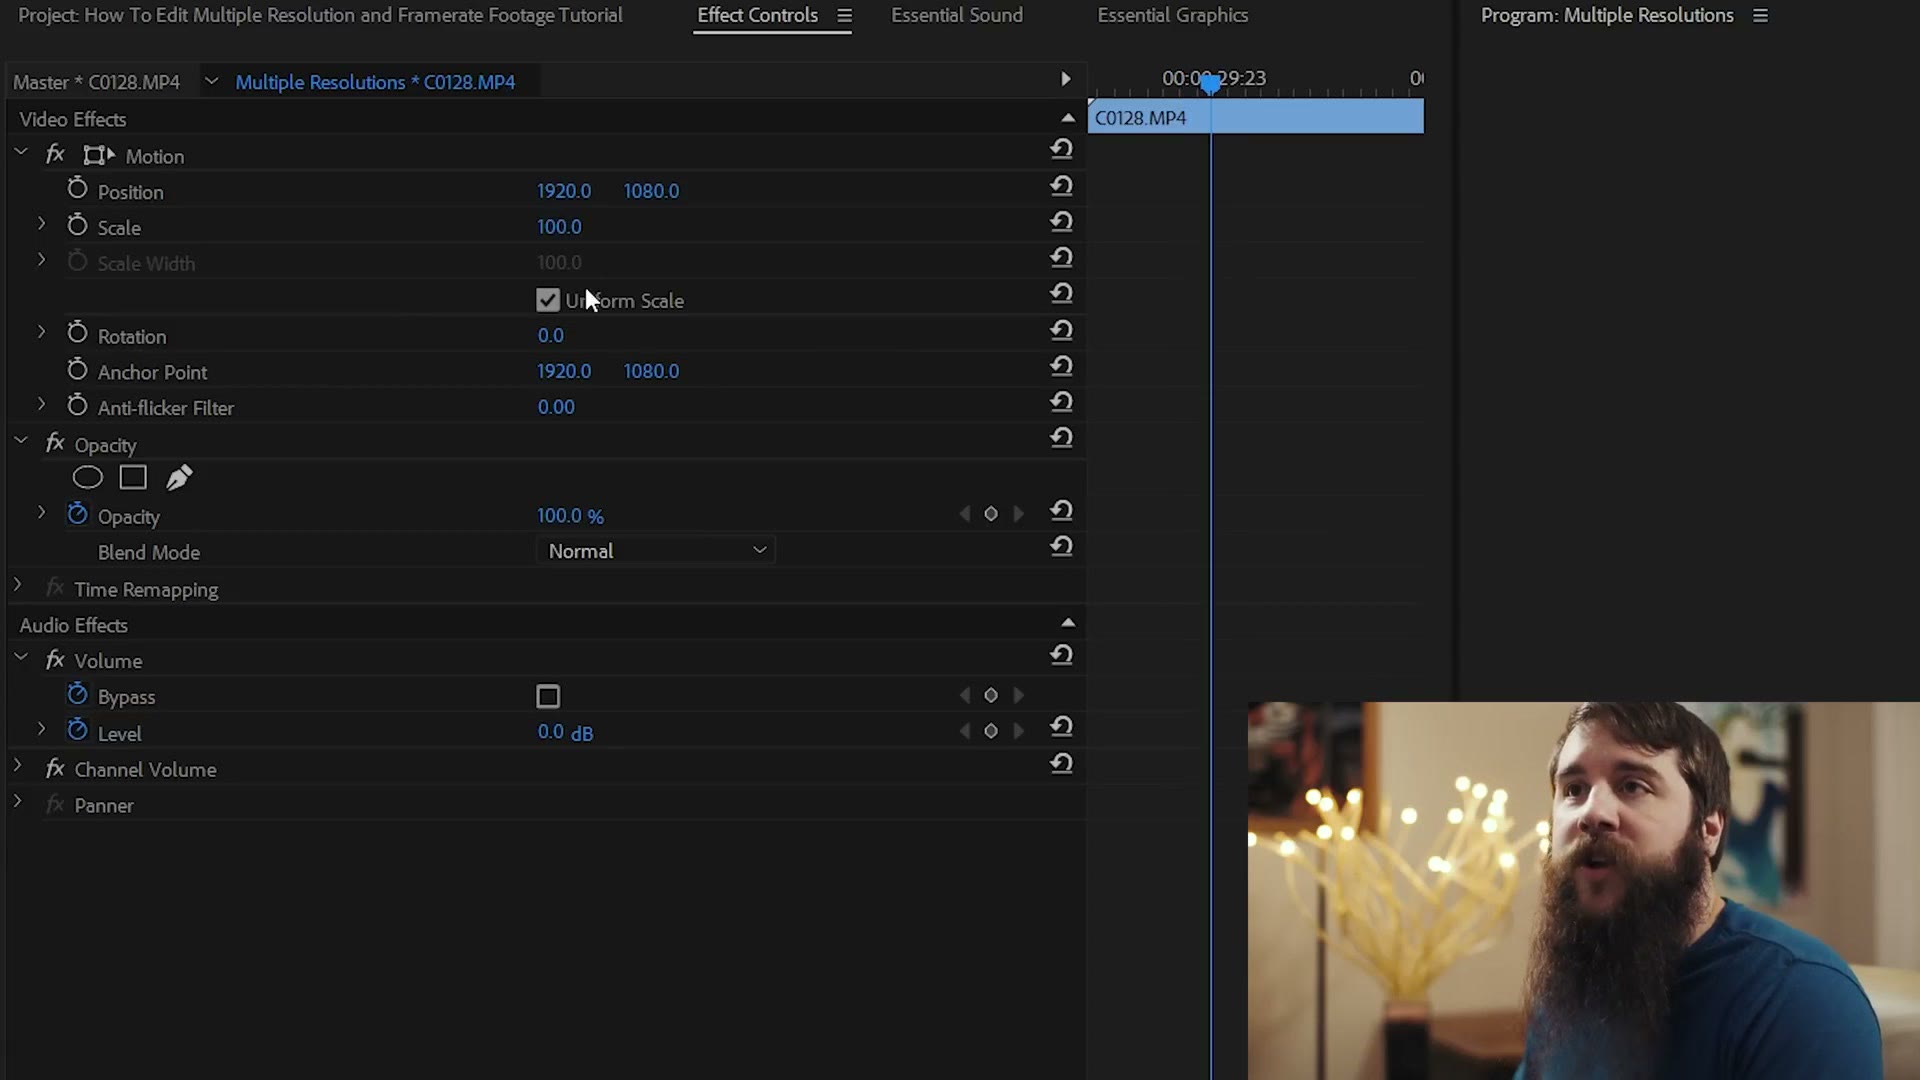
With the 1080p clip selected in a 4K timeline, Scale reads 200, which is what’s filling the frame. The 4K clip in the same timeline reads 100. So if you ever want to override Premiere and push in on something yourself, that’s the number you touch. You can absolutely zoom way in on somebody’s nose if you want to. I’m not going to, but you can.
File, New, Sequence again, and this time go to Digital SLR, then 1080p, then DSLR 1080p24.
Here’s the good news: you already changed the preference, so it applies here too and you don’t have to do anything else. Drag the 1080p clip in and it’s native. Drag the 4K clip in and it scales down, and if you check Effect Controls you’ll see Premiere set it to 50 automatically, which is exactly right.
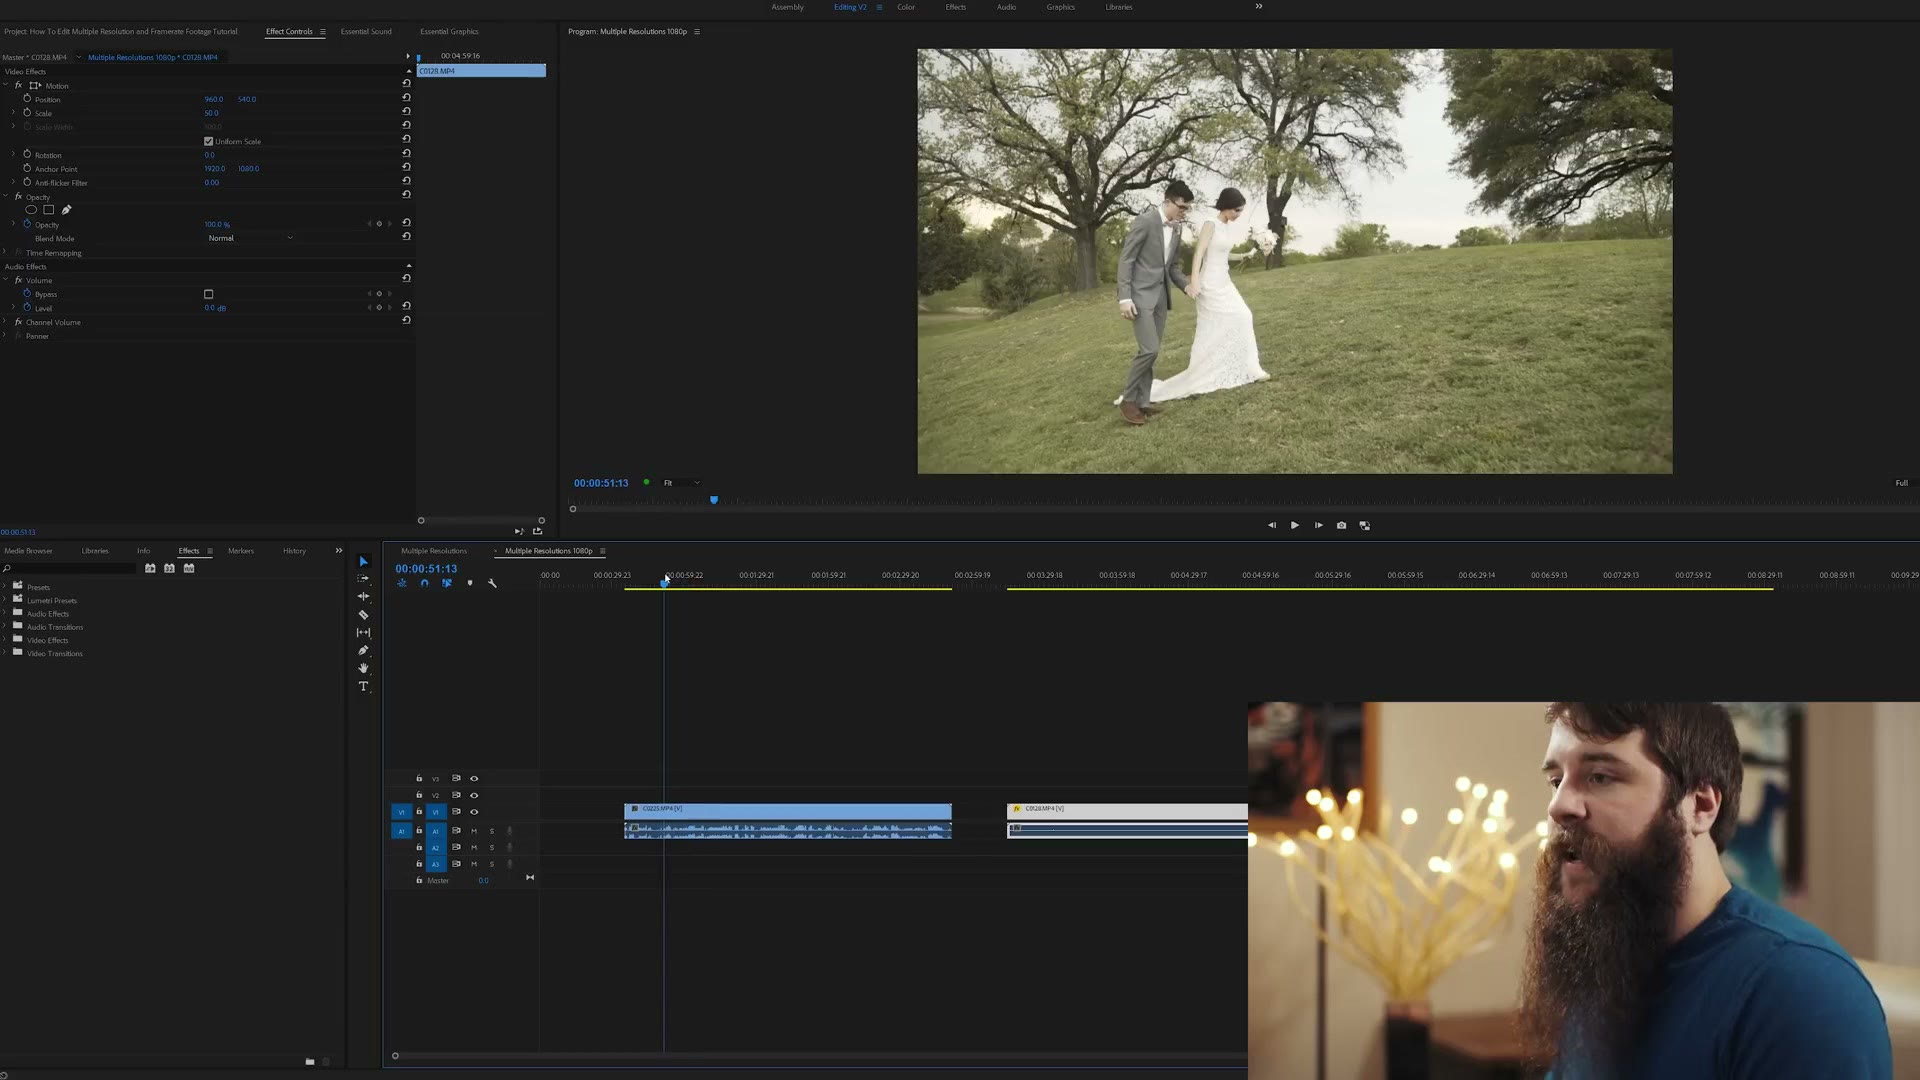
And that’s genuinely all of it. With that one preference set, your footage matches up and looks right no matter what resolution you shot it at, and you stop thinking about this forever.
If your problem is mixed frame rates rather than mixed resolutions, that’s a different fix and I made a separate guide: how to film and edit mixed frame rate video in Premiere Pro.
Don’t have Premiere? There’s a free trial. My color presets are at whoismatt.com/luts, my full edit process is in Wedding Film Framework, and there are a few thousand of us in the Learn Wedding Filmmaking Facebook group.

Four techniques I actually use with a sixteen dollar prism in my wedding films, plus the lens, focus and handheld settings that make it work.
Continue reading
Three days filming a Colorado wedding, including picking the ceremony site ourselves, moving the prep room for better light, and the full ceremony coverage plan.
Continue reading
Every part in a 000 4K editing PC built for Premiere Pro, why each one was chosen, and where to spend less without hurting performance.
Continue reading
💡 Wanna save time? Download my Multiband Compressor preset and use it on your audio files to make them instantly sound better.
This is how I edit audio in my wedding films. And whenever I say “edit audio,” I mean mixing, EQ, audio sweetening, all the terms people use to describe making your audio sound as good as possible as quickly as possible.
Two things get covered here. First, one audio effect you can apply to anything you recorded on the wedding day that will make it sound incredible. Second, how to mix a person speaking against the music you picked, so one isn’t too loud, the other isn’t too soft, and you can actually hear everything.
Quick note before we start: this was shot in Premiere Pro CC 2018, but nothing here depends on the version. It works the same in whatever Premiere you’re running today.
Pretend the edit is done and we’re at the audio stage. Video track one is a clip of my friend Noah reading a letter to his bride. Audio track one is that letter, recorded off a Sennheiser G3 lav mic clipped to his lapel and running into a Zoom H5. Audio track two is the WAV file for the song. No effects have been applied to anything, this is straight off the recorder.

Played back with no mixing at all, you can barely tell what’s going on. Solo the voice track and it actually sounds pretty good on its own: quiet room, no air conditioner, no echo. But it can sound a lot better.
(That letter reading is from Noah and Mallorie’s wedding. If you want to see exactly how I mic’d him and set that shot up, that’s a whole behind-the-scenes video, and here is the finished film.)
I use lav mics all day at a wedding, and lavs have two specific weaknesses: bass reproduction and presence. Not Christmas presents under the tree. Presence, as in how close the speaker sounds to the mic. The whole point of a lav is that you’re hiding it, so it usually ends up down on somebody’s chest, out of the shot, which means the person you’re recording sounds far away from the microphone. That’s not what we want.
Whenever I was starting out, my answer to “make the audio sound better” was “make it louder, duh.” So I’d drag the track up three decibels and, honestly, it doesn’t sound much better. Volume is not quality. And on top of that, nobody who isn’t a trained voice actor keeps their voice at a consistent level. Look at the waveform: he takes a breath, gets louder, then trails off quieter and quieter. If you fix that by hand you’re keyframing louder, quieter, louder, quieter for the length of the film, and that is a major pain.
What we want is one effect that adds the bass, adds the clarity, adds the presence, and levels all of that out for us. Good news. There’s a plugin for that.
A compressor, through a lot of audio witchcraft, takes the quiet parts of your track (somebody nearly whispering) and brings them up, and takes the loud parts (somebody practically yelling into the mic) and brings them down. What you end up with is a track that’s never too loud and never too quiet and mixes in with everything else with very little effort on your part. It’s incredible.
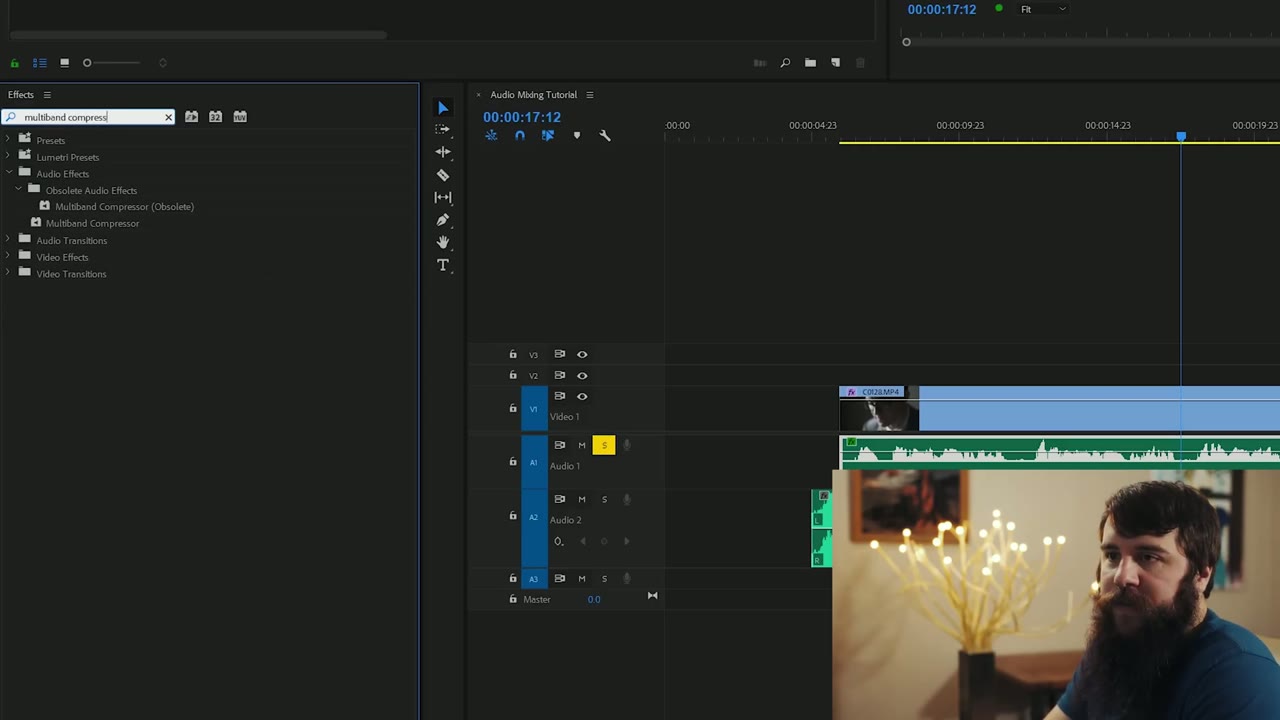
Go to the Effects tab and search for Multiband Compressor. You’ll see one sitting under Obsolete Audio Effects, ignore that, we want the current one. Drag it onto your audio clip.
Now go to Effect Controls, find the Multiband Compressor you just added, and click Edit. That opens the settings window, and my goodness, the first time you see it this thing is intimidating.
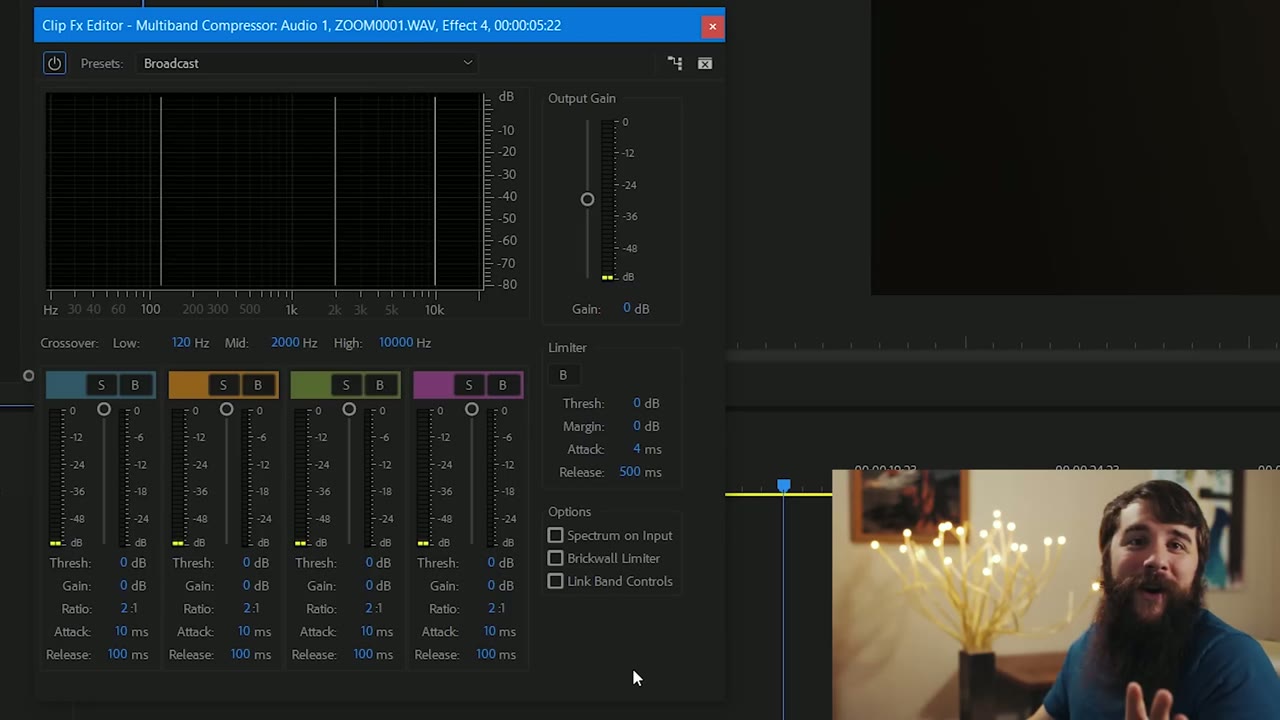
Do not worry about it. You’re going to ignore 99% of what’s on that screen, because Adobe ships presets.
Open the Presets dropdown at the top and you’ll see a pile of options. The one we want is Broadcast. But hold on, isn’t Broadcast already selected?
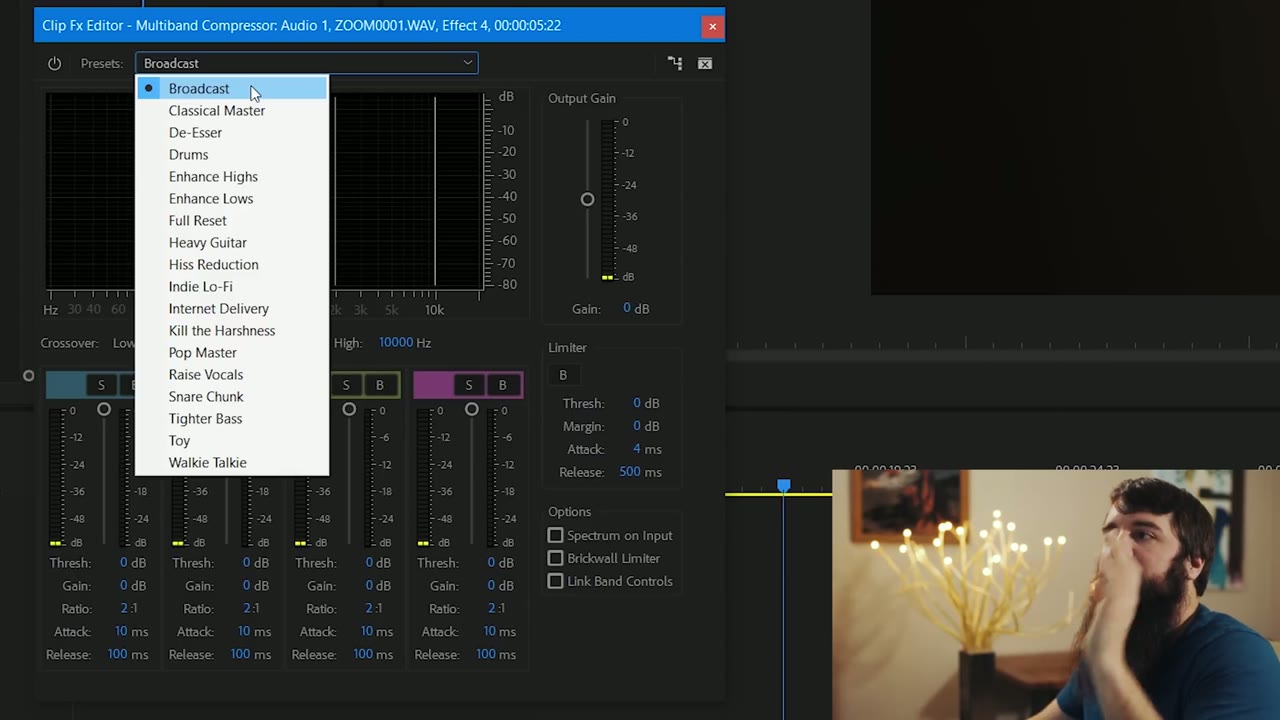
Premiere is kind of weird here. Whenever you first open the Multiband Compressor it says Broadcast, but Broadcast is not actually applied, no settings are applied at all, it’s just showing you the name. So to genuinely turn it on, click any other random preset first (I use Drums), watch a bunch of settings change, then go back up and select Broadcast. Now it’s real.
Two changes to the Broadcast preset and you’re done. Set Attack to 1 millisecond and Release to 250 milliseconds.
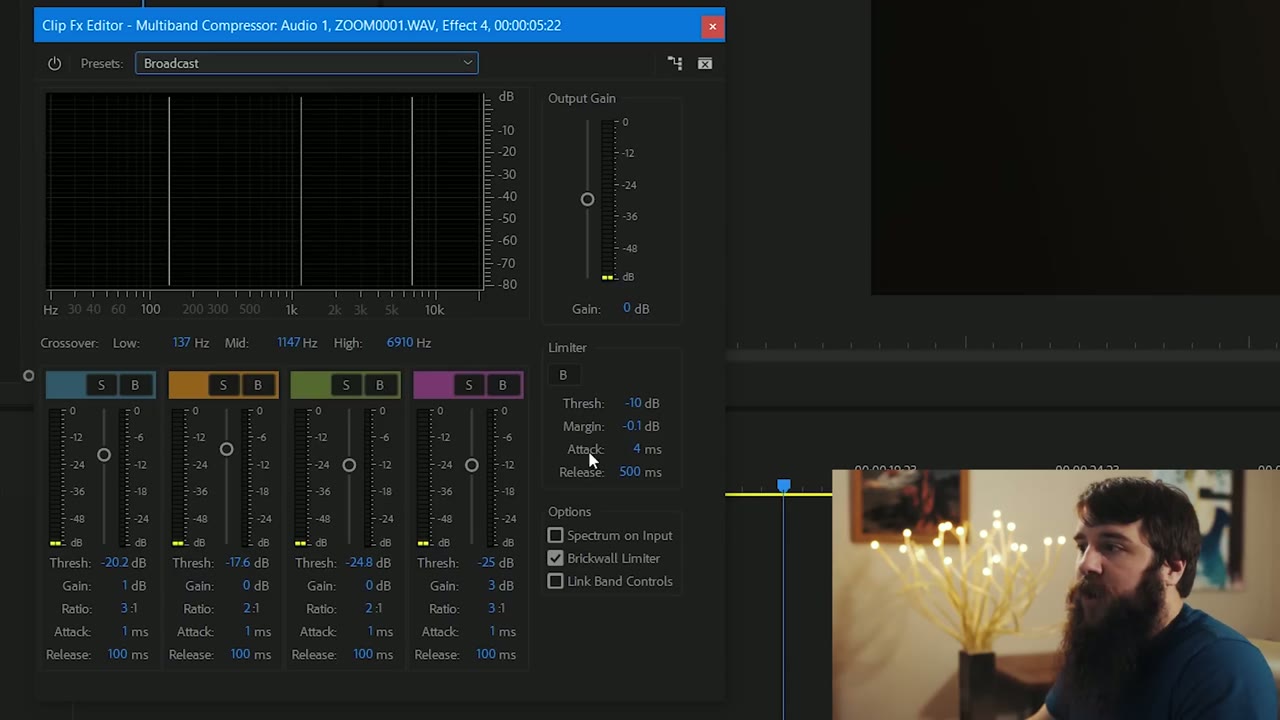
Are we attacking something? Technically, yes. A compressor is constantly analyzing your audio as it plays and adjusting the level on the fly, and attack and release control how fast it reacts. Attack is how quickly it notices the volume changed and starts doing something about it, which we want basically instant for someone speaking, because a person’s voice jumps around much faster than a song does. Release is what happens after the compressor has done its thing, and there we want a smoother roll-off, just quicker than the default. One millisecond and 250 milliseconds.
That’s it. Those are the only two adjustments you need to make. Your audio is ready to go.
Close the settings window, right click the Multiband Compressor in Effect Controls, and hit Save Preset. Name it something cool. I named mine Matt Multiband Compressor, and you’re welcome to use my name too, it’s cool.
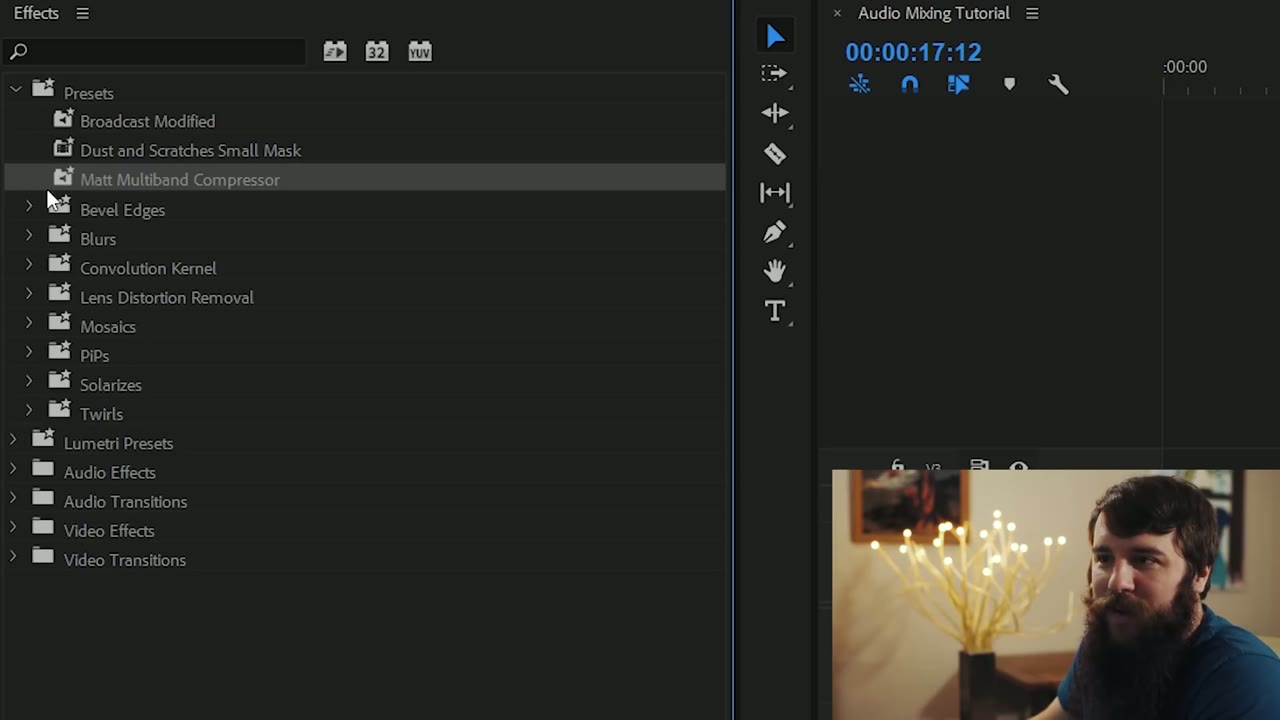
It now lives under Presets in the Effects tab, and from here on out it’s a single drag onto any clip.
And if you don’t want to go through even those two whole steps, oh my gosh, I know, I’ve made my preset available as a download so you can just grab mine. There is one hoop, which is signing up for my email newsletter. Yes, give me your email. I promise I won’t spam you, I’ll send you camera news and other video news I find interesting.
Toggle the compressor off and back on and listen to the difference. You can hear the extra bass, you can hear the extra presence. It sounds so much better.
I put together Adobe Enhance Speech EXPLAINED – Make Audio Sound Incredible In 1 Click In Premiere Pro as well, which covers the part I skipped over here.
Now check your meters, because after the compressor that voice is close to peaking.

You have two ways to bring it down: drag the audio level down on the timeline, or go back into the Multiband Compressor and lower Output Gain (I pulled mine to negative 4). I’d think doing it inside the compressor, where all the processing is happening, would be better, but I have honestly never been able to hear a difference, so I just use the level on the timeline.
As for what number to aim at, if you Google this you’ll get about a billion answers and they’ll all disagree, and most of them are talking about broadcast standards. You gotta hit this level, you gotta hit that level, don’t be blowing out grandma’s TV from 1965. In my experience most of that advice is irrelevant for what we’re making, because people are watching on a computer, or on YouTube or Vimeo or Facebook, or, worse, on a phone. All that careful mixing for television speakers goes out the window when it lands on a six-inch screen with a mono speaker.
So to be clear: if you’re making a TV commercial or anything for broadcast, call your contact and ask what levels they need. If you’re making wedding films and YouTube videos, here’s what I use.
Everything I record on a wedding day, letter reading, ceremony, speeches, toasts, I want hitting negative 3 dB after the compressor is applied. I know, that’s loud, that’s really close to peaking. But once you account for people watching on a phone or a small speaker, that’s where it sounds best without them having to touch their volume at all. Setting this particular track to negative 4 gets me averaging around negative 3 on the meters.
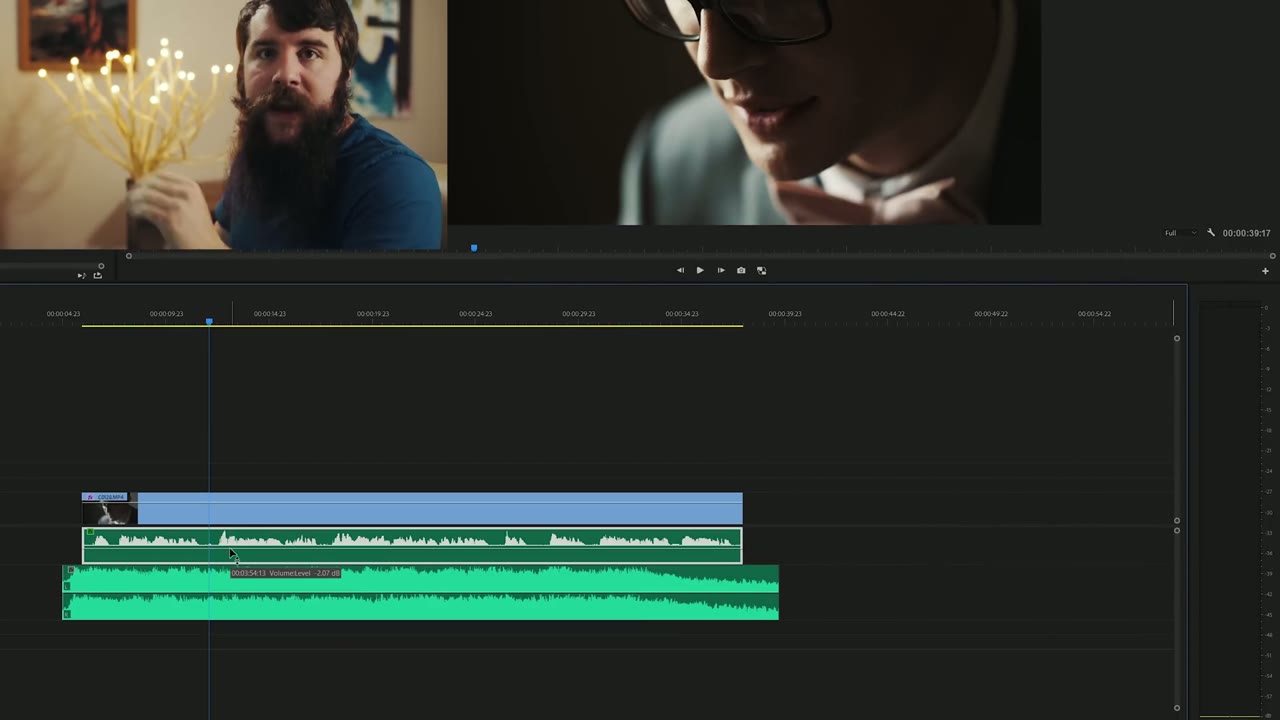
Music is a different beast entirely, because every song has different instruments and different levels, so there’s no single number to chase. What I use is a rule of thumb instead: for quieter, ambient music, a solo guitar, a piano, soft strings, nothing building to a big moment, I target roughly 10 dB below the voice track. If the speaking is at negative 4, the music goes somewhere around negative 14.
The song in this edit isn’t a quiet one. It has multiple instruments and it builds, so it needs to come down further than that. I dragged it to about negative 17 and played both tracks together, and that got it pretty close.
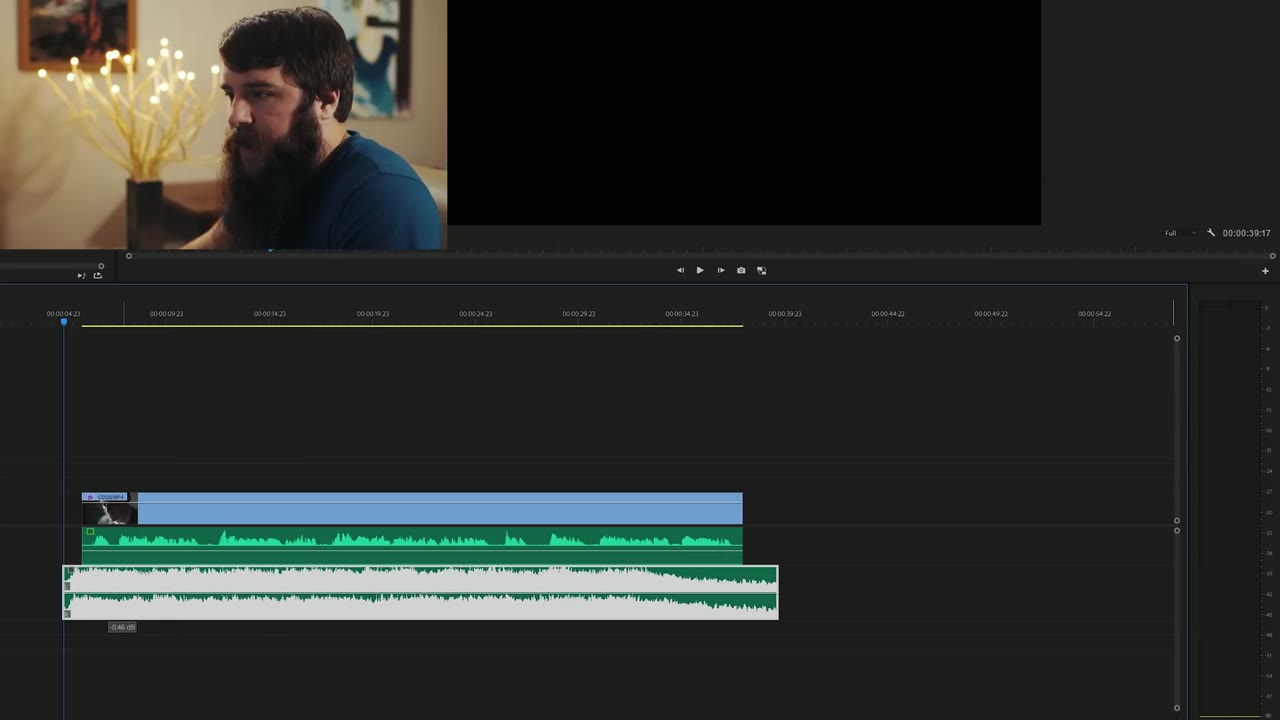
All of this comes down to one thing: the music must never overpower the recorded voice. My top priority whenever I’m mixing is clarity of whoever is speaking. If the song is swelling because the couple is about to kiss and the minister is still talking, the minister still wins, because otherwise your audience gets confused and distracted and starts wondering why they can’t hear what’s being said. You never want that.
Do not peak. Never peak. Keep an eye on your meters and don’t let them go into the red, because the second they do you get distortion on your audience’s speakers, and that’s the last thing you want to hear about.

Buy studio monitors. Speakers, to be clear, not screens. They give you clear, crisp sound and show you what your audio actually is. Do not trust your laptop speakers.
Buy real headphones. Do not trust the earbuds that came with your phone. Get a good pair of over-ear headphones, because speakers and headphones are the two ways your audience is most likely to hear this. Then play the finished thing back on your phone too. The more sources you check it on, the better it holds up everywhere.
I do not consider myself an expert on audio mixing or EQ in any sense of the word. There are people whose entire job is mixing audio, and I am not one of them. I’m just showing you how I do it in Premiere. If you have a better way or a different way that works, please leave a comment, because I’m trying to get better at this and I’d love the help.
I also didn’t cover repairing audio that’s genuinely damaged, air conditioners, a truck driving by, dogs barking, birds overhead, because that’s a zillion different variables with a different fix for each one. If there’s a specific one you want covered, leave a comment and I’ll consider it.