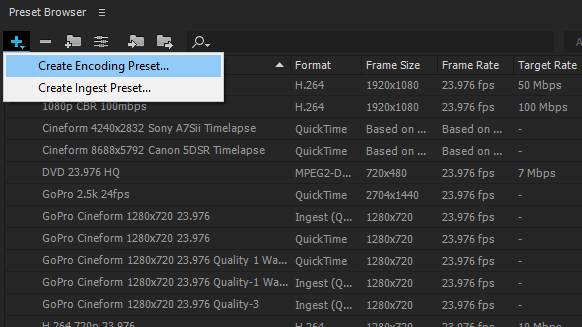
How to EASILY color grade Sony A7Sii, FS5, and a6300 footage using Premiere Pro CC

Color grading has always been one of my favorite facets of cinematography. Think about the warm reds and oranges of Mad Max, or the darker hues of The Revenant.  The ability of a colorist to alter the mood and feel of a film through hues and saturation is incredibly powerful. I’ve been wanting to make a color grading tutorial for years, but it wasn’t about a year ago that I felt that I had learned enough to even consider doing that. I knew that the time was right when I finished creating my video about my favorite picture profile for the A7Sii.

That does not mean that this tutorial only applies to wedding films shot with the A7Sii or any other camera for that matter. The philosophy, curves, and color wheels, should apply to any video you are color grading, regardless of its content. You will need a copy of Adobe Premiere Pro CC to follow along with this tutorial. Adobe currently offers a free 30 day trial of Creative Cloud with all their apps, including Premiere Pro.

I do have a couple recommendations before you start color grading. First, I would watch my first video about my favorite A7Sii picture profile. Spoiler Alert: my favorite picture profile is PP8, with the CINE4 Gamut and sgamut3.cine color space. By filming footage with that picture profile, it makes it easier to follow along with this tutorial. Second, I would invest in a good color calibration tool like a Spyder 5 Pro. If your monitor isn’t calibrated you will have no way of knowing if your color grade will look good on all screens, or only yours.

The face that I make when my monitor isn't calibrated properly...
The face that I make when my monitor isn’t calibrated properly…

If you are interested in learning more about color grading, check out the Tao Colorist Newsletter by Patrick Inhofer. Every week, he covers the latest news, tutorials, and technology in the world of color grading. It is incredibly insightful and a joy to read every Sunday. I am also a huge fan of Denver Riddle’s Color Grading Central. He offers training, LUTs, and plugins for aspiring colorists around the world. Now if he would only make some plugins for Premier Pro. 🙂

I hope this tutorial was helpful for you. I’ll be coming out with another tutorial for color grading with LUTs very soon!

Want to watch more? Check out my reviews of the A7Sii and FS5, as well as a tip for how wedding cinematographers and photographers can get along. If you have any questions or comments about this picture profile or anything else relating to wedding cinematography, please get in touch.

My Favorite Picture Profile For the Sony A7Sii and FS5

Three months ago, I started making wedding cinematography training videos to help others film weddings. It took about a week after uploading my first video for me to discover that there is a massive community of wedding cinematographers out there that want to get better at their craft. As I produce more videos in this series, I find that I am asked even more questions in comments and emails. These messages are added to an ever-increasing list of videos that I will be making in the future.

By far though, the most popular question I have received is, “Which picture profile should I use when shooting with my A7Sii?” This is definitely a complicated question due to the sheer depth of the picture profile menu on the A7Sii and FS5, as well as how many differing opinions there are across the many blogs and forums across the Internet. Your train of thought may have been something like mine: “Do I shoot with the new fancy SLOG3? But doesn’t that cause noise in the shadows? What about SLOG2 instead? Isn’t that going to cause an odd green tint in some images? Maybe one of the Cinegammas then? Aren’t those called Hypergammas in the higher end Sony Cameras? Why is everything so different? Am I crazy? Does this even look better?”

The look I make when I think too hard about Sony's picture profiles.
The look I make when I think too hard about Sony’s picture profiles.

I’m excited to say that today I have an answer for you. After extensive testing, and reading throughout the vast corners of the Internet so you don’t have to, I have found an ideal picture profile. Please keep in mind that while this may be my favorite picture profile, it doesn’t have to be yours. You can have a different opinion from me, and that is alright.

I wanted a picture profile that would suit my needs well. It needed wide dynamic range, a flat image for color grading (but not too flat!), and be versatile for the wide variety of shooting locations I typically go through on a wedding day.

Those needs almost immediately cut SLOG2 and SLOG3, with their minimum ISOs of 1600, and their bright exposure requirements, from my list of options for picture profiles. Incidentally, the 8-bit codec of the A7Sii in SLOG3 can also cause banding in the finer color gradients like blue skies etc. I wanted to avoid this as well.

If you don’t feel like watching me ramble in the above video for 6 minutes about picture profiles, here are the settings for my favorite picture profile:

SETTINGS FOR MY FAVORITE PICTURE PROFILE FOR THE SONY A7Sii and FS5

-Reset PP8 to default.
-Change the Gamut from SLOG3 to CINE4.

That’s it! Congratulations, you’re now shooting in my favorite picture profile! Leave all the other settings as they are. Go try it out and see how you like it. I’ll be making another video soon, showing how I color grade this picture profile.

Special thanks for Marien Breithouwer for originally sharing this picture profile.

Want to watch more? Check out my reviews of the A7Sii and FS5, as well as a tip for how wedding cinematographers and photographers can get along. If you have any questions or comments about this picture profile or anything else relating to wedding cinematography, please get in touch.

How wedding cinematographers can get along with photographers (and vice versa)!

If you’ve watched my previous two wedding cinematography vlogs, you’re probably aware that they are on the technical side. I’ve covered topics like bit-rates, color depth, picture profiles, and battery life for both the Sony A7Sii and FS5. Both are amazing cameras that I was more than happy to review and share with other wedding cinematographers. If you are looking to switch or upgrade to these cameras, I would highly recommend watching both of those vlogs.

Clearly, my beard and I are excited to share this tip with you.

Now, I would like to take a step back from the technical side of things, and share something that, in my opinion, has a far greater effect on how you can create great wedding films. Wedding days at their core are about relationships. The bride and groom’s relationship, the parents of bride and groom and their relationship with their children, the minister’s relationship with the couple, and many more as these two families connect on the wedding day. Let’s talk about another relationship that will affect you, the cinematographer, even more than all others on the wedding day, your relationship with the photographer.

For years, I would go show up to a wedding with no knowledge of who the photographer is, much less anything about them. All I knew is that the bride and groom had apparently hired them. Now I’m a relatively friendly guy so we would usually hit it off and work well together, but it was always a strange experience. See, weddings are unlike other 9-5 cubicle jobs where you work with the same people for long periods until they or you eventually quit or get fired. With weddings, we work with a different co-worker every week! Would you go to work without getting to know your co-workers? No! Then why would you film a wedding without getting to know the photographer beforehand?

Special thanks to Upper Torso Alex for his assistance with this VLOG.
Special thanks to head and shoulders Alex for his assistance with this vlog.

In this video, I share an amazing tip that I learned from my friend Alex Maldonado that will help you instantly hit it off with any wedding photographer. When he first showed this tip to me it completely blew my mind. And if you’re a wedding photographer, this works for you too!

Remember, everyone wins when the wedding cinematographer and photographer get along. There is a free flow of creative ideas, both of your portfolios get amazing visuals that look better, and the bride and groom get better film and photos. It’s a win all around.

I hope this vlog helped you learn something about wedding cinematography that you didn’t know before. If you have any questions or comments, please feel free to get in touch.

Konova Master Pan // Setup and Review Video

The Konova Master Pan has solved a problem that I didn’t even know I had until I used it. Oftentimes when I am filming a wedding, I only have a few minutes to film details like the wedding cake, rings, and other items from the day. This means that I’m rushing to setup my tripod, slider, and camera to get the shots I need. What Konova has made here is a way to make this process easier.
I still have to setup my slider, tripod, and camera, but when it comes to actually filming the shot, things become way easier than they were before. Konova has created an attachment to their slider that allows me to replicate a commonly used sliding and panning motion, nearly effortlessly. In one fell swoop (or should I say pan) I have replaced my tabletop dolly, and my handheld pans with my slider.

The Master Pan also works with Konova’s timelapse gear, meaning that I can now shoot panning timelapses, without having to mount their Smart Head to my slider. If you have a Master Pan, and are wanting to use it for filming timelapses, I recommend watching my Konova MS Series Setup and Review video. Please be aware that the Master Pan only works with the MS Series motors and belts, not with Konova’s prior models.

If you’re intrigued, I recommend watching my review video to see some of the shots I’ve taken with it, as well as my thoughts on the Master Pan. And if you already own one and are in the process of setting it up, I’ve included how to do that in the video as well.