After a bit of a delay due to multiple projects crowding up most of the second half of September, I am finally here with part three of my Run & Gun filming with the A7Sii series. This vlog is incredibly exciting for me to share with you because it details my setup of the camera’s custom buttons, and how I use them to access my most used features of the camera incredibly quickly. I believe this is the most important video of this series, so if you watch nothing else, this one is the one to view.
“Hey there, wanna talk about cameras?”
That said, I would highly recommend checking out part one detailing my menu setup of the A7Sii, and part two where I discuss how to use the camera’s mode dial to quickly access presets for your framerates and resolution while filming. In the future, I will also be posting a fourth and final vlog in this series, all about using the camera’s function menu to unlock even more, er, functions.
As always, if you have any questions or comments, feel free to leave on below or get in touch!
In this video I will explain about how the mode dial is actually one of the MOST AWESOME FEATURES of this camera, and how you can use it to switch frame rates, resolution, and other settings nearly instantaneously.
Ever since I made my first video reviewing the Sony A7Sii last year, people have been asking me about my camera settings. I never made a comprehensive video speaking about all the different features and settings that I use with the A7Sii when filming weddings, but that all changes today. Today I will be sharing with you how I setup my camera for filming weddings and other events in the “Run and Gun” style of shooting. Meaning: Quick setup times, near instantaneous changing of frame rates and resolution, and rapid dialing in of necessities such as white balance, aperture, and ISO.
While I wish I could share all these settings with you in one quick five-minute video, the customization capabilities of the A7Sii are quite a large topic. As I was composing my talking points I realized it would be best to split one video into a series of four, covering the menus, mode dial, custom buttons, and function menu.
Why four separate videos? Because once I started working through all I would need to speak about, I realized that my settings are worth more than a quick overview. It isn’t enough to simply tell you what settings I use; I also want to tell you why I use them. That way you aren’t going out and filming with them because “Matt said these are good settings,” but instead because you’ve tried them out and know they are good for your workflow and shooting style.
With the intention of teaching you the “why” and not just the “how,” I believe it is best to start with a good foundation, and there is nothing more foundational to the A7Sii than the menu system. This may be an understatement to say that Sony’s menu systems on the camera are a bit convoluted. Organization is lacking, camera settings aren’t where you think they would be, and there are whole headings that I question the importance of.
Thankfully, this video in all of its 38 minutes of glory is here to help you understand the menu system, access what you need, and ignore what you don’t. “But Matt” you say, “Why do you have to talk about the menus, I just want to know how to change my settings quickly.” To which I will say, “We will get there!”
Look at all these settings!
The goal at the end of this video series is for you to NEVER have to go into the menus at all to change your settings (aside from maybe formatting a memory card). You’ll be capable of changing your needed settings with one or two quick button presses, which is ideal for the “Run and Gun” style of shooting.
I love this camera, and I loved it even more once I had it customized to the way I film. I hope that this series helps you love your A7Sii too. Expect parts 2-4 to come out very soon.
If you have any questions about this video or the camera settings, feel free to get in touch.
How I setup the couple for filming, my philosophy for why I pose them certain ways, and some practical ideas for how you can create genuine laughter, smiles, and joy in your wedding film.
Since last November, I’ve been filming weddings exclusively with the Sony A7Sii in 4K. Due to the large file sizes this produces, I often end up with hundreds of gigabytes of footage from a single wedding. As I edit these weddings, I’ve realized that I will soon need to either buy a new computer to help handle the high-resolution footage, or implement a proxy based workflow where I edit lower quality video clips, then re-link the high-quality clips for final rendering.
That is why I was incredibly excited to see that the 2015.3 update of Premiere Pro added a built-in proxy workflow. Instead of having to watch as my computer bogs down from playing back the native 4K files of the A7Sii, or having to implement a round-trip through Da Vinci Resolve to create proxies, Premiere now lets me create them in Adobe Media Encoder and automatically links them to my existing footage. Once linked, it is a simple button press to switch between the native file and the proxy.
As I was working through implementing the update, I realized that it was a little TOO good. Due to the high quality proxies I was generating in Premiere Pro, it was impossible to at-a-glance tell whether I was working with the native file or the proxy file. I needed an immediate way to tell, and after a bit of research, I hit upon this a solution.
By adding a PNG file I created to the proxy export settings in Adobe Media Encoder, all my proxy files now include a transparent “Adobe Proxy” logo on the final rendered video. This makes telling the difference between native and proxy incredibly fast and easy.
To save you the work of creating your own transparent PNG logo, I’ve included a download link below. Simply download this file and follow the steps below to incorporate it into your Adobe Premiere Pro CC proxy workflow.
Follow these steps to add the adobe PNG logo to your Adobe Premiere Pro proxy workflow.
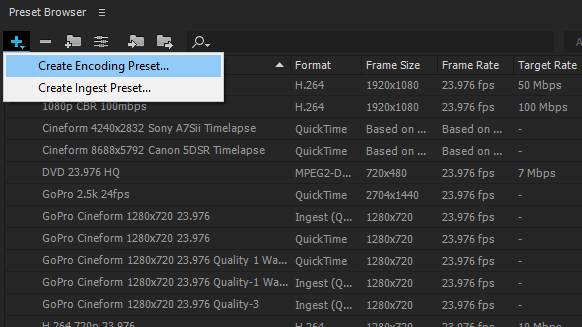
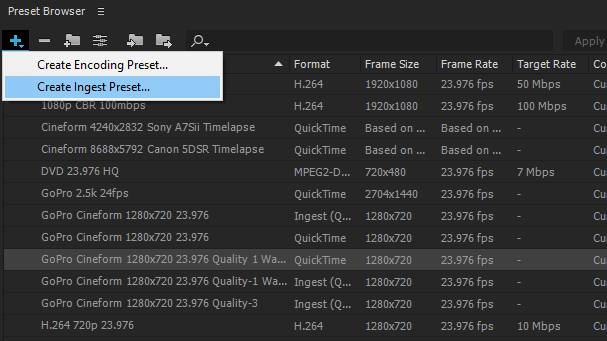
1. Open Adobe Media Encoder and in the “Preset Browser”, select the “Plus” sign and select “Create Encoding Preset.”
If you can’t see it, go to “window” at the top and make sure “Preset Browser” is checked.
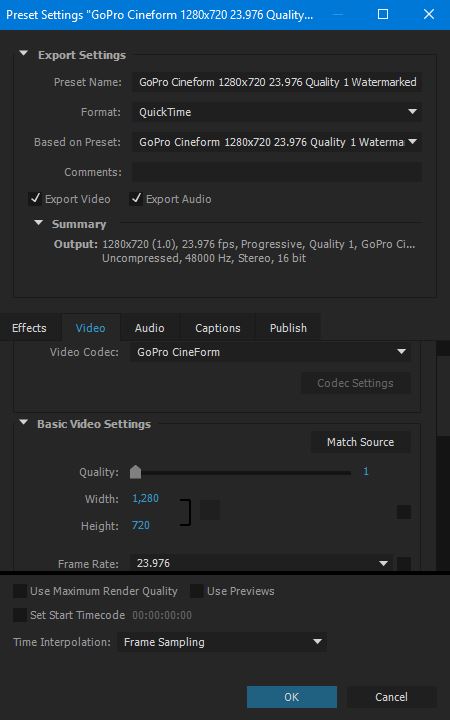
2. Create your proxy preset. In my case, I use GoPro Cineform at 720p.
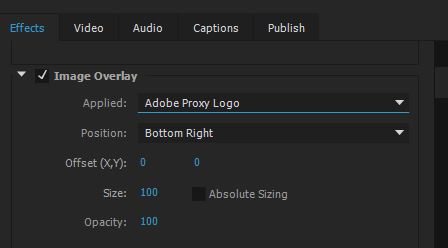
3. Open the “Effects” tab, and check the “Image Overlay” box. Click the drop down menu next to “Applied” and browse to the Watermark PNG file. Make sure you put the PNG file in a place where it will be consistent between video projects. For “Position” select “Bottom Right” or wherever you would like it to appear over your proxy video. Select “OK” and your Encoding Preset will be saved.
4. Select the “Plus” sign again in the “Preset Browser”, and this time select “Create Ingest Preset.”
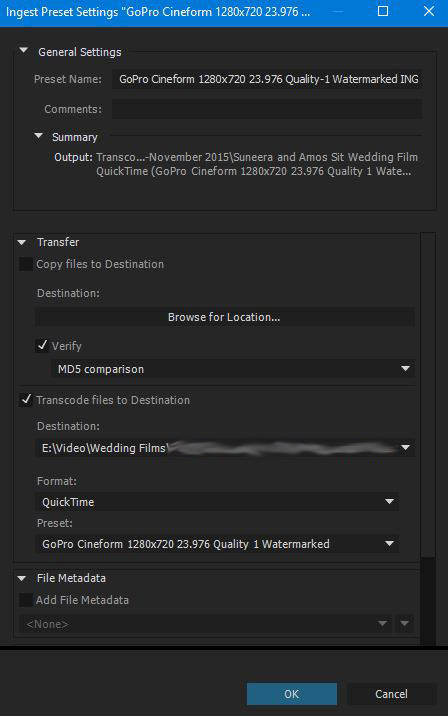
5. Name your Preset. I named mine the same as my Encoding Preset but added the word “Ingest” at the end. Check the “Transcode files to Destination” box.
6. For “Destination” navigate to your current video project. Note: It really doesn’t matter where you tell it to navigate to, because when generating Proxies, Premiere will ignore this location and by default put the proxy files generated in the same folder as the native files. For “Format” and “Preset” select the Format and Preset you created as your encoding preset. In my case, it was “Quicktime” and “GoPro Cineform.” Click “Ok” and your Ingest Preset will be saved.
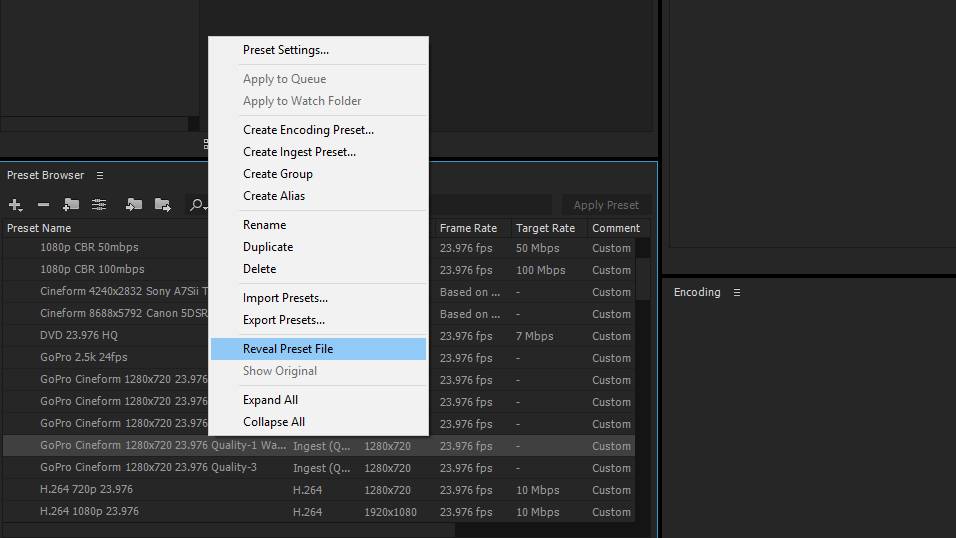
9. Right click on your Ingest Preset in the “Preset Browser” box and select “Reveal Preset File.” Make a note of where the file is in your computer’s file system.
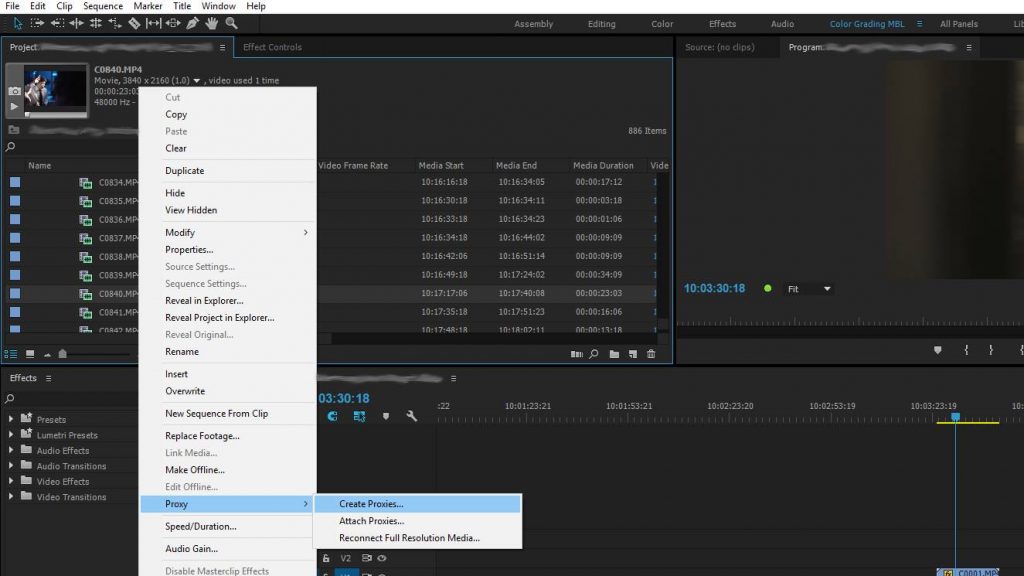
10. Open Premiere CC 2015.3, import your native video files, and in the “Project” window, select your video clips, right-click, and select “Proxy > Create Proxies…”
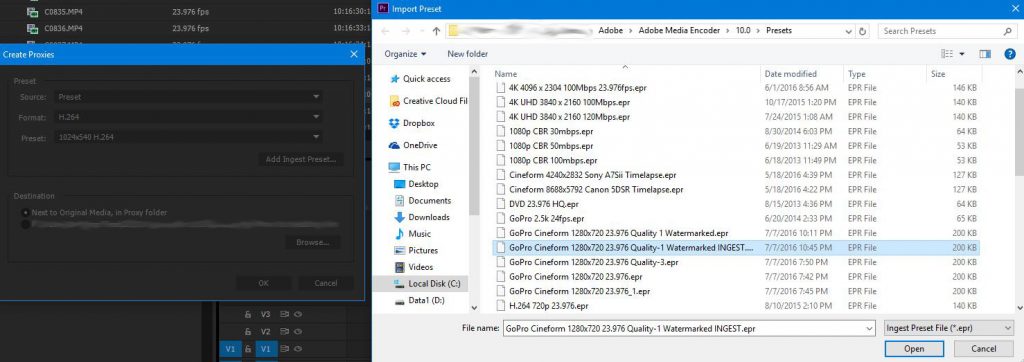
11. In the “Create Proxies” window, select “Add Ingest Preset” and browse through your file system to the Ingest Preset that you created. Select it and click “Open.”
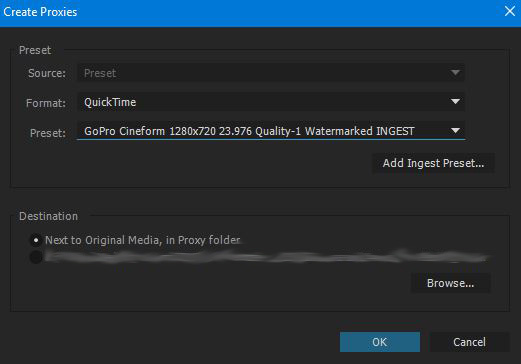
12. The “Format” and “Preset” should now match your ingest preset you created in Adobe Media Encoder. Under “Destination,” select “Next to original media, in Proxy” folder, which will cause Premiere to ignore the destination you set in step 10.
13. Click OK and sit back as Adobe Media Encoder opens up and renders all your proxy clips with the settings AND watermark that you added.
That’s it! Now all it takes is a quick glance to see if you are editing the native video files, or their proxies.
If this video has been helpful to you, you may also enjoy my wedding filmmaking training videos and tutorials. If you have any questions or comments, please do not hesitate to leave one below, or get in touch.
In case you haven't been paying attention, there is a total revolution going on in the world of camera stabilization. For five of the past six years, I have used, loved, and traveled with the Glidecam HD-4000 to every wedding I have filmed. Now, with the advent electronic gimbal stabilizers such as the Movi and Ronin, it is looking more and more like the Steadicams and Glidecams of the world are becoming obsolete. Weights, muscles, and basic physics are being replaced by motors, algorithms, and computers. Okay, maybe not the muscles, electronic gimbals are plenty heavy too.
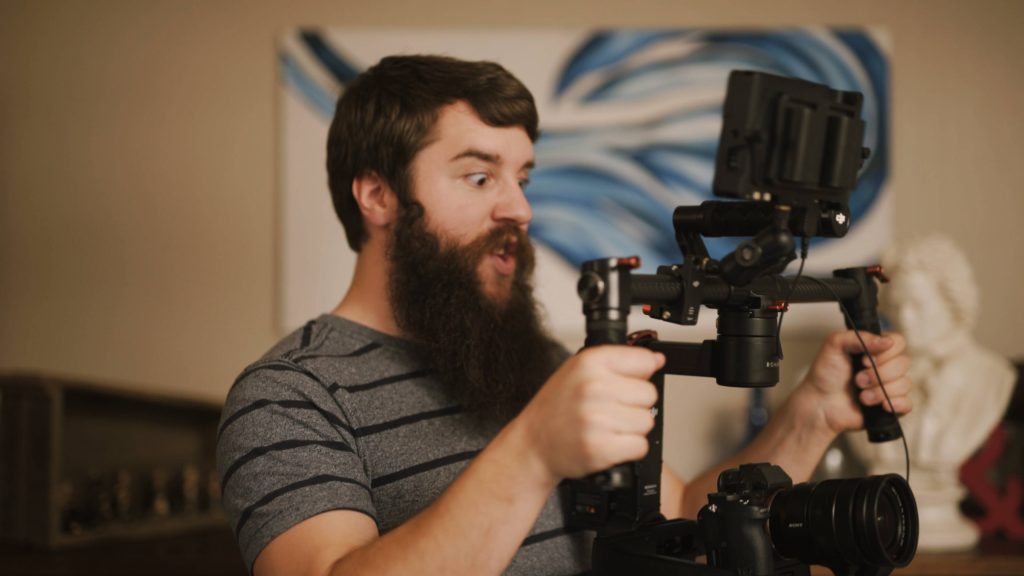
With the release of the DJI Ronin-M, I decided to jump onto the electronic gimbal train and buy one for myself. For the past few months I've been putting it through the paces, filming weddings and testing it in a variety of scenarios. I'm sure you're wondering, does it live up to the hype? Is my Glidecam now gathering dust in the corner? Do I now wish my tripod and monopod were electronic in some way too?
The face I make while using my Ronin-M
Like most things in life, the answer to these questions isn't a simple yes or no. In terms of simplicity and ease of use, the Ronin beats my Glidecam handily. But when it comes to setup time and my style of filming, I still prefer the Glidecam. In the review video above, I break down these pros and cons, as well as fully compare the Ronin-M to my Glidecam HD-4000. And like my previous reviews, I keep everything in the context of my experience using it to film weddings.
So if you are a wedding videographer, cinematographer, uncle Bob with a camera in the back of the church, or basically anyone else that wants to learn more about the Ronin-M, I hope this video is helpful to you.
Thanks for watching! Please let me know if you have any questions or comments about the review video or the camera. If I don’t know the answer, I will do my best to find it out for you.


