You hit Queue in Premiere Pro, expecting your export to hand off to Media Encoder like it always does, and instead Premiere tells you “Adobe Media Encoder is not installed” — which is a heck of a thing to read whenever you are looking at the Media Encoder icon sitting right there on your taskbar. It’s installed! You can see it! Once it is handing off properly, you can also have Media Encoder notify your phone when the render finishes.
Nine times out of ten this is a version mismatch, and it takes about thirty seconds to fix. Here’s that fix first, and then the other causes if the quick one doesn’t do it for you.
The thirty second fix: match your versions
Premiere Pro and Media Encoder have to be running the same version number to talk to each other. Whenever they drift apart, usually because one of them updated and the other didn’t, Premiere goes looking for a matching Media Encoder, doesn’t find one, and reports it as not installed. The message is misleading. What it really means is “not installed at the version I need.”
So open the Creative Cloud desktop app, look at Premiere Pro and Media Encoder in your installed apps list, and check the version numbers against each other. If either one is offering an update, take it, and update both so they land on the same version. Restart Premiere afterwards.
That’s it. That’s the whole thing for most people, and it’s why I made the video in the first place — I had a bunch of you emailing me about this exact error.
If your versions already match
Then it’s one of a few other things, roughly in the order I’d check them.
Is Media Encoder actually installed under this account?
Worth ruling out, and it’s not as silly as it sounds. Media Encoder is a separate app from Premiere in Creative Cloud, and it’s entirely possible to have Premiere installed without it, especially if somebody set the machine up for you or you cherry-picked what to install to save drive space. Open Creative Cloud, go to your apps, and confirm Media Encoder is listed under Installed and not under available-to-install.
Did you install it somewhere other than the default location?
Premiere looks for Media Encoder where Adobe expects it to be. Whenever you’ve moved the install to another drive, or installed to a custom path to keep your C drive free, that handoff can break even though the program runs perfectly well when you open it yourself. If that’s you, reinstalling Media Encoder to the default location is the fix.
Did an update leave the install half-finished?
This happens, and it’s the annoying one because everything looks right. If you’ve matched versions, confirmed it’s installed, and it’s in the normal place, the reliable repair is to uninstall both, restart the computer, then install Premiere Pro first and let it pull Media Encoder in with it. Installing in that order matters, and it’s what finally clears it for people who have been going in circles.
Do you even need Media Encoder for this export?
Genuine question, and I want to save you time here. If you’re queueing to Media Encoder purely out of habit, and you’re not batching a stack of exports or trying to keep editing while something renders, you can just hit Export in Premiere instead of Queue and be done. Premiere renders it itself and never involves Media Encoder at all.
Where Media Encoder genuinely earns its place is batching several sequences at once, and letting you carry on working while it chews through them in the background. If that’s what you’re after, it’s worth fixing properly. If you just want the one file out the door tonight, export straight from Premiere and deal with this another day.
Seven months of editing 4K wedding films on the road with the XPS 15 9570: the screen, the CPU that cut a 94 minute export to under seven, the warranty nobody talks about, and the one spec I would not buy again.
If you’re just getting started in wedding filmmaking, or you’re thinking about it, and you want to know what you actually need to buy to make a beautiful wedding film without breaking the bank or going into debt, this is the guide I made for you.
In my opinion the best budget camera for wedding filmmaking right now is the Sony a6400, at around $900.
It shoots 4K, the autofocus with face detection is amazing, the battery life is improved over previous Sony cameras, it’s very resistant to overheating, you get all the Sony picture profiles, and you have access to an absolute ton of lenses. I own this camera and I love it, and for under a thousand dollars I think it’s some of the best video quality you can get.
The only two things I wish it had are in-body image stabilization and better battery life. Keep that first one in mind, because it comes back later and it affects which lens you buy.
The upgrade: if you have more than $900 for your first camera, get the Sony a6600 at around $1400. You get in-body stabilization, much better battery life, and eye-detect autofocus for video, which is very impressive.
Batteries And Memory Cards
Two things your camera doesn’t work without, and the place people always under-buy.
On my a7S II, which uses the same batteries as the a6400, I go through about four batteries on a typical wedding day. So buy at least four NP-FW50 batteries, and bring your charger to the wedding so you can top up during the day. If you went with the a6600 instead, the battery life is much better and I’d expect one or two on a wedding day, but I’d still buy at least three NP-FZ100 batteries to be safe.
Memory cards are one of the cheapest things you’ll buy, so spend the extra few dollars on a decent brand. For under $40 these SanDisk 128GB SD cards are plenty fast and give you roughly 2 hours 45 minutes in 4K, or over 5 hours in 1080p. I usually go through one card plus a bit of a second, so pick up three.
Lenses
Wide. You want a good wide lens so you can show your audience a beautiful establishing shot of the venue, and for a budget wide it’s no contest: the Sigma 16mm f/1.4. Great autofocus, amazing in low light, and I’m still a little shocked at how Sigma priced it.
Medium. The Sigma 30mm f/1.4 is a great option with the same autofocus and low light strengths. One real con: it’s focus by wire, so if you pull focus manually there’s a slight lag between turning the ring and the focus actually moving.
Which is why I’d point you at the Sony E 35mm f/1.8 instead if you can afford it. It’s more expensive, slightly tighter, and doesn’t let in as much light, but it’s much better for manual focus and it has Sony’s optical stabilization built in. Remember the a6400 has no in-body stabilization, so if you want to shoot handheld on that body, you need a lens with OSS or your shots will be shaky. For that reason alone, the Sony 35mm is the better buy.
Tight. Here’s where I’m going to disagree with what you were probably expecting. On a budget I’m not going to tell you to buy an 85mm or a 135mm prime. Buy a zoom instead, because it gets you those long focal lengths for close-ups of the couple and covers you during the ceremony, whenever you’re stuck at the side of the chairs or pinned to the back of a church and you need the reach.
A 70-200mm is the standard here. The problem is that Sony’s cheapest 70-200 runs about $1400, which is an enormous bite out of a budget kit. It’s a great lens and I love mine, but there’s a better move.
Those Canon 70-200s are also plentiful used, so you may do better than $600. And if you want to go cheaper still, look at the Canon 70-300mm, which sells new around $377 and which I’ve seen used for under $200. You still need the adapter, but that’s not bad at all for that much focal range.
Audio, Which Matters More Than Any Of This
Audio gear is cheaper than cameras and lenses and it is arguably more important, because your couple will forgive footage that isn’t white balanced right or that’s slightly soft. They will not forgive bad audio.
Buy at least one Tascam DR-10L, two if you can afford it. With one, put it on the groom for the ceremony so you get his vows, the bride’s vows, and hopefully the officiant’s message if they’re standing close enough. With two, one on the groom and one on the officiant, and now you’re guaranteed both. They’re also great for letter readings, or for clipping onto somebody giving a toast. Very versatile little things.
Don’t forget an AAA battery and a microSD card for each one. The DR-10L supports up to 32GB.
The second recorder to buy is the Tascam DR-40X, around $200, which lets you plug into the venue’s or the DJ’s soundboard for another source during the ceremony and reception. For that you’ll want an XLR cable, a quarter inch to quarter inch, and an RCA to quarter inch. Those three between them will connect to virtually any soundboard you’ll meet.
If $200 is too much right now, Tascam’s older DR-40 is basically identical to the DR-40X and there are a lot of used ones out there for a good bit less.
Support Gear
This is the one place I’m going to tell you to spend a bit more, because in my experience a good tripod or monopod lasts years and a cheap one does not.
Since the a6400 has no in-body stabilization, you need something holding it steady. Start with a monopod. I use and recommend the Manfrotto video monopod, around $230. The feet at the base make it far more stable than a plain stick, the fluid tilt head is genuinely nice, and the thing is a workhorse that takes a beating. If that’s too much, honestly any photography monopod will work, it just won’t be as stable.
You could shoot a whole wedding on a monopod, and I know filmmakers who do, but ceremonies are long and standing there holding a camera up the entire time is a pain. So get a tripod too. For around $307 the Manfrotto MVT502AM legs with the MVH500A head are a great combination that isn’t crazy expensive. Smooth pan and tilt, and the head has a half ball mount so leveling on uneven ground is easy.
One reason I keep recommending Manfrotto for both: they share the same quick release plate. So you can pull the camera off the monopod and onto the tripod in a couple of seconds, which is critical at something as fast moving as a wedding.
That’s Everything You Need
Genuinely. I filmed my first wedding with less than this.
But I know some of you are yelling at the screen right now. What about the gimbal? What about the drone? What about the slider? Notice I said need. Those are wants, and you do not need them to make a good wedding film. Spend on the needs first, and then whenever there’s budget left over, we can talk.
Whenever You Have Leftover Budget
A second camera would be my first purchase, for another ceremony angle and for a second shooter. Ideally the same body, or at least the same manufacturer, so the colors match easily in the edit.
A gimbal, for the pretty walking shots. Cheap end, look at the Moza AirCross around $250, and you can often find a Zhiyun Crane V2 or Crane Plus used for that or less. Any of those will serve you fine as a first gimbal. If you have more, the Zhiyun WEEBILL-S at $439 is one of my favorite new gimbals, and the motors are much stronger, so it’ll still cope whenever you upgrade to a bigger full frame body or heavier glass.
A drone. You love drones, I love drones, you don’t need one to film a wedding, and I bring mine to every single wedding anyway because if there’s a chance to fly, you know I’m flying. For a budget drone, the DJI Mavic Mini at $400 is one of the best starter drones available and the 2.7K video is perfectly decent. To upgrade, look at the DJI Mavic Air.
A slider. No. I own a slider and I haven’t taken it to a wedding in years. In the time it takes to set one up I’d rather grab ten shots with a gimbal. Buy the gimbal, skip the slider.
One More Thing
I host a monthly wedding film review livestream where I review films submitted by people like you, and I’d love to review yours. Sign up here and I’ll email you a submission link about a week before each one.
Every timelapse and drone setting from the film, why I face away from the moon, and how home video from 1992 turned a week of pretty shots into an actual story.
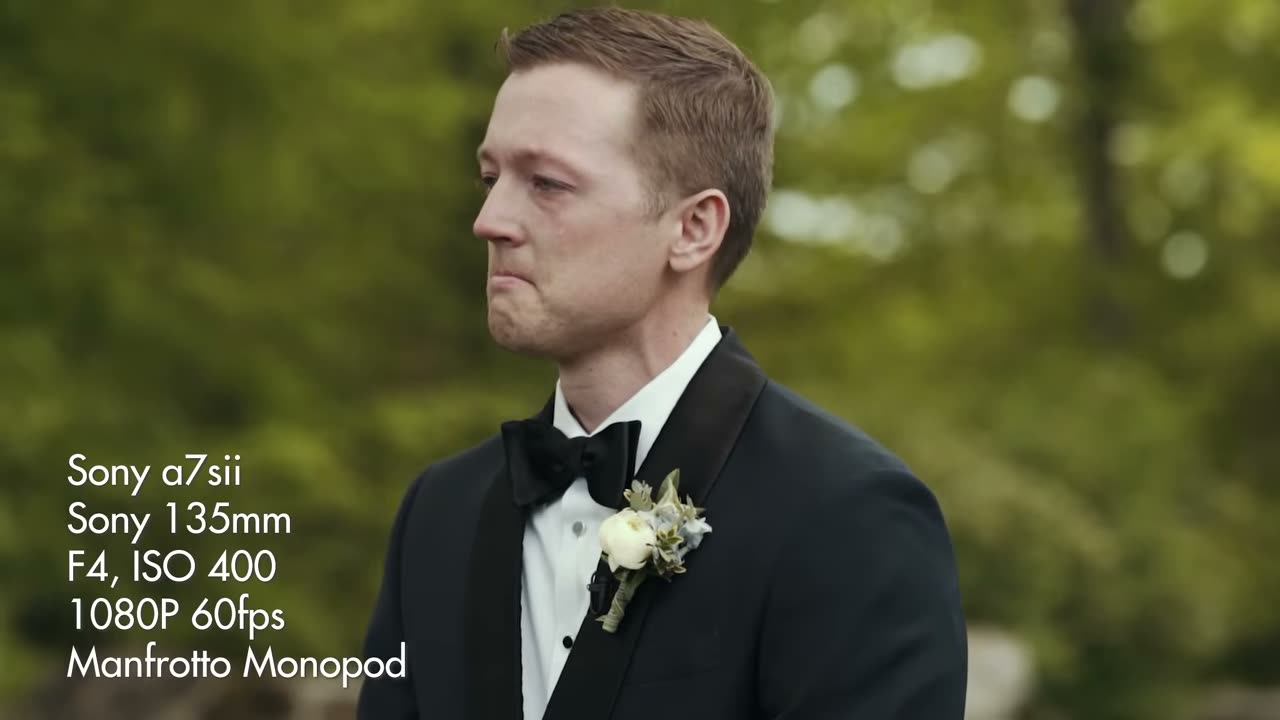
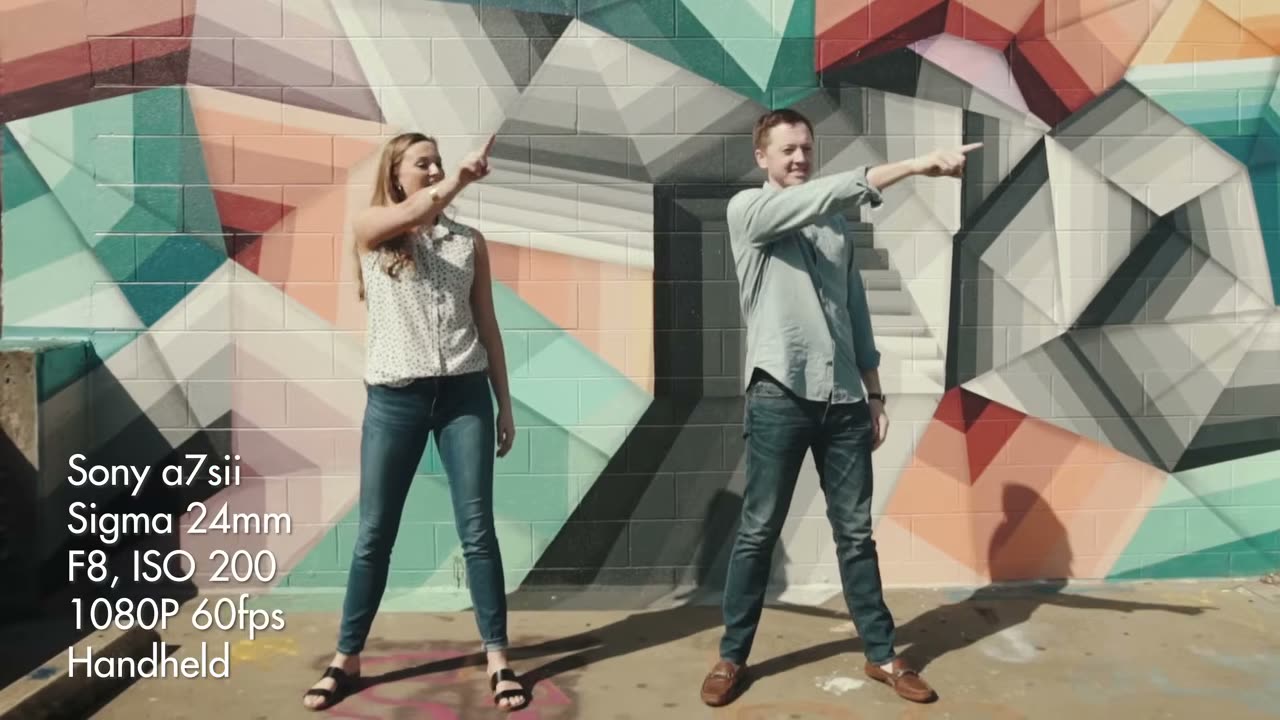
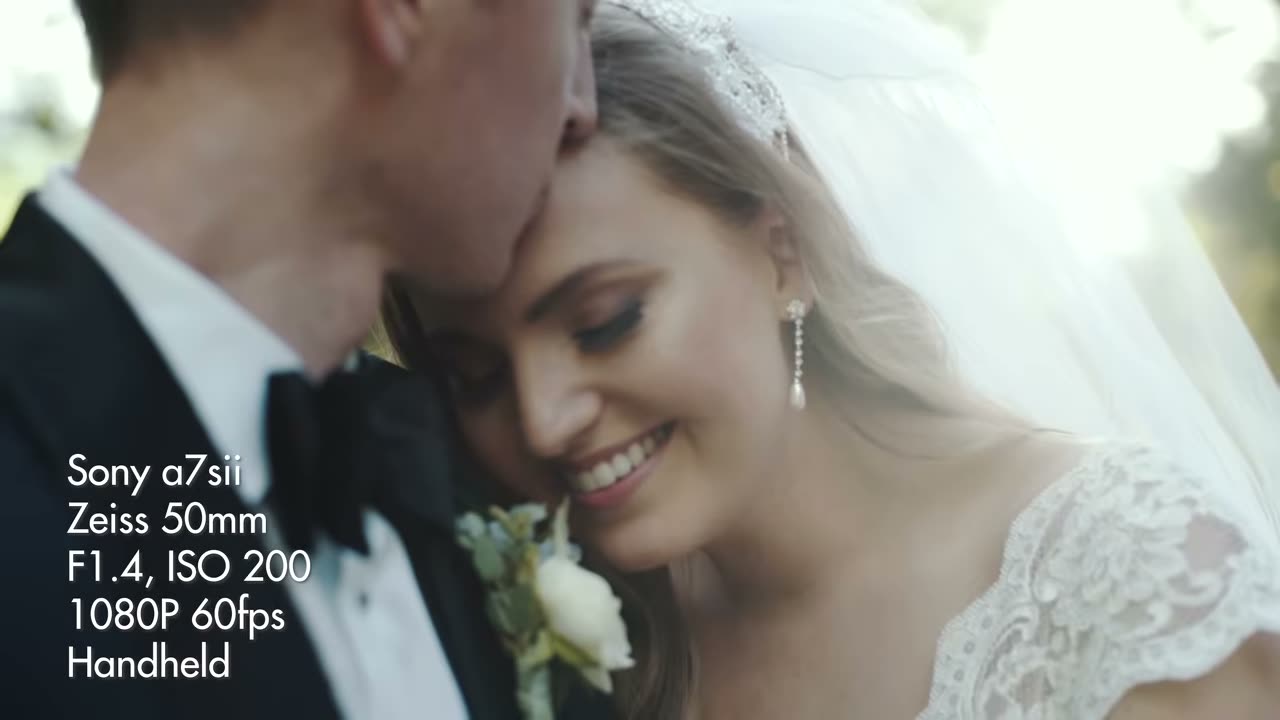
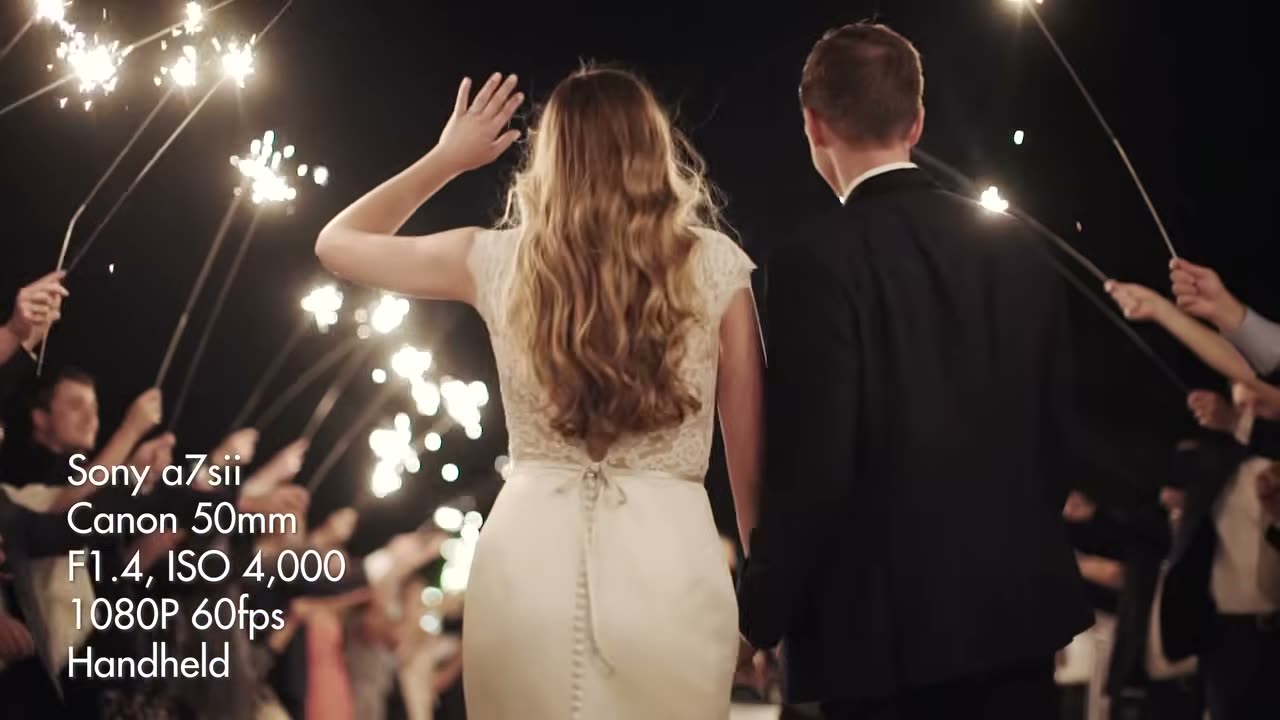
This is Allison and Seth’s wedding trailer from a December wedding at a ranch venue in Texas, and instead of just posting the film I put the camera, lens, and settings on screen for every single shot, because whenever I was starting out the thing I wanted most was to look at a wedding film I liked and know exactly what was used to get it.
So here’s the whole rundown, plus the reasoning behind it, which is honestly the more useful half.
What was in the bag
Sony a7S II and Sony a7 III as the two main bodies
Sony 135mm, Sigma 24mm, and a Canon 50mm on an adapter
DJI Mavic 2 Pro for the aerials
Zhiyun Crane 2 gimbal, a monopod, and a tripod
Canon 7D with a Rokinon 14mm, purely for the night sky title card
The two-camera system, and why each lens lives where it does
If you watch the overlays through the whole trailer you’ll notice the pairings almost never change, and that’s on purpose. Whenever you’re at a wedding you do not have time to be swapping lenses while something is happening, so each body has a job and stays in it.
135mm on the a7S II, on a monopod, for anything emotional
Sony a7S II, Sony 135mm, F2.8, ISO 500, 4K 24fps, monopod.
Every tight, flattering, someone-is-about-to-cry shot in this trailer is the 135mm, hanging around F2.8 to F5.6. It compresses the background into mush, it lets you stand well back so nobody feels watched, and on a wedding day that distance is the entire point.
The monopod is doing quiet work here too. A 135mm handheld will show every heartbeat, and a monopod kills that without tying you to a tripod, so you can still move whenever the moment moves.
Sigma 24mm on the a7 III, on the Crane 2, for anything that moves
Sony a7 III, Sigma 24mm, F1.4, ISO 3,200, 1080P 60fps, Zhiyun Crane 2.
Wide lens, gimbal, and it never leaves that body all day. Look at how far the aperture swings on this one though, because that’s the interesting part. Outside in daylight for the ceremony wides it’s at F8 and even F12 at ISO 200, and then indoors for the first dance it’s wide open at F1.4 at ISO 3,200.
Stopping down that hard outdoors isn’t me being fussy about sharpness, it’s about focus. Whenever you’re walking a gimbal through a crowd at 24mm, a deep depth of field means everything stays acceptably sharp and you’re not fighting autofocus while you’re also trying not to trip over a flower girl.
Canon 50mm for the in-between
Sony a7S II, Canon 50mm, F3.5, ISO 5,000, 1080P 60fps, handheld.
The 50mm covers everything the other two don’t, and it’s the lens that goes handheld once the reception starts and the dance floor gets busy. That’s also where the ISO climbs to 5,000, which is exactly what an a7S II is for and why I kept using that camera long after it stopped being the newest thing.
Why some shots are 4K 24fps and others are 1080p 60fps
This one’s worth spelling out because the pattern is completely consistent through the trailer, and it isn’t an accident.
The still, emotional, locked-off close-ups are 4K 24fps. The moving shots, gimbal walks, dancing, anything with motion in it, are 1080p 60fps. Shooting 60 gives you the option to slow it down to about 40% in the edit and have it still look smooth, and moving shots are exactly where a bit of slow motion earns its keep. A static shot of a bride’s face doesn’t need that option, so it gets the resolution instead.
You are trading resolution for the ability to slow things down, and on a wedding trailer that trade is almost always worth it.
The drone and the title card
DJI Mavic 2 Pro, full field of view, F4, ISO 100, 4K 30fps.
One aerial, right at the top, doing the job an establishing shot is supposed to do: here is the place, here is the lake, here is the weather. ISO 100 because it’s the middle of the day and there’s no reason to be anywhere else.
Canon 7D, Rokinon 14mm, F2.8, ISO 3,200, raw photos on a tripod.
And then the title card, which is the one shot in here that isn’t video at all. That’s an old Canon 7D with a Rokinon 14mm on a tripod shooting raw photos of the night sky, assembled afterwards. A crop sensor DSLR that was ancient even in 2018, doing something none of the newer cameras in the bag were set up to do that night.
Which is the note I’d leave you on, honestly. There is nothing in this trailer that requires current gear. The a7S II was three years old at this point, the 7D was closer to nine, and the shots still hold up. Buy the lens before you buy the body.
If breakdowns like this are useful to you, let me know in the comments on the video, because that’s genuinely why I started putting the settings on screen in the first place.
Phantom 4 Pro image quality in a Mavic sized body, which is exactly what I wanted. Three upgrade questions answered, plus the aperture range you should never leave.