
To upload the highest possible quality video to your Instagram feed, you actually need to upload it to IGTV, and then, right before you hit post, check the box that says Post a Preview. That posts your IGTV video to your feed in the best quality Instagram will give you.
One note before we go further, because this method is of its time: IGTV was a separate product when I made this, and Instagram has since folded it into their main video product, so the buttons no longer look exactly like the ones below. The principle behind it is the part worth keeping, and I’ll come back to that at the end.
Matt, I don’t want to upload vertical videos, why are you telling me to use IGTV, it only accepts vertical? You’re wrong. Instagram released an update a few months ago that lets you upload horizontal video to IGTV. Finally. What a novel thought.
But let’s rewind, because I’m sure you have questions and I want to tell you how this works and why it gets you the best quality available.
Instagram Video Quality
First thing you need to know is that Instagram’s video quality, whenever you upload to your feed the traditional way through the app, is terrible.
Even if you upload in 4K, Instagram is going to compress it down to 640×360 at around 3 megabits per second. That is standard definition. It is so bad. If you want to upload that way anyway, I made a video years ago with my exact settings for getting the most out of that method.
But you’re not reading this because you want something low quality. You want the highest quality you can get. And that’s where IGTV comes in, with a much better resolution and bit rate than a normal feed upload.
What IGTV Actually Gives You
Upload a horizontal HD video to IGTV, then download the file back after Instagram has processed it, and you’ll see it playing back at 1152×648.
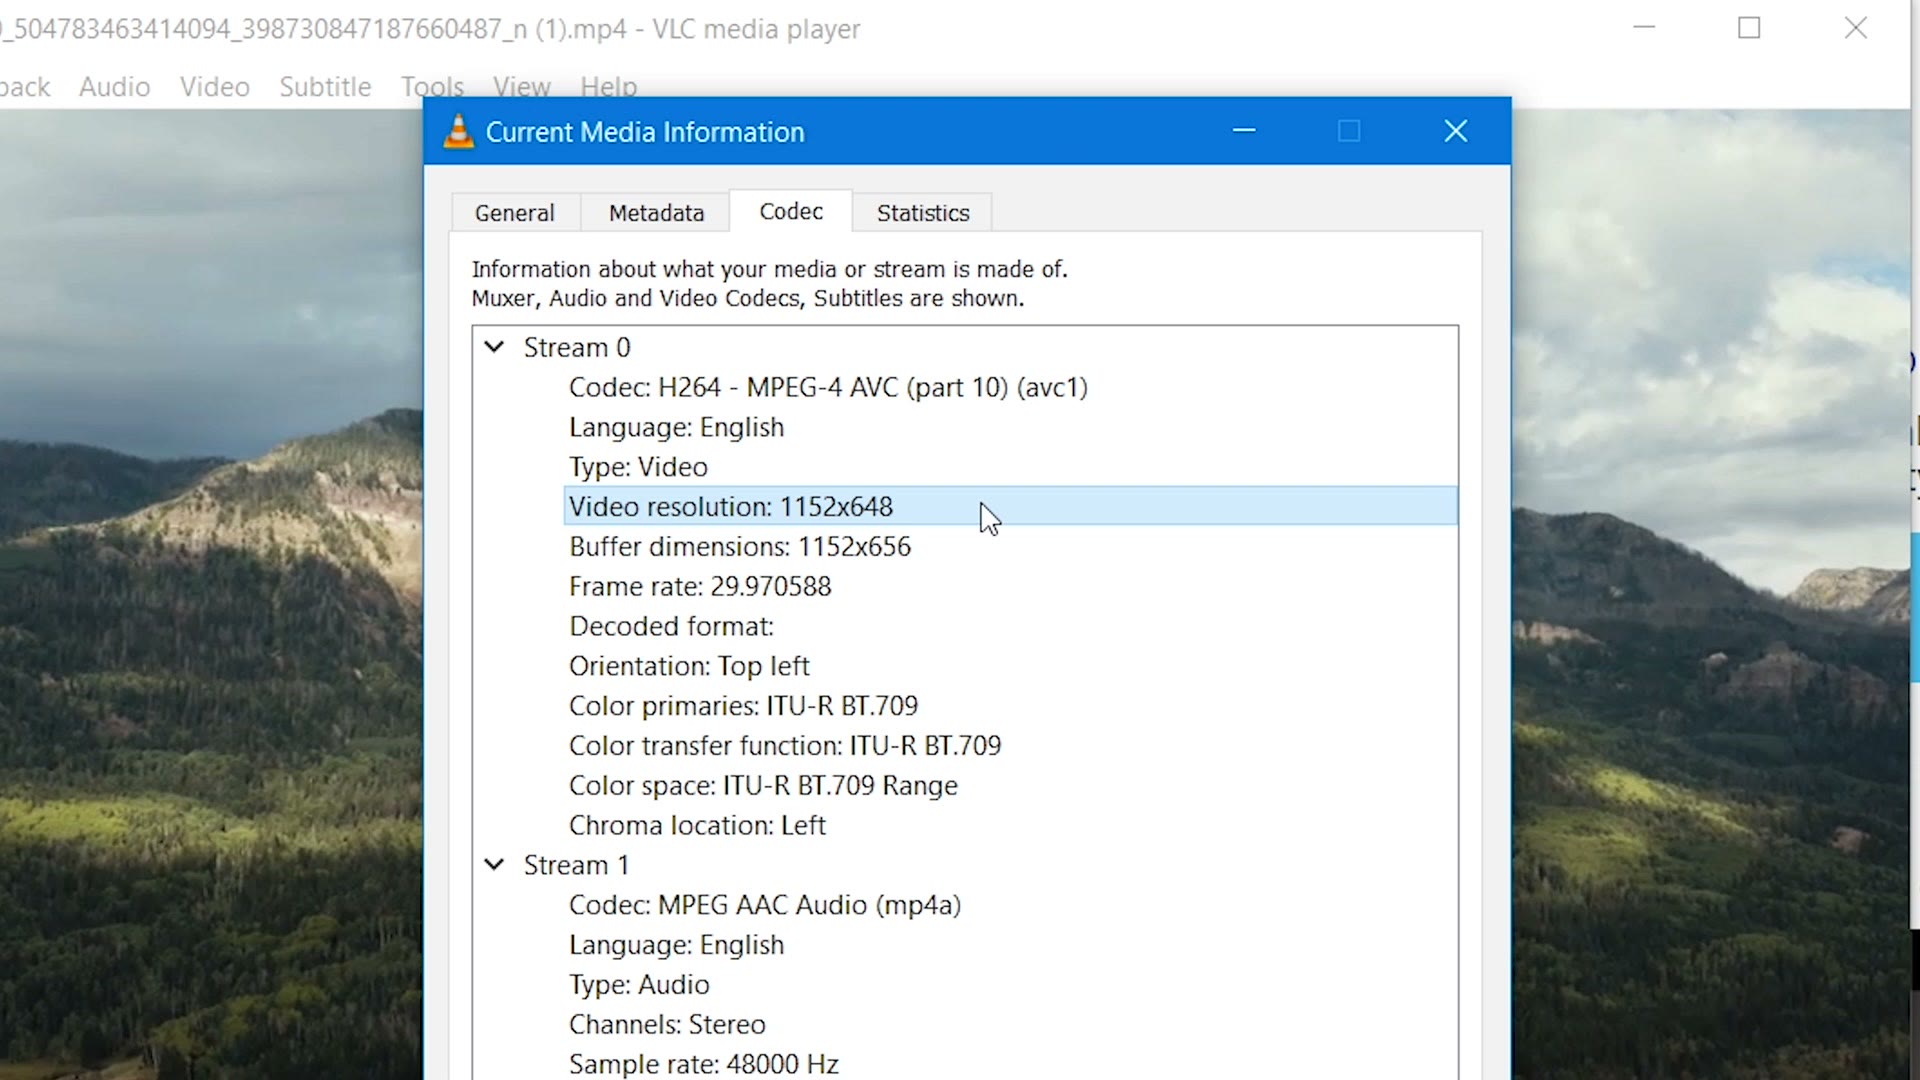
Almost 720p. Which, hey, is nowhere near 1080p HD. But it’s still almost double the resolution you get uploading to your feed the traditional way.
Horizontal Or Vertical
If you want to upload horizontally, in 16:9, I’d recommend giving it a 1080p file. I’ve written up how to export a 1080p HD video out of Premiere if you want the exact settings.
I hear you now saying, Matt, horizontal is cool but vertical video is the future, I believe that. Well, I’m not sure how accurate that is. But I’ve also covered how to export vertical videos for IGTV, so take your pick.
Video Length
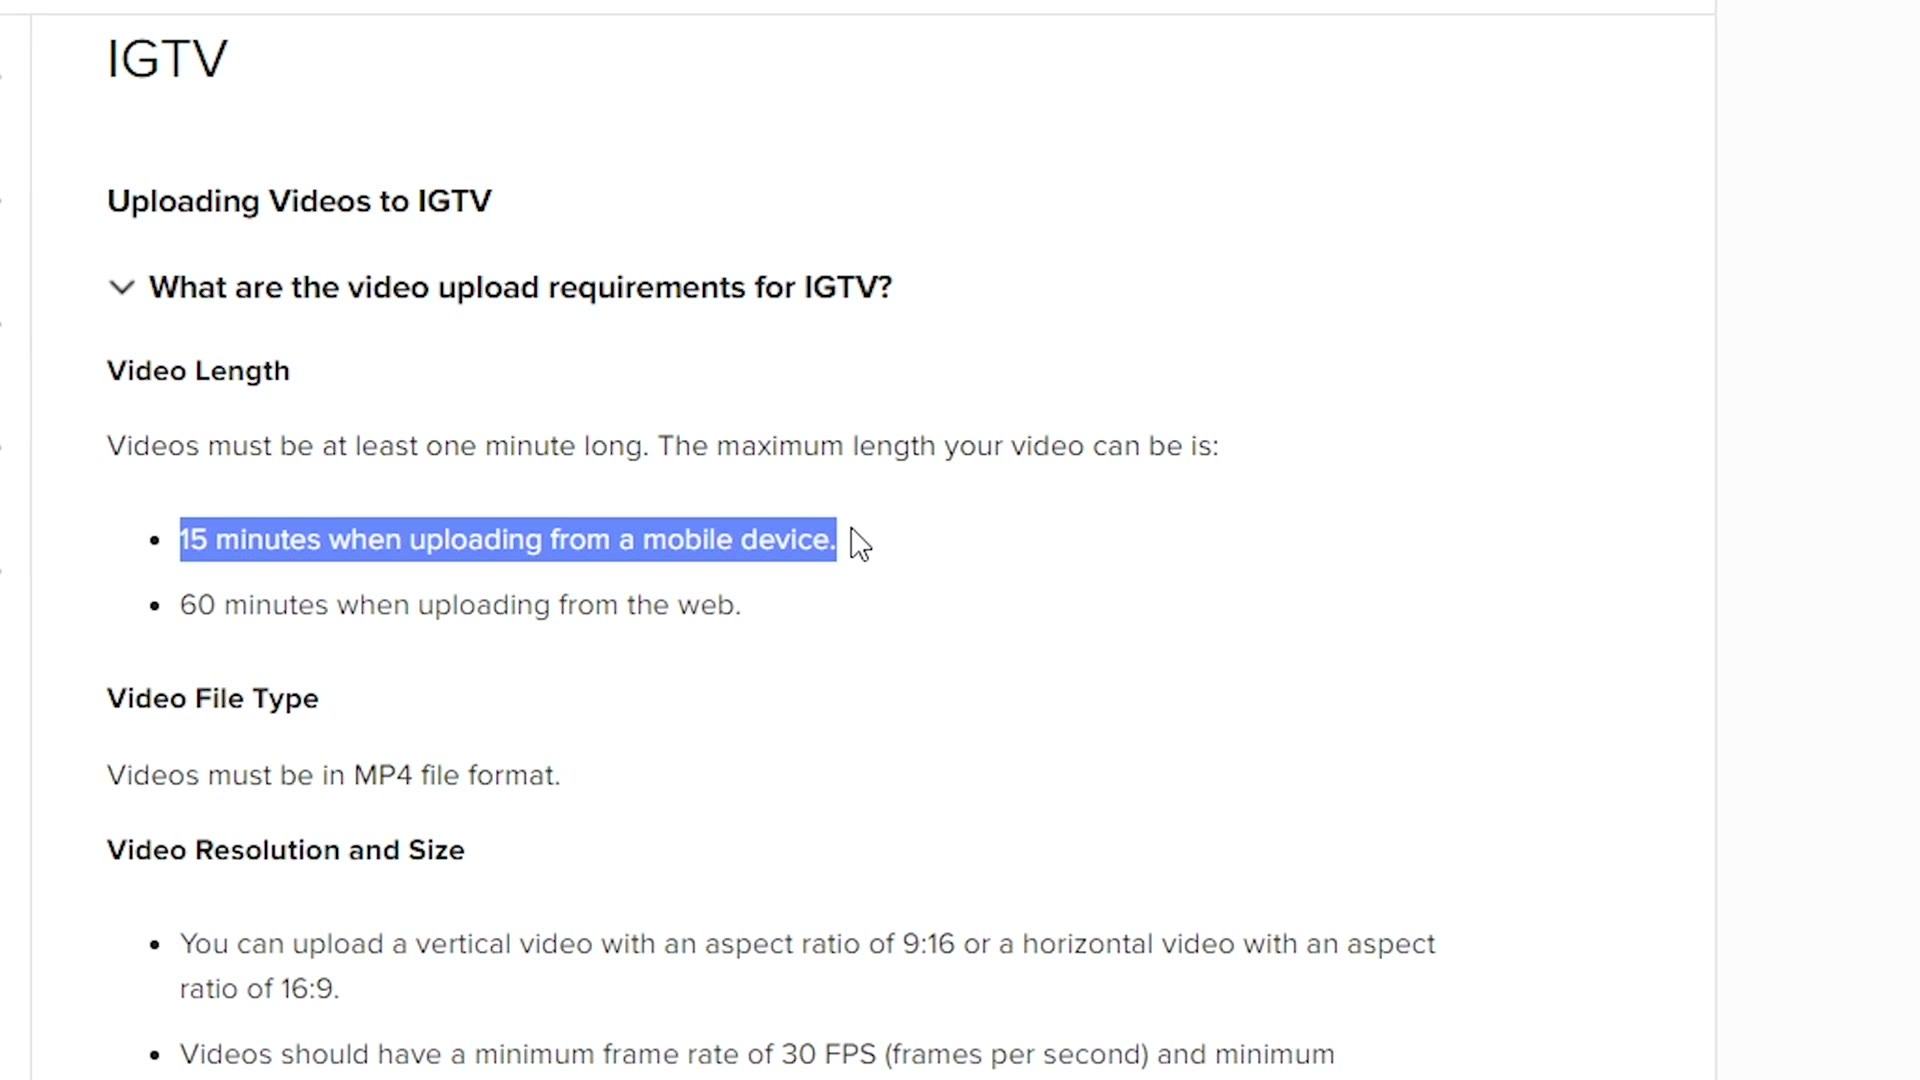
A traditional Instagram video upload maxes out at one minute. An IGTV upload works the other way round: your minimum is one minute and your maximum is an hour.
So you’re telling me, Matt, my video isn’t a minute long, IGTV won’t work for me. Simple solution. Loop it. Instagram loops videos on your feed anyway, so open Premiere or whatever you edit in, copy and paste the clip on your timeline a few times, and as long as you clear that one minute mark you’re good.
Uploading
You have two options. You can use the app, which I don’t really prefer because it has limitations. I’d much rather upload from a computer through the Instagram website.
Go to the site, sign in, go to your profile page, click IGTV, then click Upload.
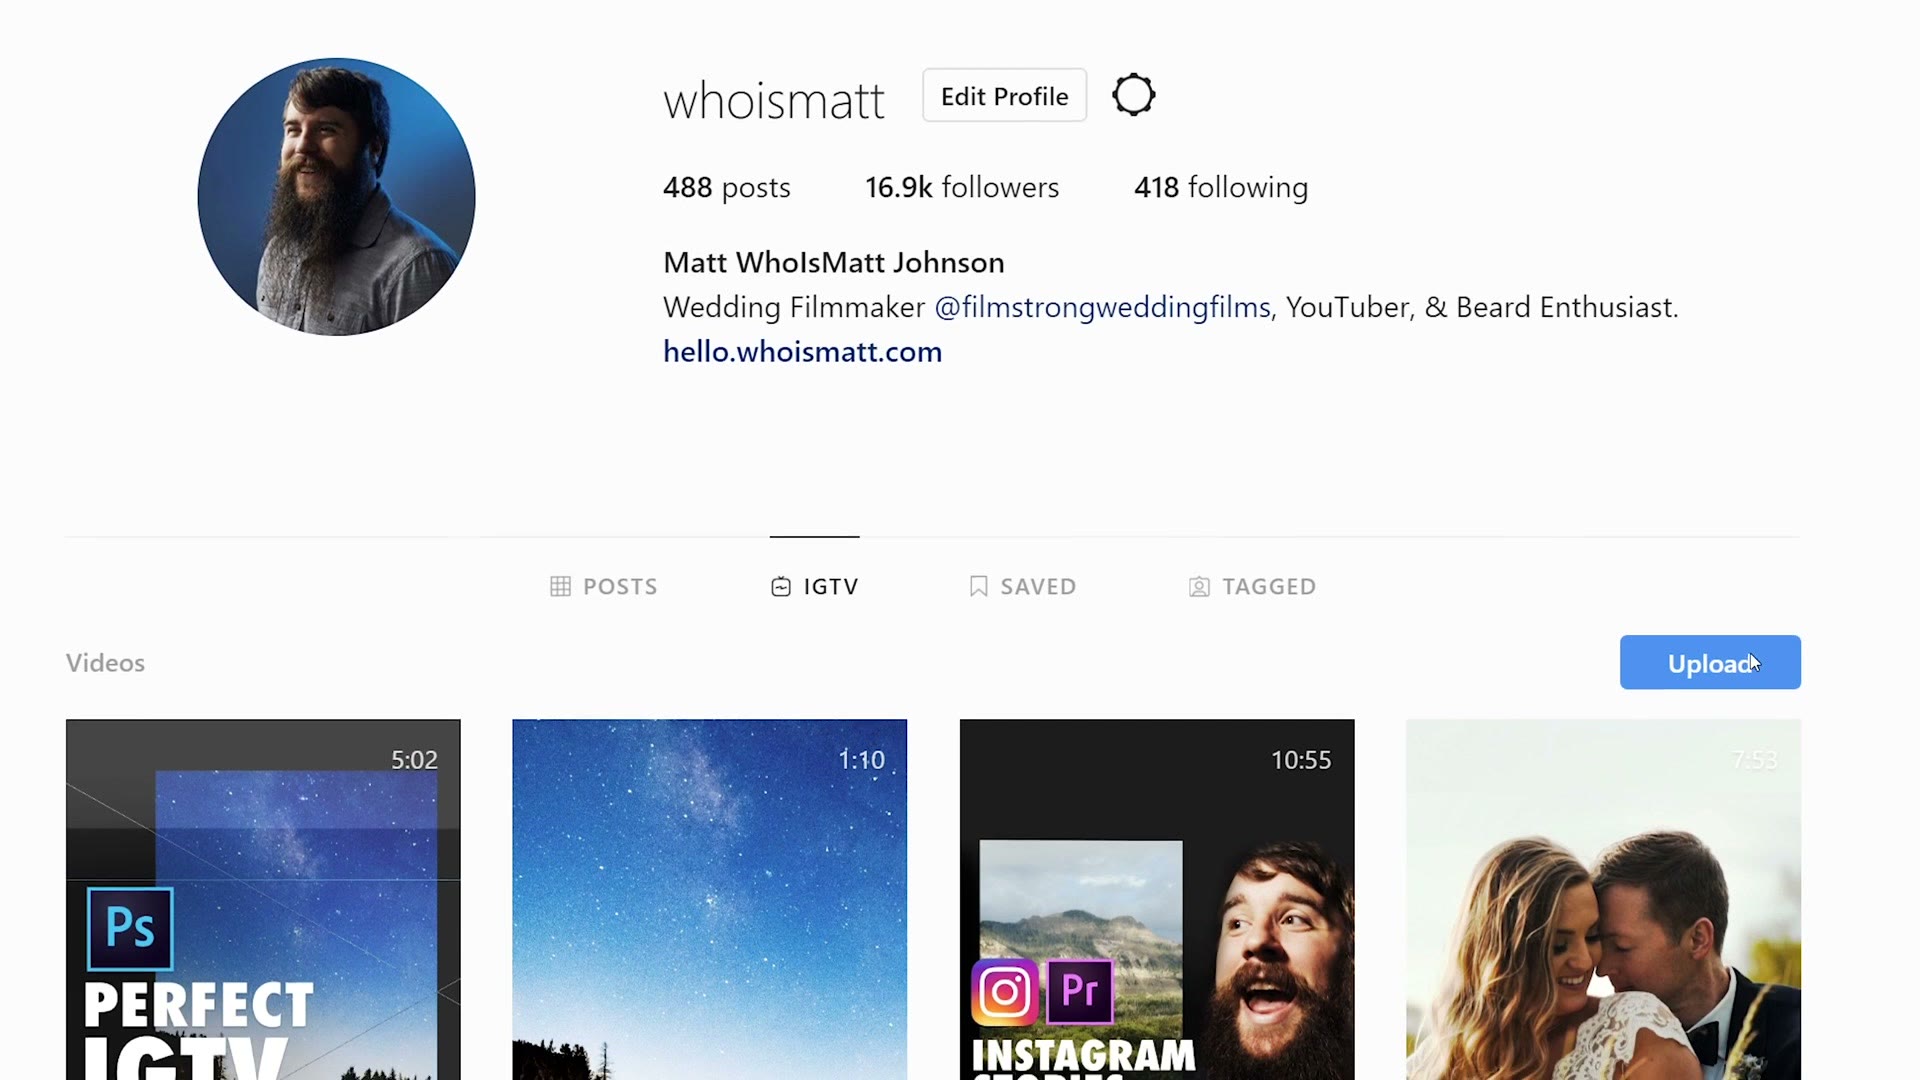
Drag your video file over, title it, write a description, and upload a thumbnail.
The Thumbnail
The thumbnail matters more than you’d think, because IGTV shows a large rectangular one and your feed shows a small square crop of the same image. So it has to work in both places. Instagram will not let you change it after you’ve uploaded, which is what makes getting it right the first time so important. I’ve put together a full sizing guide with a free Photoshop template for exactly this.
Post A Preview
Lastly, and most importantly, before you click post, make sure the Post a Preview box is checked.
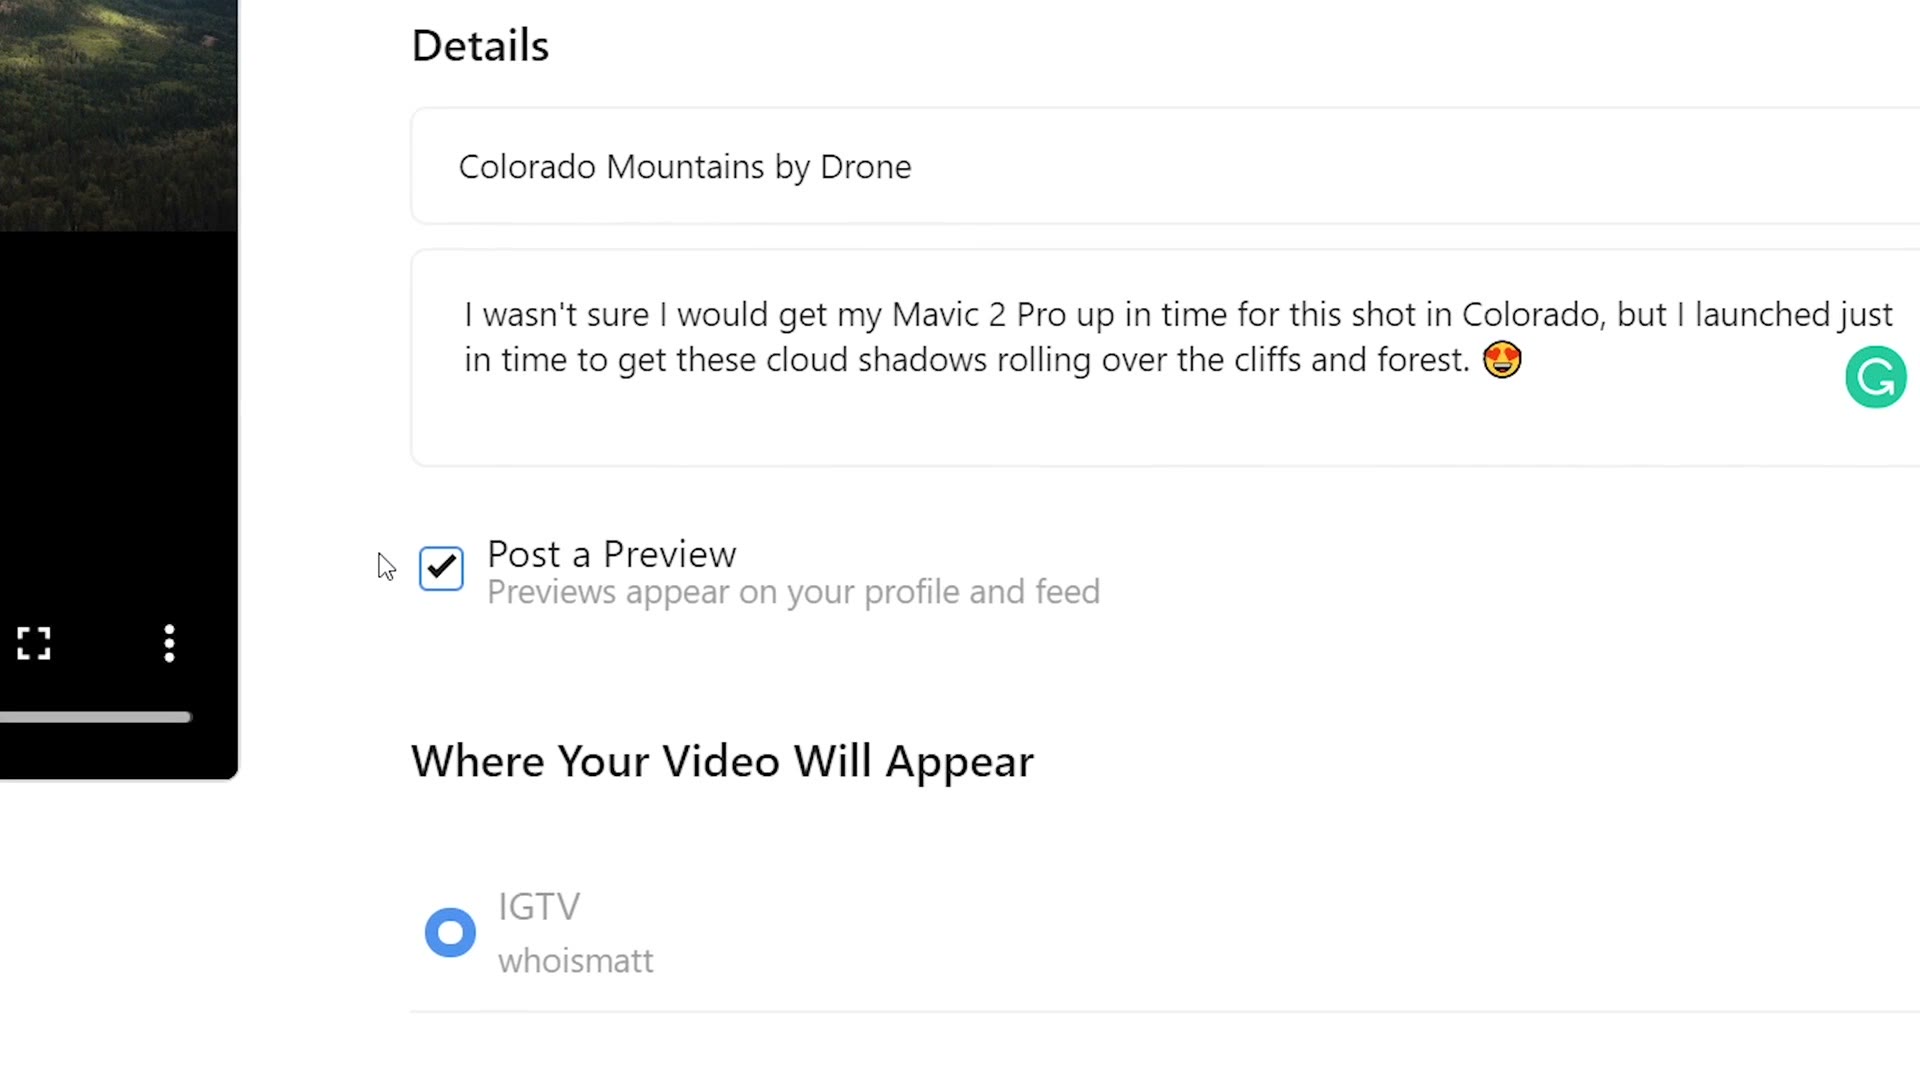
That’s the checkbox that makes your IGTV video appear in your Instagram feed just like a normal Instagram video. Click post and it goes up on your page like any other upload, but in much higher quality. You can hashtag it at that point too, same as usual.
What Still Applies
Instagram has retired the IGTV branding since I made this, so you won’t find a tab with that name anymore. What has not changed is the reason any of this worked: Instagram compresses a quick feed upload far harder than it compresses a proper long form video upload, so whenever you have the choice, put the file through the longer form path and let it surface on your feed from there. That’s the whole trick, and it outlived the button.
Hope this was helpful and gave you some insight into the inner workings of Instagram video. I have a ton more on exporting and on video quality if you want to go deeper, and if you’re a wedding filmmaker who wants to book more couples, there’s a free guide for that.