
Can you combine S-Log3 with S-Cinetone to create the ultimate picture profile?! Let’s try to make an extremely high dynamic range picture profile that also looks great straight out of camera!
Can you combine S-Log3 with S-Cinetone to create the ultimate picture profile?! Let’s try to make an extremely high dynamic range picture profile that also looks great straight out of camera!

If you are trying to record in 4K at 120FPS in XAVC S-I on the Sony a7S III and cannot figure out how to access this frame rate, here’s how to do it in 4 easy steps.
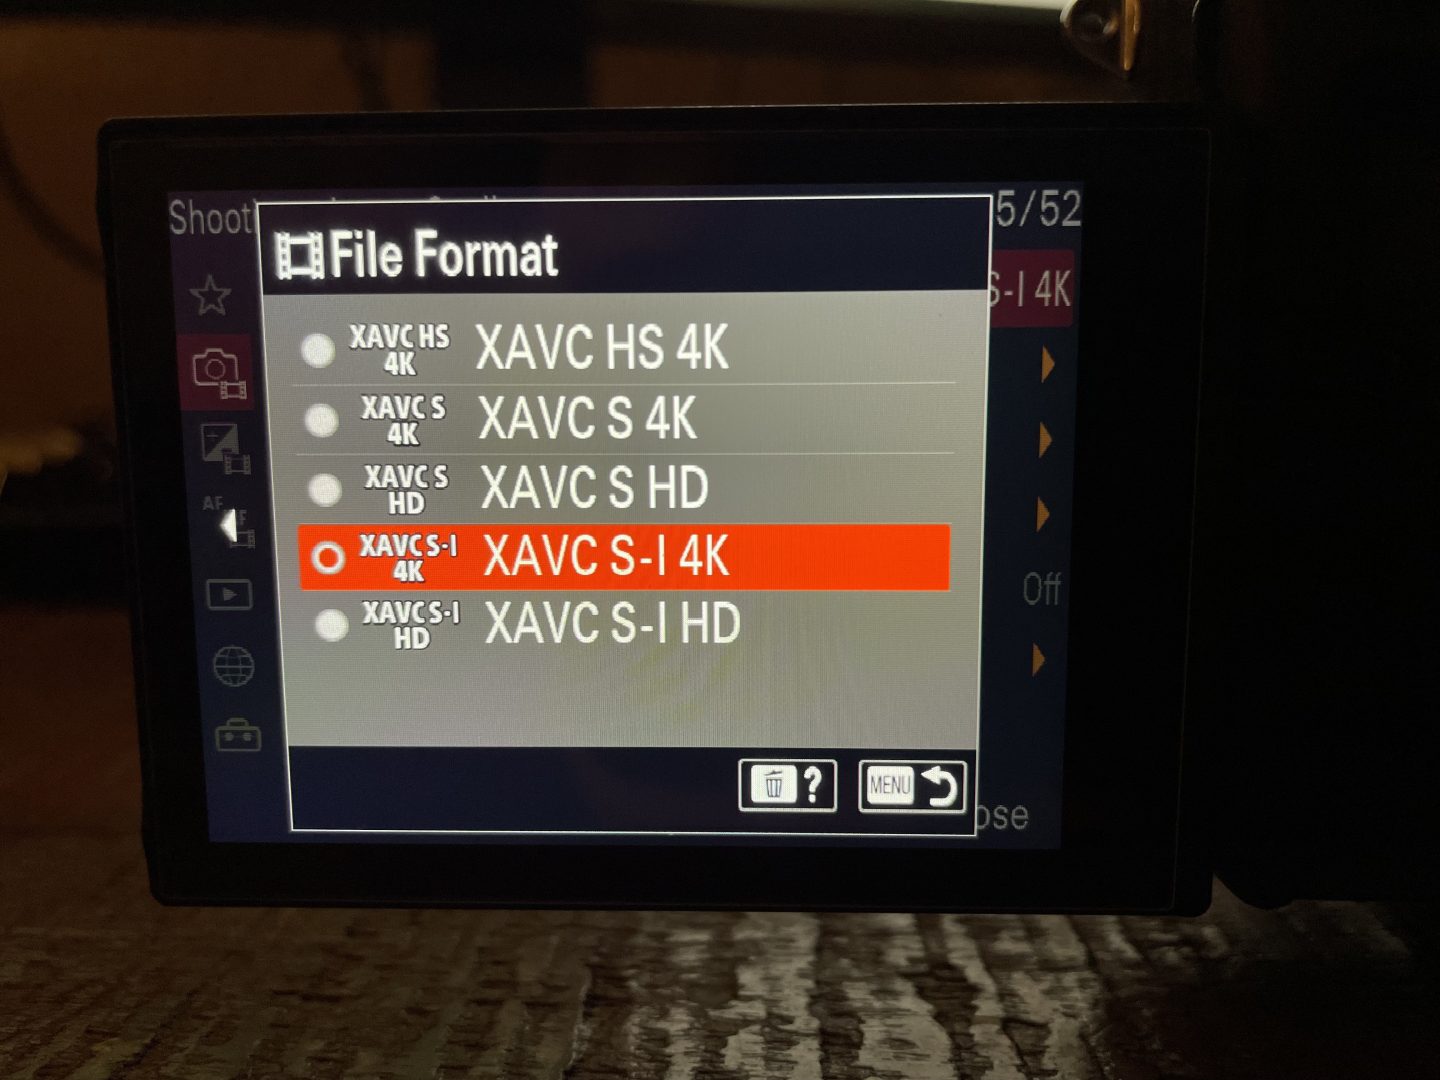
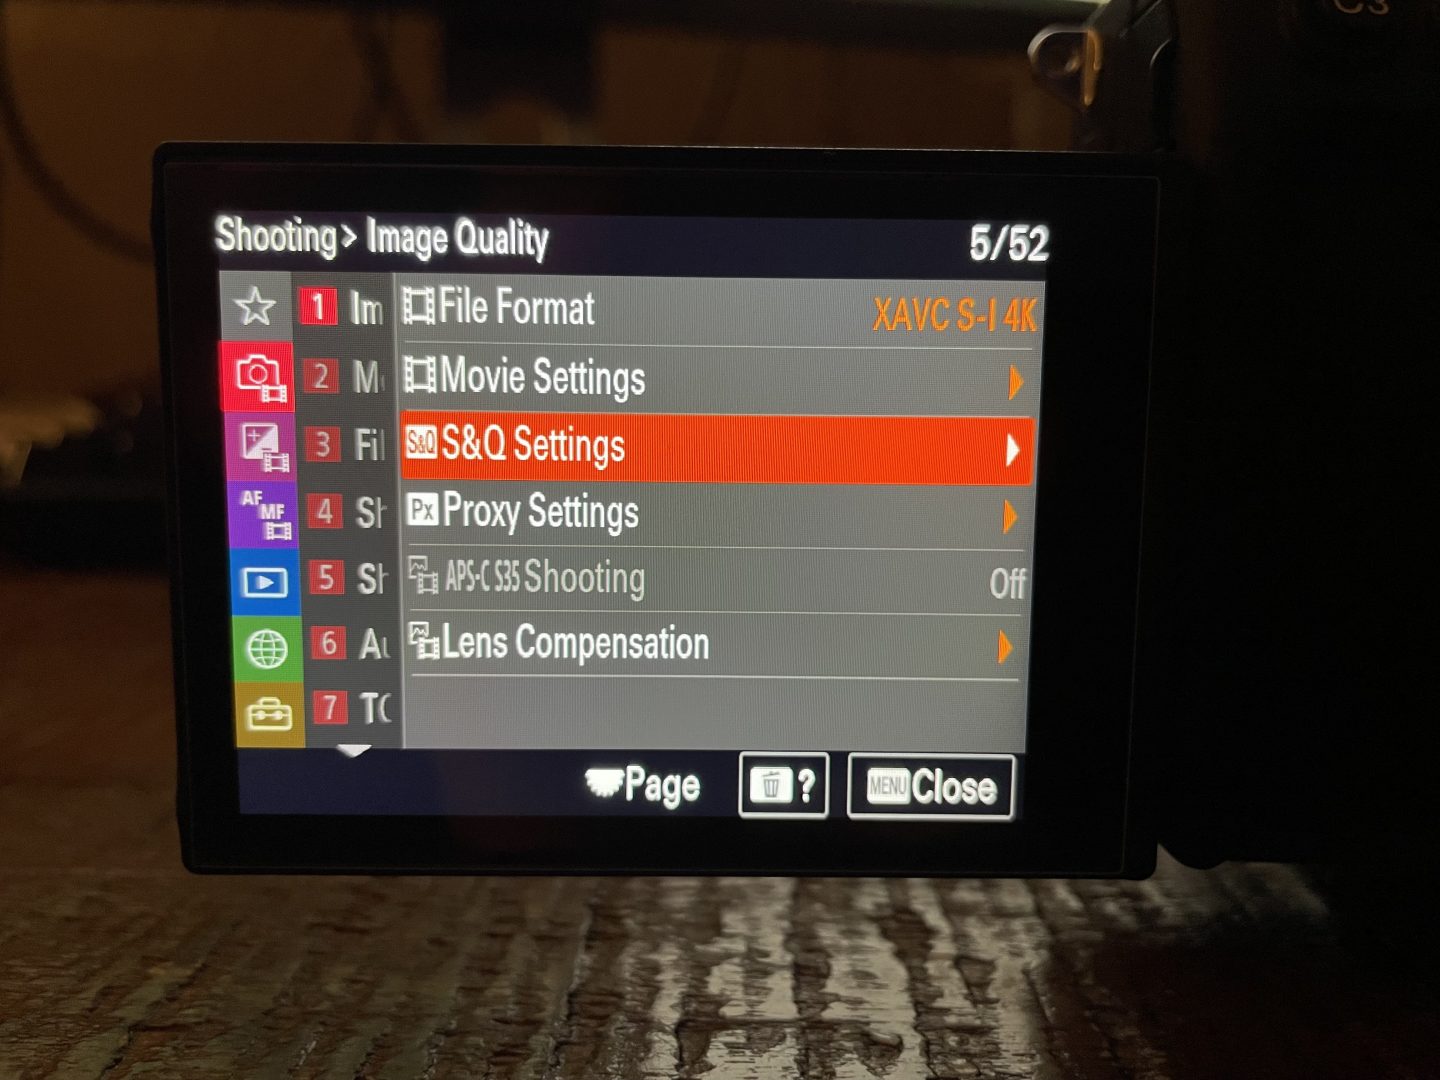
2. Navigate to the S&Q Settings Menu
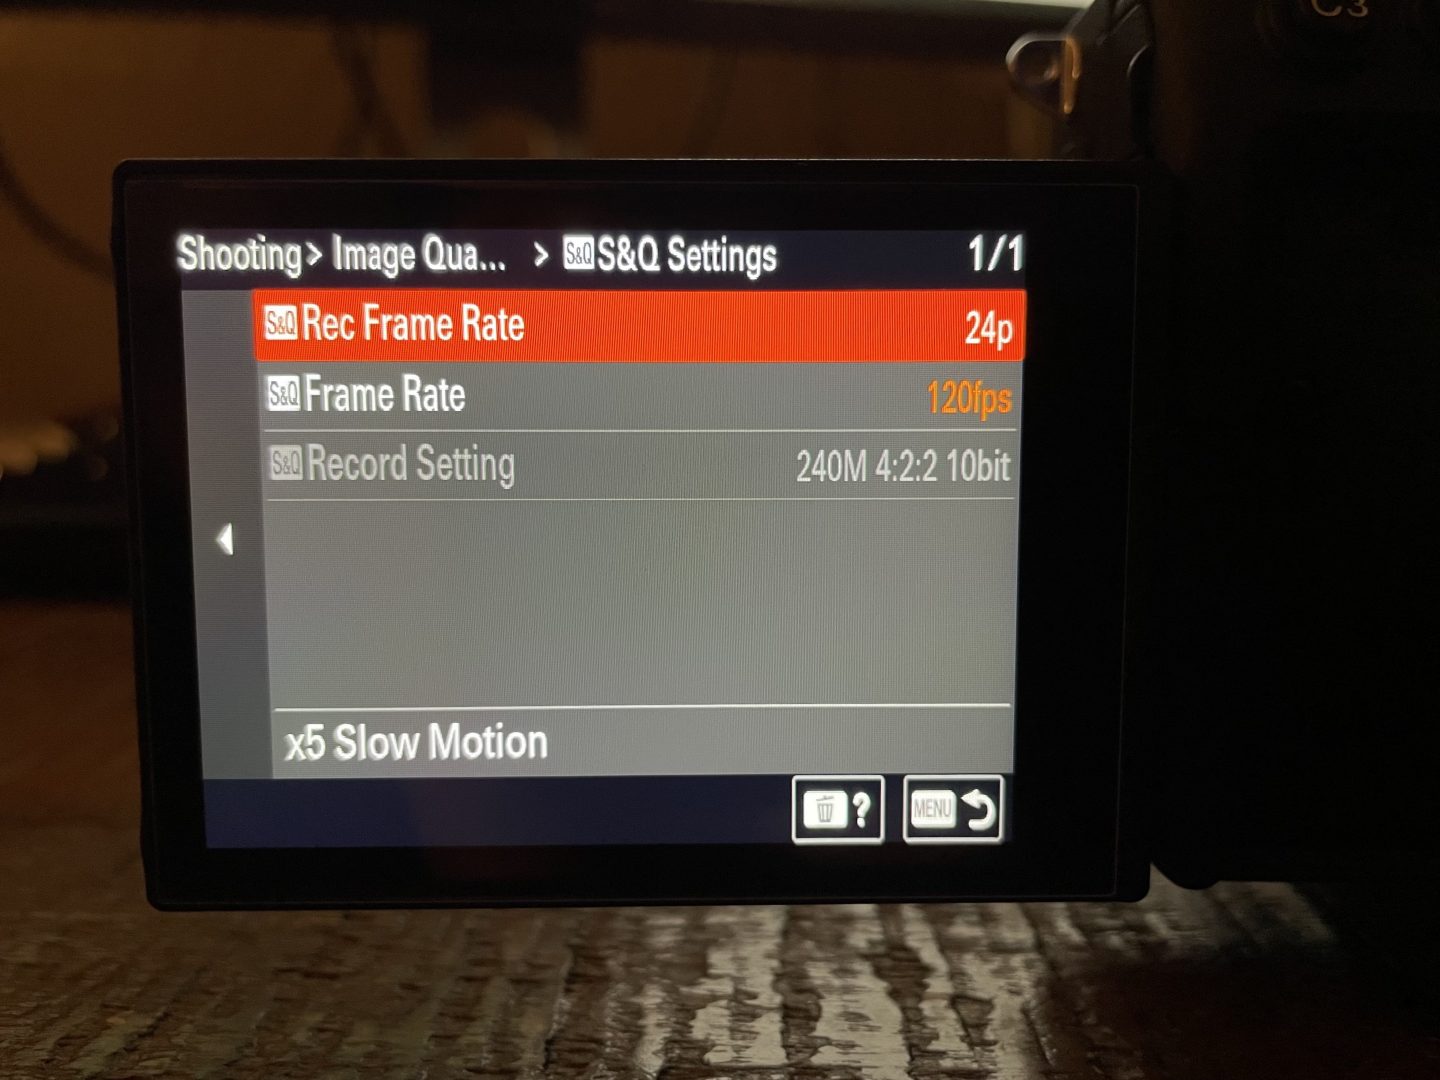
3. Set your S&Q Frame Rate to 120fps. For your S&Q Record Frame Rate, you can select the final frame rate you want your video to be in. I usually use 24p.
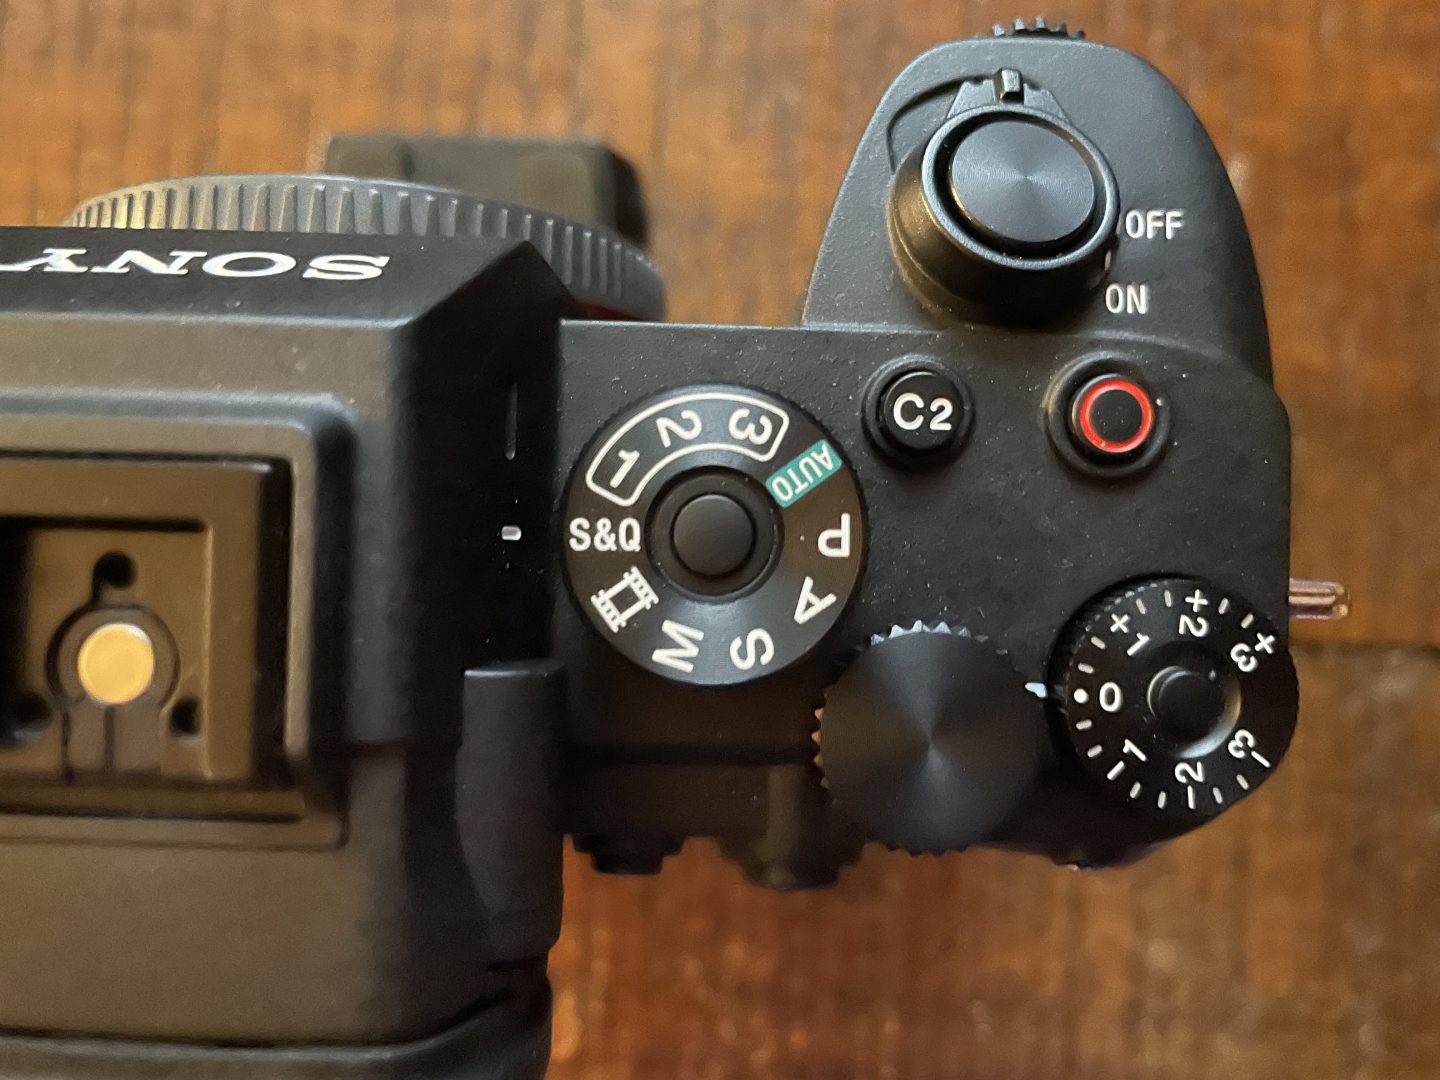
4. Set the mode dial at the top of your camera to S&Q and begin recording. Anything you film will now be in 4K at 120fps in XAVC S-I!
That’s it!
Due to the large amount of data recording in XAVC S-I in 4K generates, you have to use the camera’s S&Q mode to access 4K at 120FPS in XAVC S-I. Please be aware that recording in S&Q mode will disable audio recording, and automatically make the footage slow motion in-camera.
If you still need to record audio with your a7S III while recording in 4K at 120FPS, I recommend avoiding using XAVC S-I and instead using XAVC S or XAVC HS.
TROUBLESHOOTING
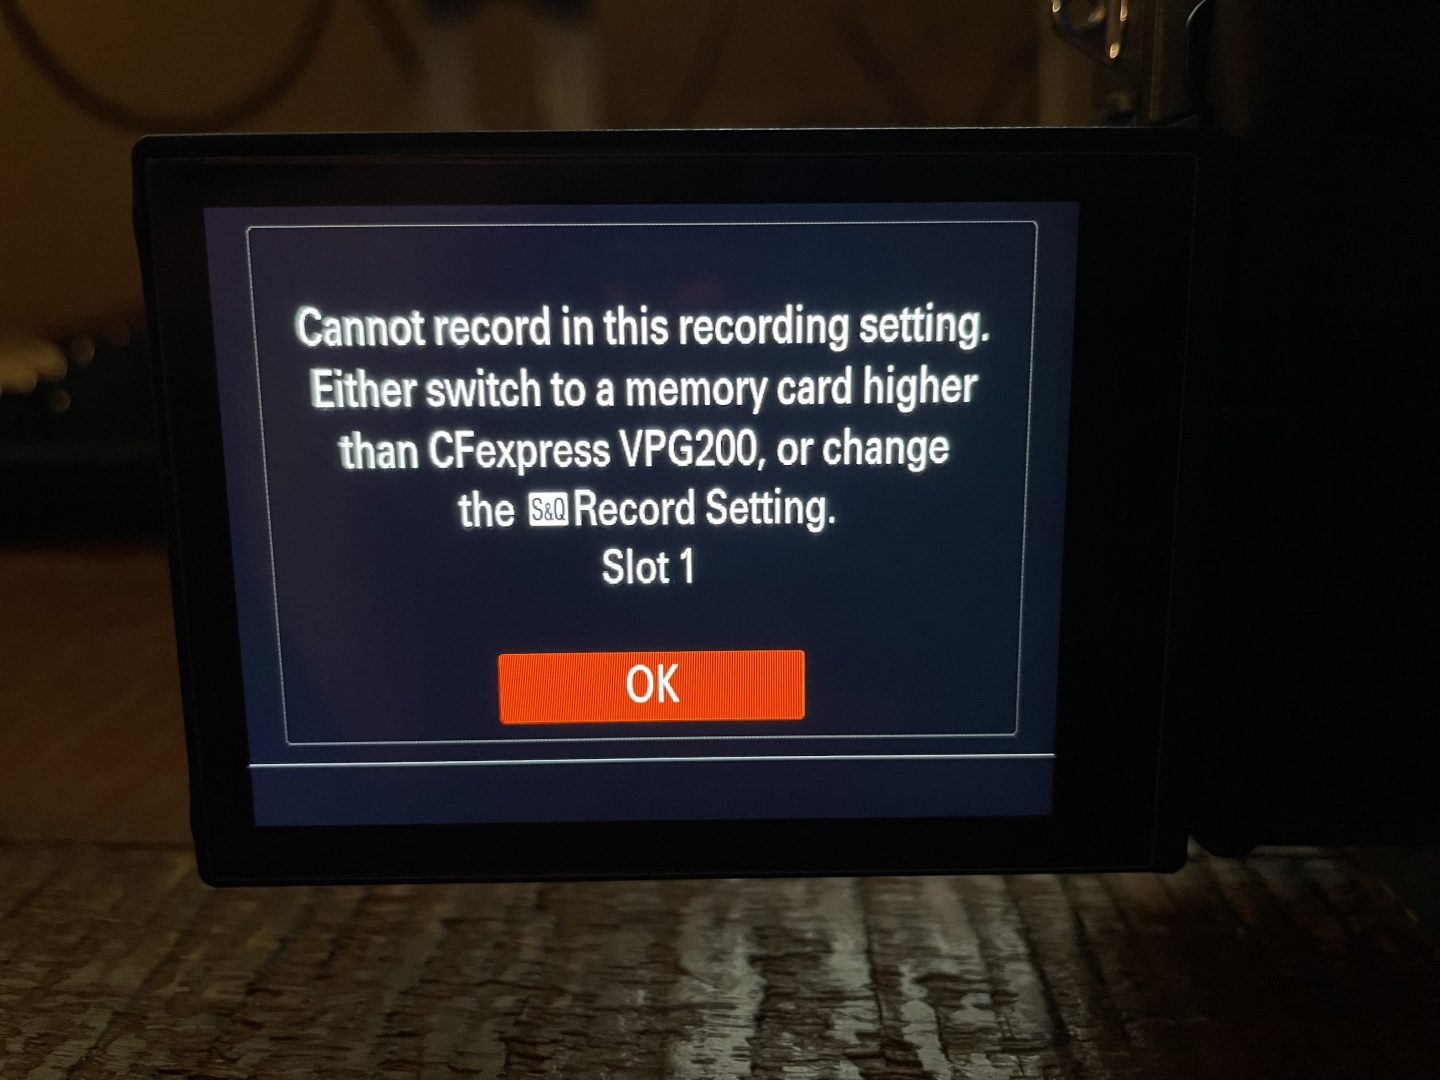
If you receive the error, “Cannot record in this recording setting. Either switch to a memory card higher than CFexpress VPG200, or change the S&Q Record Setting,” this means your memory card is not fast enough to record in XAVS S-I at 4K 120fps.
To fix this issue, you will need to use a CFexpress Type A memory card with your camera. For more information about memory cards for the a7S III, check out my a7S III Memory Cards Guide!
Has this been helpful? Send me a message using the contact form if you have any other questions!

😍 Signup for Artgrid (Extra 2 Months FREE!): https://whoismatt.com/artgrid
👍 Download my FREE Warp Stabilizer Presets: https://whoismatt.com/warpstabilizerpresets/
Fix your shaky videos in Premiere Pro without jello or wobble using Warp Stabilizer! This video covers the best warp stabilizer settings to get you smooth and stable footage.

❗ Save time color grading with my LUTs
Here’s how to use Look Up Tables (LUTs) to quickly color grade your videos in Premiere Pro and make them look awesome!
What is a LUT? In the simplest terms, a LUT is a preset file that contains color, contrast, brightness, and saturation information in the .cube format. LUTs are used for a lot of reasons, including simulating film stock looks, emulating camera colors, or even color calibration. What we will be using them for today though, is to provide a starting point for your color grading. It can save you a lot of time, and allow you to explore new creative colors that you may not have considered before.
What is not a LUT? A LUT is NOT a one-click color grade for your film. You can’t just slap one on and render your film. LUTs often don’t take into consideration your white balance and exposure settings, so you will still need to color grade your film. With a LUT though, the amount of color grading you will have to do is probably less than you would if you were grading from scratch.
Watch my a7S III Color Grading Tutorial first
SAVE LOCATIONS FOR LUTS IN PREMIERE
Windows: C:\Program Files\Adobe\Common\LUTs\Creative
Mac: Applications Folder – Adobe Premiere Pro CC – Right-click and select “show package contents” – Lumetri – LUTs – Creative

Here’s how I easily & quickly color grade log footage in Premiere Pro without using any LUTs!

Here’s how to QUICKLY & EASILY film in Sony’s SLOG3 Picture Profile, including how to expose properly & set your white balance with the Sony a7S III, FX3, FX6, & A1. If you’re a run & gun filmmaker that needs to film fast, these settings are all you need!