
Here’s how to use LUTs to quickly color grade your footage in Premiere Pro and make it look great.
Before this one, watch my a7S III color grading tutorial, which covers grading S-Log3 from scratch without any LUT at all. This picks up from there. If you need Premiere, there’s a free trial.
What A LUT Is
In the simplest terms, a LUT is a preset file containing color, contrast, brightness and saturation information, in the .cube format.
People use them for a lot of reasons: simulating film stock looks, emulating another camera’s colors, even color calibration. What we’re using them for today is a starting point. It saves you time and it pushes you toward colors you might not otherwise have considered.
What A LUT Is Not
A LUT is not a one-click color grade. You cannot slap one on and render.
LUTs don’t know anything about your white balance or your exposure, so you will still be color grading. The point is that you’ll be doing less of it than you would starting from nothing.
And while we’re here, let’s kill a lie you’ll see from people selling LUTs: never believe anyone who tells you their LUT will make your footage look perfect immediately. Every LUT needs tweaking. Some need a lot. I built mine to need as little as possible, and they still need some.
Where To Save Your LUTs
You can browse to a .cube file every time, or you can drop it in the folder Premiere reads so it appears in the Look dropdown permanently. That folder is buried:
- Windows:
C:Program FilesAdobeCommonLUTsCreative - Mac: Applications, then Adobe Premiere Pro CC, right-click and choose Show Package Contents, then Lumetri, then LUTs, then Creative
Applying It
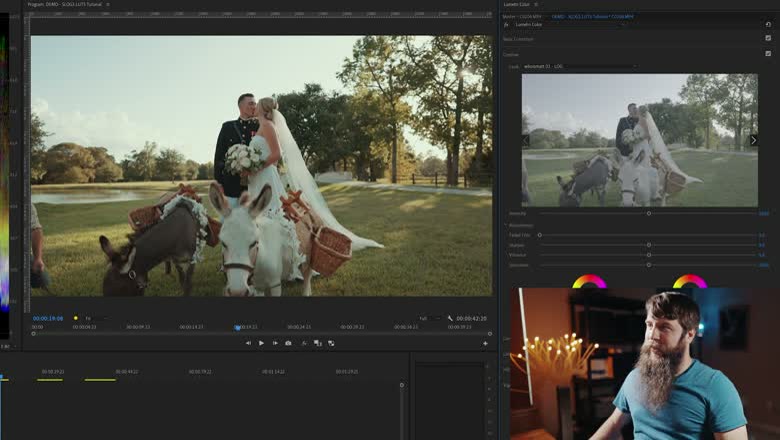
Get into the Color workspace, open the Lumetri Color panel, and go to the Creative tab with your clip selected. Next to Look, where it says None, hit the dropdown. Either browse to a .cube file or pick one you’ve installed.
Immediately you get more contrast, more saturation, and in this case some nice golden sunset.
Underneath is an Intensity slider. Drag it left and it’s as though no LUT is applied. Drag it right and it looks like nuclear fallout. Every LUT I’ve ever bought has needed a nudge here to sit right.
Speaking of which, Premiere Pro LOG Color Grading INSTANTLY Without LUTs – Color Management Tutorial is worth a look too.
Tweaking It
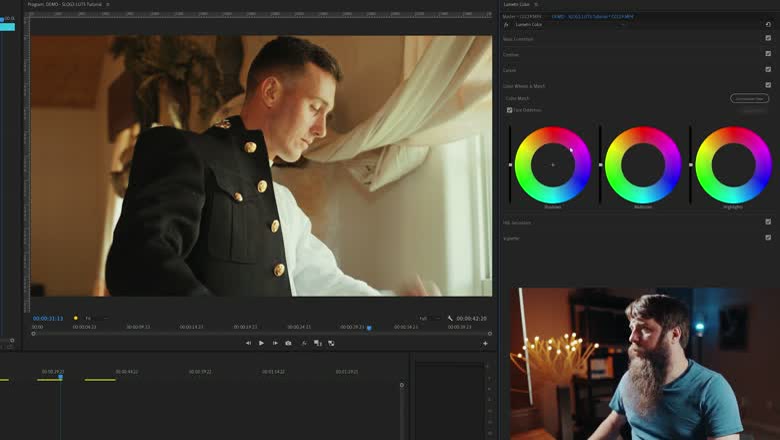
On this shot the skin tones came out a touch warm, so:
Curves. Make a point in the midtones and bring the brightness up slightly. That lifts the shadows too much, so make a second point and bring the shadows back down a smidge. This shot was dark and the couple were backlit, so it needed it.
Color Wheels. I liked the warmth overall but wanted less of it in the skin, so I dragged the midtones very slightly down and cooler, then pushed the highlights slightly warmer to keep the golden sun without it landing on their faces.
Carrying It To Your Other Clips
Select the graded clip, go to Effect Controls, click the Lumetri Color effect and copy it with Ctrl+C or Cmd+C. Select the next clip and paste with Ctrl+V or Cmd+V.
It will not be right. On the second shot here everything went super golden, so I double-clicked the two color wheels to reset them, cooled the midtones toward blue to bring the skin back, and cooled the highlights a little so his shirt read properly white. Warm and healthy, not orange. Be careful about making people look too tan.
For the third shot I copied from the cooled version rather than the original, which is less work again. It still needed the highlights pulled down, and then two things in Basic Correction: Temperature a few points left to put blue back in, and Tint slightly toward green, since the dress and the skin were reading red. Right takes you pink, left takes you green.
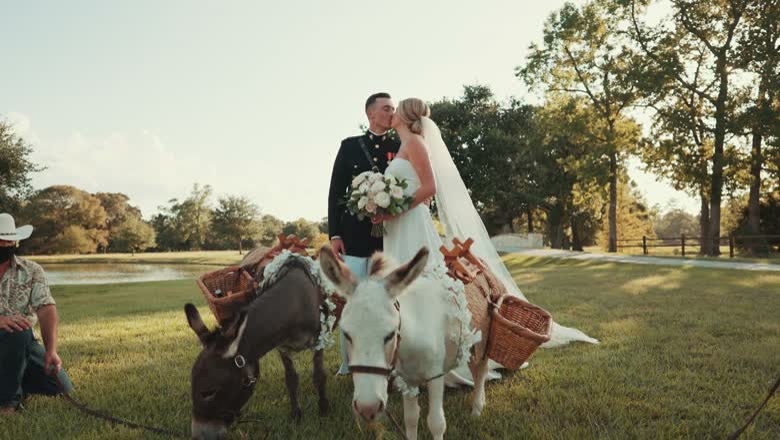
Suddenly the dress is white, his pants are white, the skin tones are good, and the couple pops off the screen. That’s a few minor tweaks per clip, not a grade from scratch, which is the entire point of working this way.