
Today I’m going to show you how to quickly set up your Tascam Portacapture X8 to record flawless 32-bit float audio for YouTube videos, wedding films, or anywhere else you need high quality audio.
General Settings
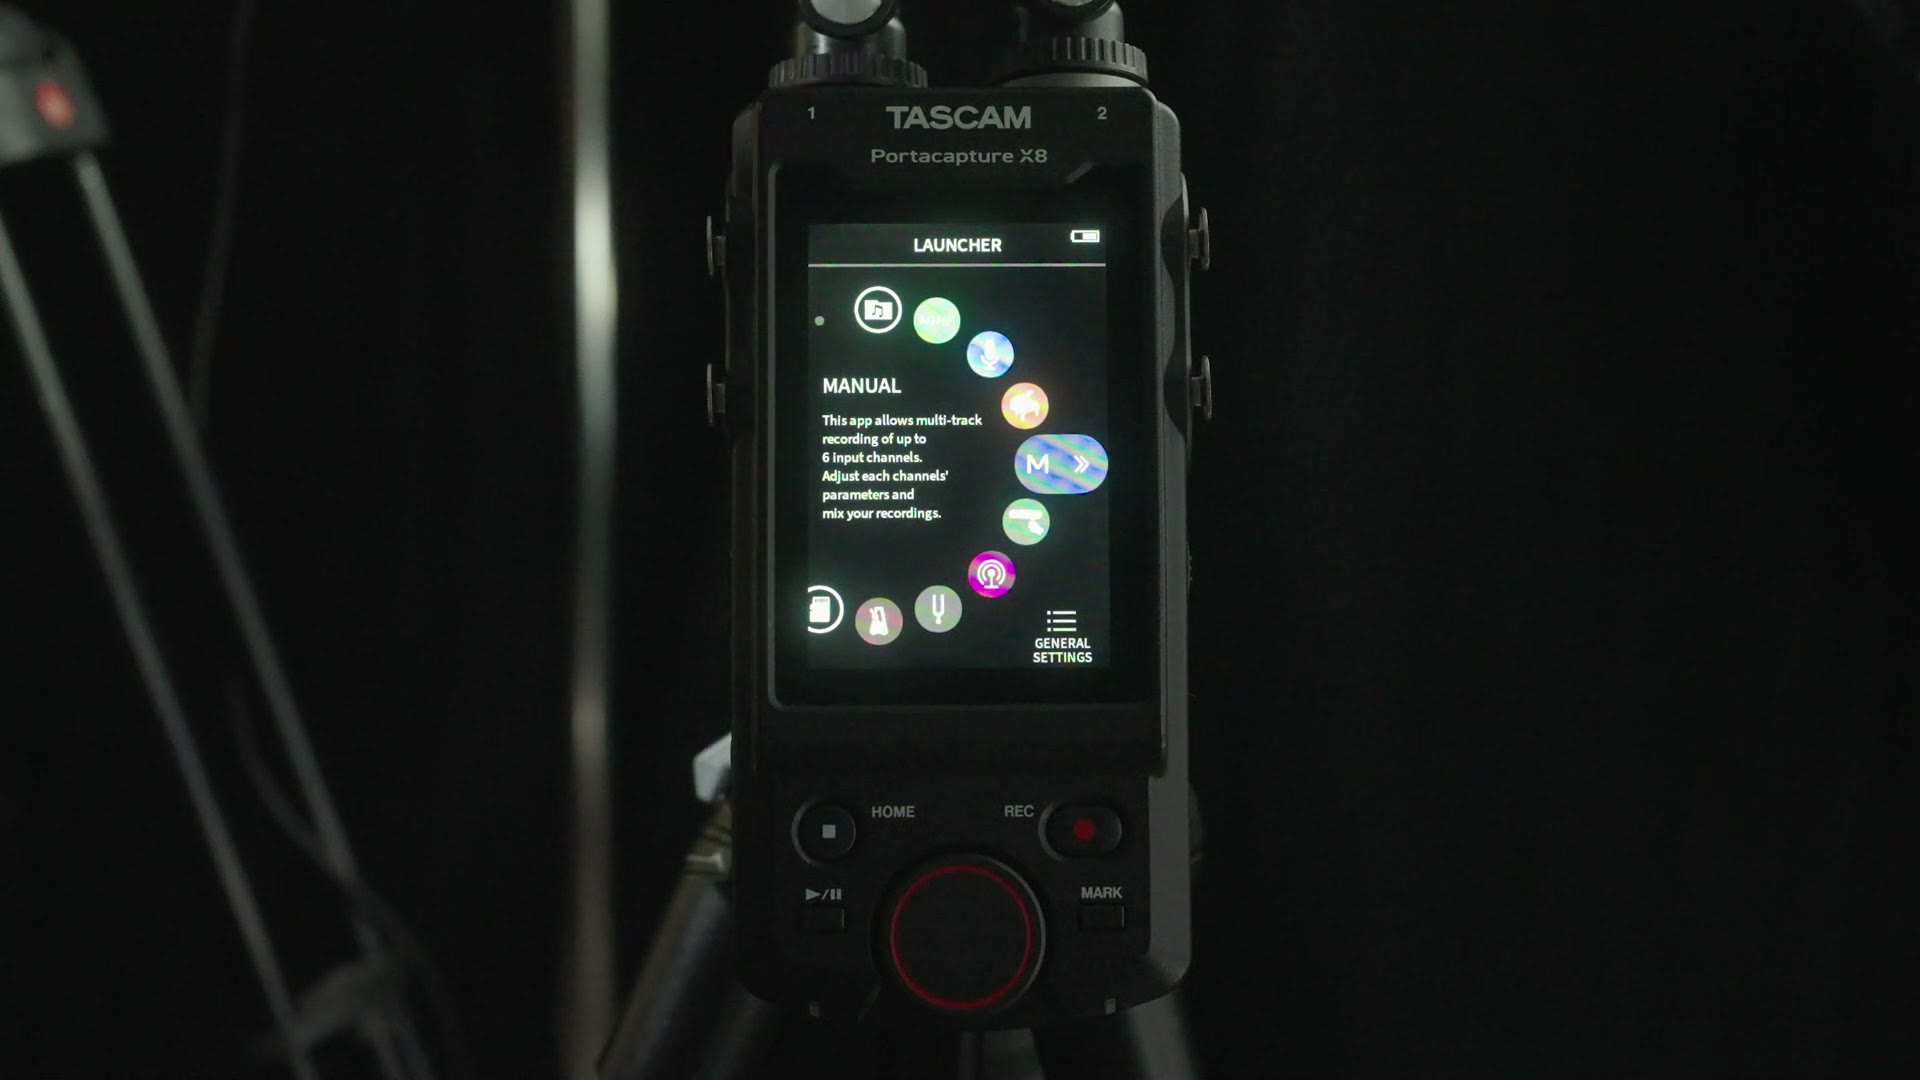
Power on your X8 and ignore all the fancy presets and other menu options, because first we need to dig into the general settings by tapping that in the bottom right.
Go to Record Settings at the top and make sure your file format is WAV, your sample rate is 48 kHz, and most importantly, that your bit depth is set to 32-bit float. That setting is where all the magic comes from, because it means you never have to deal with audio that’s too quiet or too loud.
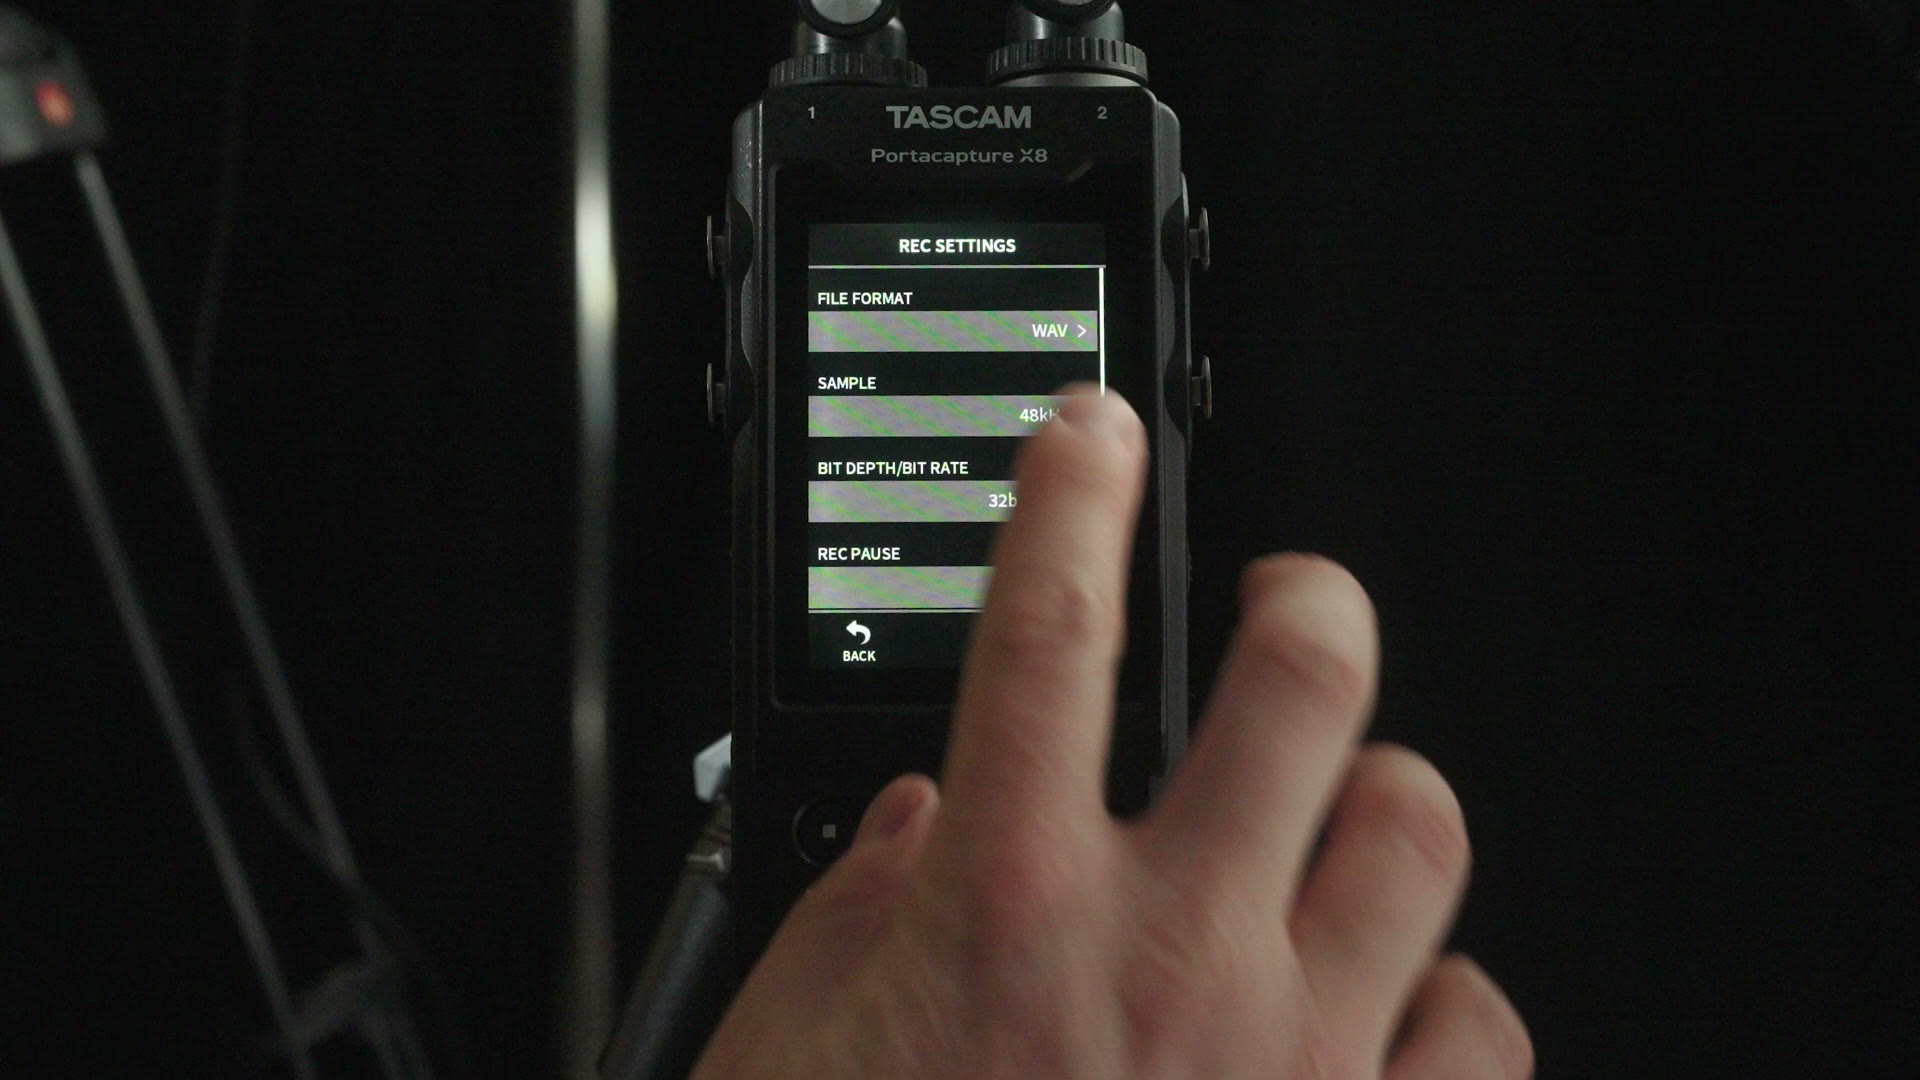
You can leave everything else in that menu turned off. Record pause off, auto record off, dual record off, pre-record off, time file increment off.
Press back and go into System Settings, and make sure your date and time are set properly. That really helps whenever you’re copying and organizing your files later, so get it right.
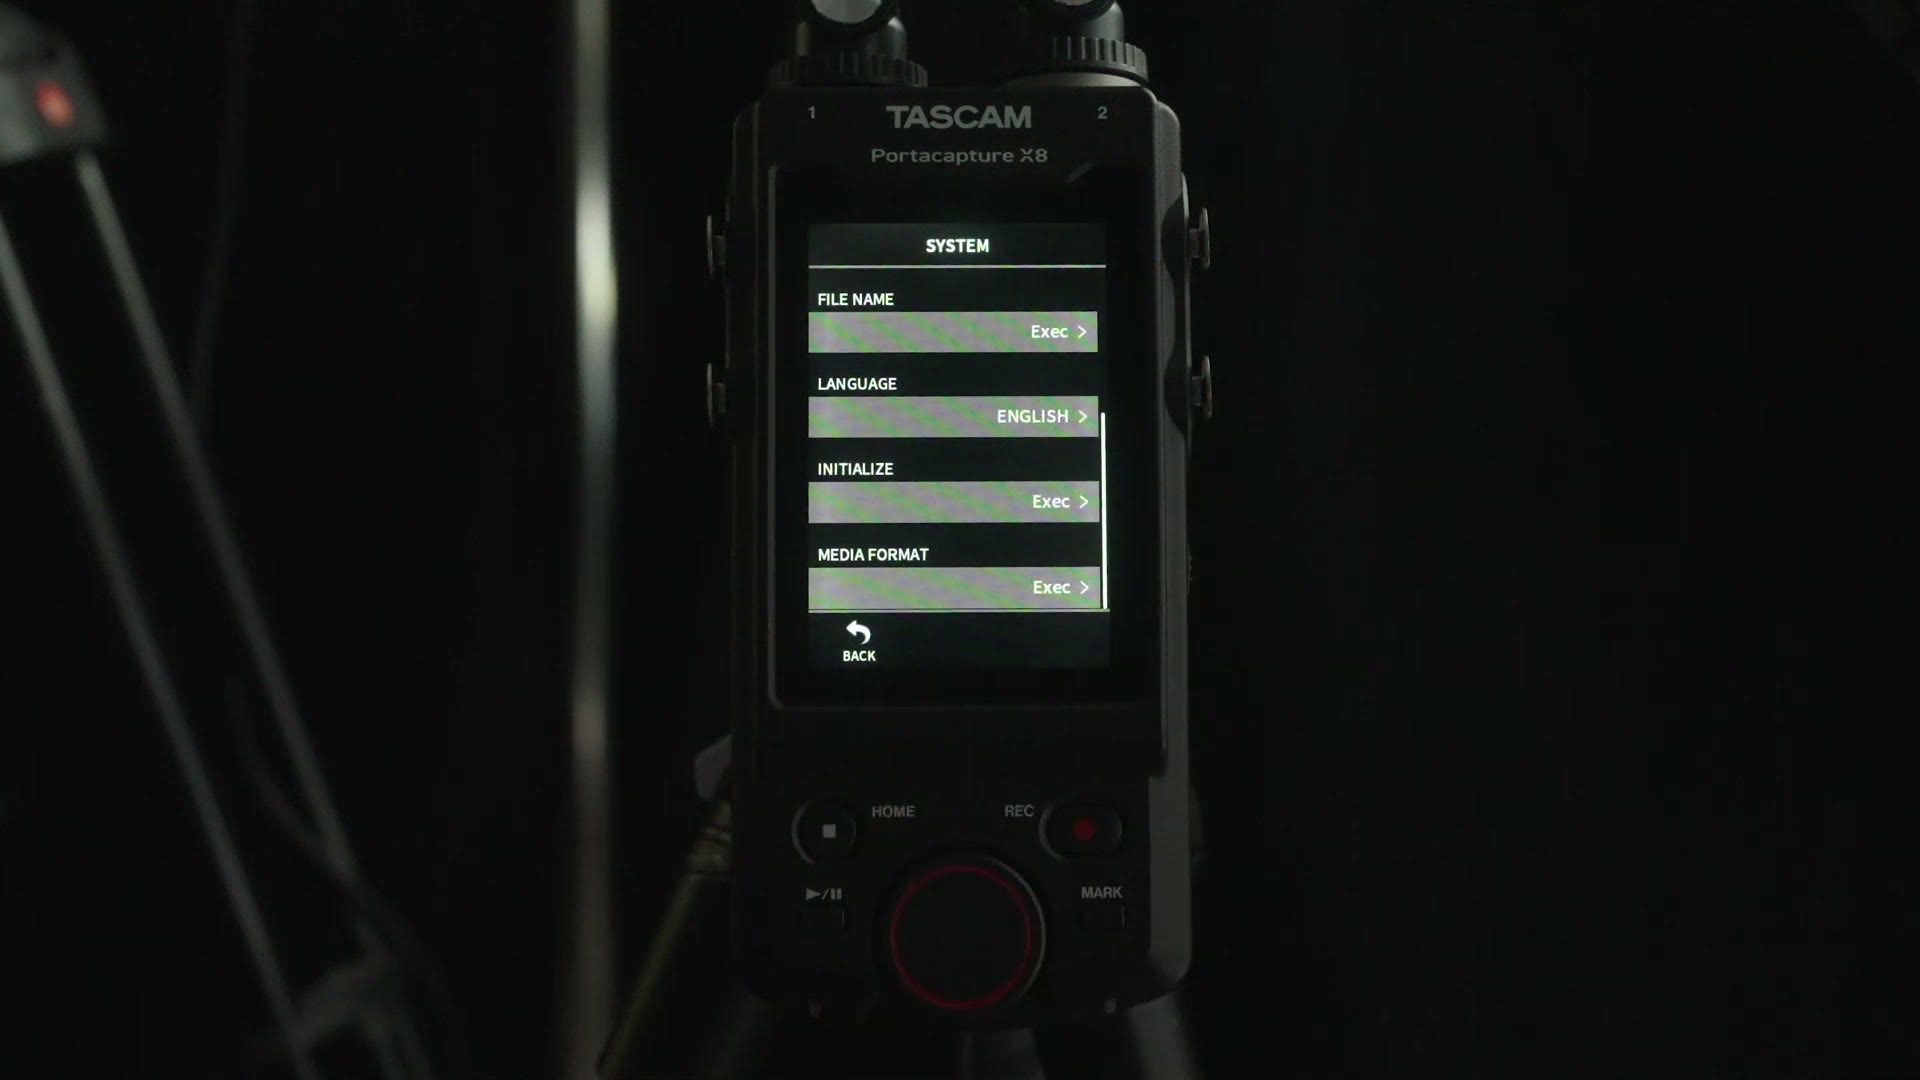
This is also where you can change the file name that gets saved with every recording. Go down to File Name, select Execute, and if you’re recording something specific, say a wedding ceremony, change it to say ceremony. That way you know exactly which files came from the ceremony whenever you’re editing.
The System menu is also where you’ll find Media Format, which wipes your memory card. Any time you put a fresh card in the recorder I recommend doing this, to make sure it’s formatted properly for recording with the X8.
Lastly, go into the Power and Display menu. Turn auto power save on, and make sure you select your battery type, whether you’re using regular alkalines, rechargeables or lithiums.
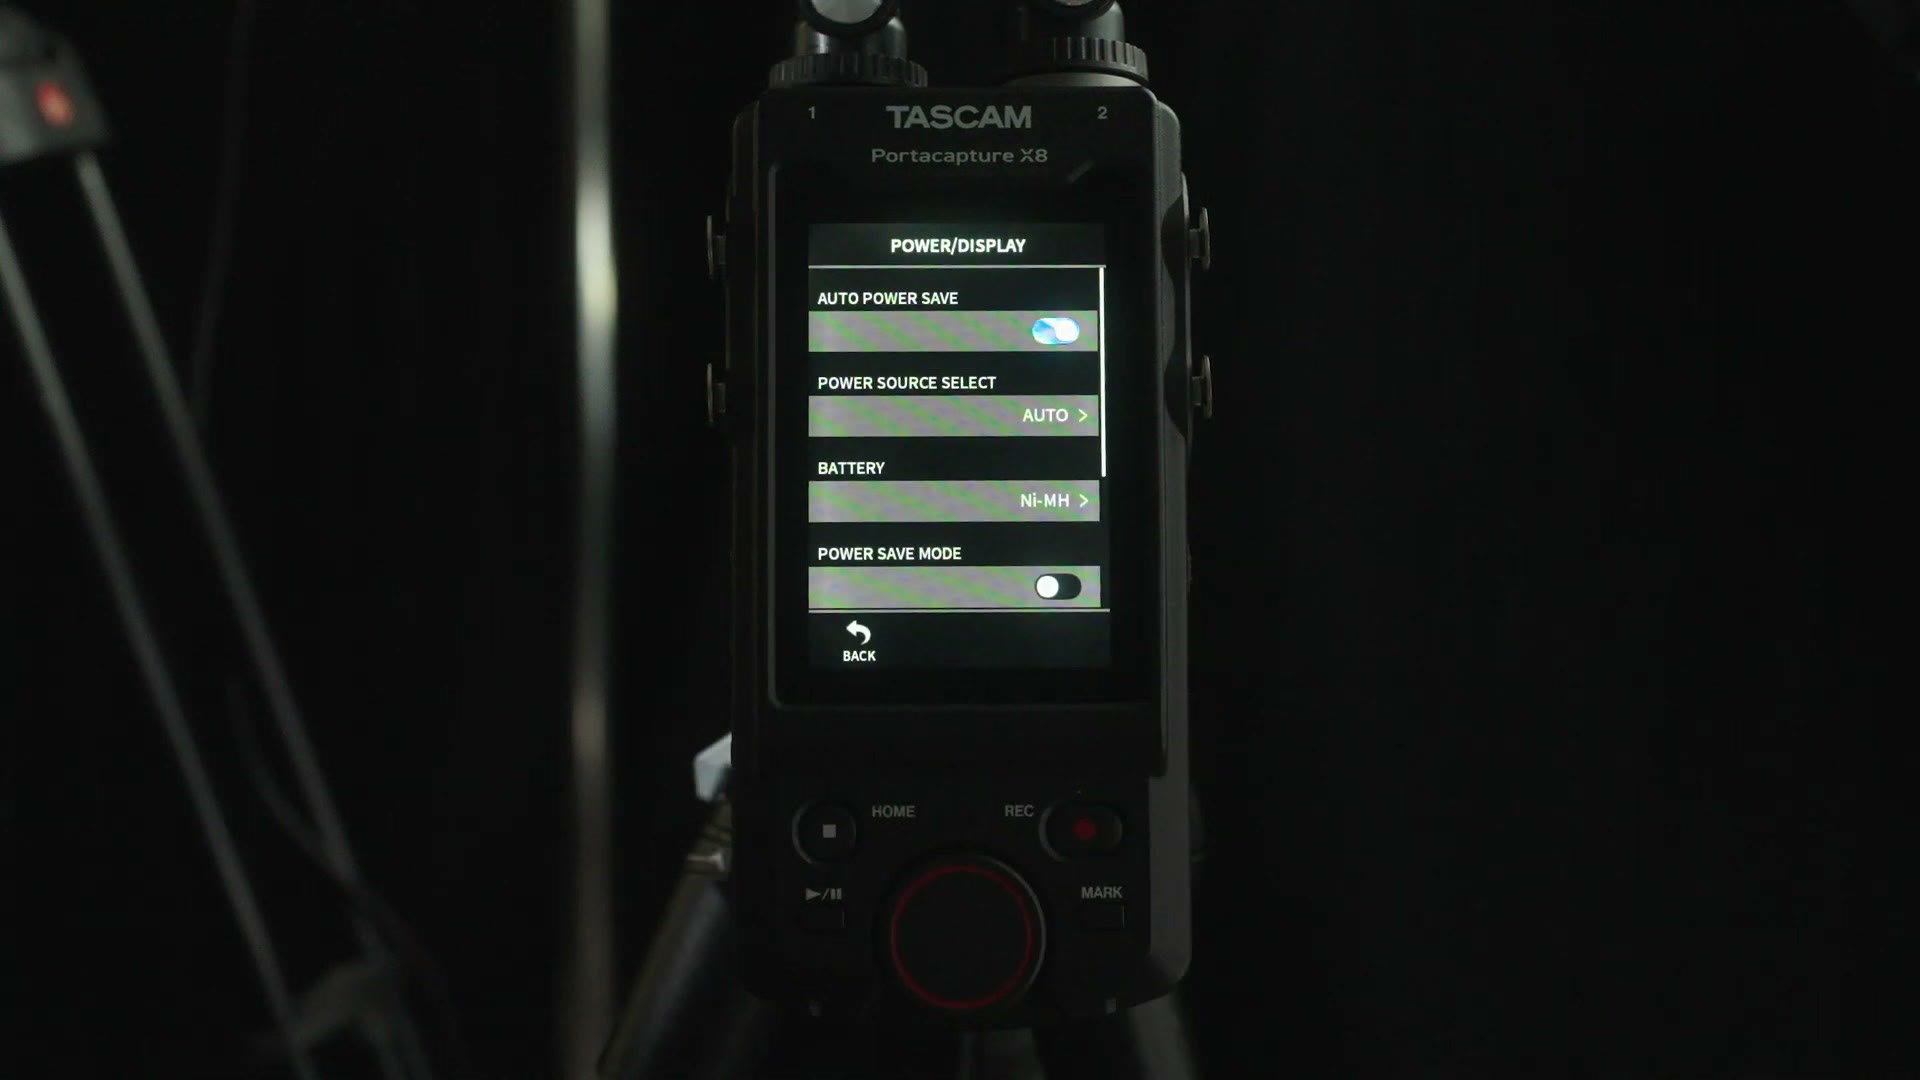
Choosing the right battery type lets the recorder report your remaining battery life accurately, which really matters, because you need to know whether your recorder is about to die in the middle of a ceremony.
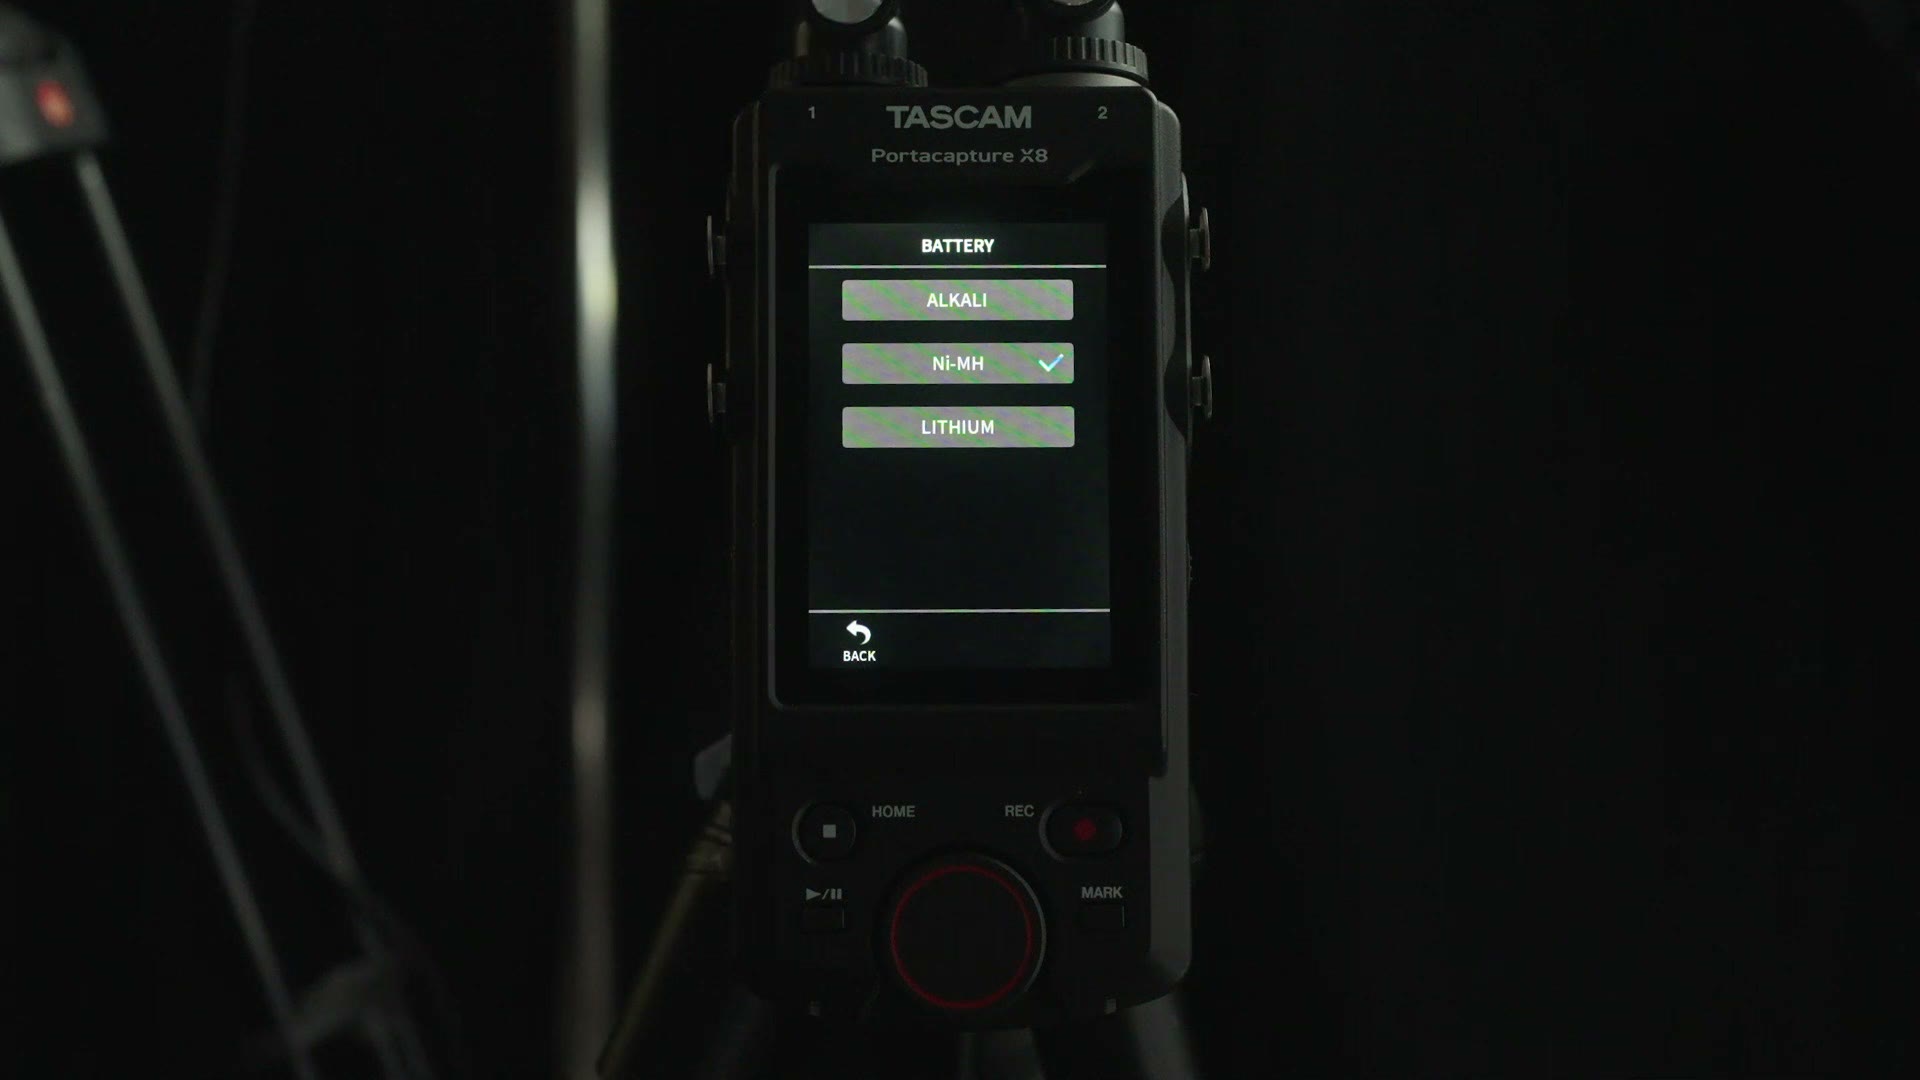
This is also where you can turn on power save mode, which dims the screen and gets you better battery life. I’ve got it off here so you can actually see the screen.
Manual All Day Baby
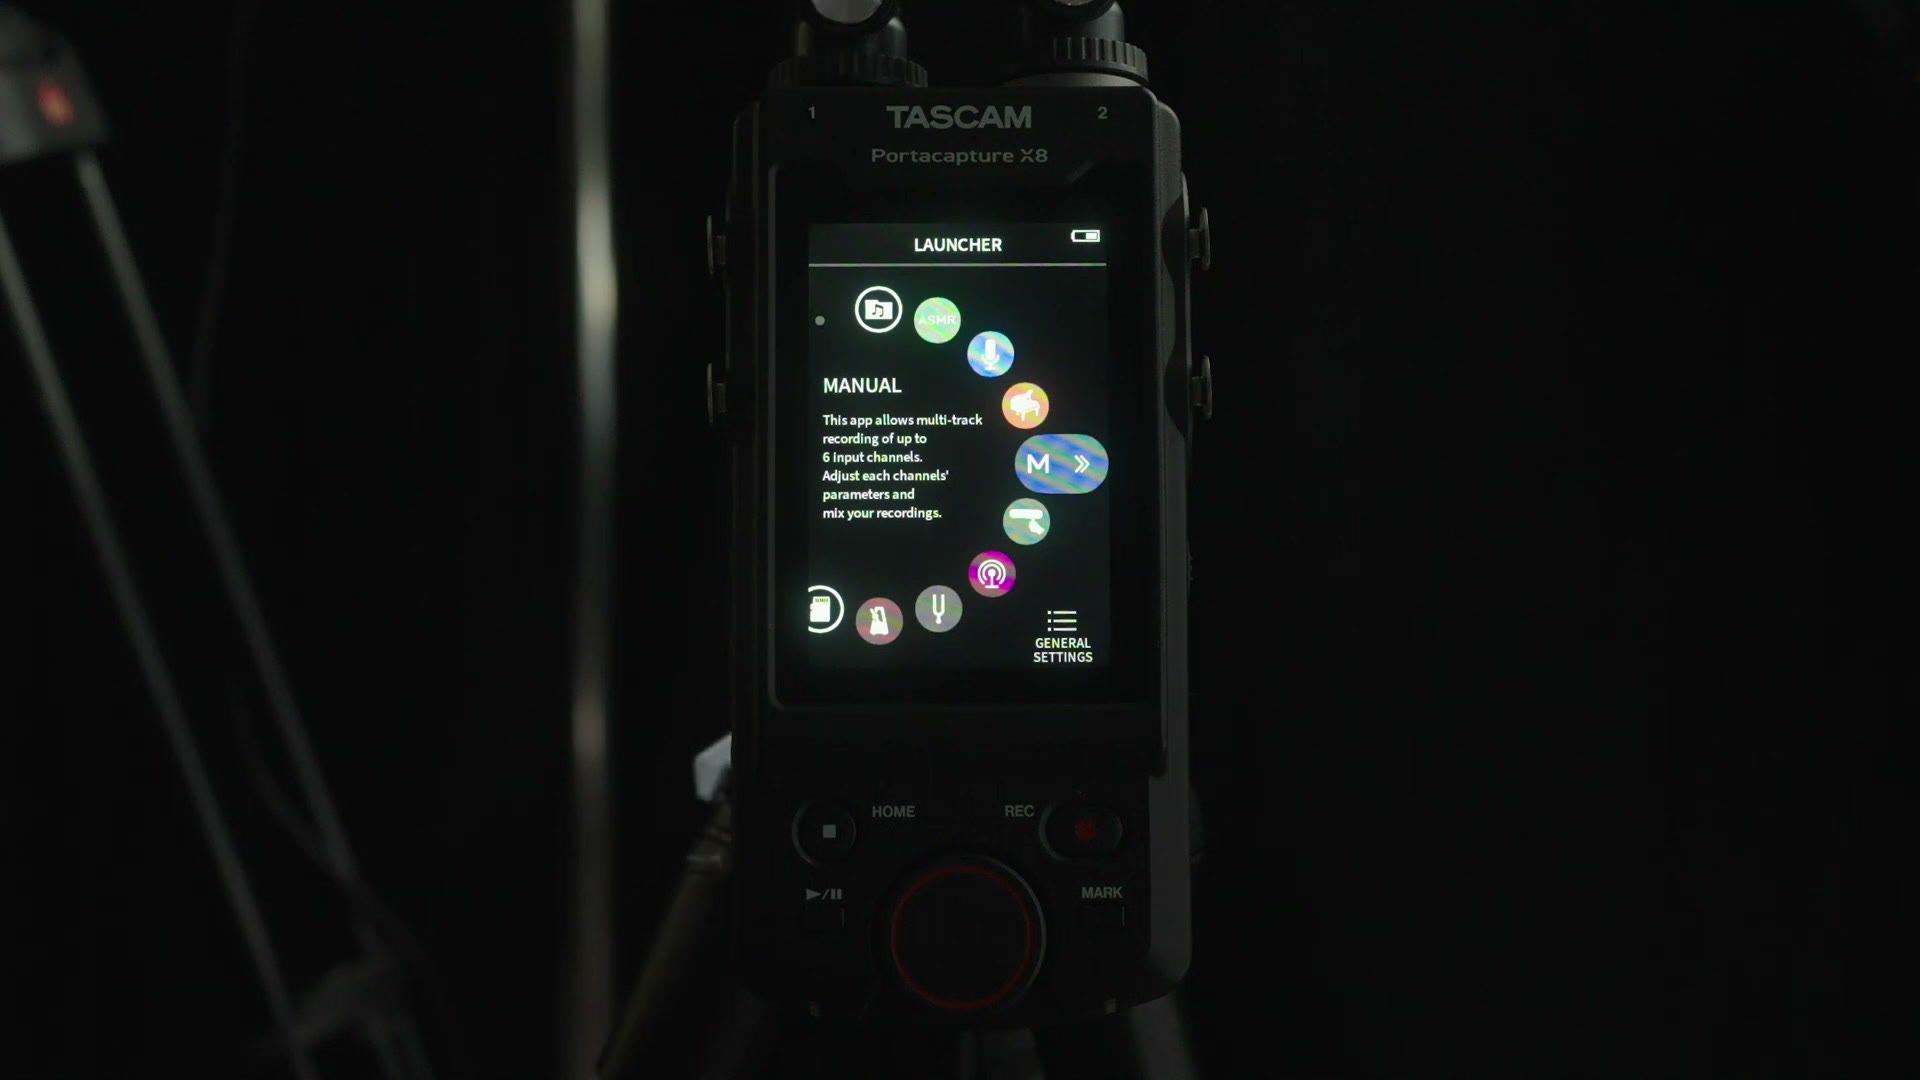
Press back and go to the launcher, because we’re done with settings and we’re almost ready to record. On the launcher screen, select the Manual preset. We don’t need anything fancy. Manual all day, baby.
Audio Tracks Setup
The first thing to do in the Manual preset is tap the hamburger menu in the top left and go to Input Select. The X8 is a six track recorder, but it’s up to you to tell it which tracks you want to record and where the audio is coming from.
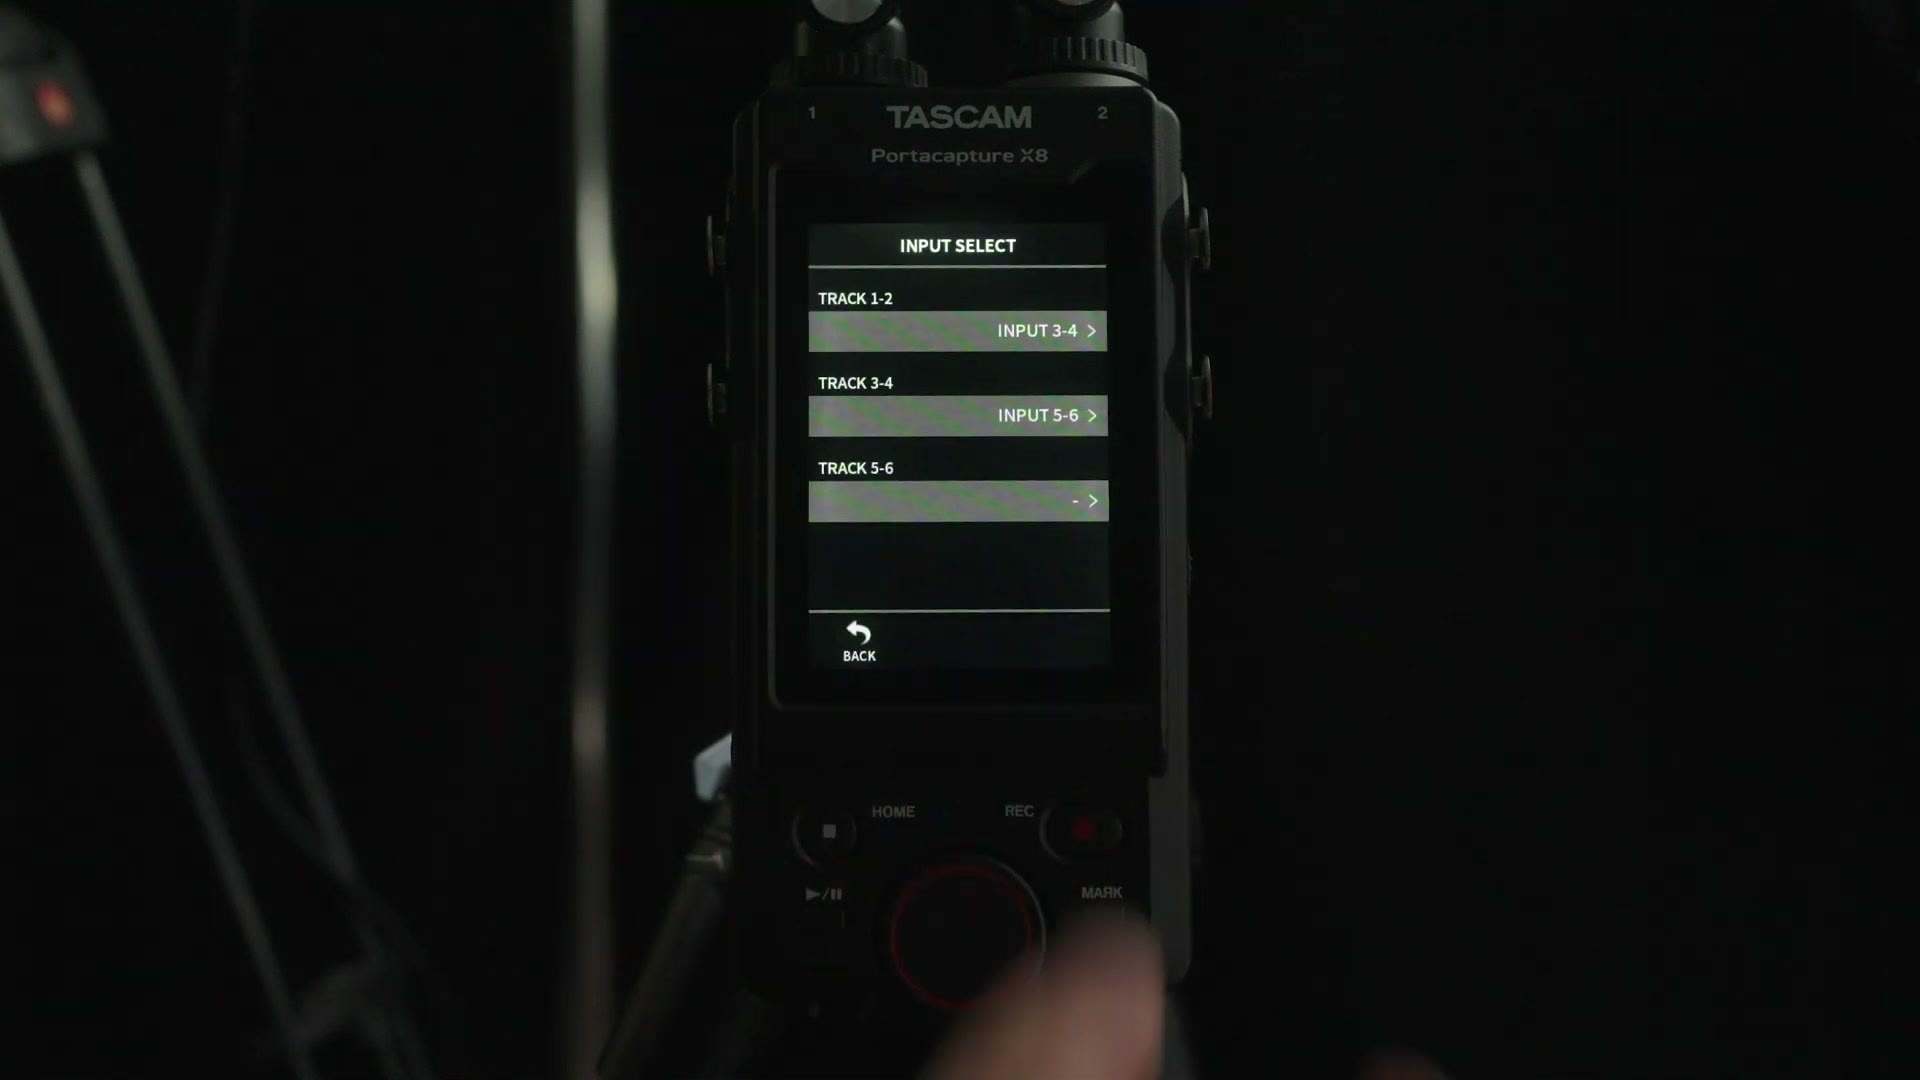
Select Track 1-2 and you get a helpful graphic showing the recorder and every input it can take.
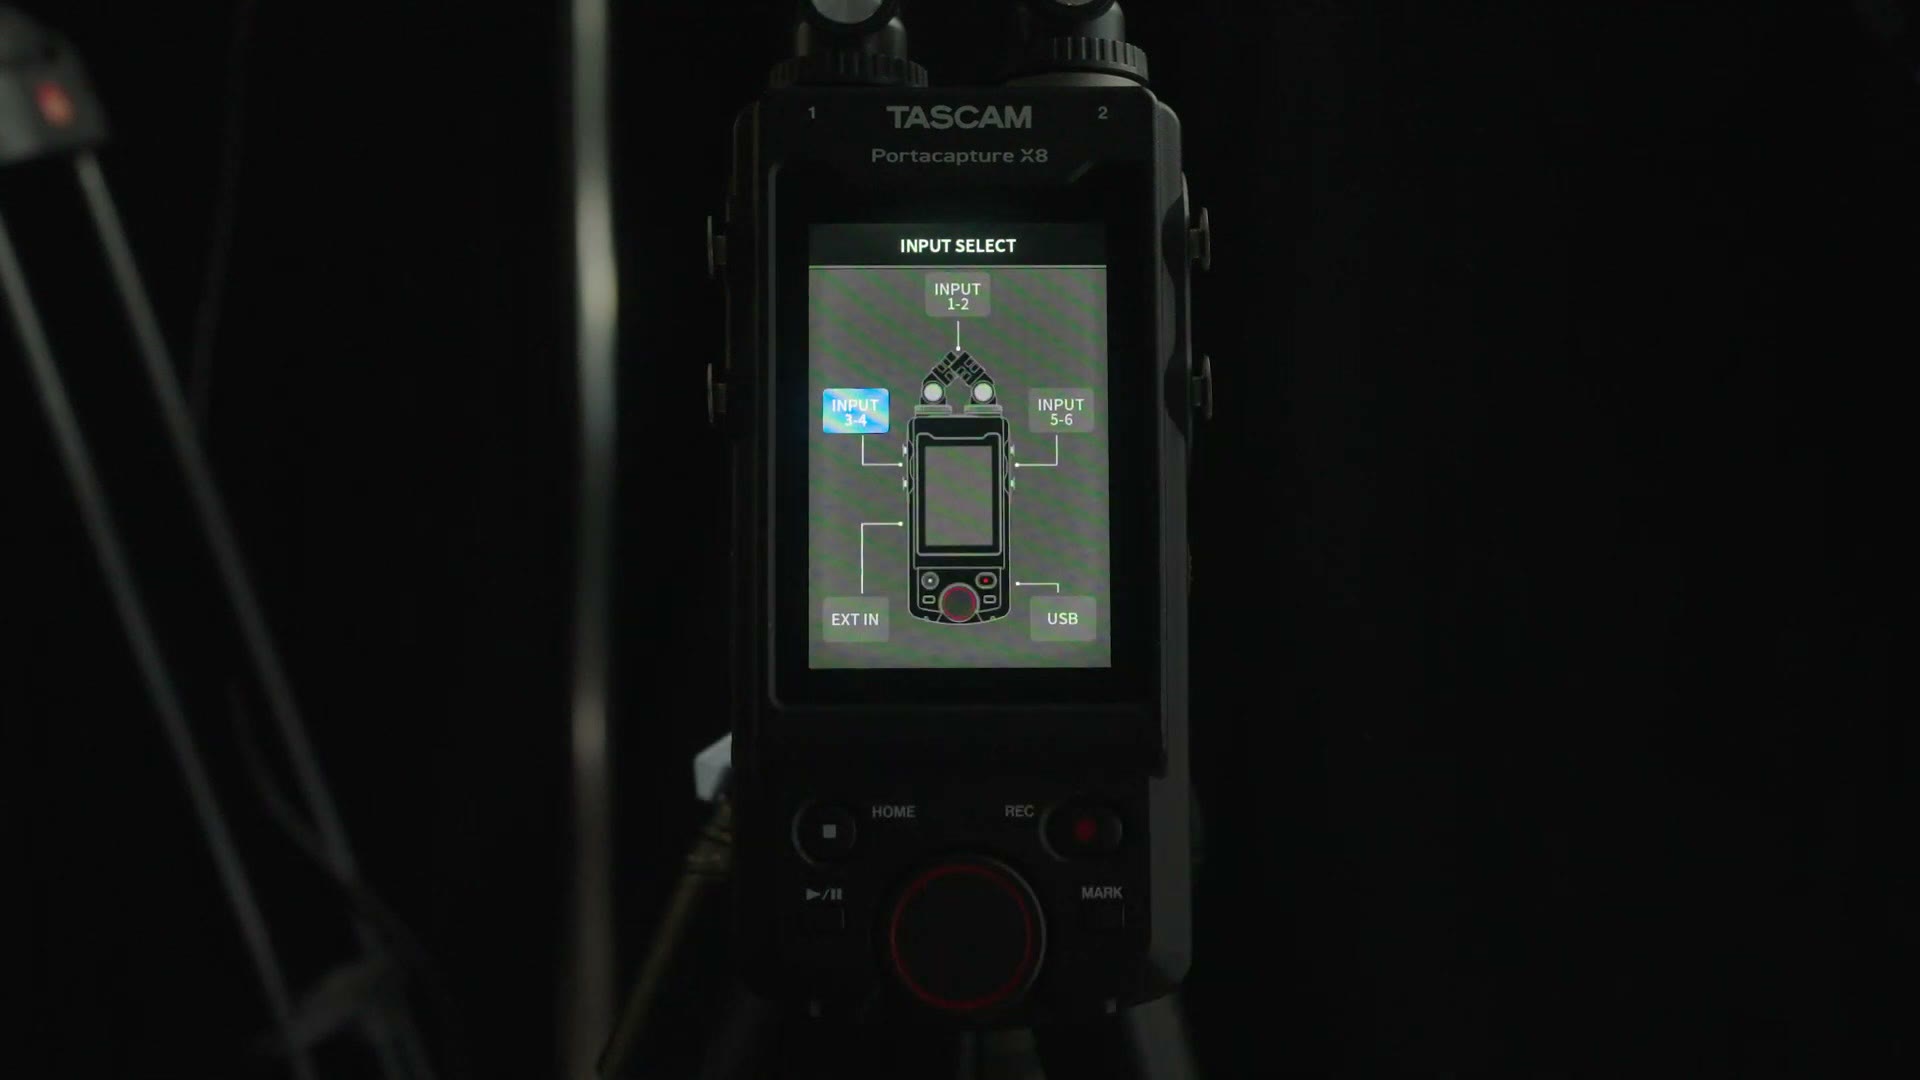
For this example let’s say I have an XLR cable running from the DJ’s soundboard into one of the left XLR inputs on the X8. In that case I tap Input 3-4, because I plugged into input three, and that tells the recorder I want my first two audio tracks recorded from those two inputs on the left.
If you have more than two inputs, select Track 3-4 and choose Input 5-6 for the two right hand ports. And if you want to use the recorder’s built in microphones at the top, select Inputs 1-2.
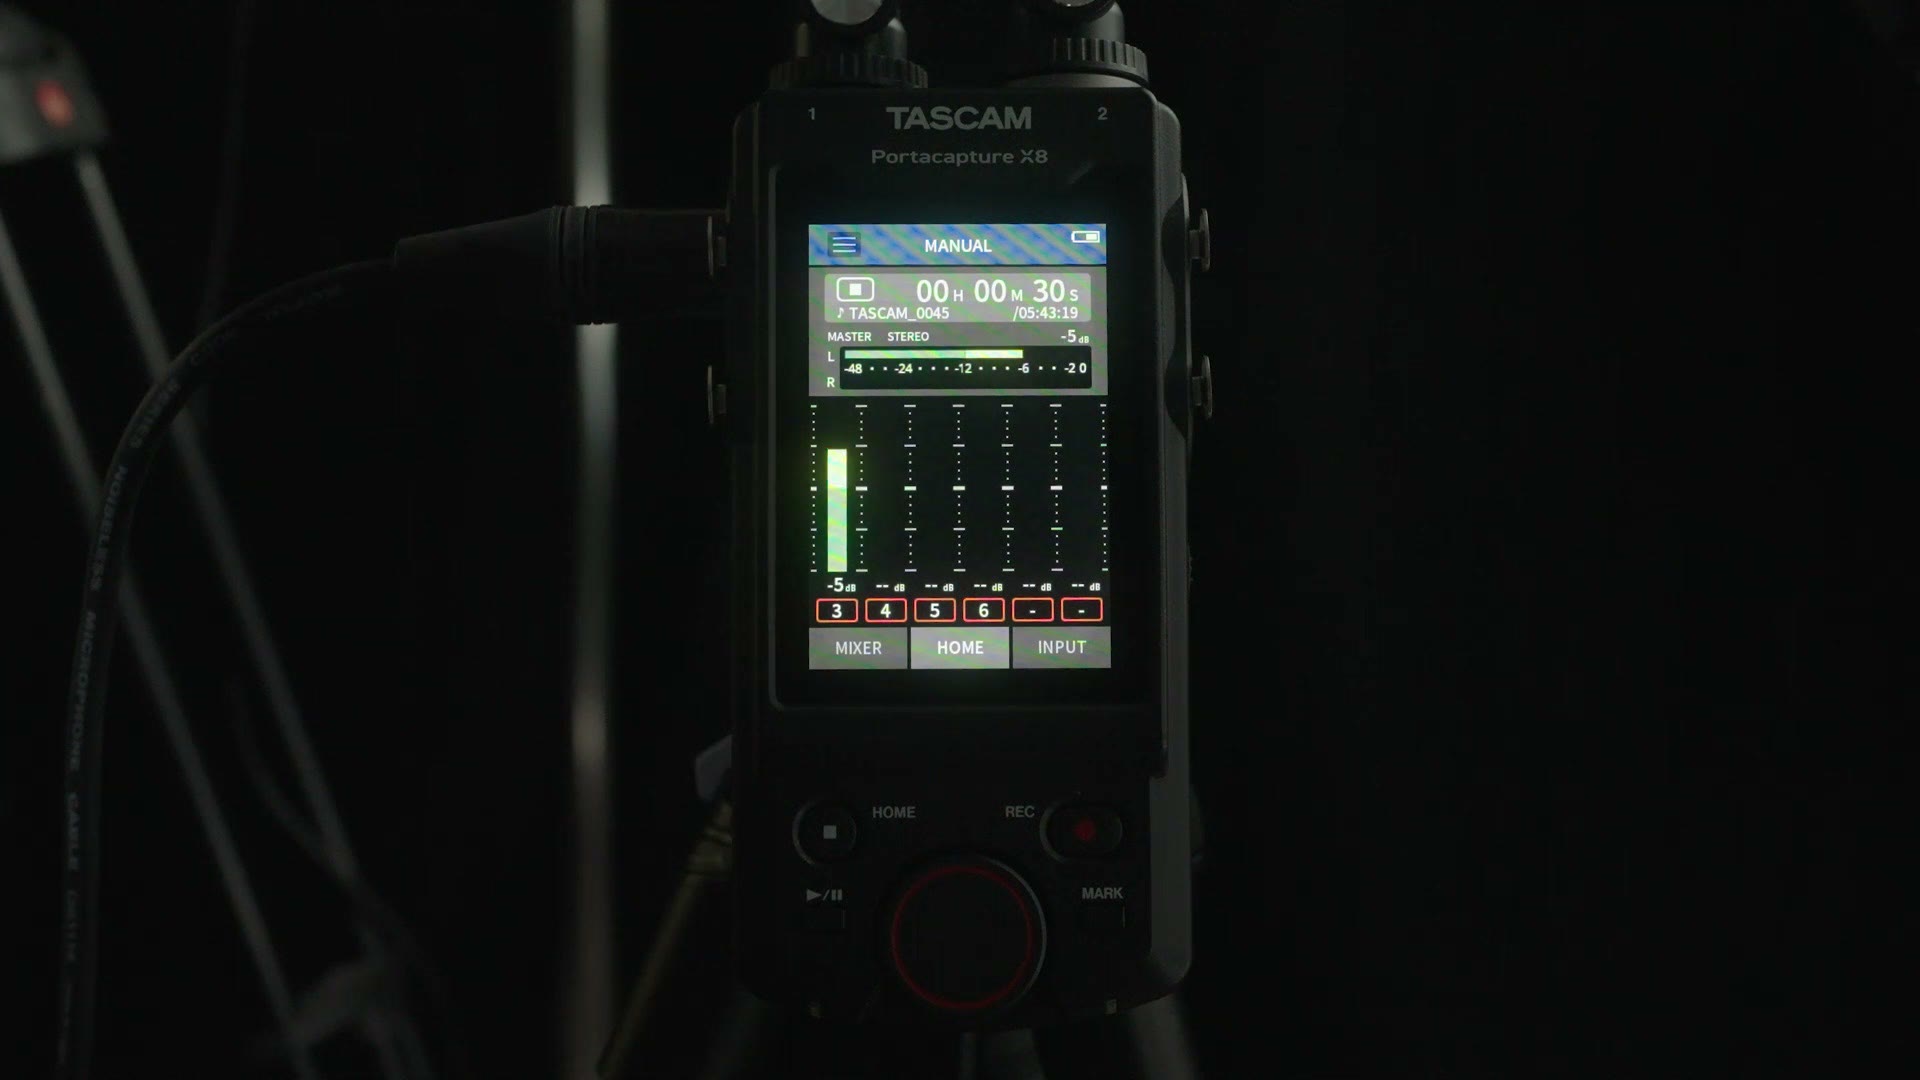
Press back, and on the home screen you’ll see a number three down in the bottom left with audio bars showing the recorder is picking up sound. If you don’t see that green bar, it could be that you’ve just plugged into the soundboard and the DJ needs to bring the volume up or unmute the mic so you can test it.
Now press the red record button, which brings up a really helpful guide that walks you through what you need to do to start recording. It can be disabled, but if you’re using the recorder for the first time this is what you’ll see.
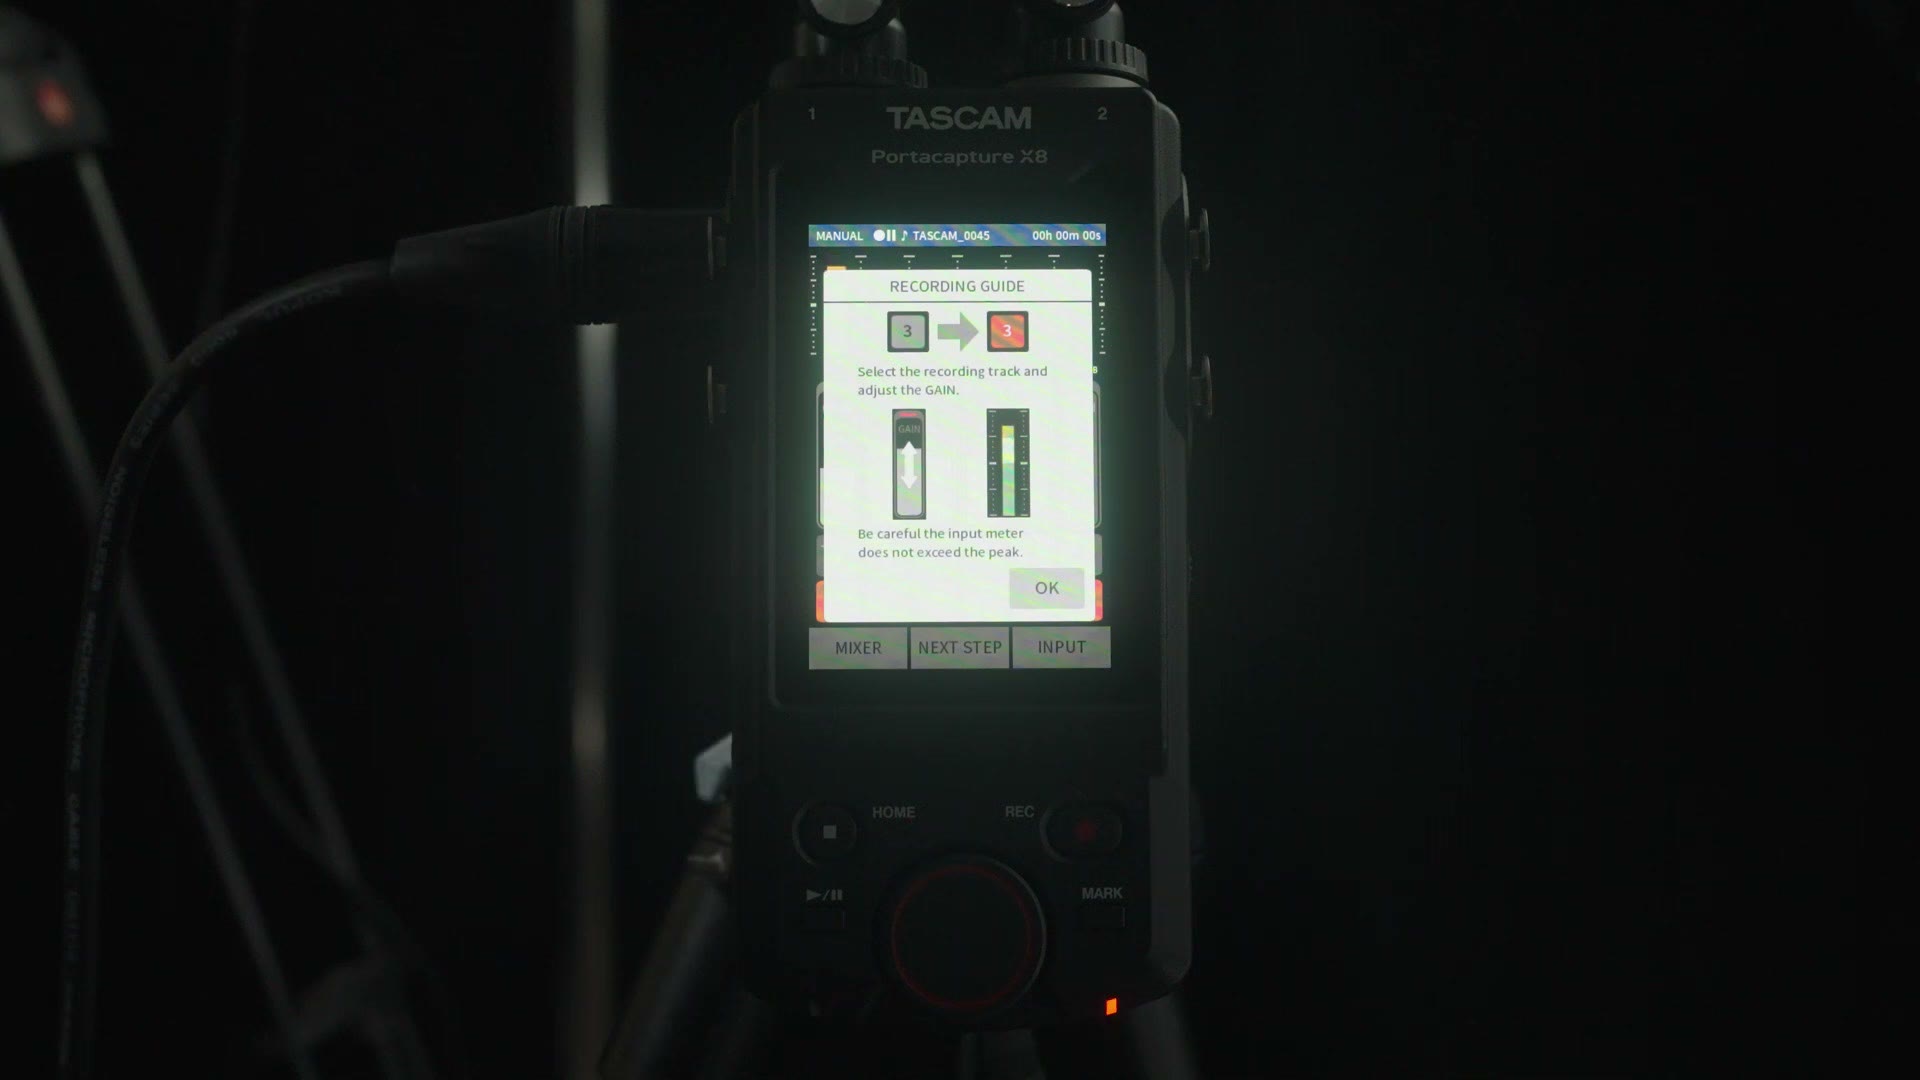
The guide starts by telling you to select your recording track by lighting it up red, then adjust the gain and make sure the audio doesn’t peak.
So first, tell the recorder which tracks you actually want to record. At the bottom you have 3, 4, 5 and 6, all lit up red. Red means it will be recorded. But we only plugged into input three, so we don’t need any of the others, and if you leave them active the recorder will record all of them as silent tracks, which clutters your edit and wastes card space.
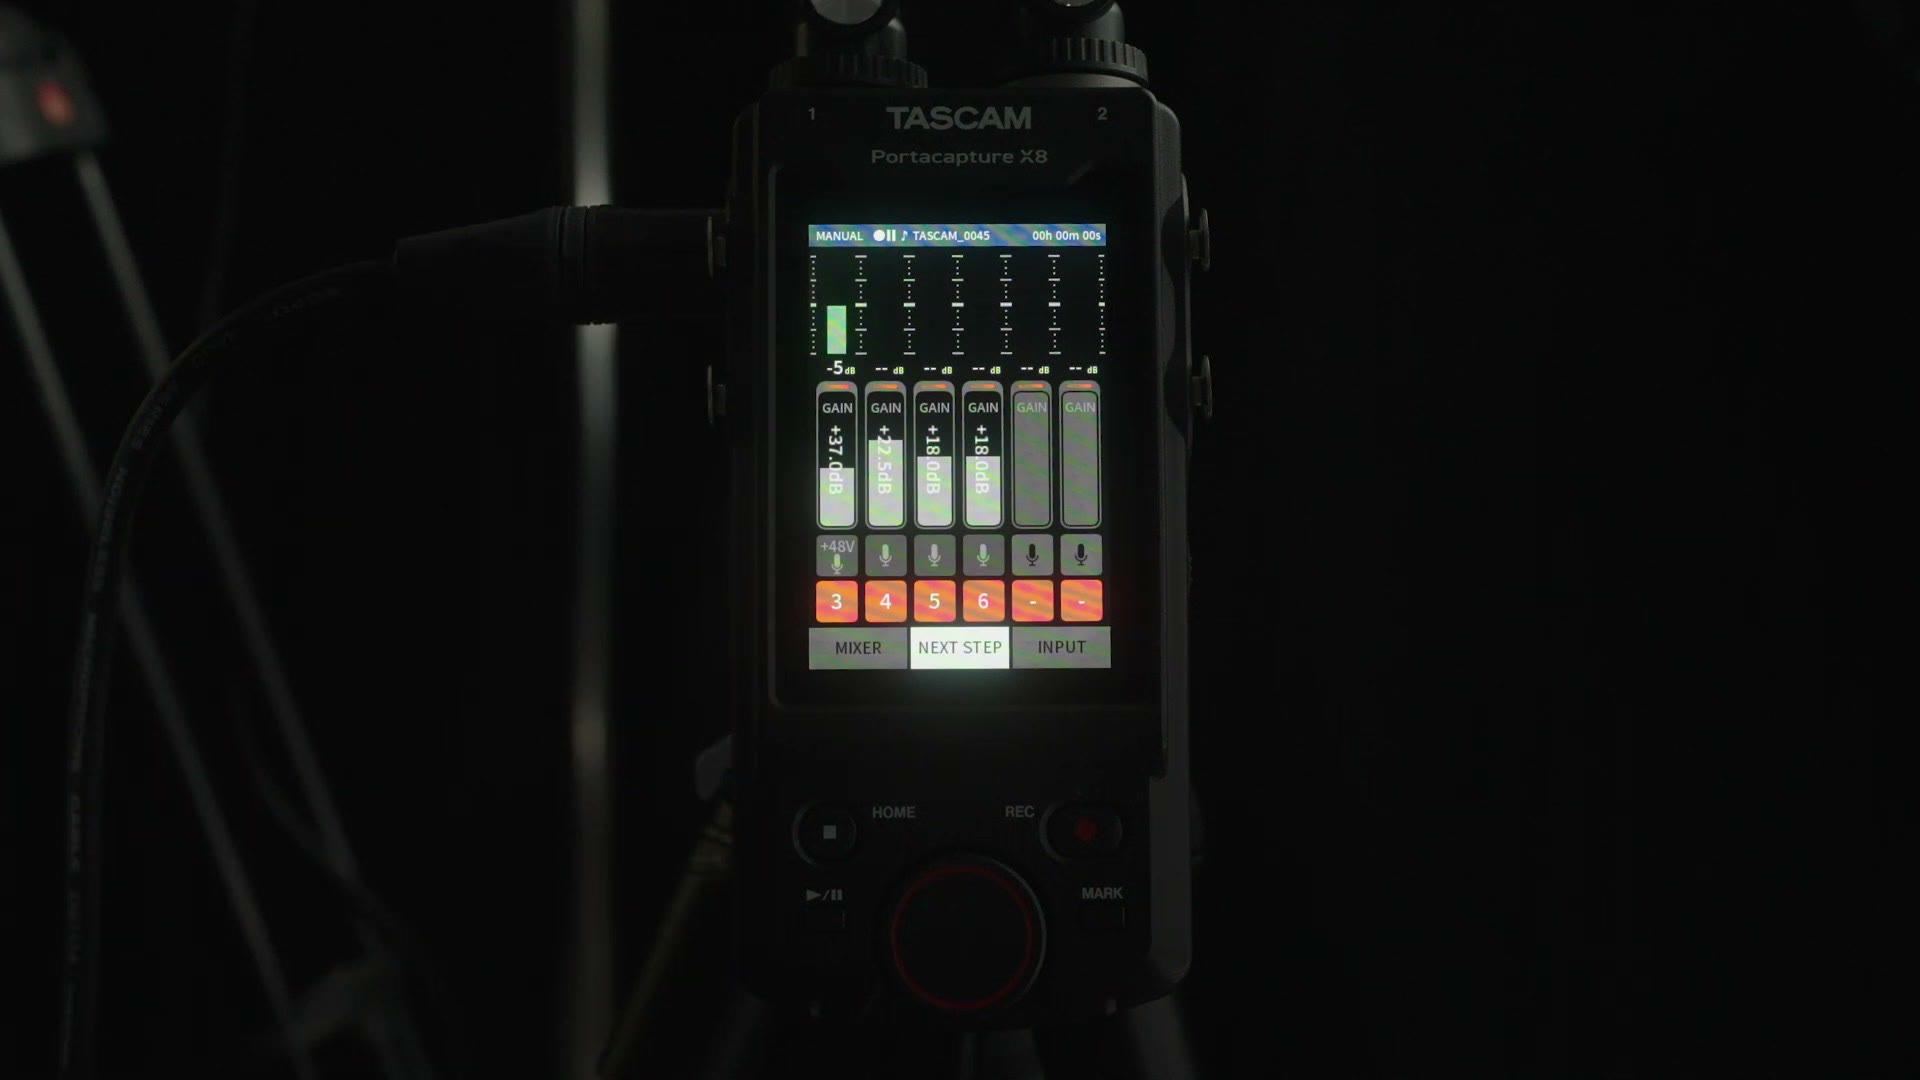
So tap every number at the bottom that you don’t want to record until it turns gray, including the two dashes. Of course, if I were recording from input four, five or six, I’d leave those red.
Input Settings
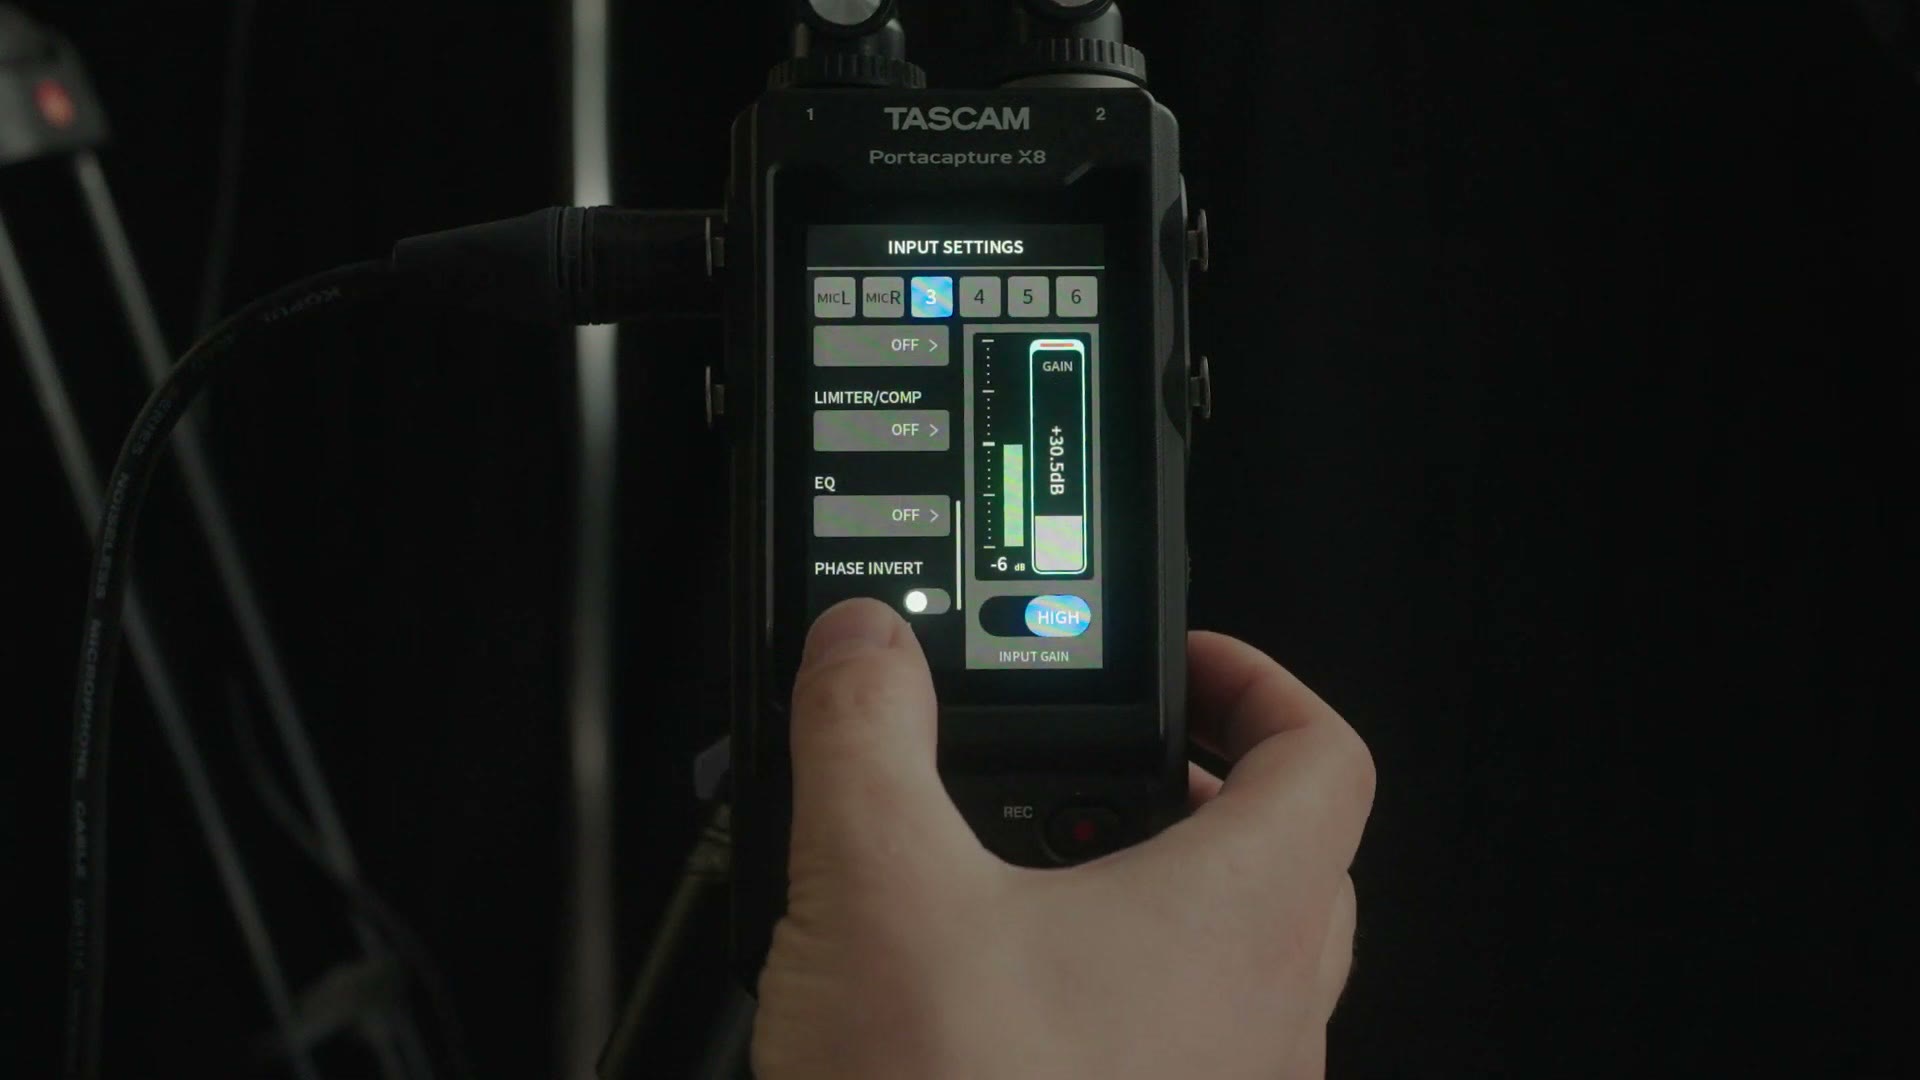
Next you can press and drag up and down to adjust gain, but there are other settings we need to change first, so tap the microphone icon to bring up the input settings for that specific input.
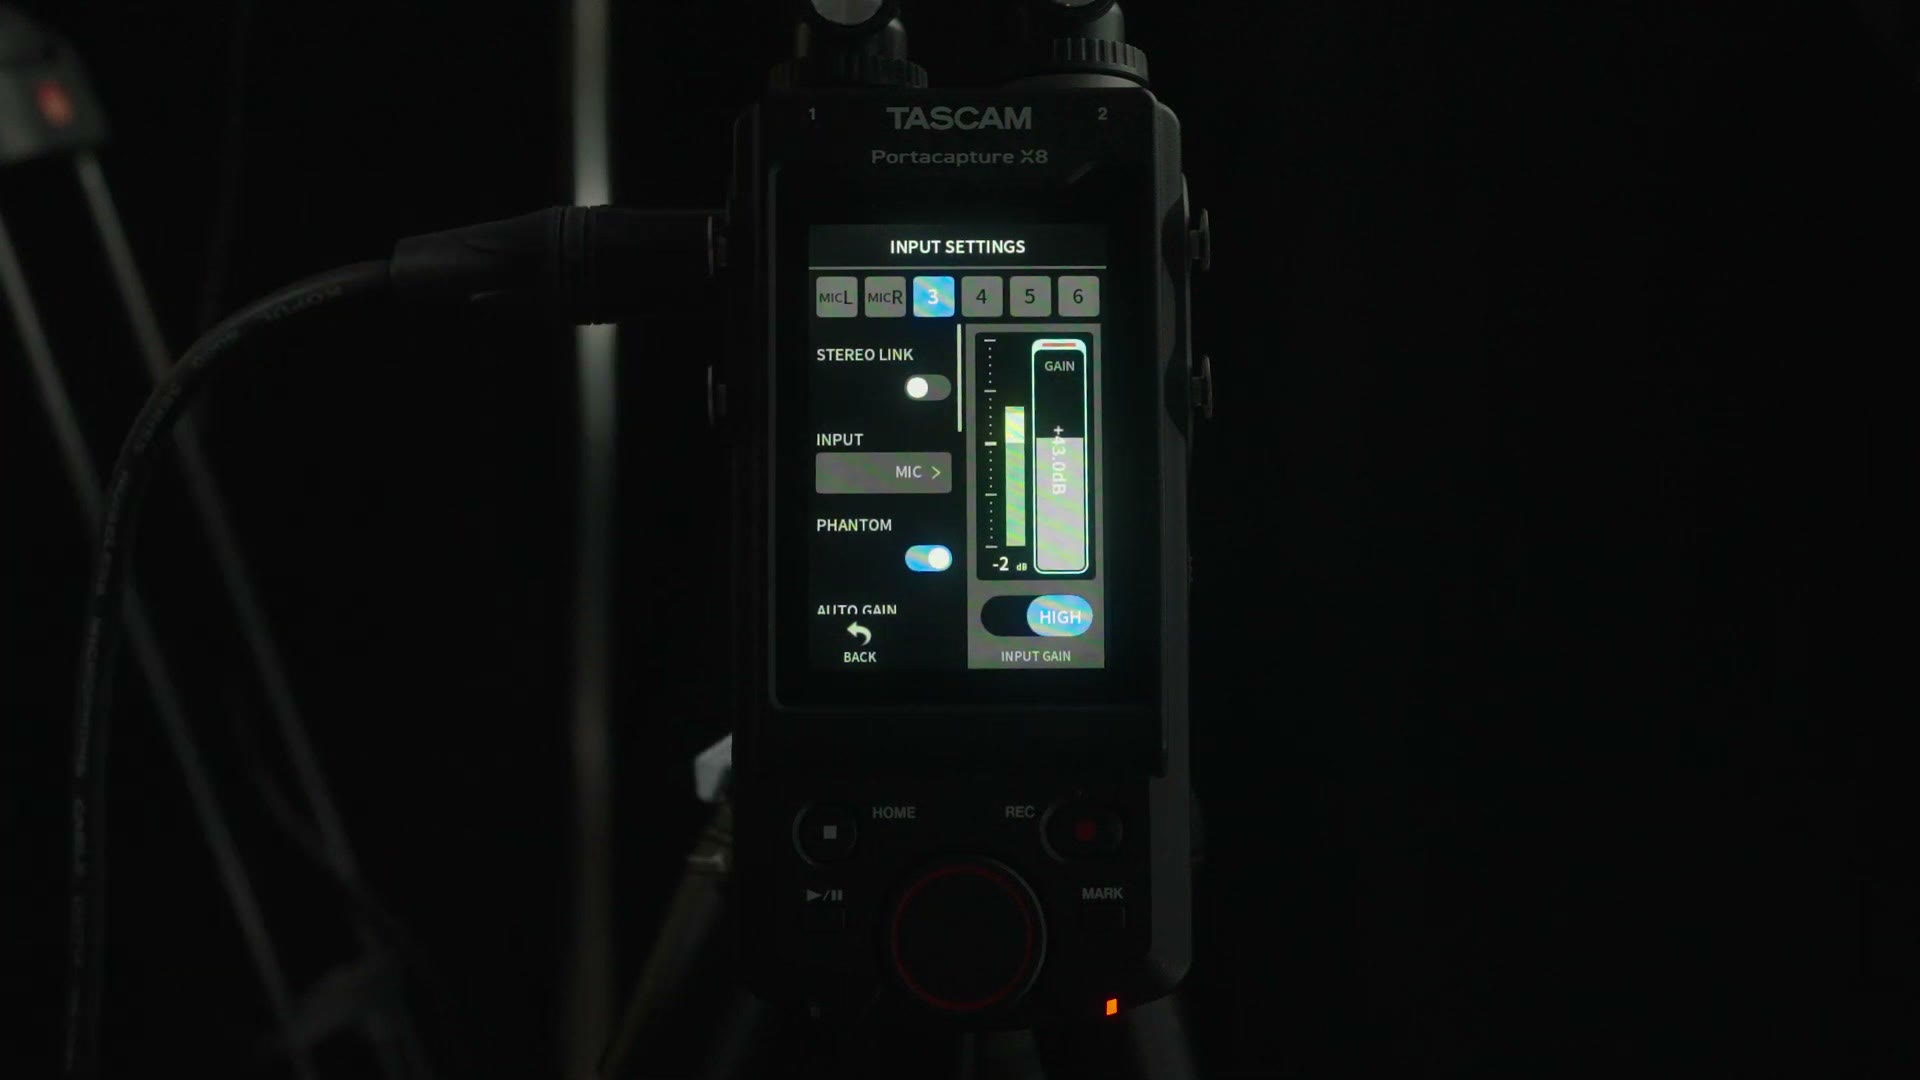
First, make sure Stereo Link is turned off. If you have two things plugged into the left two inputs and stereo link is on, it mixes those two tracks together, which is really bad news if you’re recording separate sources. Believe me, keep this off.
Below that you can select Mic or Line. Typically, if you’re plugging directly into a DJ soundboard or into the back of a wireless receiver, you want Mic level. If you’re plugged into the back of a speaker, you want Line level. In short, mic level is much quieter, so the X8 boosts its gain automatically, whereas line level out of a speaker is dramatically louder, so the X8 drops its gain to compensate.
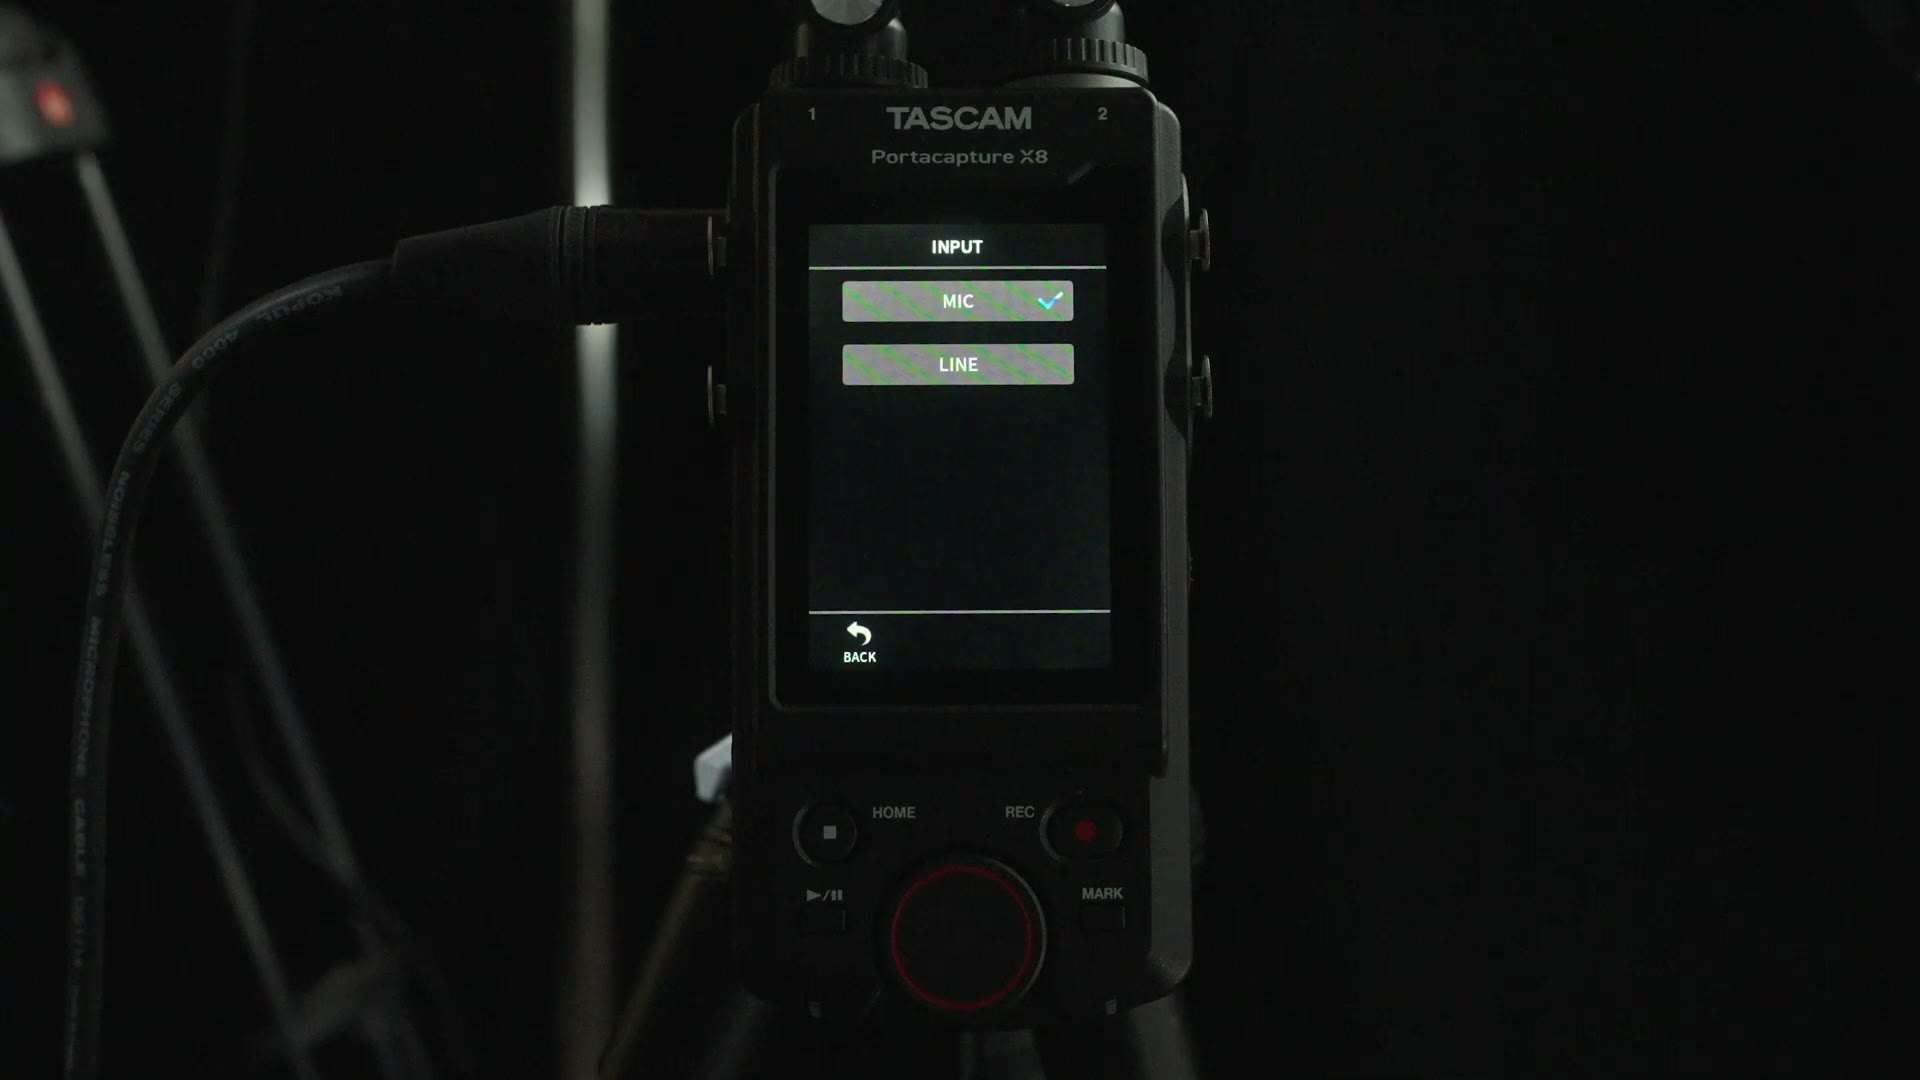
Press back, and below that you have phantom power. If you’re plugging into a soundboard or a speaker you always want this off, because it can absolutely cause issues. I have it on here because for this example I’m running a shotgun mic into the XLR input, and without phantom power the recorder won’t power the mic. So the only time to turn phantom on is when you’re plugging a microphone directly into the recorder and it needs the power.
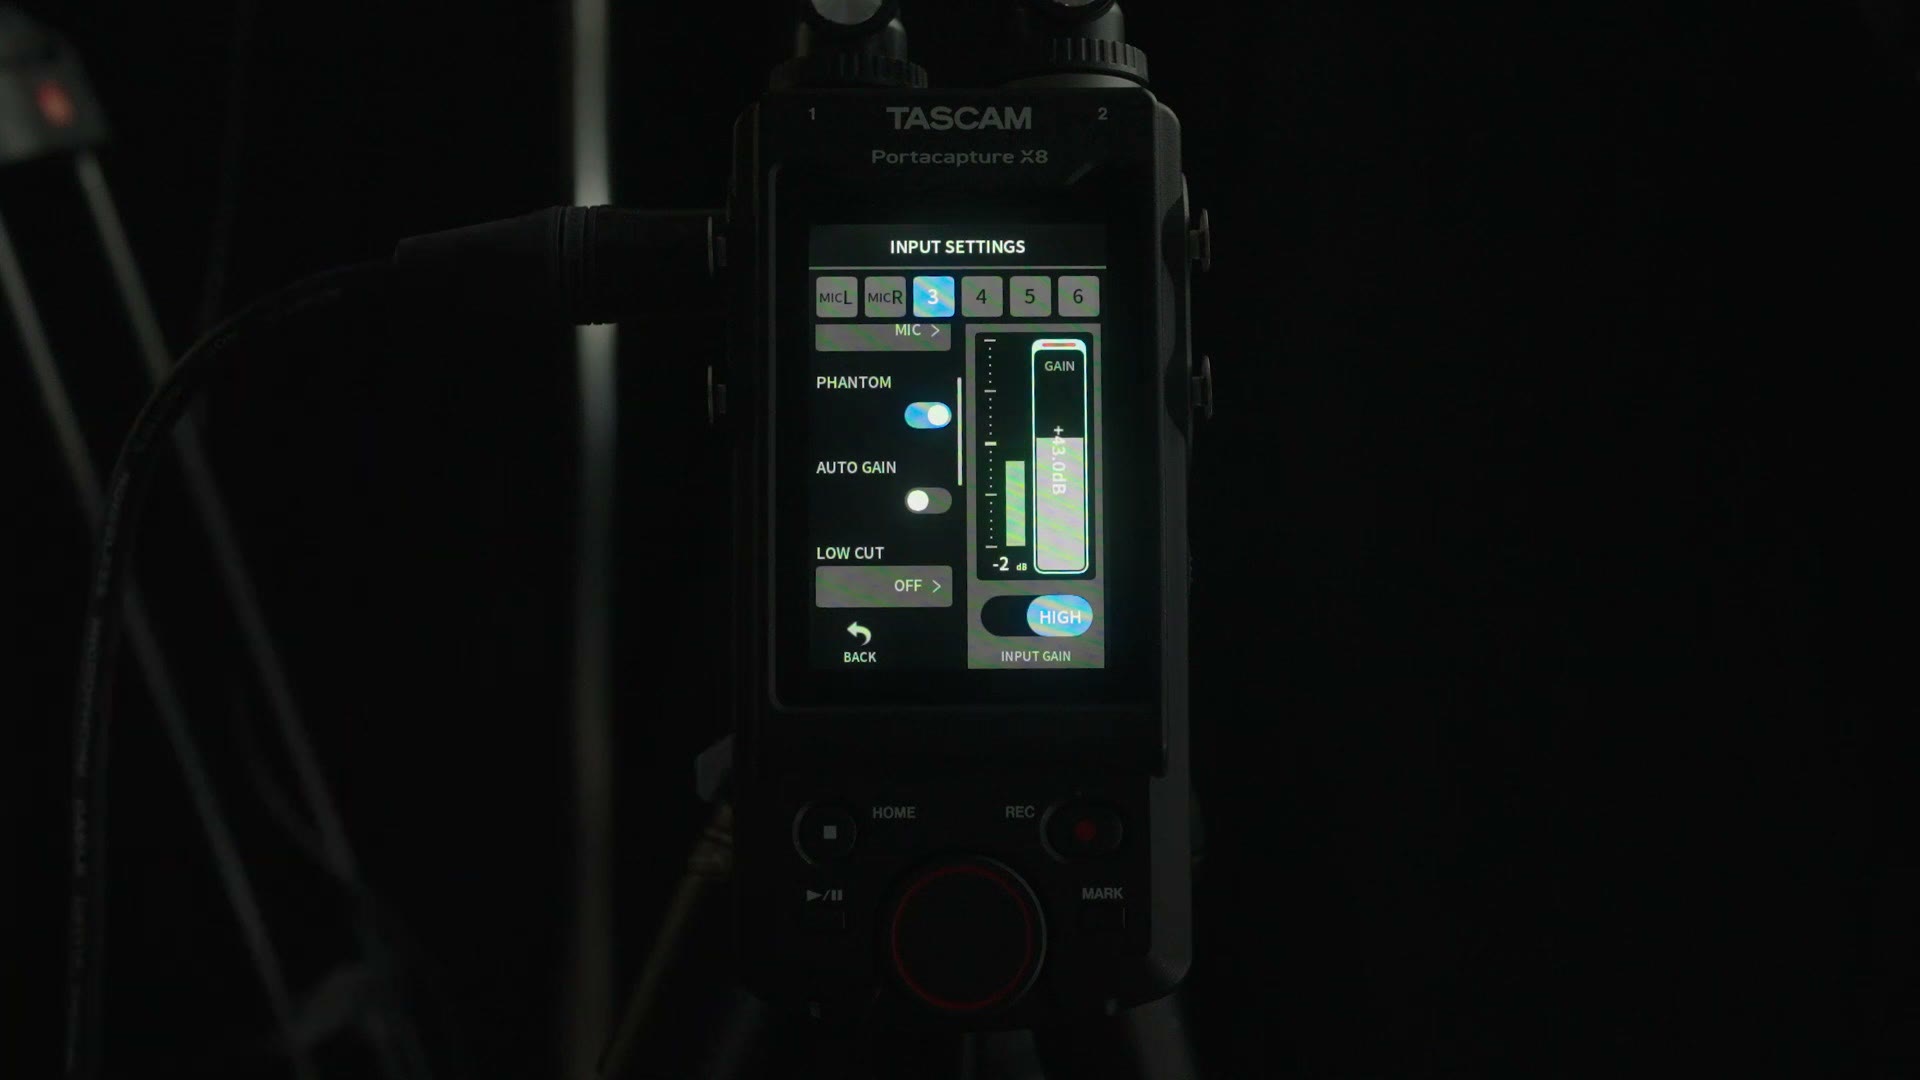
I’d also turn auto gain off, because you’re recording 32-bit float and you do not need your gain dialed in super precisely. Leave the low cut filter off, the noise gate off, the limiter and compressor off, the EQ off, and phase invert off. Same reason. You’re recording 32-bit float, so you don’t need any of it. Just make sure they’re all off.
While you’re here, take a look at Tascam X8 – The Best Audio Recorder For Wedding Filmmaking (Review) and Tascam X6 – A Powerful & Affordable Audio Recorder For Wedding Filmmaking (Review).
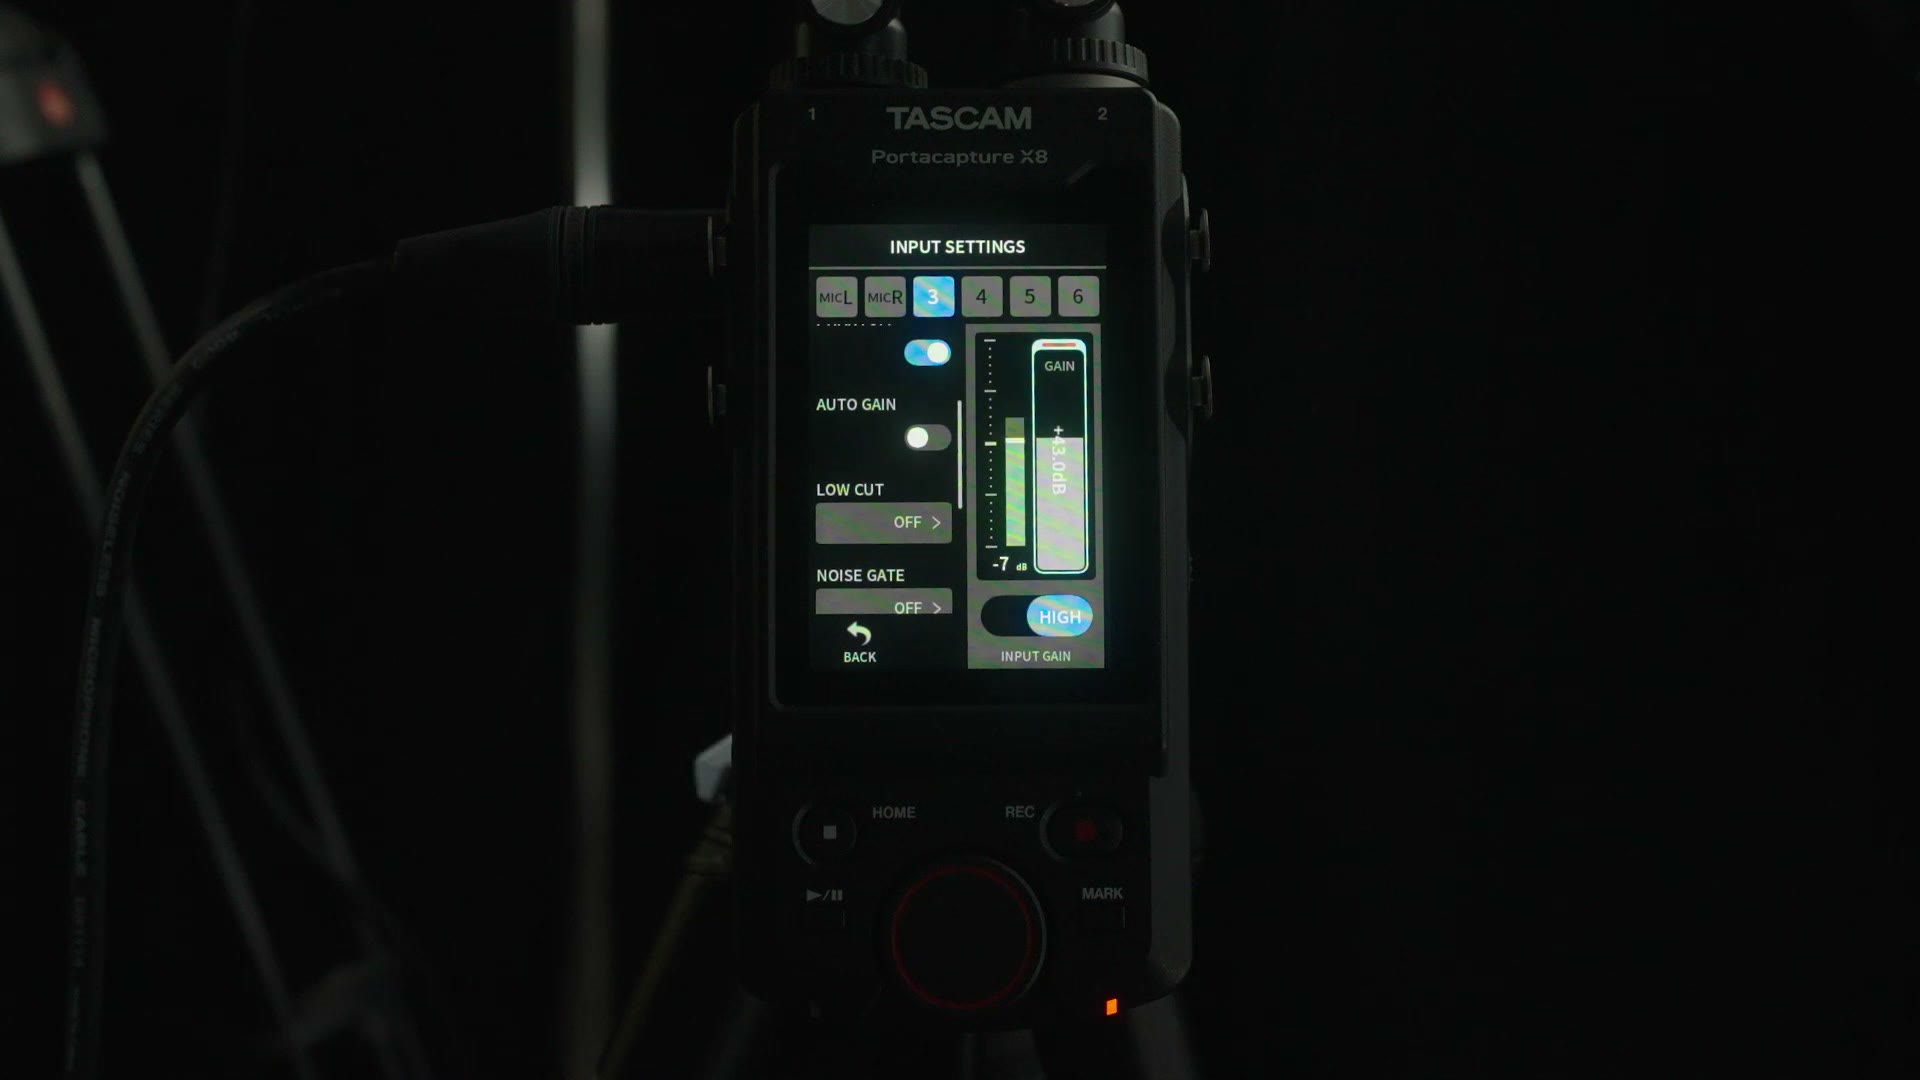
On the right side of the screen you have your audio meters showing how loud the incoming audio is, plus your gain controls. If your audio is coming in very quiet, first check the soundboard you’re plugged into and try raising the levels there. If it’s still too quiet, change your input gain at the bottom from Low to High, which significantly boosts your volume.
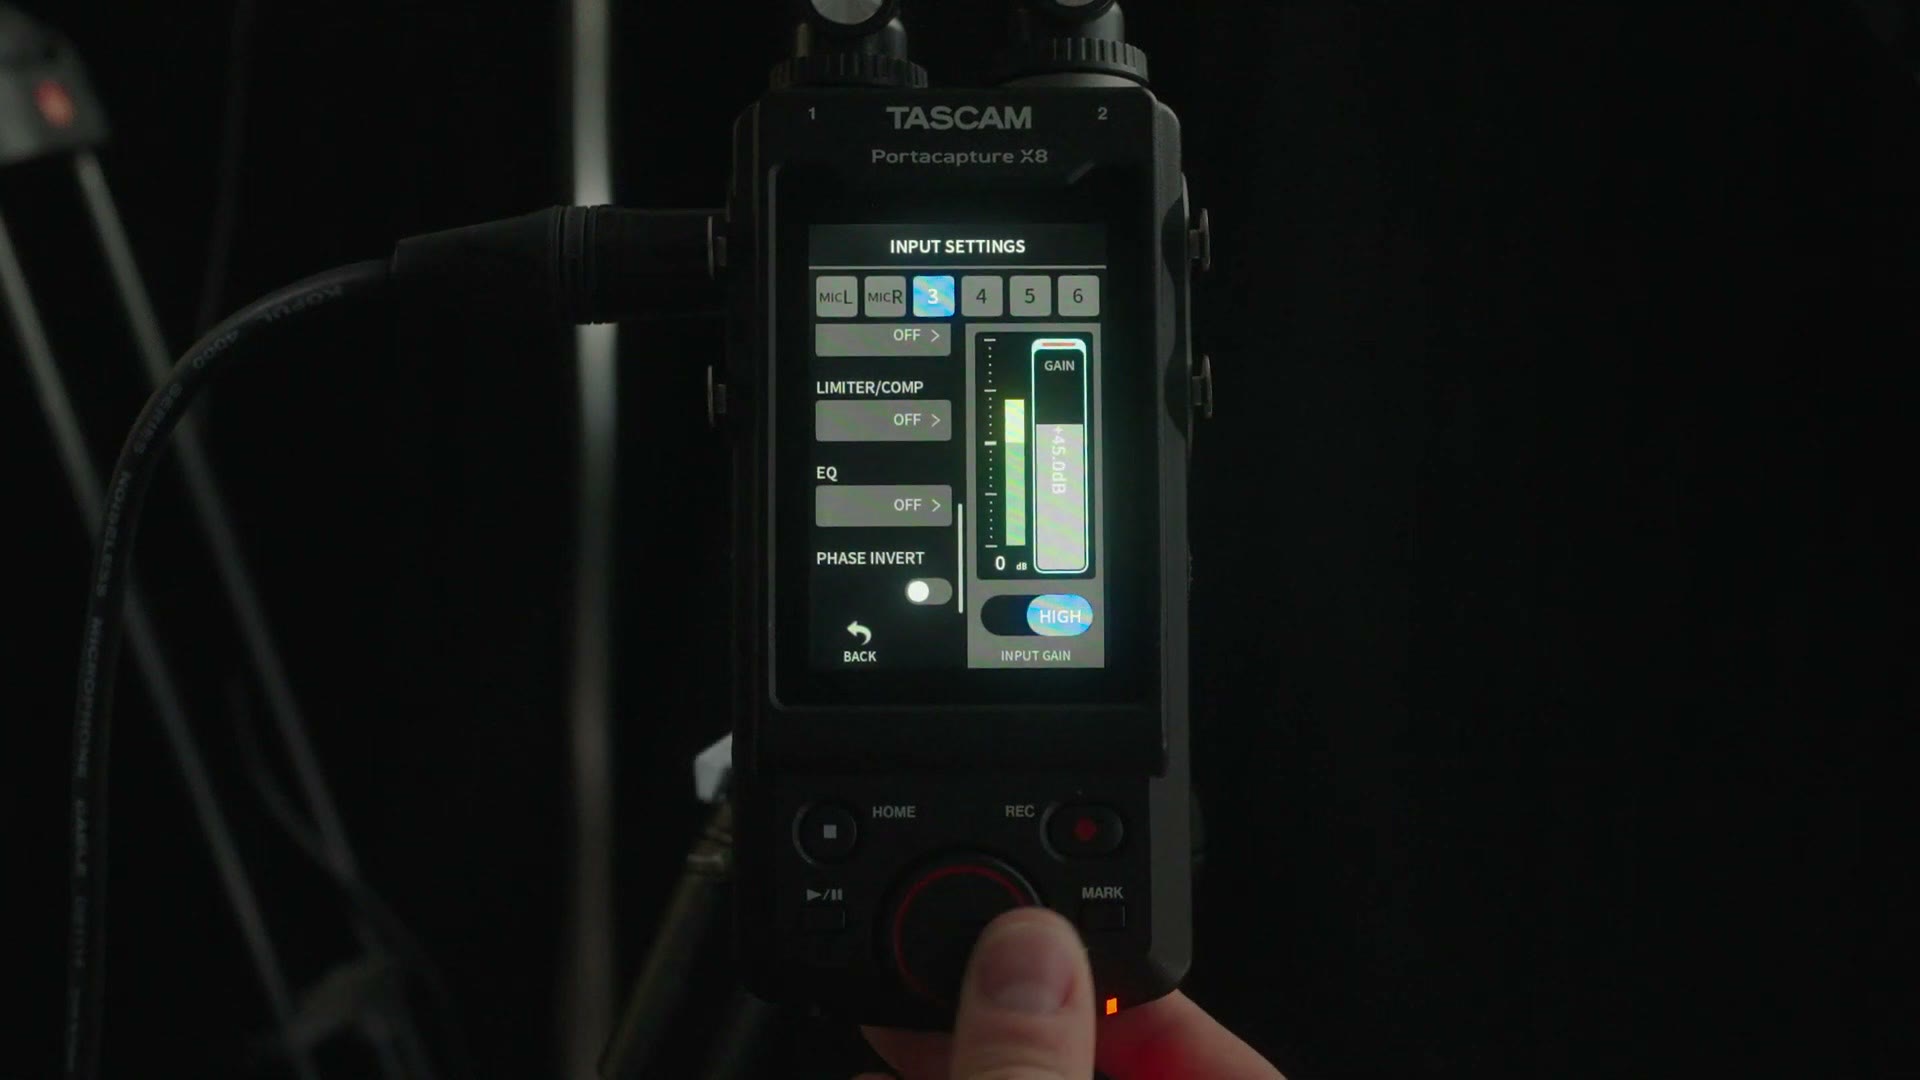
You can tap and drag the gain level up and down, but for more precision I really prefer using the red control dial at the bottom, which you can rotate for very fine adjustments. With your gain dialed in, I recommend aiming for around -15 to -12 dB on your meters. And keep an eye on the LED in the bottom left labeled Peak. If that lights up red, your gain is too high and you need to bring it down.
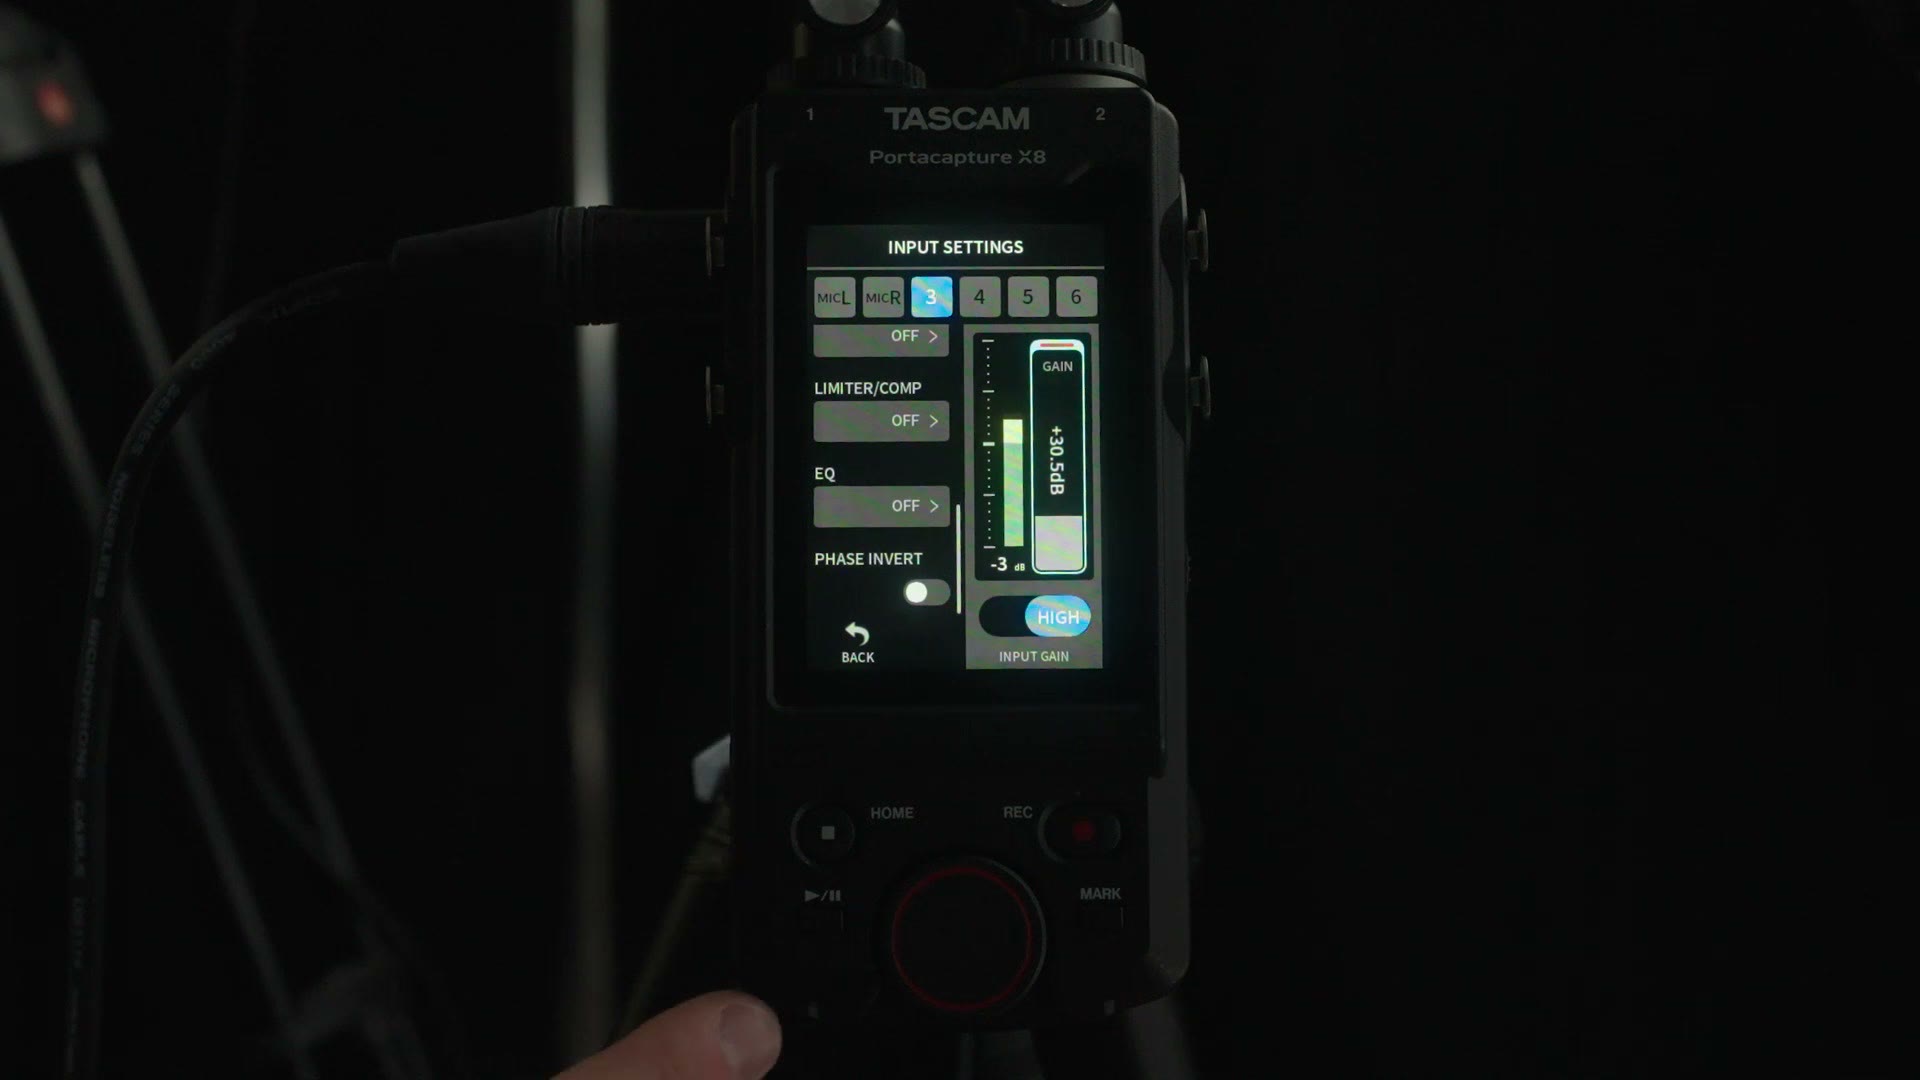
If you have other inputs recording, say a separate cable or the built in microphones, you can get to their settings by pressing the input numbers at the top of the screen.
Audio Mixer
Press back and, down in the middle of the screen, you’re still in the built in Tascam tutorial, and it says Next Step. Tap that, and it walks you through adjusting your faders and making sure your audio doesn’t peak. Press OK, and it’ll tell you to press record to start recording, then ask if you want to see the tutorial again in the future. If you think you’ll forget, press yes.
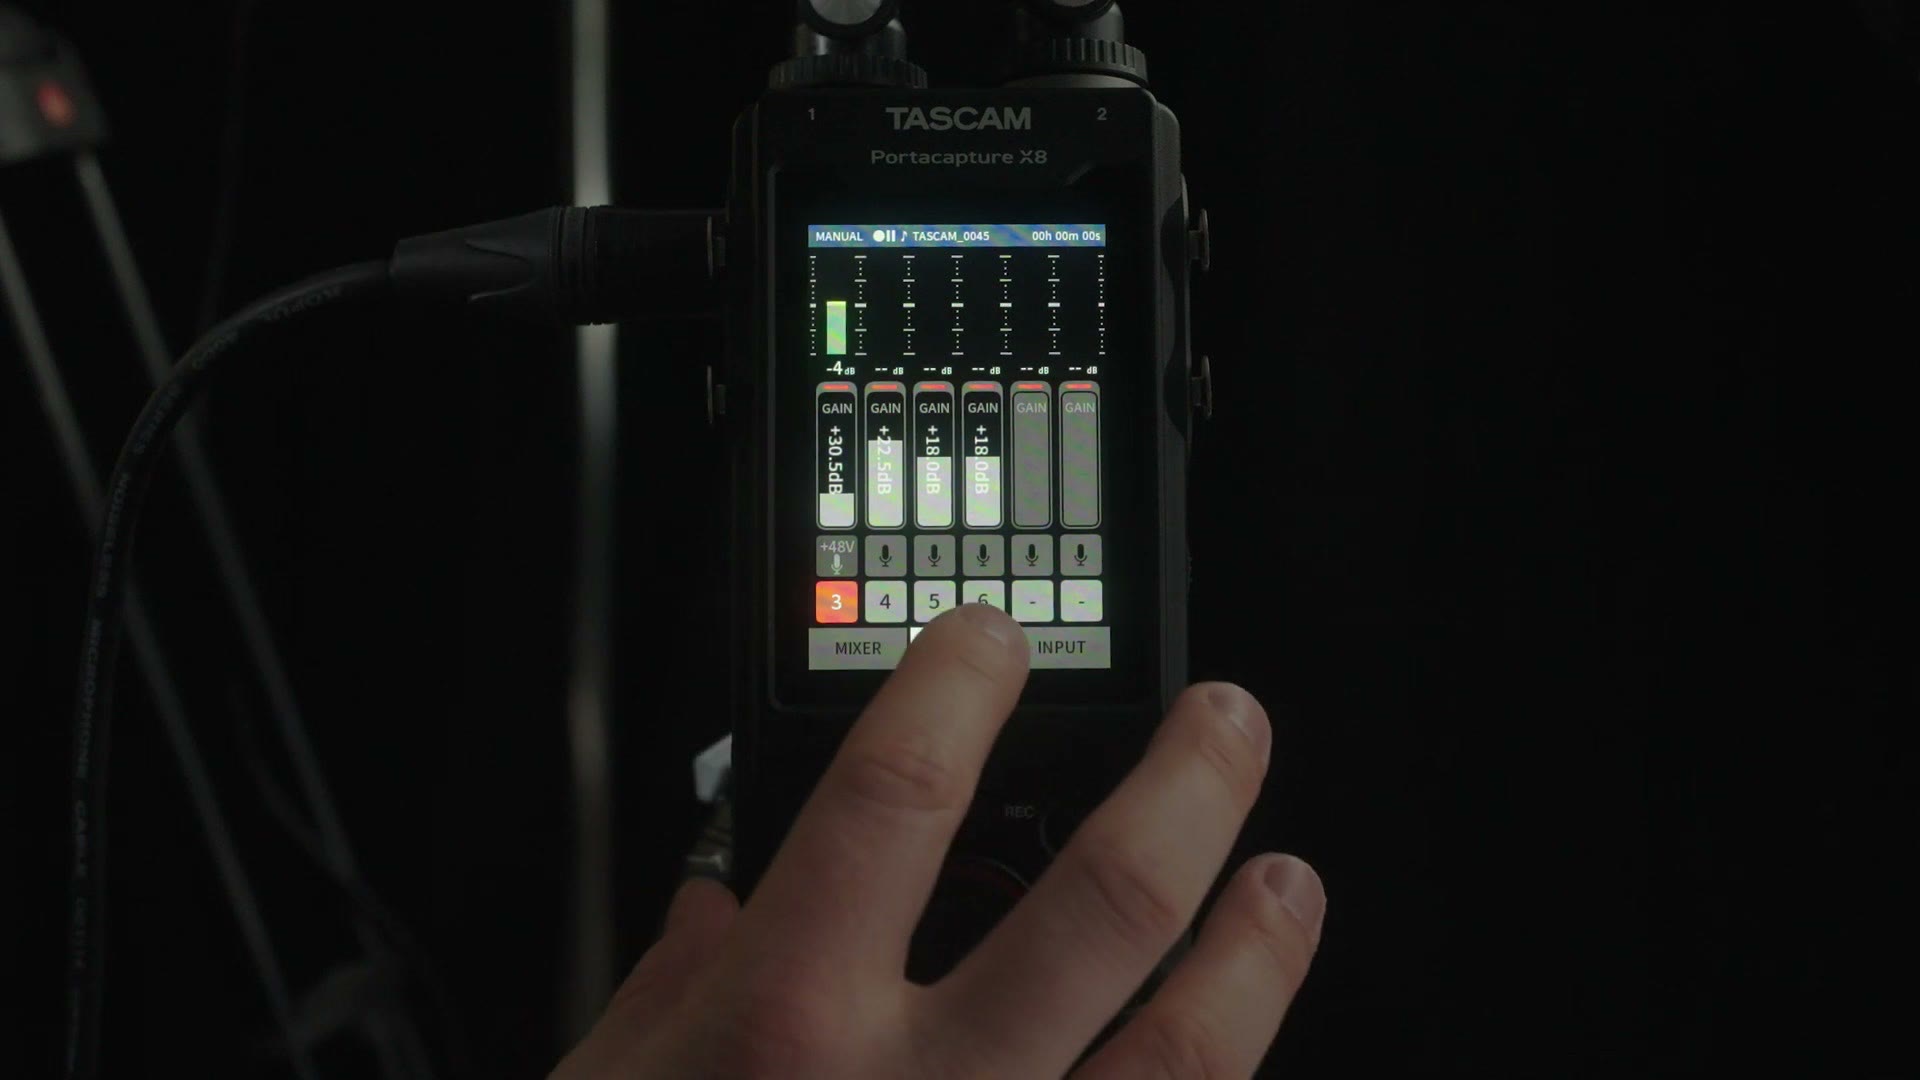
So what is this mixer, and why is it letting you change your gain levels again? I thought we just did that.
Here’s the thing. The X8 doesn’t only record all of your inputs separately as their own tracks and files. It also records a mixed track with all of your sources combined. I don’t find that especially useful for wedding filmmaking, where I usually want every source kept separate, but if you’re recording something live and want to save time, these levels affect that mixed track.
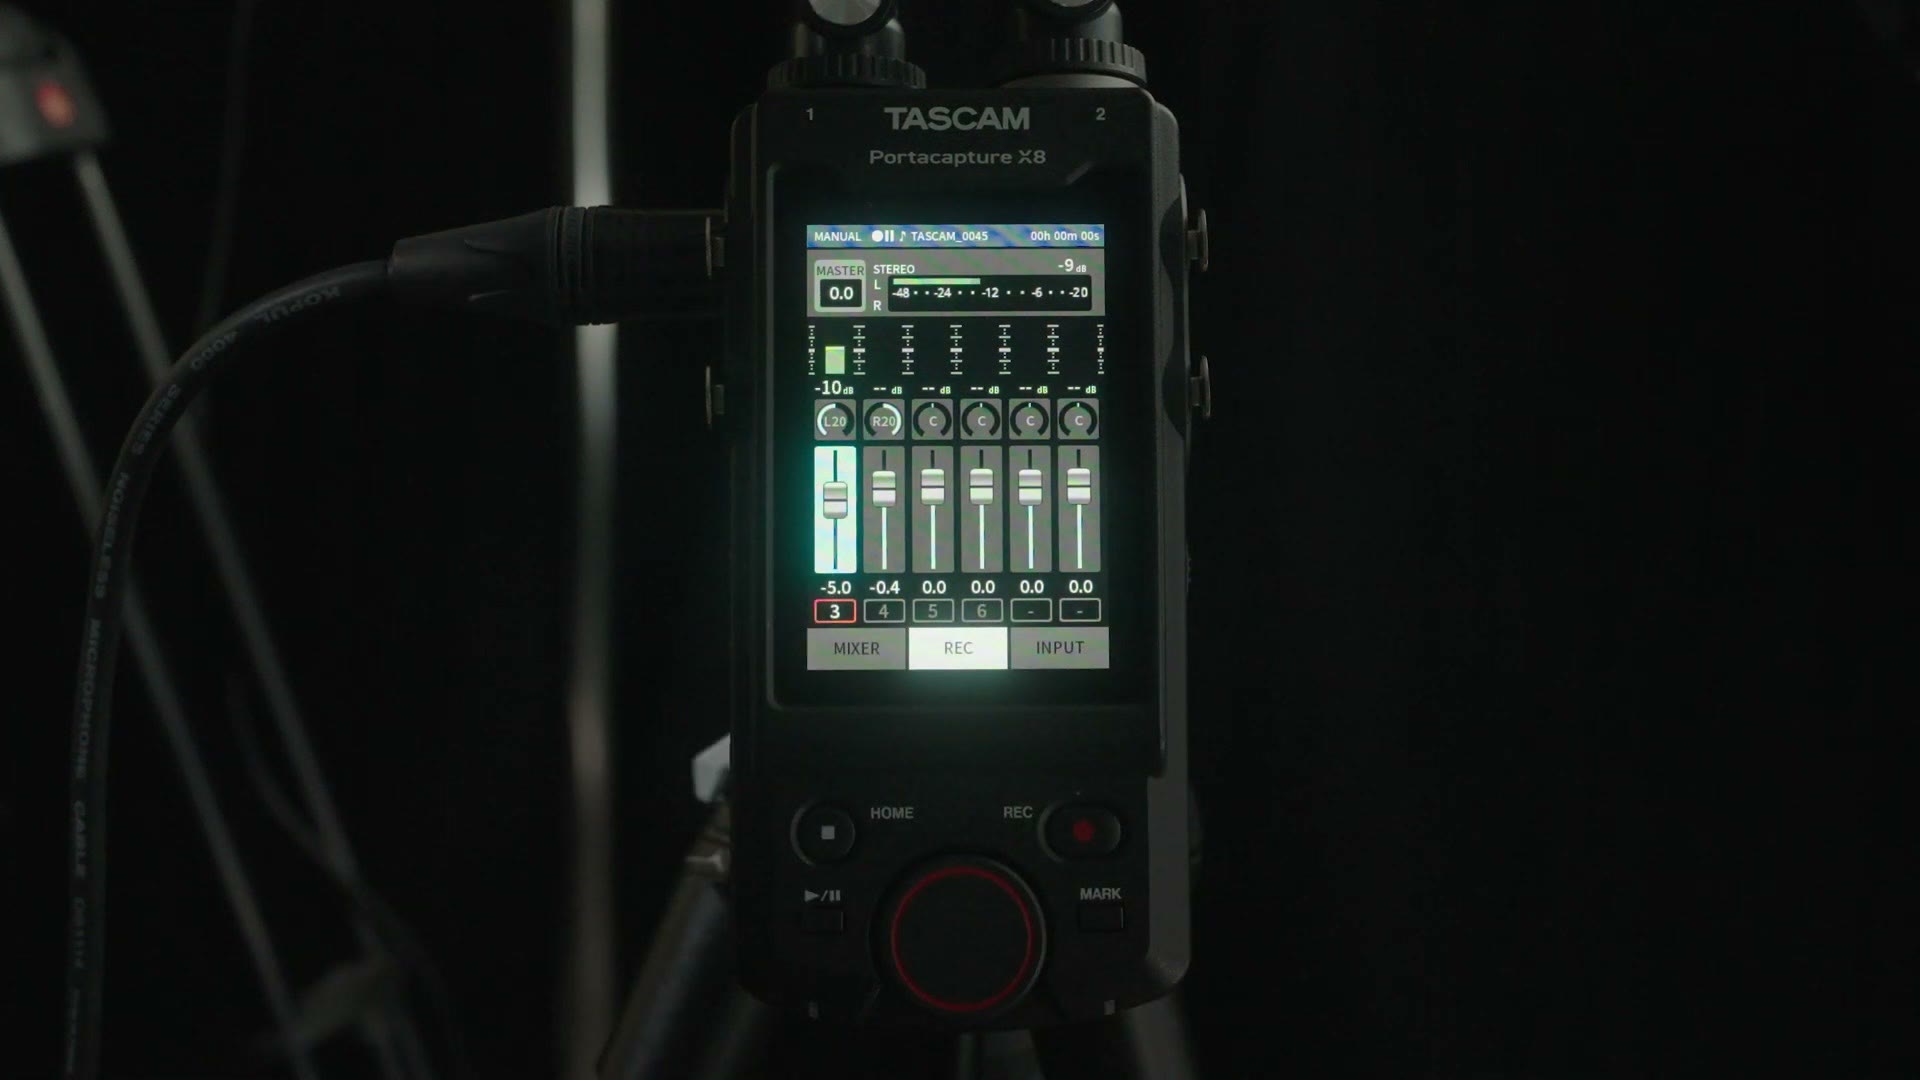
You can tap and drag the mixer bars, but that isn’t very precise. Notice that whenever you do, the fader lights up blue, and then you can use the control dial to adjust it accurately. Personally I don’t use the mixer, and if you aren’t planning to either, you can completely ignore this screen.
Final Step!
It’s finally time to record. Either press the big red record button in the bottom right, or tap record on the screen. Congratulations, your X8 is now recording in beautiful 32-bit float.
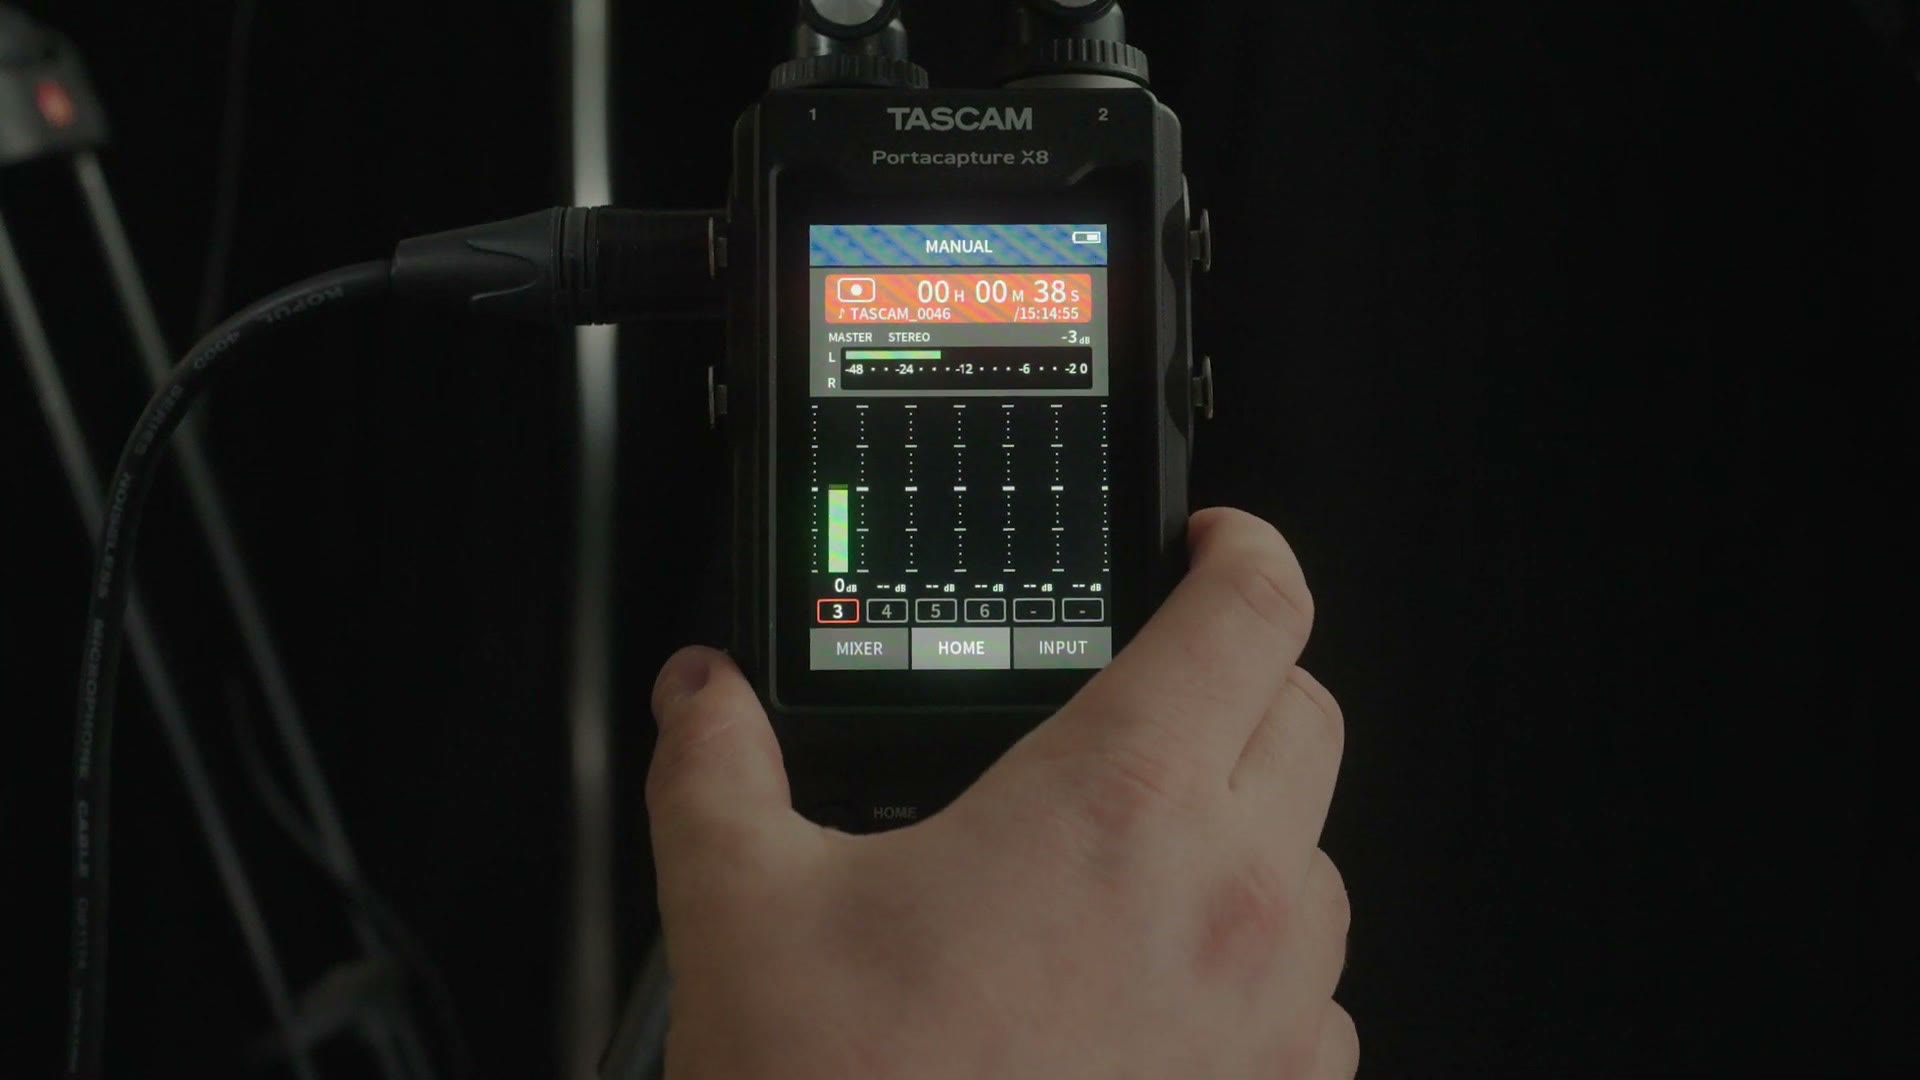
As one final step, bring your hand over to the right side of the recorder and slide up the hold switch, which disables all the buttons in case the DJ bumps into it, or a wedding guest goes rogue and tries to take over the sound system.
And one last thing worth knowing. Once you turn hold off and press stop, you’ll see a Home button, an Input button and a Mixer button along the bottom of the screen. So if you’ve disabled the built in Tascam tutorial, you can press Input to get to the input page and tap the microphone to dial in your settings for that input, or press the bottom left button to get to the mixer page.
With that, your X8 is set up and you’re ready to record audio at a wedding or anything else. If you’re still deciding between this and the Zoom F3, I put the two of them head to head over here.
Free Guide To Book More Wedding Clients
If you happen to be a wedding filmmaker like me, I want to help you book more weddings. I’ve made a free guide that walks you through practical steps you can take right now in your business to book more couples and film more weddings. It’s a completely free gift to you, and you can download it right here.

You can pick up the X8 at Sweetwater, Amazon or B&H. The footage here is graded with my own color presets at whoismatt.com/luts, my full gear list is on kit.co, and I have filmmaking courses if you want to go deeper.
Thanks so much for reading, and have a great day!