
My name is Matt Johnson, and today I am going to show you how to use proxy files to take your high quality 4K video from stuttery and painful to play back, to cutting through your clips like butter in Premiere Pro.
To save you time, I made a proxy cheat sheet with the exact settings, including the slow motion numbers we get to later. You can download the Premiere Pro proxy cheat sheet here, and I highly recommend it, because there are a lot of numbers in this one.
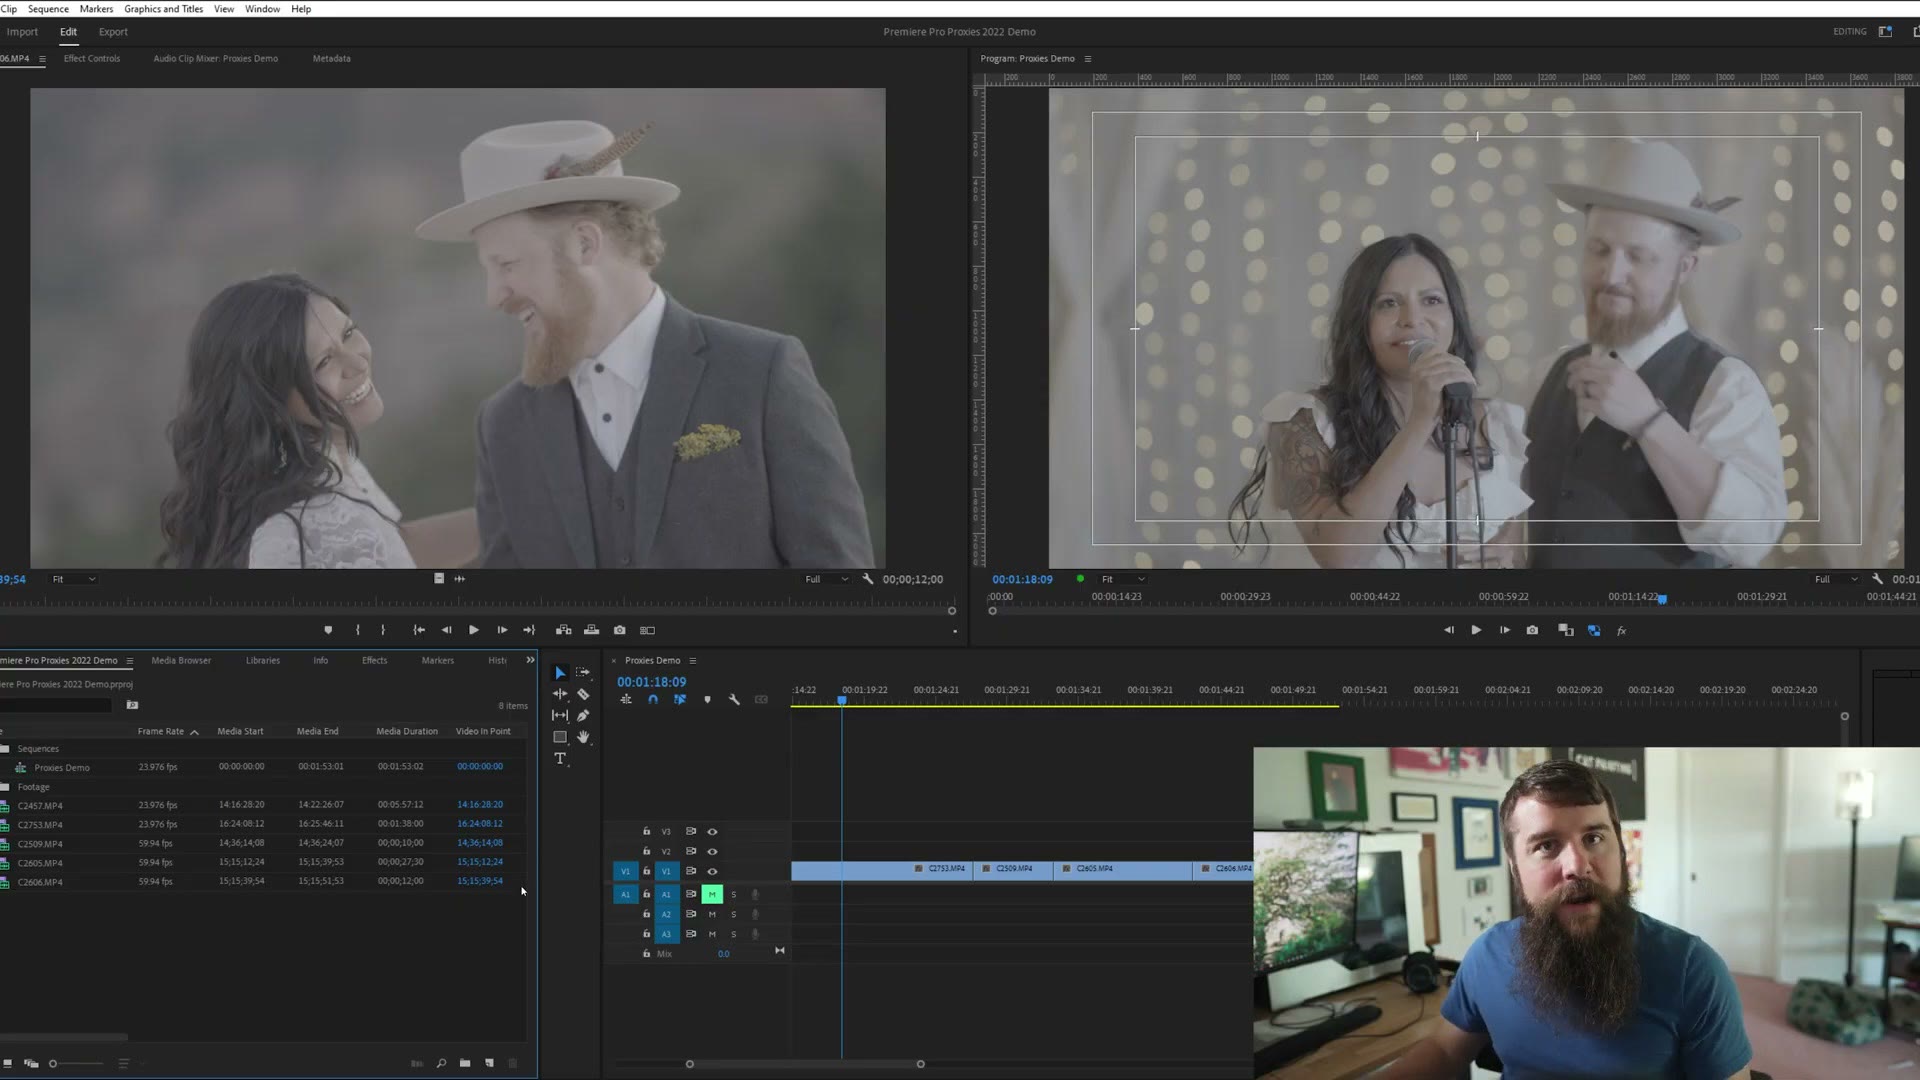
The project you are looking at has 4K 60 frames per second 10 bit footage from my Sony a7S III in it, and it ain’t playing back smooth. Takes a moment to load, scrubbing is rough. We need some proxies.
How To Make Proxies FAST
Go down to the project panel where your video files live and select all of them. Yes, all of them. It does not matter what resolution or frame rate anything was filmed at. Click the first clip, hold shift, click the last one, scrolling if you need to.
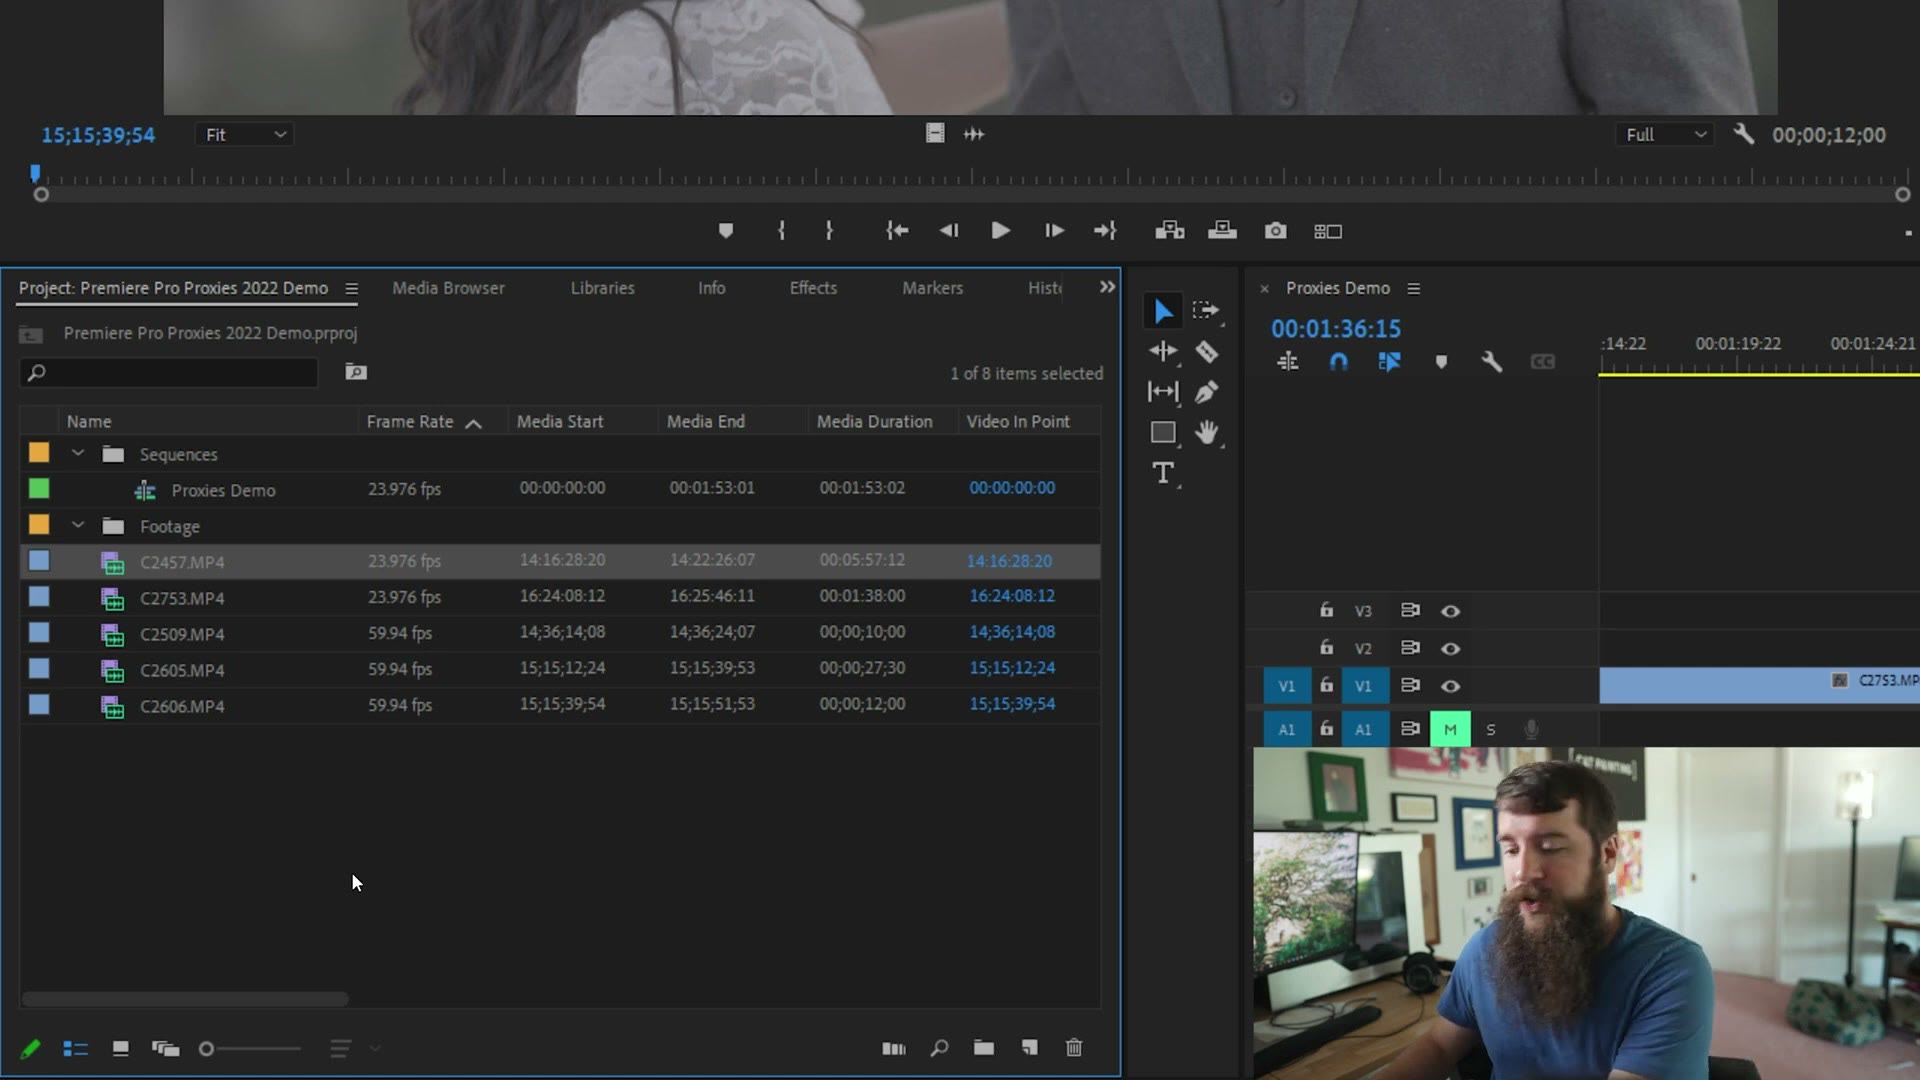
Then right click on them and go to Proxy, then Create Proxies. That opens the Create Proxies dialog, and you will see a pile of format and preset options.
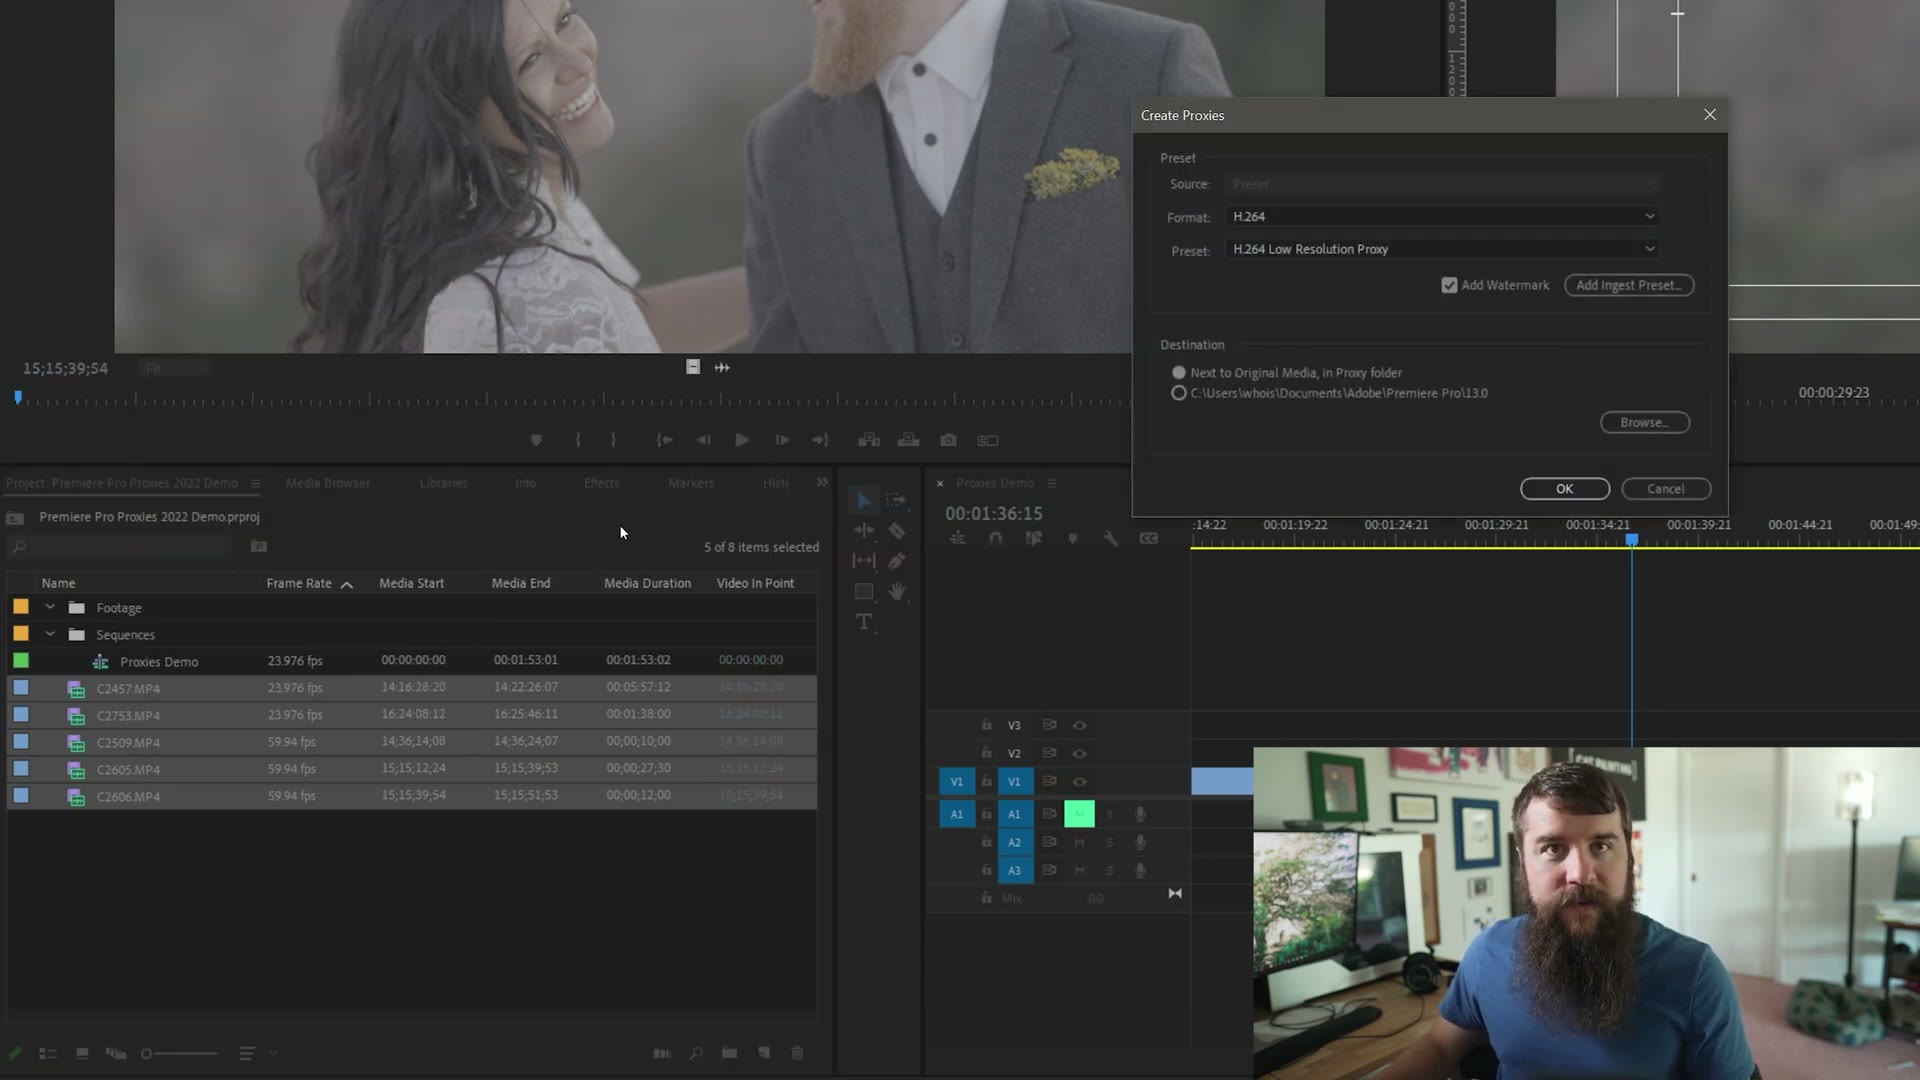
In my testing, if you want the smoothest playback across the widest variety of cameras and computers, plus a small file size, your best bet is:
- Format: QuickTime
- Preset: ProRes Low Resolution Proxy
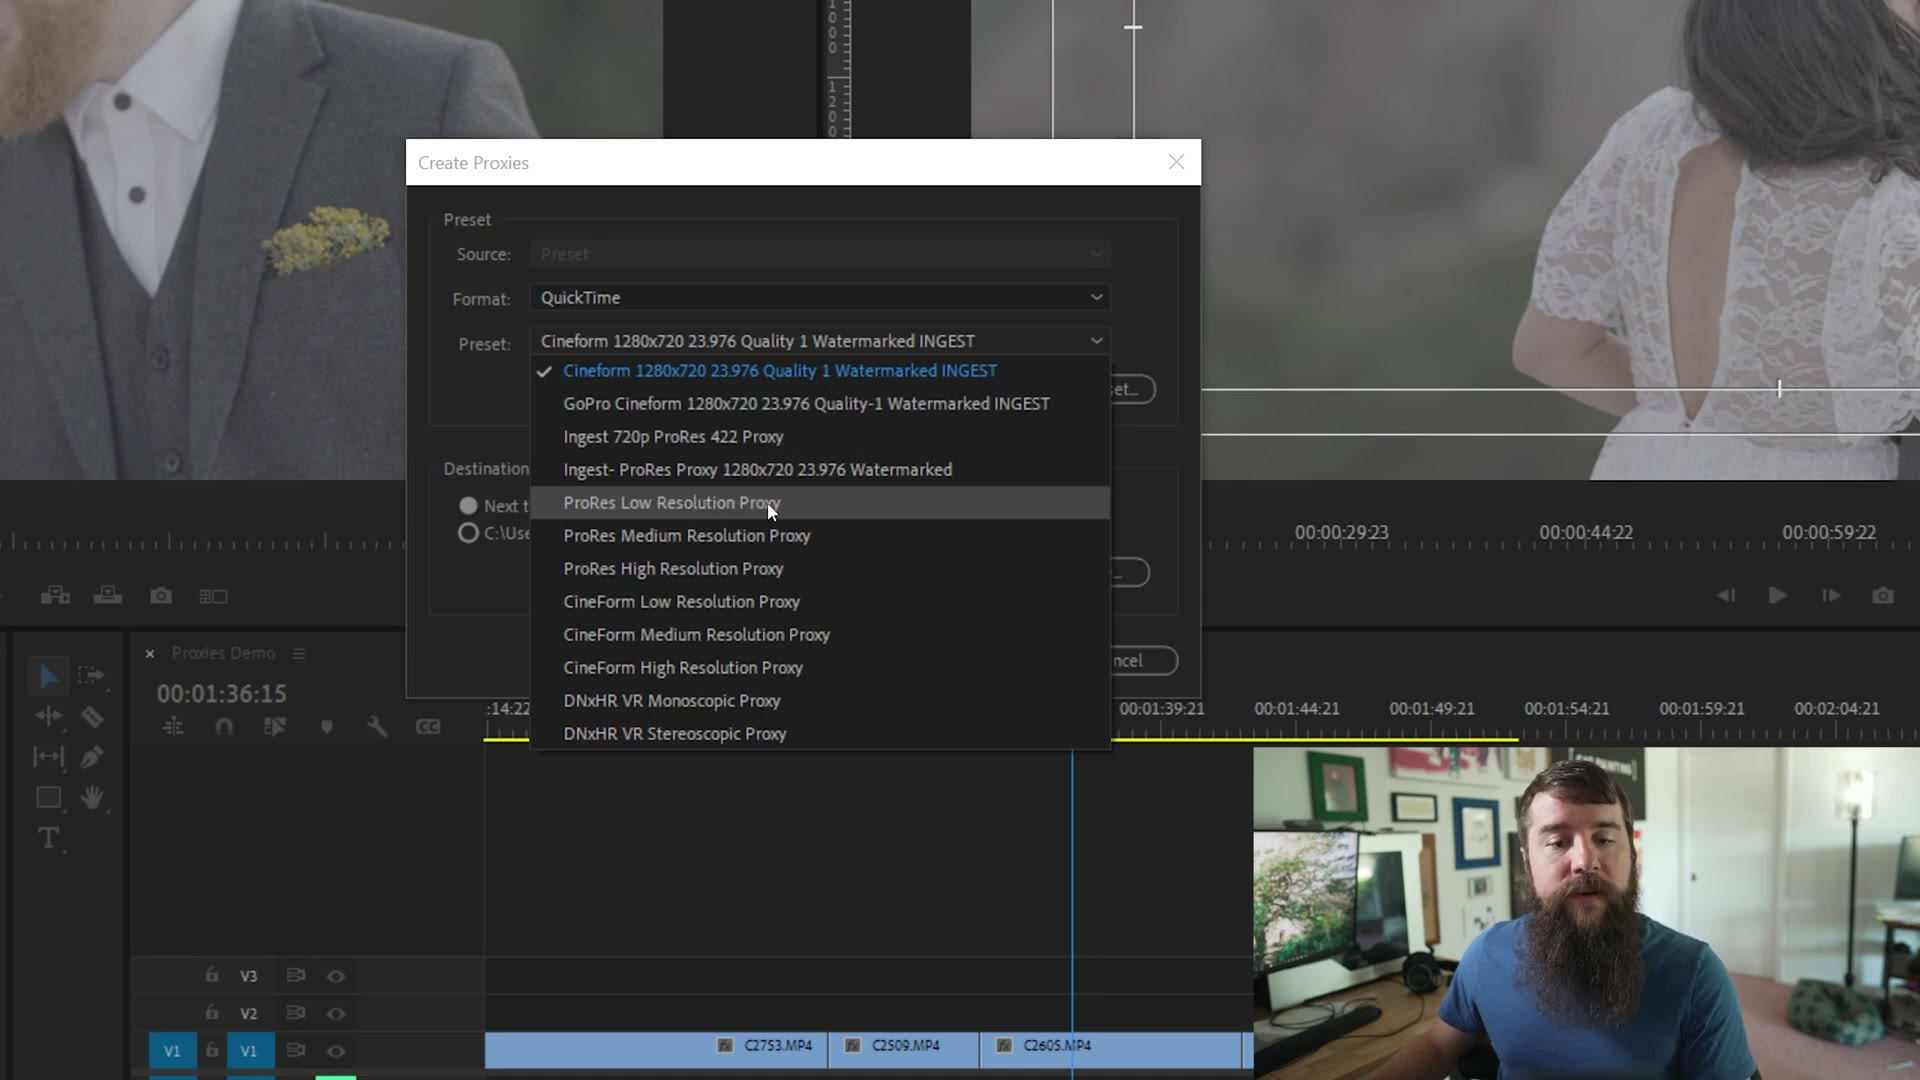
In the past I recommended QuickTime with CineForm, but CineForm is not supported on some newer computers now, which is why we are going with ProRes instead.
If you are not seeing these options at all, you are probably on an earlier version of Premiere Pro, and you can watch my earlier proxy tutorial for the older workflow.
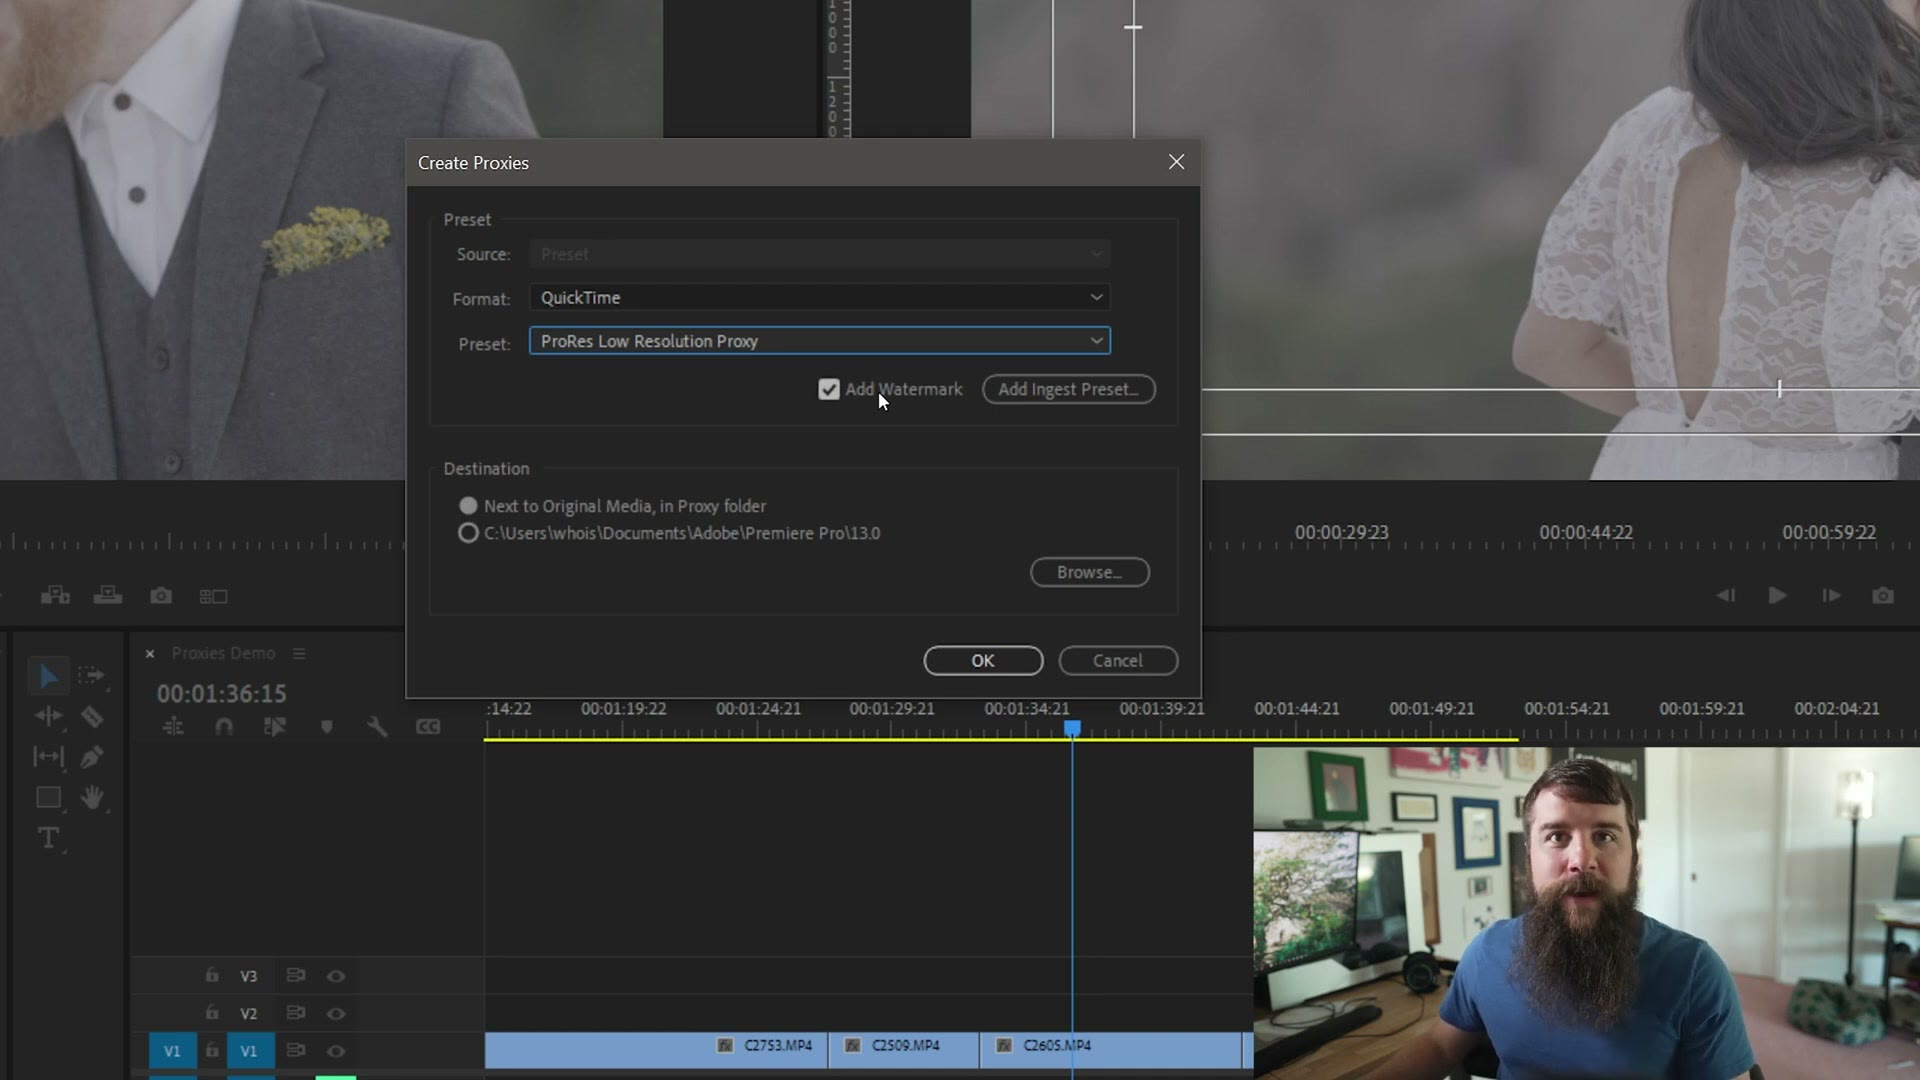
Two more things in this dialog. Check the Add Watermark box, because that enables some genuinely useful stuff we will get to in a second. And for Destination, select Next to Original Media, in Proxy Folder. Then press OK.
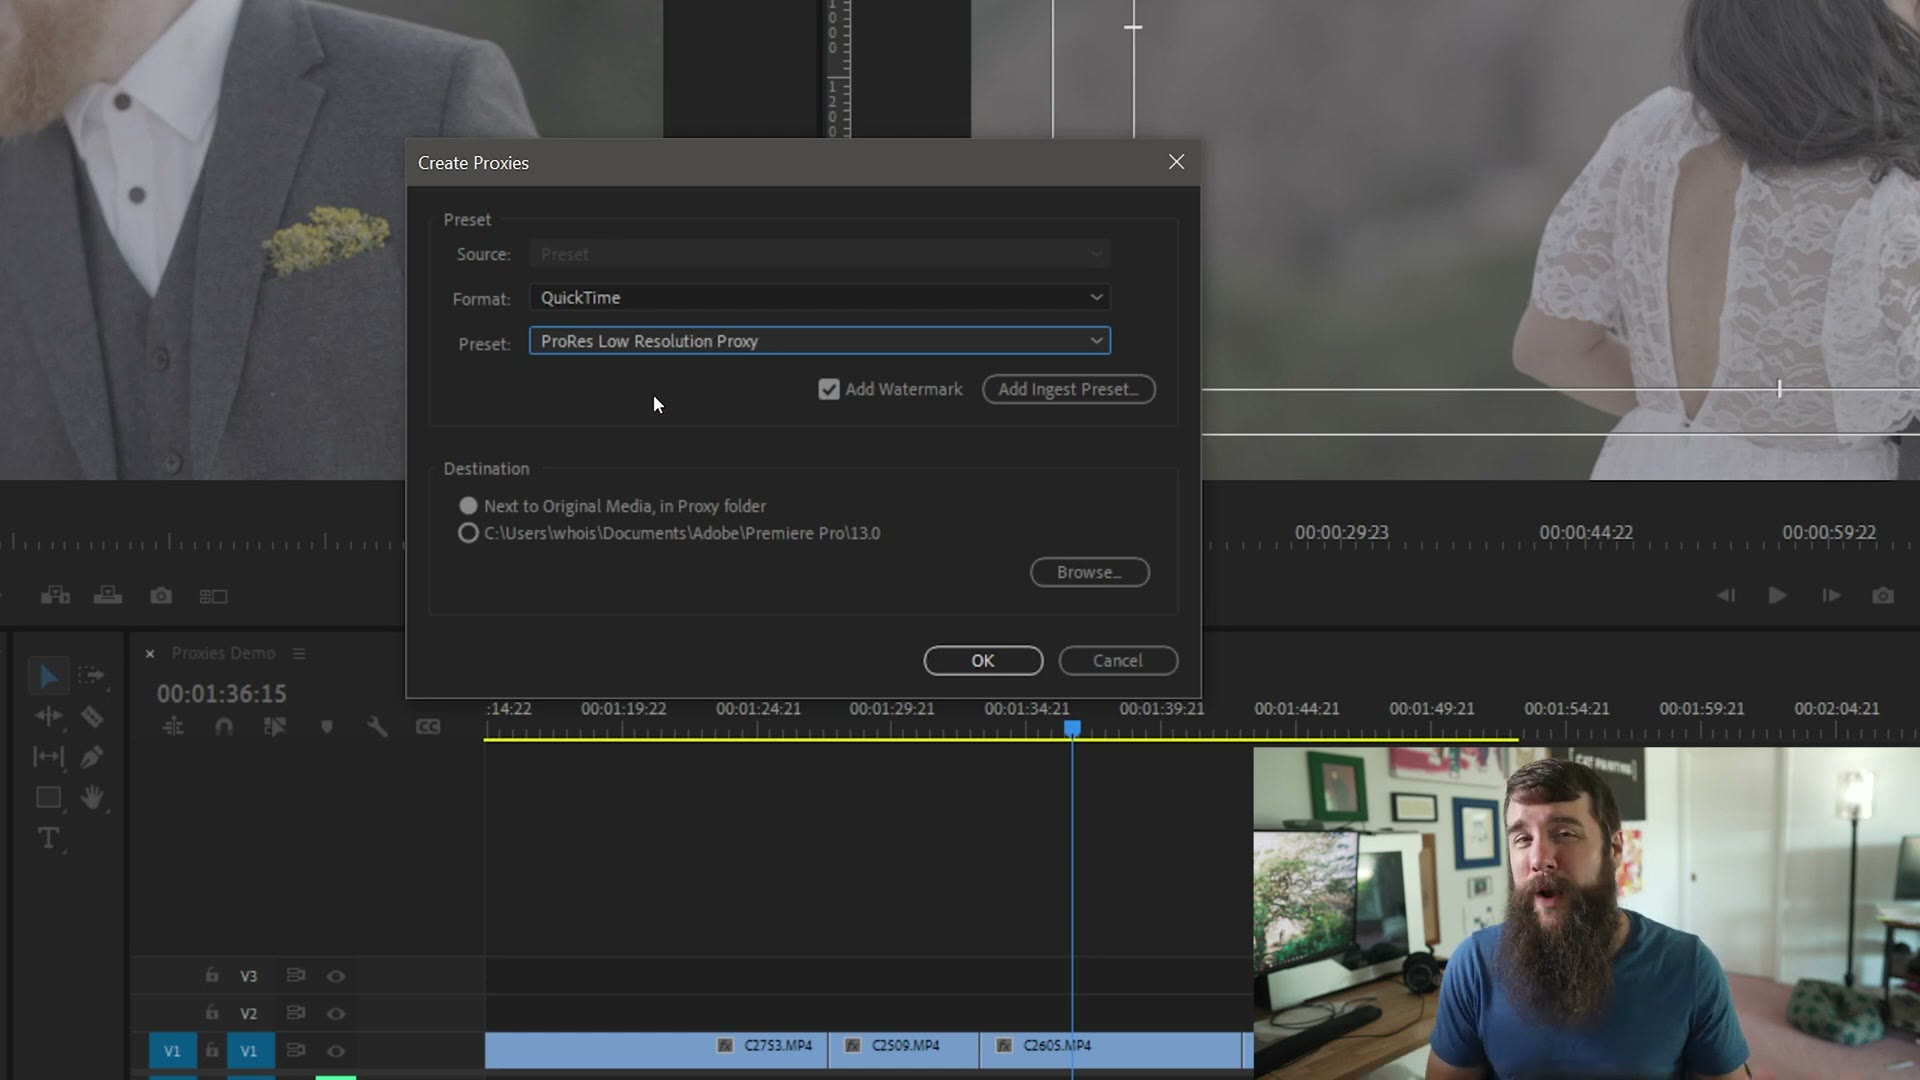
At this point Premiere starts sending every one of those clips over to Adobe Media Encoder. I am going to warn you now: this can take a while. A handful of clips might be done in seconds. A wedding film with hundreds of clips can leave Premiere sitting there for five or ten minutes, sometimes longer, just handing everything off.
Once they are all handed off, Media Encoder starts rendering in the background and you can go straight back to editing. It links the finished proxies to your native files automatically when they are done.
Time To Enable Proxies
Here is where things get awesome. Back in Premiere, you will notice some new things.
Because you checked Add Watermark, every clip that has a proxy now shows a little proxy icon. By default it is grayed out in black and white, because your proxies are disabled. And you can tell they are disabled, because clicking around is still not smooth.
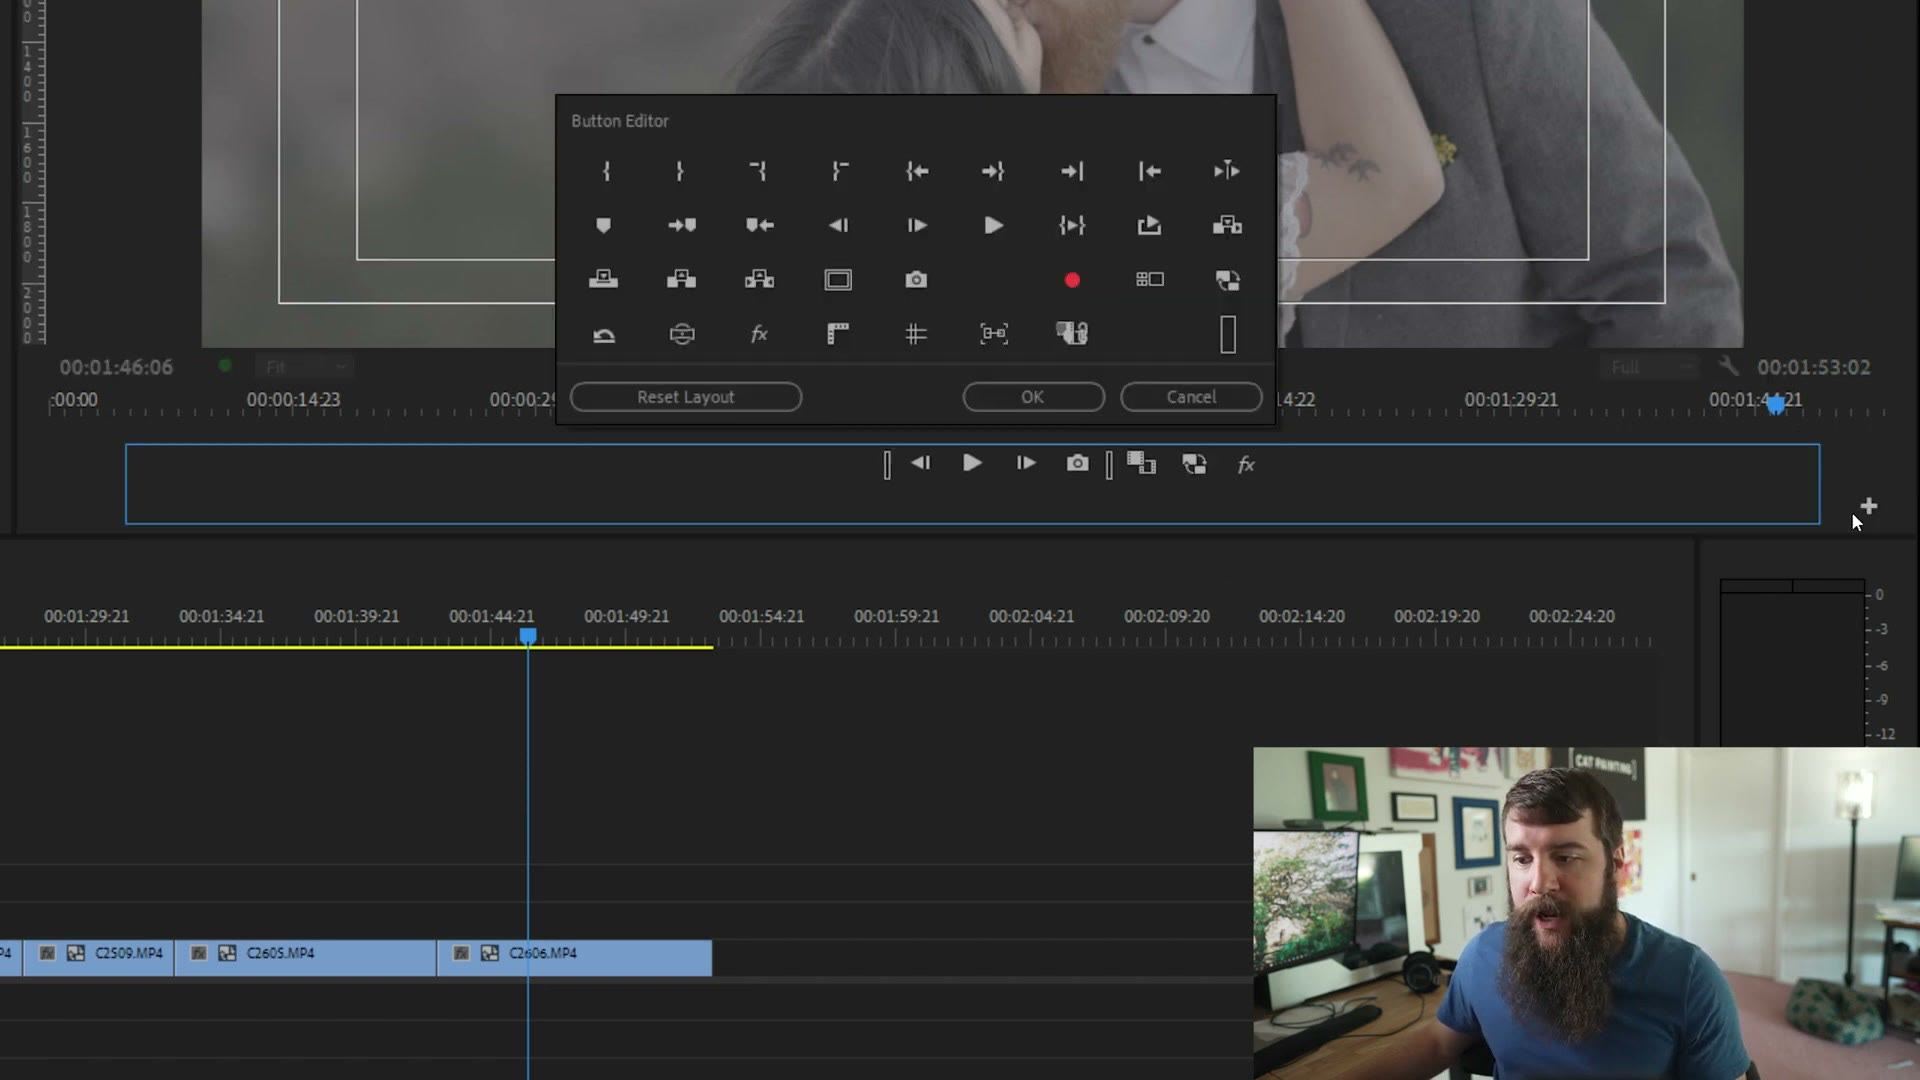
To turn them on, find the Toggle Proxies button in the upper right of the program monitor. If you do not see it, click the plus icon on the right to open the button editor, find it in there, and drag it down onto the strip. Press OK and it stays.
Click Toggle Proxies so it is highlighted, and two things happen at once.
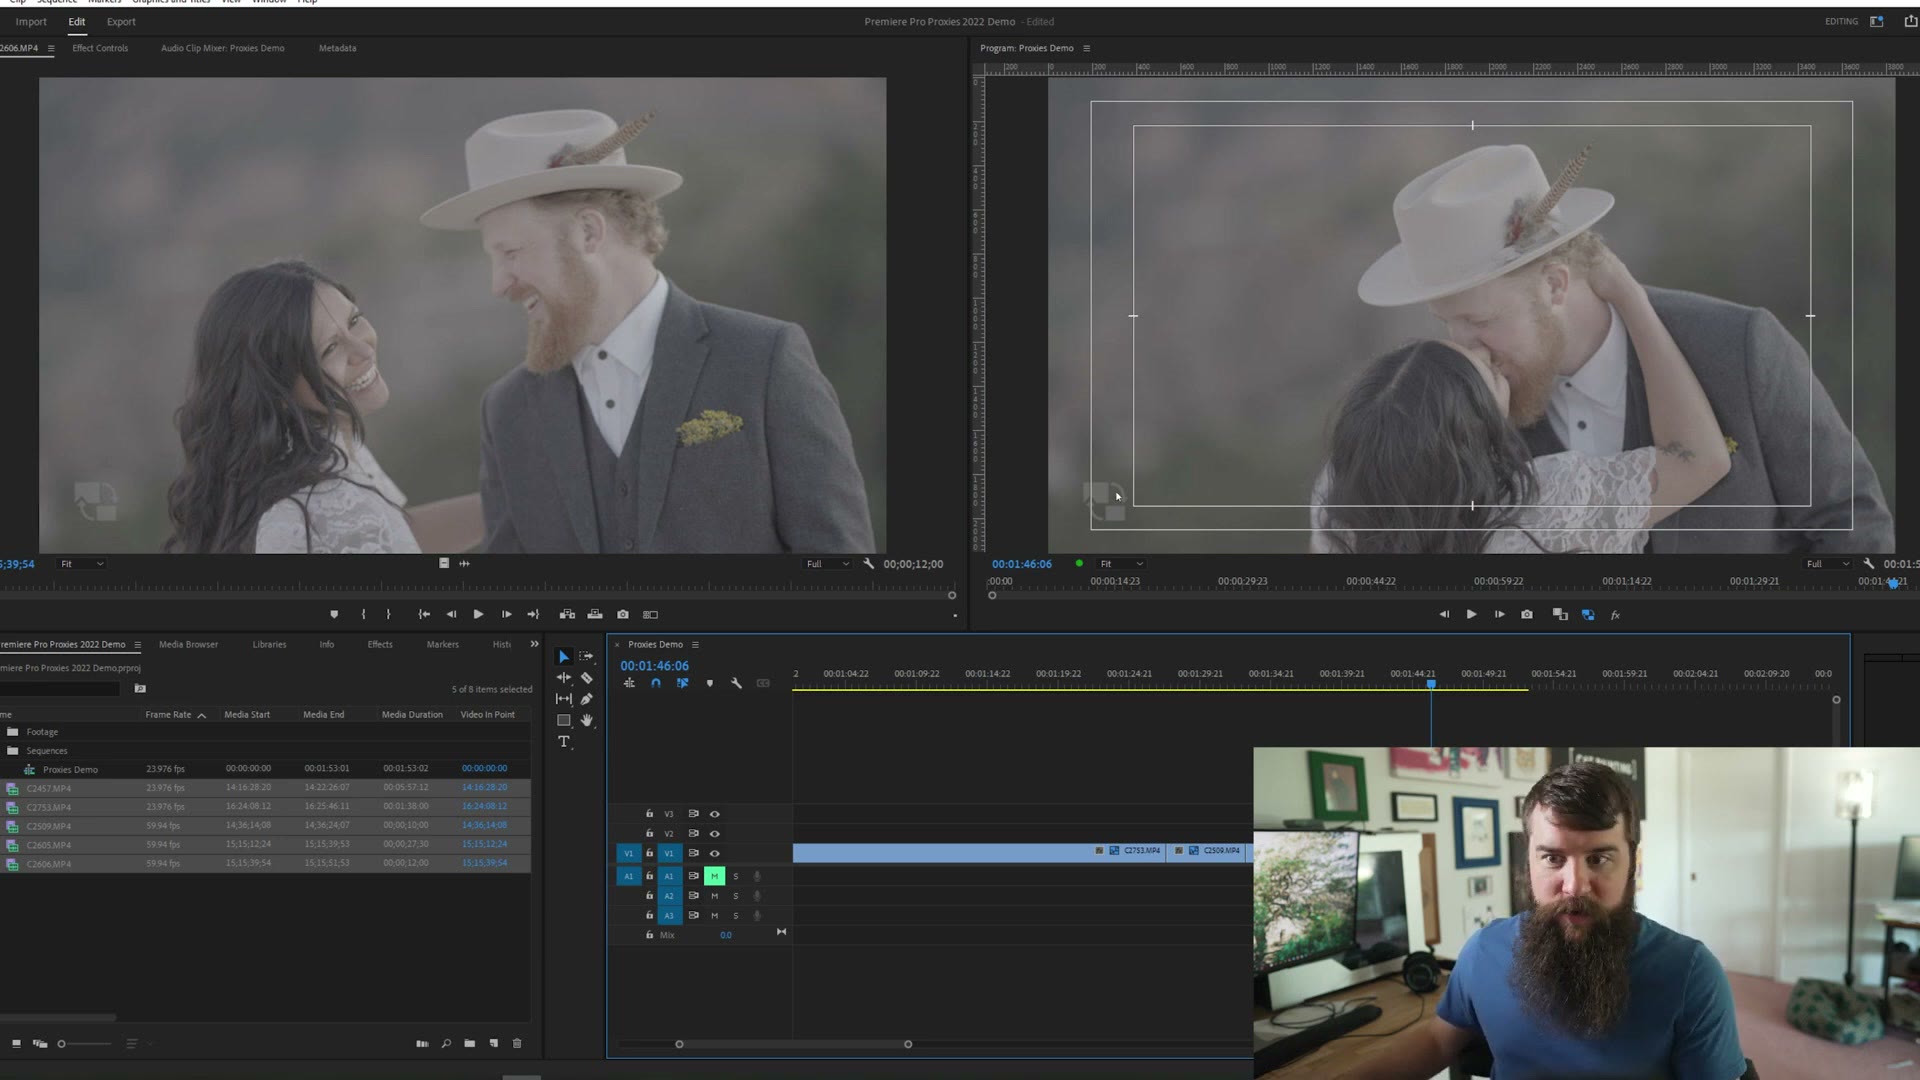
First, those little proxy icons on your clips light up blue, which means the proxy is active. Second, look at the bottom left of your program monitor and you will see a very faint proxy watermark sitting on the image.
That watermark is the whole reason to check that box. It means you can tell at a glance, from across the room, whether you are looking at a proxy or the real file.
And now you can click and drag around as fast as you want and it plays instantly. Just like butter. I love it so much.
Using Slow Motion Footage With Proxies (NOT Interpreting)
If you watched my previous proxy tutorial, I told you to interpret your footage to slow it down, and that worked great at the time. Adobe has since updated Media Encoder and disabled the ability to interpret footage, which makes that whole workflow basically impossible.
So here is how to slow all your footage down instead, in a way that still plays nicely with proxies. Big shout out to Chris Olson, who made a video about this on YouTube.
You only want to do this to clips filmed above 24 frames per second. Anything already at 24 is as slow as it goes.
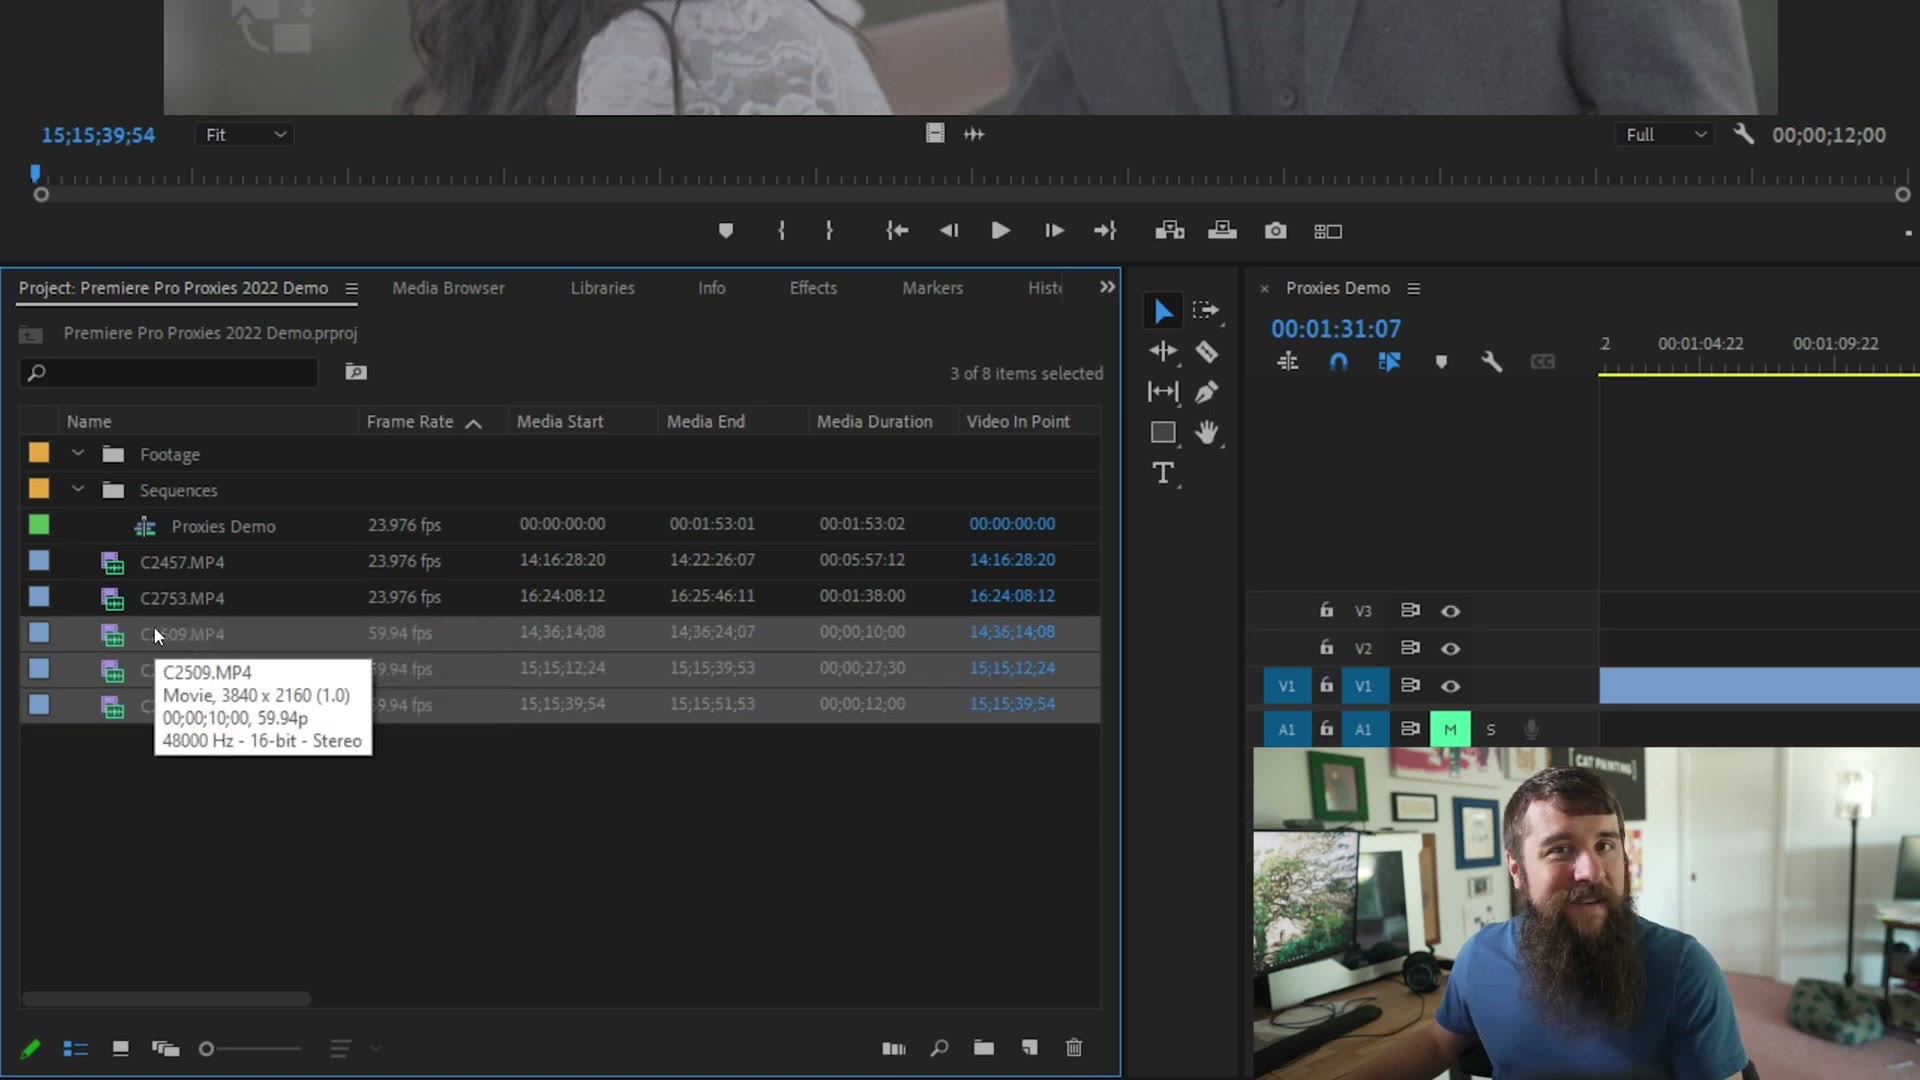
If you only shot a few high frame rate clips, just select them by hand. But if you have a lot of them, or you filmed at a mix of 30 and 60 and 120, here is how to batch the whole thing.
If you want to go deeper, I’ve also got EDIT FASTER with ANY Sony Camera – In Camera Proxy Guide and How to use Proxy Files to Edit SUPER FAST in DaVinci Resolve!.
Step one: find every clip at one frame rate
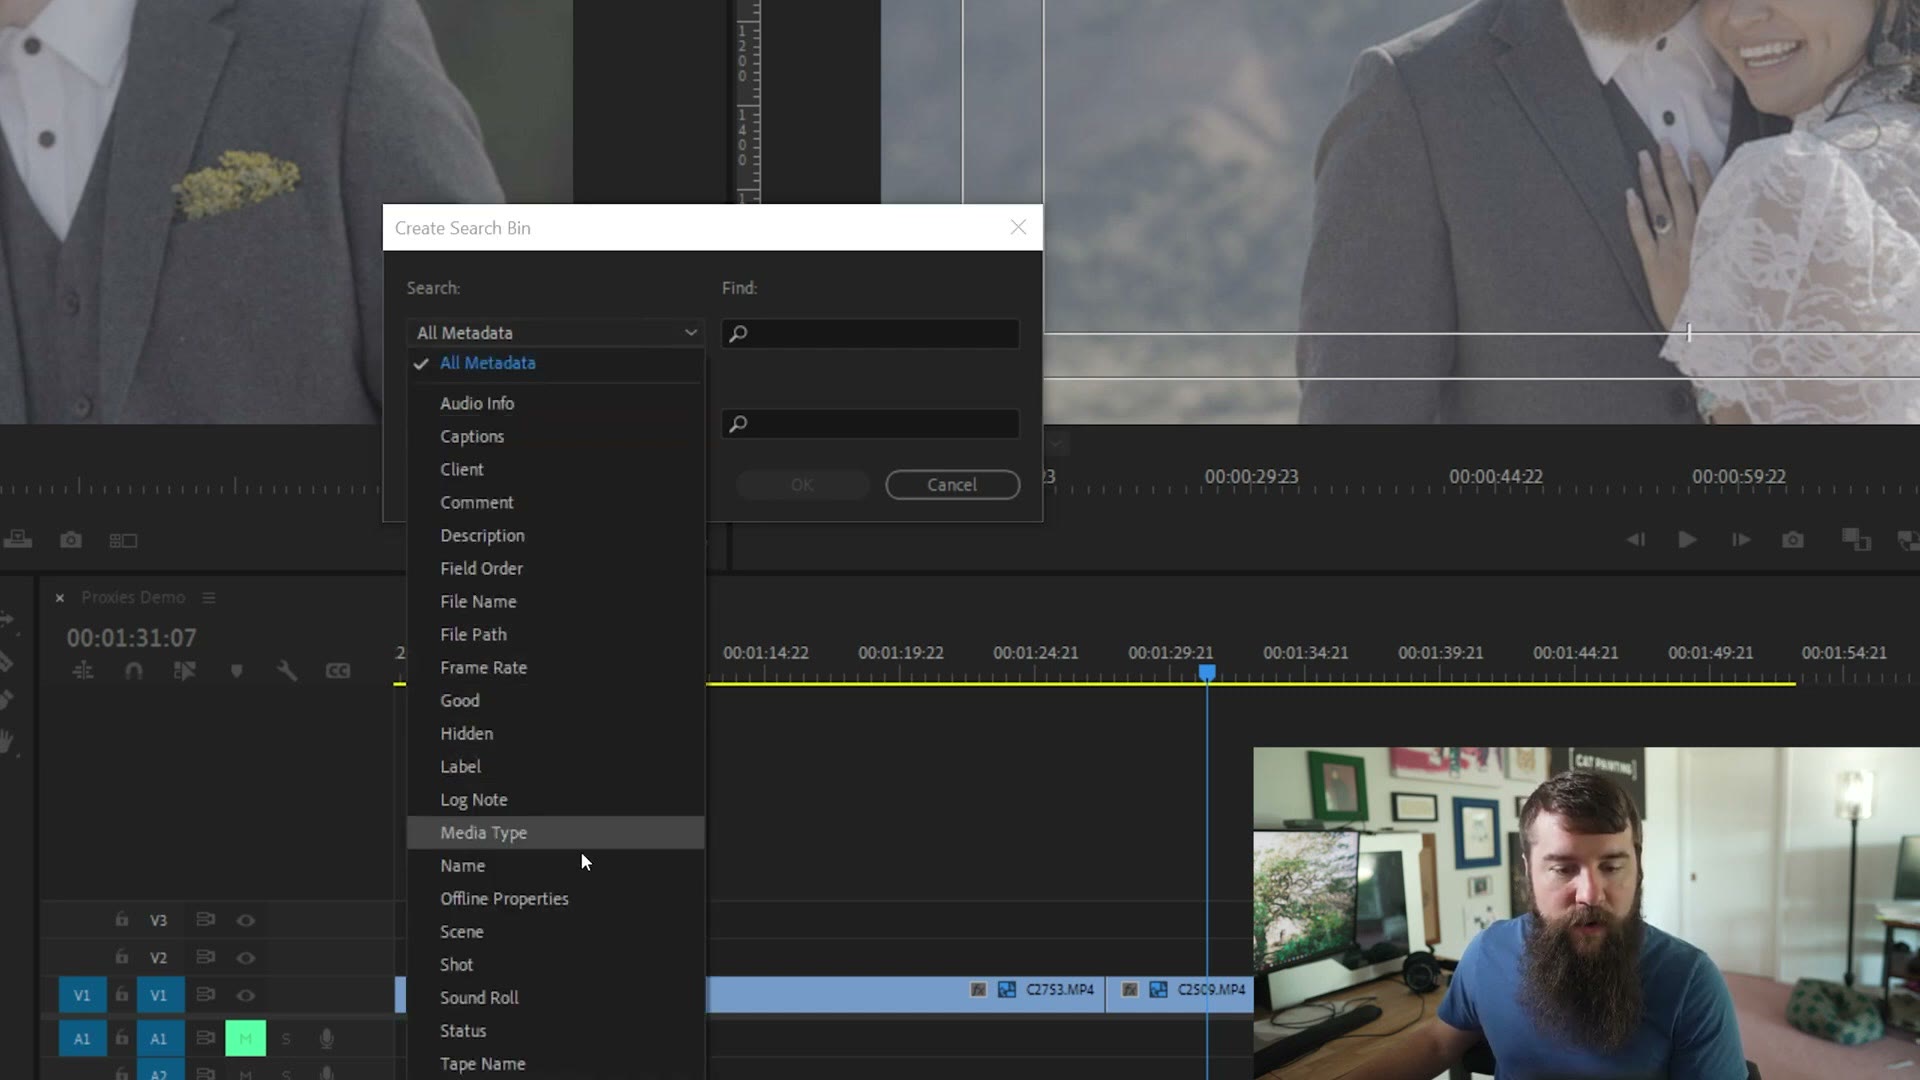
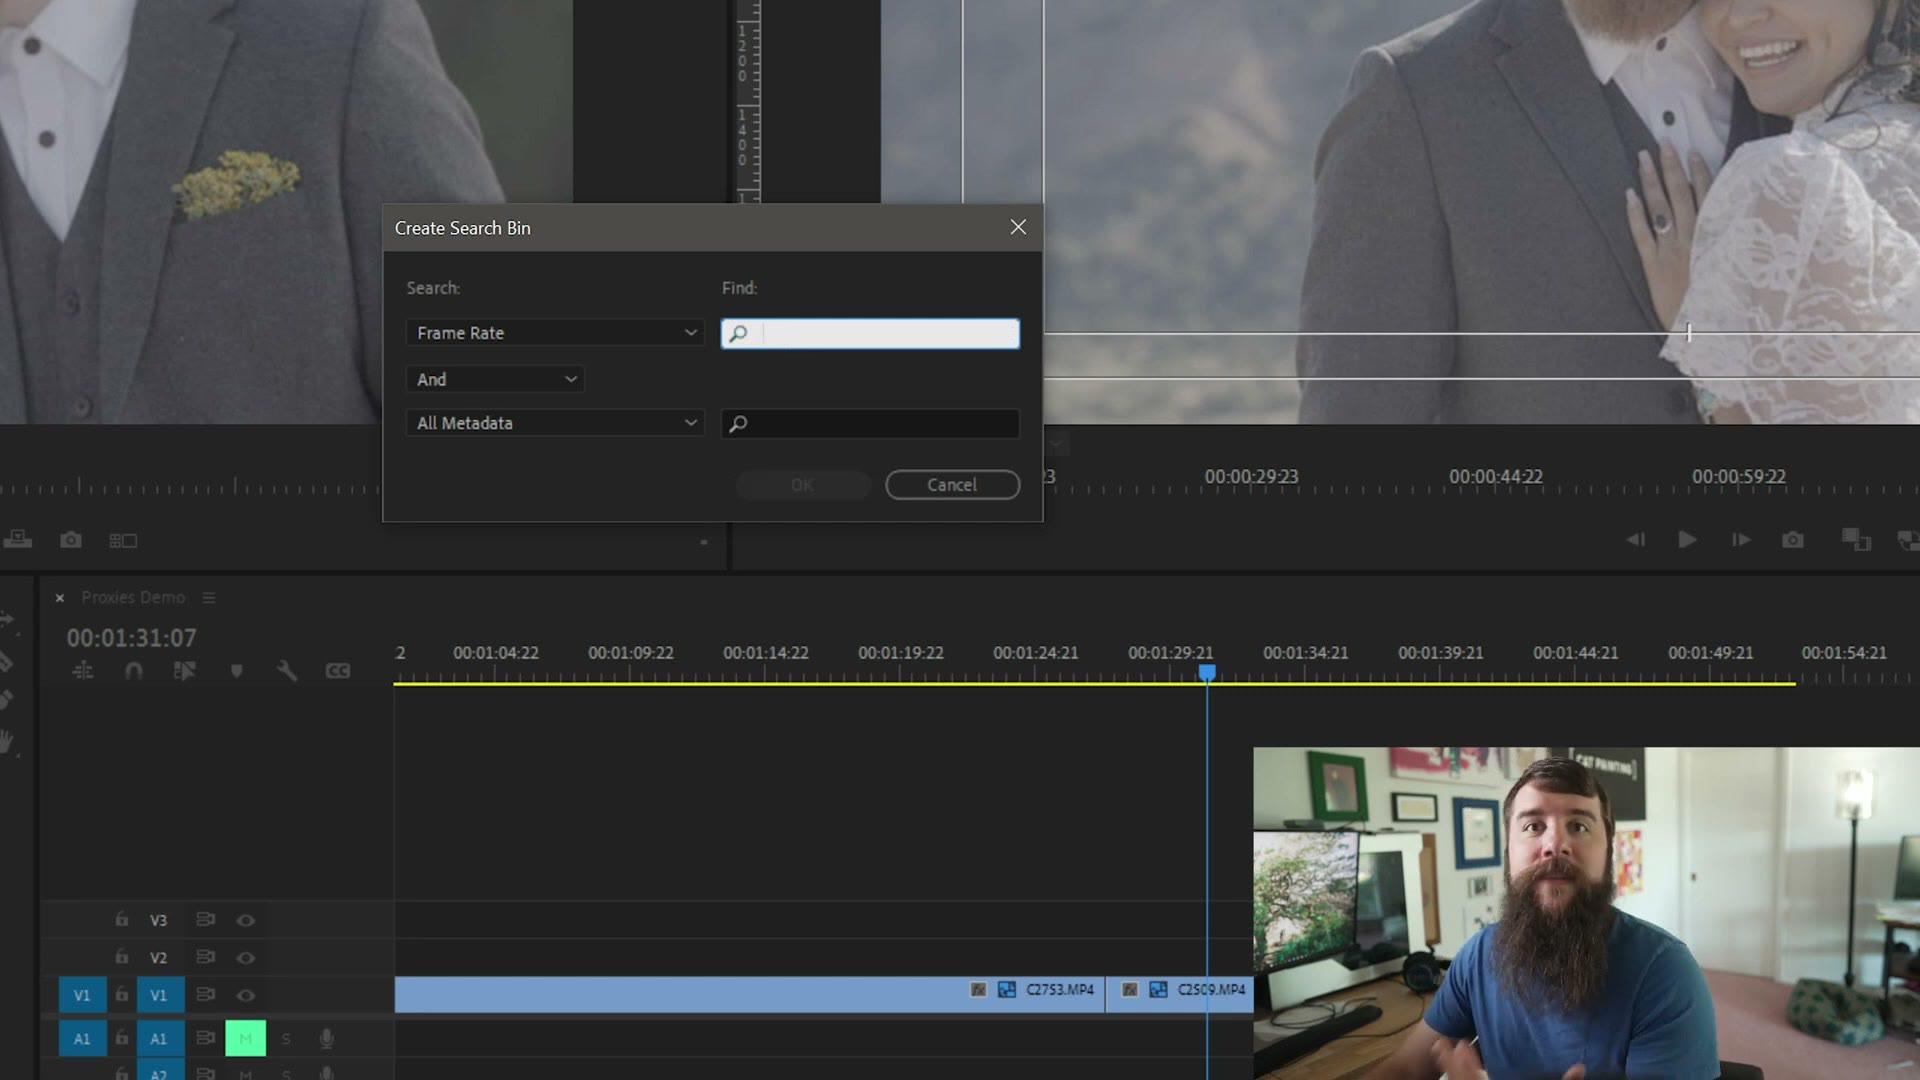
Right click on a blank spot in the project panel and select New Search Bin. In the dialog, change Search from All Metadata to Frame Rate, and in the Find field type the frame rate you are hunting for.
The numbers you actually type are not the round ones:
- 30 frames per second is 29.97
- 60 frames per second is 59.94
- 120 frames per second is 119.88
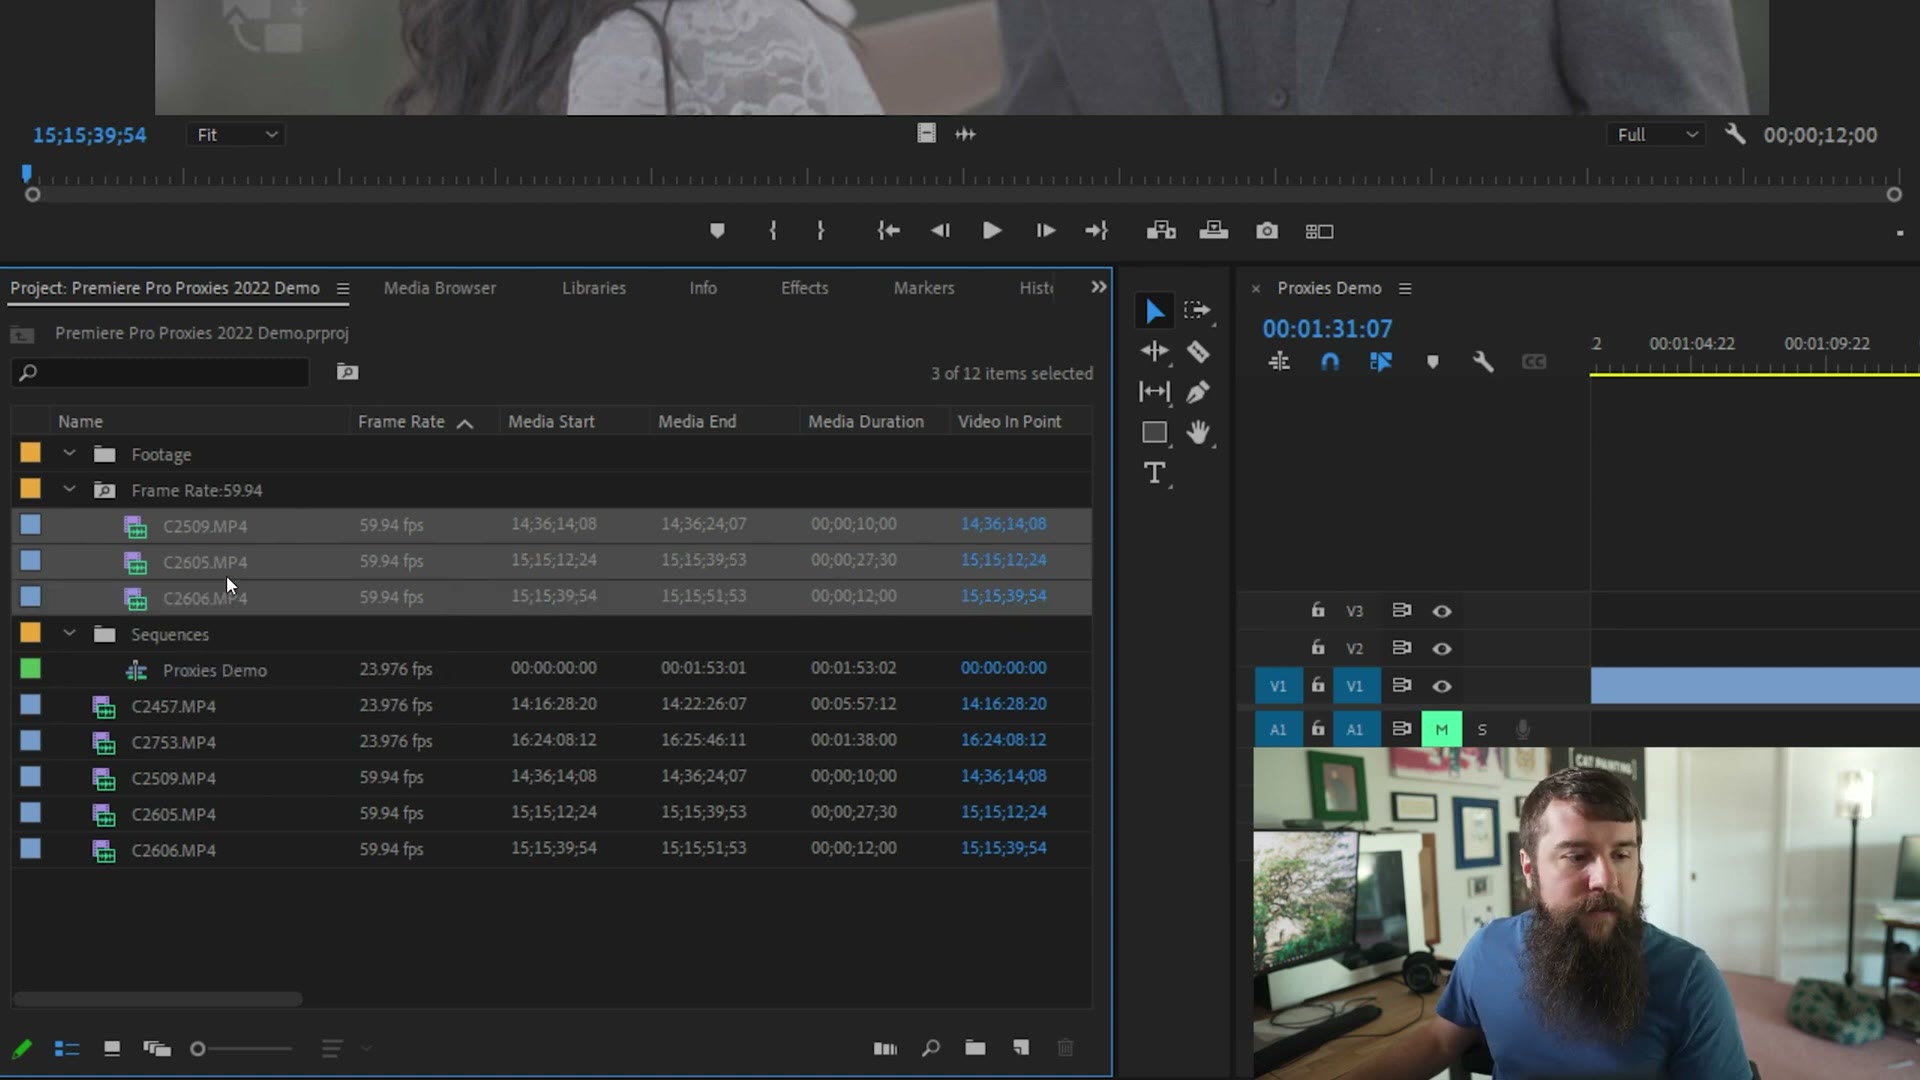
Press OK and Premiere creates a bin that automatically gathers every clip at that frame rate in one place.
Step two: slow them all down at once
Click the first clip in that bin, hold shift, click the last one. Right click, and instead of going to Modify and Interpret Footage the way you used to, go to Speed / Duration.
Then set the speed percentage:
- 60 frames per second down to 24: 40%
- 30 frames per second down to 24: 80%
- 120 frames per second down to 24: 20%
I realize that is a lot of numbers, which is exactly why I made the free proxy cheat sheet. Every frame rate and percentage in this section is on it.
Press OK and those clips are now slowed to 24 frames per second. Drag one to the timeline and you will see it play back dramatically slower, in proper slow motion.
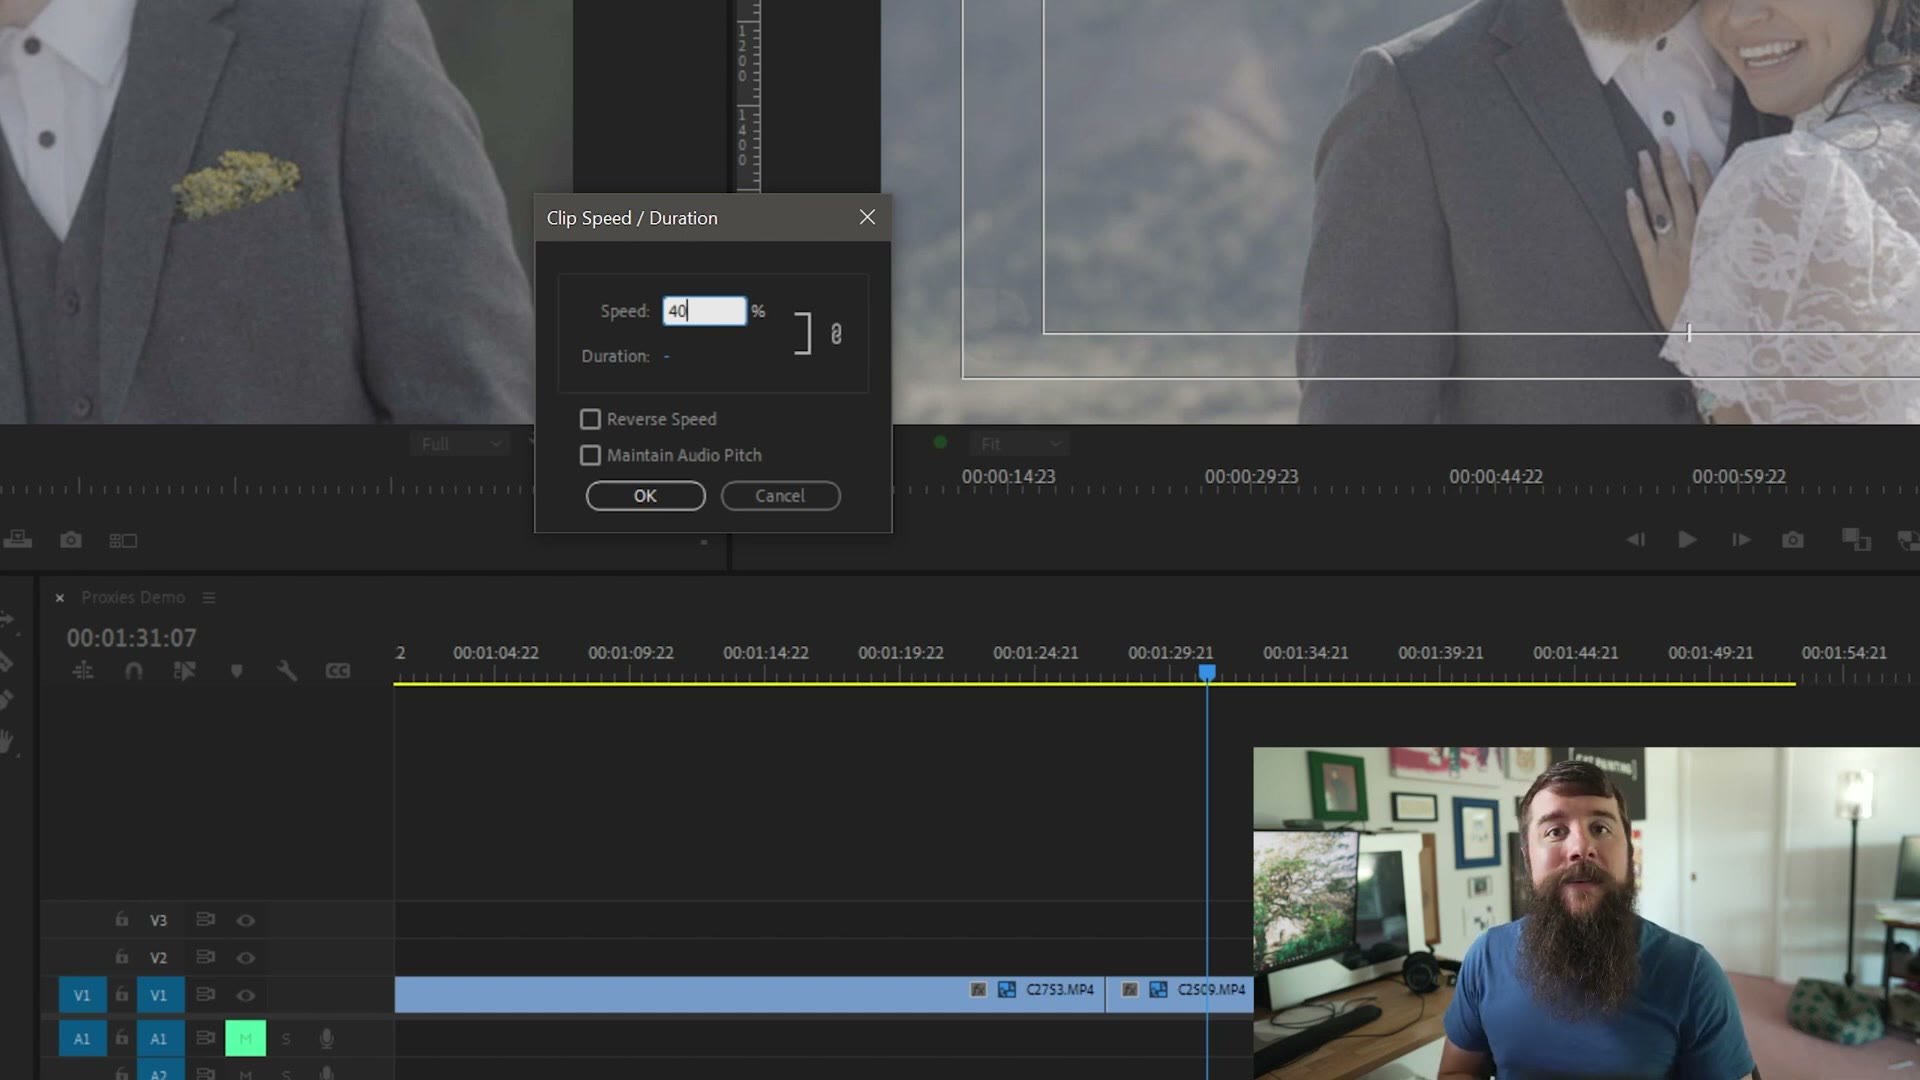
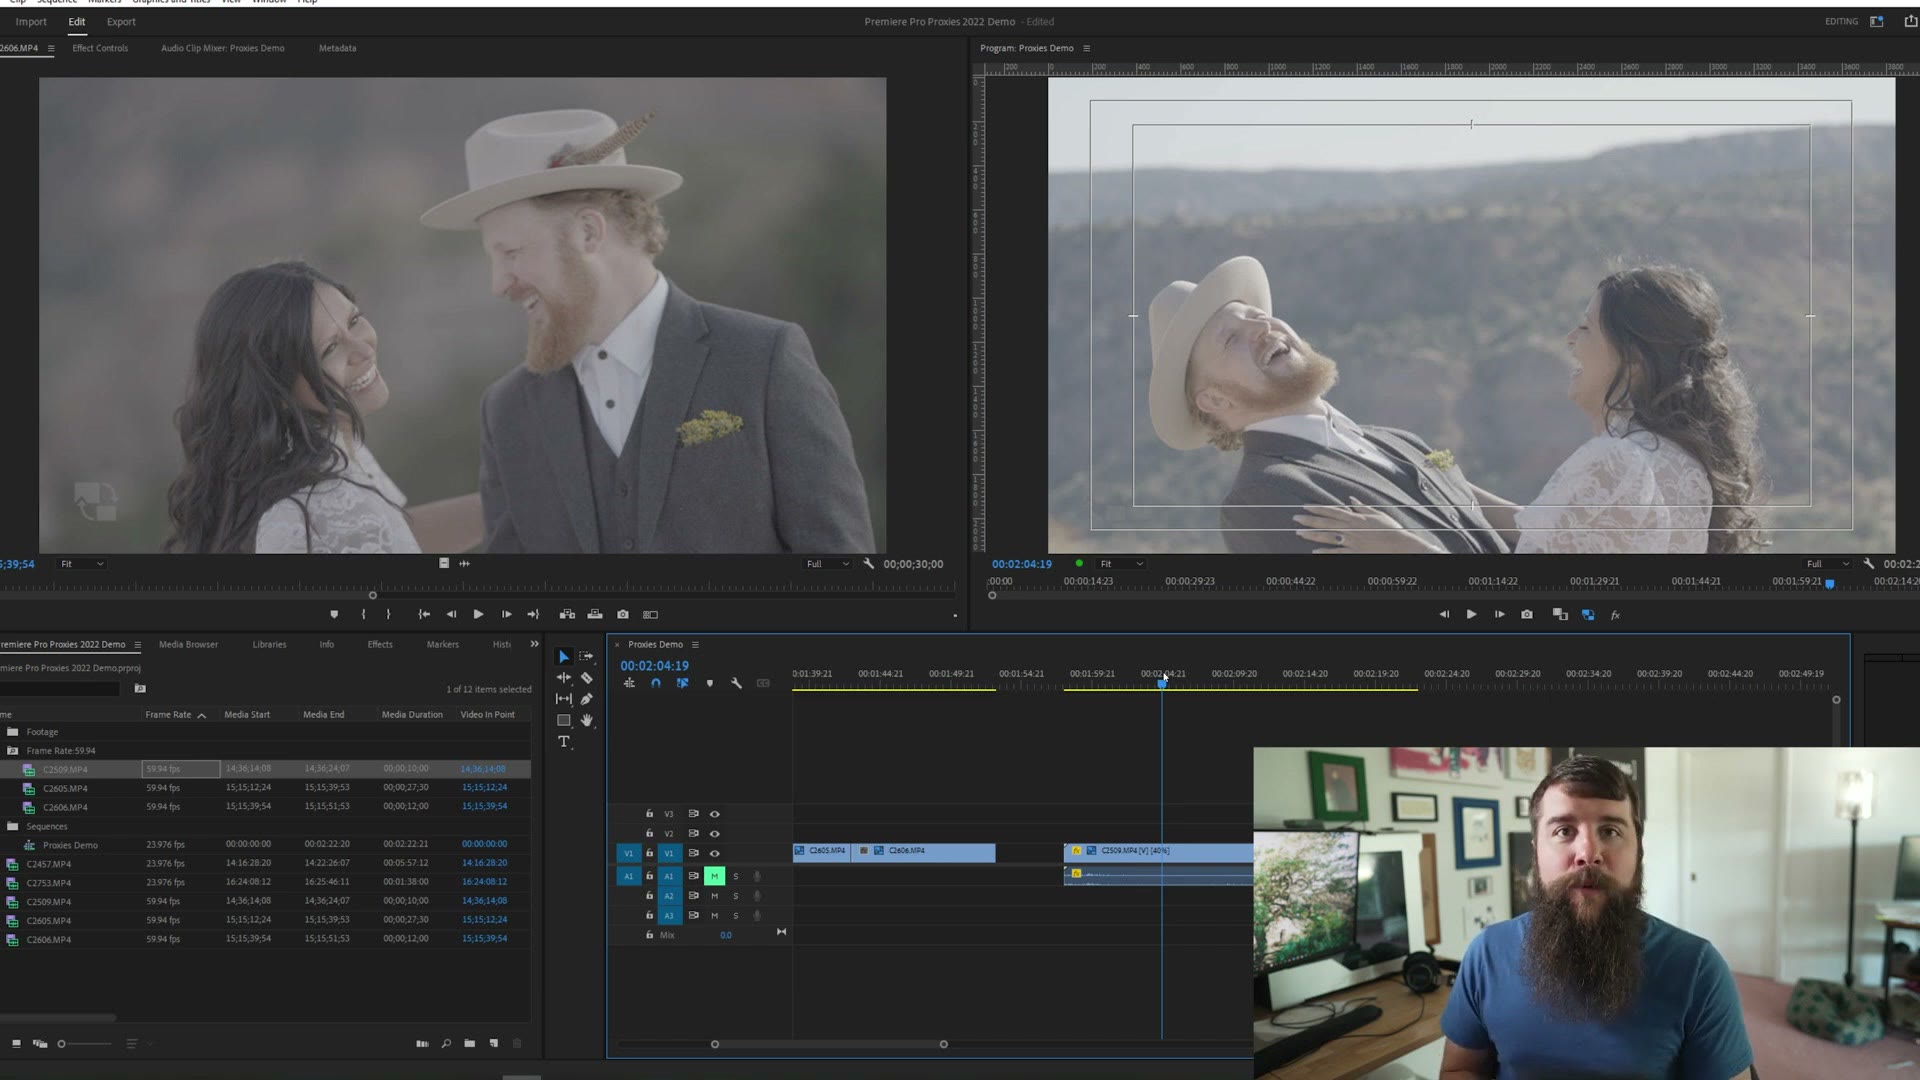
And the best part: your proxy file syncs up perfectly with the native file and slows down right along with it. So it does not matter when you create your proxies, at the start of the edit or halfway through when you realize your computer is dying. As long as you slow footage down this way, your proxy frame rate will never drift out of sync with your native files. It is awesome.
When You Should Disable Proxies
Two rules of thumb here.
First, turn proxies off whenever you are color grading. A proxy is a much lower quality file, and while grading you need to see exactly what your footage really looks like. Hit the toggle, grade on the native files, toggle back when you are done.
Second, Warp Stabilizer disables your proxies automatically on any clip you apply it to. So I would not apply warp stabilizer until you are finished with the rest of your edit, which keeps everything else fast for as long as possible.
Do You Need To Disable Proxies When Rendering?
I get asked this constantly, so: no.
Premiere Pro is smart enough that regardless of whether the toggle is on or off, when you press export it automatically reaches for your native video files and uses those. You do not need to worry or stress about accidentally exporting a video full of proxies. You are good to go.
Bonus For Video Editors
I really hope this helps you edit faster. Don’t forget the free proxy cheat sheet, which has all of those percentages and frame rates and settings in one place so you never have to remember them.
And I would love to help you more than that, so I also made a free guide called Edit Videos Like A Pro, covering the techniques that took me many years to figure out. You can download that one for free too.
A few other things that pair with this:
- How to get a notification on your phone when Media Encoder finishes, which is genuinely useful given how long proxy renders take.
- How to edit and export high quality YouTube Shorts in Premiere Pro.
- My color presets, which is what this footage was graded with, and my filmmaking courses.
Thanks so much for reading, and have a great day!