
Today I am going to show you how to easily edit and export high quality videos for YouTube Shorts in Adobe Premiere Pro. To save you time though, if you do not want to watch me ramble through the whole thing, you can download my YouTube Shorts export presets completely free and start exporting immediately.
This video is also sponsored by my friends at Musicbed, and I will tell you more about them in a bit. Otherwise, if you want to see the entire process, keep reading.
Sequence Setup
I have already imported some footage from a trip to New York City, and the first thing you are going to notice is that it is a horizontal 16 by 9 video. But wait, Matt, YouTube Shorts are vertical. Yes. So we need to make a new sequence and modify this video to fit the vertical format.
With the project panel highlighted in blue, either press Ctrl+N on PC or Cmd+N on Mac, or go up to File, New, Sequence.
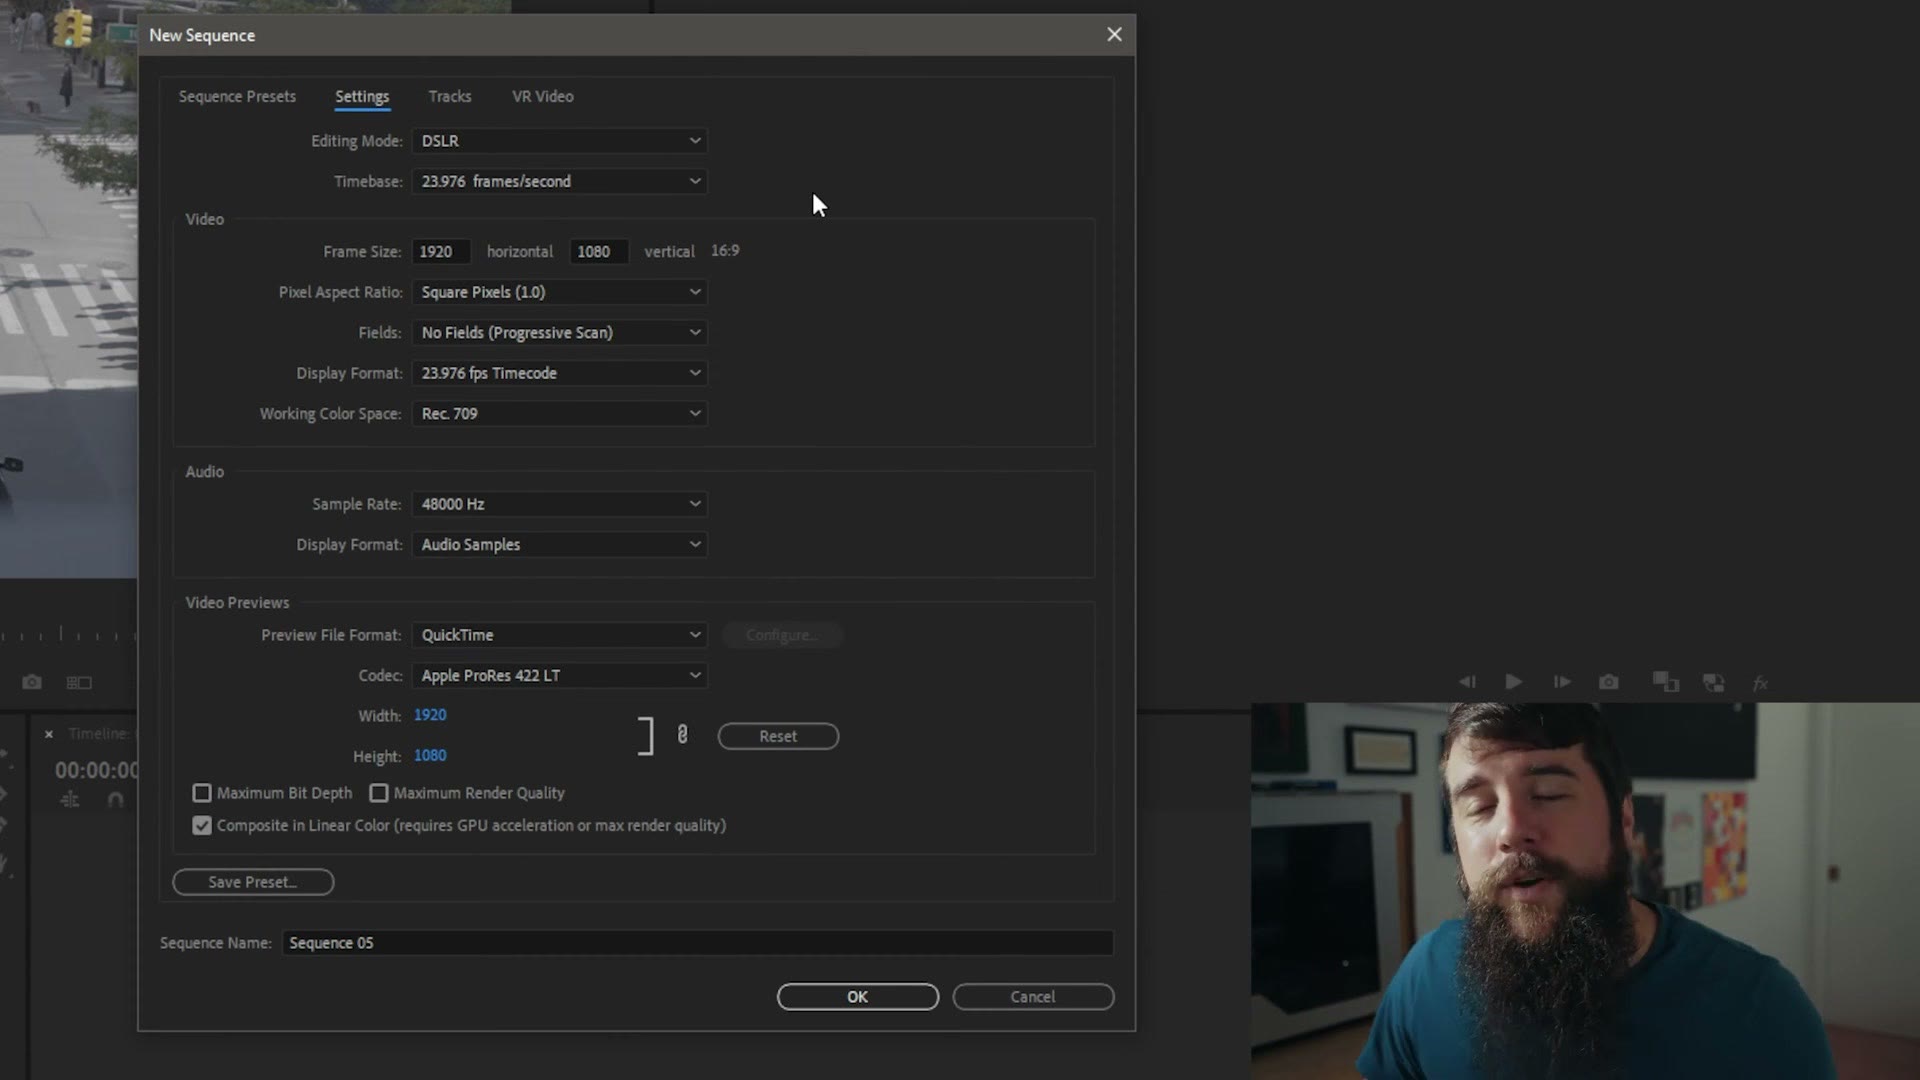
In the dialog box, click Digital SLR, then 1080p, then DSLR 1080p24, and go up to the Settings tab.
For your Timebase, the vast majority of cameras are filming at 23.976 frames per second. If you want to export at a different frame rate, say 30 or 60, you can choose it here, but for most people leave it at 23.976.
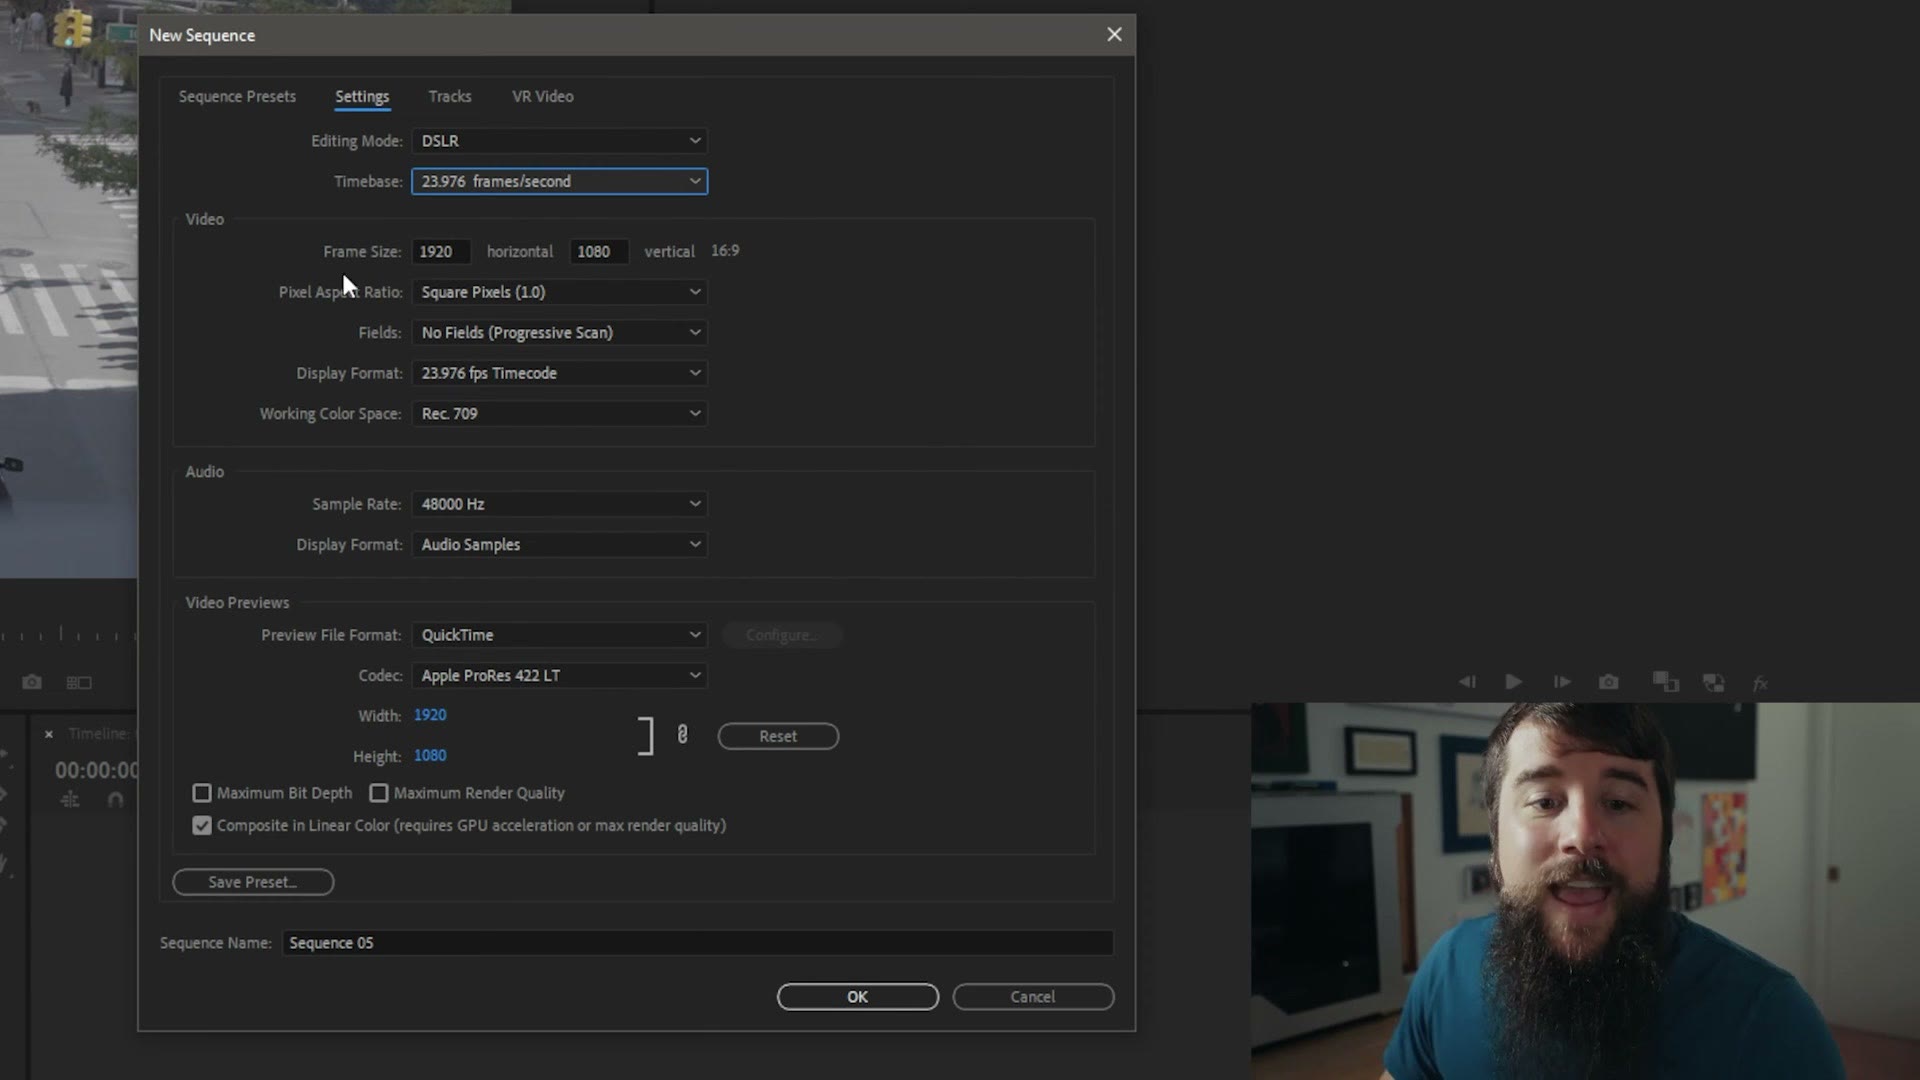
Where we need to make a change is Frame Size. Instead of 1920 by 1080, we need 1080 by 1920. Yeah. We are flipping things around here, baby. All the rest of these settings are fine by default.
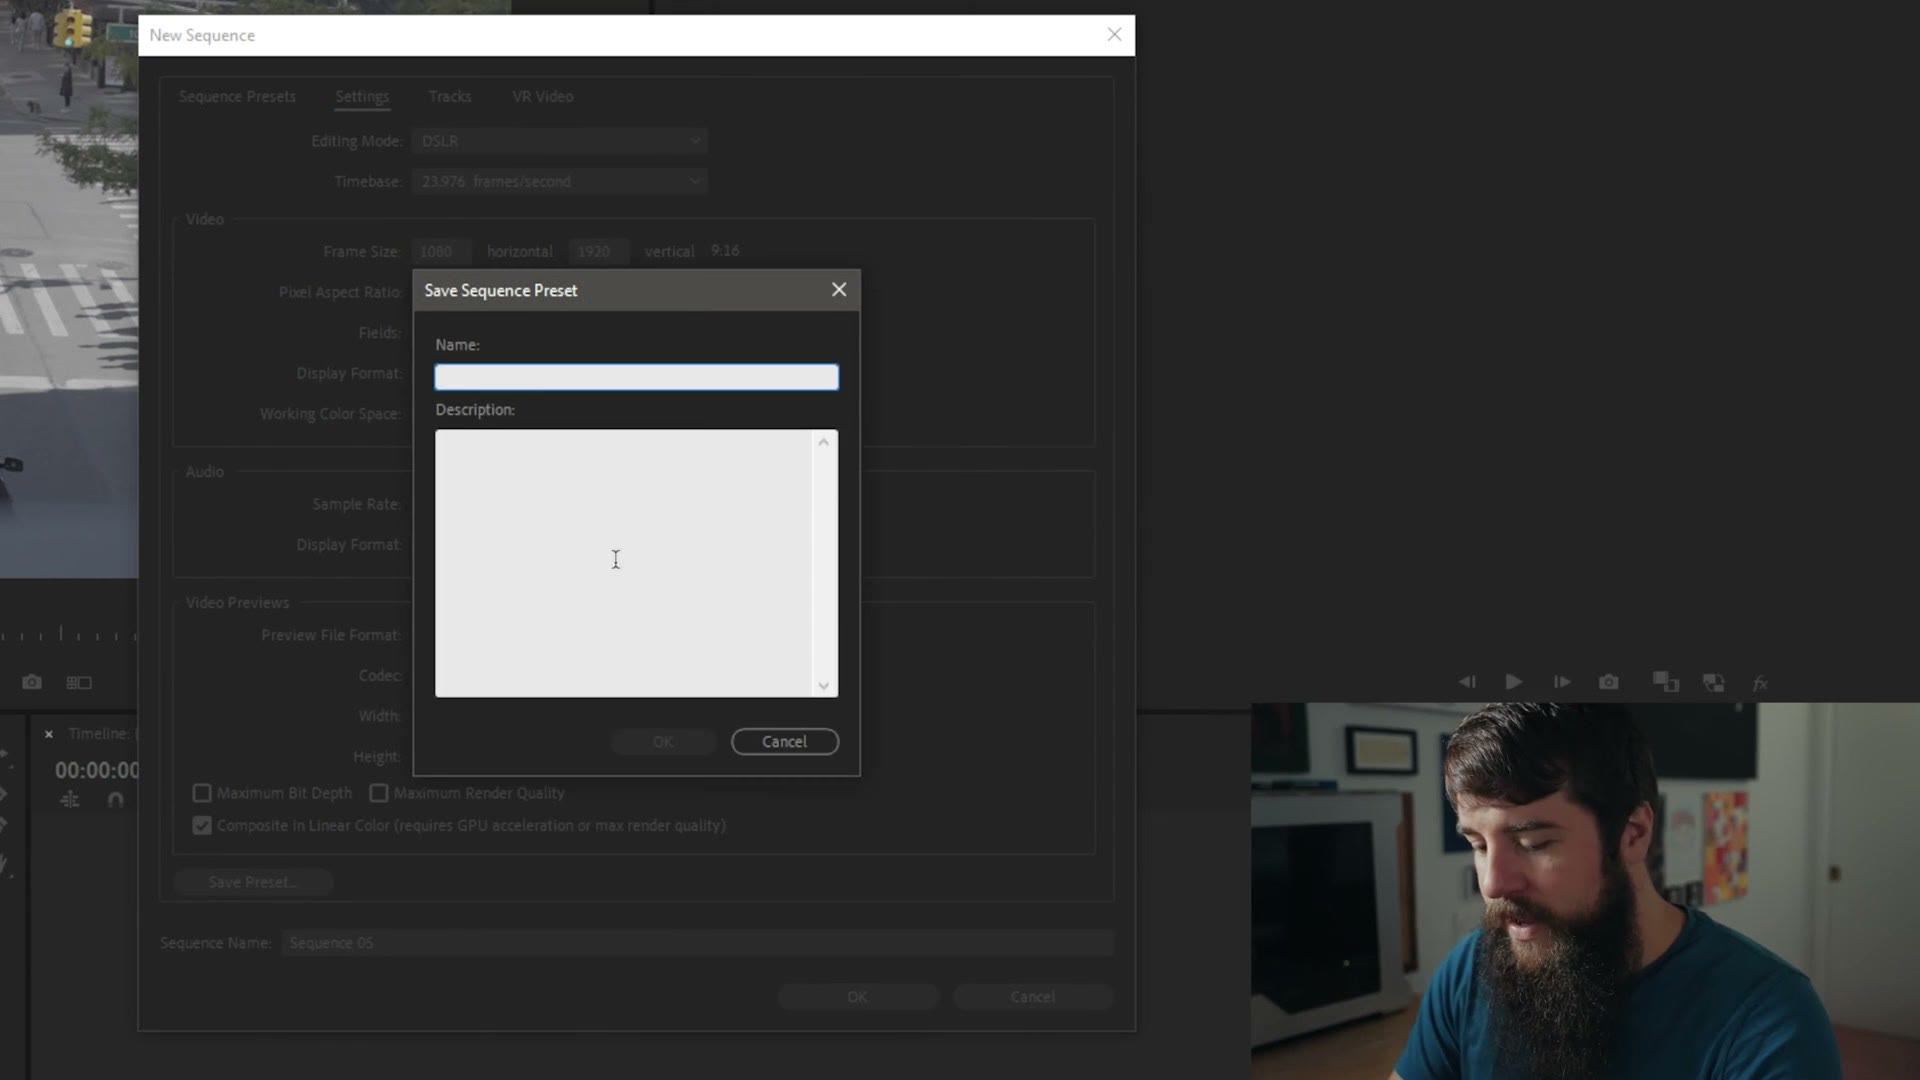
Go down to Save Preset and name it something like YouTube Short. Press OK, and then down at the bottom under Custom you will find your new YouTube Shorts preset. Name the sequence and press OK.
Resizing Horizontal Clips
Now drag your footage over to the timeline, and make sure you click Keep existing settings. Whatever you do, click that.
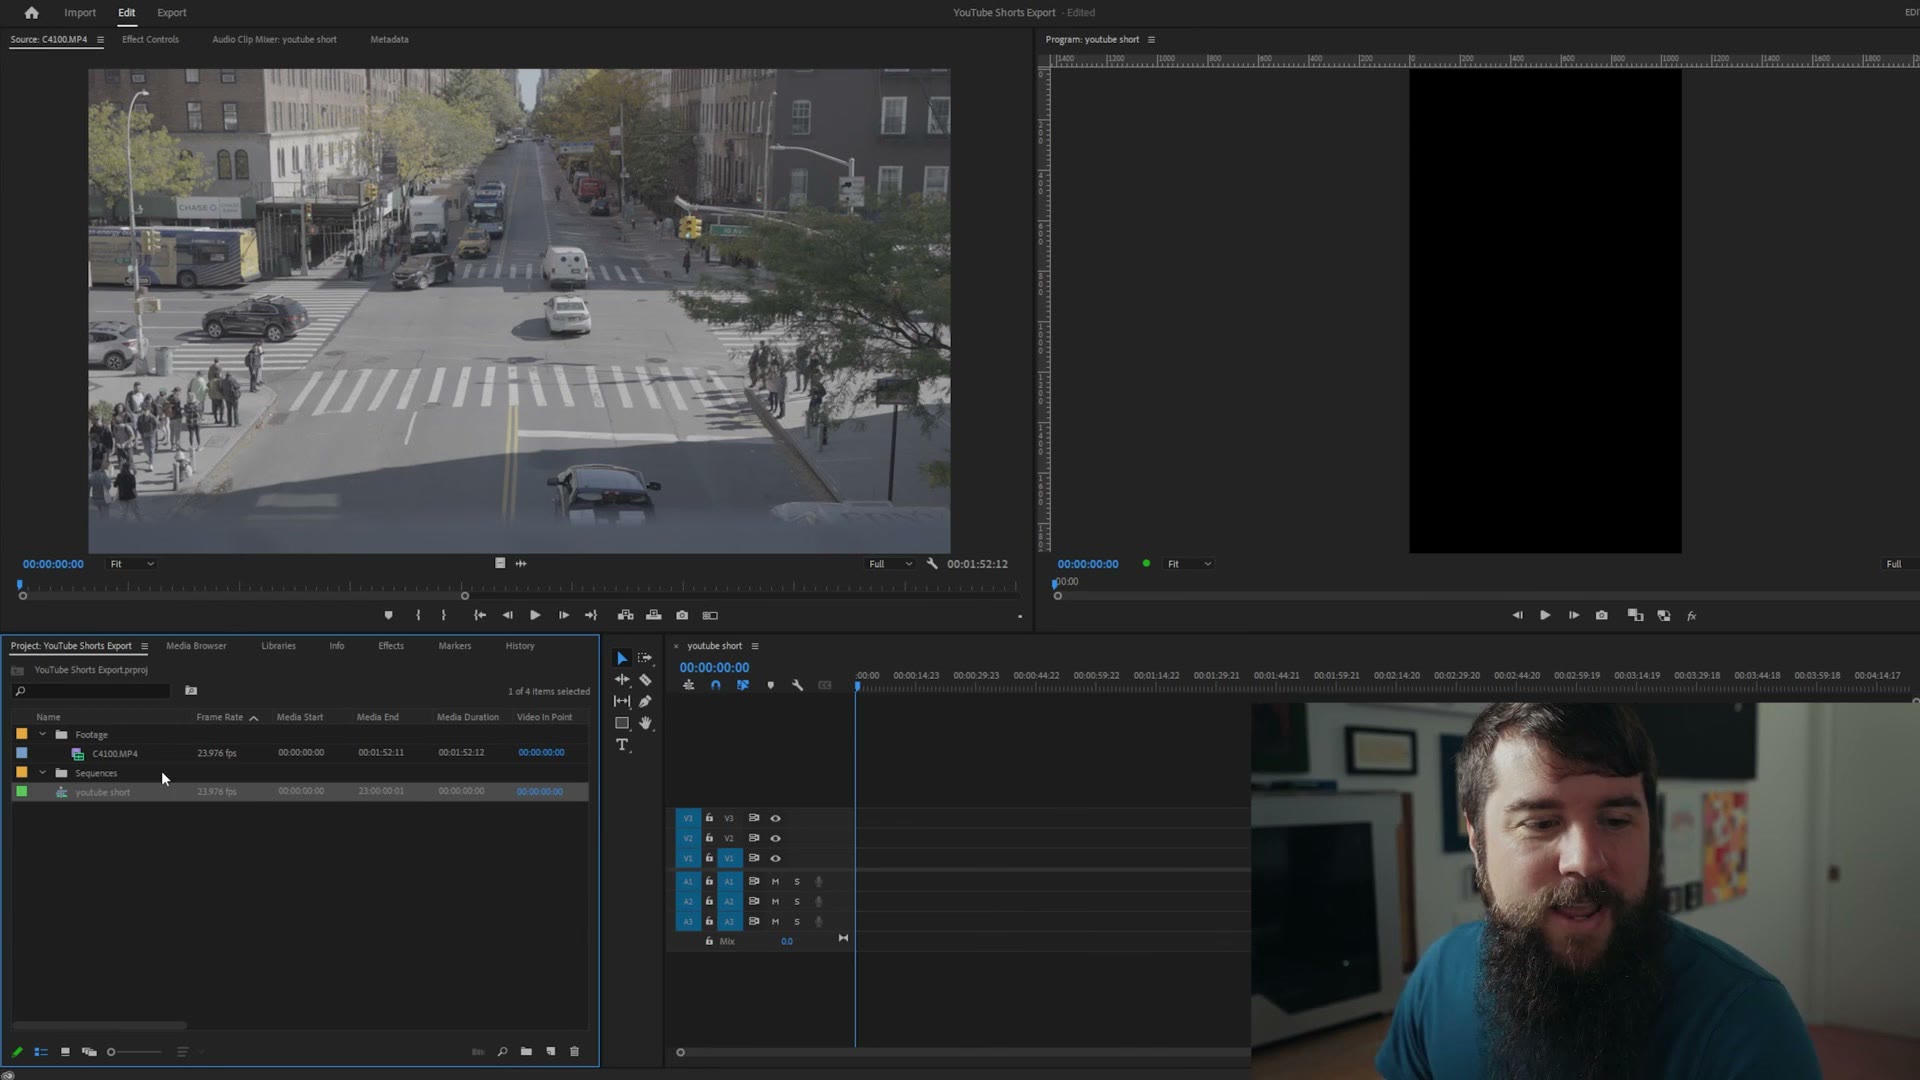
And wait a second, it is all squished in the middle. Dang it. We have got to resize this thing so it fits properly.
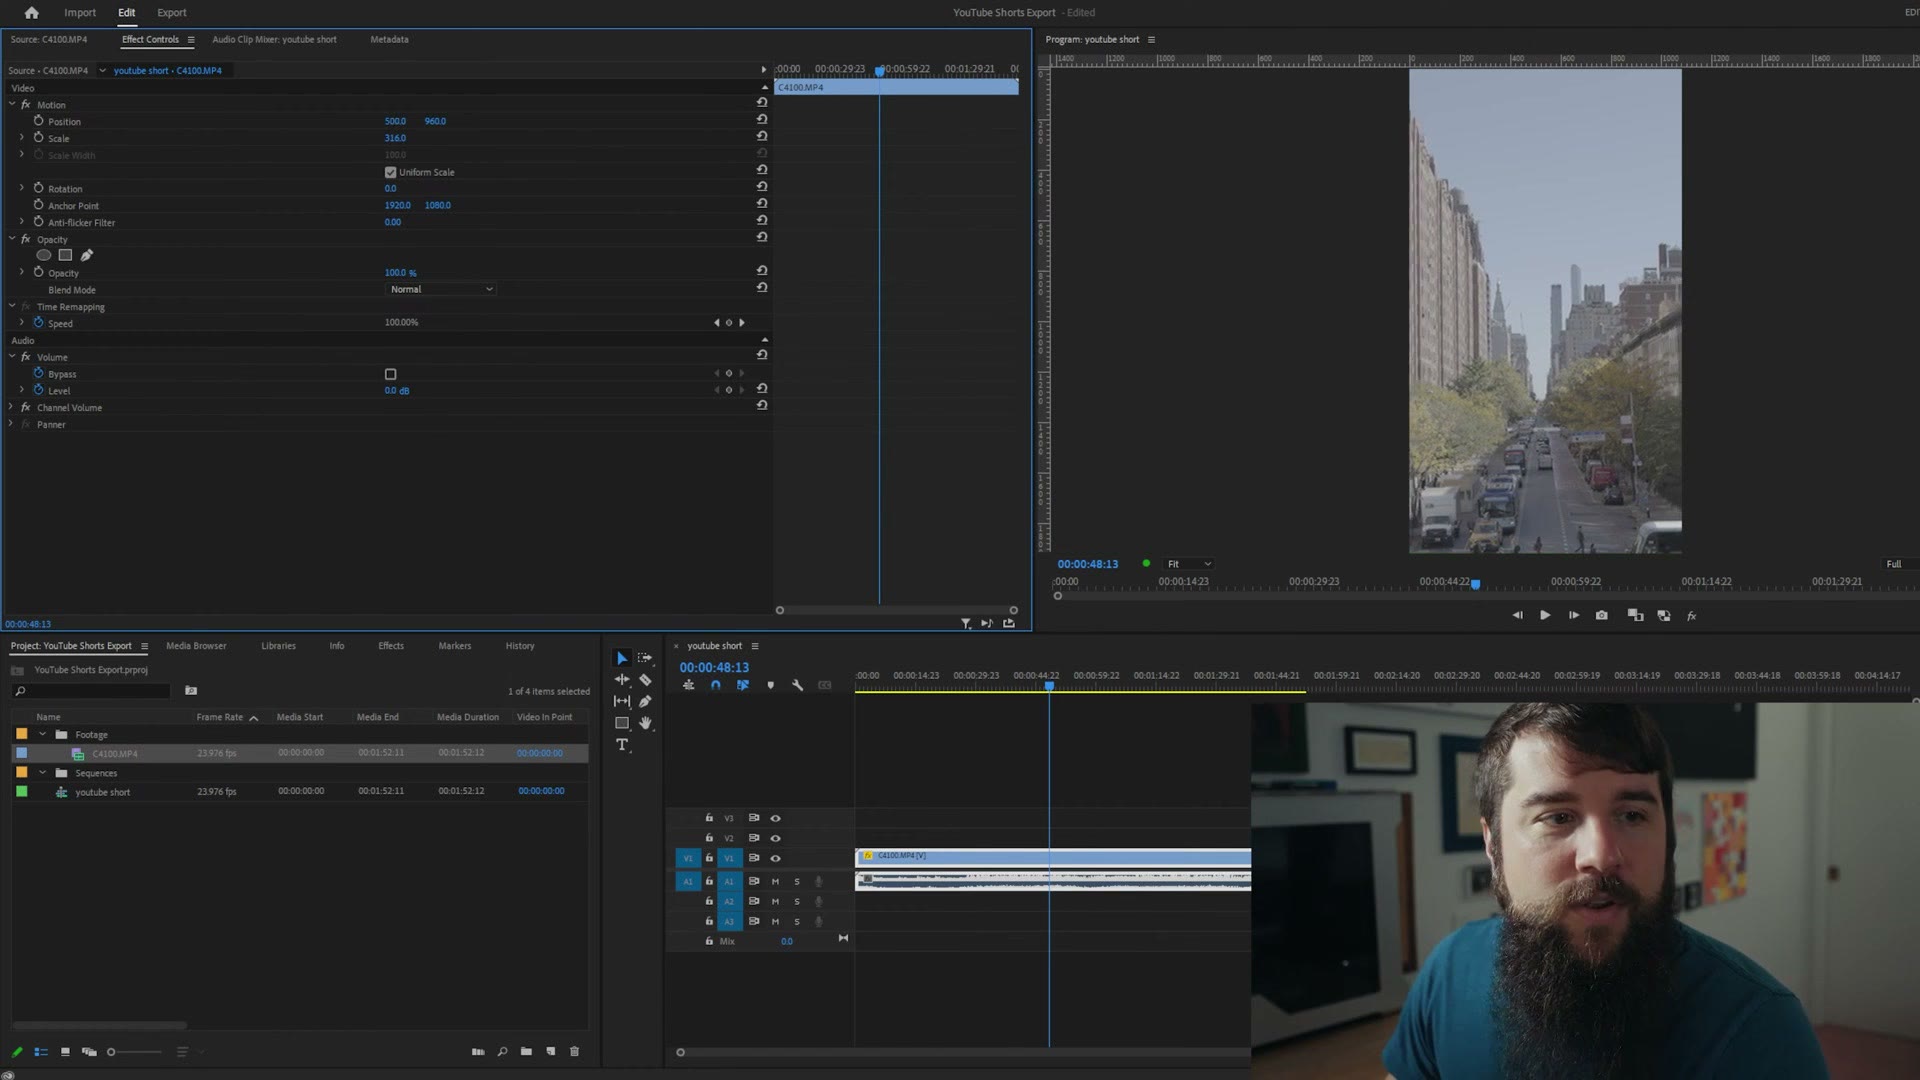
Go up to Effect Controls, and under Scale you can scale the clip up. For YouTube Shorts I find about 316 looks good for a 4K horizontal clip. Then use the Position values to drag left and right until the framing looks right.
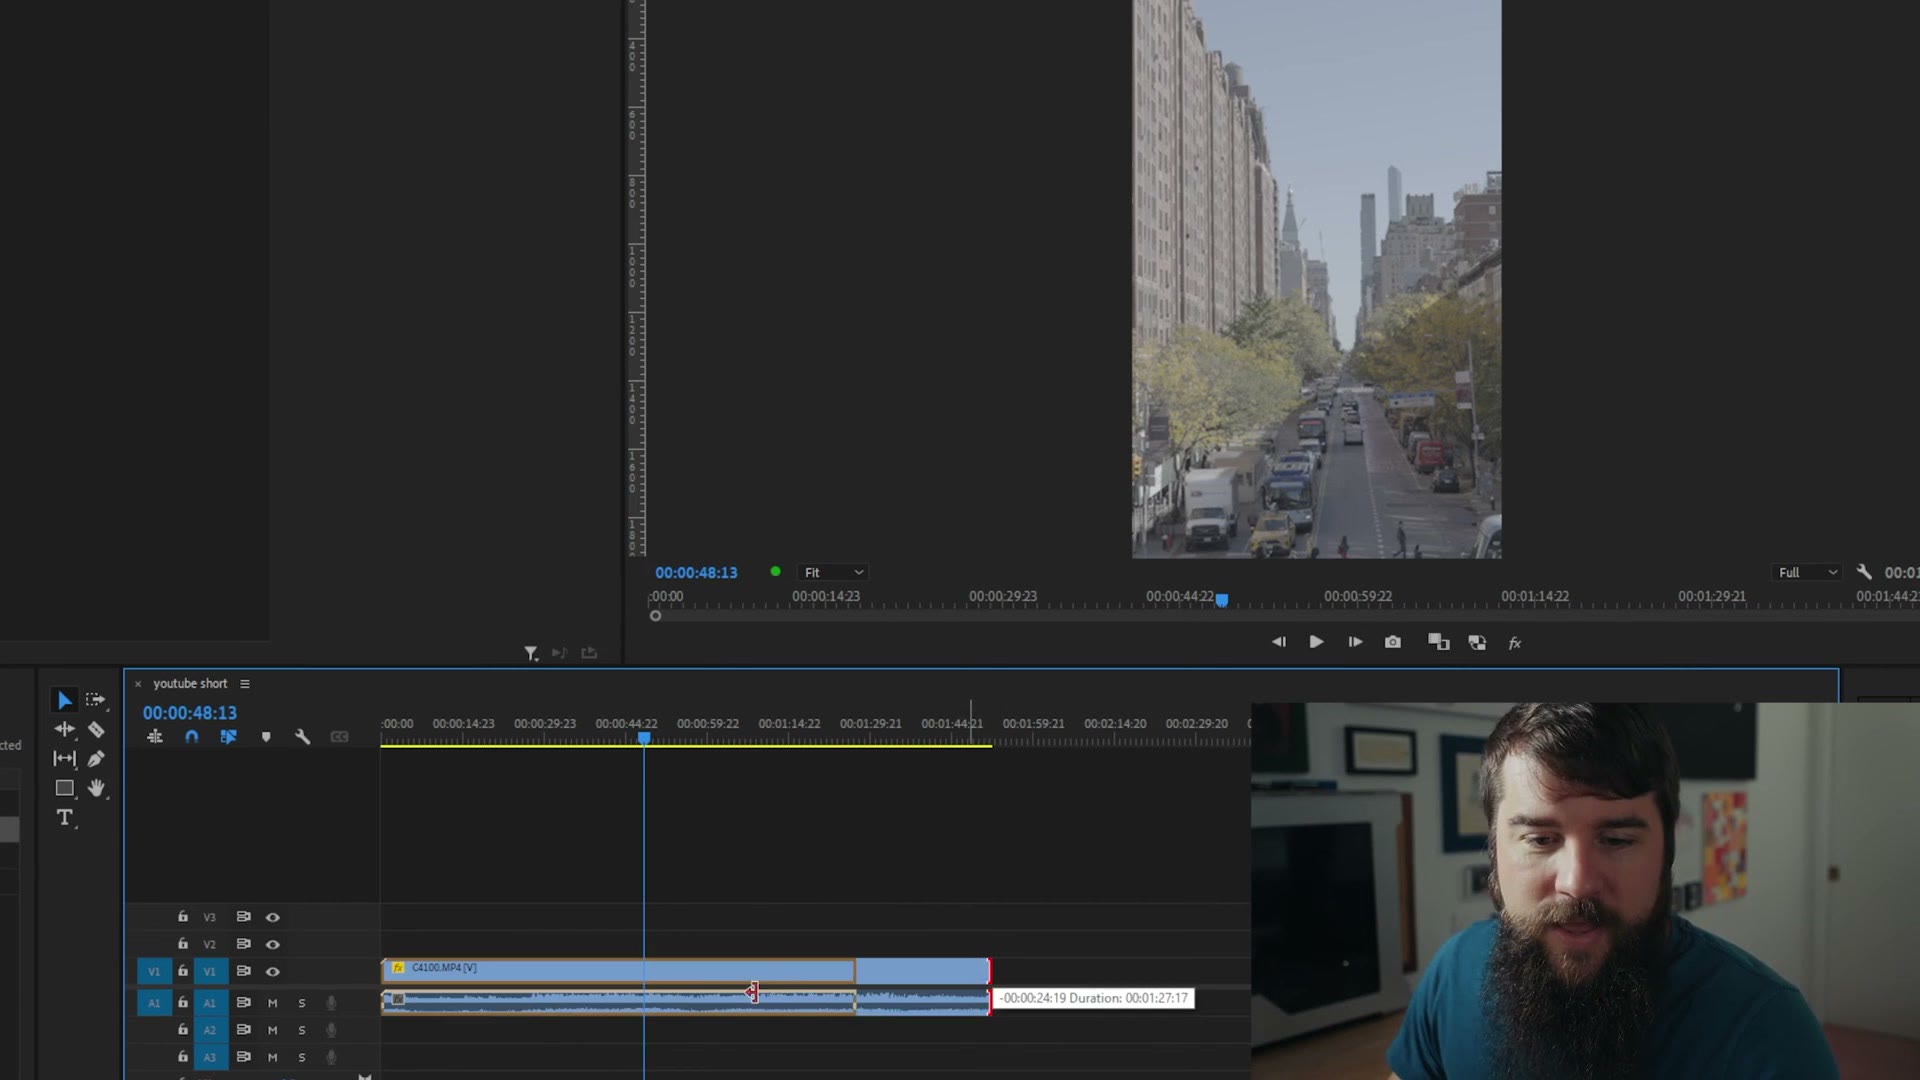
Lastly, this clip is too long. Keep in mind that YouTube Shorts are a maximum of 60 seconds right now, so drag the end back until it fits. And now your video is properly sized and ready to export.
Export Settings
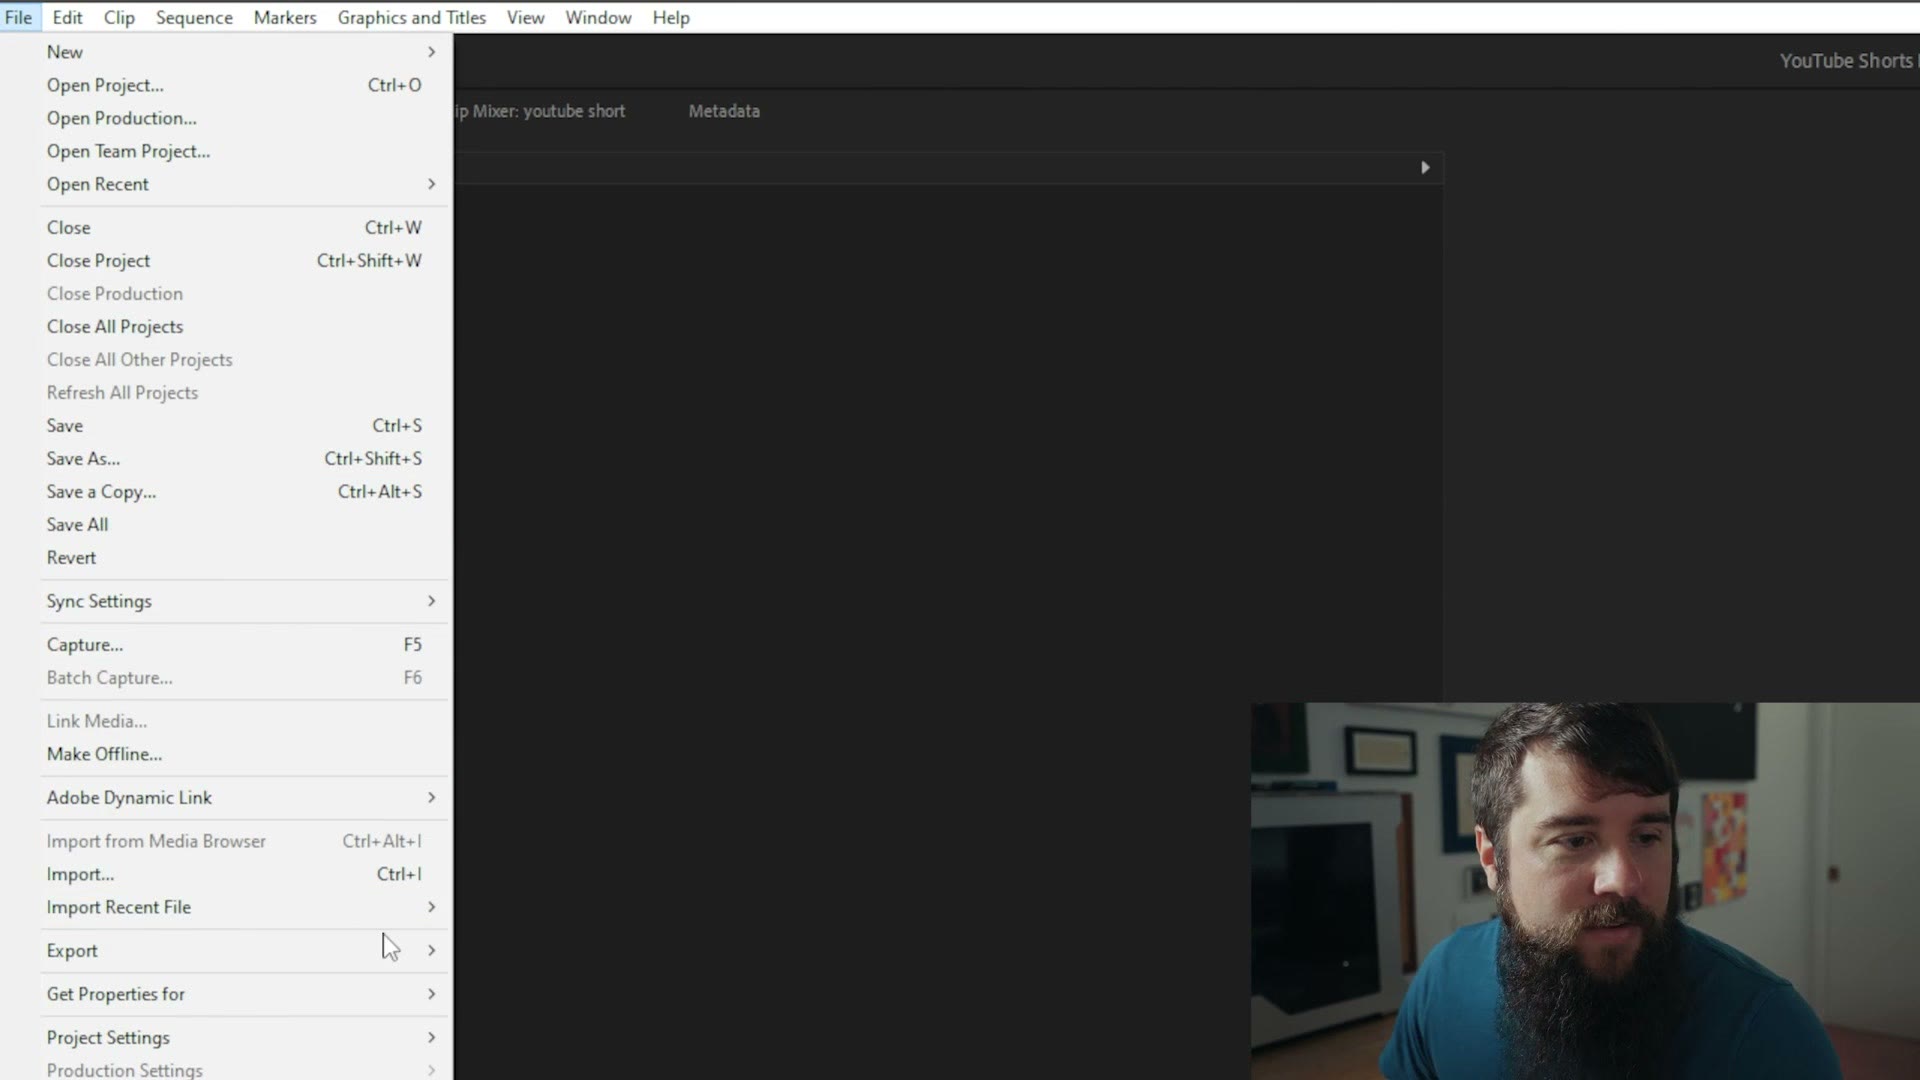
With the timeline selected and highlighted in blue, press Ctrl+M on PC or Cmd+M on Mac, or go to File, Export, Media.
For File Name, call it whatever you want. Location is very important, because you need to click on it and pick where the file gets saved. Choose a folder and click Save.
For Format, select H.264. Your preset will be set to whatever you used last, which is fine, because we are about to customize everything.
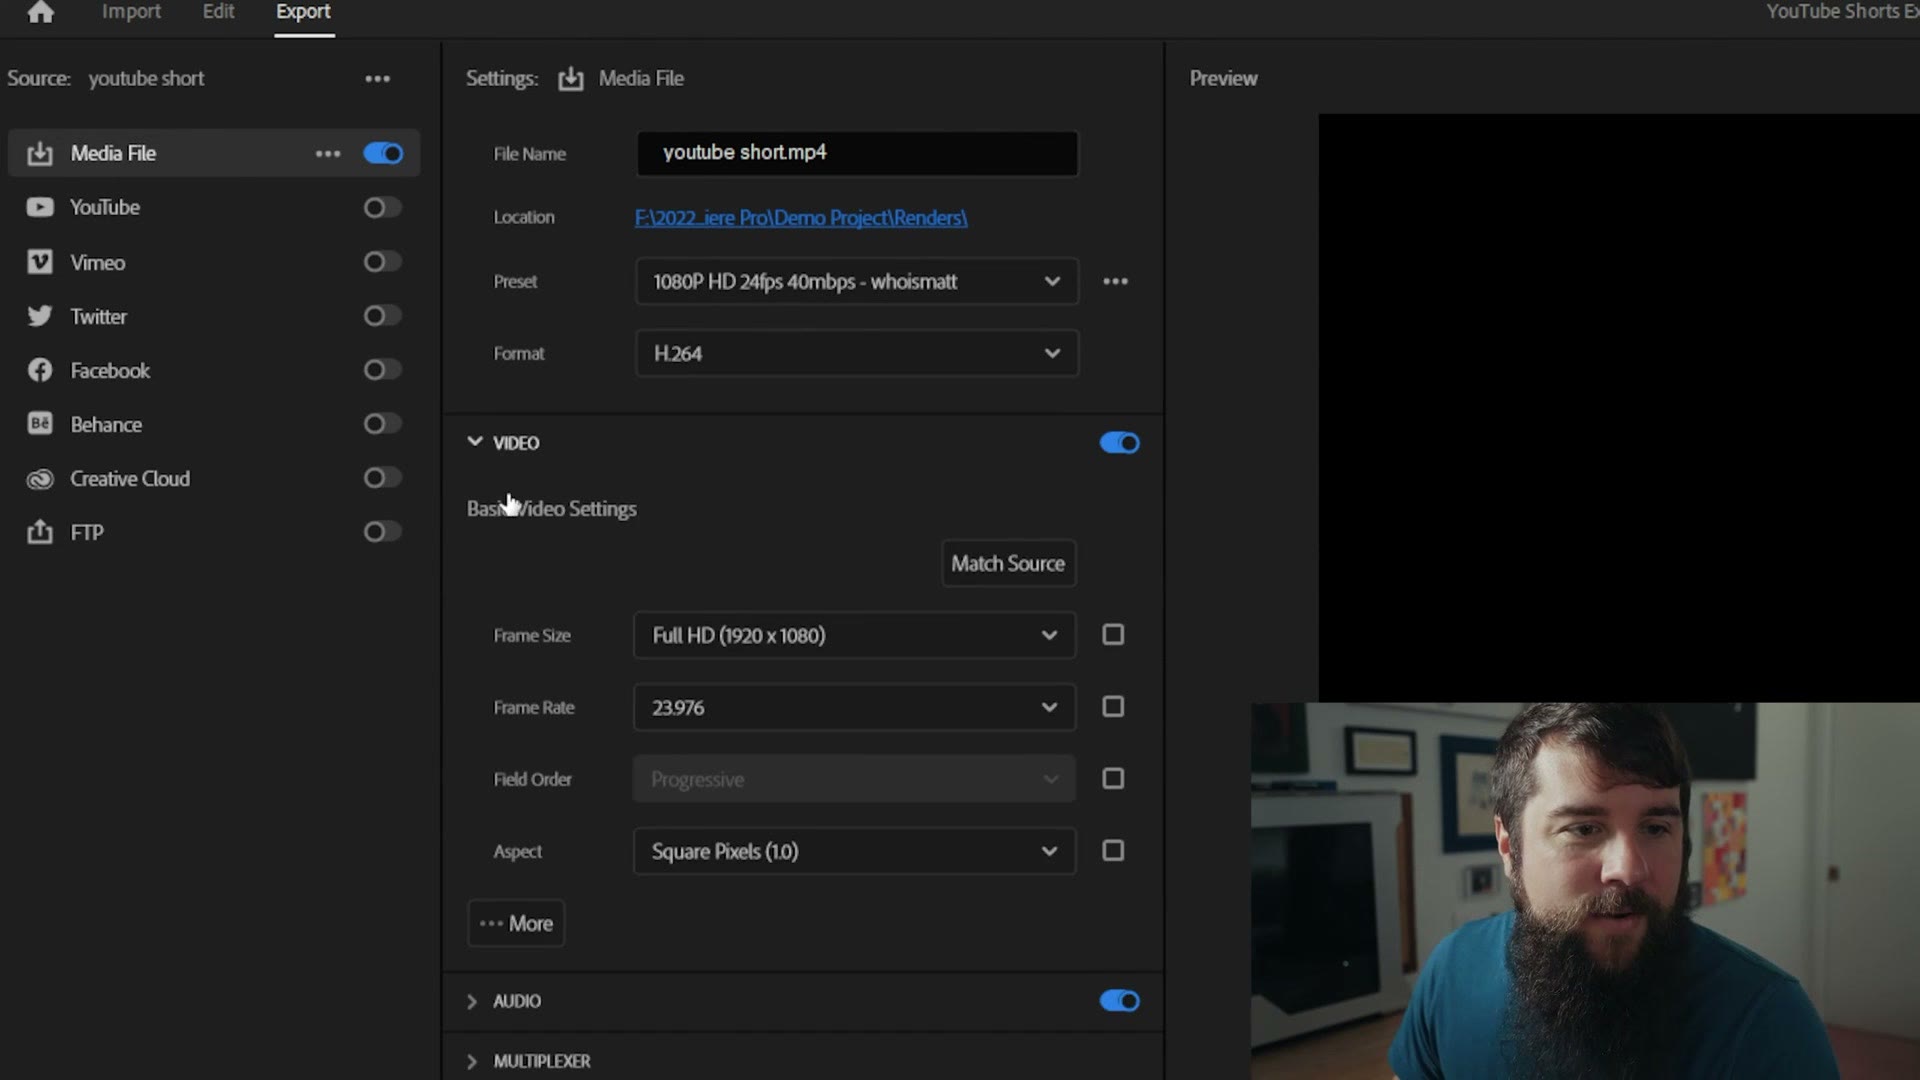
Go down to the Video dropdown, and under Basic Video Settings click Match Source. That automatically resizes everything to the sequence settings we just made, so your frame size should now read Custom, 1080 by 1920.
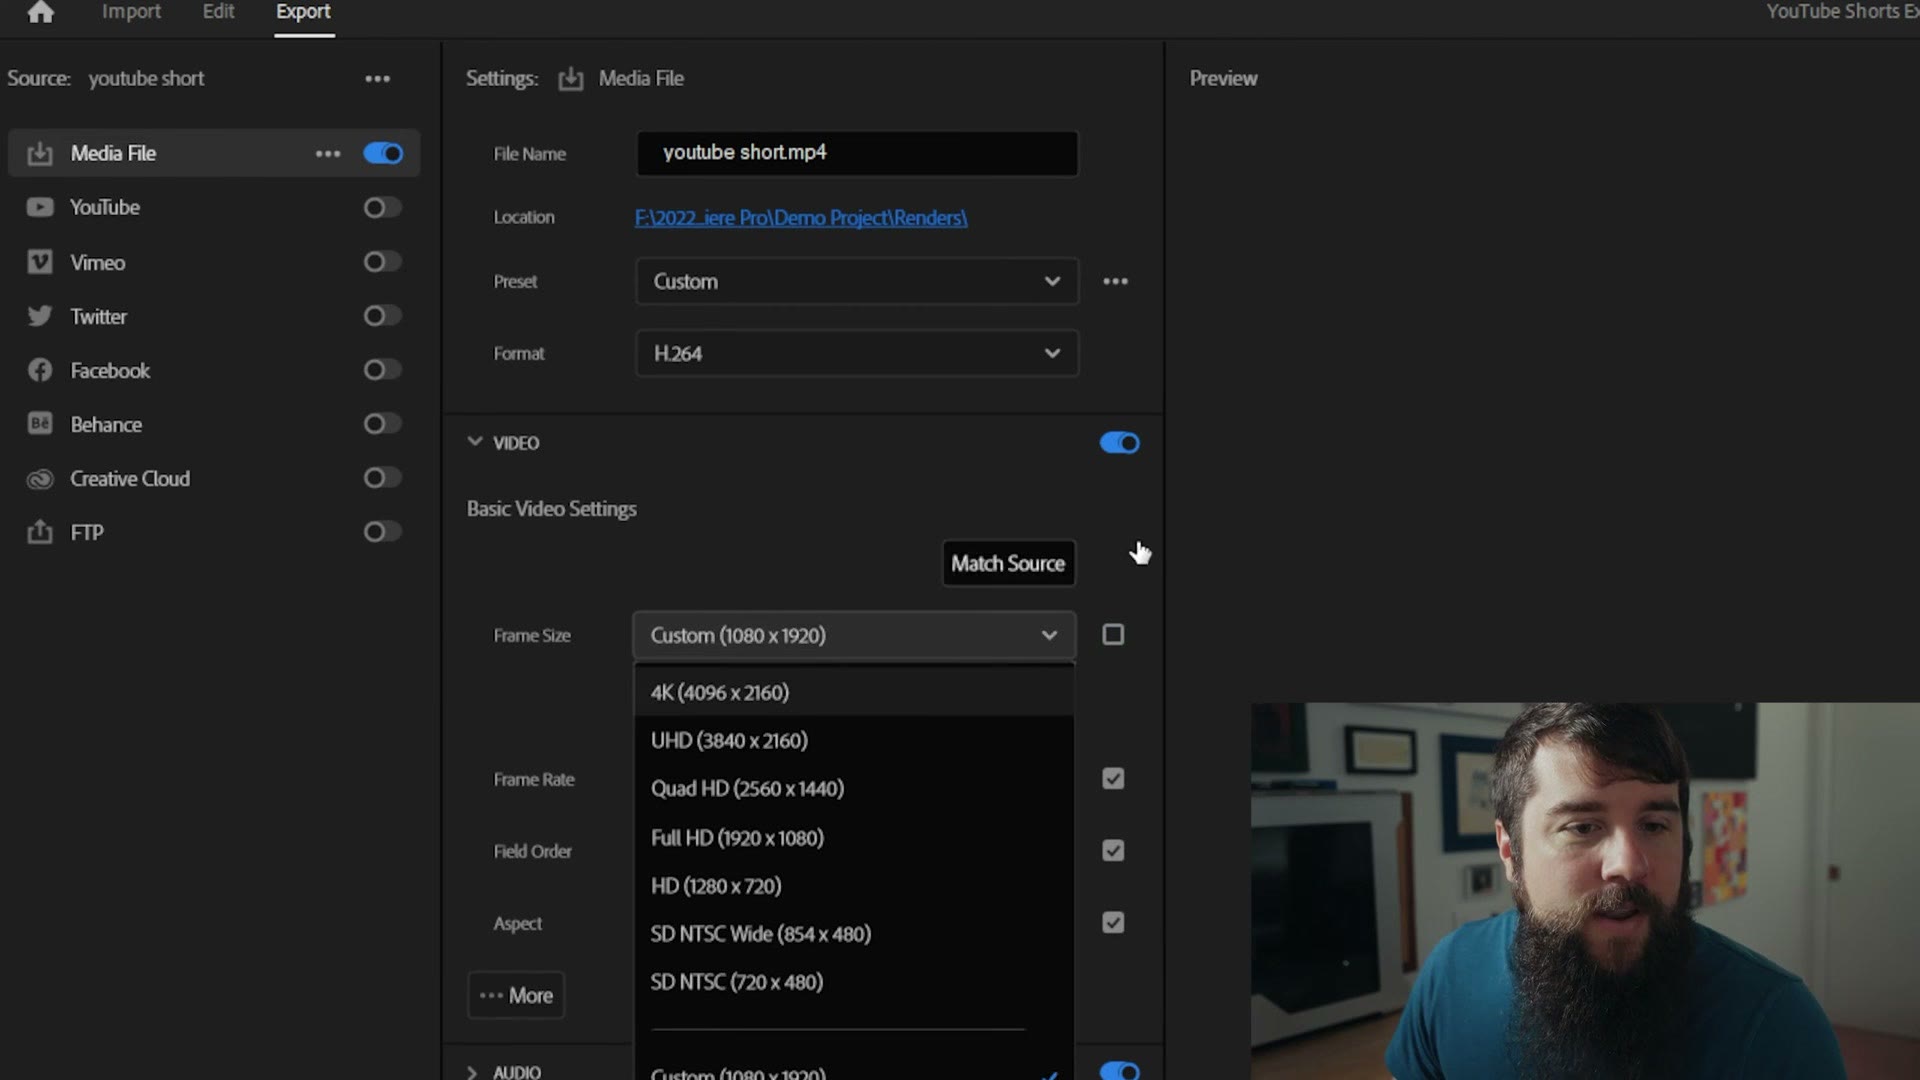
If it does not, tick the checkbox next to it, use the dropdown to set it properly, then untick it again. Frame rate should be 23.976, field order Progressive, aspect Square. That all looks great.
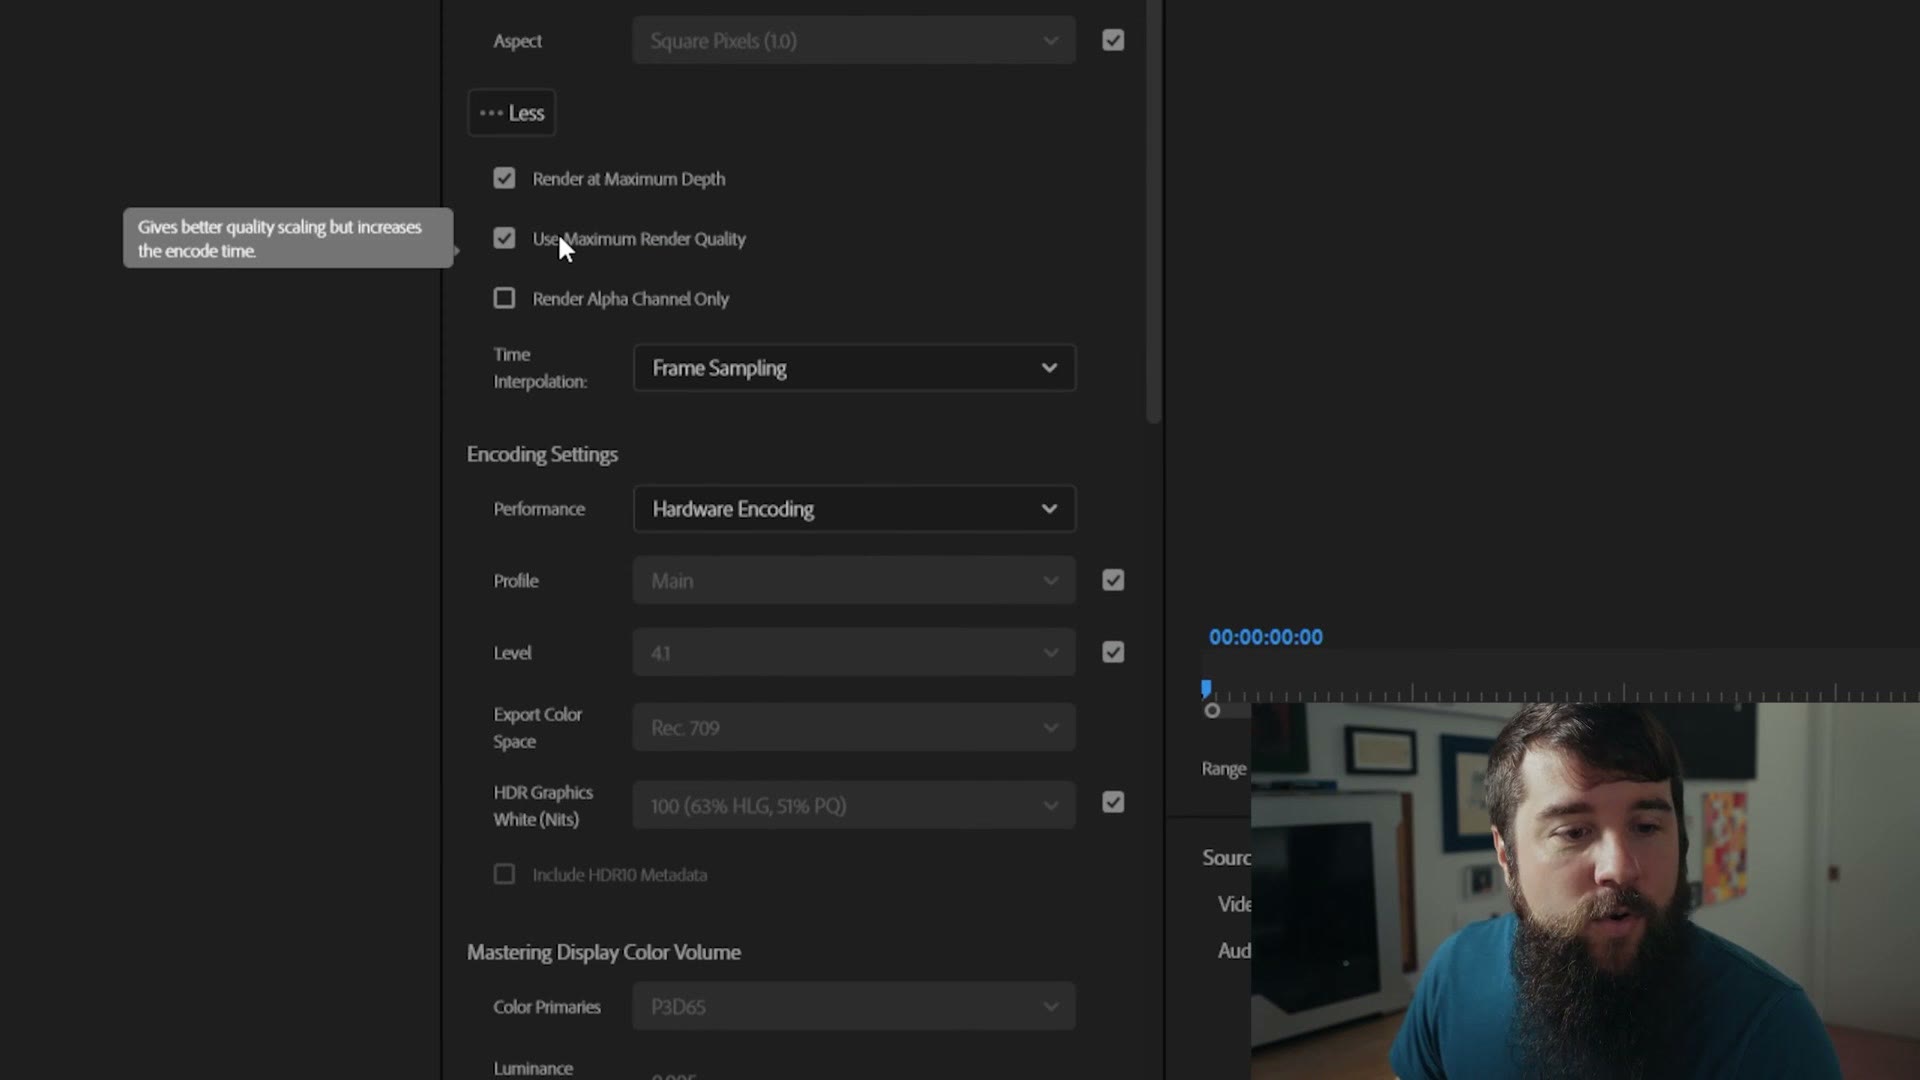
But we are not done, because there are more settings hidden down here. Make sure Render at Maximum Depth and Use Maximum Render Quality are both ticked, because we want the maximum quality. Of course we do.
Under Performance, in Encoding Settings, set this to Hardware Encoding if you can, which helps your computer render faster. If you have to use software encoding, that is okay too. Everything else here, the profile, the level, Rec.709, is fine as it is.
Editing in something else? I covered How To Edit & Export High Quality YouTube Shorts In DaVinci Resolve 18 too.
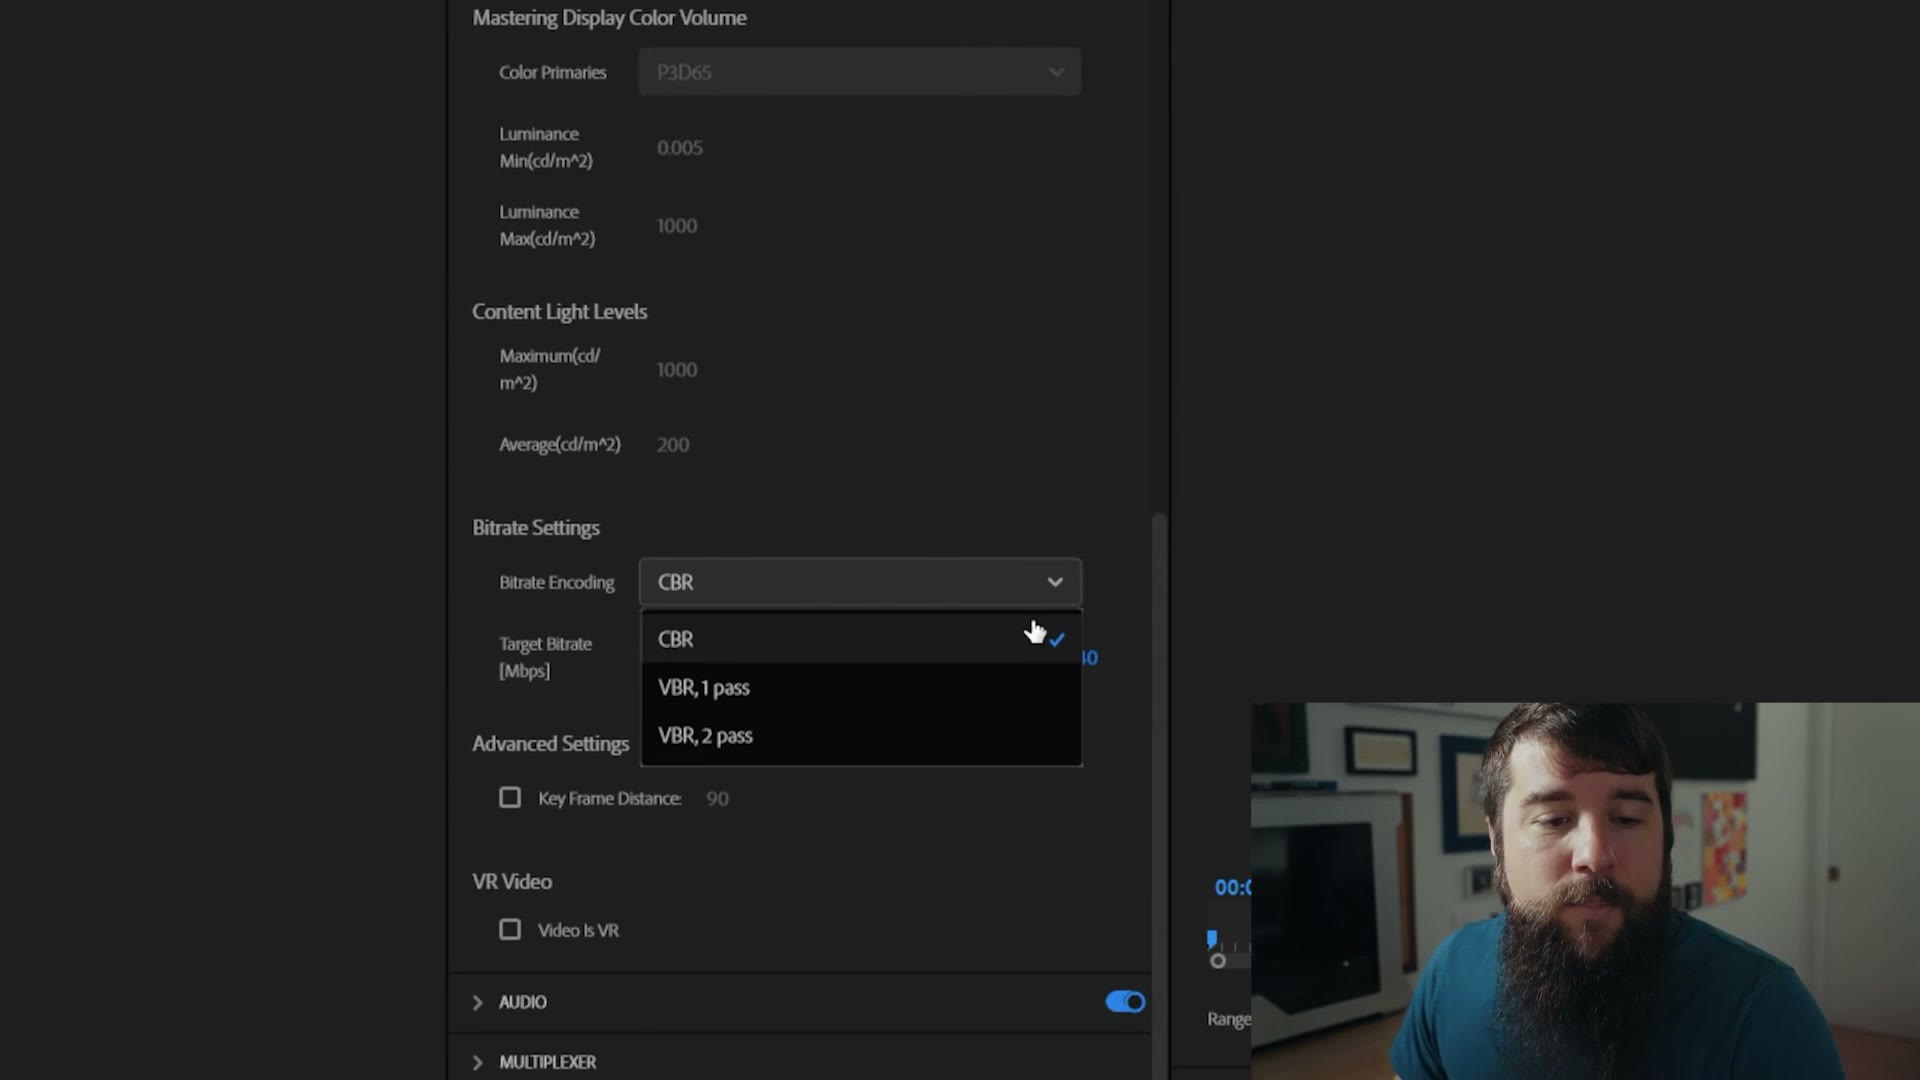
Then scroll down to Bitrate Settings, and this is where things get really important. By default Premiere is probably set to VBR 2 Pass, but you want CBR, which stands for constant bitrate, and which basically tells Premiere to throw as much video data as it can at this footage. That helps your quality survive once YouTube compresses it.
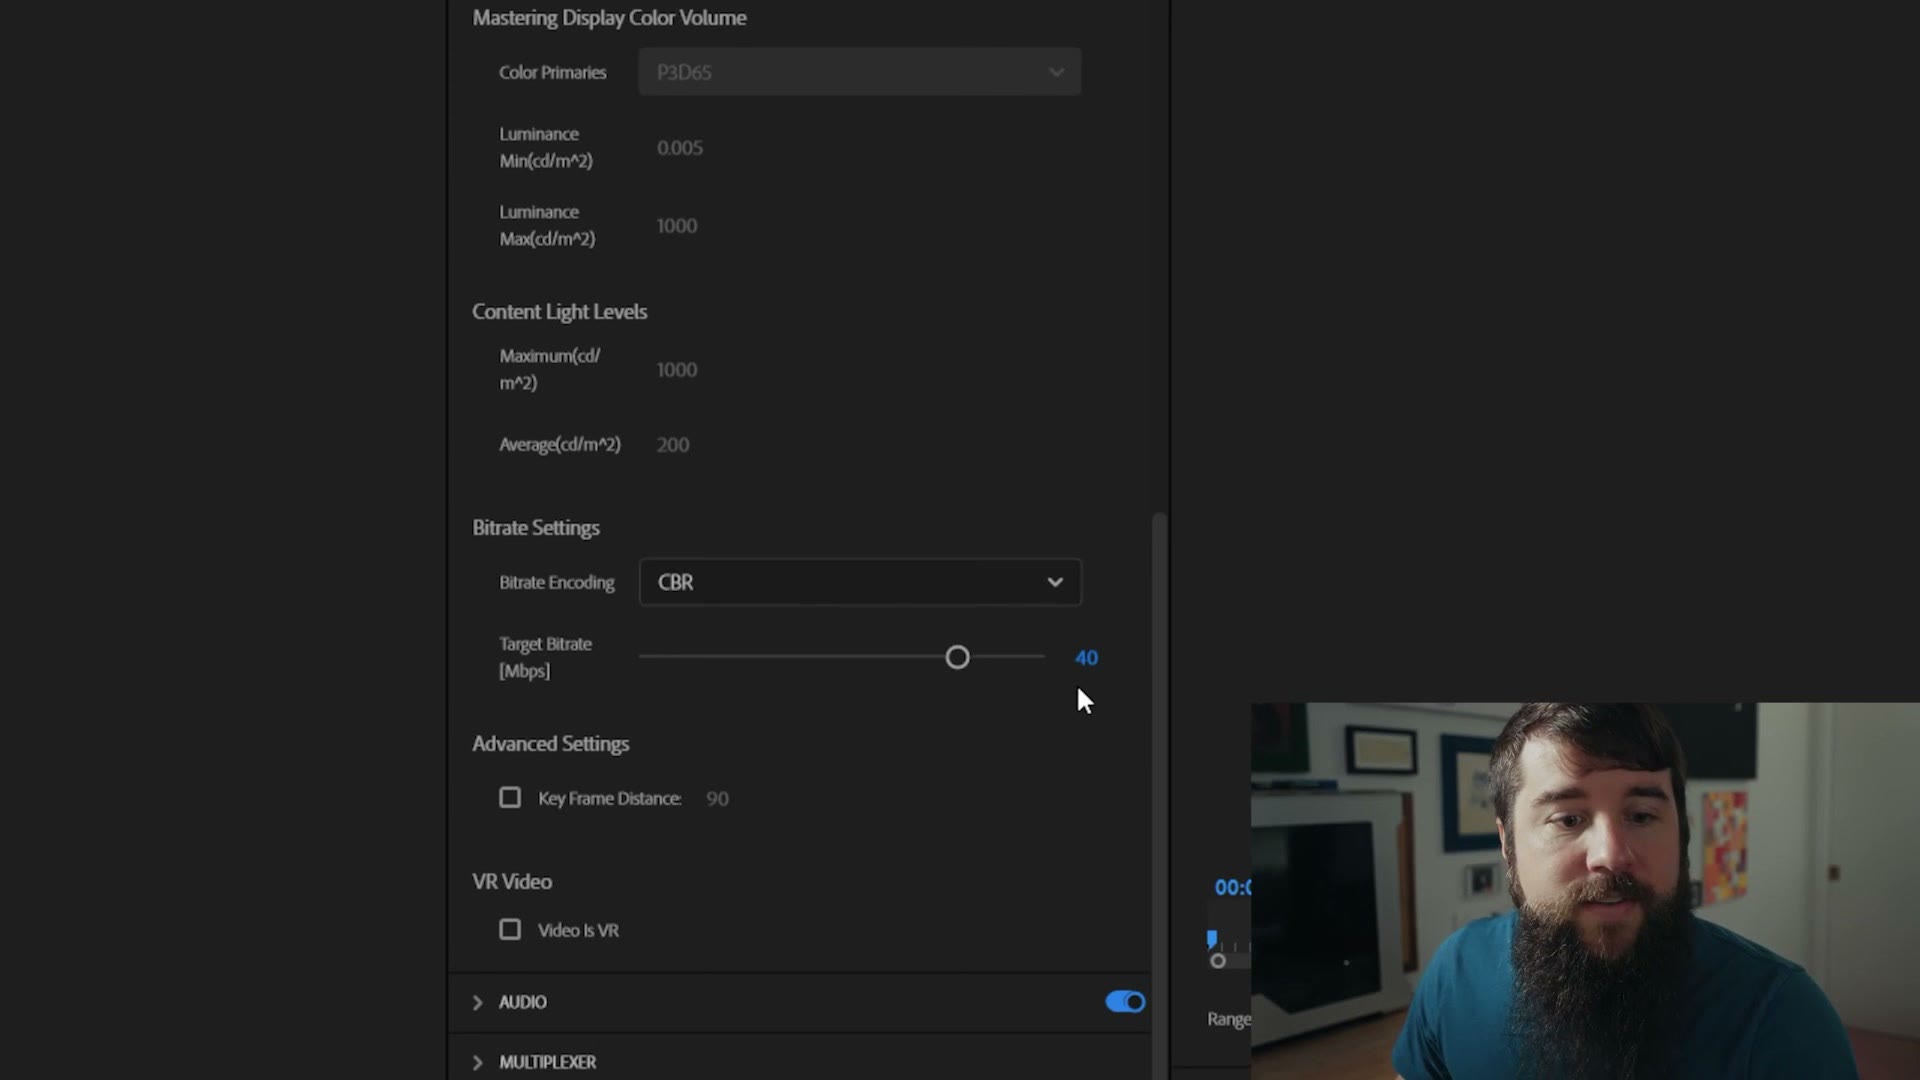
For your Target Bitrate, set it to 40 megabits per second. I know that is very high, but keep in mind YouTube is going to process this video and compress it smaller, and you want a high bitrate going in so you do not end up with compression artifacts.
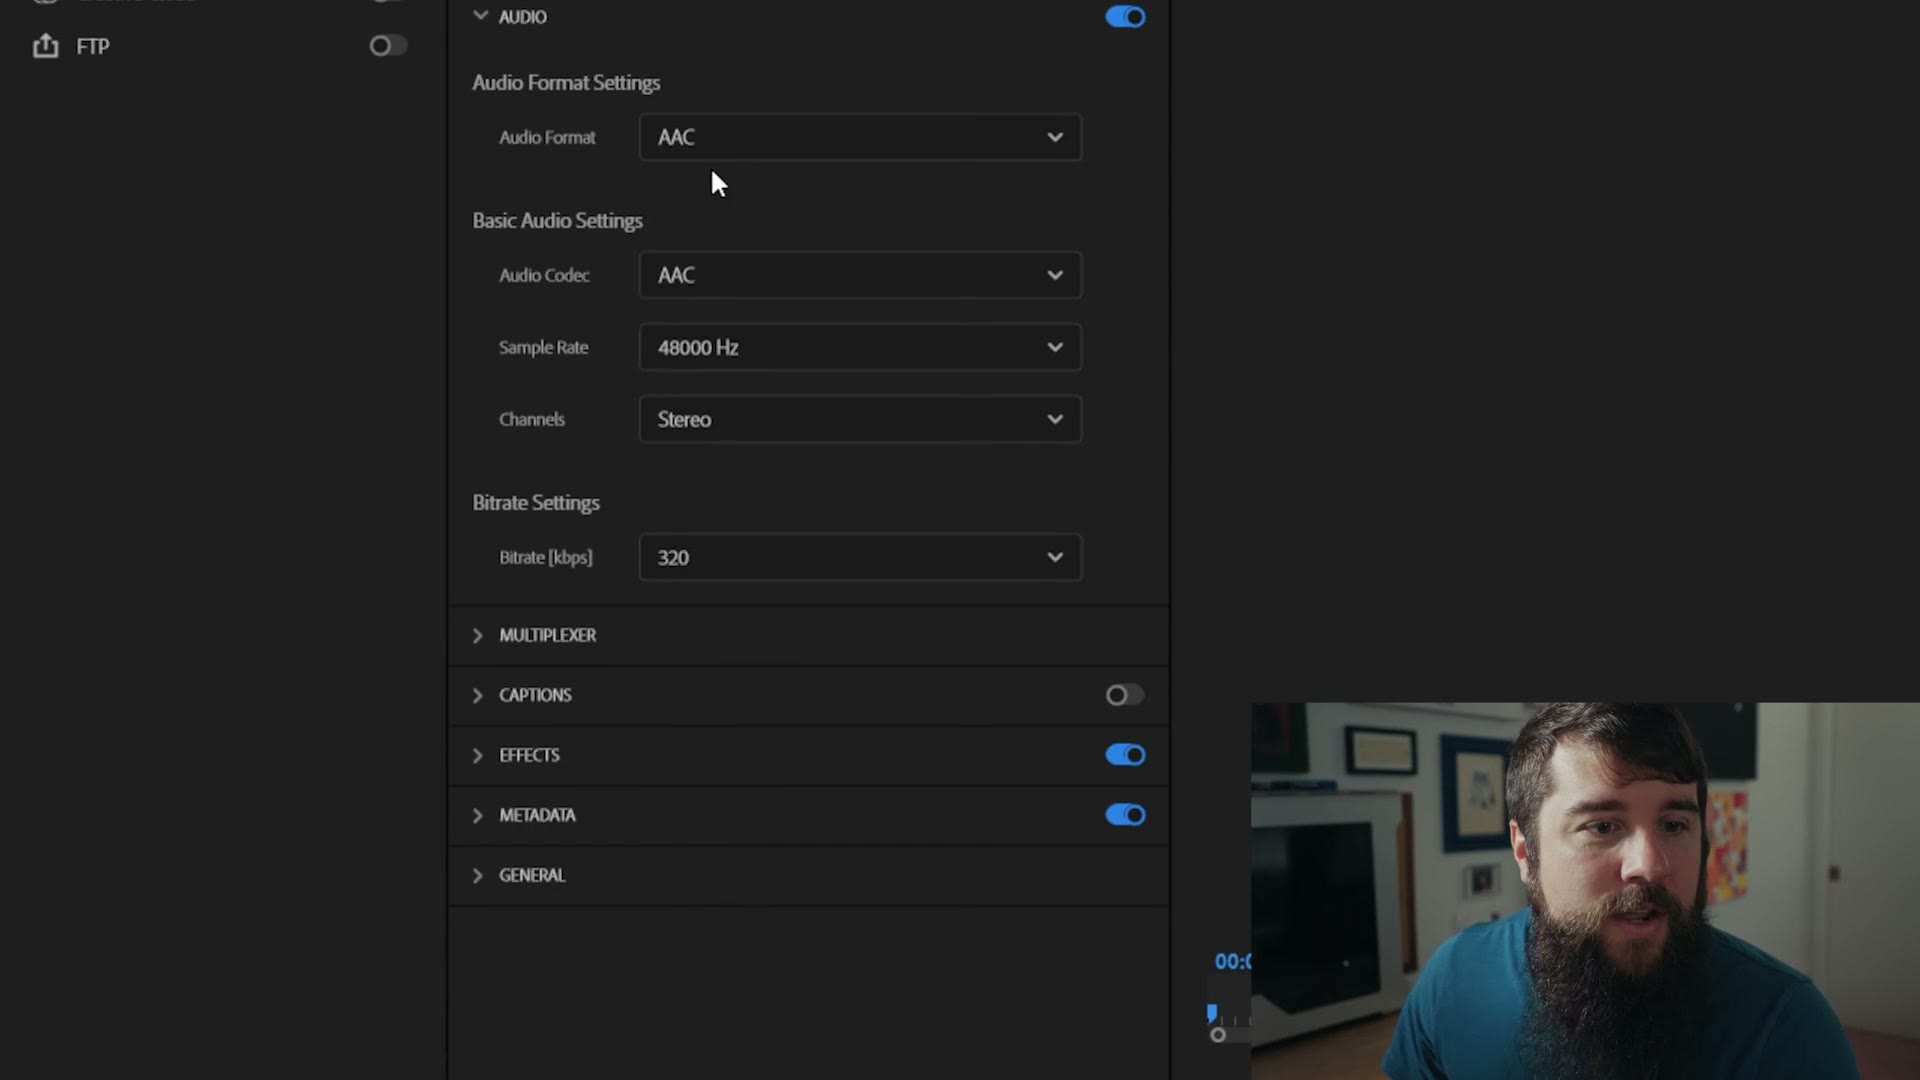
Now click the Audio dropdown. Choose AAC for the codec, 48,000 Hz, channels Stereo, and then bring the bitrate all the way up to 512. Because we can do 512 now, so why not have higher audio quality? It is not going to make the file much bigger. Go for it.
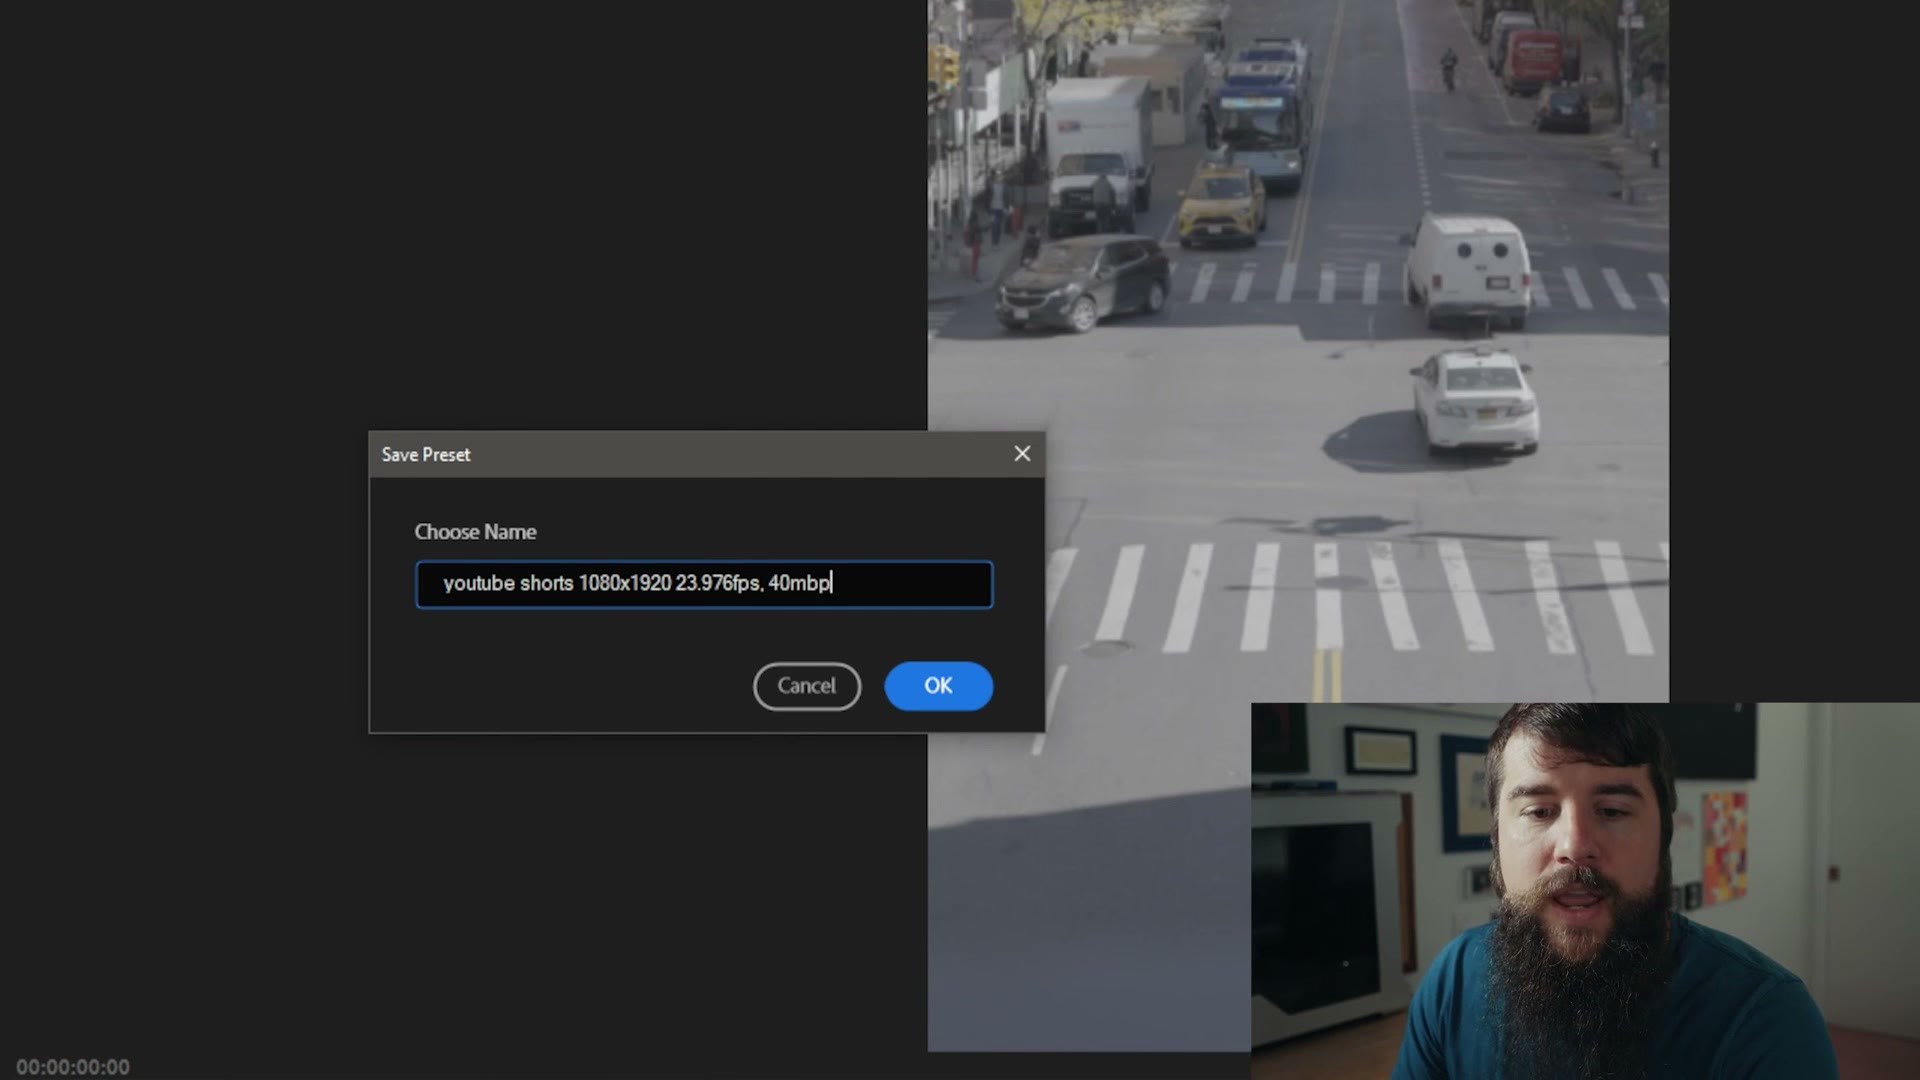
Lastly, save all of this as a preset so you never have to do it again. Up at Preset, click the three dots, click Save Preset, and name it something you can read at a glance, like YouTube Shorts 1080×1920 23.976fps 40Mbps CBR. Press OK, and now any time you want these settings you just pick that preset from the dropdown.
Then click Export down in the bottom right, or click Send to Media Encoder if you would rather render there so you can keep editing in the background. In Media Encoder, hit the green play button to start it.
Copy Your Short To Your Phone
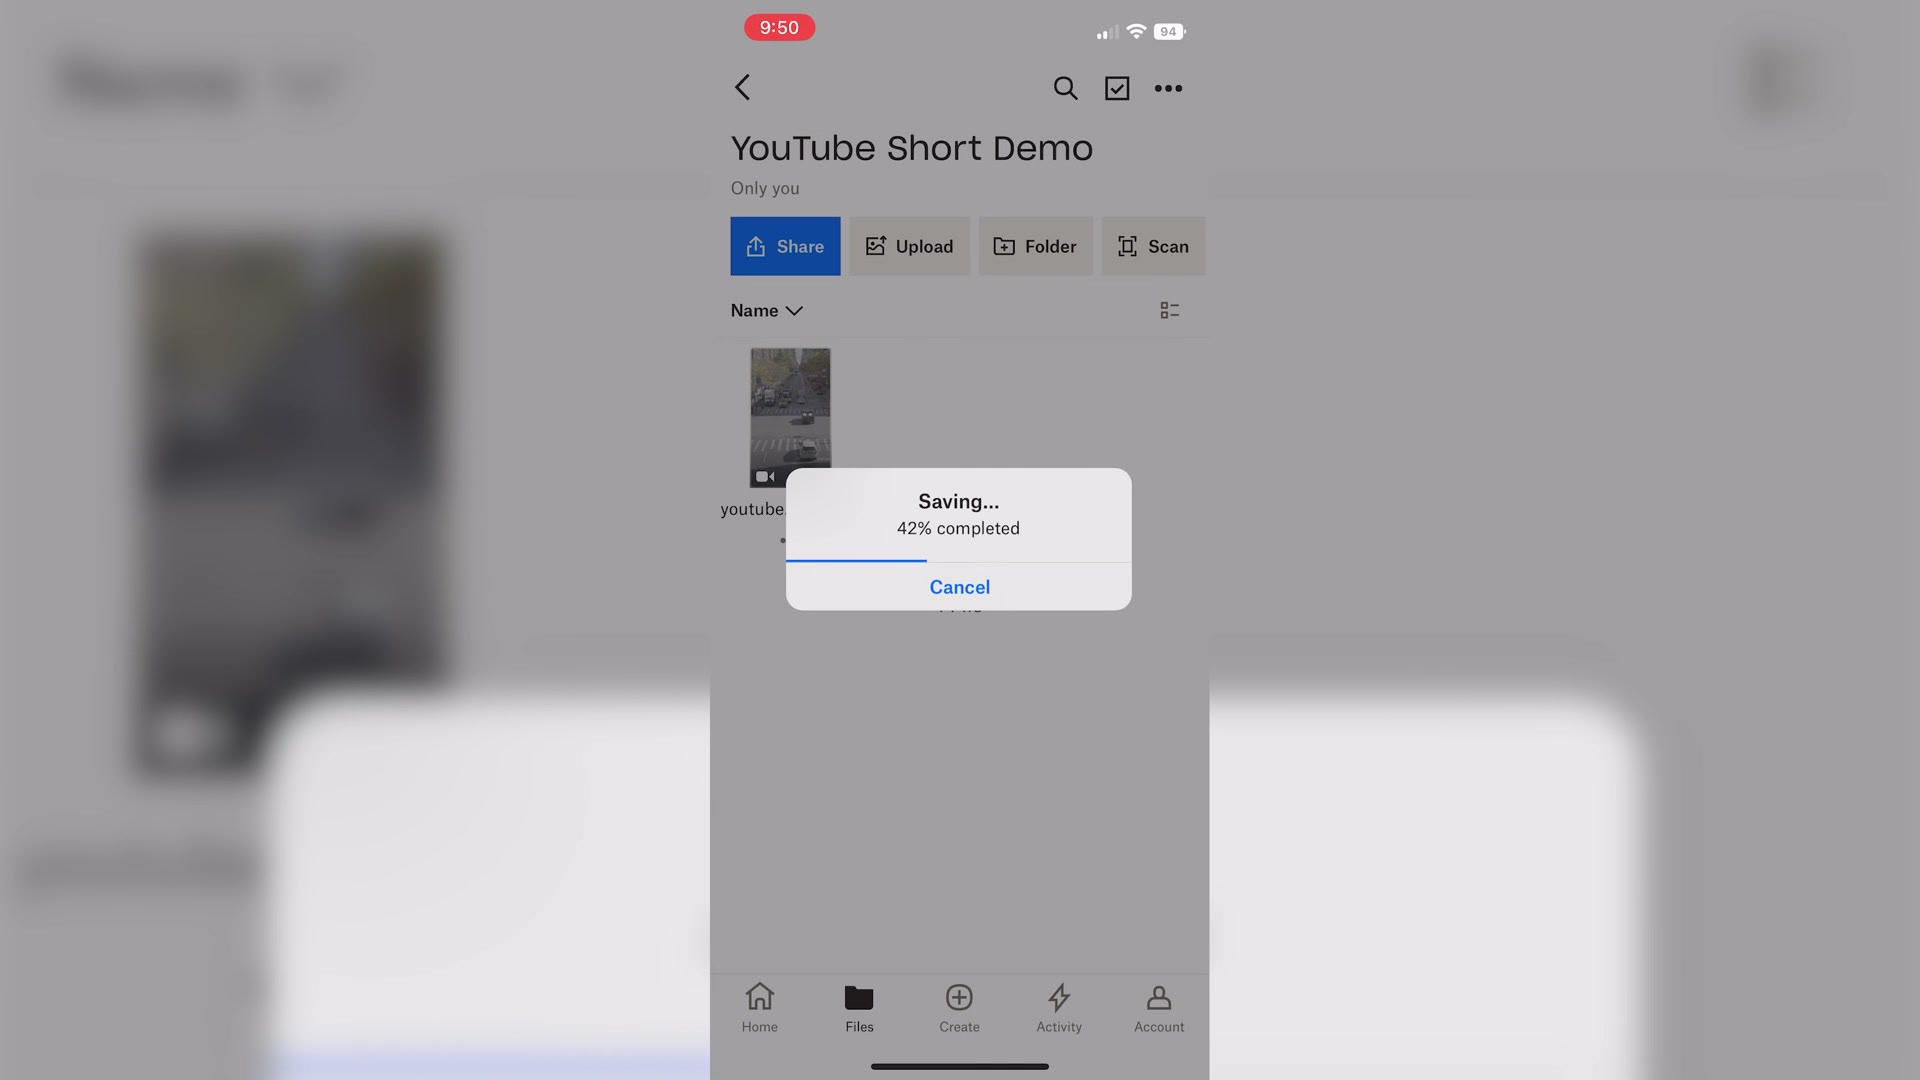
Once your video is rendered you need to upload it, and you can use something like Dropbox, or AirDrop if you are on a Mac. Use your phone and the Dropbox app or AirDrop to save the video, then open the YouTube app, upload your Short and hit post.
And that is how you get high quality video onto YouTube Shorts using Adobe Premiere Pro. If you would rather skip all of that, my export presets are still free to download. And if you edit in DaVinci Resolve instead, I made a version of this tutorial for Resolve too.
Thanks To Musicbed
Musicbed is my favorite place to find music for my projects, and with over a thousand artists and over 40,000 songs I can always find the right one. Their search tools make it easy, with filters that let you search by BPM and key, not to mention playlists put together by your favorite filmmakers. I personally love the funk and folk pop playlists and spend a pretty good amount of time in there whenever I am looking for inspiration.
My secret weapon though is their complimentary song search service, where they will help you find the exact song you need for your video. That can save you so much time.
You can hear the difference their music makes by signing up for a free account, and whenever you are ready to subscribe, use the coupon code MATTMUSICBED, all caps, all one word, at checkout to get one month free with an annual subscription. Thanks again to Musicbed for sponsoring this video.
Thanks so much for reading, and have a great day!