Tyler Herrinton and I are here to answer all of your drone questions! And yes, you need another drone! Many drones! A fleet of drones!
Tyler’s YouTube Channel: https://www.youtube.com/theherrintons
ART LIST – (free extra 2-months when you subscribe using this link!)
Sound Stripe – (use the coupon code “WHOISMATT” for 10% off a yearly or monthly subscription!)
Filmstro – (use the coupon code “WHOISMATT20_ANN” for 20% off all yearly licenses)
I’m required to state that I’m a part of affiliate programs for Amazon, B&H, SoundStripe, ArtList, Musicbed, and Adobe and that some of the links above are affiliate links.
TIMESTAMPS BELOW (courtesy of Albert Arriola)
2:45 – a7iii
5:10 – shooting weddings solo
7:37 – how to market yourself
11:05 – beard products lol (i have no facial hair)
12:01 – red dragon
12:50 – pricing and how to charge
17:00 – edit and outsource
20:35 – how did you convince rachel of video work
21:52 – how to get a first gig with no work done
22:28 – what cameras are you using
23:20 – a7sii, a7riii, or gh5 or m50 canon
27:30 – how to white balance on the fly
29:19 – what lenses to use
33:25 – how to deal with using a drone in bad weather
34:40 – replacing a7rii and a7sii for an a7riii
36:00 – how many weddings this year
37:30 – hard drive space
38:33 – dvd or blu ray delivery
40:51 – do you give raw footage
44:10 – tips for marketing to a region without a wedding film industry
47:30 – how do you color grade
48:55 – can’t fix S-log footage
51:11 – how much do you try to steer the bride where to have shots taken
53:30 – do you offer consulting
53:42 – are you guys an LLC
55:10 – converting to pro res before edits
56:25 – still on a7sii?
57:10 – candids or pose your couple
58:23 – Sony or gh5 for $2000 budget
59:40 – bucketlist for weddings
1:00:04 – how long is too long to deliver the wedding video
1:01:25 – tips for beginning videographer marketing pricing
1:03:55 – best way to get bookings
1:06:50 – wedding contracts
1:08:50 – what do you use for CRM tracking and expenses
1:12:22 – what made you decide to become a videographer
1:13:07 – were you home schooled
1:13:50 – how do you feel about working for companies that contract you to shoot weddings
1:15:05 – can you use 32gb of ram for 2 slots
1:16:28 – tips from a having a creative block
1:19:03 – tips on moving to commercial stuff from weddings
1:21:30 – what kind of insurance do you have for your business
🎥Want to learn to film weddings? I’m now offering one-on-one filmmaker consulting! Sign up!
ART LIST – (free extra 2-months when you subscribe using this link!)
Sound Stripe – (use the coupon code “WHOISMATT” for 10% off a yearly or monthly subscription!)
Filmstro – (use the coupon code “WHOISMATT20_ANN” for 20% off all yearly licenses)
I’m required to state that I’m a part of affiliate programs for Amazon, B&H, SoundStripe, ArtList, Musicbed, and Adobe and that some of the links above are affiliate links.
Which frame rate to shoot for which moment, why dropping 60fps onto a 24fps timeline looks stuttery, and the four-click Interpret Footage trick that makes an entire project match.
You’ve got some 4K footage and some 1080p footage and you need it all to be one video at one resolution. Here’s how I handle that in Premiere Pro, and honestly the whole thing comes down to one checkbox that nobody tells you about.
I’m making this because a lot of you have asked. Plenty of people already know this one, but if you’re new to Premiere, or you’ve been editing a while and just never happened to hit mixed resolutions, this should sort you out.
First, Pick A Direction
Before you touch anything you have to decide whether you’re exporting in 4K or in 1080p, because everything downstream follows from that.
The way I decide is simple: I look at what I’ve actually got. I shoot far more 4K than 1080p, so I upscale the 1080p up to 4K. If you’re the other way around, maybe you shoot a lot of 60fps slow motion because your camera can’t do 4K60, and you’ve only got a bit of 4K, then downscale the 4K to 1080p instead.
Yes, upscaled 1080p won’t be as sharp as your real 4K, and downscaled 4K will look sharper than your real 1080p. But once it’s rendered and YouTube has had its way with it, the difference is genuinely not a big deal. Pick whichever direction means less of your footage getting messed with and move on.
Make The Sequence
File, New, Sequence. This is where you tell Premiere the resolution and frame rate you want to edit and export at.
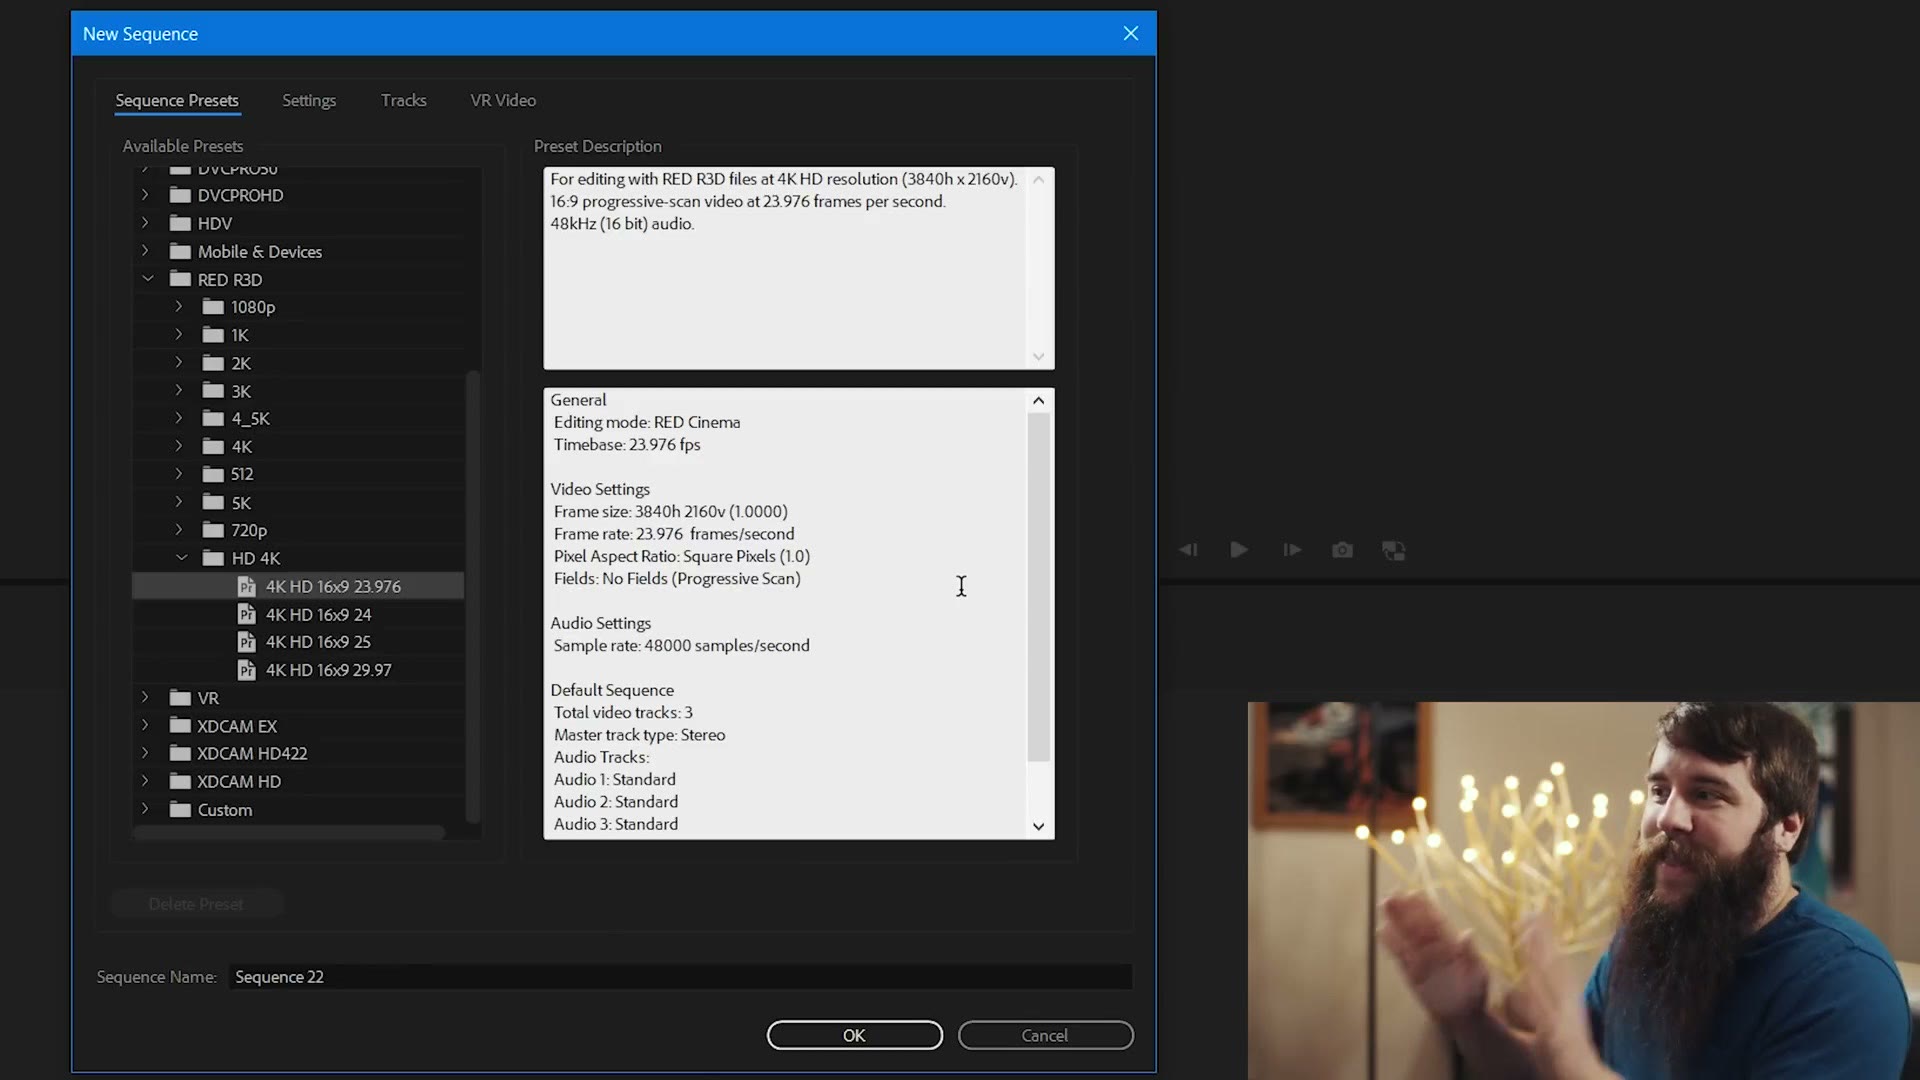
For a 3840 by 2160 timeline at 23.976, go down to the RED presets, then HD 4K, then 4K HD 16×9 23.976. And I know what you’re about to say. No, you do not need a RED camera. I shot this on a Sony a7S II. The preset does not care what camera you own, it only sets a resolution and a frame rate, and that one happens to have exactly the pair I want.
The Setting That Actually Matters
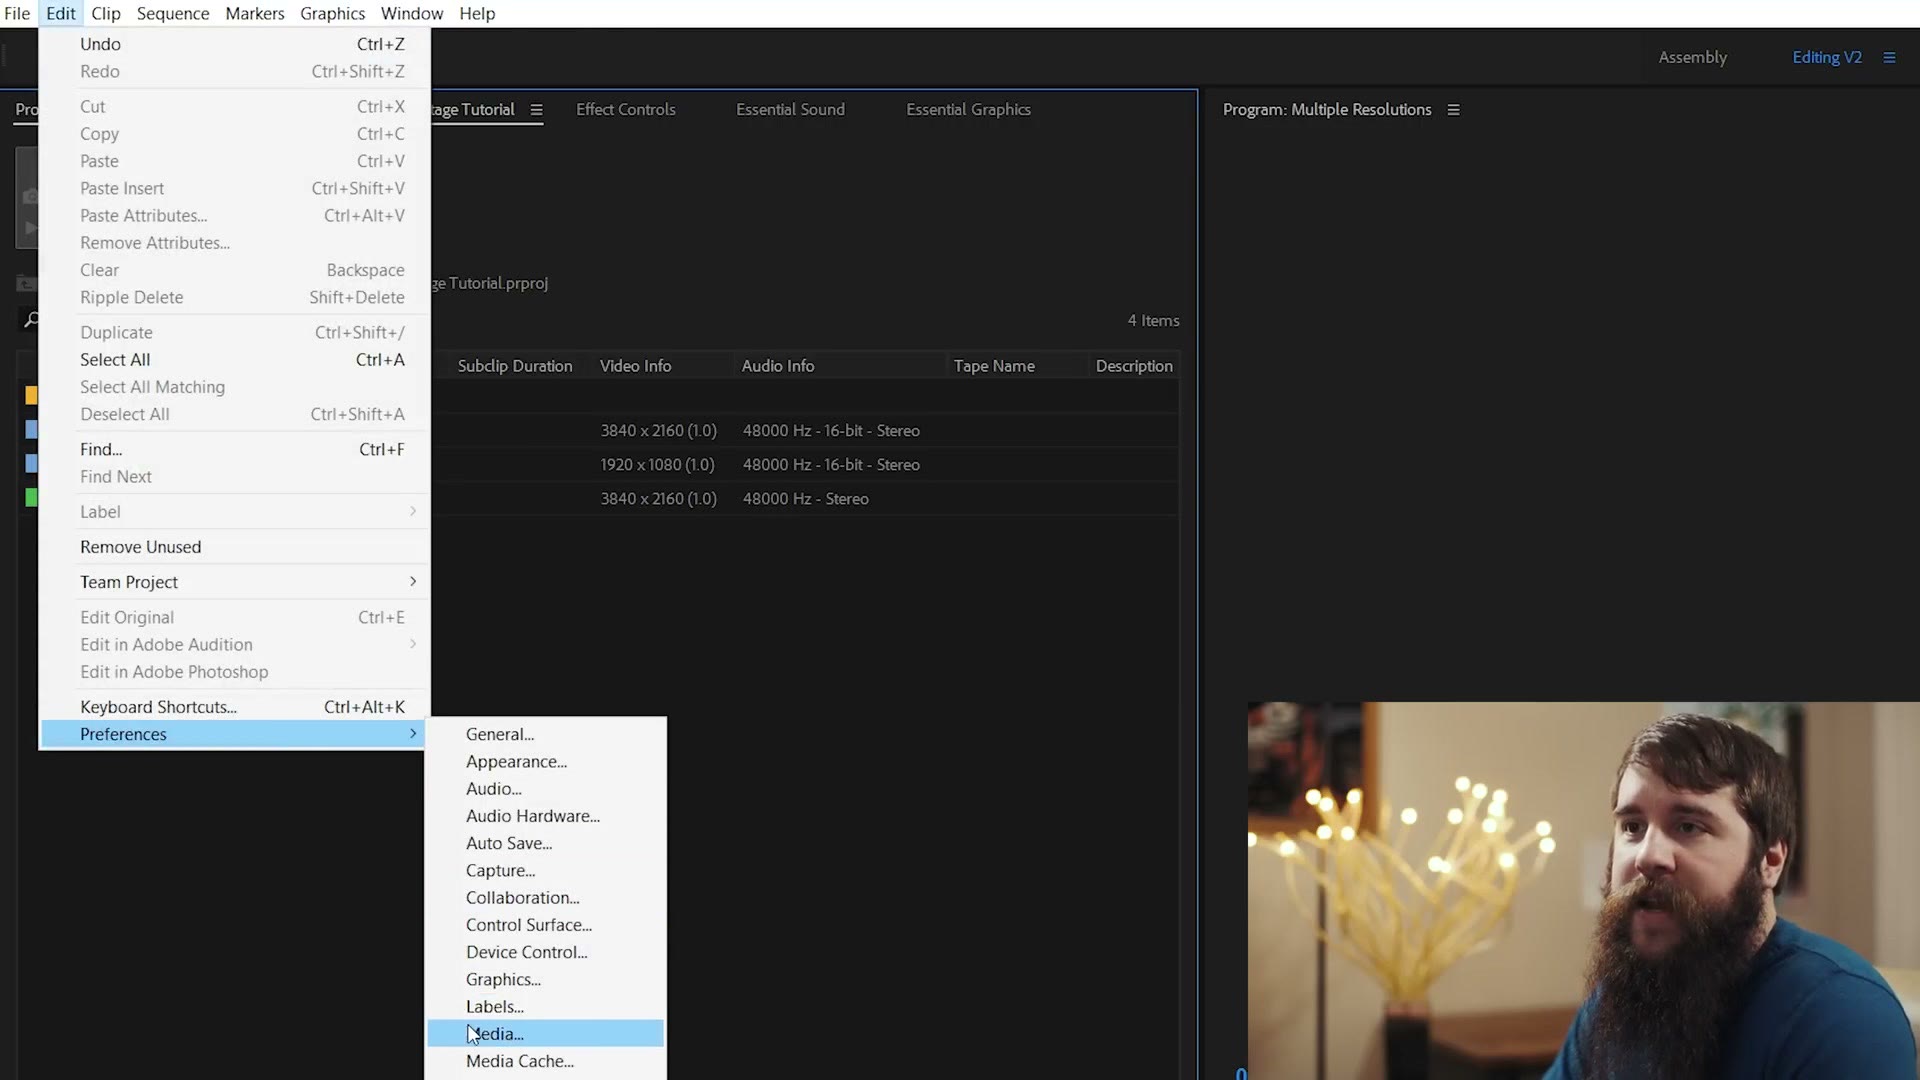
Before you drag a single clip down, go to Edit, Preferences, Media.
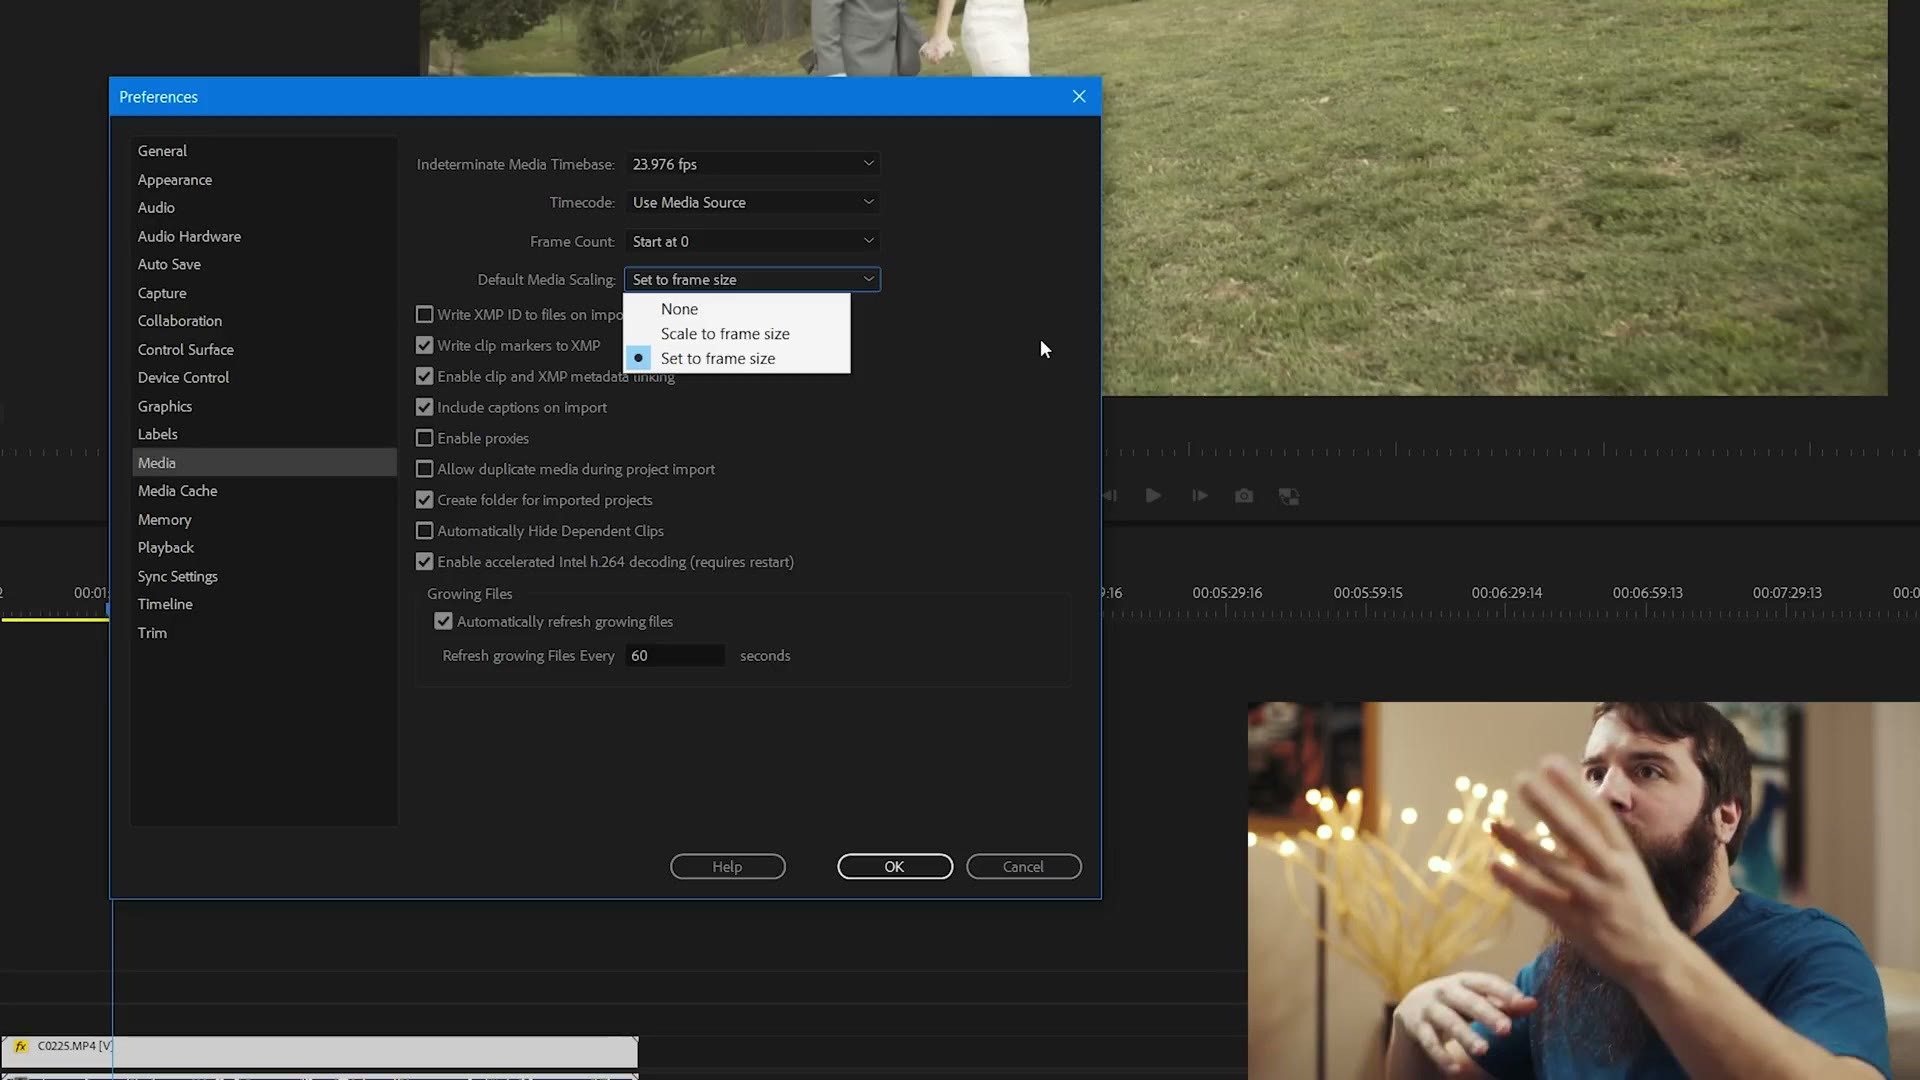
Find Default Media Scaling and set it to Set to Frame Size. That’s it. That’s the whole trick.
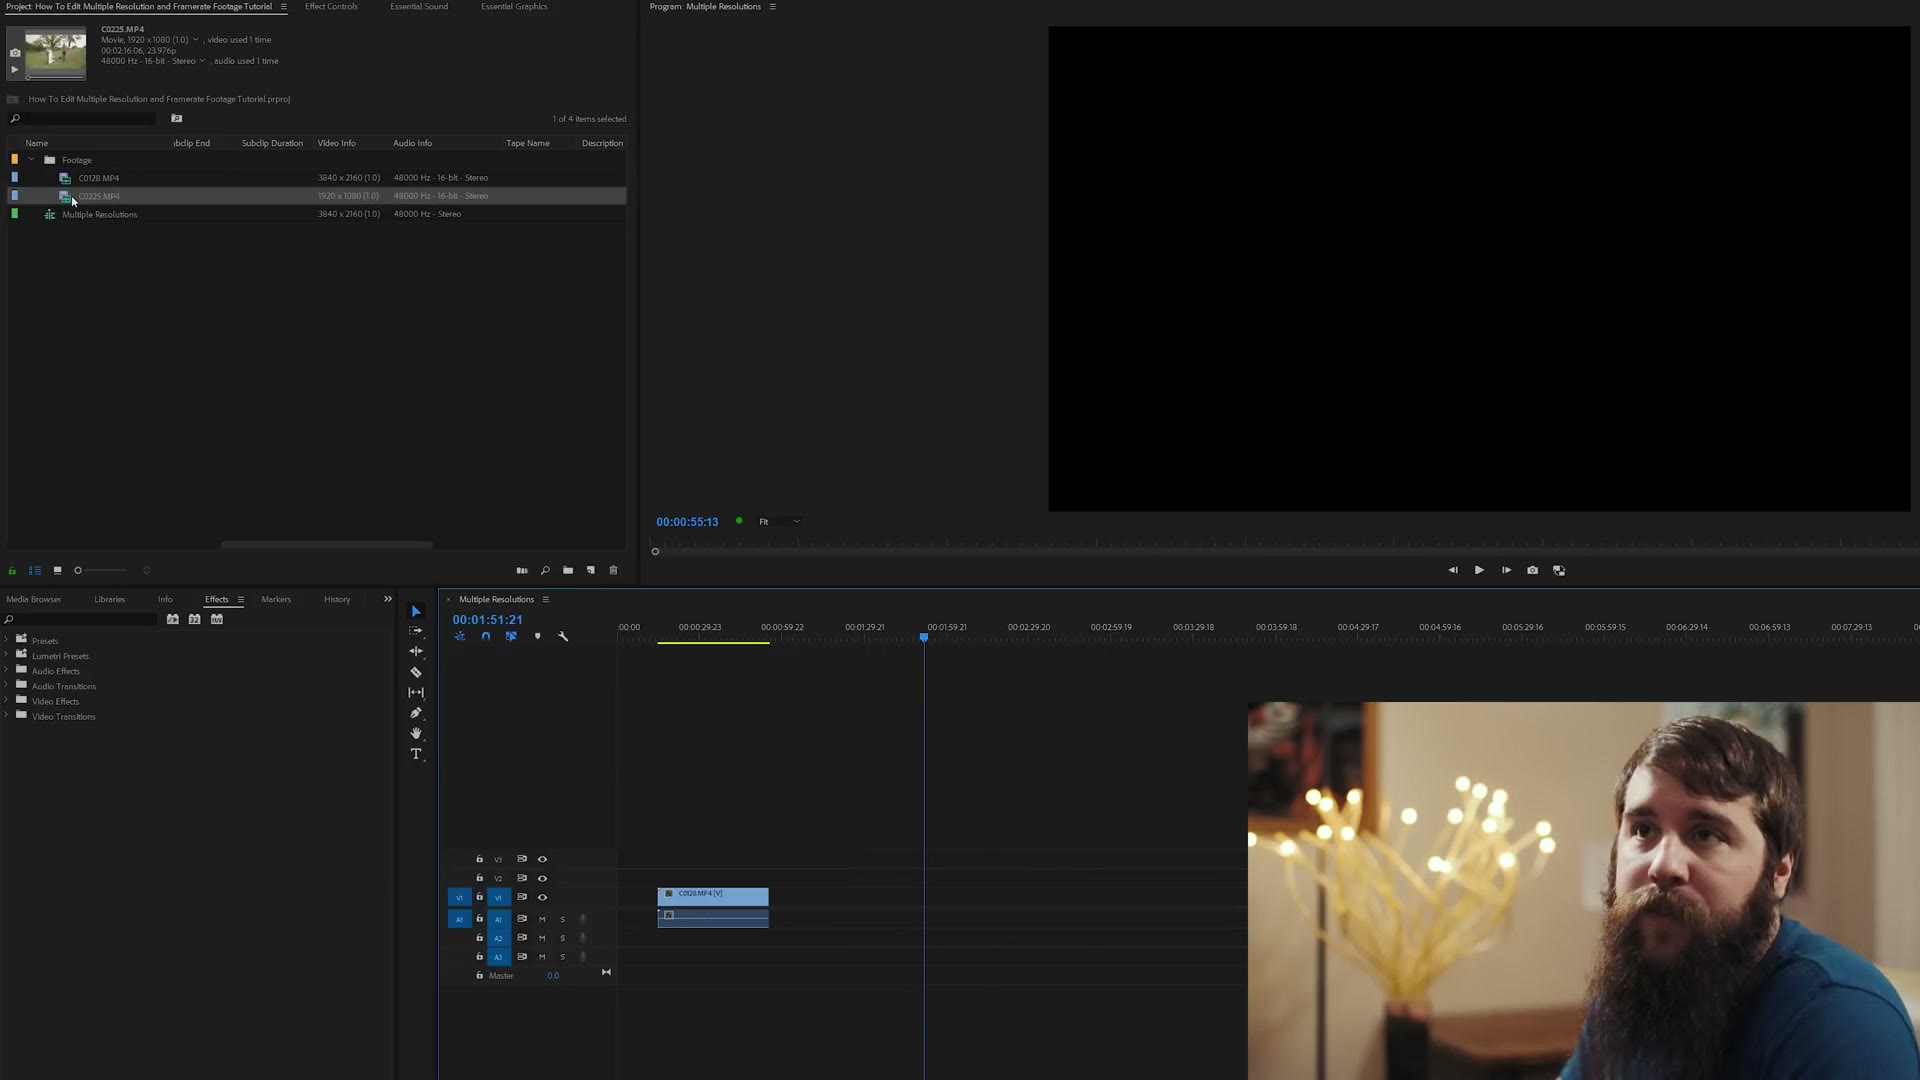
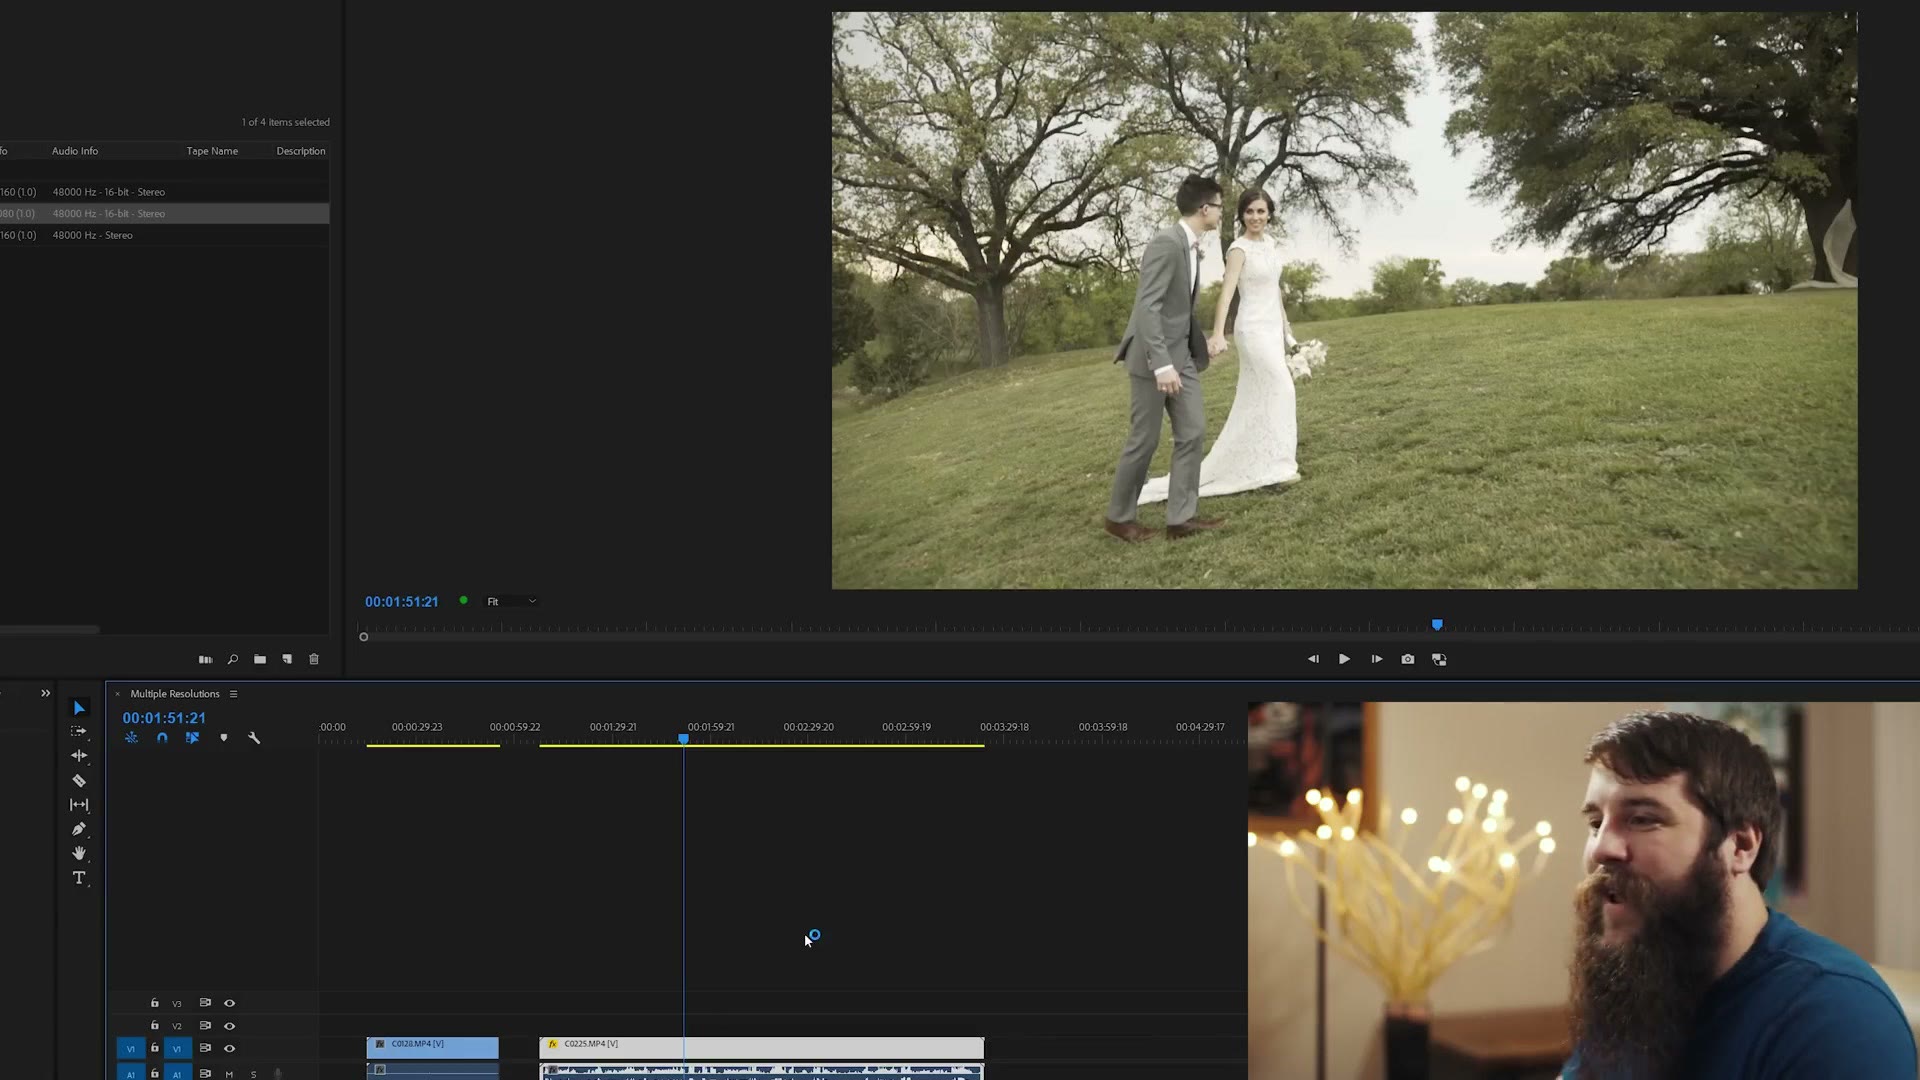
Now drag your 4K clip onto the timeline, nice and sharp, looks great. Then drag your 1080p clip down and scrub over it, and it fills the frame properly too. Two different resolutions, both scaled correctly, no thinking required.
So what happens if you don’t change it? Set it back to None, delete the 1080p clip, drag it in again, and there it is.
Black bars everywhere, because that is exactly what a 1080p video is in a 4K timeline: a quarter of the frame, sitting there being small. Which is what you’ve been fighting whenever this has happened to you.
If You Already Forgot To Change It
No problem. Right-click any clip on the timeline that isn’t scaled right, choose Set to Frame Size, and it snaps to full frame. That does exactly the same thing as the preferences change, just one clip at a time, which is why I prefer setting the preference and forgetting about it.
Why Not “Scale To Frame Size”?
You’ll have noticed there’s a third option in that dropdown, and it’s worth explaining why I skip it.
Whenever you use Scale to Frame Size, you lose the ability to tell at a glance which clips are 1080 and which are 4K, because the scale value no longer tells you anything. You have to go dig around in the project window to check. That’s a pain, and it’s the entire reason I use Set to Frame Size instead. Set leaves the scale value visible and honest.
Adjusting Scale By Hand
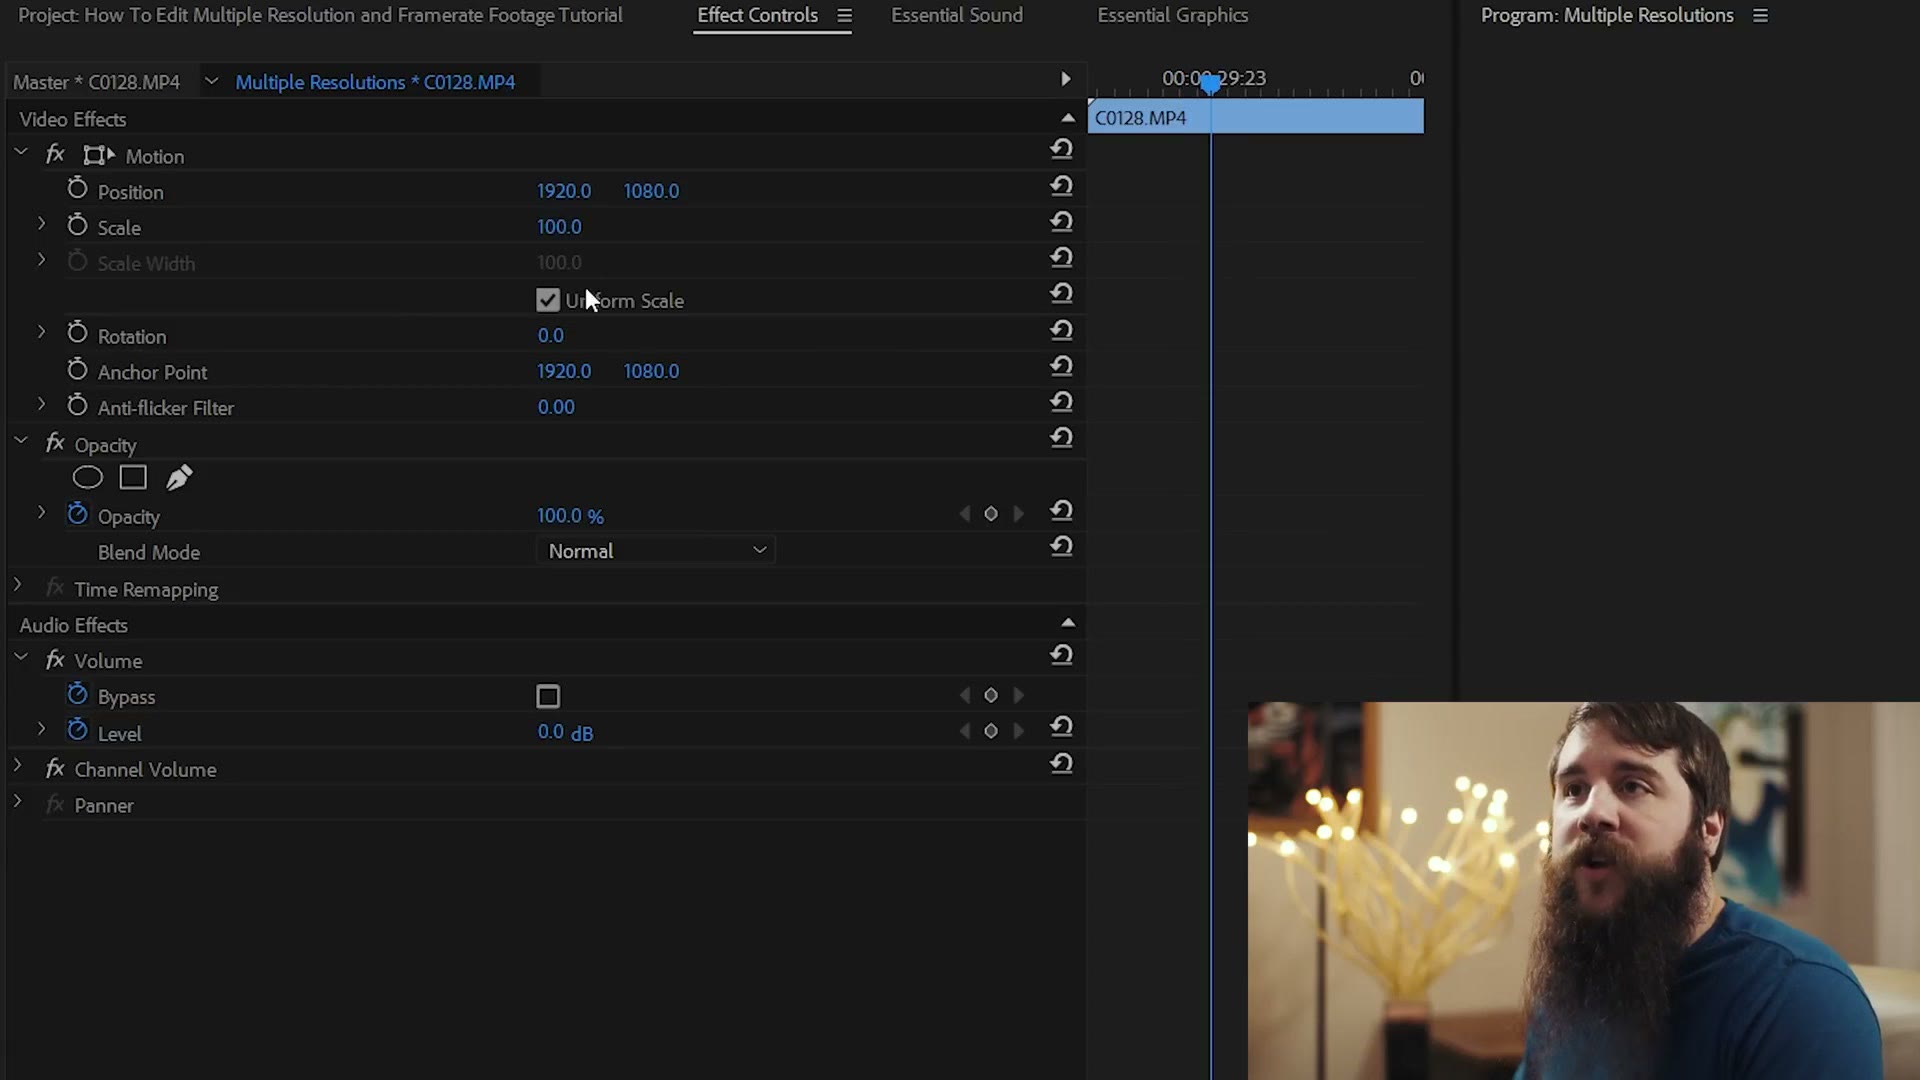
Select a clip and open Effect Controls, where you’ll find Motion, then Position and Scale.
With the 1080p clip selected in a 4K timeline, Scale reads 200, which is what’s filling the frame. The 4K clip in the same timeline reads 100. So if you ever want to override Premiere and push in on something yourself, that’s the number you touch. You can absolutely zoom way in on somebody’s nose if you want to. I’m not going to, but you can.
Going The Other Way, 4K Down To 1080p
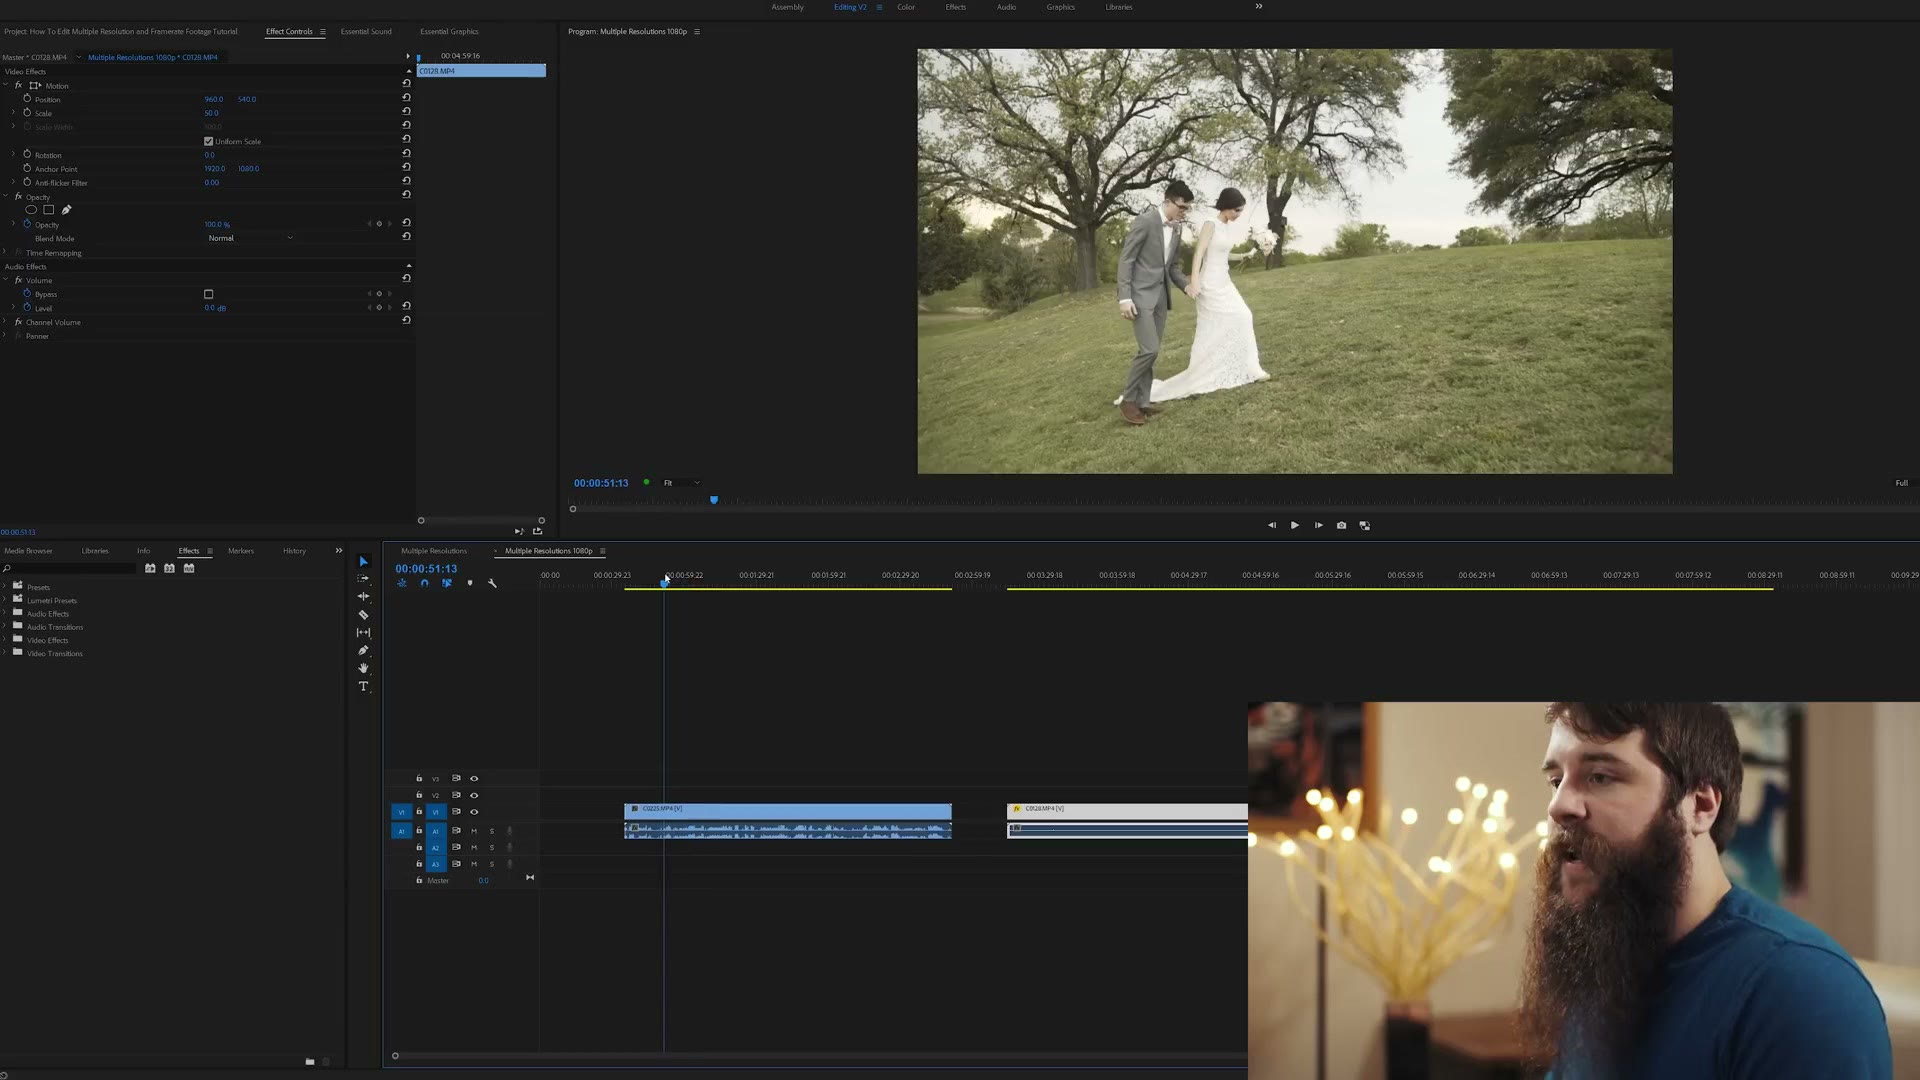
File, New, Sequence again, and this time go to Digital SLR, then 1080p, then DSLR 1080p24.
Here’s the good news: you already changed the preference, so it applies here too and you don’t have to do anything else. Drag the 1080p clip in and it’s native. Drag the 4K clip in and it scales down, and if you check Effect Controls you’ll see Premiere set it to 50 automatically, which is exactly right.
And that’s genuinely all of it. With that one preference set, your footage matches up and looks right no matter what resolution you shot it at, and you stop thinking about this forever.
Emotional may be the best word to describe Caitlin and Tanner’s wedding day. In fact, we can’t really think of a time that one of them wasn’t happy crying.