
Premiere Pro’s Warp Stabilizer versus DaVinci Resolve’s stabilizer. Both of these tools will give you smooth footage, but which one is actually better? This is the first in a new series where I put video editing software head to head and tell you which tools and effects and features win, so if you’re somebody who likes to argue about which editing software is superior, you’re going to love this. And feel free to tell me I’m wrong about any of it in the comments.
Here’s how the rounds shook out, and I’ll walk through every one of them below:
- Applying the effect: Premiere Pro
- Analysis speed: DaVinci Resolve
- The analyze banner: DaVinci Resolve
- Quality out of the box: DaVinci Resolve
- Customization: Premiere Pro, slightly
- How the data gets saved: DaVinci Resolve
Before we get into it, I already have videos showing you the absolute best settings for both of these tools, so here’s my best settings for Warp Stabilizer and here’s my best settings for the DaVinci Resolve stabilizer. And I’ll also point you at my Edit Videos Like A Pro guide, which is completely free and works regardless of whether you edit in Premiere Pro or Resolve or even Final Cut. What?
How To Apply Each Effect
The clip I’m using here is one I filmed at a wedding on a very windy day. My camera was on a Glidecam, not an electronic gimbal, so there’s a decent amount of wobble, and a lot more at the end as I was trying to back up. Stabilizing in post is the safety net, but there is a lot you can do to stop shaky gimbal footage in camera first.
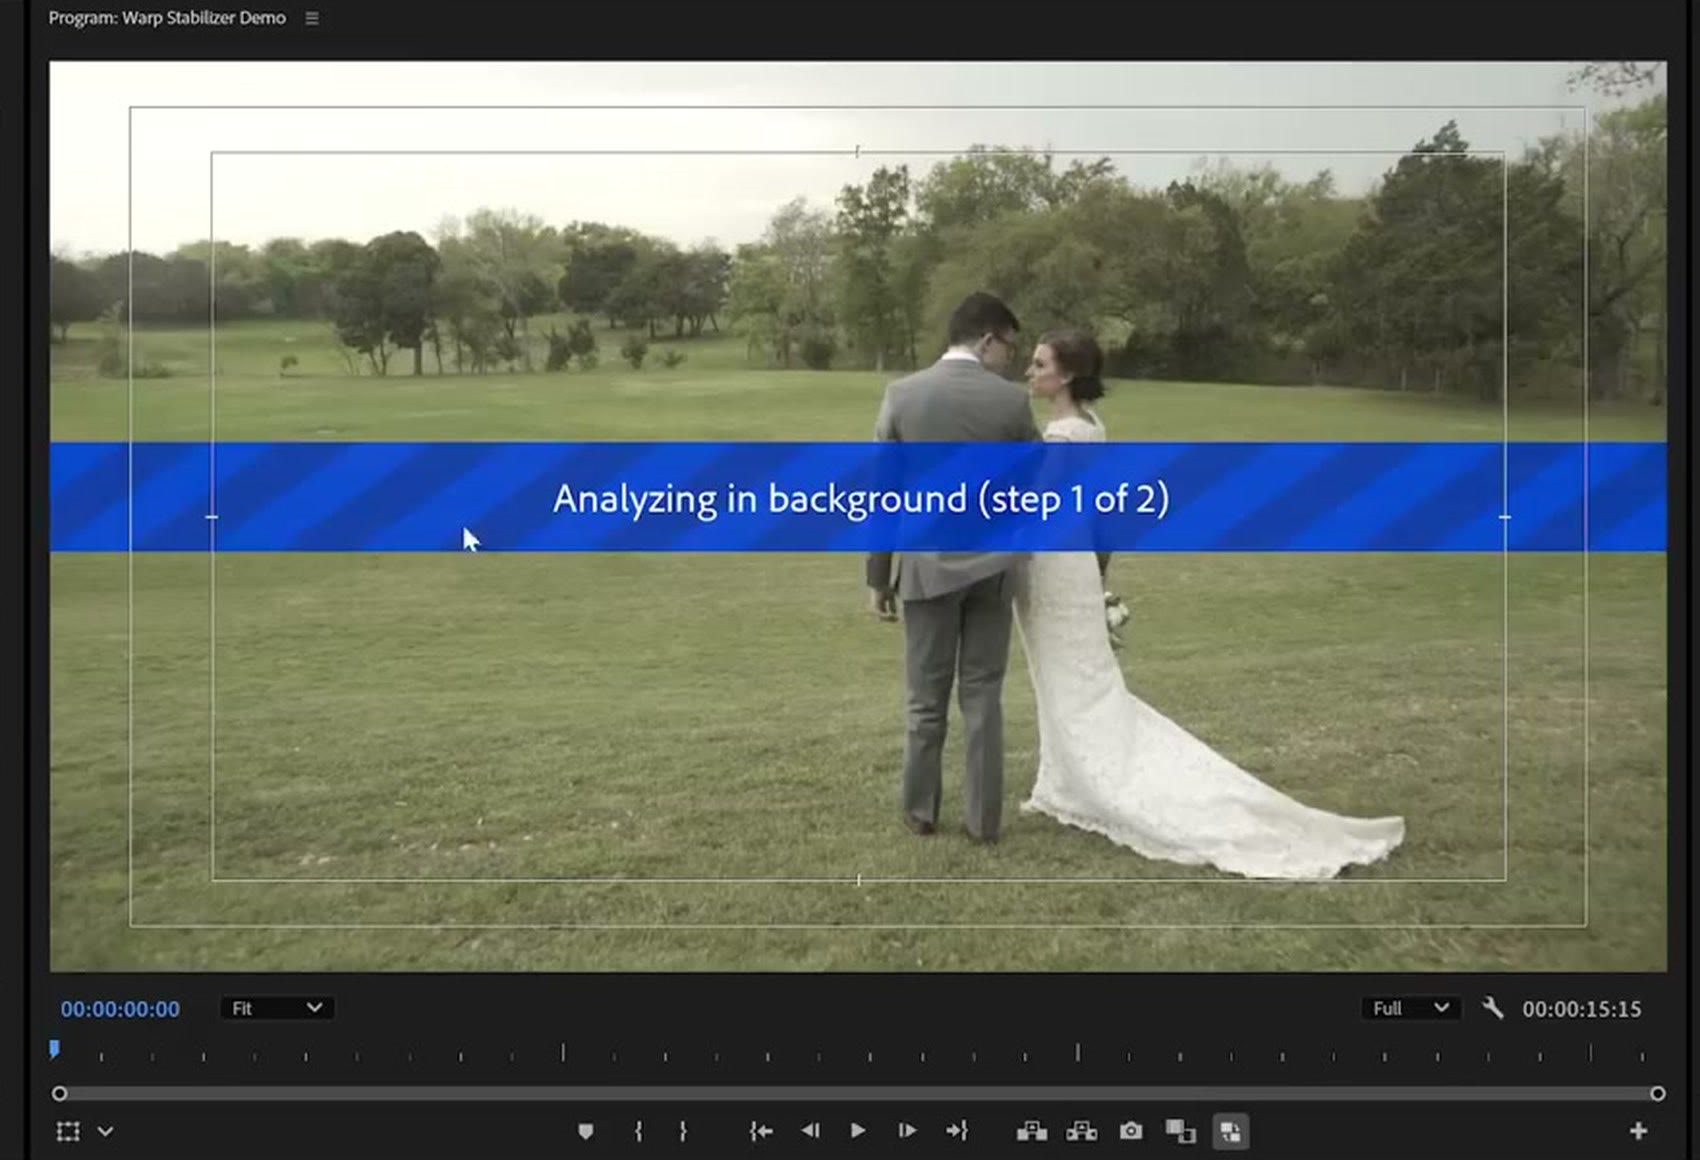
In Premiere Pro, all you do is go to your Effects panel, grab Warp Stabilizer, drag it onto the clip, and it immediately starts analyzing in the background. The whole time it’s working, you can keep editing.
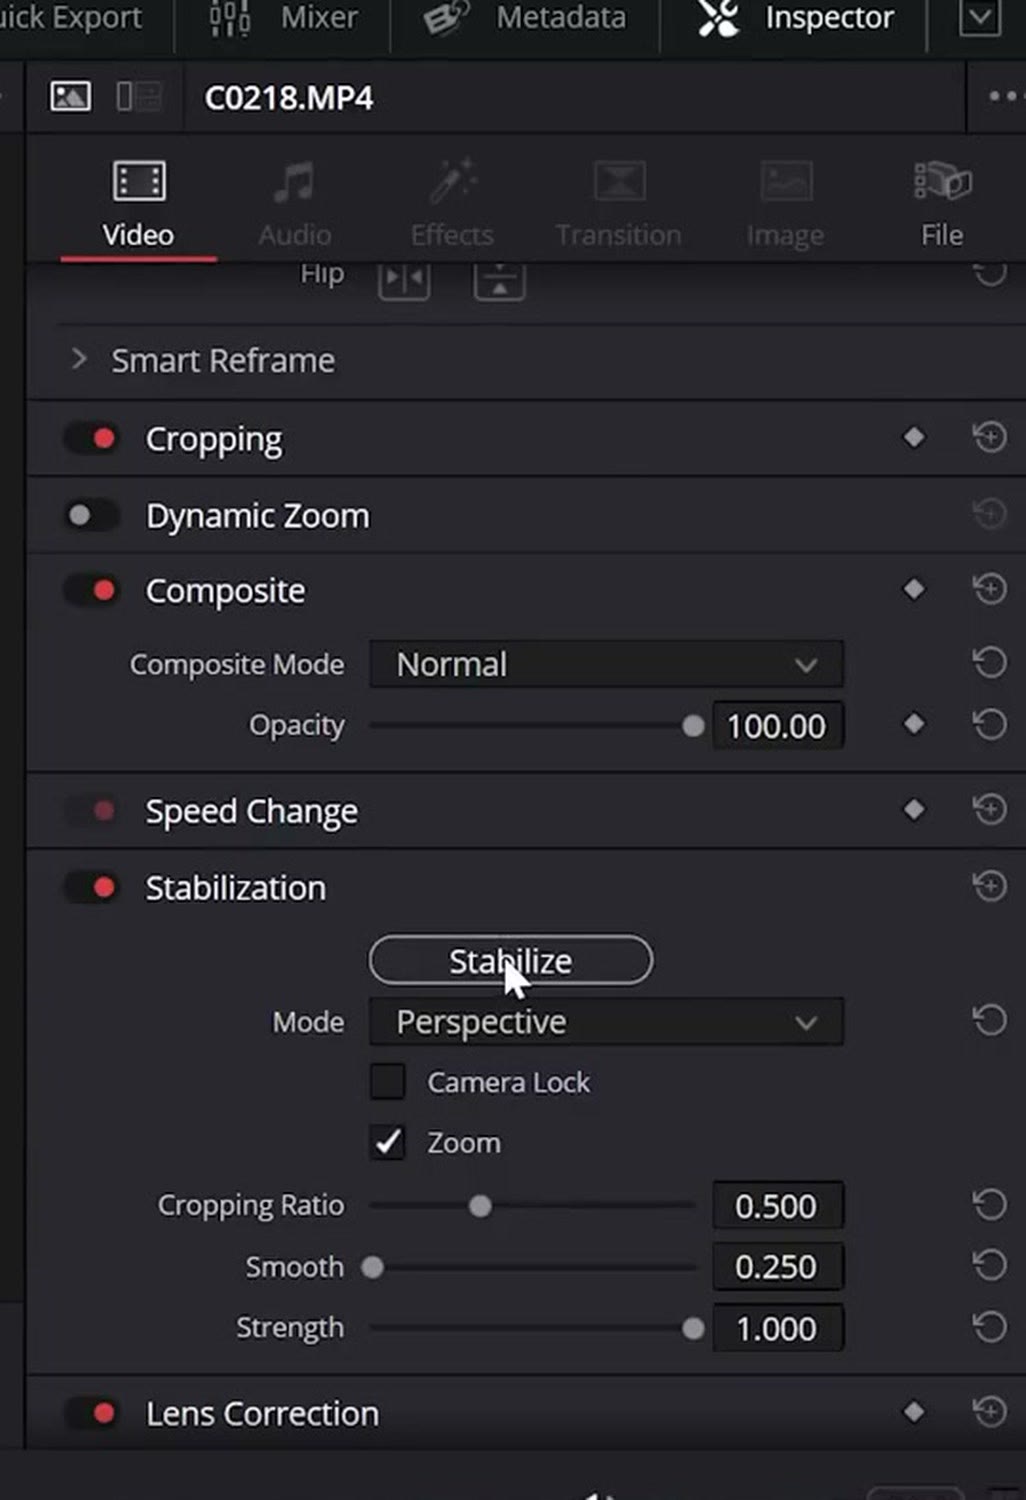
In DaVinci Resolve, you select the clip, go to the Inspector panel, down to Stabilization, and click Stabilize.
And here’s why that’s worse than Premiere: Resolve will not analyze in the background. It pops up a window that will not let you do anything until it finishes.
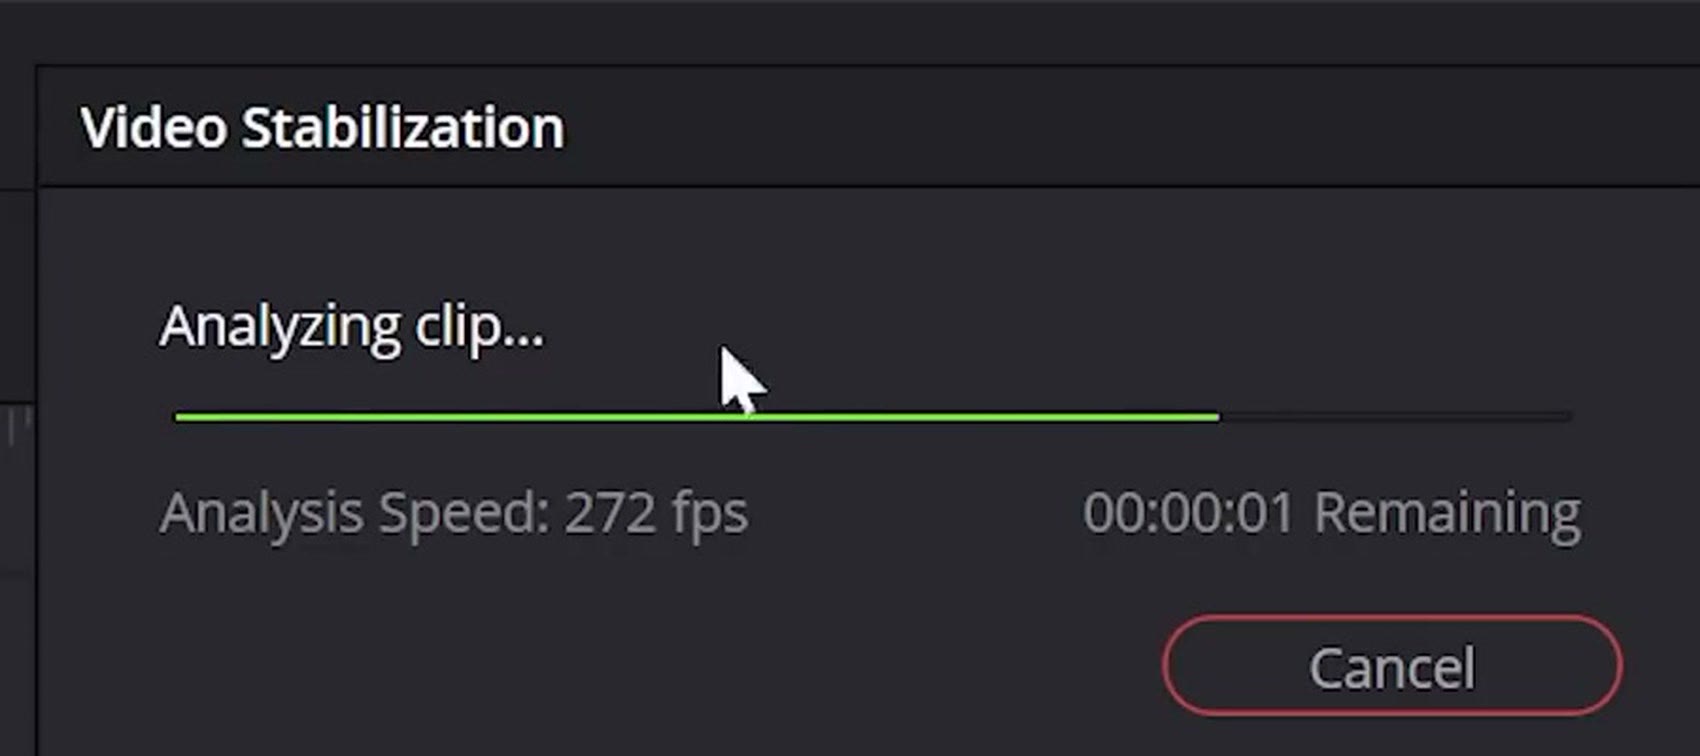
That can really put a damper on your productivity, because if you’re in the zone making a lot of edits quickly, you suddenly have to stop everything and wait. So even though it was very fast in Resolve here, because this is a short clip, I’m still giving the edge to Premiere Pro for analyzing in the background. Point: Premiere Pro.
Stabilization Speed
That said, once you’ve told either program to go analyze, this is where Resolve stops looking so shabby, because it’s capable of analyzing significantly faster than Premiere Pro. I hit reset here, hit Stabilize again, and it takes a few seconds. It’s very fast. Whereas Premiere is going to think about it for a bit longer.
Of course this all depends on the length of the clip, its resolution and the speed of your computer. But the choice really comes down to whether you’d rather have Resolve analyze faster while blocking you from doing anything else, or Premiere take longer while letting you keep working. Point: DaVinci Resolve.
Warp Stabilizer Warning
Before we leave the subject of analysis, there’s one big difference here that has the potential to get you into real trouble with a client, so pay attention.
Whenever you apply Warp Stabilizer to a clip it should automatically start analyzing. But occasionally Premiere will stop the analysis, and instead you get this big banner across your footage that says “Click Analyze to begin.” And by default, that banner is going to be visible whenever you export your video.
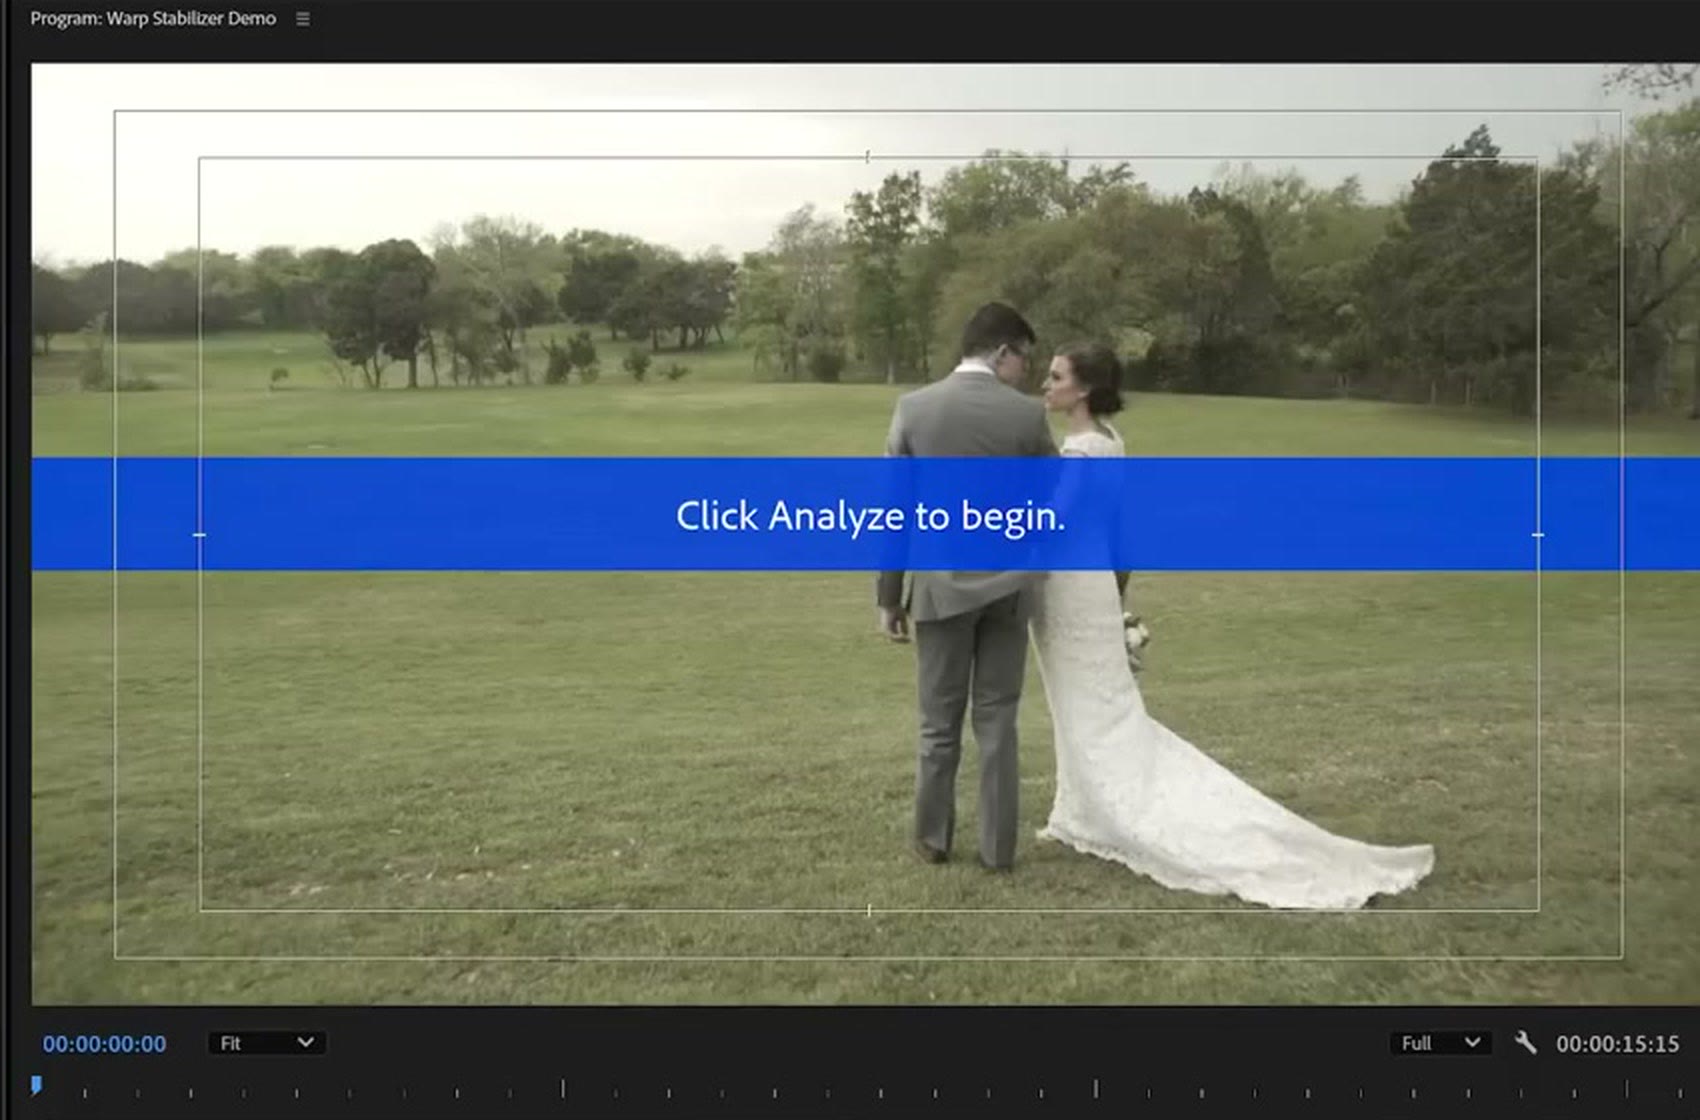
Thankfully Adobe has since added the ability for Premiere Pro to warn you if you’ve got Warp Stabilizer applied to clips that haven’t been analyzed, so you can go back and click the button. But back when Warp Stabilizer was first introduced you had to go through every single clip manually and check. Otherwise you could send a video off to a client and get a very confused email back asking why there’s a blue banner telling them the footage needs to be analyzed. You could also ask me how I know that, because I have done exactly that to a client.
Or if you want a more terrifying visualization, I’ve seen an Instagram reel of a video billboard in Times Square with this exact banner still on it. That’s terrifying. And I’m very glad Resolve does not put a banner like that on unanalyzed clips. So I think Adobe is trying to be helpful here, but I still have to give this one to Resolve. Point: DaVinci Resolve.
How Each Effect Works Out Of The Box
None of the analysis stuff would matter if either of these tools sucked and didn’t give you stable footage. Thankfully both of them have the potential to give you great stabilization. But because we’re specifically talking about how they work the second you apply them, I have to give this one to Resolve, because in my experience if you apply the Resolve stabilizer to any clip there’s a very good chance it’s going to look smooth and stable with no artifacts and no major issues.
Premiere, on the other hand, sets Warp Stabilizer’s Smoothness, which is also its stabilization strength, to 50% by default, and in my experience that is a very high level of stabilization. Because of that, Warp Stabilizer can be a bit overzealous, let’s say, and it will try to over stabilize your clip, which gets you the dreaded jello effect. If you’ve used Warp Stabilizer for any length of time you know exactly what I mean: your footage gets wiggly and warped and looks like a bowl of jello, because Warp Stabilizer is attempting to remove every single bit of camera shake and it just ends up looking weird.
With Resolve you don’t really get that. At the end of my clip it still shakes, but you can tell it was intentional camera shake, and it doesn’t have that jello look nearly as much.
Thankfully, I have good news. I’ve created a set of free Warp Stabilizer presets that dial back the intensity of the tool and get you a much more natural, better looking result in one click. If you use Premiere Pro, you need these. I use them in almost every video I edit. But as far as out of the box quality goes, this round goes to Resolve. Point: DaVinci Resolve.
Editing in something else? I covered DaVinci Resolve Stabilizer EXPLAINED – Fix Shaky Video FAST too.
Customizing Each Effect
Both of these give you a lot of tools for fine tuning. We’ve already talked about lowering Warp Stabilizer’s intensity, which is what my presets do, but there’s plenty more. Premiere has a Detailed Analysis checkbox under Advanced that analyzes your clip more carefully and stabilizes it better, sliders to control framing, extra scaling and cropping, and even a feature that helps remove rolling shutter you might get from certain cameras.
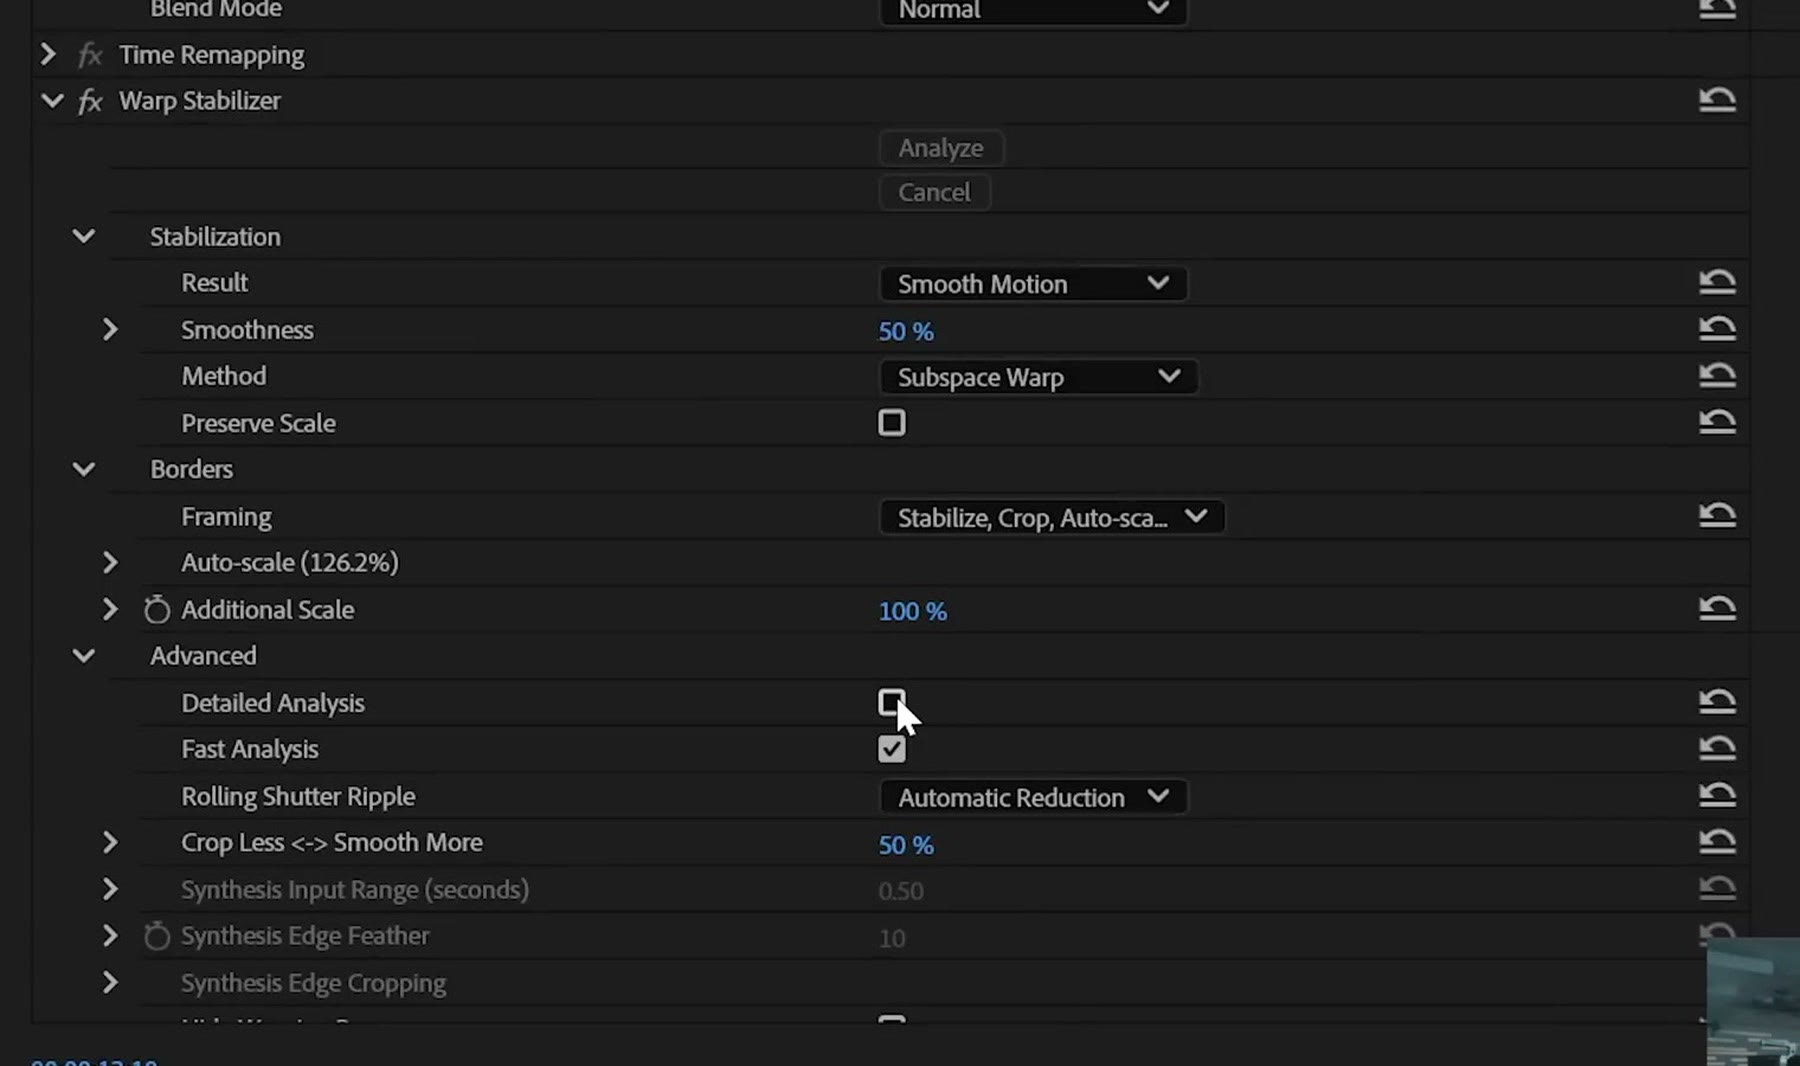
Resolve includes similar tools which, although they have different names, essentially do the same jobs, with the one gap being a dedicated rolling shutter tool. Because of that I’ll give the slight edge to Premiere Pro here, though there really are a lot of similar settings on both sides.
And if you want to learn more about the Resolve tools specifically, because in my opinion they’re a little more complex and not quite as easy to understand out of the box, I have a free cheat sheet of the best DaVinci Resolve stabilizer settings you can download. Point: Premiere Pro.
One Invisible Warp Stabilizer Issue
There’s one more significant difference here that you probably aren’t aware of, because it isn’t visible in any of these settings and you won’t run into it whenever you first start using these effects.
Whenever you edit in Premiere Pro and add an effect like Warp Stabilizer, all of that stabilization data gets saved into your .prproj project file.
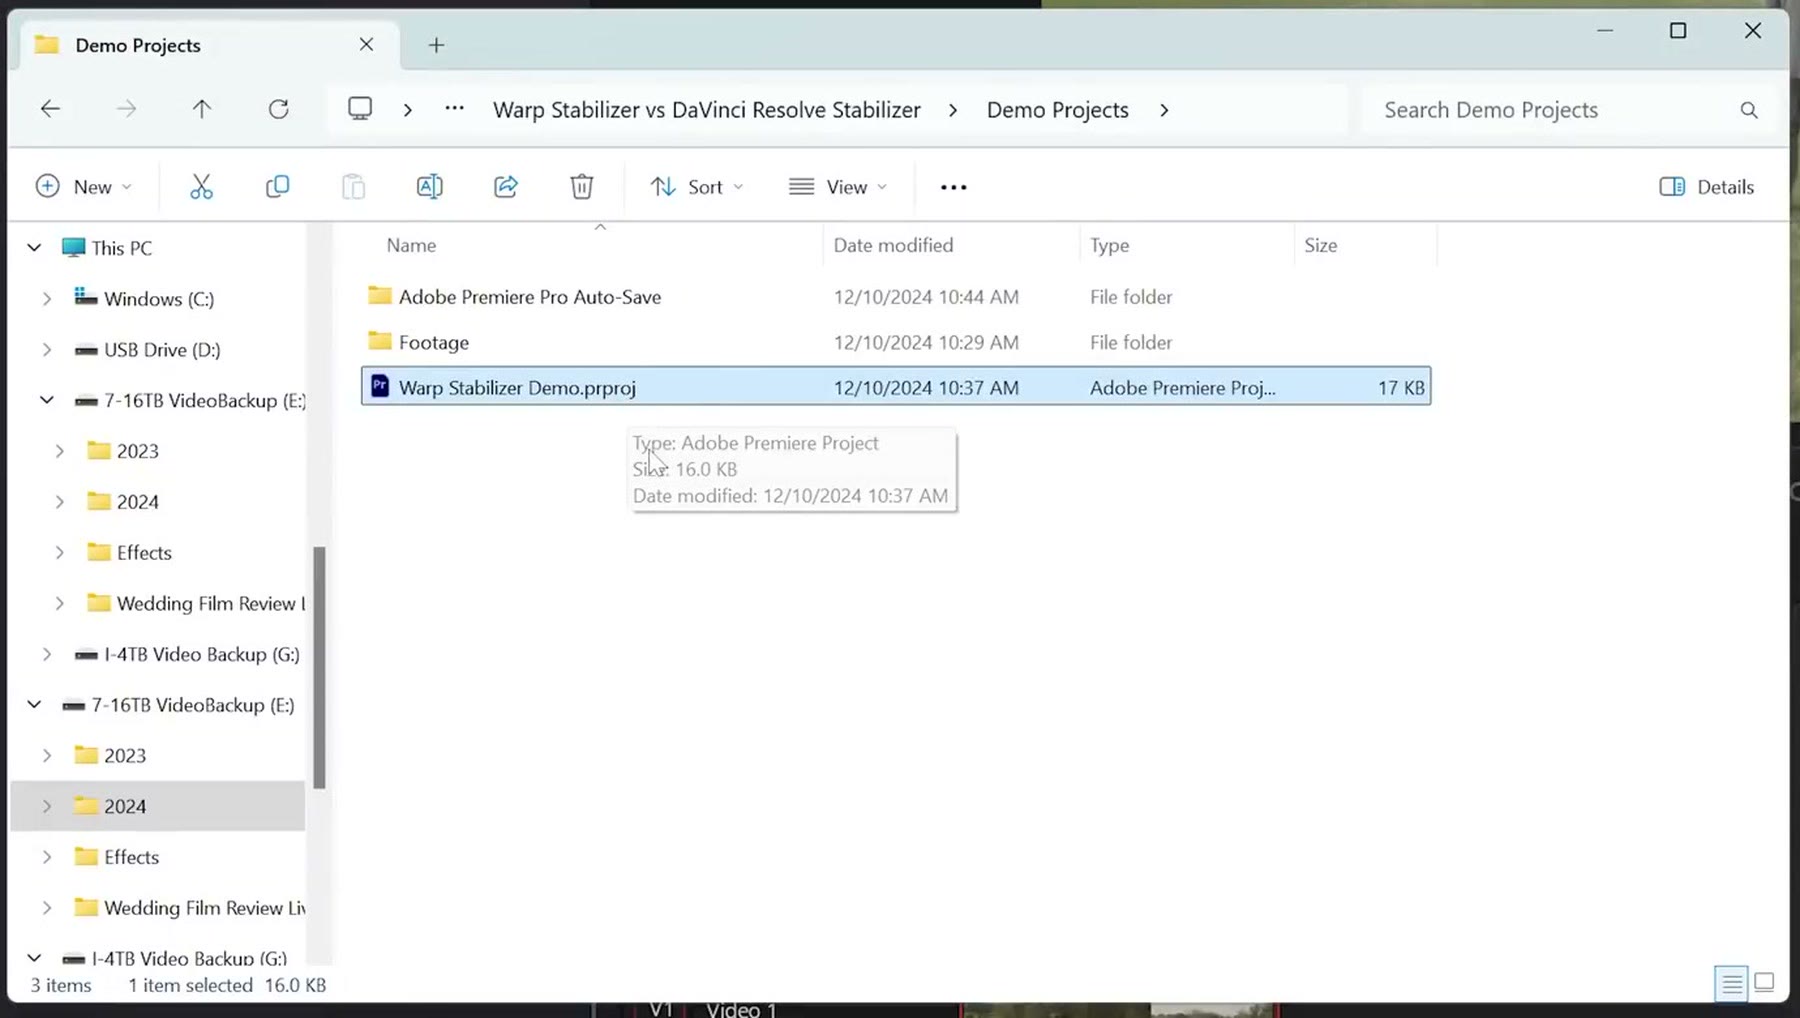
Resolve, on the other hand, uses a database system, and saves all of your edits and effects and stabilization into that database instead. The reason this matters is that every clip you add Warp Stabilizer to makes your Premiere project file bigger and bigger, and it can balloon up to 50MB or 100MB if you’ve stabilized a lot of clips. I realize 50MB doesn’t sound very large. But whenever it comes time for Premiere to save that project, it can take quite a while. On a large project we’re talking 30 seconds, or even one or two minutes, which really slows down your editing, especially if you’re saving often, which you should definitely be doing.
With Resolve I’ve never experienced any slowdown, even after adding the stabilizer to a lot of clips, and I believe that’s down to the database. So in the database versus project file category, which you did not know was going to be a category, but it is, the win goes to Resolve. Point: DaVinci Resolve.
Which Stabilizer Is Best?
If I had to crown a winner, it’s going to be DaVinci Resolve, by the smallest of margins, because its stabilization usually just looks great by default the moment you apply it.
But let’s be honest, you are not going to switch editing software over a stabilization effect. Both of these programs have great stabilization. Yes, Premiere takes a bit of tweaking to get Warp Stabilizer right, which is exactly why I made those free presets for you. And on the other hand, Resolve throws up a pop up that won’t let you do anything else until your clip is analyzed. Both effects have their strengths and their weaknesses.
Like I said at the start, tell me if I’m right or wrong in the comments. I’d love to hear your experience of working with both of these, and I really want to know which one you think is superior. I’d also love to know what other effects and features you want me to compare between these two programs head to head. Thanks so much for reading and have a great day!