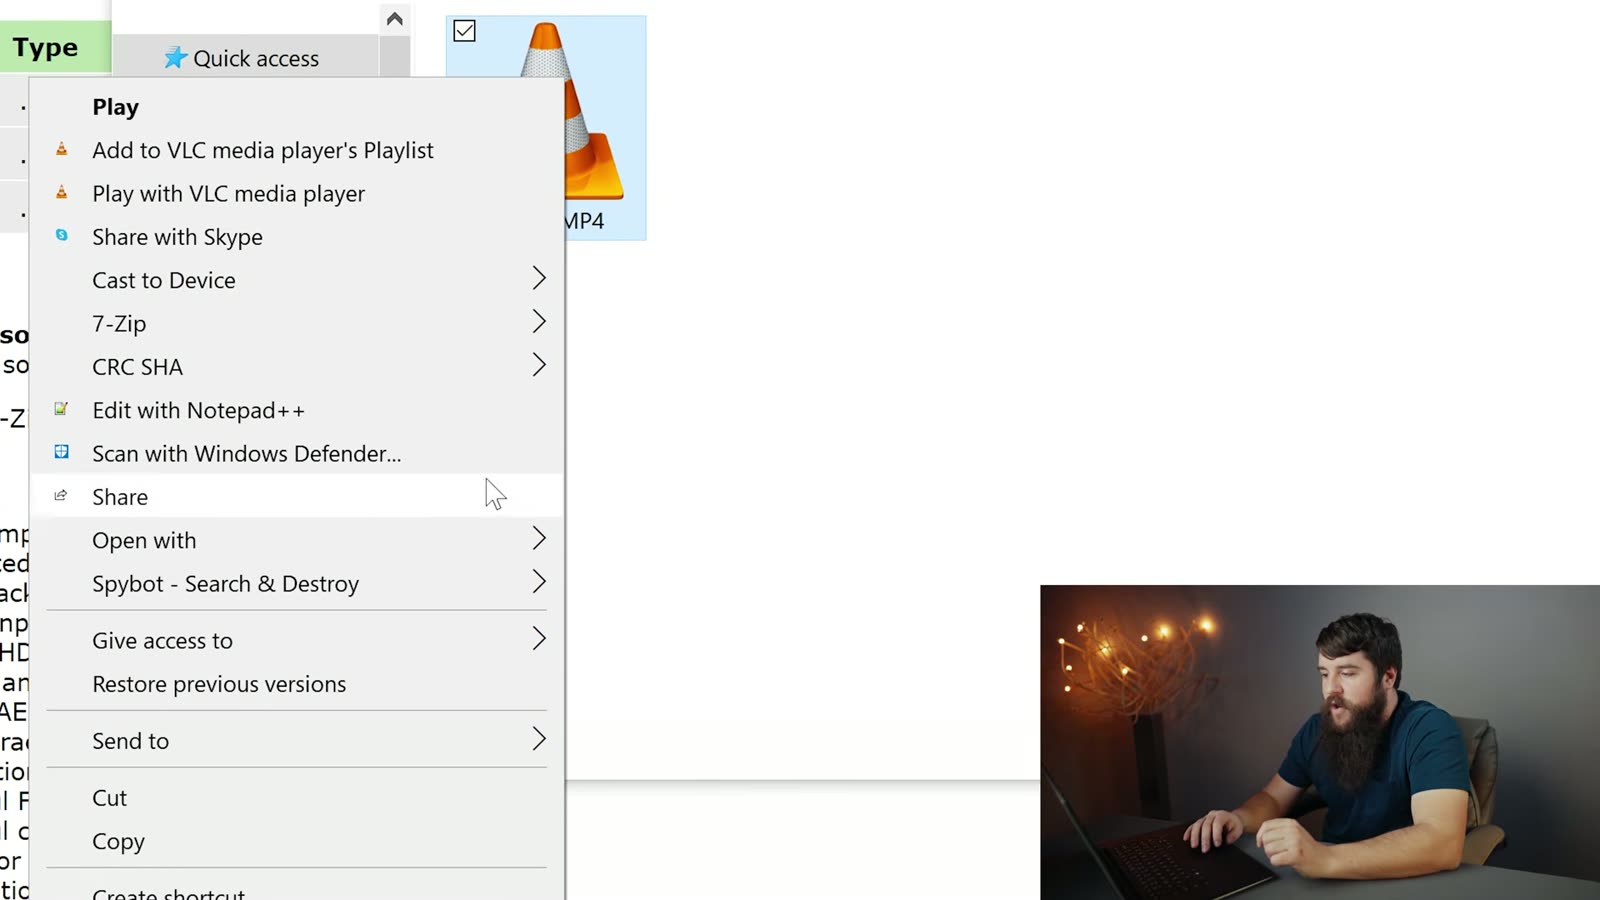
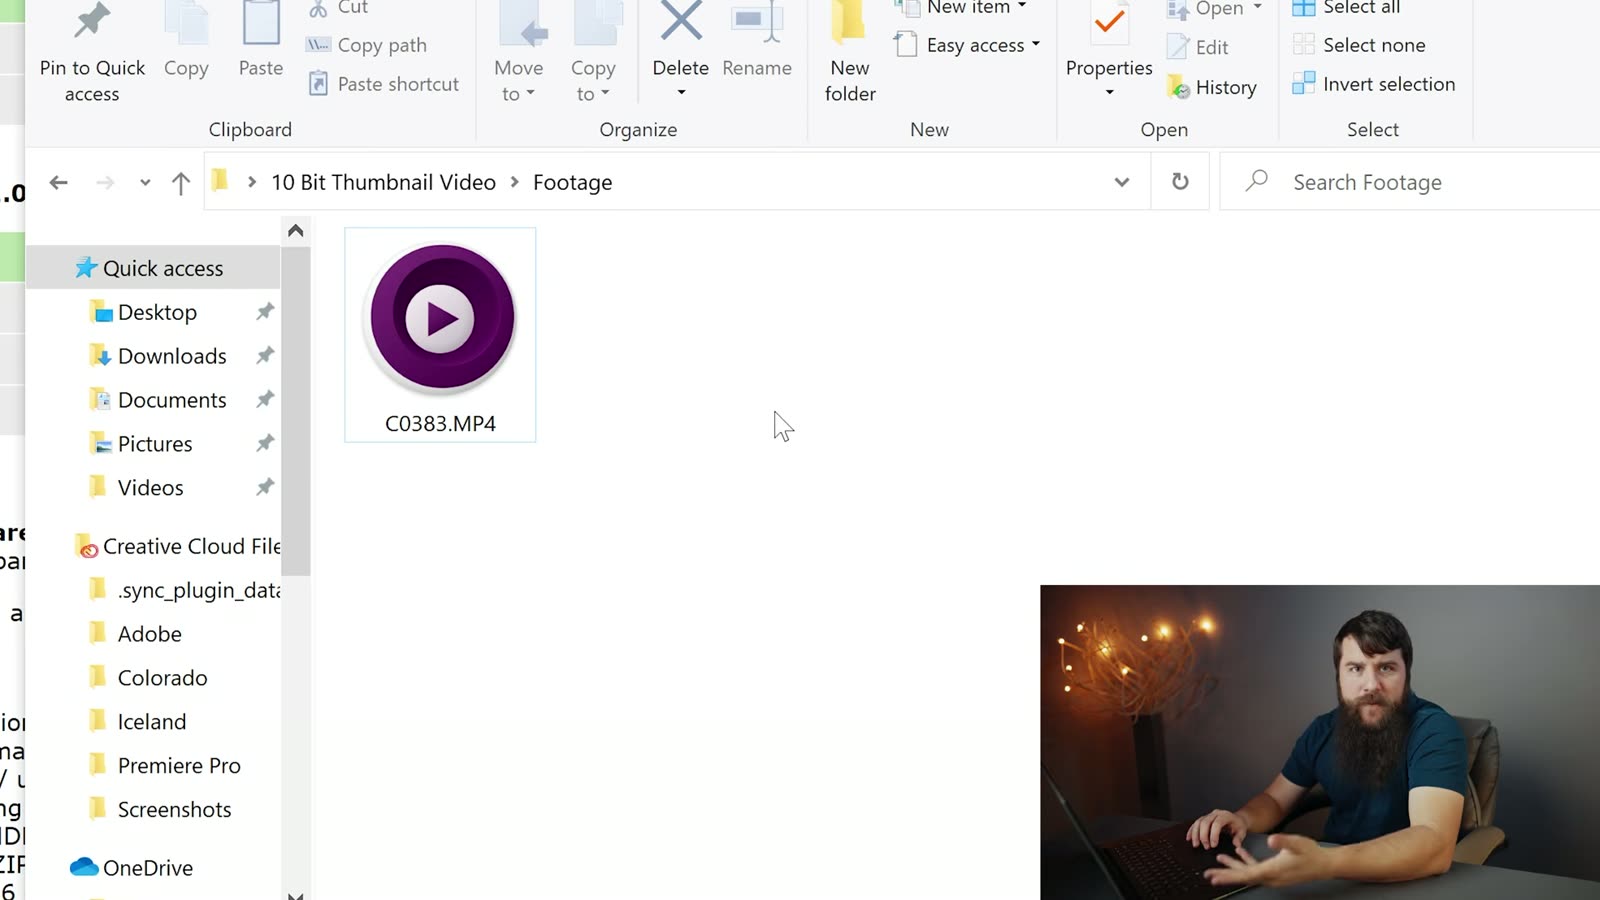
I’ve always loved being able to see thumbnail previews of my video clips in Windows, because whenever you’re digging through a wedding day’s worth of footage looking for one specific shot, being able to see your clips instead of reading file names is the difference between finding it in ten seconds and finding it in ten minutes. But then I upgraded to a 10-bit camera and all those previews disappeared, and every single clip turned into a VLC traffic cone. Bummer!
Here’s how to get your thumbnails back, for free, in about three minutes.
Quick note before we start. The video above is from 2021 and Icaros has moved house since then, so the download link in the video points at an older version. Everything below is updated for where it actually lives today, and the setup steps inside the program are still exactly the same.
Why did your thumbnails disappear?
Windows generates those little preview images itself, and it only knows how to do it for formats it understands. Whenever your camera started recording 10-bit, Windows stopped recognizing the files, so it quietly gave up and handed the job to whatever media player you had installed, which is why you’re staring at a folder full of traffic cones instead of your footage.
The fix is a free tool called Icaros, which does the thumbnail work Windows won’t do. It’s been actively maintained for years, it’s open source, and it runs on Windows 11 as well as 10.
You can also still get it from VideoHelp, which is the link I used in the video, and that page is still kept current. Either one gets you the same program, so use whichever you like.
Install it and switch it on
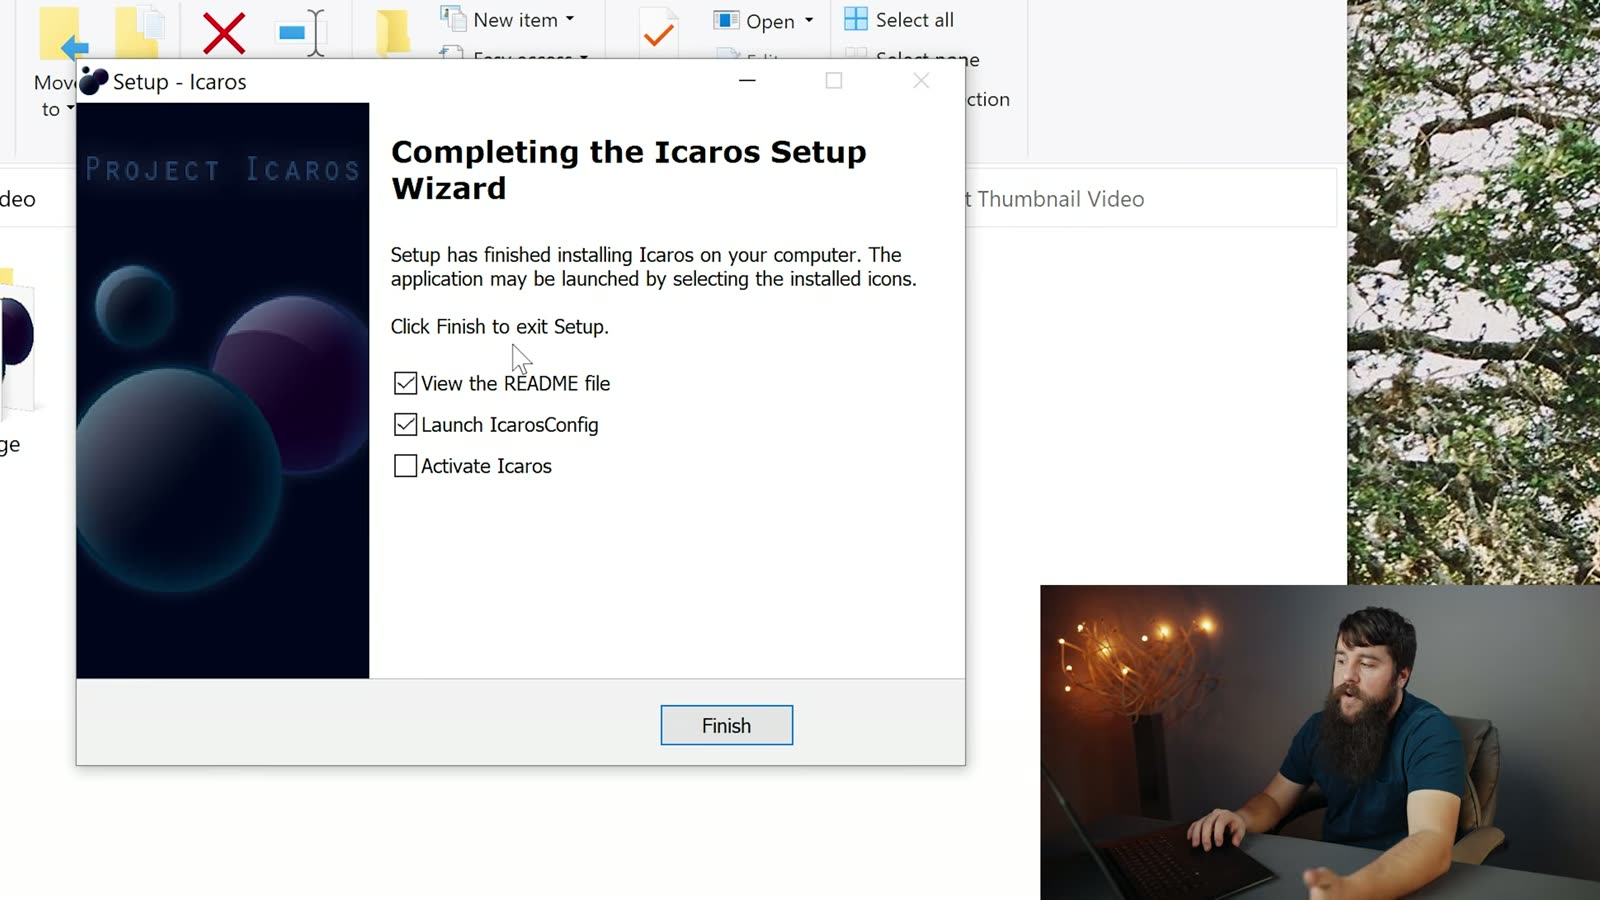
Run the installer, and at the end make sure Launch IcarosConfig is ticked before you click Finish. You don’t need the README.
Tick Launch IcarosConfig, skip the README.
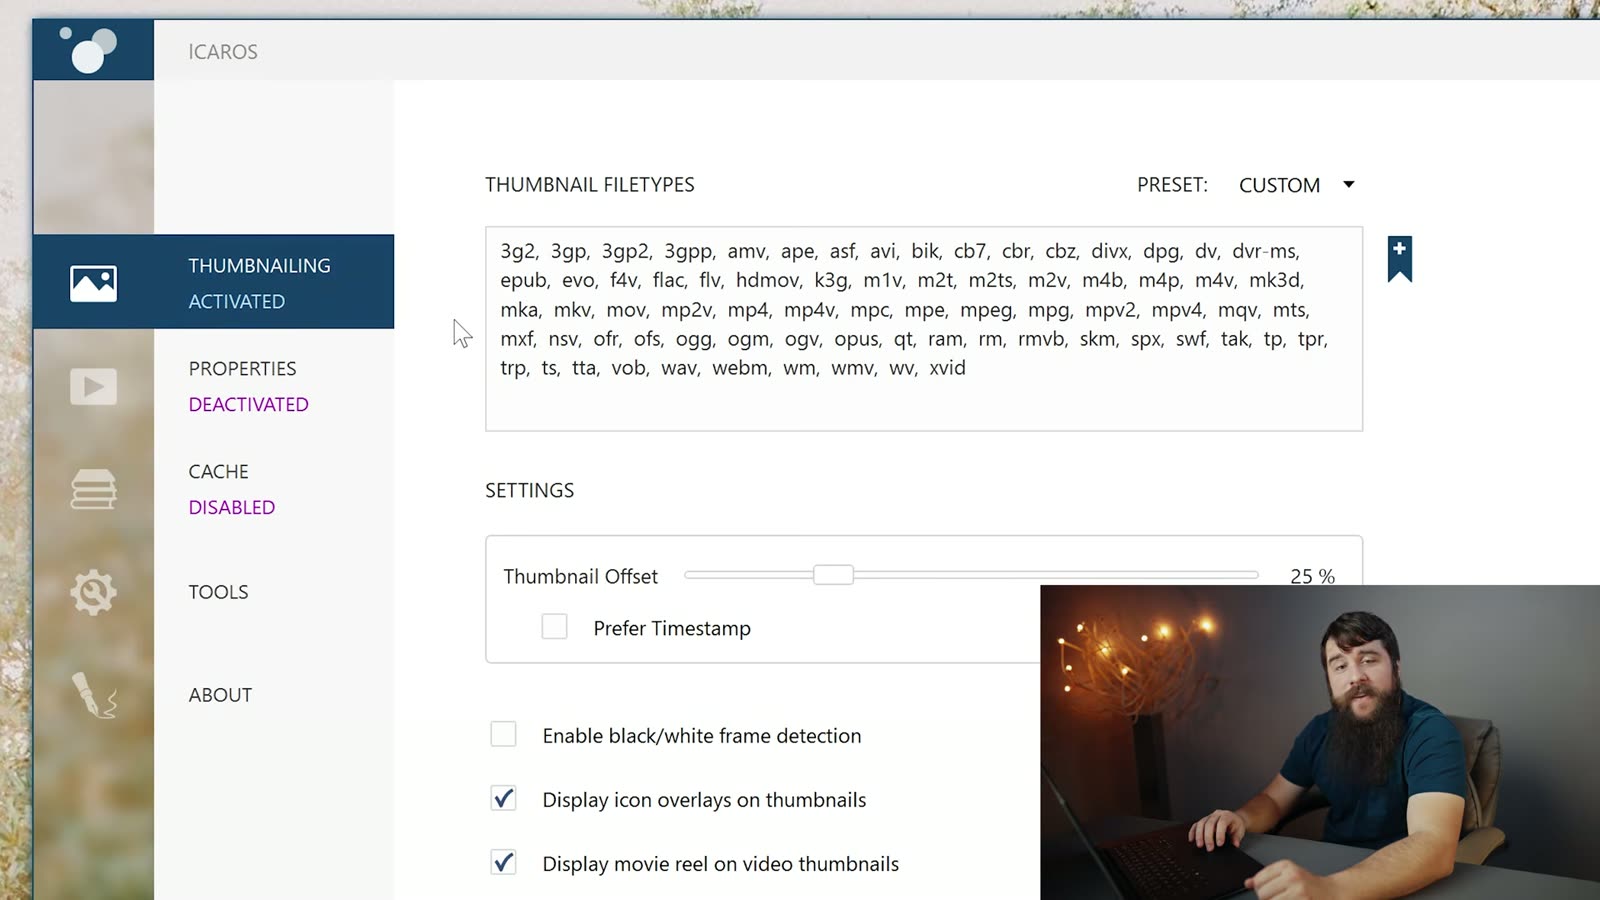
Once IcarosConfig opens, you’ll see it’s currently switched off, which is what that DEACTIVATED label is telling you. We’re gonna fix that in two clicks.
DEACTIVATED, for now.
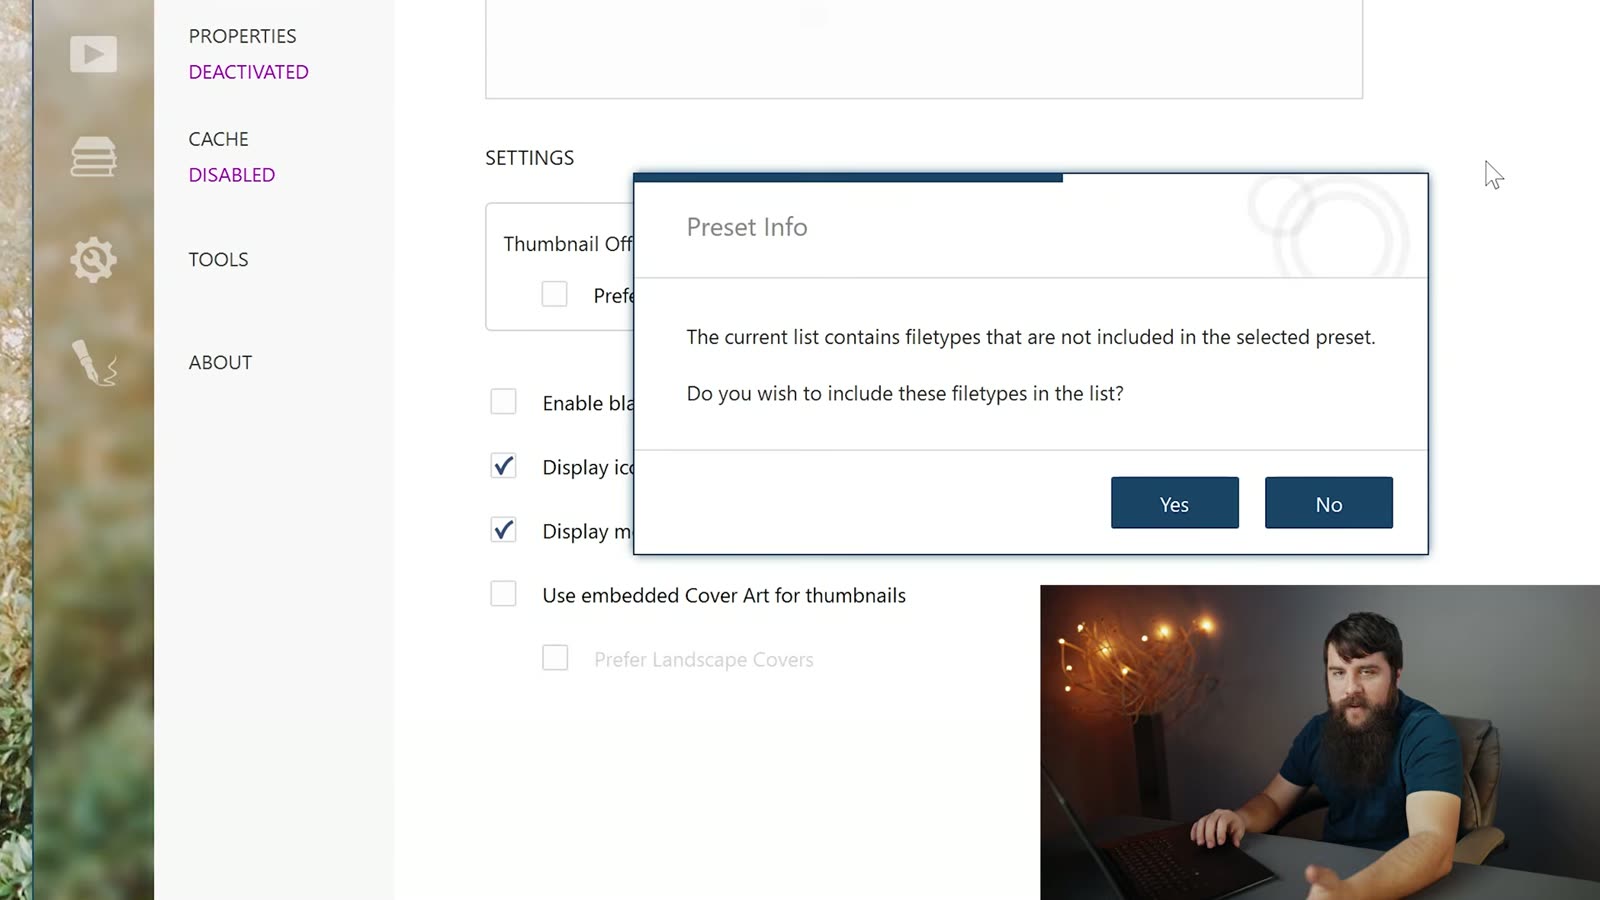
First, click the PRESET dropdown and choose Video only. You don’t need Icaros generating thumbnails for every file type on your computer, you just need it for your footage. A dialog will pop up asking whether you want to include the extra filetypes, and you can click Yes.
Click Yes here.
Then click that magenta DEACTIVATED text so it flips to ACTIVATED. That’s it. That’s the whole thing. Minimize Icaros, go back to your footage folder, and your thumbnails are there.
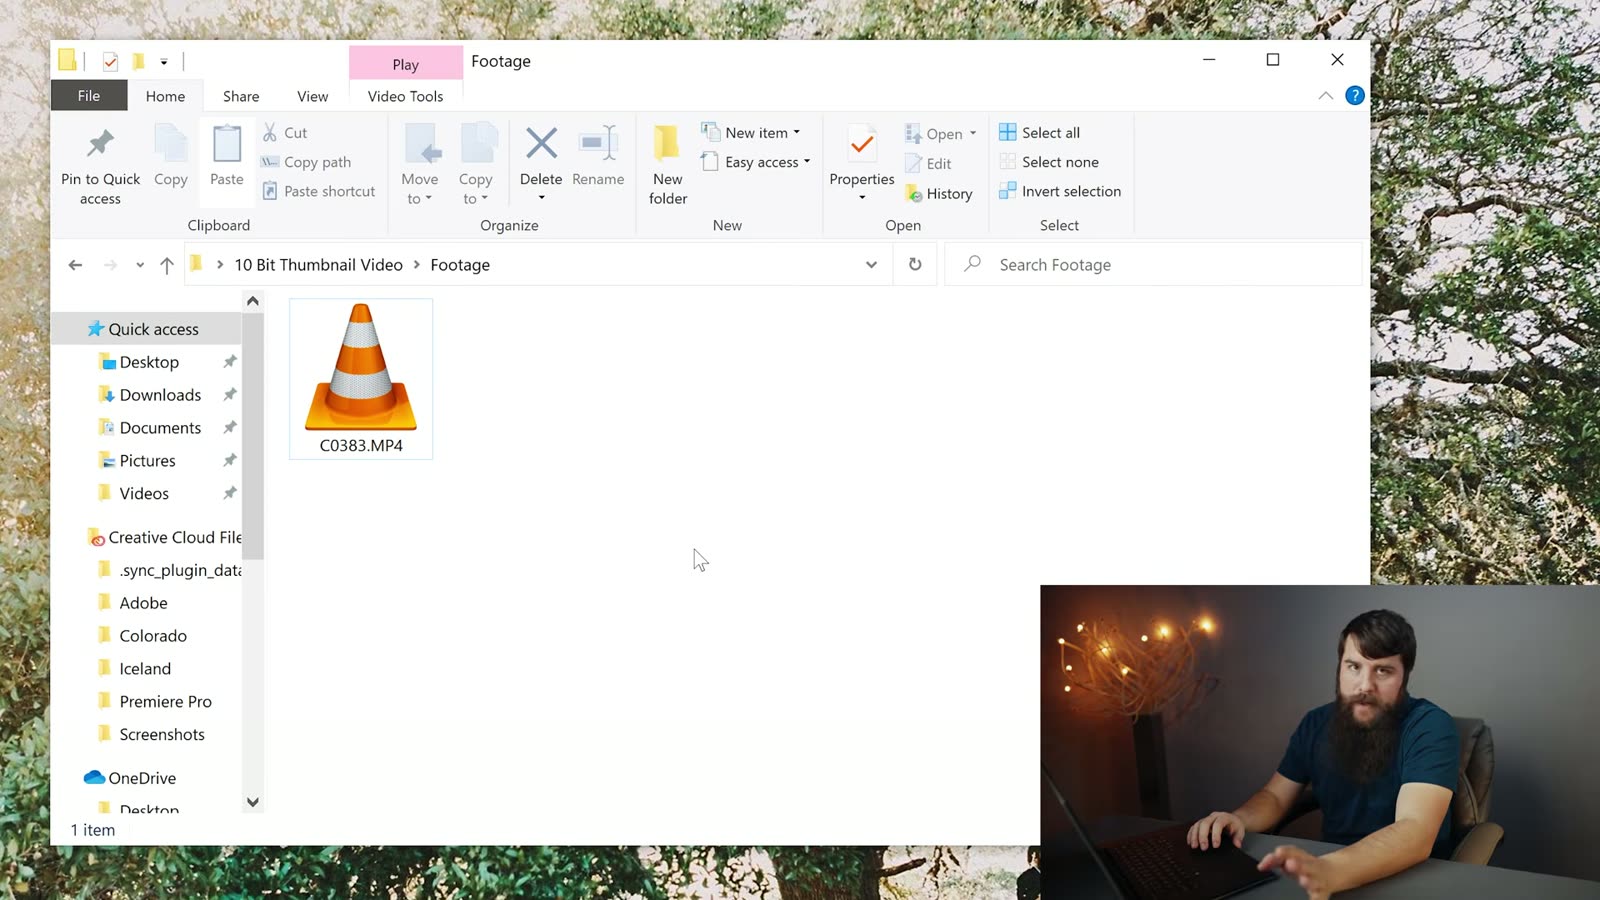
There it is. A real preview, on a 10-bit file.
Common questions
Windows says the installer might be harmful. Is Icaros safe?
A few of you have asked me this in the comments and it’s a fair question, so here’s a straight answer. That warning is Windows SmartScreen, and it shows up whenever an installer isn’t code-signed with an expensive certificate. It is not Windows telling you it found something bad in the file. Small open-source projects run into this constantly because those certificates cost real money every year, and one developer maintaining a free thumbnail tool understandably hasn’t bought one.
What I’d tell you to do is what I do: download it from the project’s own GitHub releases page rather than some random download-aggregator site, because then you know exactly who built the file you’re running. The source code is right there to look at. If you’re still not comfortable, that’s completely fine, don’t install it, and no hard feelings.
Does Icaros work on Windows 11?
It does. Windows 10 stopped getting support back in October of 2025, so most of you are on 11 now, and Icaros supports it. The IcarosConfig window looks the same and the two steps above haven’t changed.
My thumbnails still aren’t showing up. What now?
Two things to try. First, make sure the label actually reads ACTIVATED and not DEACTIVATED, because it’s easy to click the preset and think you’re done. Second, Windows caches thumbnails aggressively, so a folder you were staring at before you installed Icaros may keep showing the old cones out of pure stubbornness. Open a different folder, or restart Explorer, and they should populate.
My 10-bit footage won’t play either. Can I fix that too?
You can, and it’s a separate free program. Thumbnails and playback are two different problems in Windows, which feels like it shouldn’t be true but here we are. I wrote that one up over here: how to play 10-bit video in Windows. Do both and your footage folder finally works like it did before you upgraded your camera.
You just bought a camera that shoots 10-bit footage, you copied that footage over to your PC, and now Windows either refuses to play it at all or plays it back like a slideshow, and even VLC, which normally plays back anything you throw at it, is just sitting there stuttering. You’re not doing anything wrong! This is a Windows problem, and you can fix it in about five minutes with a completely free program.
One heads up before we start. I made the video above back in 2021, and the mpv download page has changed since then. In the video I tell you to click “stable” over on SourceForge, and that folder does not exist anymore, which is why so many of you have left comments saying you can’t find it. You’re not going crazy! The written steps below are updated for what the site actually looks like today, so follow these and you’ll be fine.
Hey, my name is Matt Johnson, I’ve been filming weddings for over 15 years, and I’m here to help you become a better filmmaker and video editor.
Why won’t Windows play 10-bit video?
Whenever your camera records in 10-bit, it’s storing a lot more color information than the 8-bit footage Windows has been handling comfortably for years, and Windows doesn’t ship with everything it needs to decode that on its own. So you get one of two things: a file that won’t open, or playback so choppy that you assume the file is corrupted. It isn’t corrupted! Windows just doesn’t know what to do with it.
A whole folder of footage and not one preview. Just traffic cones.
The fix is a free media player called mpv. I’ve traditionally loved VLC, and I still use it for plenty of things, but for 4K 10-bit files it just does not hold up, and mpv handles them without breaking a sweat.
How do you download mpv now that the page has changed?
Here’s the deal: mpv doesn’t build its own Windows version, so the site sends you off to a third party who does, and that’s the part that moved. It used to live on SourceForge with a folder called “stable” and now it lives on GitHub with no such folder, which is why the old instructions dead-end.
Go to mpv.io/installation. Under the Windows heading, the very first row says “Windows builds by shinchiro (git)”, and the link next to it goes to github.com/shinchiro/mpv-winbuild-cmake/releases. That’s your destination. There’s a second row for builds by zhongfly, and that works too, so if one of them is ever down you have a backup.
Which file do you actually download?
This is the part that trips everybody up, because that GitHub page throws about eight files at you with names like mpv-x86_64-20260809-git-dd5d17d328.7z and none of them say “stable” or “download this one.” Those numbers aren’t random though, and once you know what they mean it’s easy.
Take the newest release at the top of the page, open the Assets list, and grab the file that starts with mpv-x86_64- followed by a date. That’s the normal 64-bit Windows build, and it’s the one almost everybody wants.
Skip the rest, and here’s what they are so you’re not guessing:
Anything with dev in the name is for programmers building software against mpv. It’s not the player. You don’t want it.
i686 is the 32-bit build, and unless you’re on a very old PC, that’s not you.
aarch64 is for ARM processors, like a Surface Pro X. Not a normal desktop or laptop.
x86_64-v3 is the same player tuned for newer processors. It’ll usually work fine, but plain x86_64 is the safe pick and you won’t notice a difference playing back footage.
Unzip it with 7-Zip
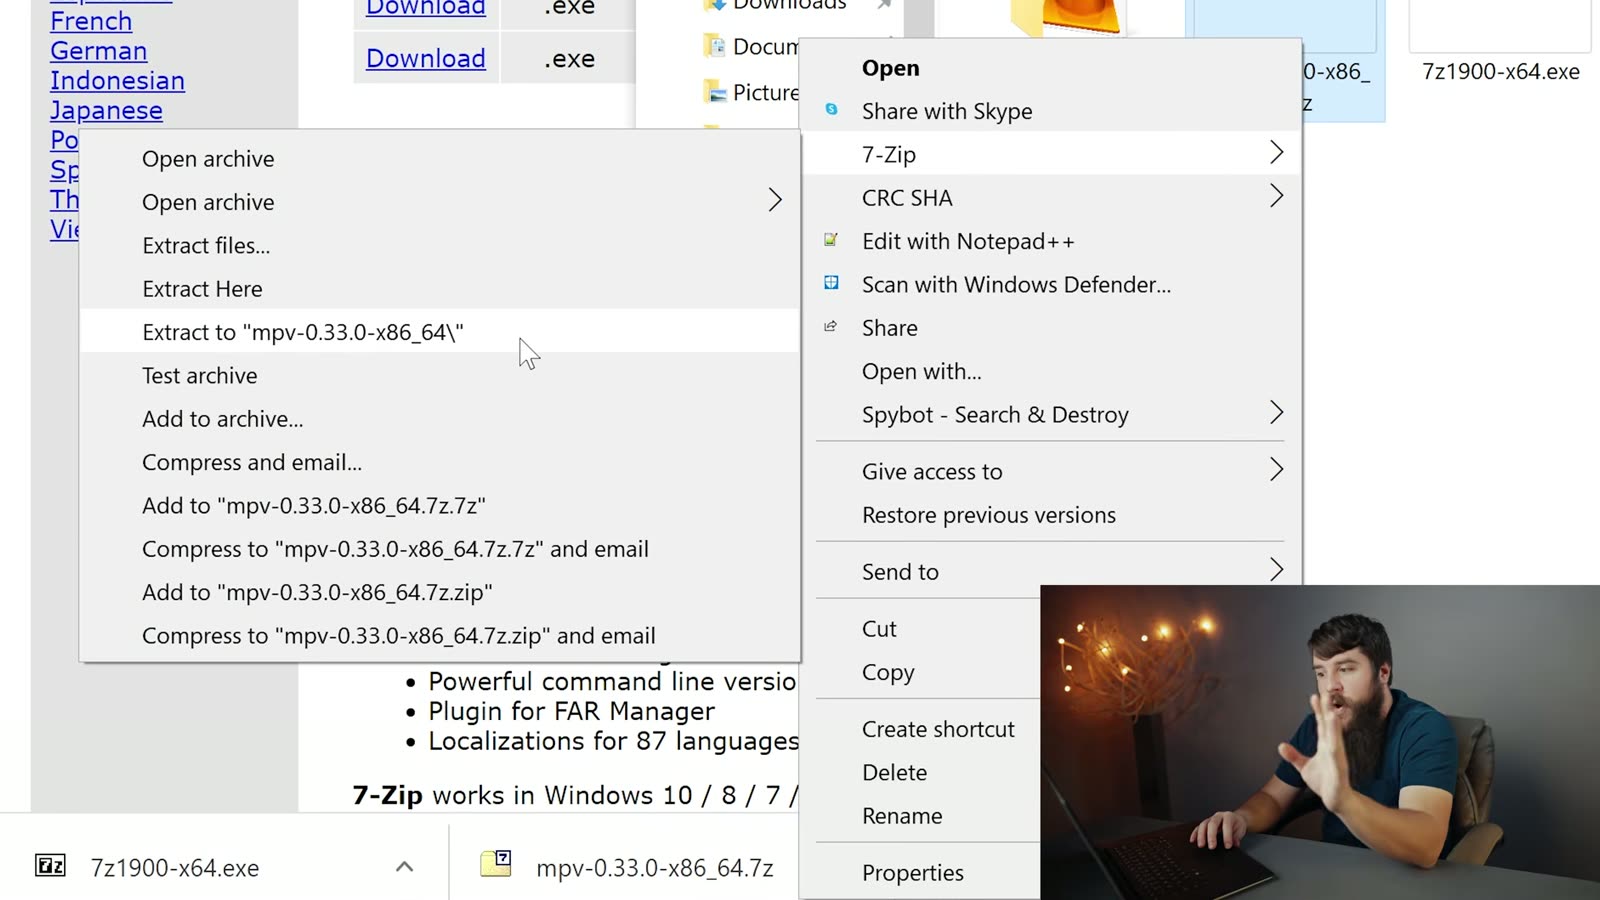
That download is a .7z file, which Windows can’t open by itself, so you’ll need 7-Zip. It’s free, it takes ten seconds to install, and honestly it’s worth having on your machine anyway. On the homepage, click the download link next to the 64-bit version.
Grab the 64-bit version unless you know you need otherwise.
Once 7-Zip is installed, right click the .7z file you downloaded, go to the 7-Zip menu, and click Extract to “mpv-…”. That drops everything into its own folder.
Open that folder and you’ll find mpv.exe sitting inside. There’s no installer here and nothing else to run, that file is the program. Remember where it lives, because we’re gonna come back to it in a second. I’d honestly move the whole folder somewhere sensible like your Documents rather than leaving it in Downloads, because whenever you clean out your Downloads folder in six months you’ll break your video playback and have no idea why.
Tell Windows to open your footage with mpv
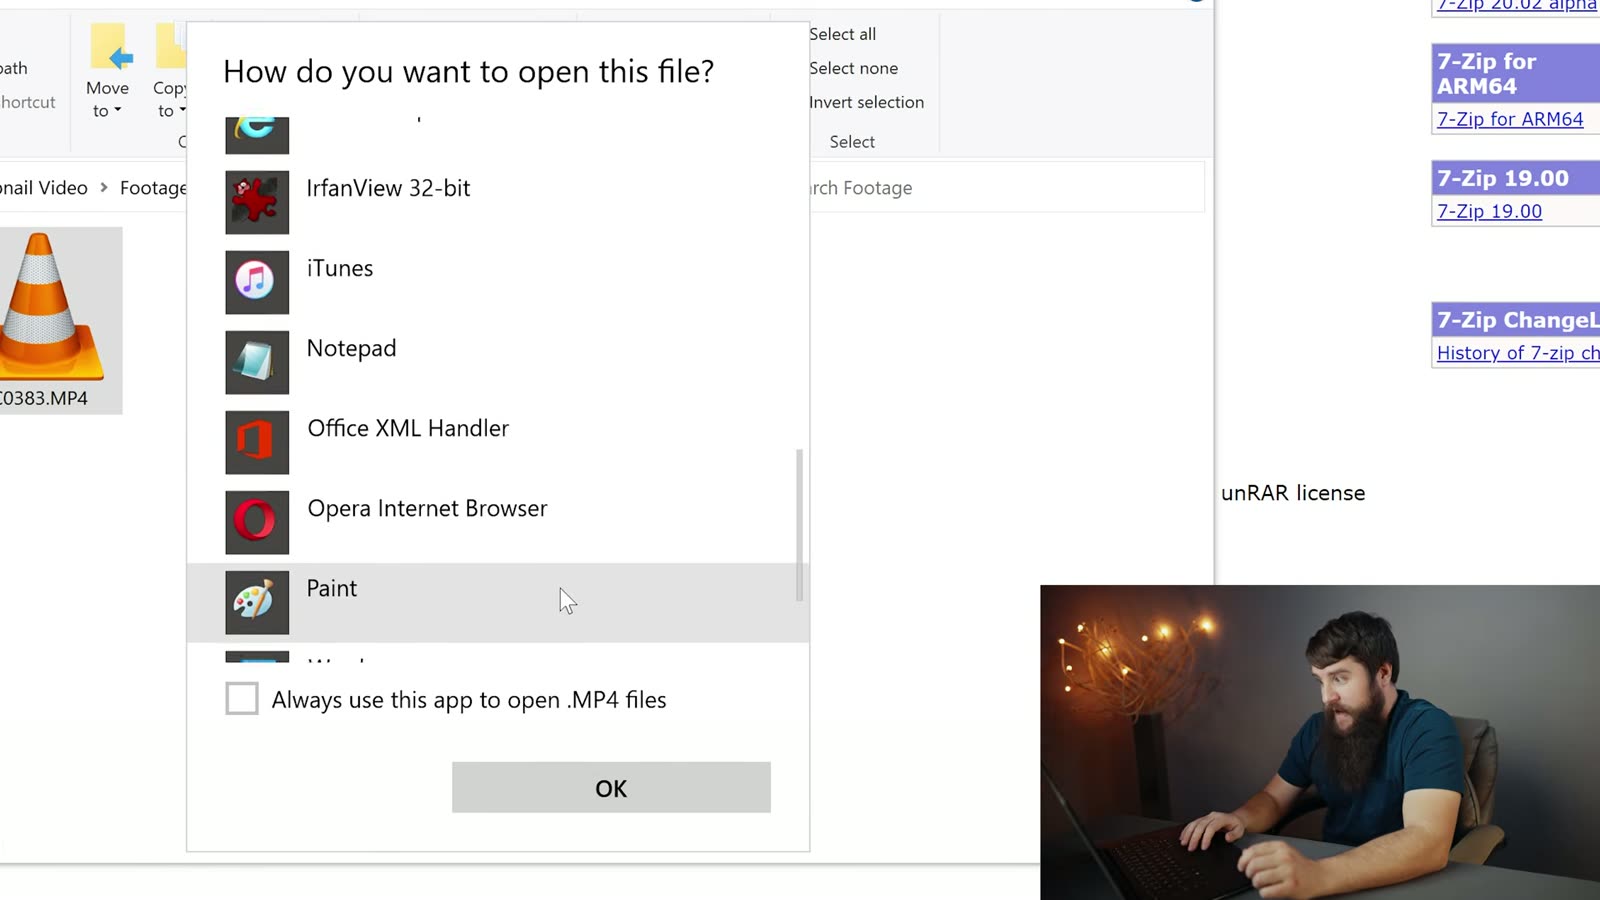
Now navigate to some 10-bit footage that you can’t normally play. Right click the video file, go to Open with, then Choose another app. Scroll to the bottom of the box that opens, click More apps, scroll down again, and click Look for another app on this PC. Then browse to that mpv.exe file, select it, and click Open.
Point Windows straight at mpv.exe inside the folder you extracted.
Ta-da, your footage plays. Smoothly!
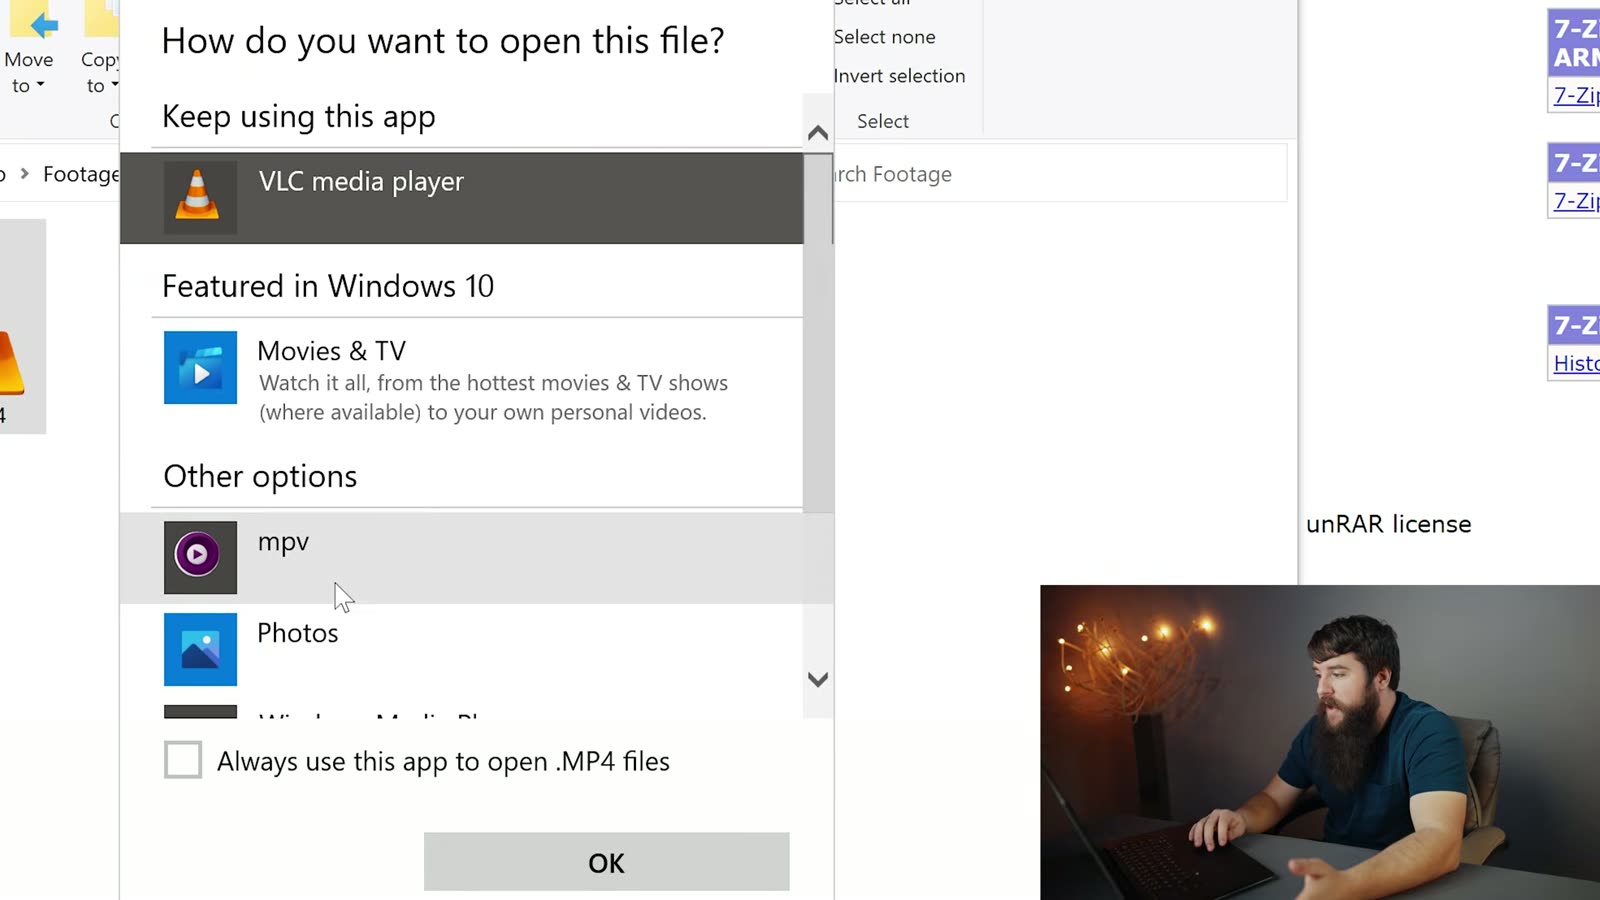
One last step, because right now you’ve only told Windows to open that one file that one time. Right click your video file again, go to Open with, Choose another app (this’ll feel familiar), and this time mpv is right there in the list. Click it, tick Always use this app to open .MP4 files, and click OK.
Tick the box or you’ll be doing this dance for every single clip.The purple mpv icon means Windows got the message.
Does this work on Windows 11?
Yes. The video was filmed on Windows 10 back when that’s what everybody was running, and Windows 10 stopped getting support in October of 2025, so most of you reading this are on 11 now. mpv runs on Windows 11 exactly the same way, and the steps above are identical. The Open with menu looks a little different on 11 and you may need to click Show more options first to get to the full right-click menu, but everything else is where you’d expect it.
Common questions
I can’t find “stable” anywhere. Where did it go?
It’s gone, and it’s not coming back. The builds moved from SourceForge to GitHub, and GitHub doesn’t use folders like that, it just lists releases newest-first with the files attached underneath. Take the top release and grab the mpv-x86_64- file. That’s the modern equivalent of what “stable” used to give you.
Will this fix playback in Premiere or Resolve too?
Nope, and I don’t want you to be disappointed later, so I’ll say it plainly. mpv fixes playback in Windows, for previewing and sorting your footage. Your editing program does its own decoding and doesn’t care what media player you installed. If your 10-bit footage is choppy on the timeline, that’s a proxy workflow conversation, not this one.
My files still have no thumbnails. Didn’t this fix that?
Playback and thumbnails are two separate problems, and mpv only solves the first one. Getting real preview images back in Explorer takes a second free tool, and I wrote that up separately: how to show thumbnail previews for 10-bit video in Windows. Do both and your footage folder finally behaves like it used to.
Premiere will not let you build a sequence above 60fps, and H.264 will not export above it either. Both limits have the same simple workaround, and neither of them involves slowing your footage down.
If you’ve ever uploaded a video to Instagram and thought, “Why does this look worse than it did in Premiere?”, you’re not alone. Instagram is notoriously aggressive with compression, and if your export settings aren’t dialed in correctly, it will absolutely destroy your video quality.
In this post, I’m going to walk you through exactly how I edit and export high quality Instagram Reels using Adobe Premiere Pro, so your videos look as good as possible after Instagram does its thing.
This is the same workflow I use for my own content, and it’s designed to give Instagram the best possible file to work with.
Start With the Right Sequence Settings
Before we even talk about exporting, the foundation starts in your sequence settings.
Instagram Reels are vertical video, which means your sequence should be set to a 9:16 aspect ratio. Specifically, you want a resolution of 1080 by 1920.
Frame rate matters here too. Instagram prefers 30 frames per second, so if you’re starting a brand new sequence specifically for Reels, set it to 29.97 or 30 fps. If your footage was shot at a higher frame rate, that’s totally fine, just make sure your final sequence matches what Instagram expects.
This alone can prevent unnecessary resampling and compression issues later.
Editing for Vertical Video in Premiere Pro
If your footage was shot horizontally, Premiere makes it pretty painless to reframe for vertical.
Once your clip is in the timeline, you can use the Effect Controls panel to adjust scale and position. The key here is to resist the urge to over-scale. The more you blow up the image, the more you’re helping Instagram ruin it later.
If you’re working with 4K footage in a 1080×1920 sequence, you’ve got plenty of room to reframe without losing quality. That’s one of the big advantages of shooting higher resolution video, even if your final delivery is smaller.
For talking head content, I usually keep eyes slightly above center and leave enough headroom so nothing feels cramped on smaller screens.
Color and Contrast Matter More Than You Think
Instagram compression hates subtle gradients and flat images.
If your footage is extremely flat or low contrast, Instagram will often introduce banding and ugly artifacts once it compresses the video. This doesn’t mean you need to overdo it, but a well-contrasted image with clean color separation tends to survive compression better.
Make sure your footage is properly exposed, your blacks aren’t lifted too high, and your highlights aren’t crushed. A clean, balanced image gives Instagram less to destroy.
Export Settings That Actually Work for Instagram Reels
This is where most people go wrong.
When exporting from Premiere Pro, start by choosing H.264 as your format. This is exactly what Instagram is going to convert your video into anyway, so you’re better off controlling that process yourself.
Set your preset as a starting point, but do not rely on it blindly.
Here are the key settings you want to double-check:
Resolution: 1080 x 1920
Frame Rate: 30 fps
Field Order: Progressive
Aspect: Square Pixels
For bitrate, this is critical.
I recommend using VBR, 2-pass. Set your target bitrate around 10 Mbps and your maximum around 12 Mbps. This gives Instagram a high quality file without being so large that it triggers extra compression.
Cranking the bitrate higher than this does not help. In fact, it can sometimes make things worse.
Profile and Level Settings
Under the video tab, make sure your profile is set to High and your level is set to 4.2. This ensures better compatibility and quality across devices.
Also, enable “Render at Maximum Depth” and “Use Maximum Render Quality.” Yes, exports take longer, but this helps preserve fine detail and scaling quality.
If you’re already putting in the work to create good content, waiting a little longer on export is worth it.
Audio Settings That Won’t Get Ruined
Audio is just as important as video, even on Instagram.
Set your audio codec to AAC, sample rate to 48 kHz, and bitrate to 320 kbps if possible. Instagram will compress audio too, but starting with clean, high quality audio makes a noticeable difference.
Bad audio is one of the fastest ways to make a Reel feel low quality, even if the video looks decent.
Uploading Tips That Actually Matter
Once your video is exported, upload it directly from your phone if possible. AirDrop or a direct cable transfer is ideal.
Avoid sending the file through messaging apps, email, or cloud services that might recompress it before it ever reaches Instagram.
When posting, make sure “Upload at Highest Quality” is enabled in Instagram’s settings. It sounds obvious, but a surprising number of people forget this step.
Final Thoughts
Instagram is always going to compress your videos. You can’t stop that. What you can do is give it the cleanest, most optimized file possible so the final result still looks sharp, professional, and intentional.
If you start with the right sequence settings, avoid unnecessary scaling, export with the correct bitrate, and upload properly, your Reels will look noticeably better than most of what’s on the platform.
And if you want to go deeper into building a complete workflow for filming, editing, and delivering better videos, I’ve got a free filmmaker gear guide that breaks down everything I personally use and recommend.
Sony and Canon have been going back and forth all year. Between the R5, the R6 and the a7S III, filmmakers have a ton of mirrorless choices, and now at the end of 2020 that same competition is showing up in the cinema camera space.
Sony fired first on September 6th with a development announcement for the FX6, a little brother to the very popular full frame FX9. Canon followed on September 24th and pulled the wraps off the C70, their first RF mount cinema camera. Then on November 17th Sony fully unveiled the FX6, which means we finally know what both of these cameras actually do.
So let’s compare them, and I’ll tell you which one I’d recommend buying.
Build And Form Factor
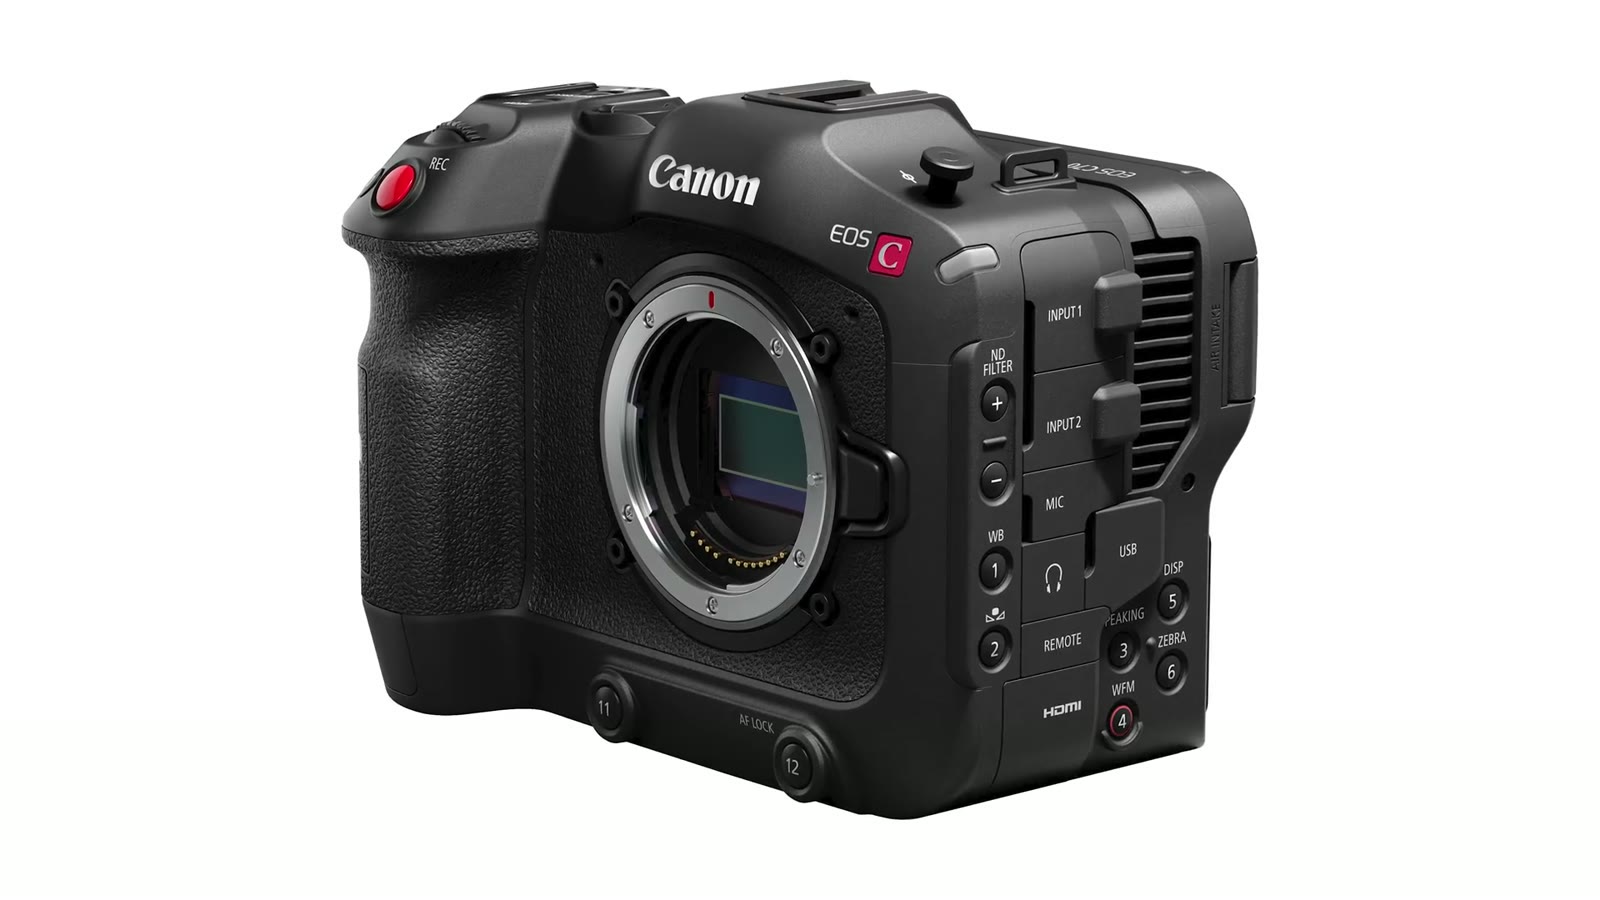
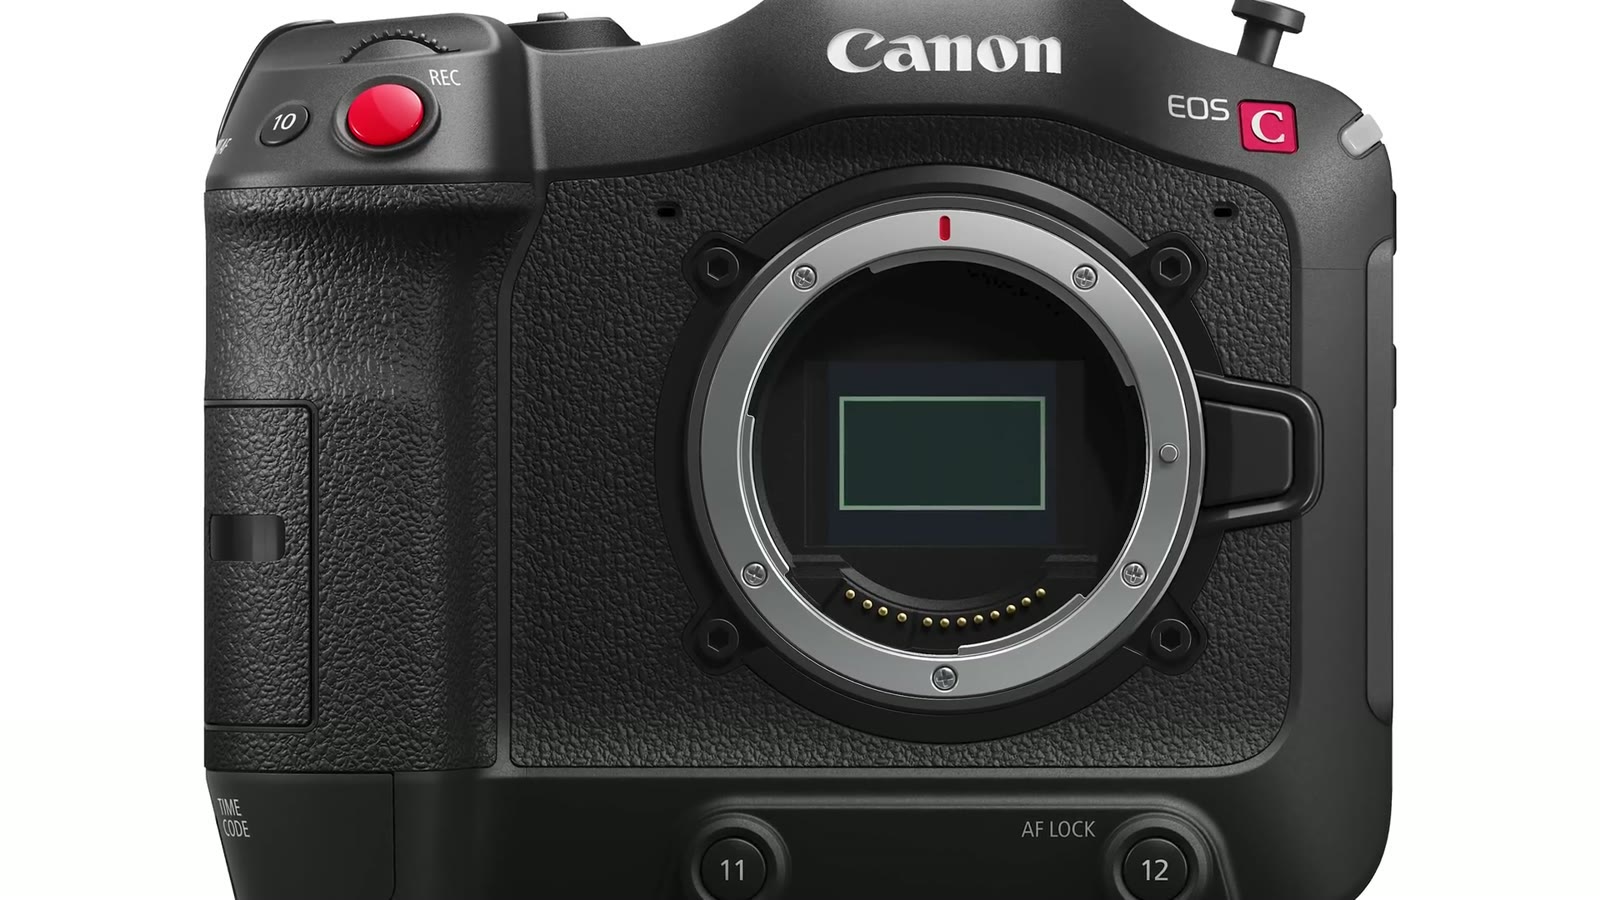
The Canon C70. A hybrid of a DSLR and a cinema camera, and it reads as both.
The first thing you notice is how differently these two are built. Canon went with a hybrid DSLR-cinema look, which to me reads as a shorter, slightly overweight 1DX. Sony went with a traditional but shrunken video camera body that looks like a small FX9 or FS7.
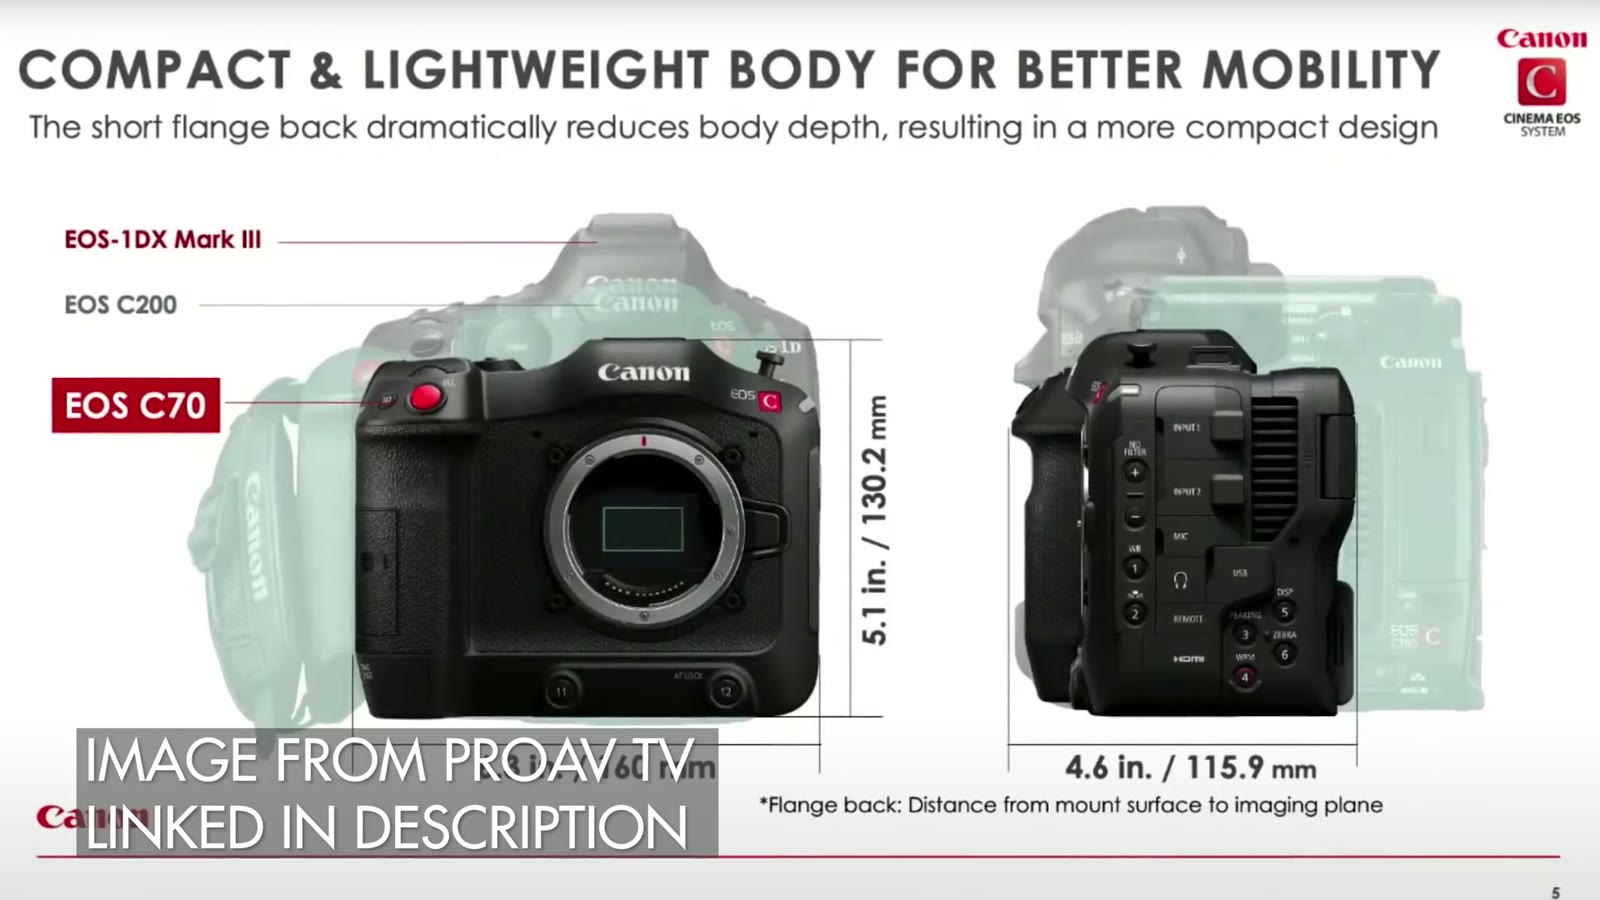
Canon’s own diagram of what the short flange back buys you. Image from ProAV TV, linked in the video description.
Canon clearly designed the C70 to feel familiar to anyone coming from a DSLR or mirrorless hybrid. It isn’t much bigger and it should sit in your hands the same way. Sticking with that theme, the screen and grip are permanently attached and part of the body, like a 6D or an R5. You can’t move the screen somewhere else.
Unlike a DSLR, though, Canon chose not to include an EVF. If I had to guess it was to save cost, but it’s a bummer given their earlier cinema cameras like the C100 had one.
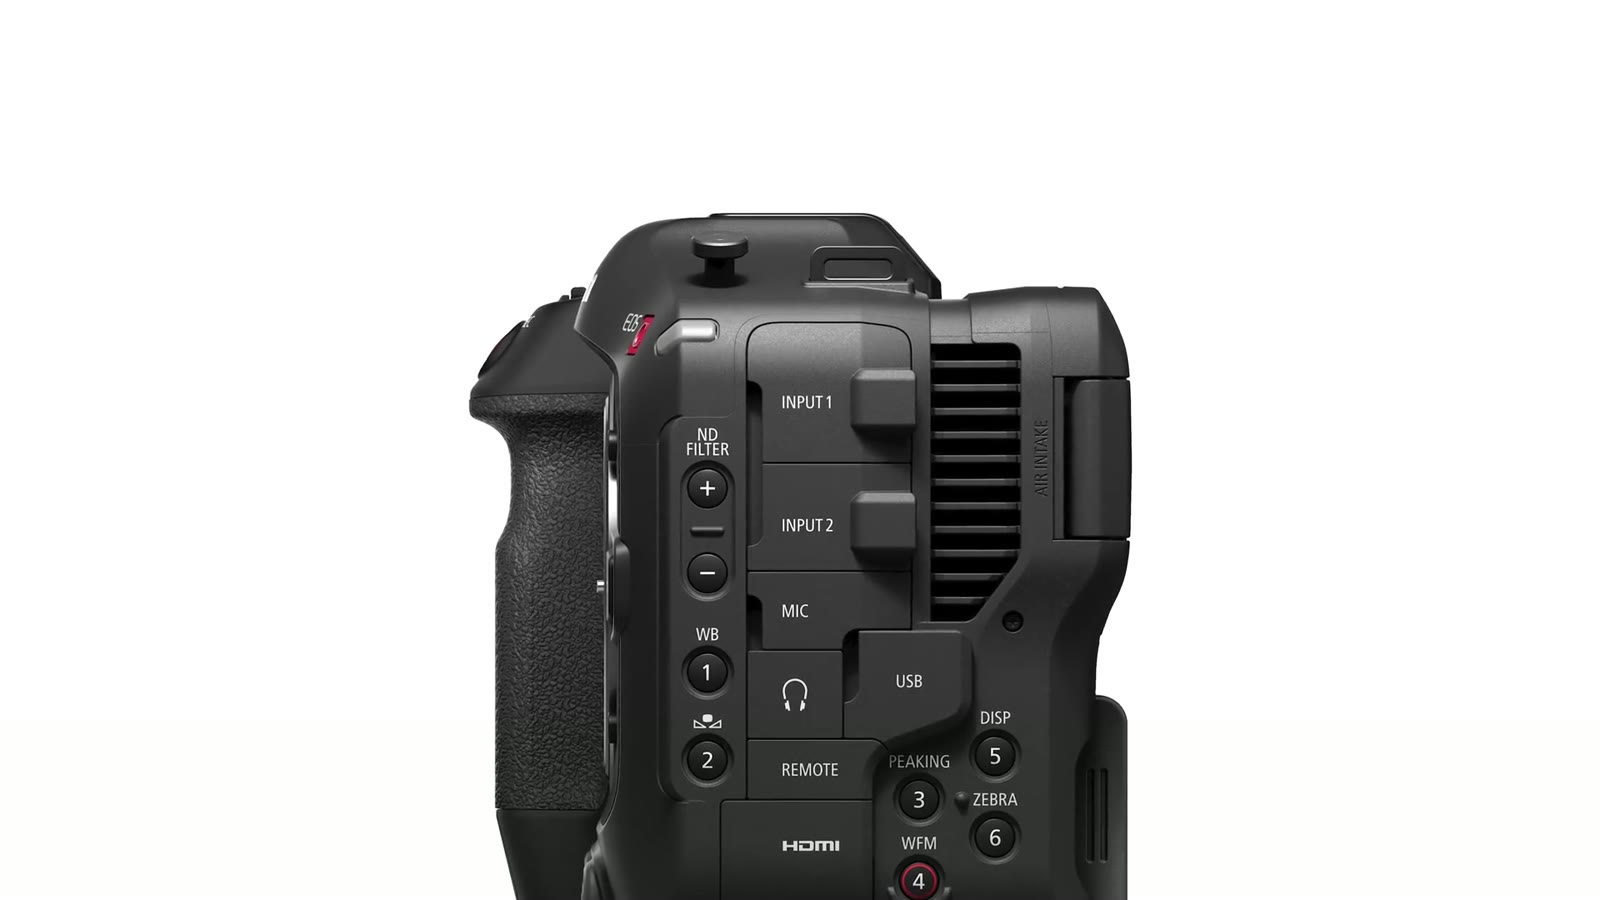
Two mini XLR inputs and a 3.5mm stereo input, all on the body itself.
On audio, Canon included two mini XLR inputs plus a 3.5mm stereo input on the body. A lot of filmmakers I know, me included, wish those were full size XLRs, but it makes sense given how small they were trying to keep this thing.
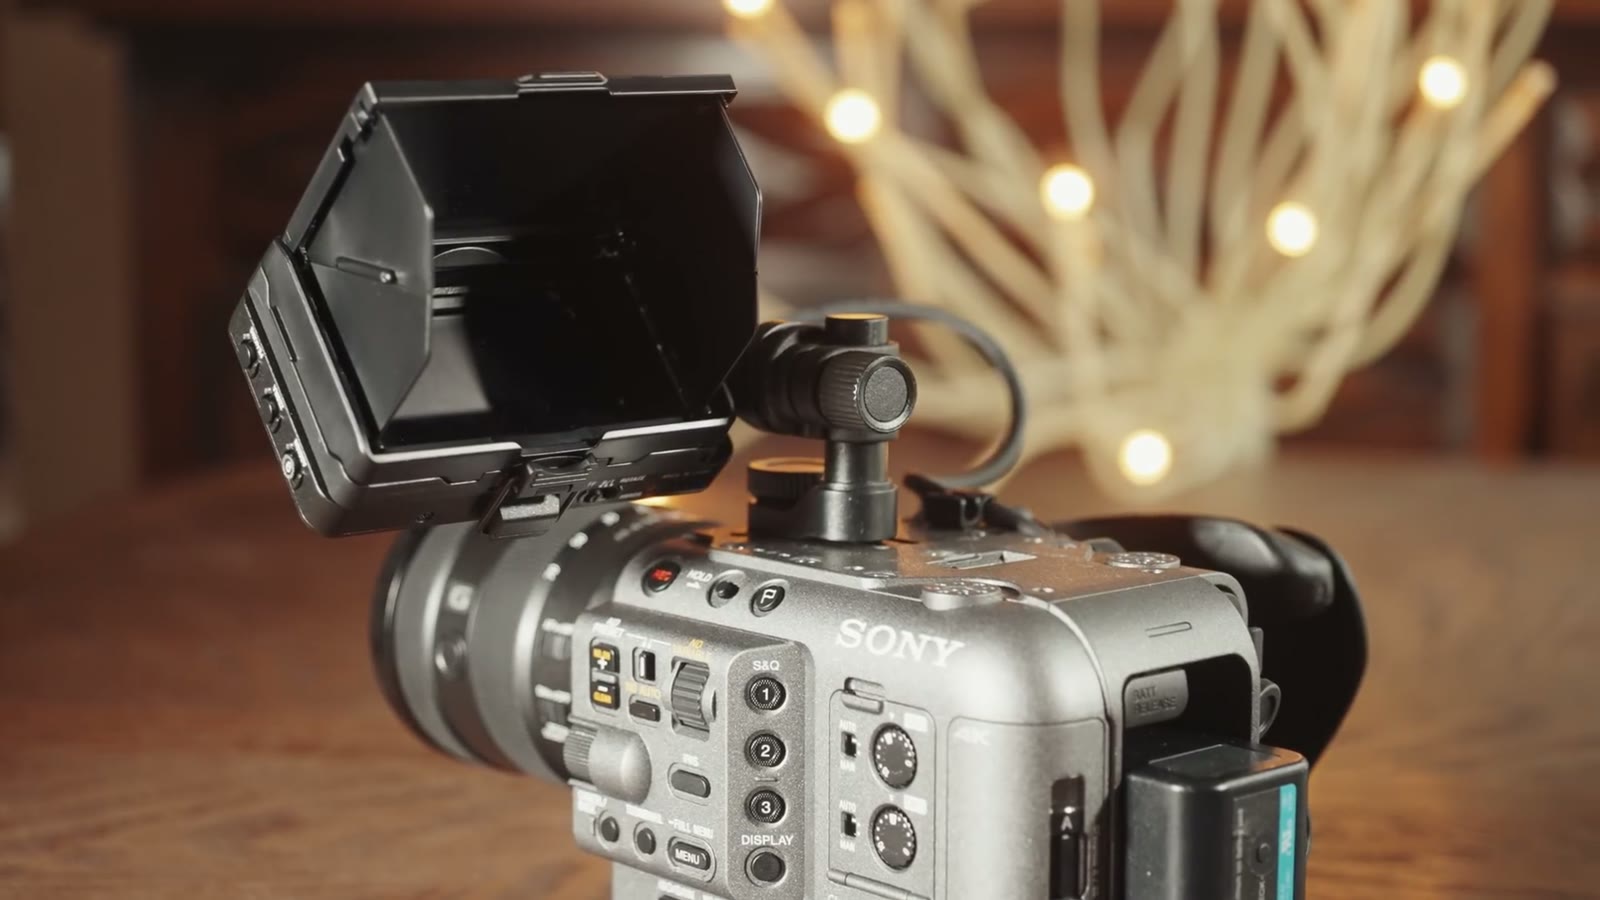
The FX6 is modular, which is the strength and also the catch.
The FX6 is considerably more modular. The monitor isn’t fixed to the camera and can mount a variety of ways, which also makes adding a viewfinder easy, something that may be difficult or impossible on the C70 given how its screen articulates. The top handle and side grip both detach, so the camera can get genuinely small.
But that modularity comes with a catch, and it’s a strange one: Sony put the XLR inputs on the top handle. Take the handle off to slim the camera down and you have no audio inputs at all, just a small internal mic. That’s an oversight worth knowing about. If you want to do a walk and talk interview with the FX6 on a gimbal and record decent audio, you’re reaching for an external recorder.
Sensors And Lens Mounts
Super 35 on the Canon side, and an RF mount that only takes RF glass without help.
The C70 has a Super 35mm sensor, roughly the same size as an APS-C crop sensor. Canon says it’s the exact same sensor that’s in the significantly more expensive C300 Mark III, which is not bad at all considering that camera costs eleven thousand dollars.
In front of it is Canon’s RF mount. There aren’t a ton of RF lenses yet, but the ones that exist are very impressive and more are coming. Canon also makes an EF to RF adapter that works very well, so their enormous EF lineup is available to you.
The FX6 has a full frame sensor, significantly larger, and I’ve been told by Sony that it’s roughly equivalent to the one in the a7S III. Which makes it a lowlight champ, and I’d expect it to beat the C70 in a high ISO test. E-mount in front of it means a wide choice of glass.
On pure sensor size the win goes to Sony. And this is where it gets interesting.
Canon’s Secret Weapon
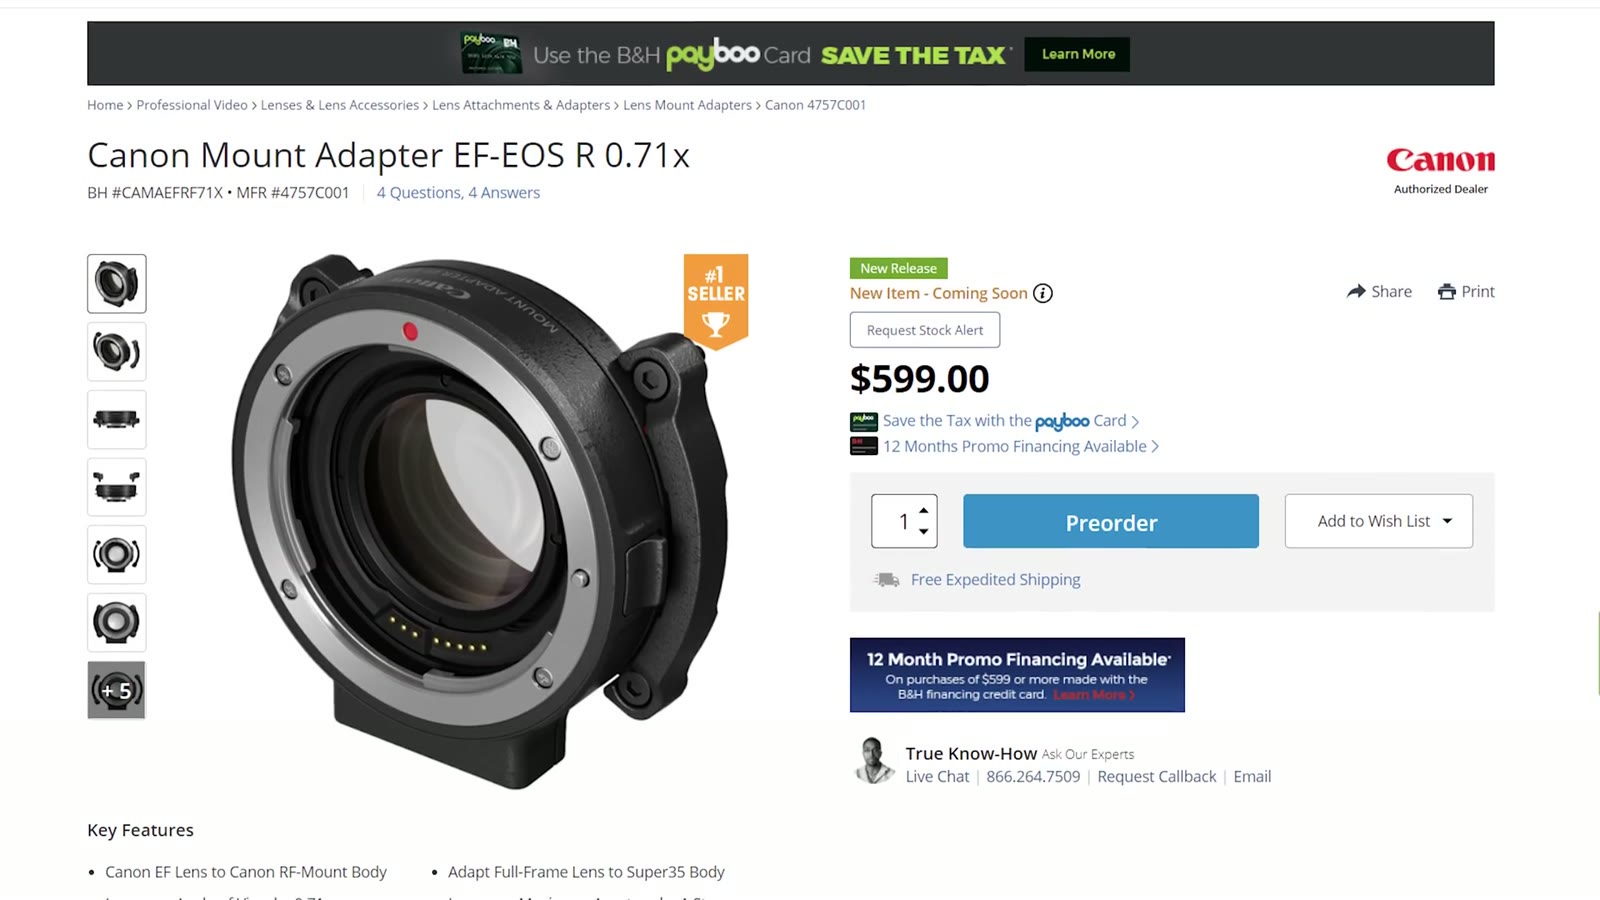
The 0.71x adapter. 599 dollars, EF glass only, and the piece the whole argument turns on.
Canon also makes the Mount Adapter EF-EOS R 0.71x. Don’t let the boring name fool you, because this thing is genuinely magical. Put your full frame EF lenses on it, gain an extra stop of light, and it widens the field of view enough that the C70’s Super 35 sensor behaves essentially like a full frame sensor.
It costs $599 and it only works with EF glass, not Canon’s new RF lenses. But it puts these two cameras on a level playing field for sensor size. Hold that thought, because it comes back later and it hurts.
Frame Rates
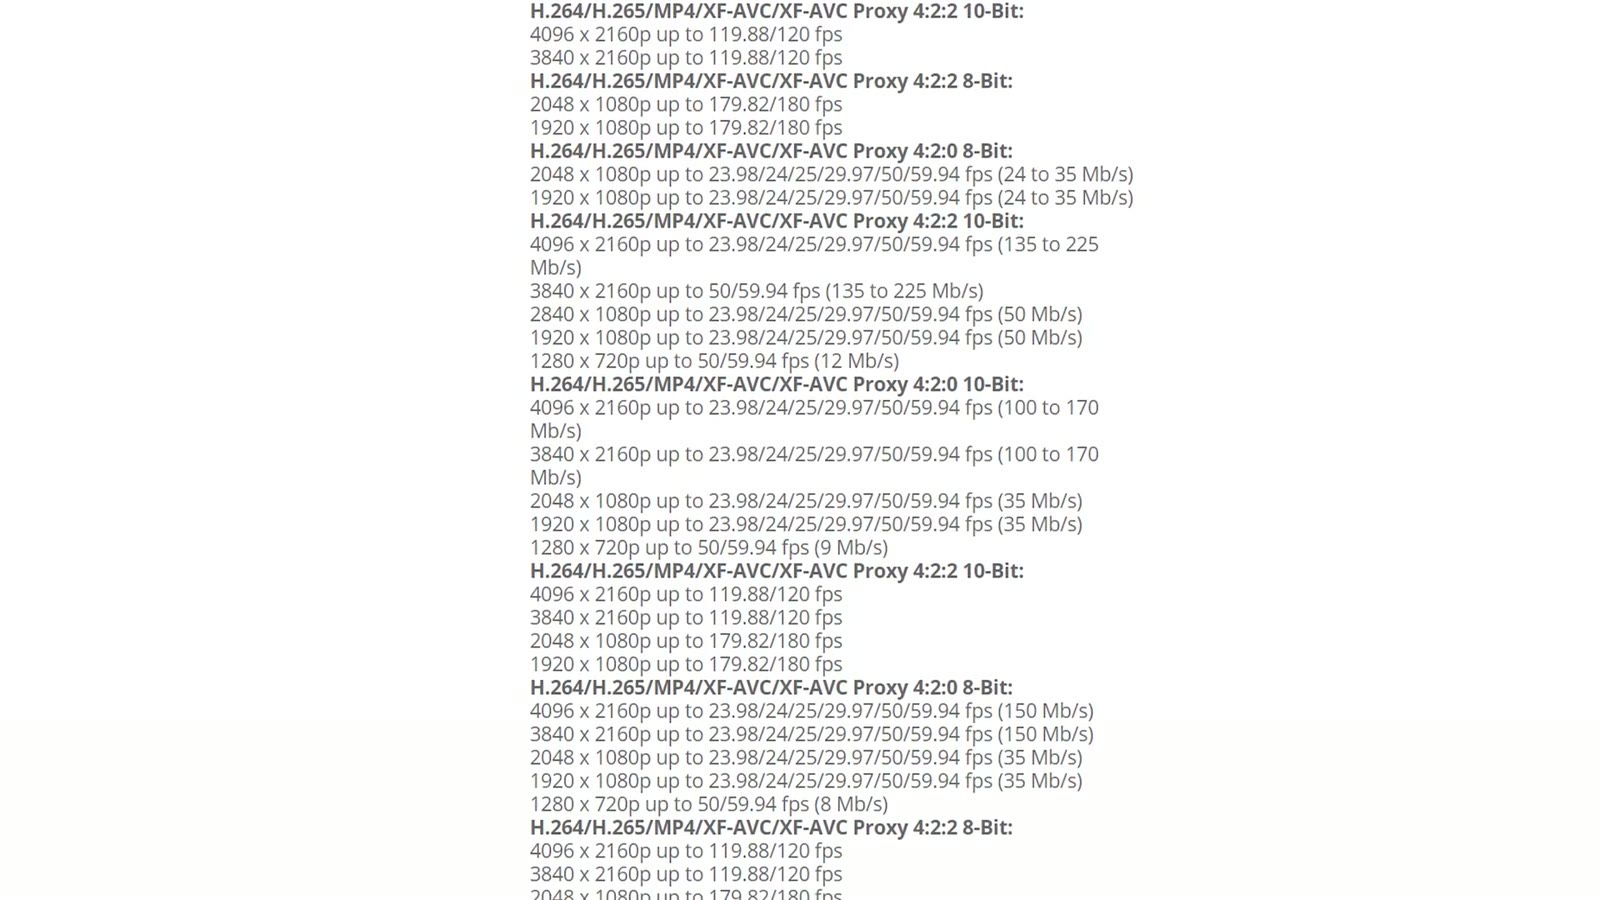
The full frame rate list, which is longer than anybody needs but does answer the question.
This one is close.
C70: DCI 4K up to 120fps, 1080p up to 180fps, all of it in 4:2:2 10-bit
FX6: DCI 4K only up to 60fps, but UHD 4K up to 120fps, and 1080p all the way to 240fps, also 4:2:2 10-bit
One practical difference: just like the a7S III, the FX6 needs CFexpress Type A cards for 4K All-I at 120fps and 1080p All-I at 240fps. The C70 records every frame rate and bit rate to SD cards, so there’s no second card format to buy into.
RAW Recording
If you want RAW out of one of these, this is the other thing you are buying.
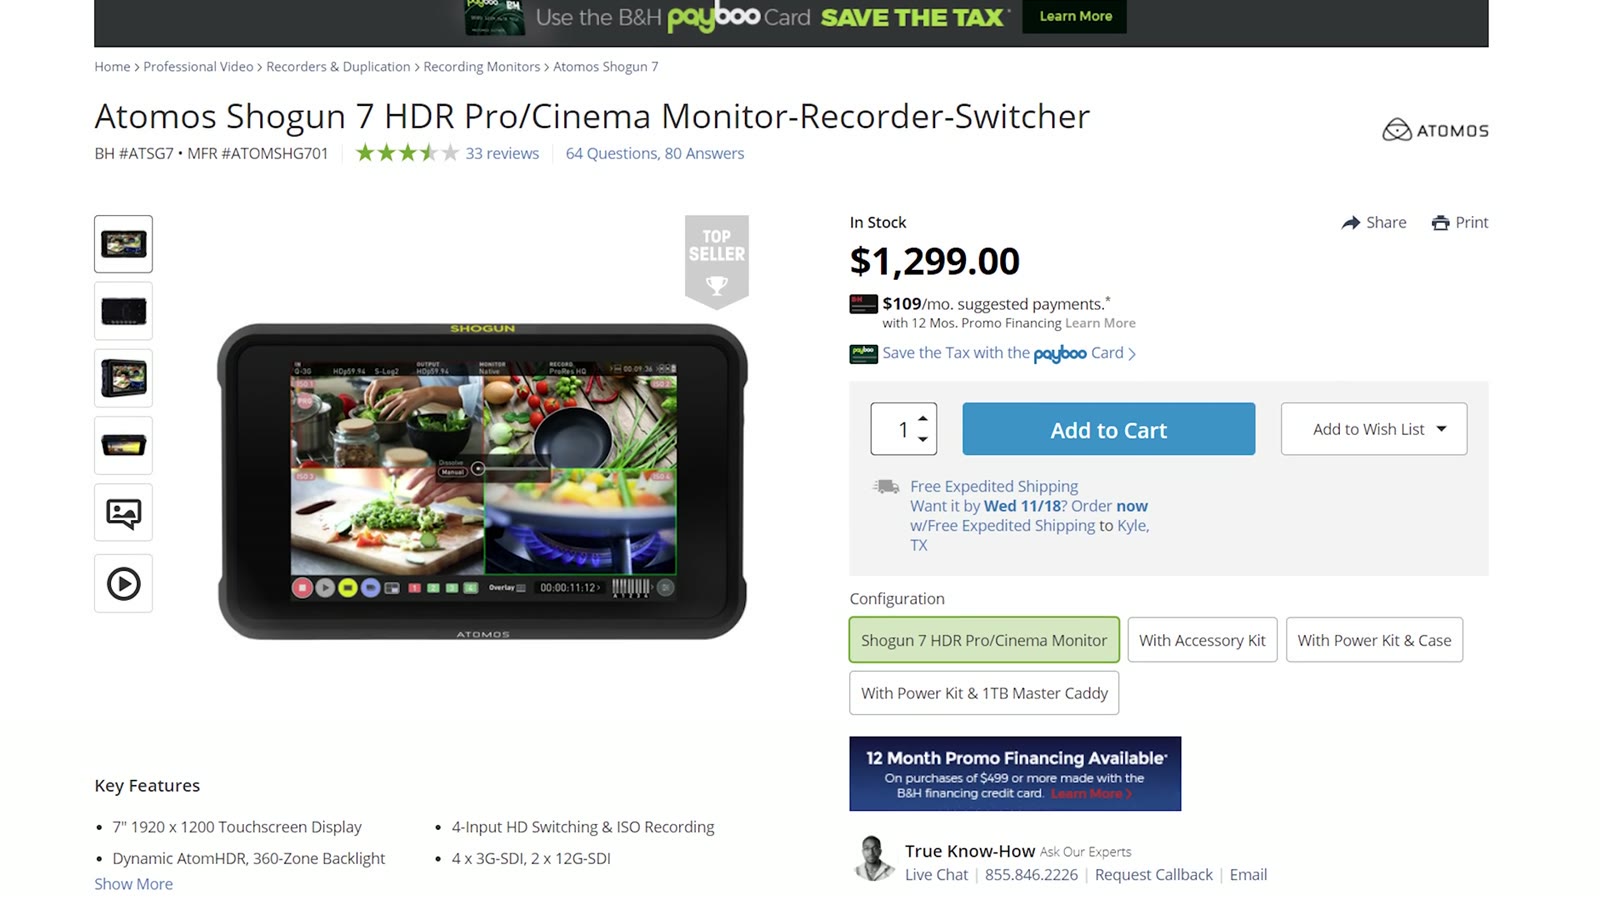
Here they split cleanly. The C70 cannot record RAW at all, internally or externally. The FX6 can record ProRes RAW externally over SDI to a recorder like an Atomos Shogun.
So Canon wins if you want that extra bit of resolution at DCI 4K 120fps. If you want 1080p at 240fps and external ProRes RAW, the FX6 takes it outright.
Autofocus, And Canon’s Bad Secret
Canon has led the pack on autofocus for a long time with Dual Pixel, and the good news is the C70 has it, so expect stellar performance. The caveat is that it does face and head tracking but not eye detect. If you’ve been using an R5 and loving eye AF, that isn’t here, and as far as I’m aware there’s no animal eye detect either.
Sony essentially took the a7S III’s autofocus system and put it in the FX6, so you get face and eye detection. At this point the two companies are very close on autofocus and both of these are great.
Great, they’re even, moving on. Except hold on, because here’s where it gets complicated for Canon.
Remember that 0.71x adapter that turns the C70 into a full frame camera? It can enlarge the image being recorded, but it cannot add autofocus points to the sensor. So you’re recording a big beautiful full frame image while autofocus only works in a much smaller Super 35 sized area in the middle of it.
Specifically, in an interview with a Canon rep, ProAV TV was told that with the 0.71x adapter you only get autofocus points covering the middle 60 percent of the image. The FX6 has autofocus points across the entire sensor.
So if what you want is a full frame cinema camera with great autofocus, I have to recommend the FX6.
Colors And Dynamic Range
Everybody loves Canon colors, they’re pretty much universally praised, and the C70 pairs them with wider dynamic range through C-Log 2 and C-Log 3.
Sony has always been praised for dynamic range and not always for colors, but the FX6 has S-Cinetone, which looks gorgeous straight out of camera while still holding a wide range. And you can still shoot S-Log3 if you want more.
I wouldn’t let colors or dynamic range decide this for you. Both should be impressive.
ND Filters
One of the main reasons filmmakers buy a cinema camera over a mirrorless is built in NDs, which is what lets you shoot wide open in bright sun without a bag of screw-on filters.
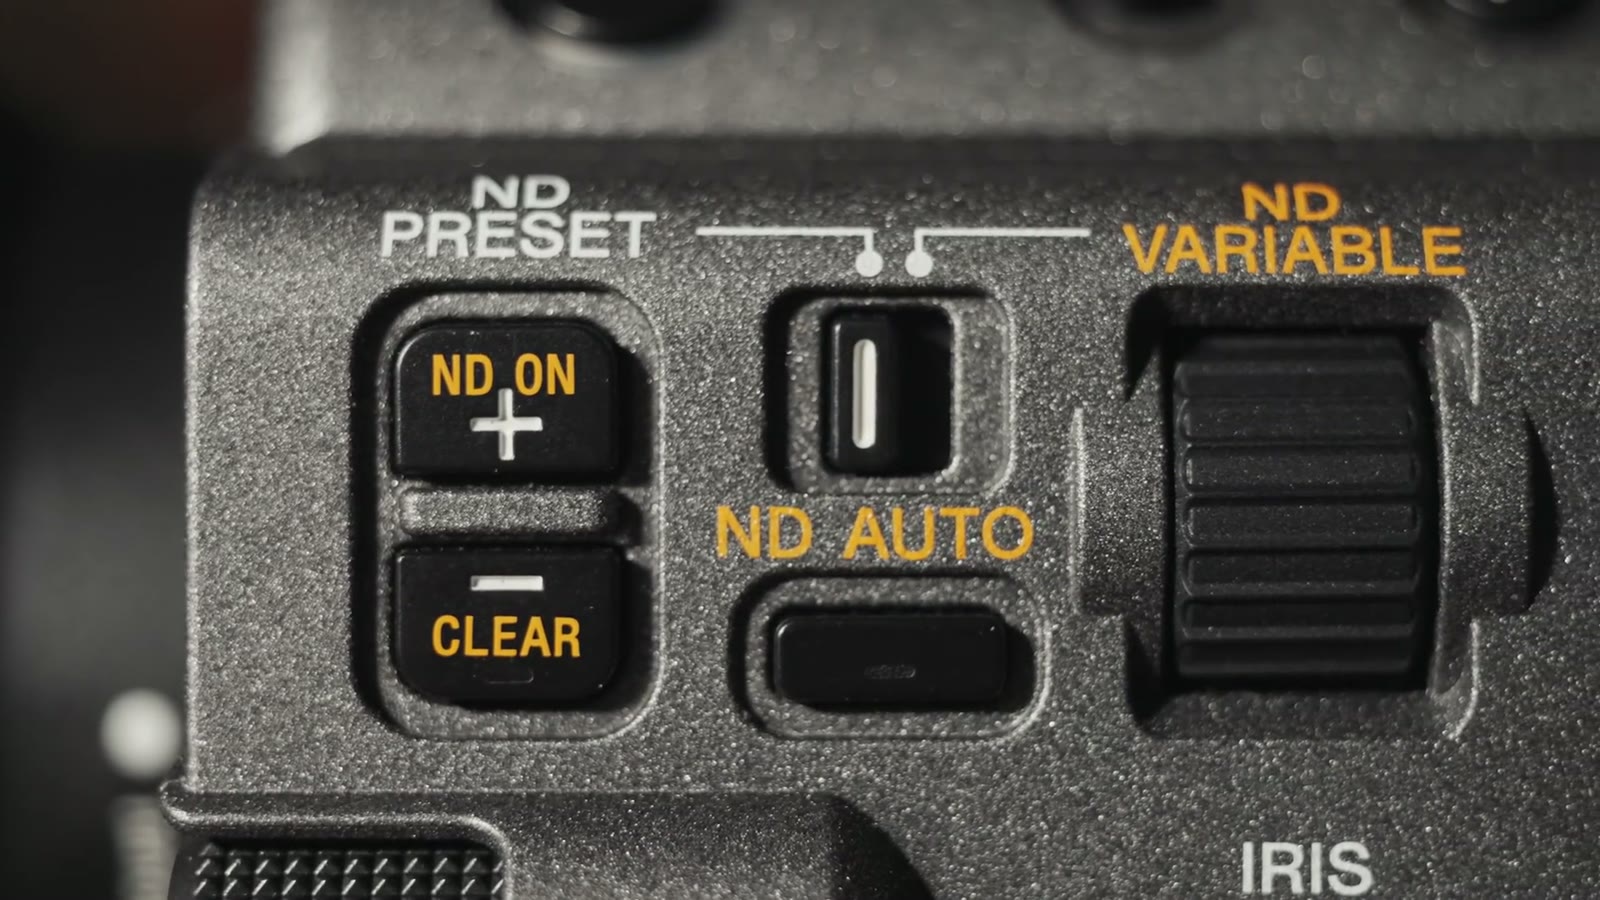
Impressively, Canon crammed NDs into the C70 despite how narrow it is, giving up to 10 stops of light reduction.
Canon fitted mechanical NDs into a body this narrow, up to 10 stops.
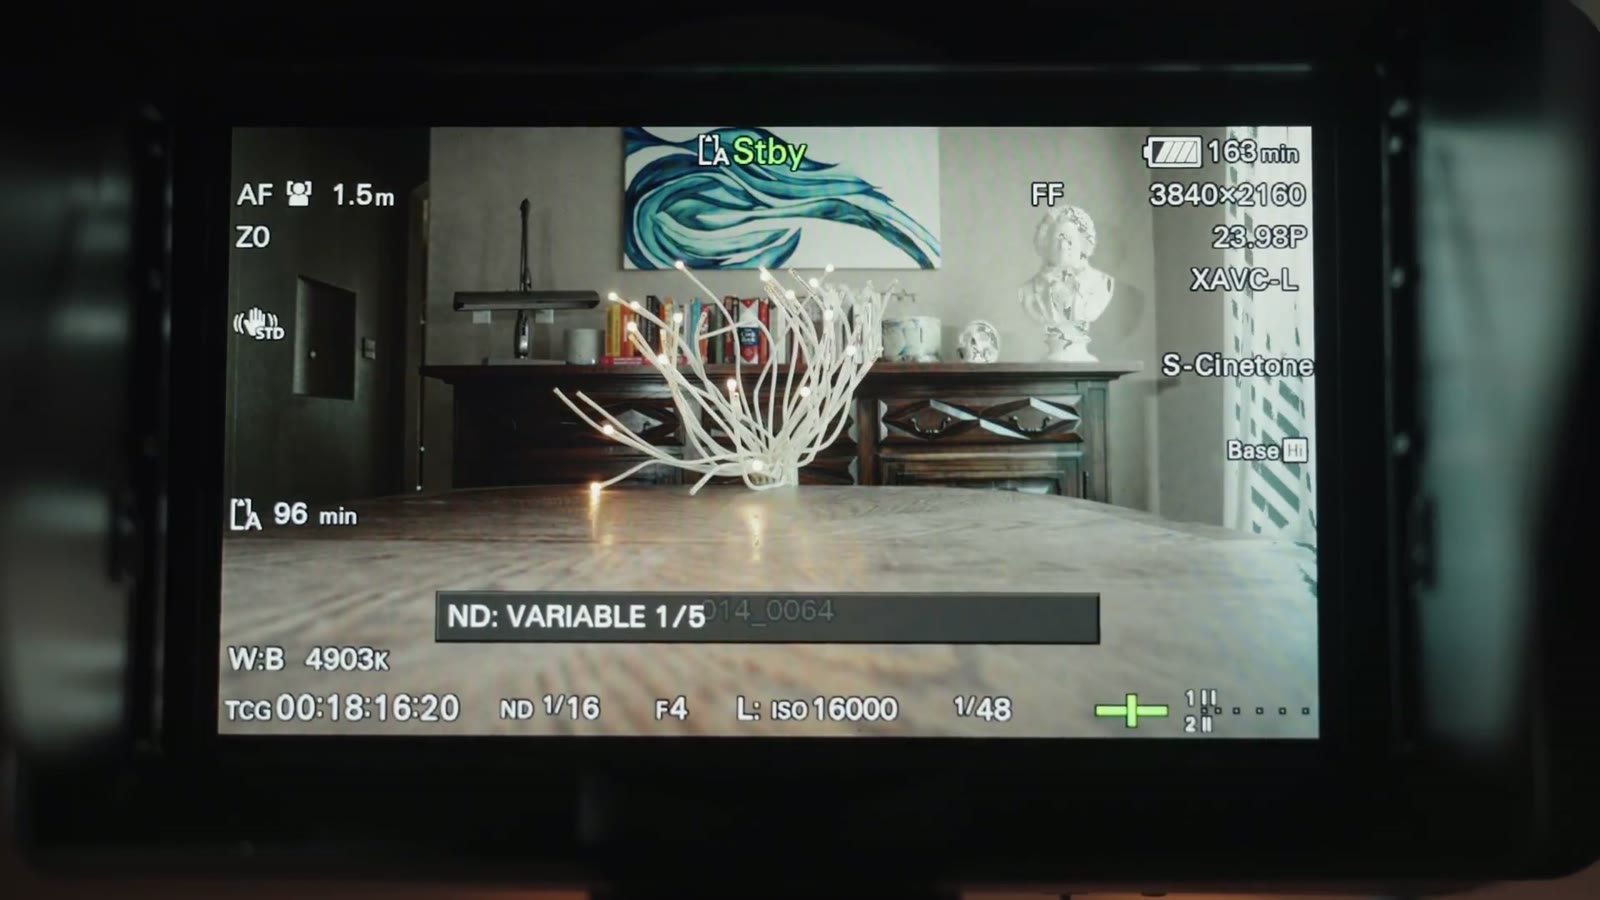
Sony went a different way. The FX6 has an electronic variable ND: one piece of glass that changes its own density rather than several pieces sliding into place, down to 7 stops.
Sony went electronic instead. One piece of glass that changes its own density, and a readout to match.
That lets it do things the C70 simply can’t, like automatically adjusting ND to hold your exposure while you never touch shutter or aperture. Once you’ve used it you do not want to go back.
So the C70 wins on pure light reduction, 10 stops against 7, but the FX6’s electronic ND is arguably the more compelling feature.
Price
Otherwise these two are pretty similar. Both take larger batteries for longer runtimes, both record unlimited length, and both are covered in a zillion buttons. Which leaves price.
So the C70 is the cheaper camera. Except if you want it to be full frame you need the 0.71x adapter at $599, which puts the Canon $100 above the Sony.
Which Should You Buy?
The first question to ask isn’t about specs at all. It’s how invested are you in the Canon ecosystem? Do you already own a lot of Canon glass, are you comfortable shooting Canon bodies, do you love Canon colors? If so it’s a no-brainer, take the C70, it looks like a fantastic camera and it will serve you very well.
But if you’re not heavily invested in Canon, or you’re considering jumping ship to Sony, and you want a more modular traditional cinema body, more frame rate options, external RAW, autofocus that works across an entire full frame sensor, and one of the coolest ND systems in any camera today, then the FX6 is the obvious choice and the one I’d wholeheartedly recommend.
This comparison went up in December 2020, before either camera shipped, so it’s built on published specs, Canon and Sony’s own material, and the ProAV TV interview rather than on hands-on testing. Prices are what they were at announcement. Both cameras have had firmware updates since, and the C70’s autofocus coverage with the 0.71x adapter is the specific claim most worth re-checking against current firmware.
I’m required to state that I’m part of affiliate programs for Amazon, B&H, Soundstripe, Artlist, Musicbed, and Adobe, and that some of the links above are affiliate links.
Color grading is the part of editing where most people either lose an entire evening or give up and post something that doesn’t look like what they saw on the day. So I built a set of presets to shortcut it, and I’ve been using them on my own paid work ever since.
WhoisMatt LUTs is a set of 12 video presets built around one priority: skin tones that look like actual human beings, with greens that stay put instead of taking over the whole frame. If you’ve ever graded a wedding on a lawn and watched everybody turn slightly radioactive, you know exactly the problem I’m talking about.
All of them, near enough. Every LUT has been tested on footage from all the major brands so the look holds up consistently rather than falling apart the moment you switch bodies, and that testing gets updated as new cameras land. Right now that includes the Sony FX3, Canon R5 II, Nikon ZR and Panasonic S1 II.
As a Sony shooter it mattered to me that they work across the picture profiles you actually use, so SLOG3, SLOG2 and CINE4 are all covered.
Standard and LOG versions of everything
This is the bit people miss, and it’s the bit that saves you the most time. Every look ships in two versions: one for LOG footage and one for standard footage.
Whenever you drop a LOG LUT onto footage that isn’t LOG, you get a contrasty, crushed mess, and whenever you go the other way you get something flat and lifeless. Having both means you grab the right one and move on instead of fighting it, and it means the pack still works on the days you didn’t feel like shooting LOG.
What each look actually does
WhoisMatt 01 — the original. Warm and vibrant with skin tones as the priority. If you only ever use one of these, it’s this one.
WhoisMatt 02 — the same idea dialled back. Softer contrast and saturation, richer, good whenever you want mood without drama.
WhoisMatt 03 — the punchiest of the set. Adds contrast and saturation without blowing out your highlights.
WhoisMatt 04 — desaturates the greens so skin lifts off the background. This is the one for outdoor work and elopements.
WhoisMatt 05 — my attempt at bottling an Iceland sunset, where the golden hour lasted for hours. High contrast, warm highlights, at any time of day.
WhoisMatt 06 — if 05 is sunset, this is the blue hour after it. Cooler shadows, and skin really pops against them.
And if you want something with more attitude
There’s a second pack, WhoisMatt Moody LUTs, for whenever you want the grade itself to have a personality. Moody 01 is warm and bold while keeping skin accurate, Moody 02 pushes further into warm and romantic, and Moody 03 is the versatile one I reach for most.
These are stylised on purpose. They’re not the pack to reach for whenever a client wants their wedding to look exactly like it did in real life, and they’re absolutely the pack for a film that’s meant to feel like something.
A LUT is a starting point, not a finish line
Here’s the honest part, and it’s the same thing I’d tell you about anybody’s presets including mine. A LUT will not rescue badly exposed footage, and it will not fix a white balance you got wrong on the day.
Get your exposure and white balance close in camera, drop the LUT on, and then nudge it from there. Used that way it turns an evening of grading into a few minutes per clip, which is the entire reason I made them. Used as a magic fix button, it’ll disappoint you, and so would every other pack on the internet.