
Today I’m going to show you how to edit and export 120 frames per second video using Adobe Premiere Pro, at 120fps, not in slow motion. So if you’re a gamer who has recorded a lot of gaming footage at 120 frames per second and you want to edit and export it at 120fps, this is how you do it.
And if you want to save time, I’ve created a free set of 120 frames per second export presets for Premiere that you can download.
Premiere’s “Max” Frame Rate Of 60 FPS
I’ve already imported some 120 frames per second footage that I filmed with the Sony a7S III in 4K 120. It’s beautiful.
Now, traditionally you’d start editing by creating a new sequence, either with Ctrl+N on PC or Cmd+N on Mac, or by going to File, New, Sequence.
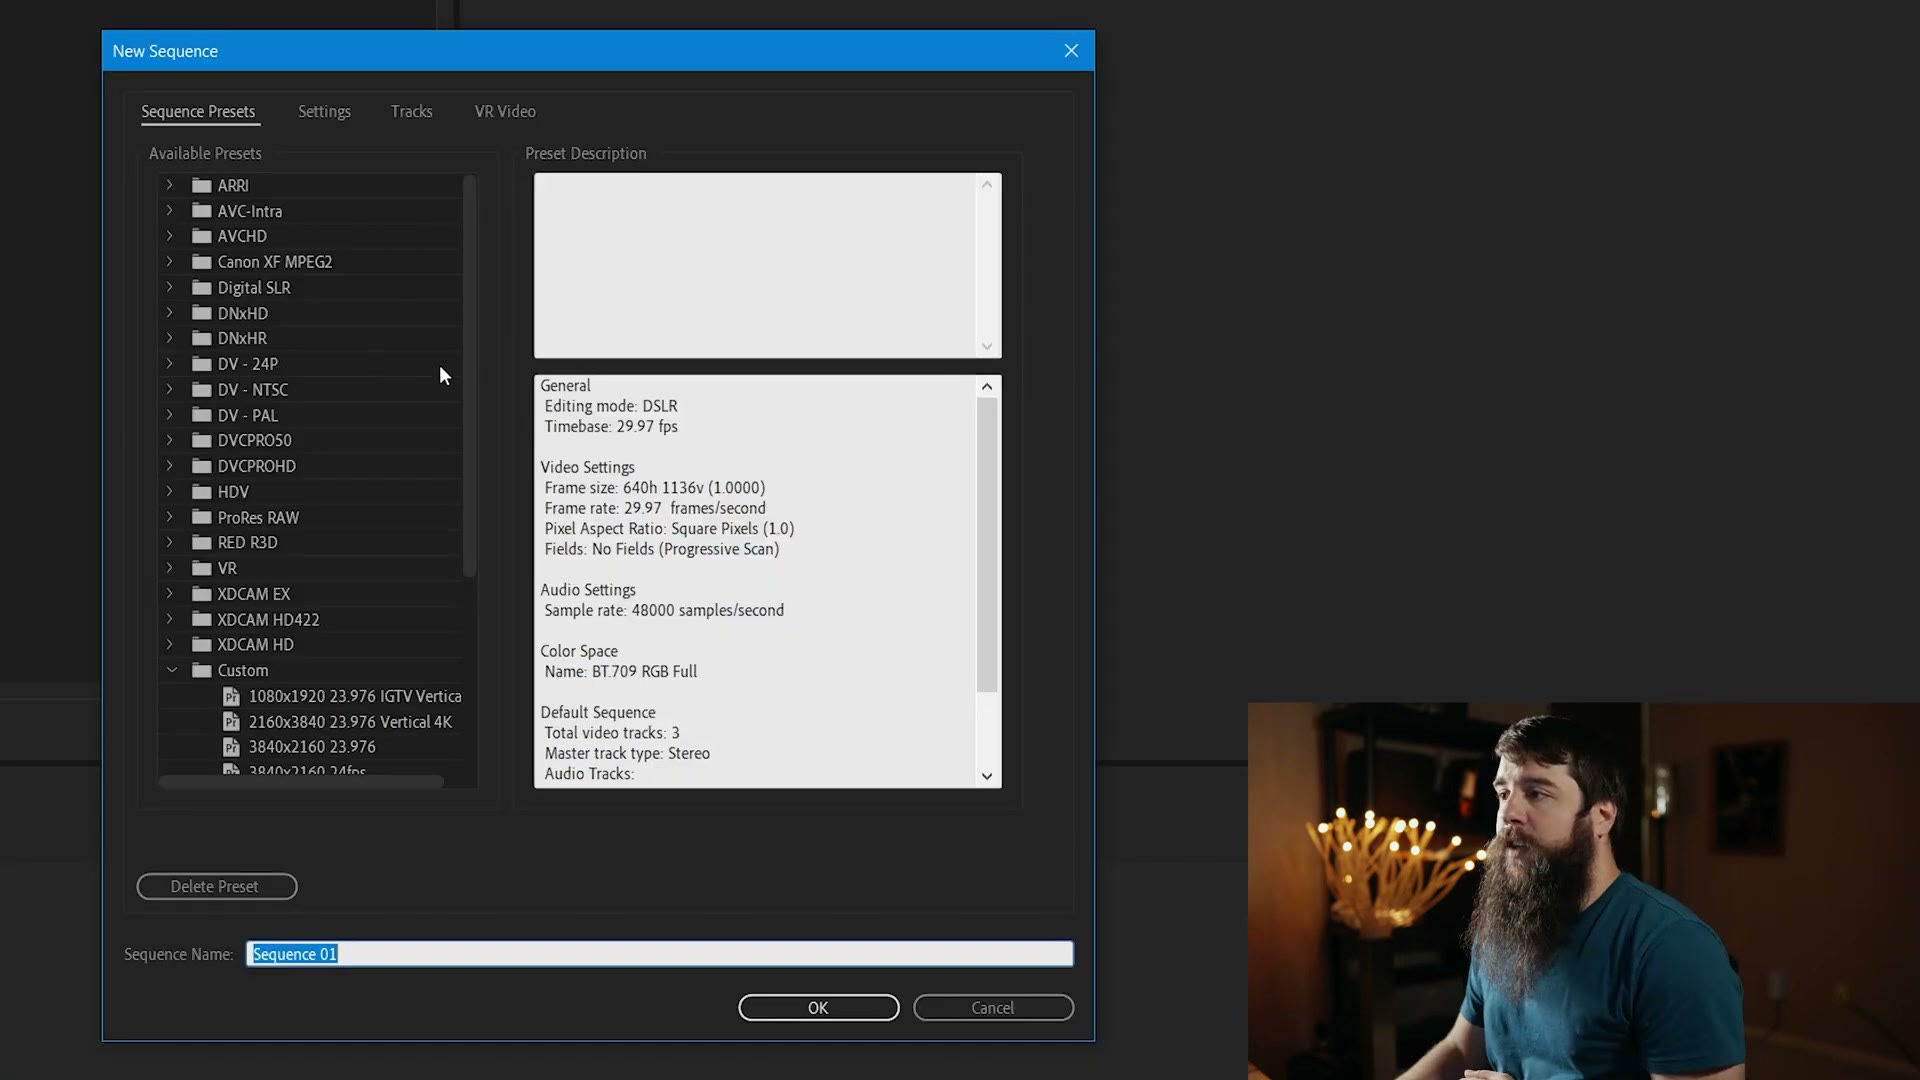
But as you dig through the presets you’re going to notice, wait a second, there’s no 120 frames per second option. And even if you select one of these presets and go to Settings and look at Timebase, you’ll see Premiere maxes out at 60 frames per second. Regardless of which preset you choose, you cannot set a sequence frame rate higher than 60.
Help me, Matt. How do I fix this?
The Trick To Get A 120 FPS Sequence
I’ve got a workaround for you, and it’s surprisingly simple.
Instead of creating a new sequence at all, select your footage, making sure it’s the 120 frames per second clip, and drag it onto the timeline where it says “drop media here to create sequence.”
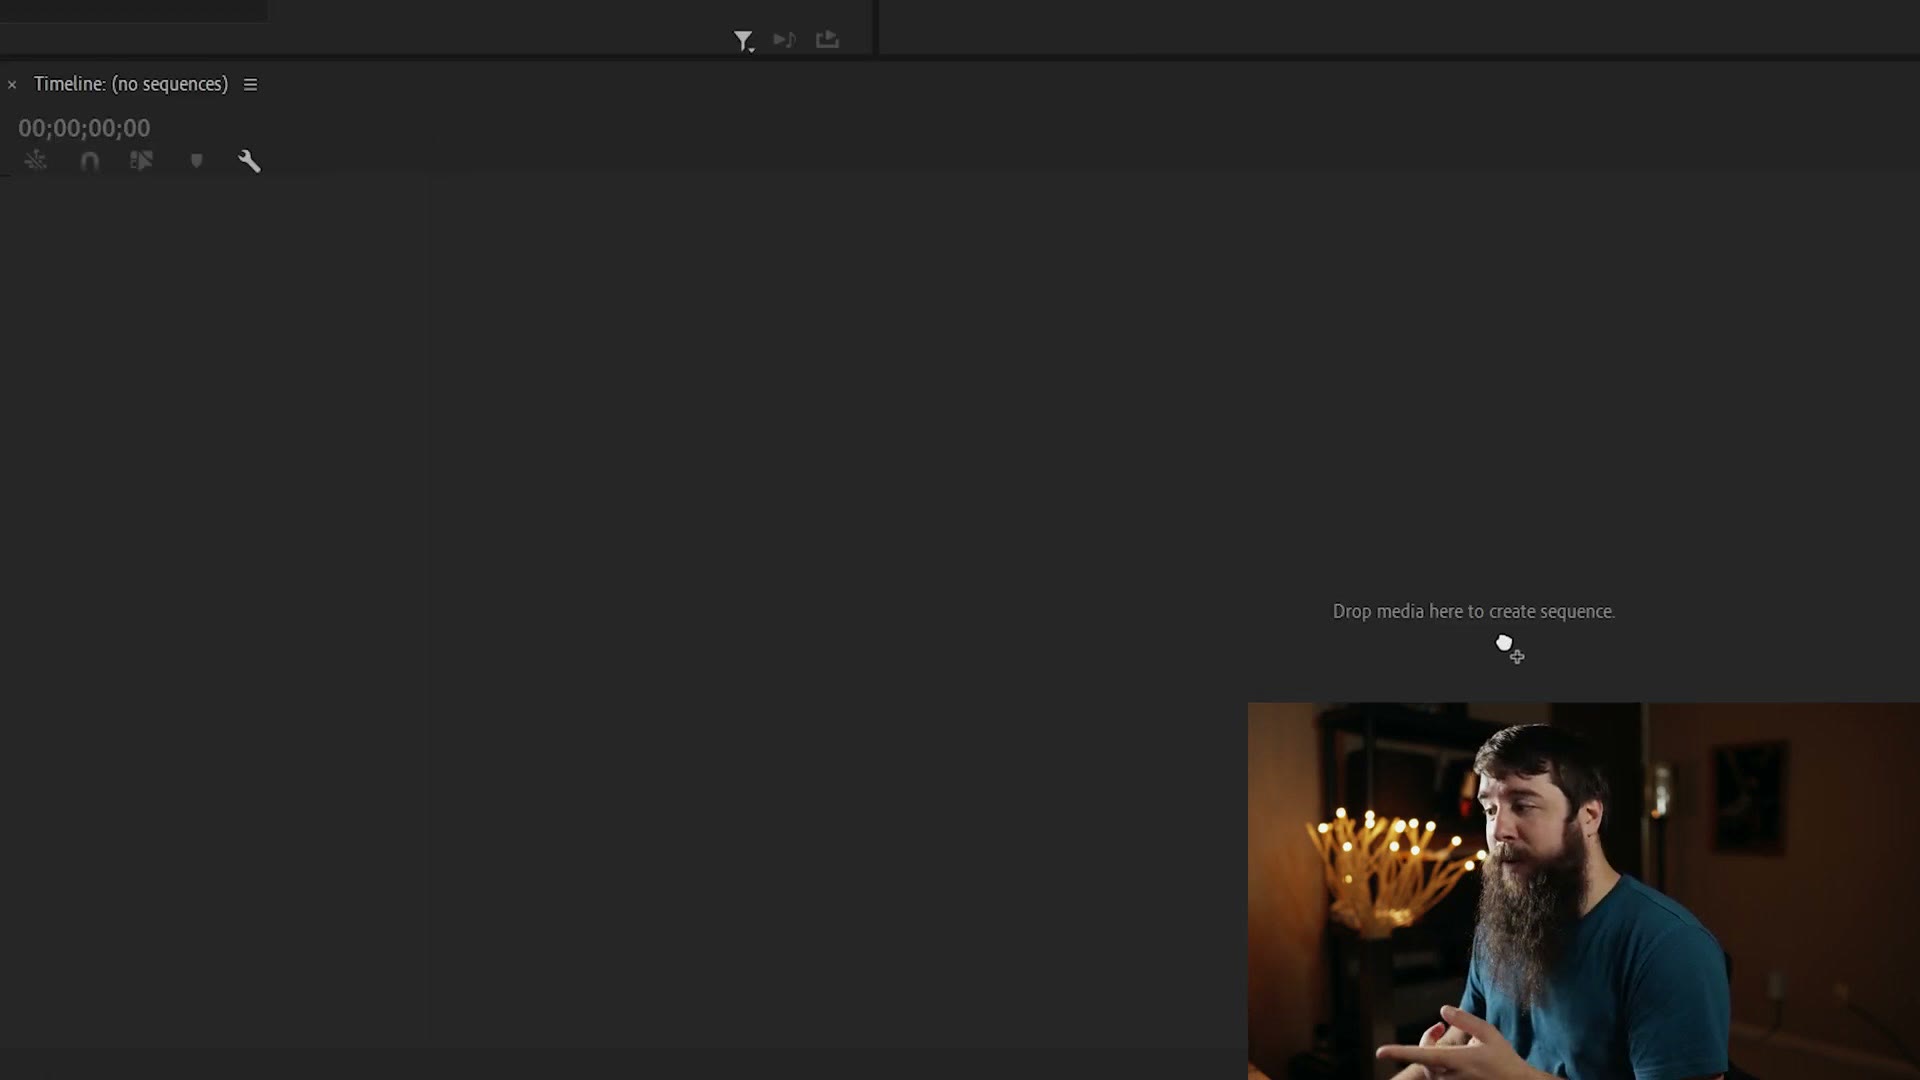
Voila.
Are you sure that’s 120 frames per second, Matt? Check this out. With that panel selected, go up to Sequence, Sequence Settings.
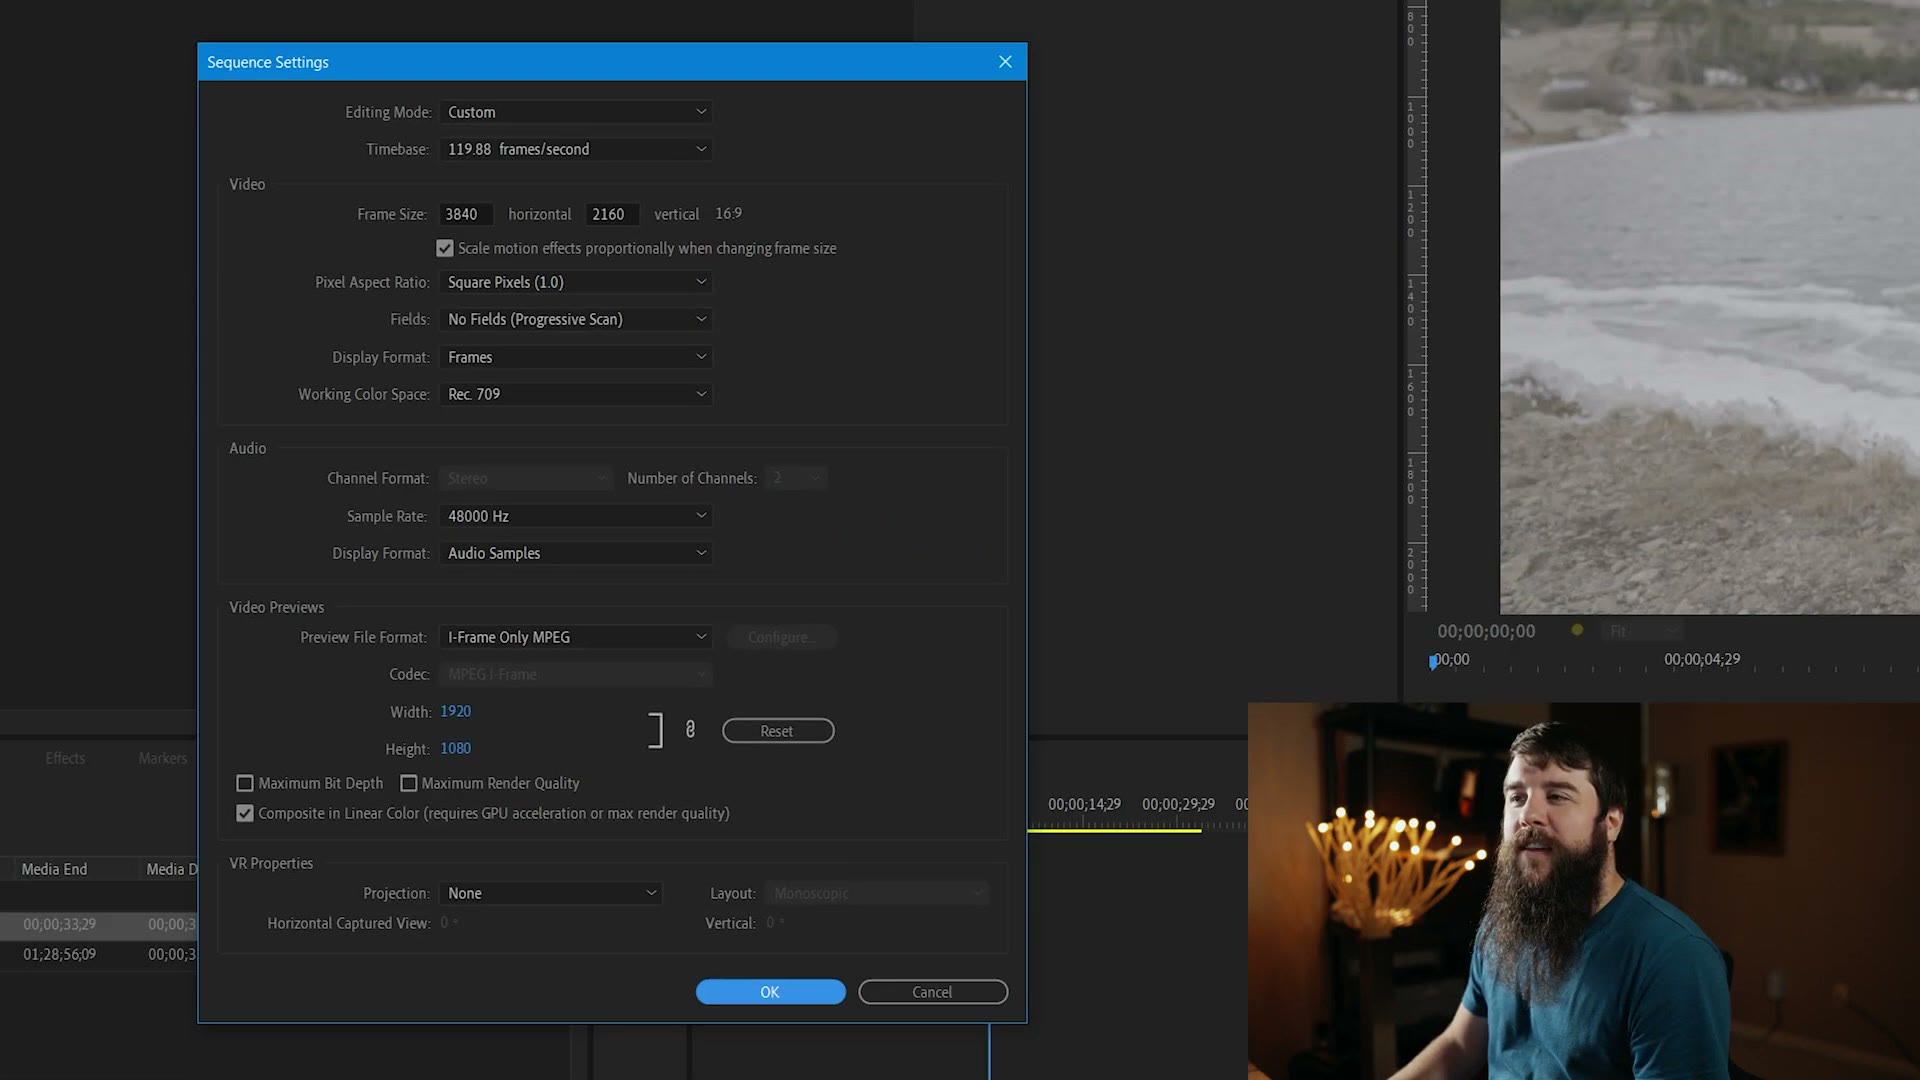
Timebase: 119.88 frames per second. 120fps. We tricked Premiere into doing it.
Leave all those settings the same, hit OK, and you’re back in a 120 frames per second sequence, so you can now edit your video at 120.
Export Settings For 120 FPS
Let’s pretend I’ve already cut the video. Time to export.
First drag to the beginning of the clip and press I to set your in point, then drag to the end and press O for your out point. If you can’t find the very last frame, use your arrow keys until you do. Then press Ctrl+M on PC or Cmd+M on Mac to open the export settings, or go to File, Export, Media.
And here is the next roadblock. If you normally export in H.264, which is very common, and select the Match Source High Bitrate preset, that should copy your sequence settings, meaning your video should export at 120 frames per second. But look down here: frame rate 60. Dang it. And even if you tick the box to modify it, it’s still 60. We can’t export higher than 60. What do we do?
Ignore all of that. Go back up to Format, and instead of H.264, select HEVC (H.265).
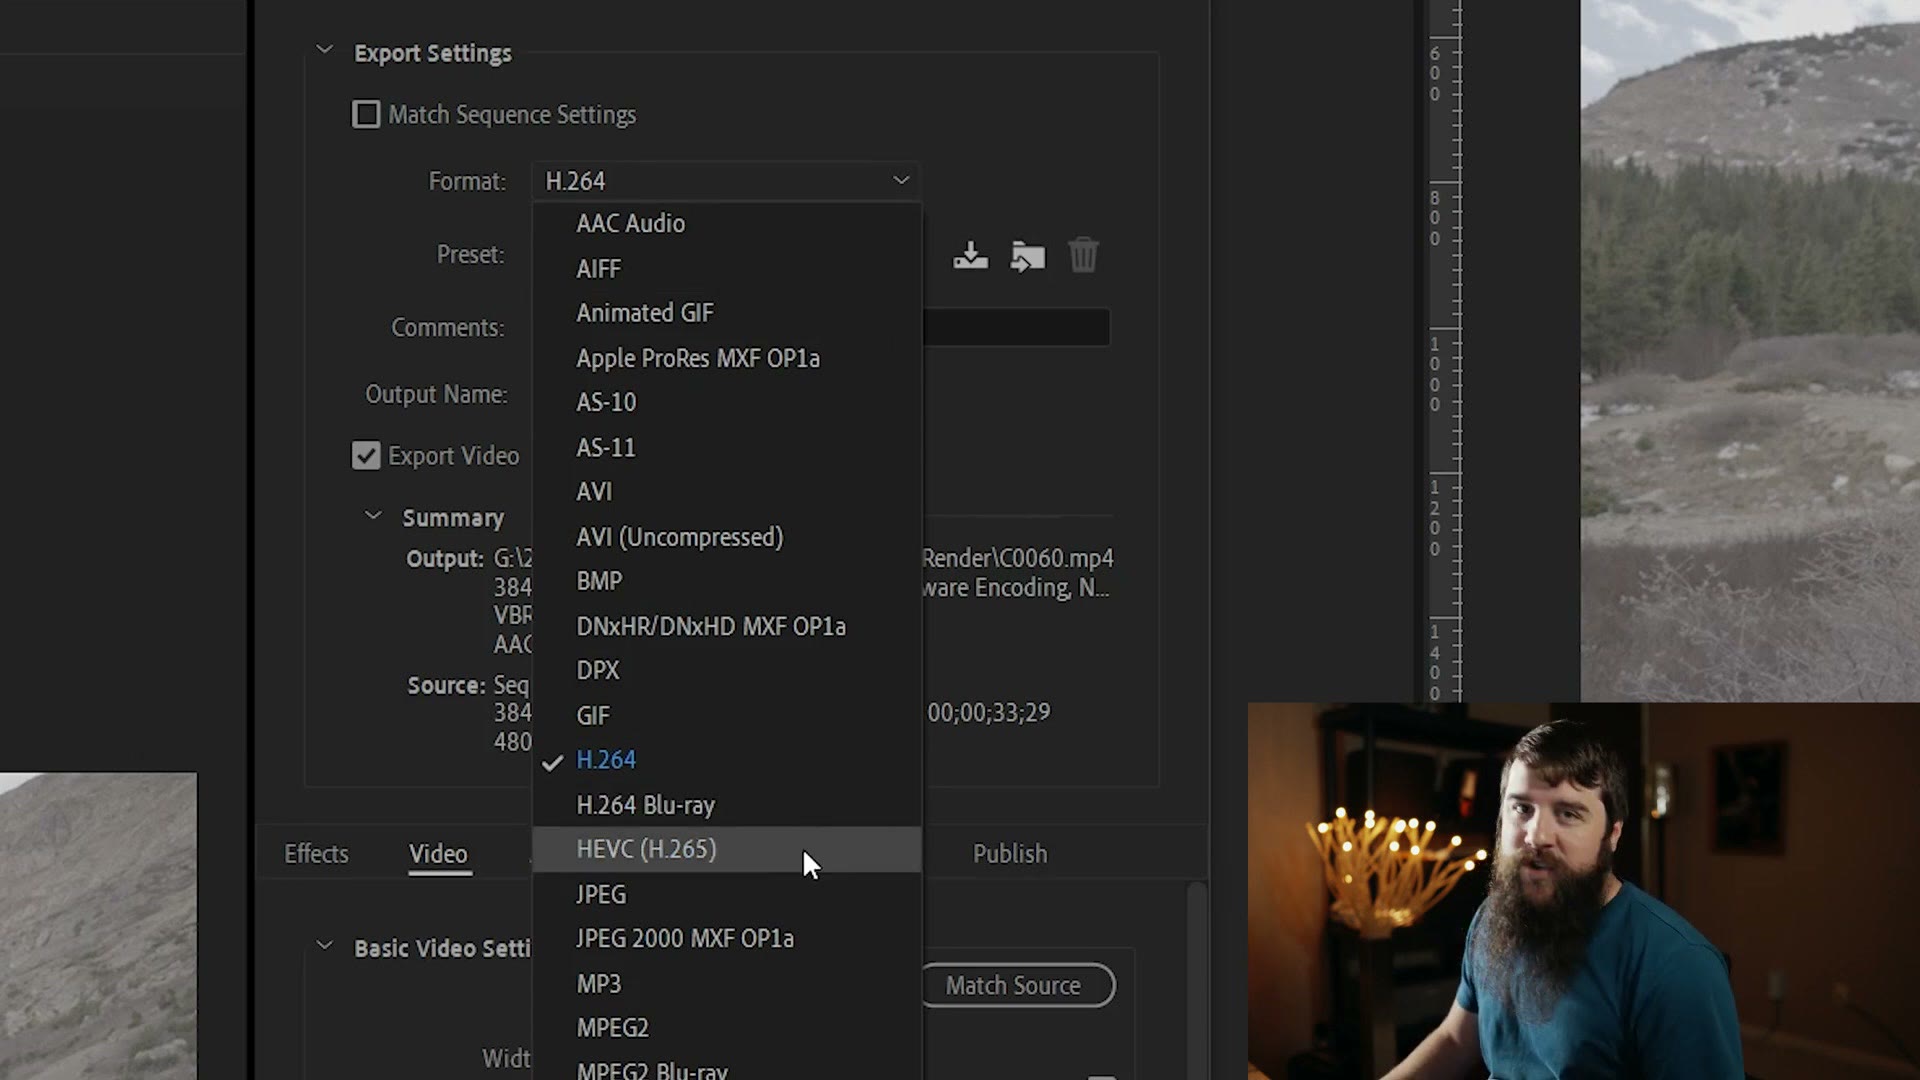
Now with Match Source High Bitrate selected, scroll down and check the frame rate.
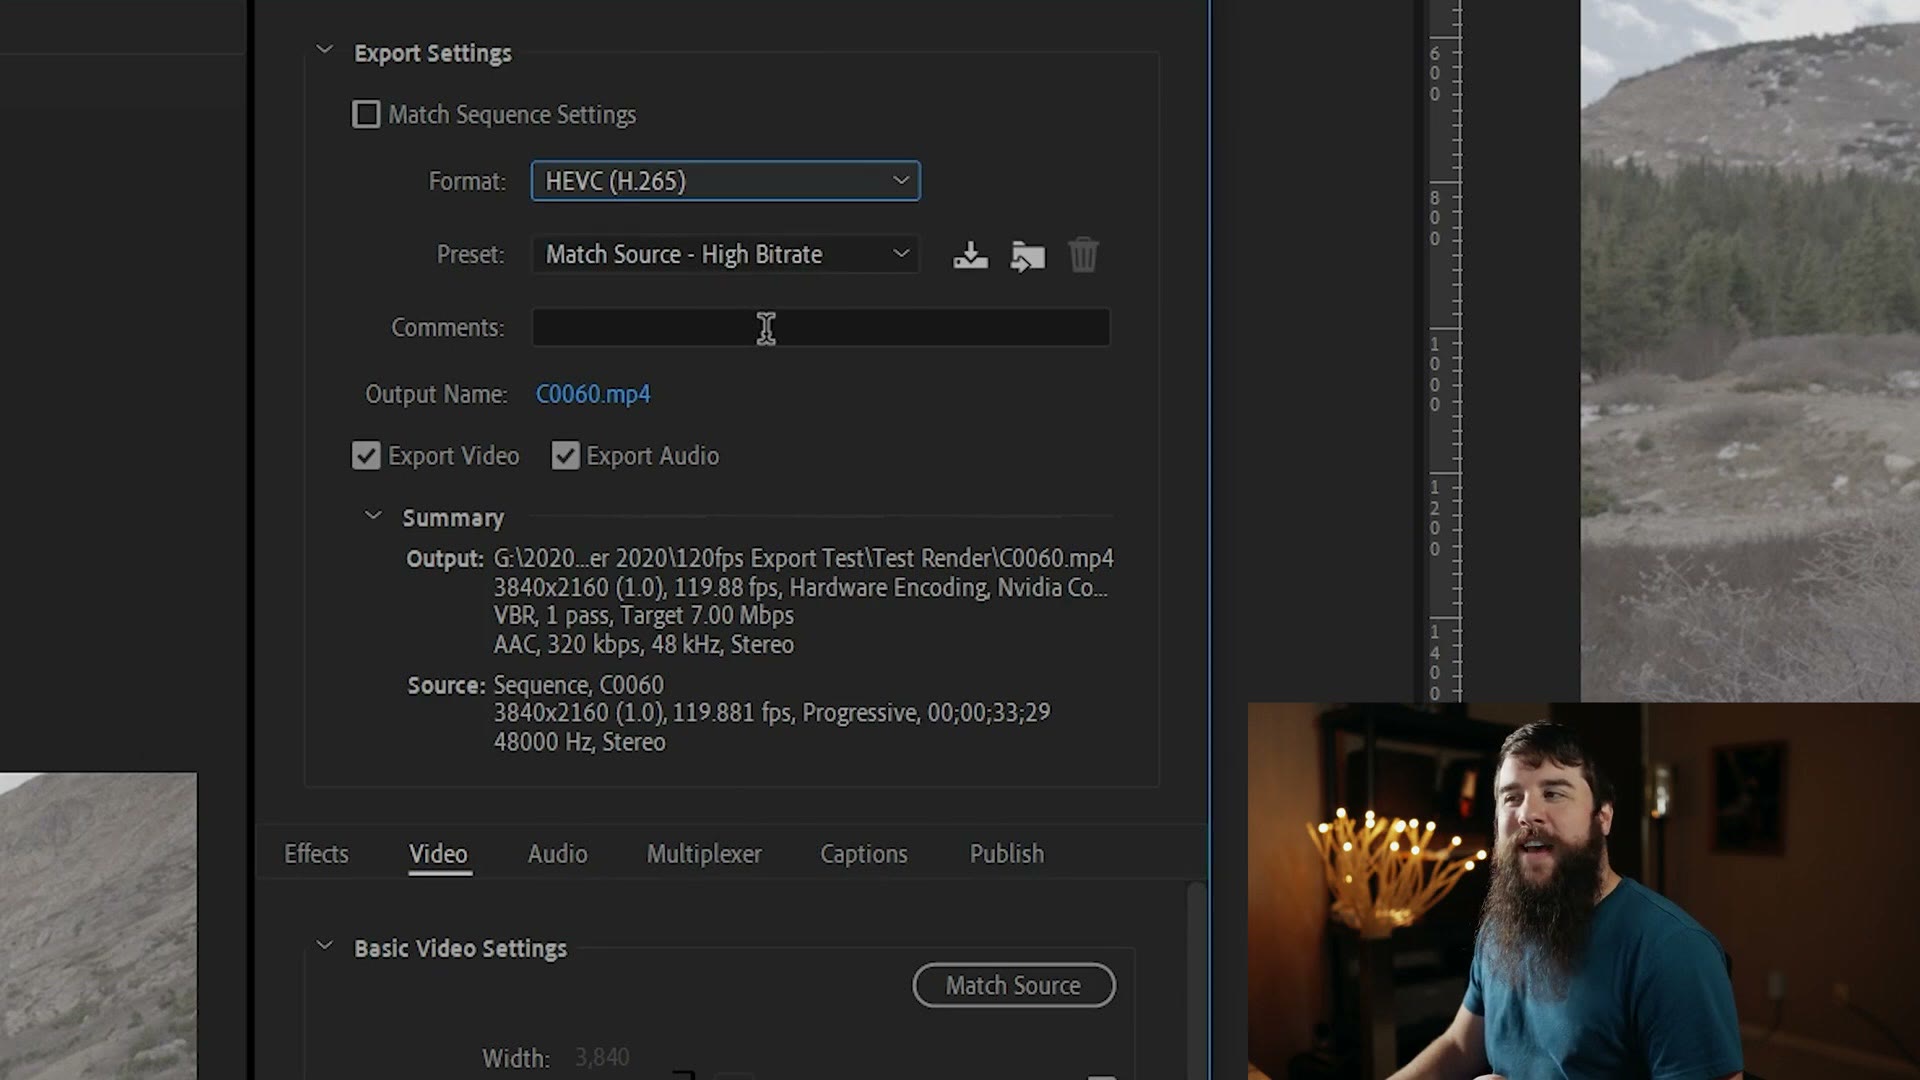
119.88. 120fps.
Let’s go through the rest of the settings.
For Output Name, click it and choose where you want to save your video. Make sure you know where you saved it, otherwise you’re not going to be able to find it and you’ll be leaving me confused comments like some people do. Check that Export Video and Export Audio are both ticked, which matters if you want those two things.
Down in the Video tab, my width and height are 3840 by 2160. If your footage is smaller, say 1920 by 1080, tick the box and change the numbers. Then make sure you tick Render at Maximum Depth, which is going to help your video quality.
Under Encoding Settings I have Hardware Encoding enabled, but if you only have Software Encoding that’s okay too. It depends on your graphics card. If you can do hardware encoding, do it.
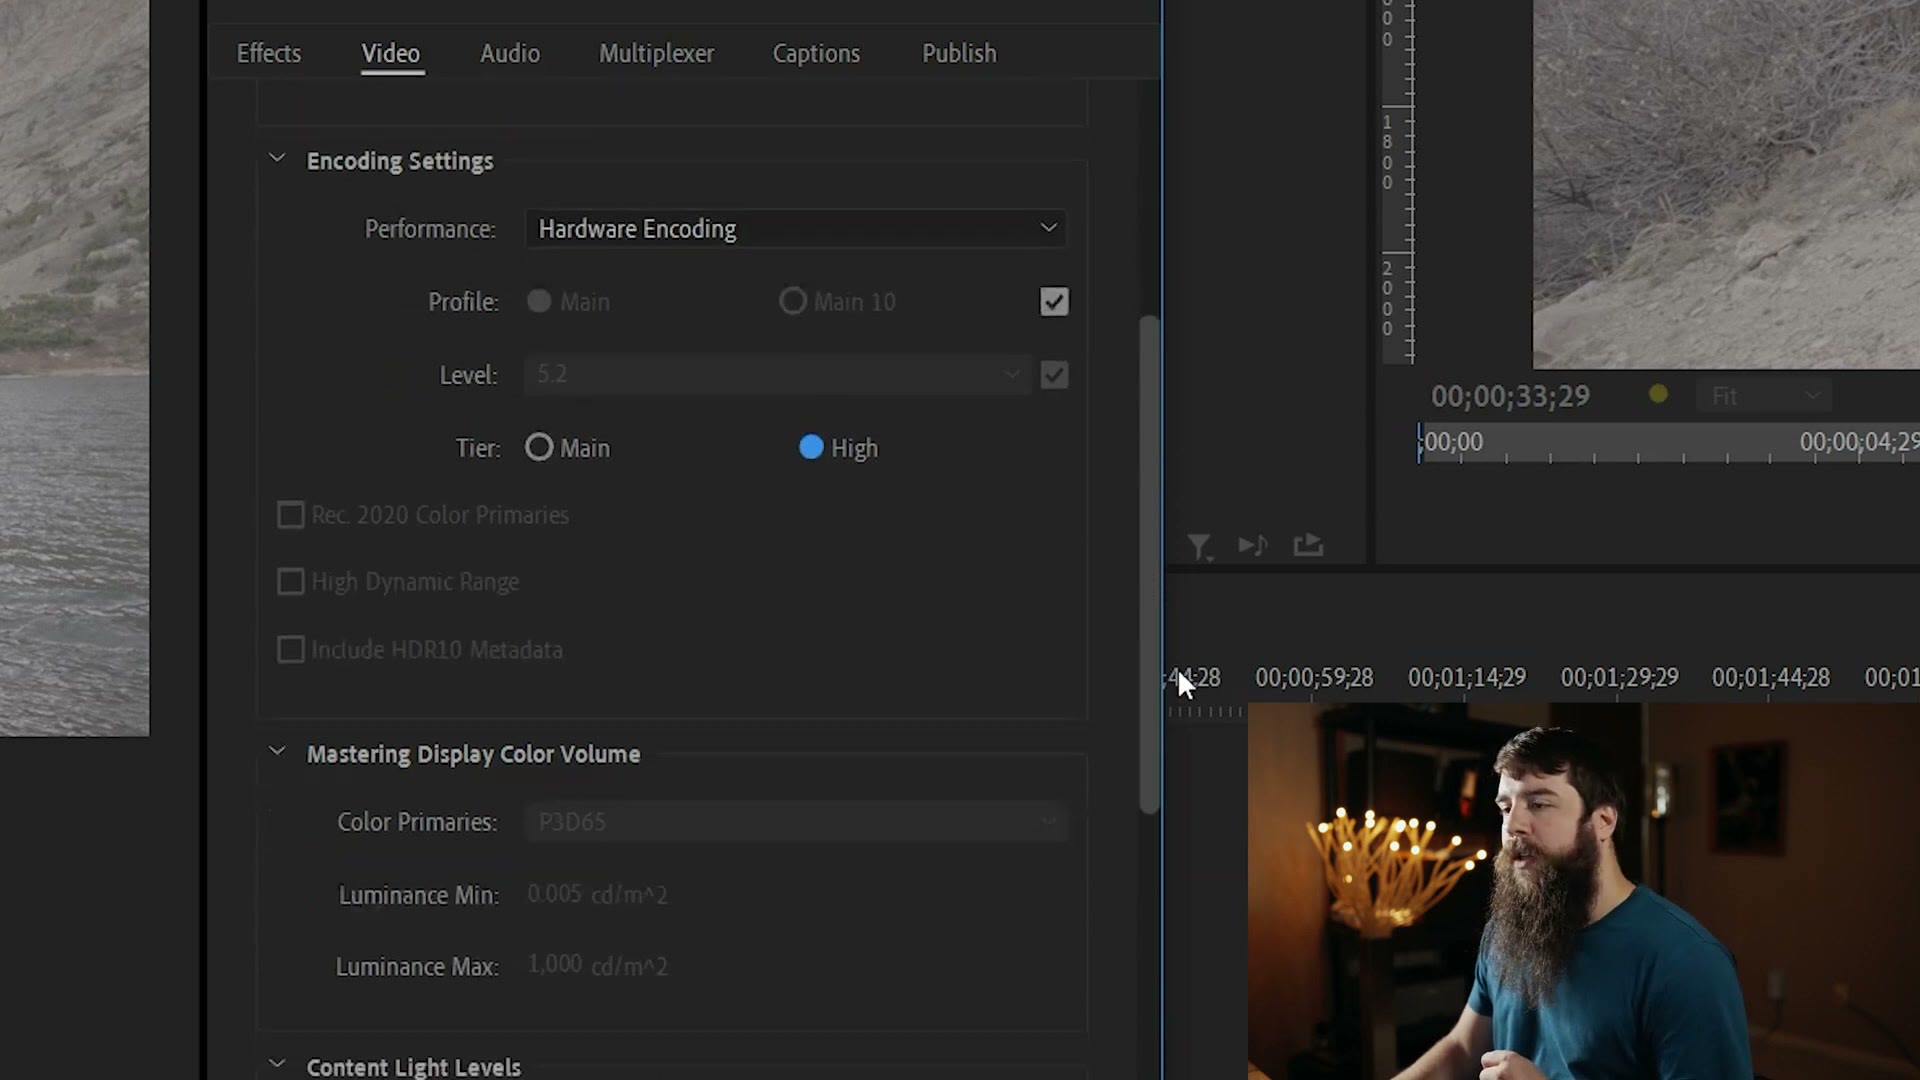
Now, under Tier, this one is important. Switch it from Main to High, which is what enables the changes we’re about to make.
Scroll down to Bitrate Settings. Because this is a 4K 120 frames per second clip that was recorded at 280 megabits per second on the a7S III, I want to make sure the file I’m exporting has a high bitrate too. My recommendation is to select CBR, and then for your target bitrate I have two options for you:
If you’re exporting 4K at 120fps, set your target bitrate to 100 megabits per second. That’s high but not super high, and it should still look really good. No need to crank it all the way to 240, we don’t need to go that crazy. If you do see image quality loss and artifacting, don’t be afraid to raise it.
If you’re exporting 1080p at 120fps, I don’t think it needs to be that high. I think you could get by with 60 megabits per second.
With that set, tick Use Maximum Render Quality at the bottom, then head to the Audio tab, because audio is very important. There I want AAC, 48,000 Hz, stereo, audio quality High, bitrate 320, with the precedence set to bitrate.
Lastly, save all of this as a preset so you don’t have to dig through these settings every time. Next to Preset, click the down arrow and give it a name, something like 3840×2160 119.88fps. That preset then lives under the H.265 format, so any time you need it you can just click it. Or, if you downloaded my free presets and installed them, it’s already there.
Then export. Click Export to render immediately inside Premiere, or click Queue to open Adobe Media Encoder and render from there, which lets you keep editing in Premiere while your video exports. I click Queue and then hit the green button.
And that’s it: a finished file playing back at normal speed, not in slow motion.
If it’s the slow motion side you’re after rather than true 120fps playback, that’s a different job, and it’s covered in how to speed ramp interpreted footage and frame rates explained.
Also, if you happen to be a wedding filmmaker like me, you probably want to book more couples and film more weddings. To help you out with that I’ve created a free guide with practical steps you can take right now. It’s a completely free gift to you.