
Here is how to export 4K video out of DaVinci Resolve at very high quality for YouTube, Facebook, Vimeo, or your clients.
And to save you time, I’ve built a set of free export presets you can download right here. They give you every setting below immediately, without dialling any of it in by hand, and they come with instructions for importing them into Resolve. Go grab them for free.
The Exact Export Settings You Should Use
Open your project. Mine has a 4K 24 frames per second clip on the timeline, and let’s pretend it’s a finished edit that’s ready to go out.
Click the rocket ship in the bottom right corner to get to the Deliver page. Over on the left in your render settings, name the file, then hit Browse and pick where you want it saved so you can actually find it after it renders.
Then set these:
- Format: QuickTime
- Codec: H.264
- Encoder: leave it on Auto, whatever your computer picks
- Resolution: 3840 x 2160 Ultra HD
- Frame rate: 23.976
And then the one that actually matters most. Quality. As the name implies, this directly determines how good your export looks. For the highest possible quality, select Restrict to and set it to 100,000 Kb/s.
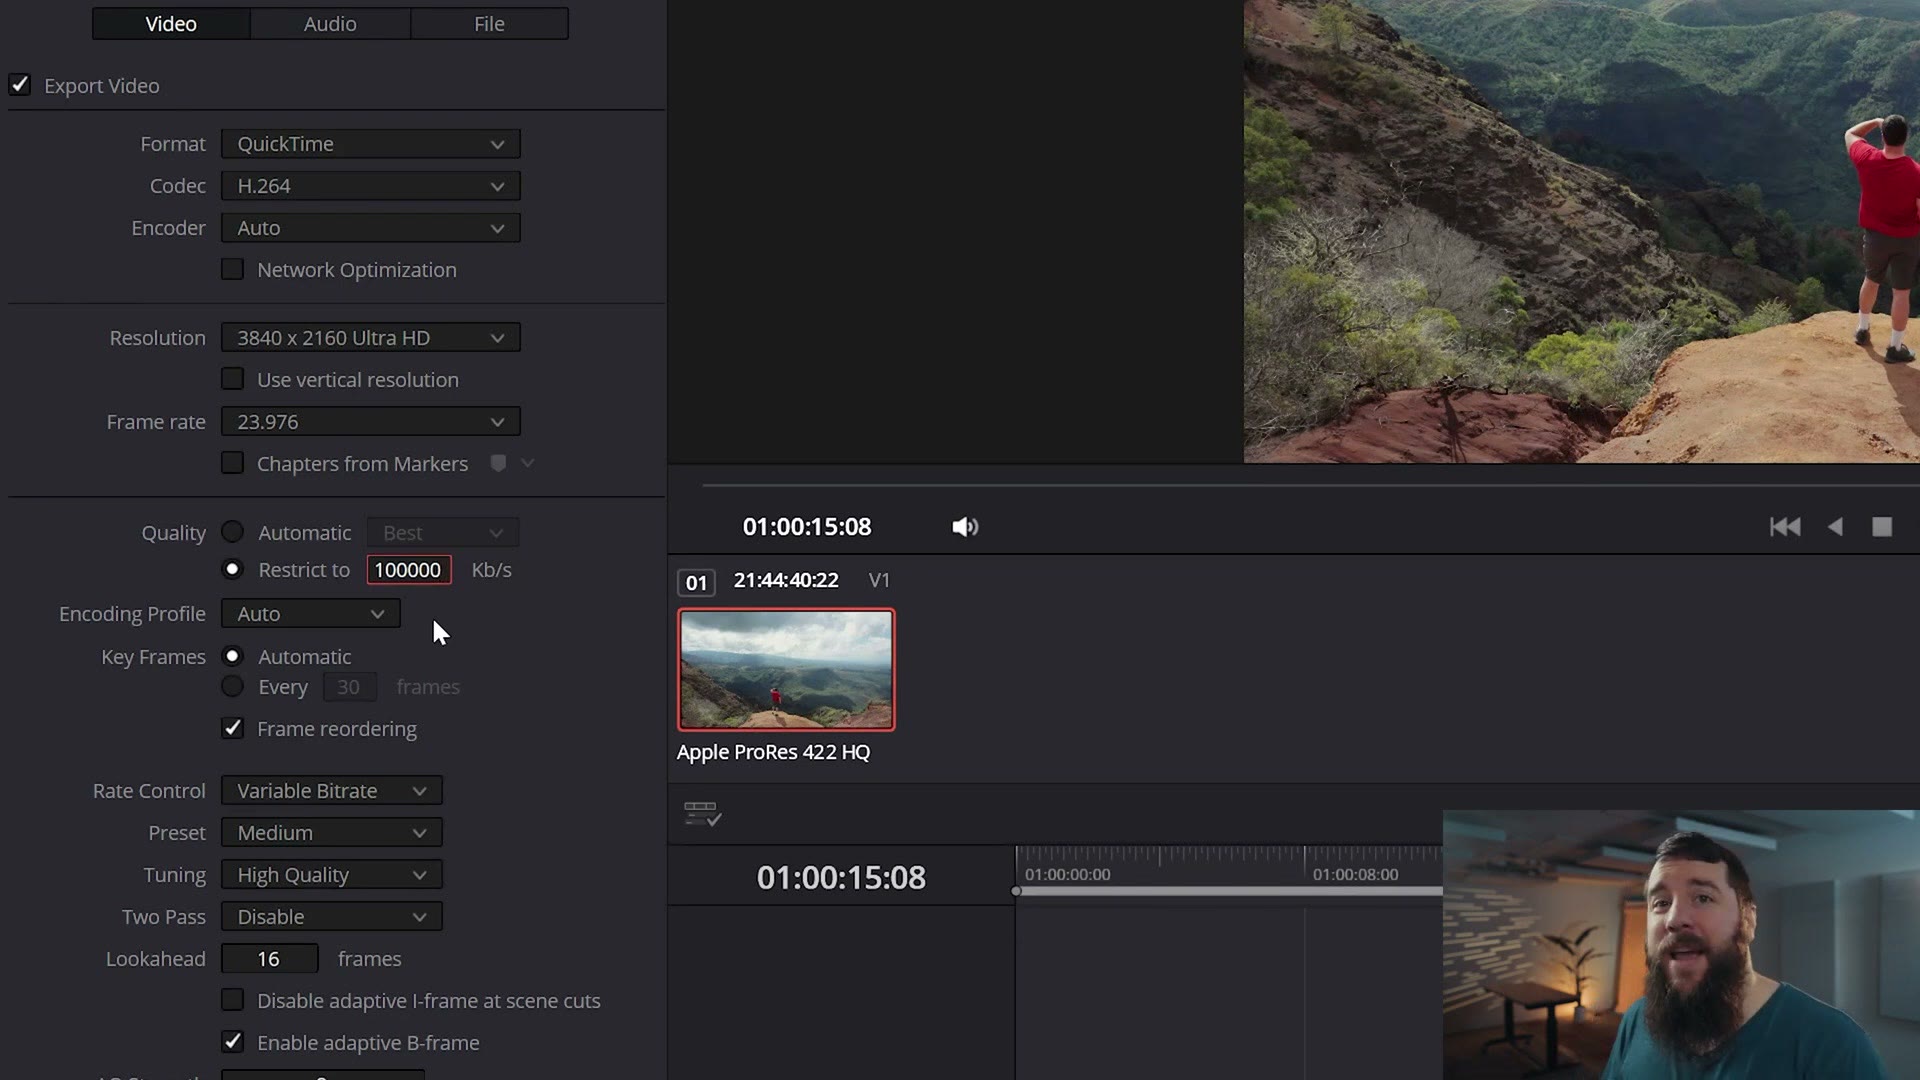
Yes, that produces a very big file. It also looks very good once it’s up on YouTube, and in my opinion the file size is completely worth it if you want the best looking 4K video you can get on there.
Export In 4K Even If You Didn’t Shoot In 4K
Speaking of quality on YouTube, here’s something a lot of people don’t know. Even if you filmed in 1080, I would still use these 4K export settings for basically everything you upload.
Because if you upscale your lower resolution footage to 4K and upload that, YouTube uses a significantly higher bitrate when it plays your video back, and the result looks dramatically better than if you’d uploaded it in HD. Same goes for Facebook, Vimeo and pretty much anywhere else. Uploading in 4K nearly always helps you.
One More Setting, If You Have It
Scroll down a little further. If you see a setting called Rate Control, open that dropdown and choose Constant Bitrate, which essentially tells Resolve to hold the highest bitrate the whole way through and keeps your quality as high as possible.
If you’re not using this one, I went through Best Export Settings For Premiere Pro For YouTube as well.
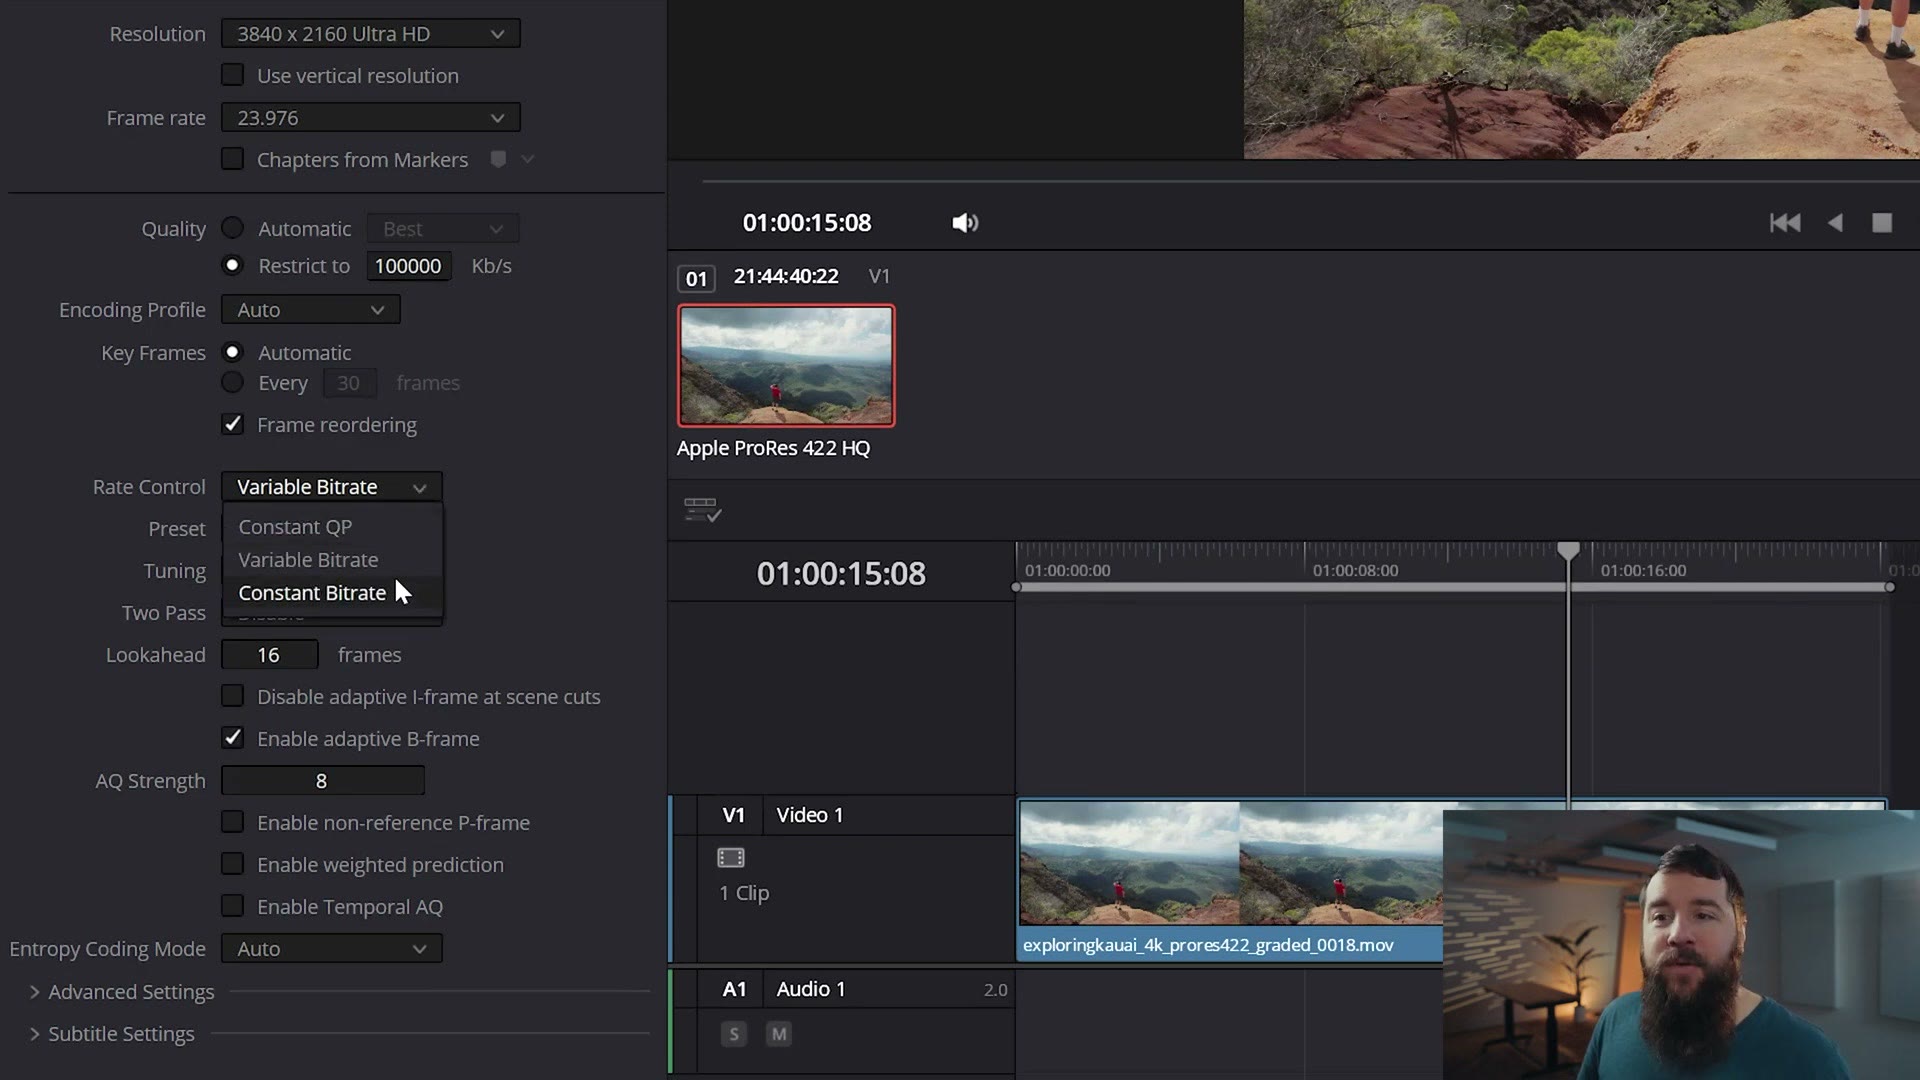
And if you don’t see Rate Control at all, do not stress about it. I’m not entirely sure why it doesn’t appear for everybody. It might be the free version of Resolve, it might be Mac versus PC, I’m on a PC. Just know that if it isn’t there it is not the end of the world. Your quality is still going to be great. Enabling it is not strictly necessary.
Once all of that is dialled in, congratulations, you’re ready. Click Add to Render Queue, then Render All over on the right.
Save Your Export Settings
But do you want to save time? Do you want to never dial any of this in again?
You can either download my free presets, which already contain everything above, or you can save what you just built as your own preset.
To do that, go up to the top right to the secret three dot menu, click it, and select Save As New Preset.
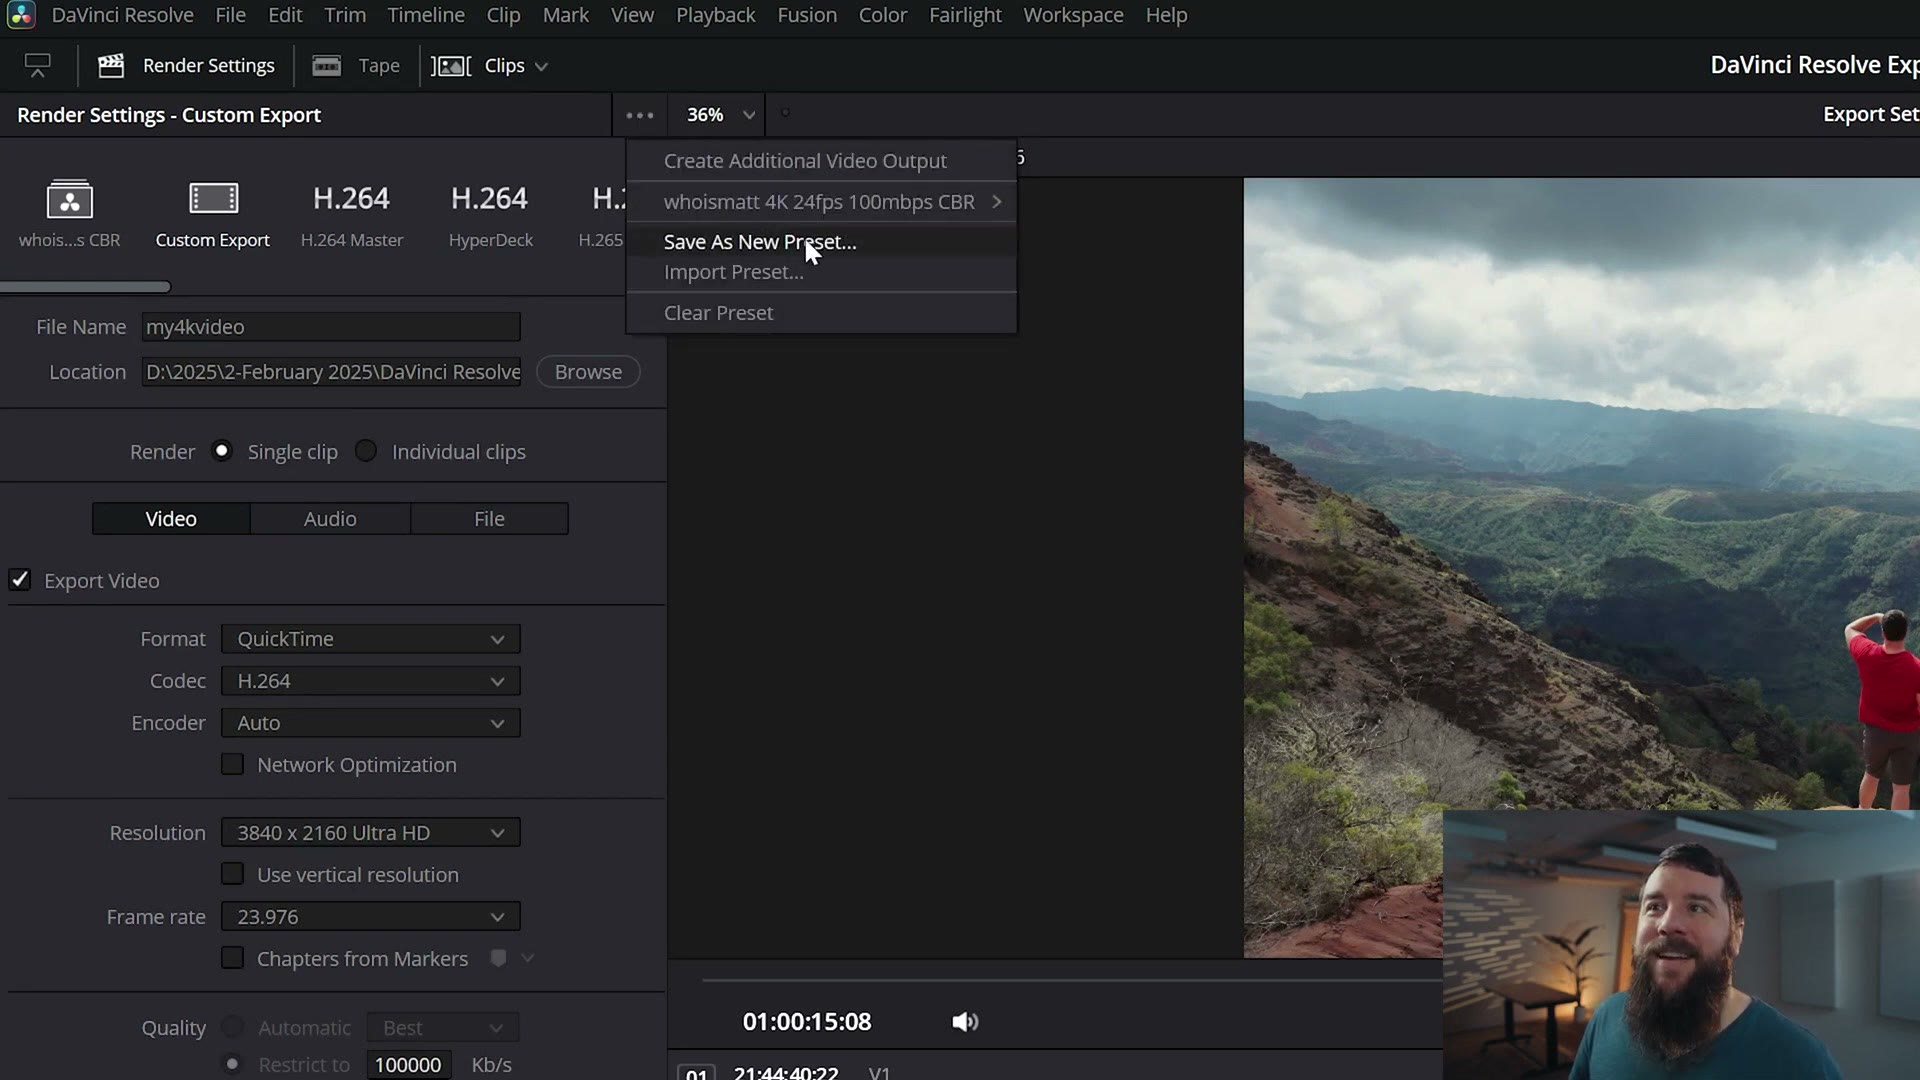
Name it something you’ll recognize later, like “4K 24fps 100Mbps,” and hit OK. From then on, any time you want these settings, go to the preset bar along the top, scroll left or right, click your preset, and you’re done.
That’s it. If you also work in Premiere, or you want the version of this I keep updated, I have a newer walkthrough of these Resolve export settings here.