
This is part two of my four part series on run and gun filming with the Sony a7S II. Part one was 38 minutes on the menu system, covering every setting I use for weddings, corporate promos and anything else shot on the move.
This one gets out of the minutiae and onto the mode dial. Which I know sounds like nothing. On a Canon you set it to manual and never touch it again. How important could a mode dial possibly be?
On this camera it is one of the best features it has, and it will let you change frame rate and resolution almost instantly.
Saving Your First Preset
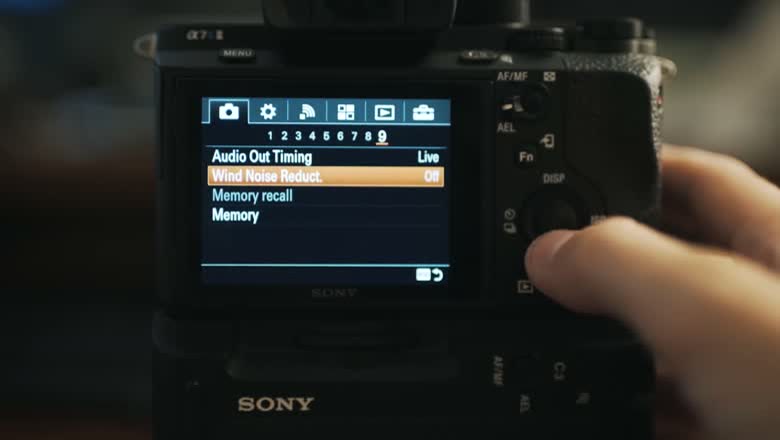
Set the camera up exactly how you want it. Then go to Menu, the camera icon, all the way over to subheading 9, and at the bottom you’ll find Memory.
Open it and you’ll see 1, 2, and then M1 through M4. The 1 and 2 are the two positions on the mode dial itself, which is why we start there. Select 1, hit enter, and it kicks you back out looking like nothing happened.
Now turn the dial to 1. You’ll get a Recall panel in the top left showing what’s stored: video mode, 1/50, ISO 200, 3200K, whatever you had. Hit enter and the camera is those settings again.
Saving A Second One
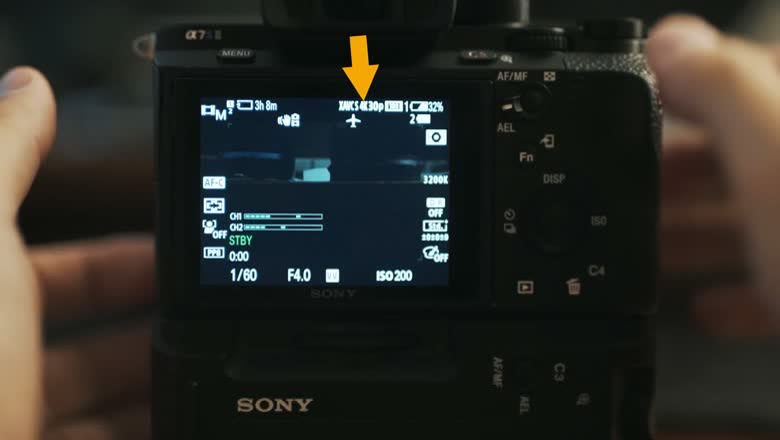
Go back into Menu, camera icon, subheading 2. There’s File Format, XAVC S 4K, and under it Record Setting. Change it from 24p 100M to 30p 100M.
Now, because you’ve doubled your frame rate, double your shutter: 1/60. Leave everything else. Then back to subheading 9, Memory, and this time save to 2.
Flip the dial from 1 to 2 and the recall panel comes up with the 30p settings. Flip back to 1, press enter, and you’re at 24p with your original shutter speed, instantly, without going near a menu.
How I Actually Use It
On a wedding day I shoot a lot of different frame rates. 4K 30, 1080p 60, sometimes 120. I do not want to dive into menus to switch.
So preset 1 is always 4K at 24fps. If I’m filming the bride reading a note, or the ceremony, or the toasts, I flip to 1 and I know I’m getting good audio and that everything will cut together with my other cameras.
Preset 2 is whatever b-roll setting I want that day. That’s the whole system.
And you can change what’s saved from either position. The camera already knows it’s in video mode, so anything you adjust stays in video mode. Want 1080p instead? Subheading 2, XAVC S HD, Record Setting 60p 50M. Bump the shutter to 1/125 to keep the doubling rule, and save it.
Six Presets, Not Two
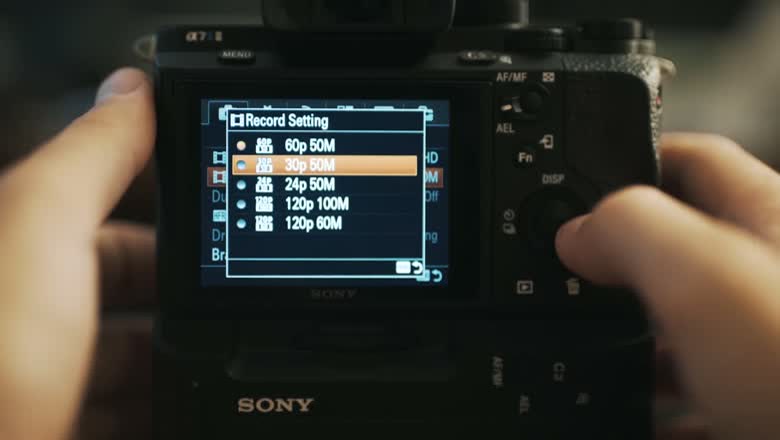
Here’s the part people miss. Back in the Memory menu, past 1 and 2, are M1 through M4. Those are stored on the card rather than on the dial, but you reach them from the same recall panel: turn the dial to 1 or 2, then scroll across.
Set up 1080p at 120fps, push the shutter to 1/250 so you don’t get motion blur, then save to M1. Now flip the dial and the recall panel offers you 1, M1, M2, M3 and M4. Pick M1 and you’re at 120fps.
Between the two dial positions and the four memory slots that’s six frame rate and resolution presets you can reach in about two seconds.
The possibilities get more useful than just frame rates. Say you’re shooting indoors and outdoors on the same day. You already know indoors is 3200K and outdoors is 5500K. Set M1 to 4K 24fps at 3200K and M2 to 4K 24fps at 5500K, and walking out of the building becomes one flick of a dial.
The Rest Of The Series
Part three is my custom buttons setup, and part four is the function menu. Between the three, you can shoot this camera fast without ever fighting the Sony menus.