
This is part three of my Run & Gun filming series for the Sony a7S II, and honestly, if you only watch one of these, make it this one.
The whole goal here is to let you shoot run and gun, which is what a wedding is, without ever digging through the menu going “what was it under, subheading nine?” Everything you need should live on a custom button, the mode dial, or the function menu. Nothing else.
So before this one, go watch Part 1, where I set up the menus, and Part 2, where I set up the mode dial to change resolution and frame rate without touching the menu at all. Otherwise a lot of this will not make sense.
Where To Find Custom Key Settings
You are probably thinking there are only four custom buttons on this camera, so what is there to talk about. Actually, no. You can customize literally every single button on the back of this thing, which is amazing.
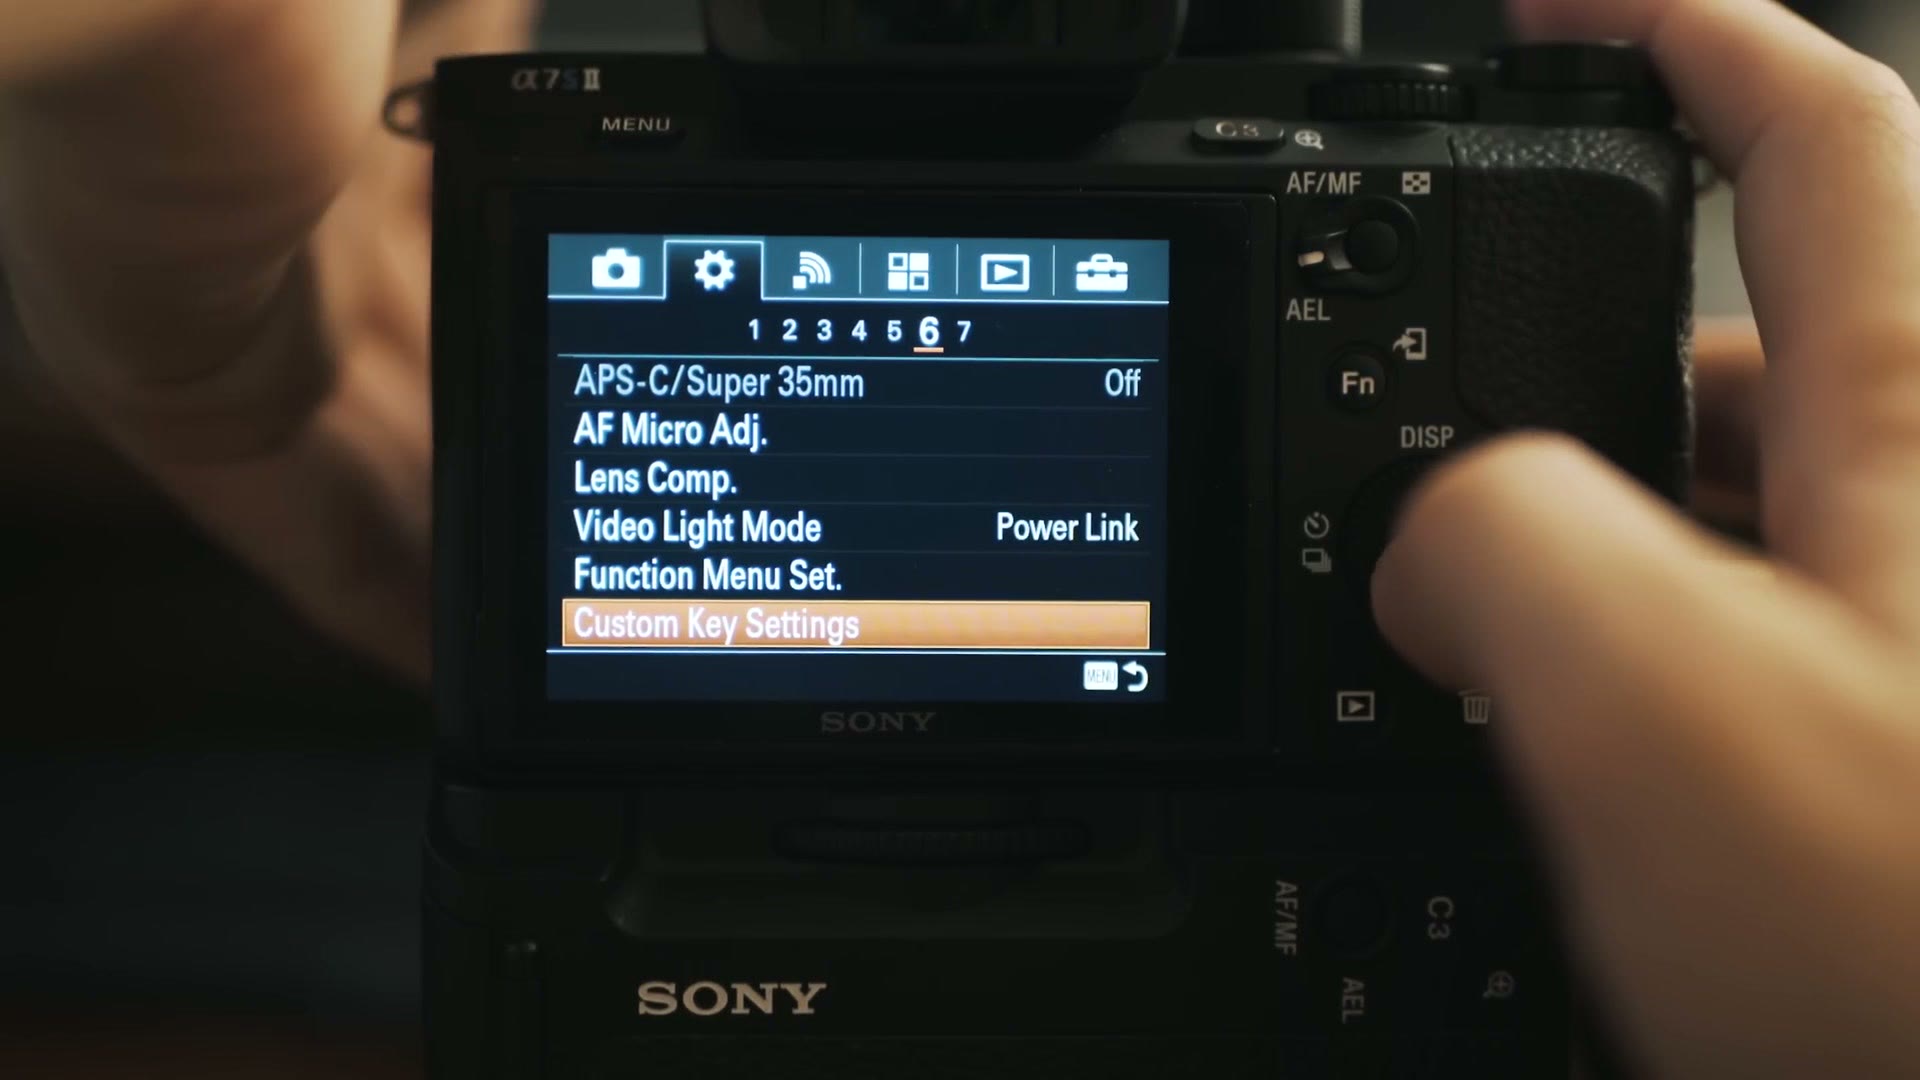
Hit menu, go to the gear icon, go all the way over to subheading six, and at the very bottom you will see Custom Key Settings. Open that and you get two pages.
Page One: The Custom Buttons
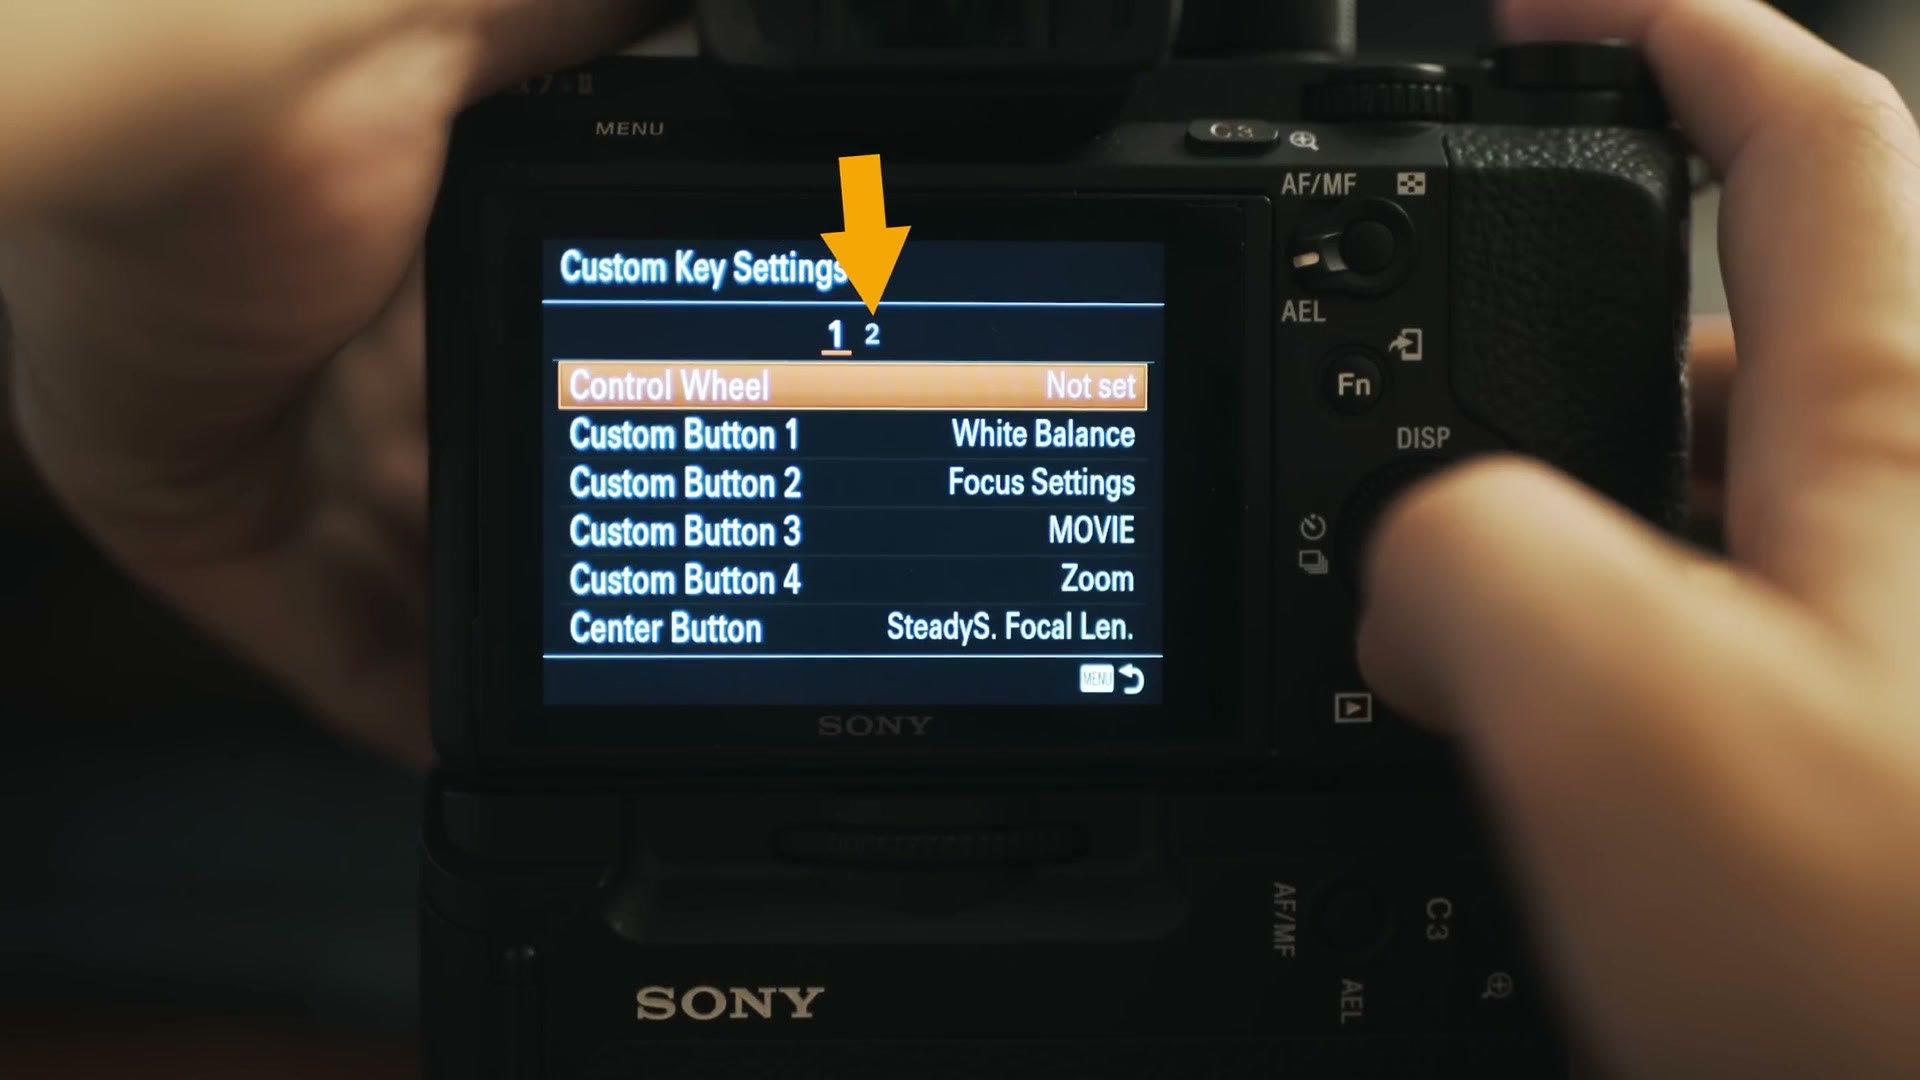
Control Wheel: Not Set. It is really easy to bump the control wheel while you are filming, and if I had ISO on it I would be changing my exposure by accident every time I adjusted my grip. So I leave it off. Don’t let that stop you from setting it if you want it, though. There are a ton of options in there.
Custom Button 1: White Balance. One of the settings I touch most often on a wedding day, so I want it one click away.
Custom Button 2: Focus Settings. This one behaves differently depending on your lens. With a dumb lens like the one I have on here, hitting C2 while recording punches in so I can check focus. With an electronically connected lens that does autofocus, like my 16-35, it takes you into the focus area settings instead, where you pick wide or zone or center.
Custom Button 3: MOVIE. Oh, I love custom button three. This moves the awkwardly placed record button from the side of the camera to C3, which my thumb can reach without contorting my whole hand while I’m trying to hold the thing steady. C3 is my dedicated record button now.
Custom Button 4: Zoom. In part one I set the zoom to Clear Image Zoom, which basically turns my non-zoom lenses into zoom lenses. Very handy when you are stuck in place and thinking, man, I wish I was a little closer.
Center Button: SteadyShot Focal Length. Because I shoot dumb lenses and still want the in-body stabilization, I have to tell the camera what focal length is mounted. Instead of digging for that in the menu every time I swap glass, I hit the center of the wheel, even while recording, and scroll to the right focal length.
Page Two: Everything Else On The Back
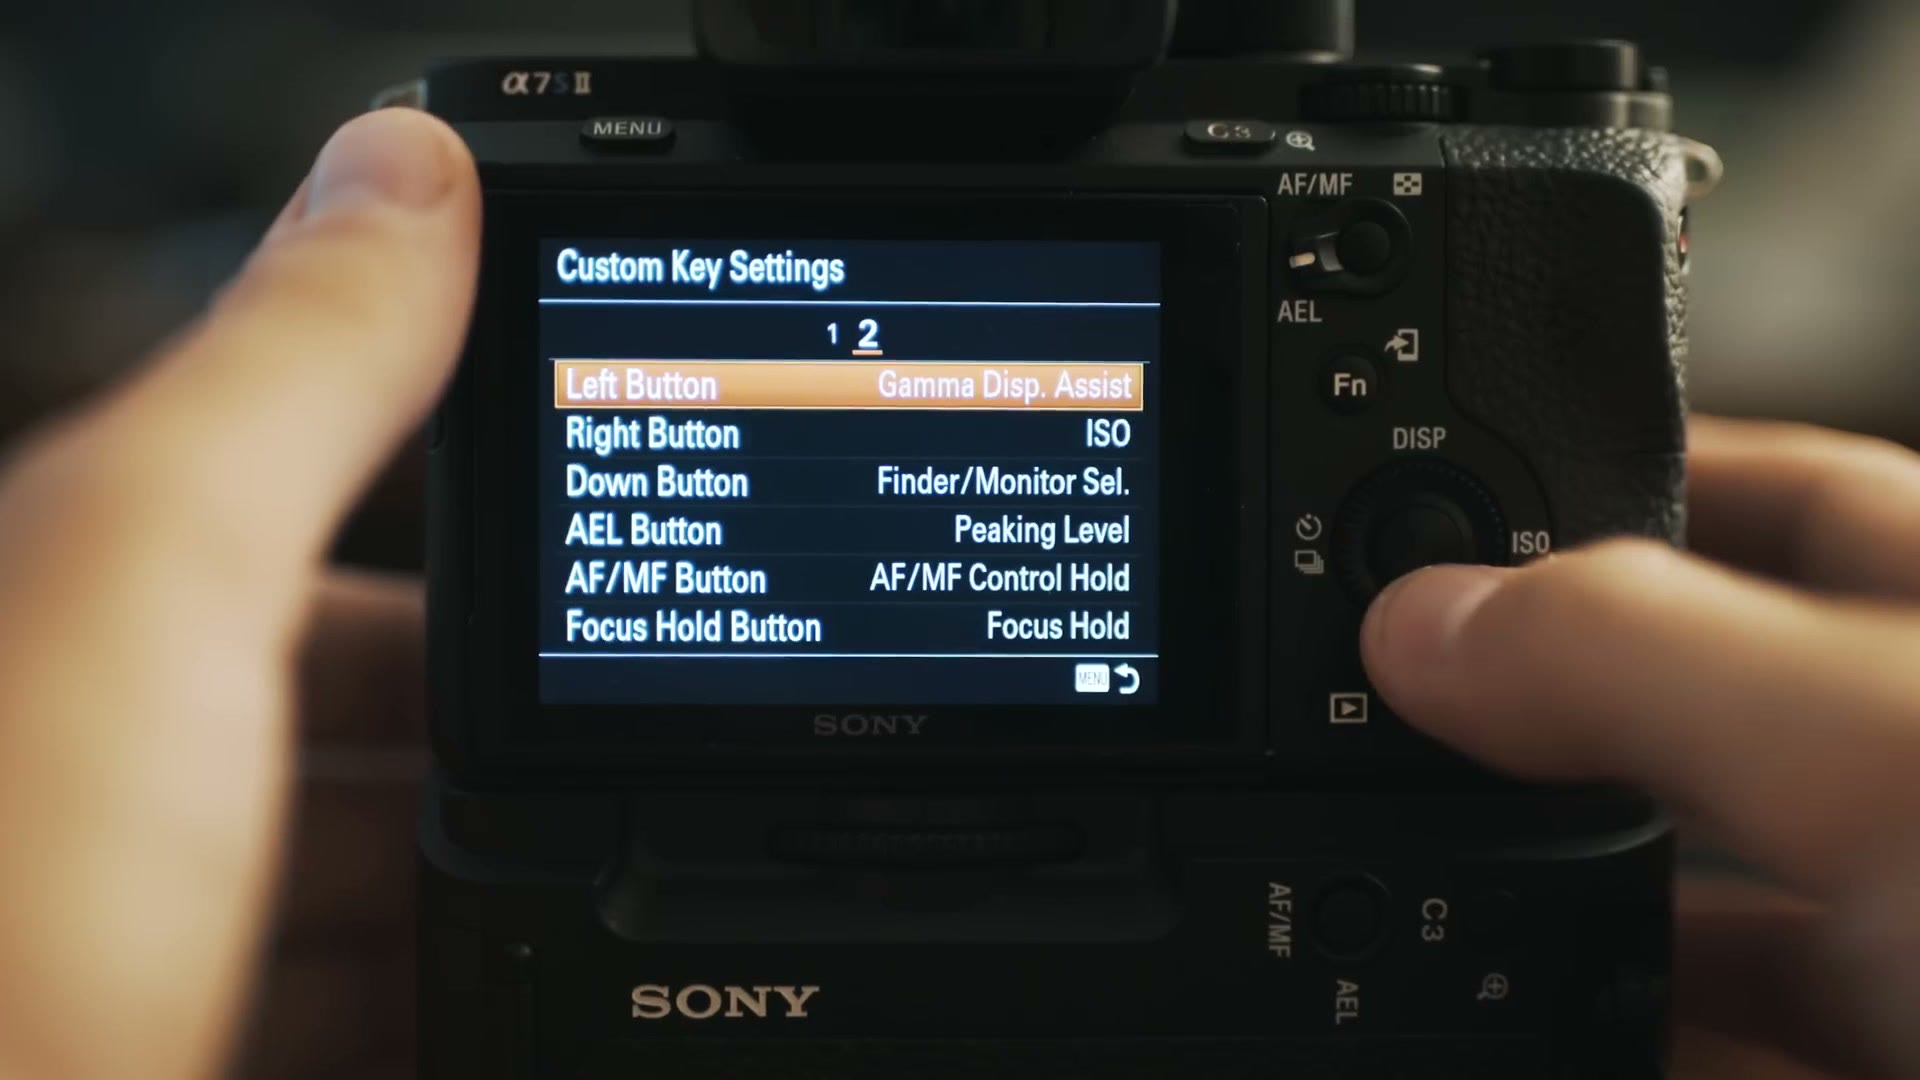
Left Button: Gamma Display Assist. One drawback of shooting MattFlat is that it is flat enough that it can be hard to judge white balance. Is that 3800 or 3200? I can’t tell. So I press left, turn on the S-Log3 assist, get a preview of what the color will actually look like, fix my white balance, then turn the assist back off. I don’t shoot with it on. It makes everything super saturated and everyone glow, and I don’t like it.
Right Button: ISO. The back of the camera already says ISO next to that button, so I saw no reason to be clever. It stays ISO and it is easy to remember.
Down Button: Finder/Monitor Select. In the menu video I set the camera to monitor only, because on auto it kept killing the screen mid-adjustment and I needed to see that. But sometimes I do want the viewfinder. Press down, it switches, use the finder, press down again, back to the monitor. No menu.
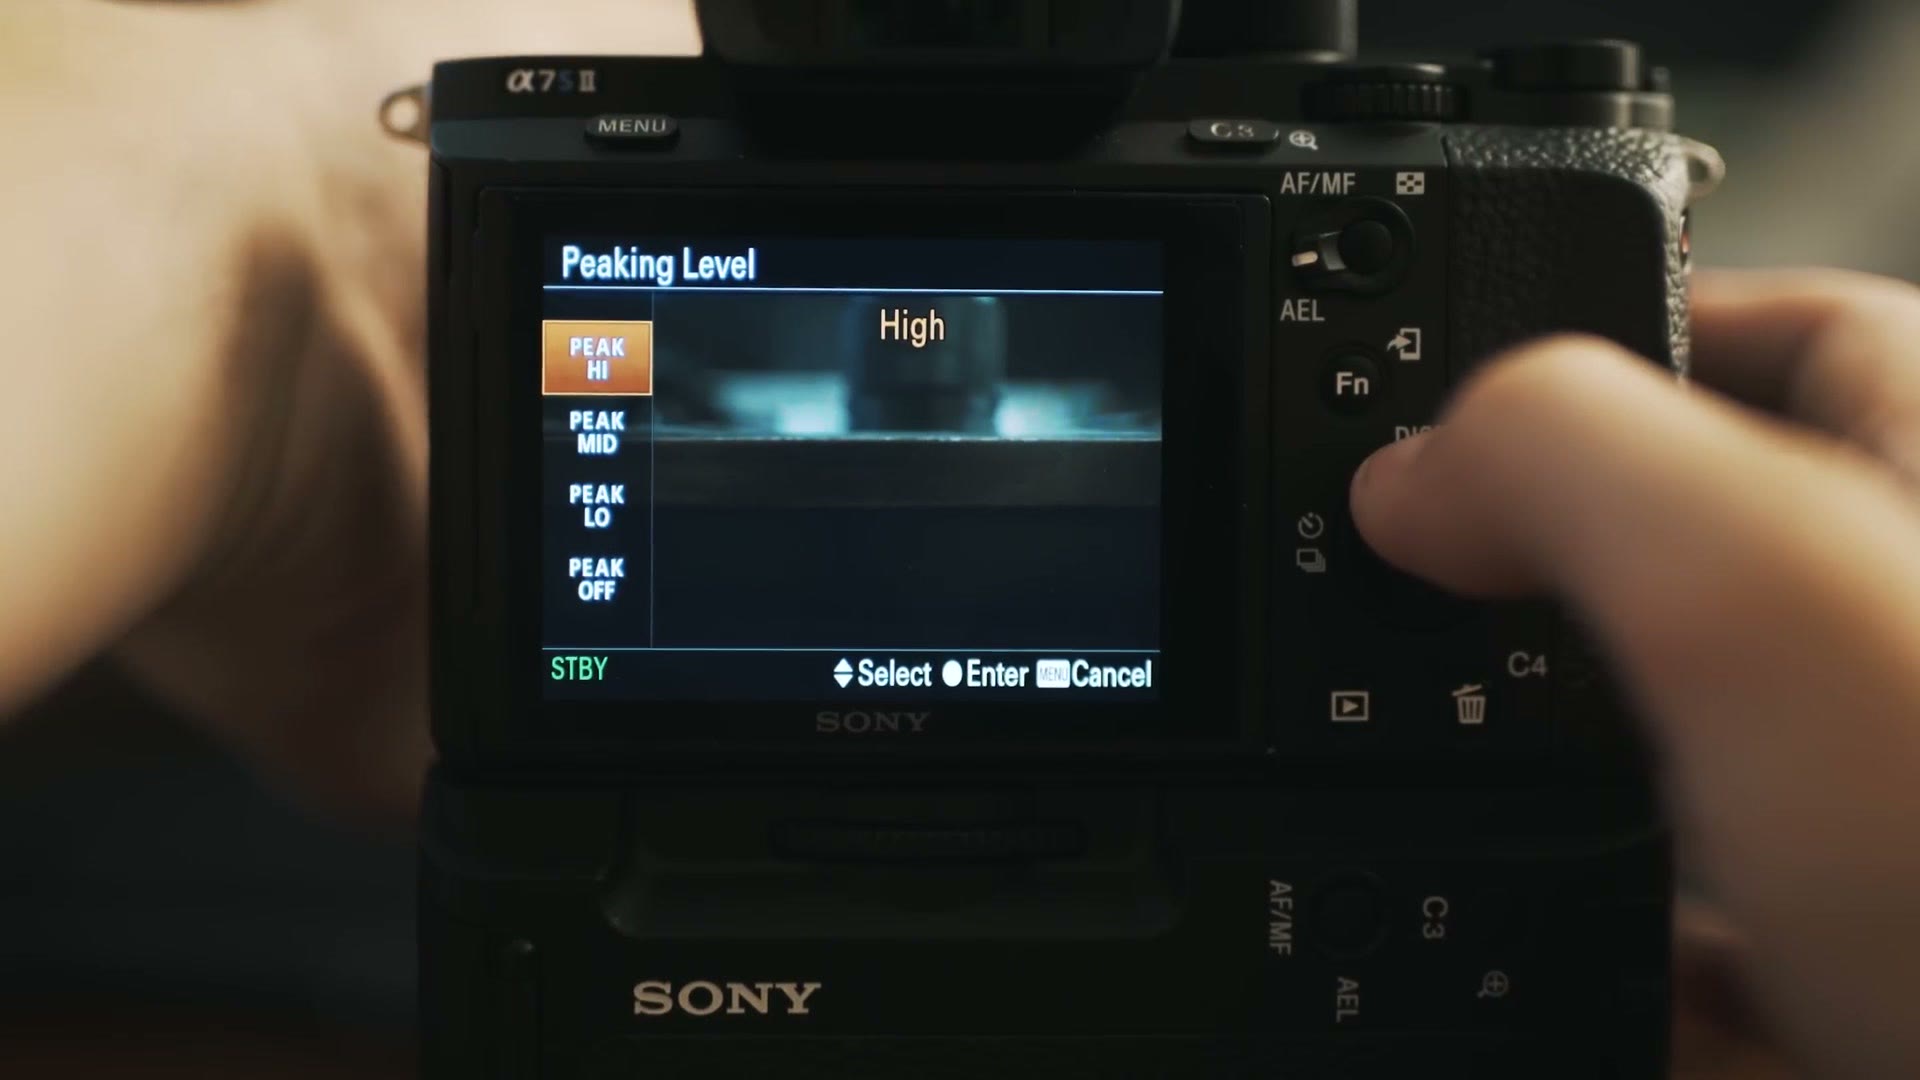
AEL Button: Peaking Level. There is a switch next to this button for AEL and AF/MF. I only ever use the AEL side, because at this point there are already a lot of buttons to remember. With it on AEL, that button brings up peaking, and I can pick high, mid or low. Very useful when you’re manually focusing and squinting at the screen wondering if that is actually sharp.
AF/MF Button and Focus Hold Button: left at default. AF/MF Control Hold and Focus Hold. I have not changed them, because at this point the camera is already customized to death and I have everything I need at my fingertips. There are more buttons here than I need, which is not a bad problem to have.
Next Up: The Function Menu
The camera gives you a ton of options to save yourself from digging in the menu. Between the custom buttons and the mode dial you can make the majority of your changes without opening it at all.
In the last video in this series I cover the function menu, which duplicates a lot of what is already on the custom buttons but presents it in a more readable format, so you don’t have to remember what each button does. If setting up every single custom button feels like a lot, start there instead. You get almost the same speed.
Between the three, you can shoot this camera fast at a wedding without ever dealing with the much maligned Sony menus.