
Today I want to show you how to use Adobe Premiere Pro and After Effects to remove sensor dust, sensor spots, or even beard hair from your footage in post. I realize that third one probably doesn’t apply to you.
With 4K and mirrorless cameras it’s no longer a question of if you’ll get a dust spot, it’s when. On a mirrorless body like the a7S II the sensor sits very close to the front of the camera, which is a thing called flange distance, and it isn’t a dirty word, don’t worry. But that short distance plus a big sensor means it’s very easy for dust to drop straight in while you’re swapping lenses.
The best fix is not getting dust in there in the first place, so here’s my quick and cheap trick for keeping dust off your sensor, and here’s the exact gear I use to clean it. Get a rocket air blower, which looks like the thing you use to clear a baby’s nose, and which is genuinely multi-purpose.
And please use the blower rather than just blowing on the sensor with your mouth, because you may drool on your camera sensor a little bit. That may have happened to me. Multiple times.
But this post is about what happens after that. You’re home, everything’s copied over, you’re watching your beautiful glorious 4K footage, and there they are. Spots. That’s what we’re fixing.
There are a lot of other tutorials about this and none of them are as straightforward as this. People will tell you to grab a screenshot, take the JPEG into Photoshop, mask out layers and bring it back in. Or to just blur over the spots, which doesn’t actually fix it, and if it does it’s a mountain of work. You don’t need any of that.
Which version you’re on doesn’t matter much. This was recorded in Premiere Pro CC 2017, and the technique works in earlier and later releases.
The Footage
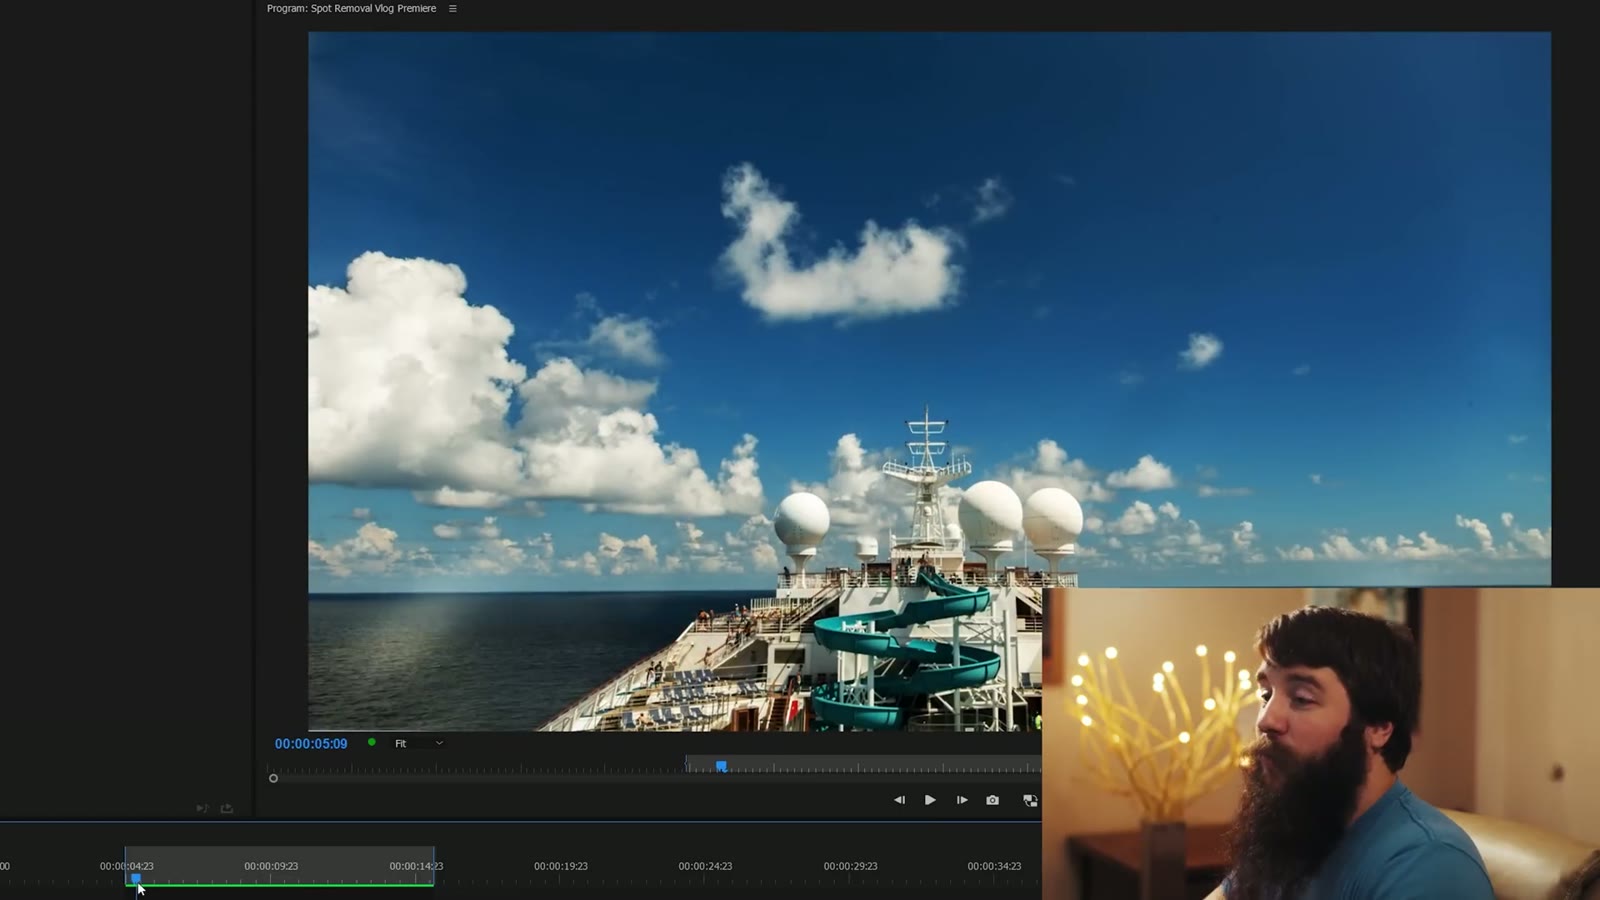
This is a timelapse I shot from the back of a cruise ship on a family vacation, which ended up in this video. Clouds rolling overhead, ship churning through the water, and it looks really awesome. Then, right before I was about to render and be done with it, I noticed the spots.
Zoom into the sky and there are three of them. And because they don’t move while everything else does, they’re extremely distracting once the clip is playing.
Premiere Pro
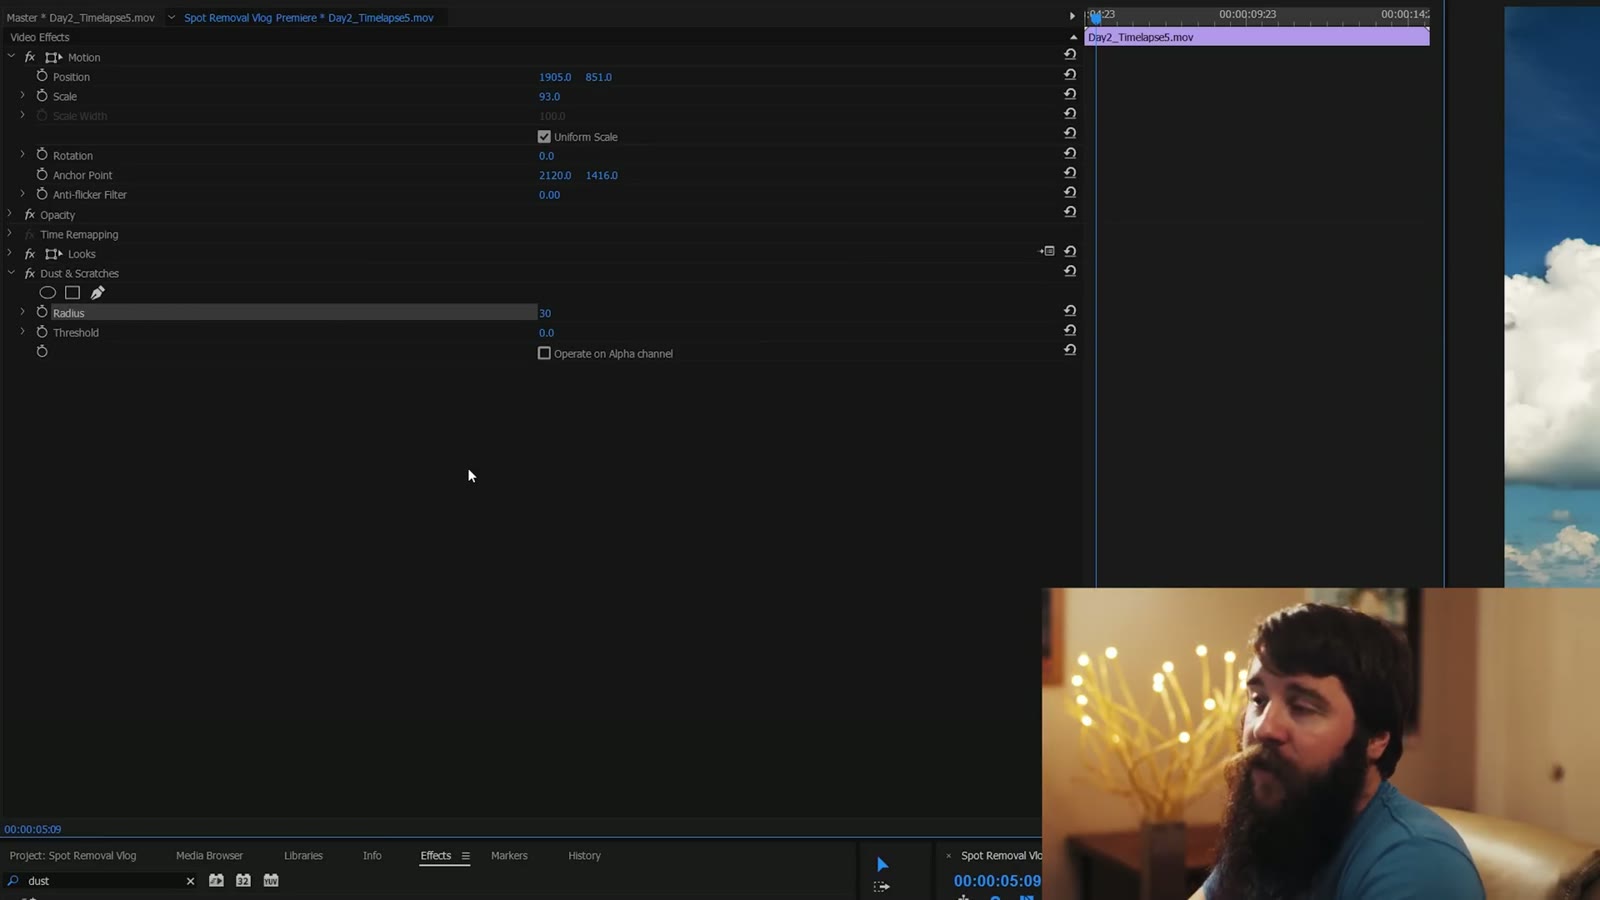
Go to the Effects tab and search for dust. That brings up Dust & Scratches, which lives under Video Effects, Noise & Grain. Drag it onto your clip.
The effect is simple. It has a Radius and a Threshold, and Radius is the only one you really need to care about. Set the radius to 30 with no mask and watch what happens: it removes most of the solid lines from the whole clip and turns your video into a watercolor painting. Fun effect, terrible for this. So turn it back down to 1.
Mask The First Spot
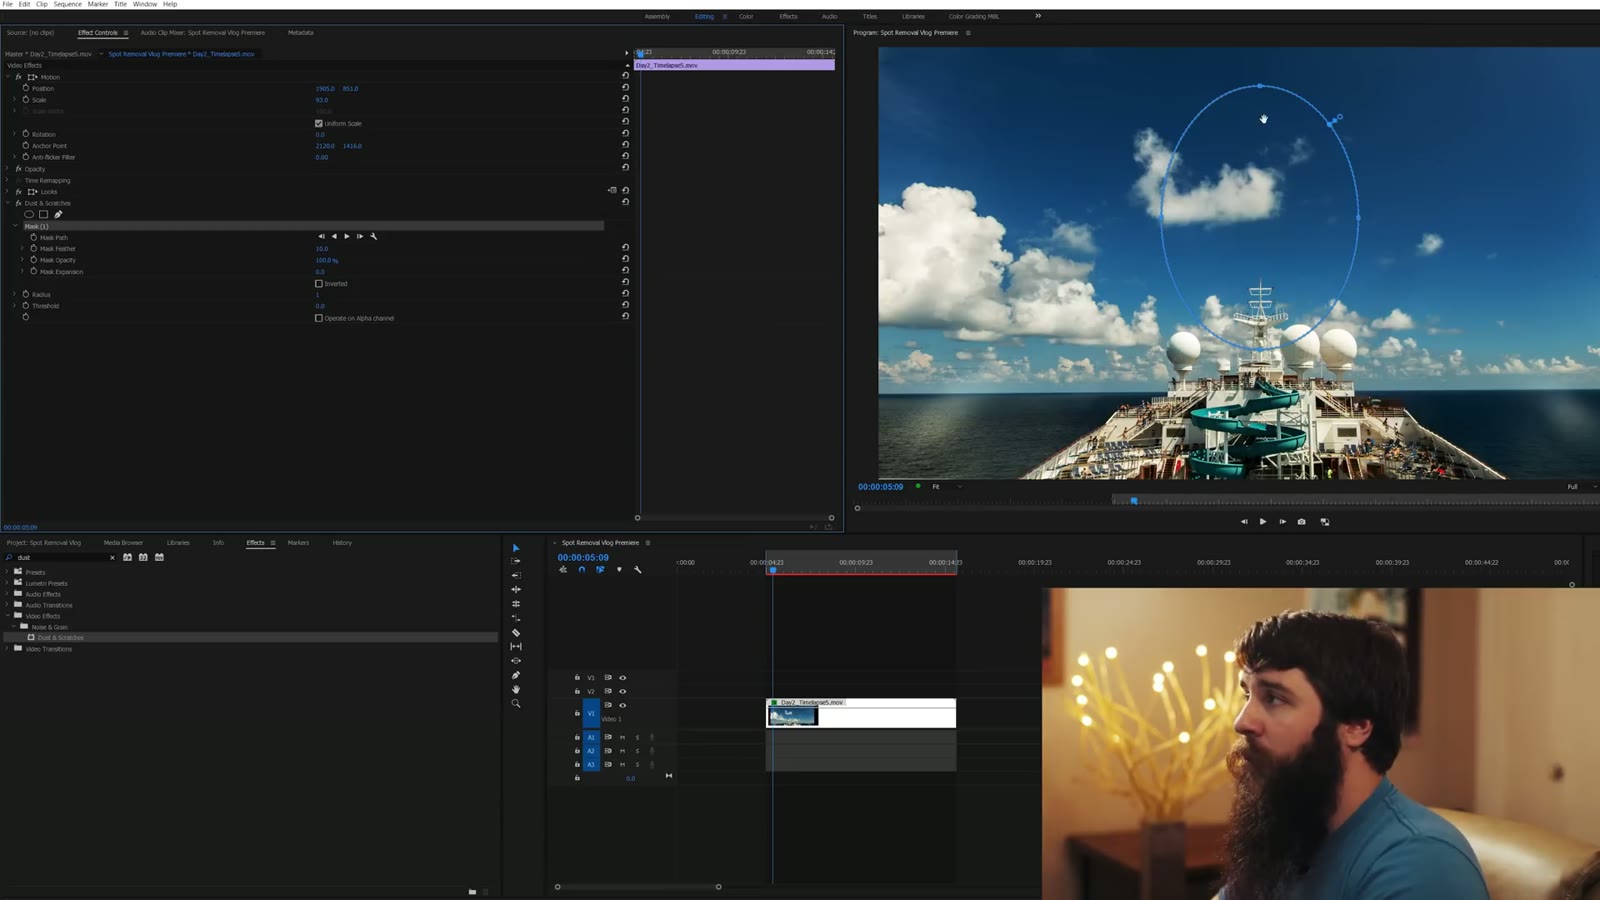
Click Create ellipse mask. Now the effect only applies inside that circle instead of to the whole frame, which is the entire trick.
Drag the mask over to your first spot and resize it roughly to the size of the spot. Then set your preview Fit to 200% and go back in to fine tune it, because you want the circle to be just barely larger than the dust spot and no bigger.
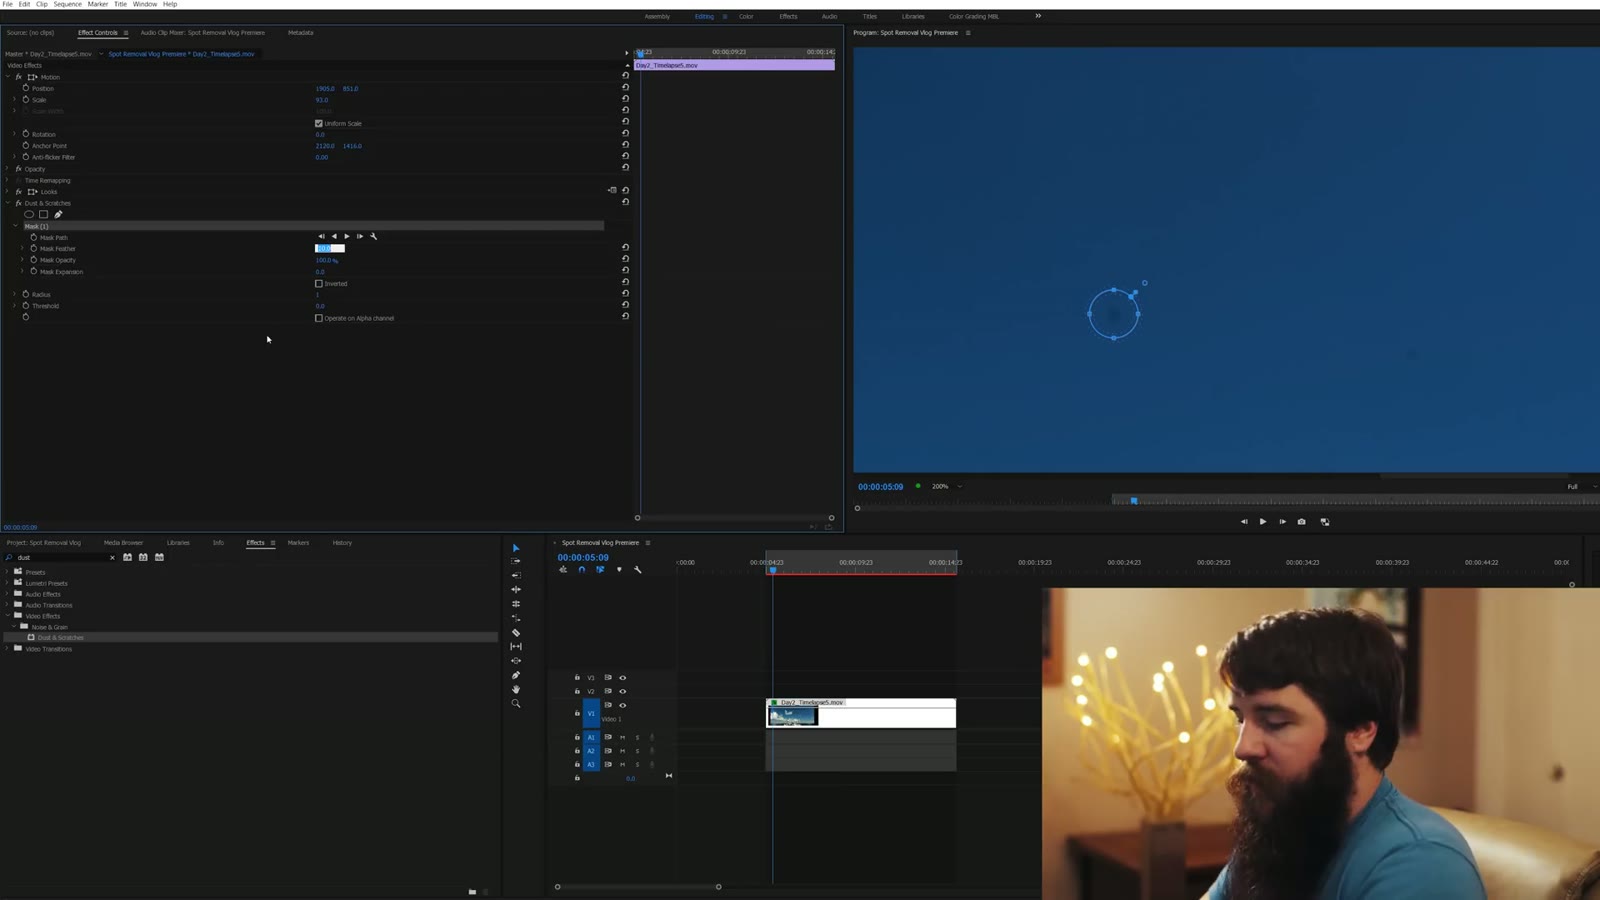
Set Mask Feather to 20 pixels. That widens the dotted line around the mask and gives you a smooth, natural transition from the untouched video into the masked area, so it doesn’t look like something was obviously removed.
Now go back up to Radius and set it to 30. And, wait a second, the dust spot is completely gone. Click away from the mask and you can barely tell anything is there. Look very closely and it’s a slightly smoother patch of gradient, but once it’s up on YouTube or Vimeo with compression applied, nobody is ever seeing it.
Repeat, Then Render
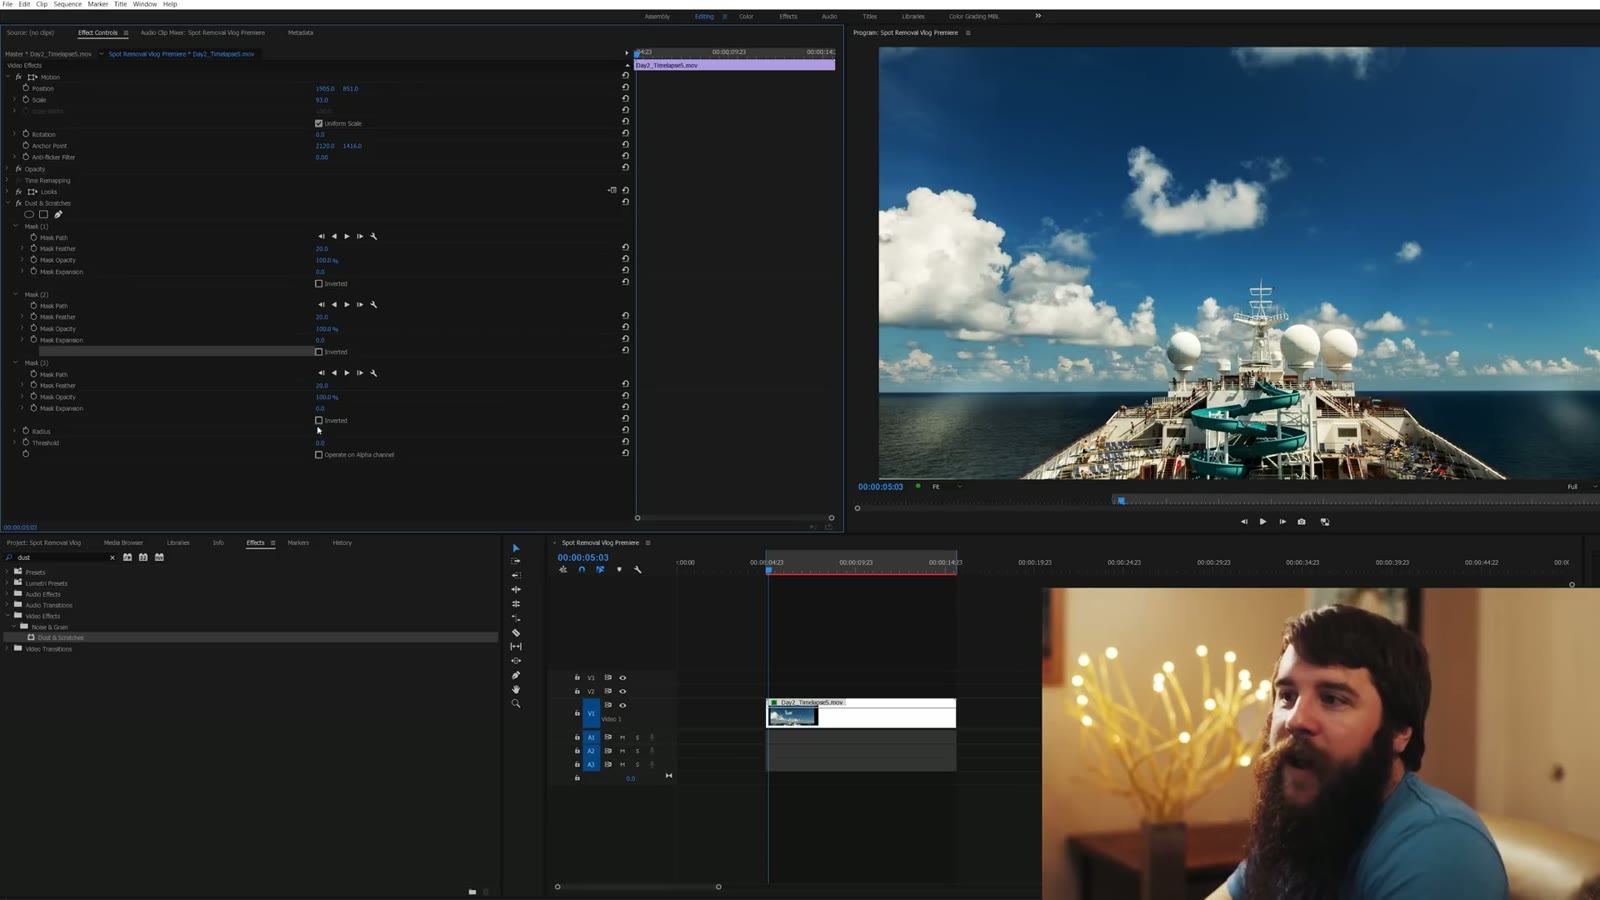
Do the same for the other spots. I’ll spare you five minutes of watching me resize circles. Three masks, each feathered at 20, and then the radius goes to 30 for all of them.
On radius: 20 works for small spots, 30 is the sweet spot for most sensor dust, and 40 or even 50 if you’ve got something big like a hair.
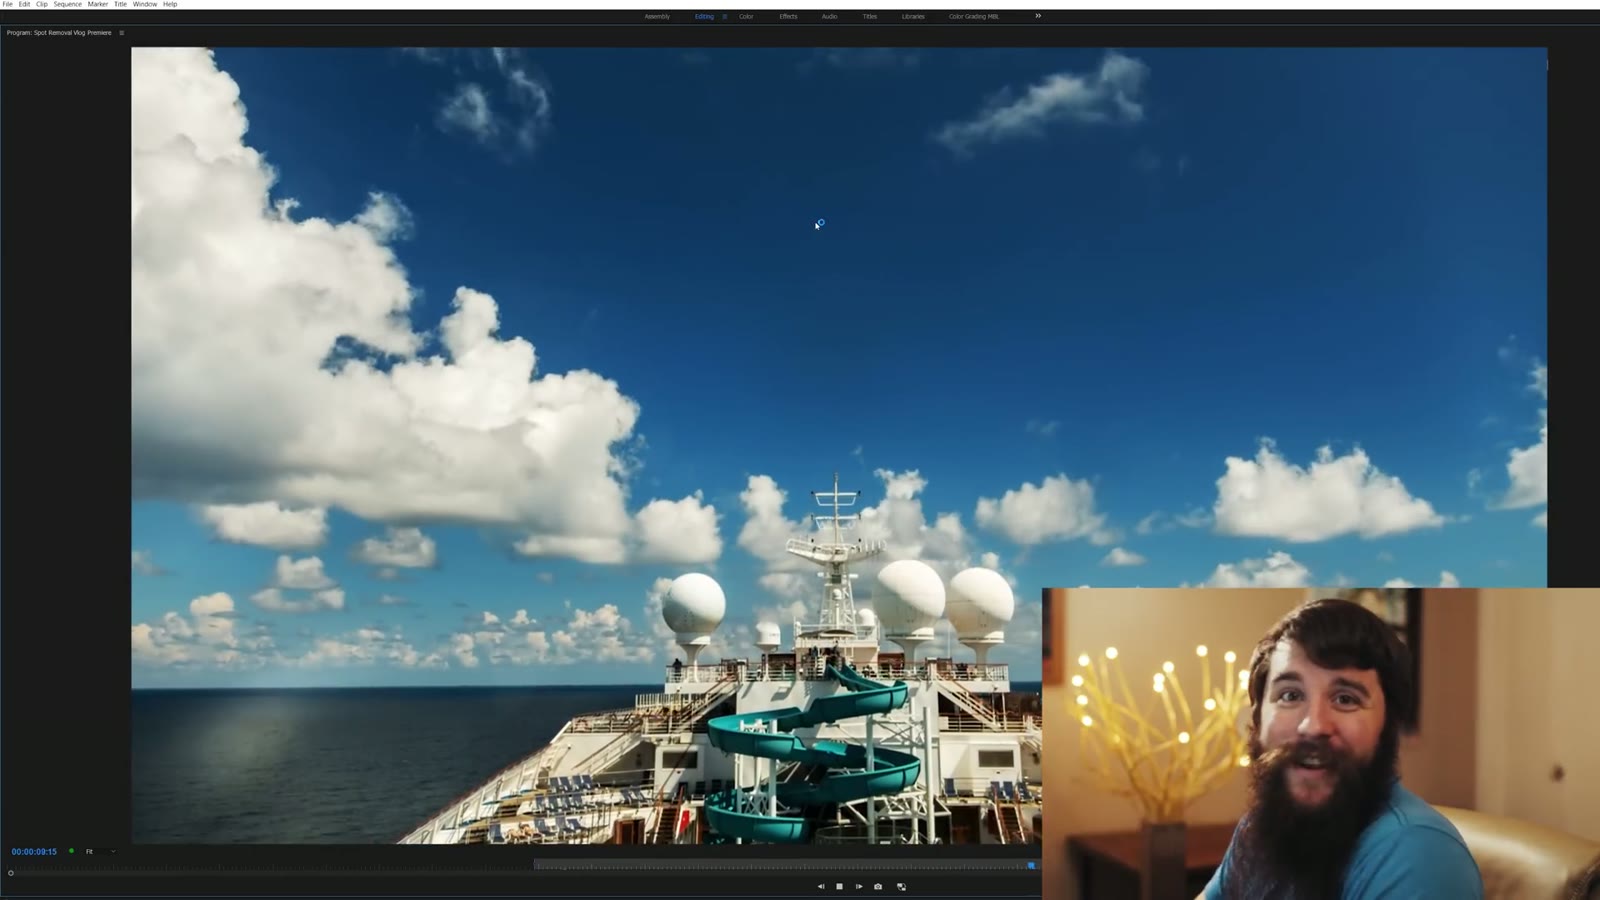
Render it, make the player window big, and hit play. No dust spots. All three gone, and it’s a total lifesaver.
If you have one or two spots, you can stop reading right here. That’s the technique and it’s all you need.
When You Have Thirty Spots
But maybe you borrowed a camera from a friend who never cleans their sensor, shot a timelapse on it, pulled it into your editor and found thirty spots. You mention it and they go “sorry man, I didn’t know.” Which is not helpful to you.
For a really dirty clip, use After Effects. Same effect, much faster masking.
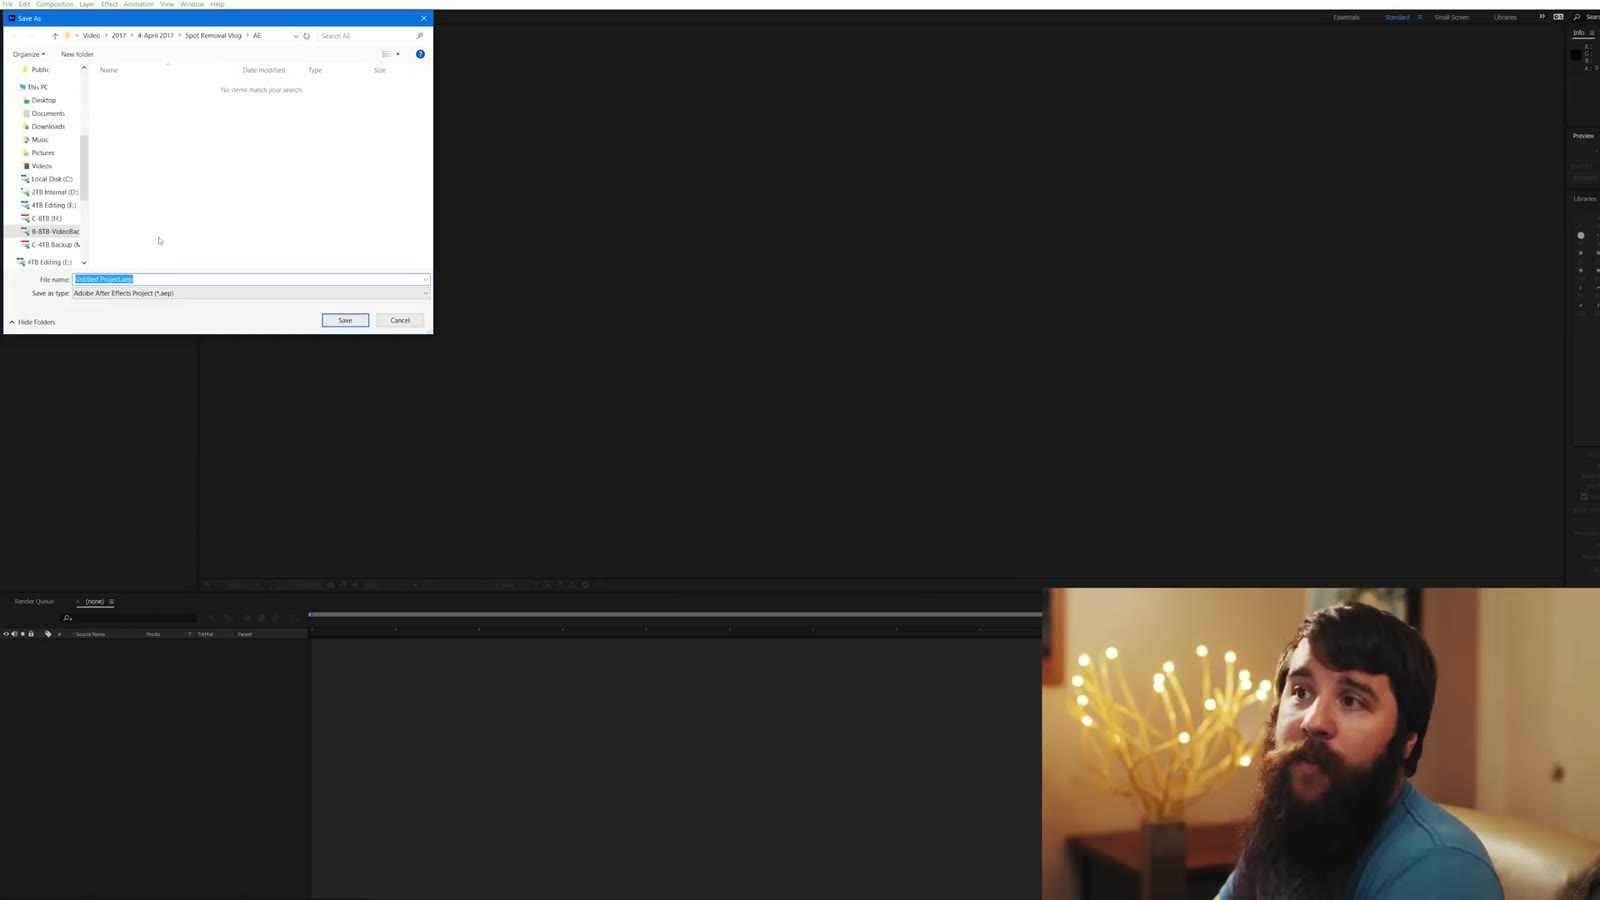
Select the clip in Premiere, right click, and choose Replace With After Effects Composition. After Effects opens and immediately asks you to save the project. Name it something you’ll recognize and save it alongside the rest of your project files for this video, so the two stay together.
The Mistake Everybody Makes In After Effects
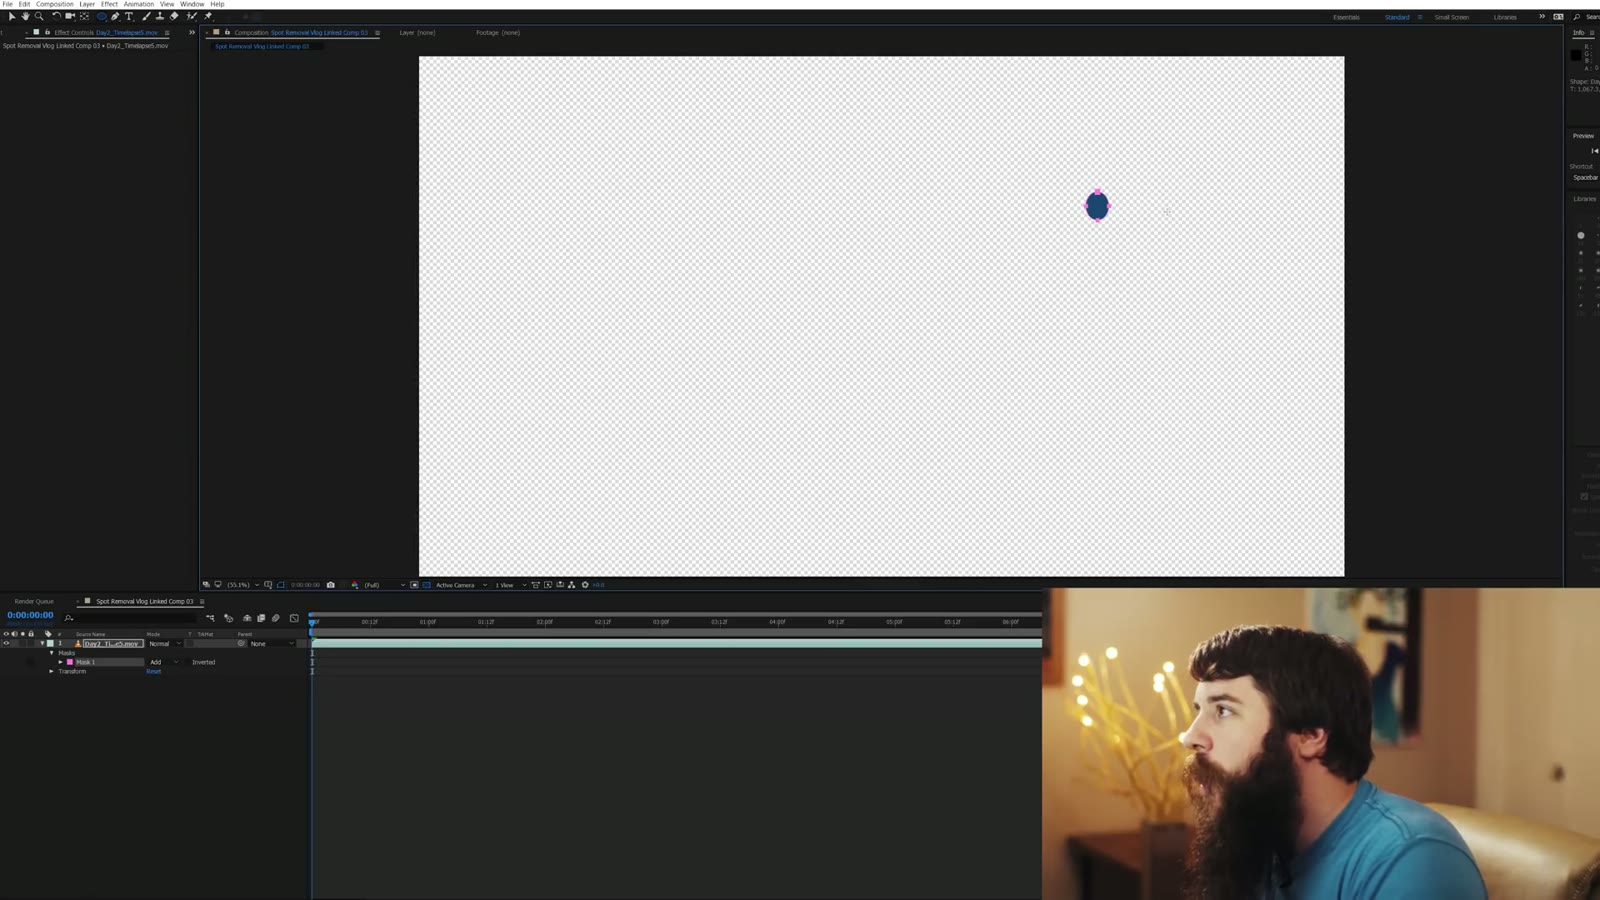
After Effects handles masks and layers very differently from Premiere, because it’s a more advanced program. So if you select your clip, switch the mask tool from rectangle to ellipse like you did in Premiere, and start drawing circles over your spots, you get this: it masks to those shapes and makes everything else transparent. Which is the exact opposite of what you want.
While you’re here, take a look at How to EASILY remove dust spots from your videos in Premiere Pro & After Effects.
Ctrl+Z your way back out of that.
What you actually do is duplicate the video layer first. Select the clip, Ctrl+C, Ctrl+V, and you get an identical layer sitting directly above the original. That’s the whole fix. Now draw your masks on the top copy and they behave, because the untouched layer underneath is showing through everywhere else.
Masking Fast
Two shortcuts make this quick:
- Ctrl and + to zoom in for precision
- H for the hand tool, so you can pan around the frame, then Q to jump straight back to the mask tool
Zoom, pan, draw, pan, draw. That rhythm is why After Effects wins on a filthy clip.
One warning: once you’re zoomed in you start noticing a little spot here, a little spot there, and it’s very easy to go spot crazy. I’ve done it. Only get the ones that are actually noticeable, because every mask you add increases your render time and slows everything down. If you can’t see a spot without zooming way in, your audience can’t see it either.
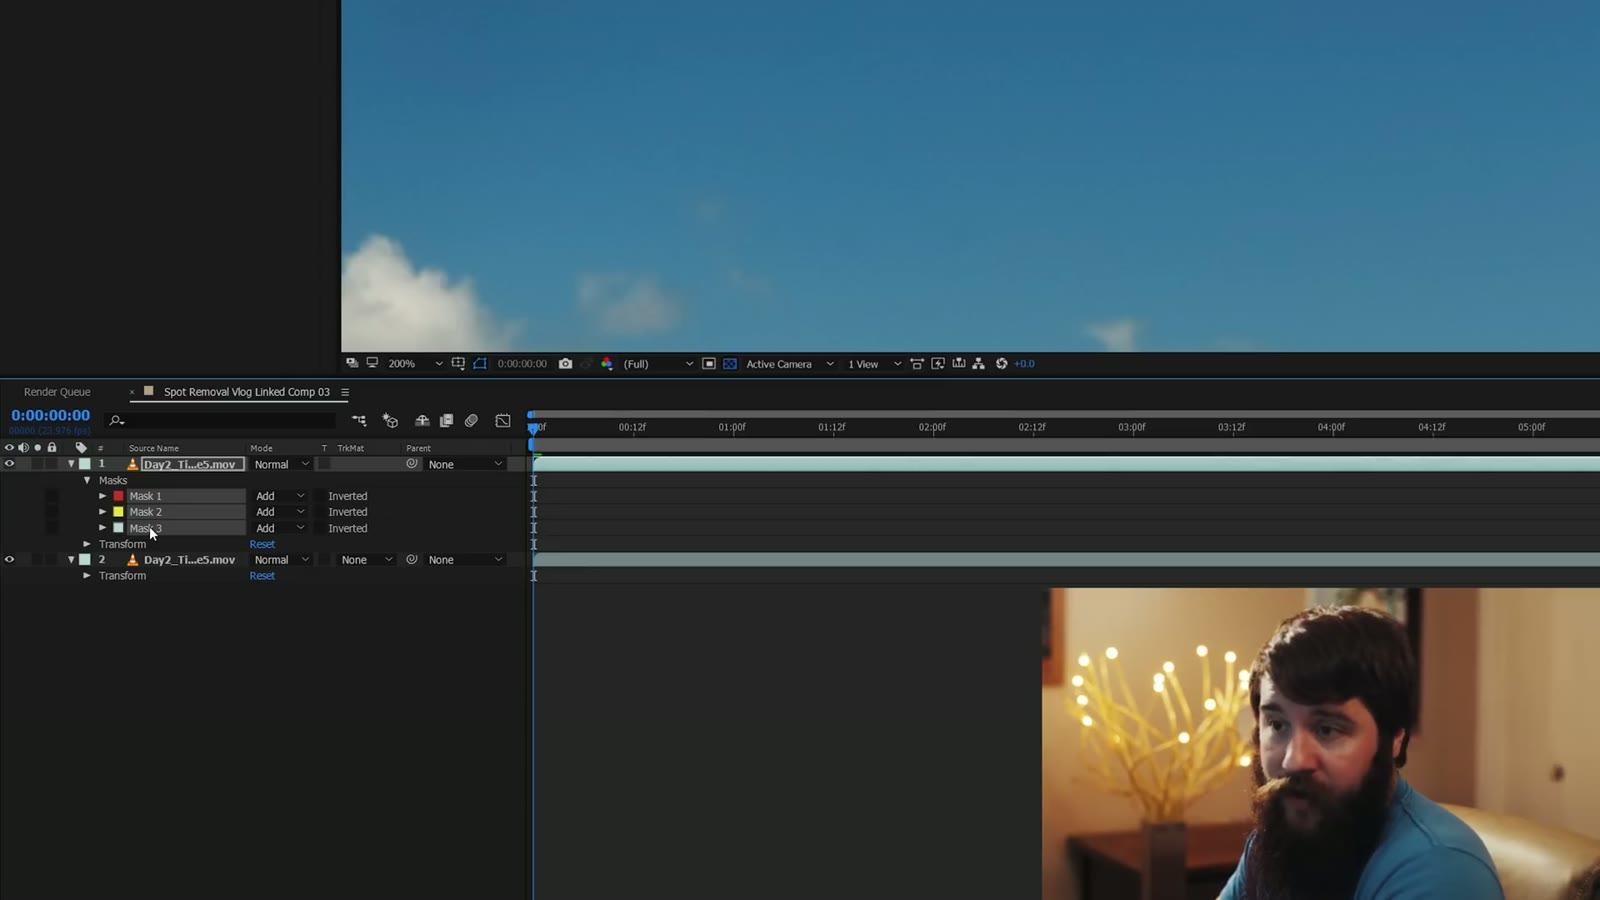
Once your masks exist, click Mask 1, hold Shift, click the last one so they’re all selected, then click the arrow on Mask 1 to expand all of them at once. Set the first mask’s feather to 20 pixels and it applies across the selection, exactly like the feather in Premiere.
Apply The Effect And Send It Back
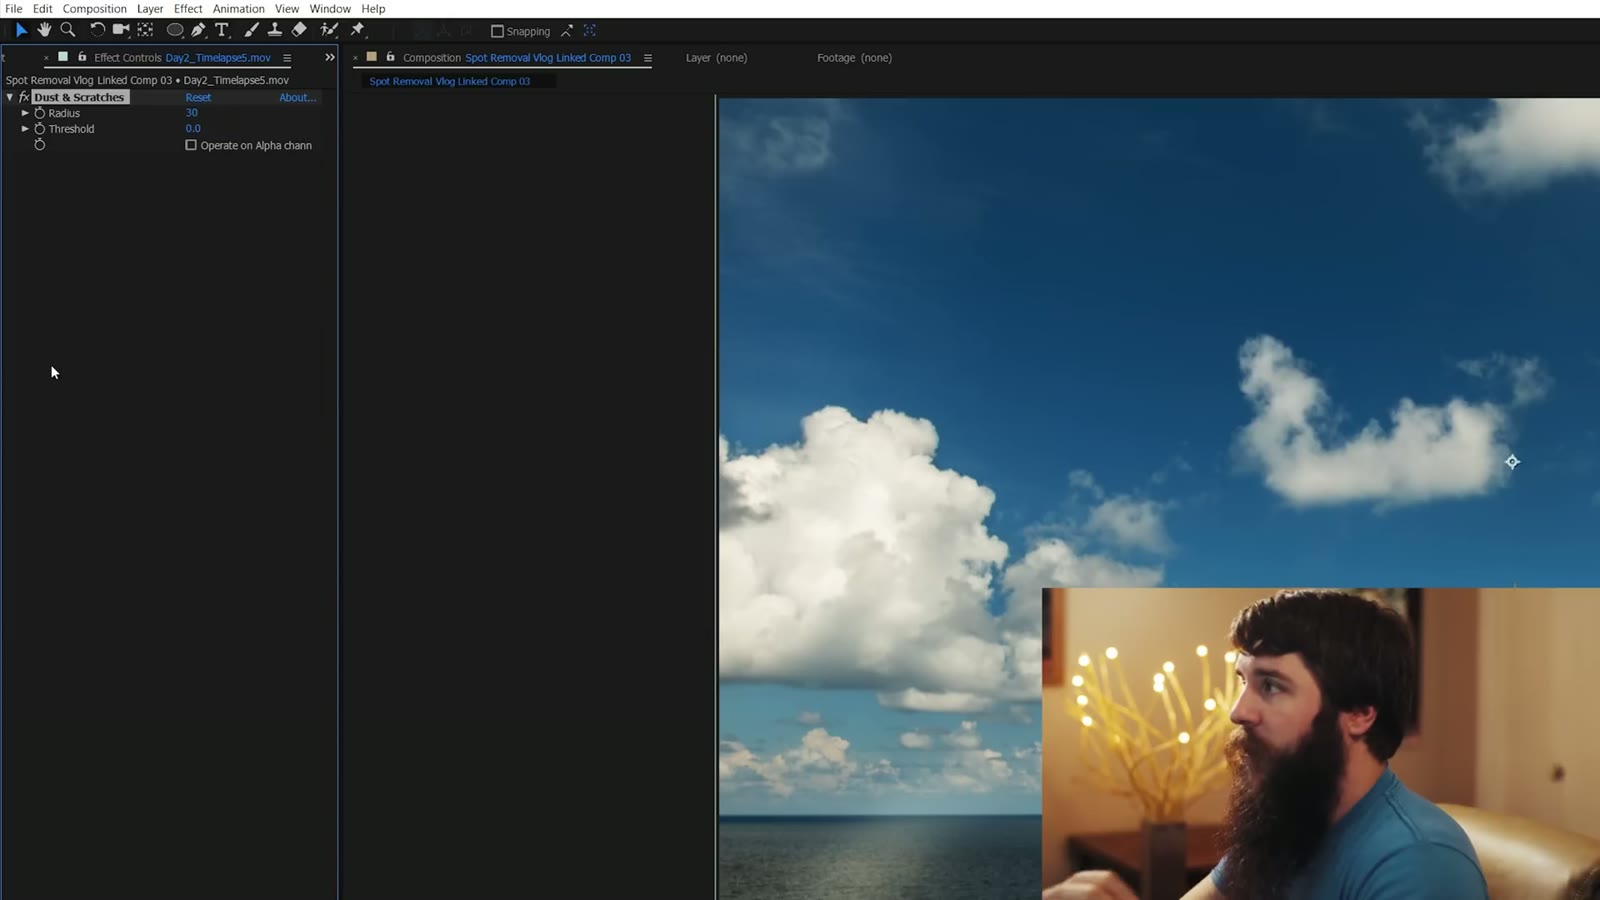
Set your magnification back to Fit so you can see the whole frame, make sure the upper clip is selected, and go to Effect, Noise & Grain, Dust & Scratches. Looks familiar, right? Same settings. Radius to 30, wait for the blue loading bar, and they’re gone.
Now the good part. Click back over to Premiere and give it a second. Wait for it. And there it is: Premiere updates itself and the dust spots are gone there too, because Dynamic Link is holding the two programs together. You can now edit and render that clip in Premiere exactly as you normally would, and it carries everything you did in After Effects.
Which One Should You Use?
A few dust spots, stay in Premiere Pro. A lot of dust spots, and you want the faster masking and the better tools, go to After Effects. Between the two of them you should not be stuck with spots on your footage again.
Don’t have it? Download a free Premiere Pro trial here.
Credit where it’s due: I first learned this technique from a timelapse blog that hasn’t been updated in years. It wasn’t my idea, I just found the fastest way through it.
More
Keeping dust off the sensor in the first place is the companion to this one, and it’s cheaper than any of it.
Want more help? Download my free quick tips guide to booking more wedding film clients, take a look at my wedding film editing course, or come join the Learn Wedding Filmmaking Facebook group. Everything I shoot gets graded with my LUTs.
The music licensing sites I recommend are Soundstripe (use the code WHOISMATT for 10% off a yearly or monthly subscription), Artlist (two extra months free), and Musicbed.
I’m required to state that I’m part of affiliate programs for Amazon, B&H, Soundstripe, Artlist, Musicbed, and Adobe, and that some of the links above are affiliate links.