
Today I’m going to show you how to quickly and easily transcribe and add captions to your videos for free, using Adobe Premiere Pro.
Make Sure You Are On At Least Premiere Version 15.0
Open Premiere and make sure you’re on at least version 15.0. I’d really recommend being on at least 22.0 though, because that version added a genuinely great captions feature we’ll get to in a minute.
You also want your video to be edited and basically ready to export, because captions should be the final step before you export. The reason is that if you make any changes afterward, especially to the length of the video, you’ll have to recreate the captions so they sync properly again.
Open The Captions Workspace
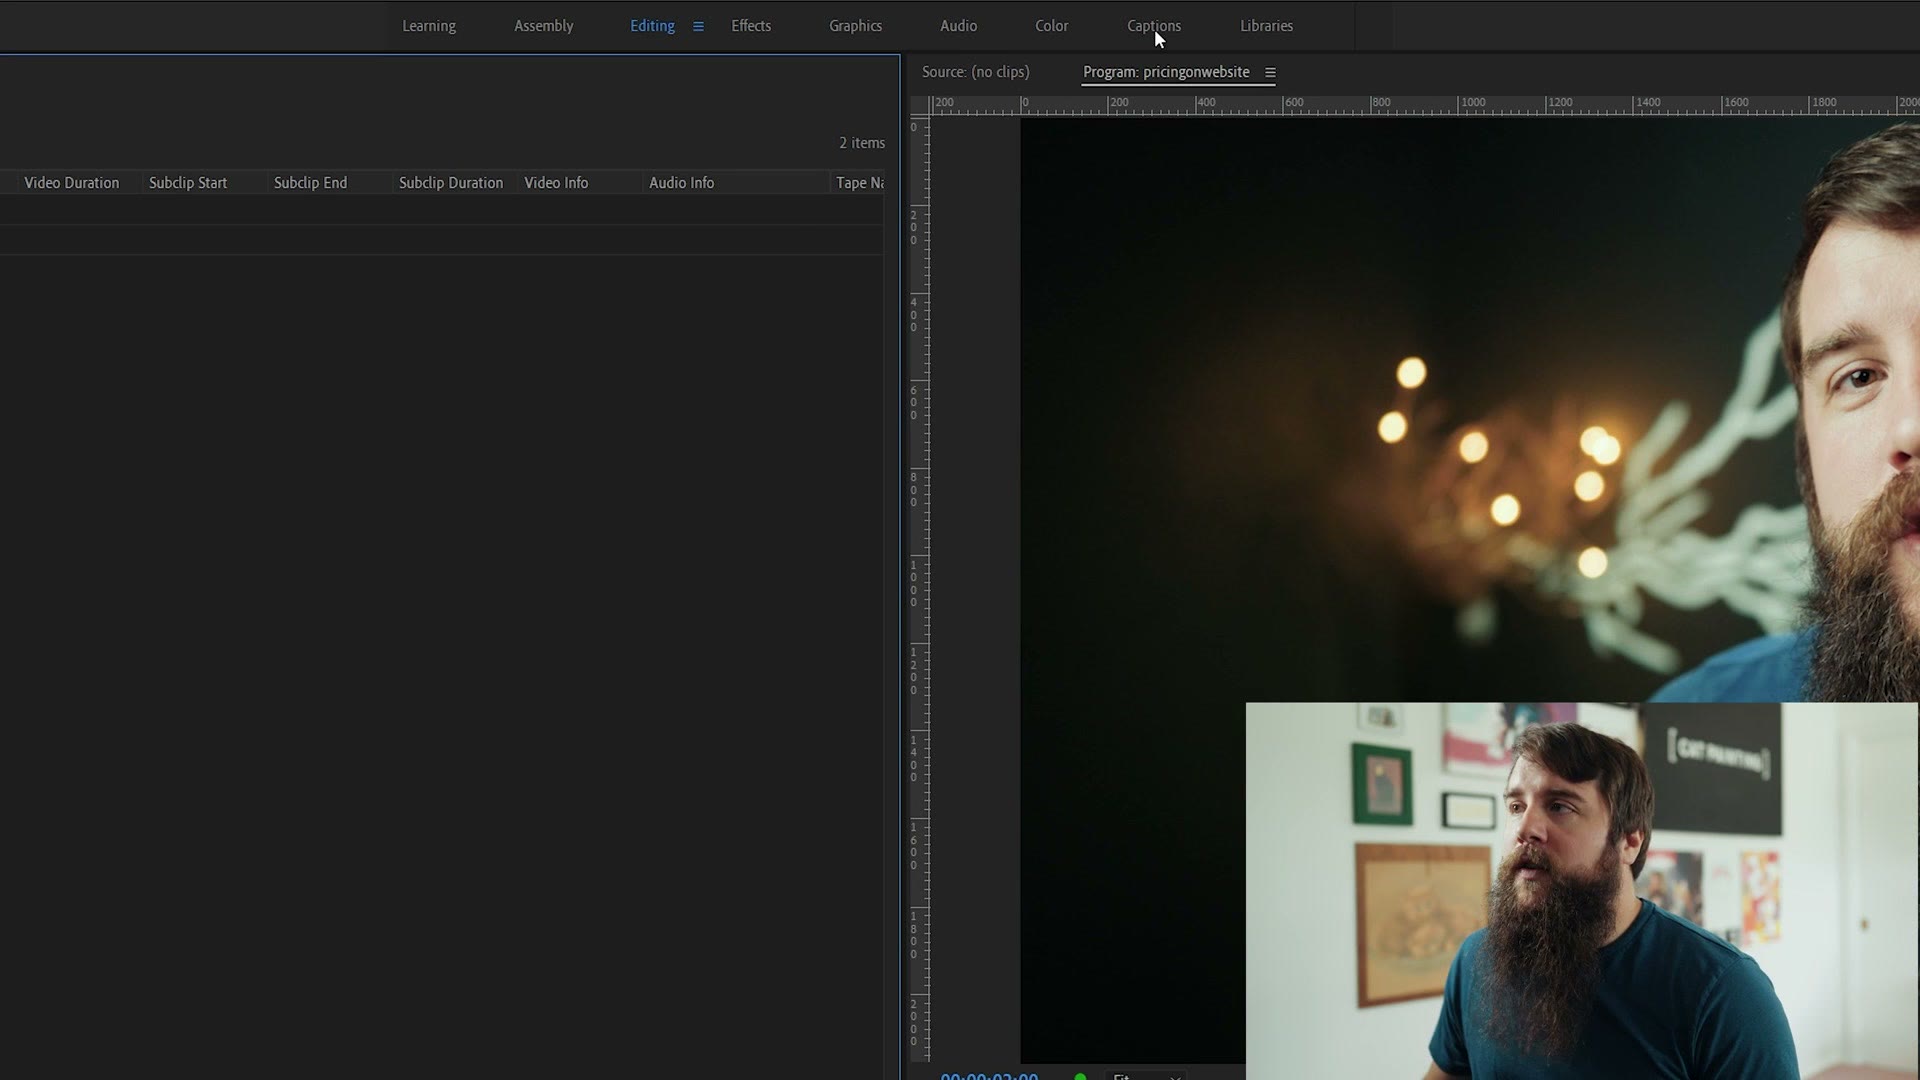
Up in your workspaces at the top you’ll notice a workspace called Captions. Click it and you’ll get two new panels, a Transcript panel and a Captions panel.
The Captions panel is the one you want, and the first thing to click is Transcribe Sequence.
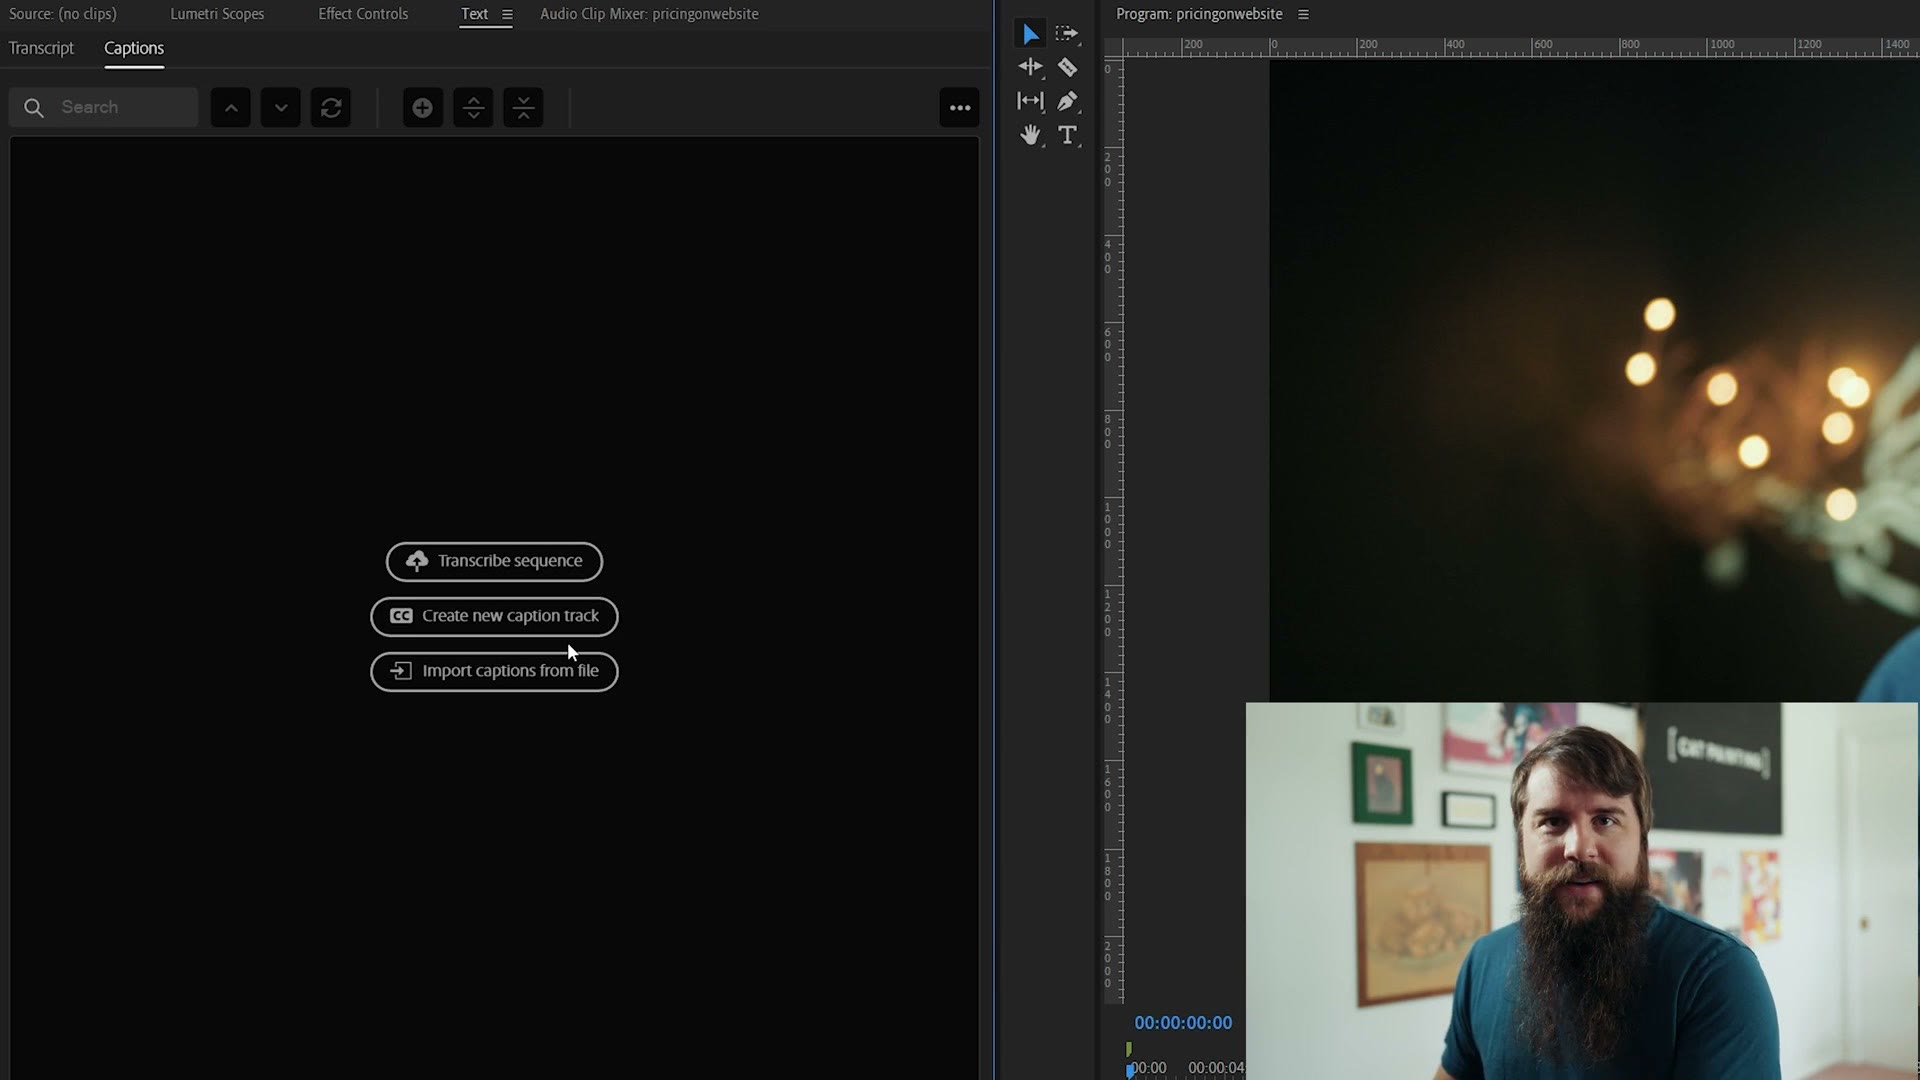
You’re probably thinking, Matt, the second option says Create New Caption Track, and I want to create captions, so why shouldn’t I click that? Because you need to do things in order. If you create a caption track without transcribing your audio first, the captions are going to be blank unless you want to type them in by hand. And typing them manually is definitely not easy.
Transcribe Your Sequence
Under transcription settings, for Audio Analysis select Audio On Track, then choose the track your spoken dialogue is on. In my case that’s audio 2.
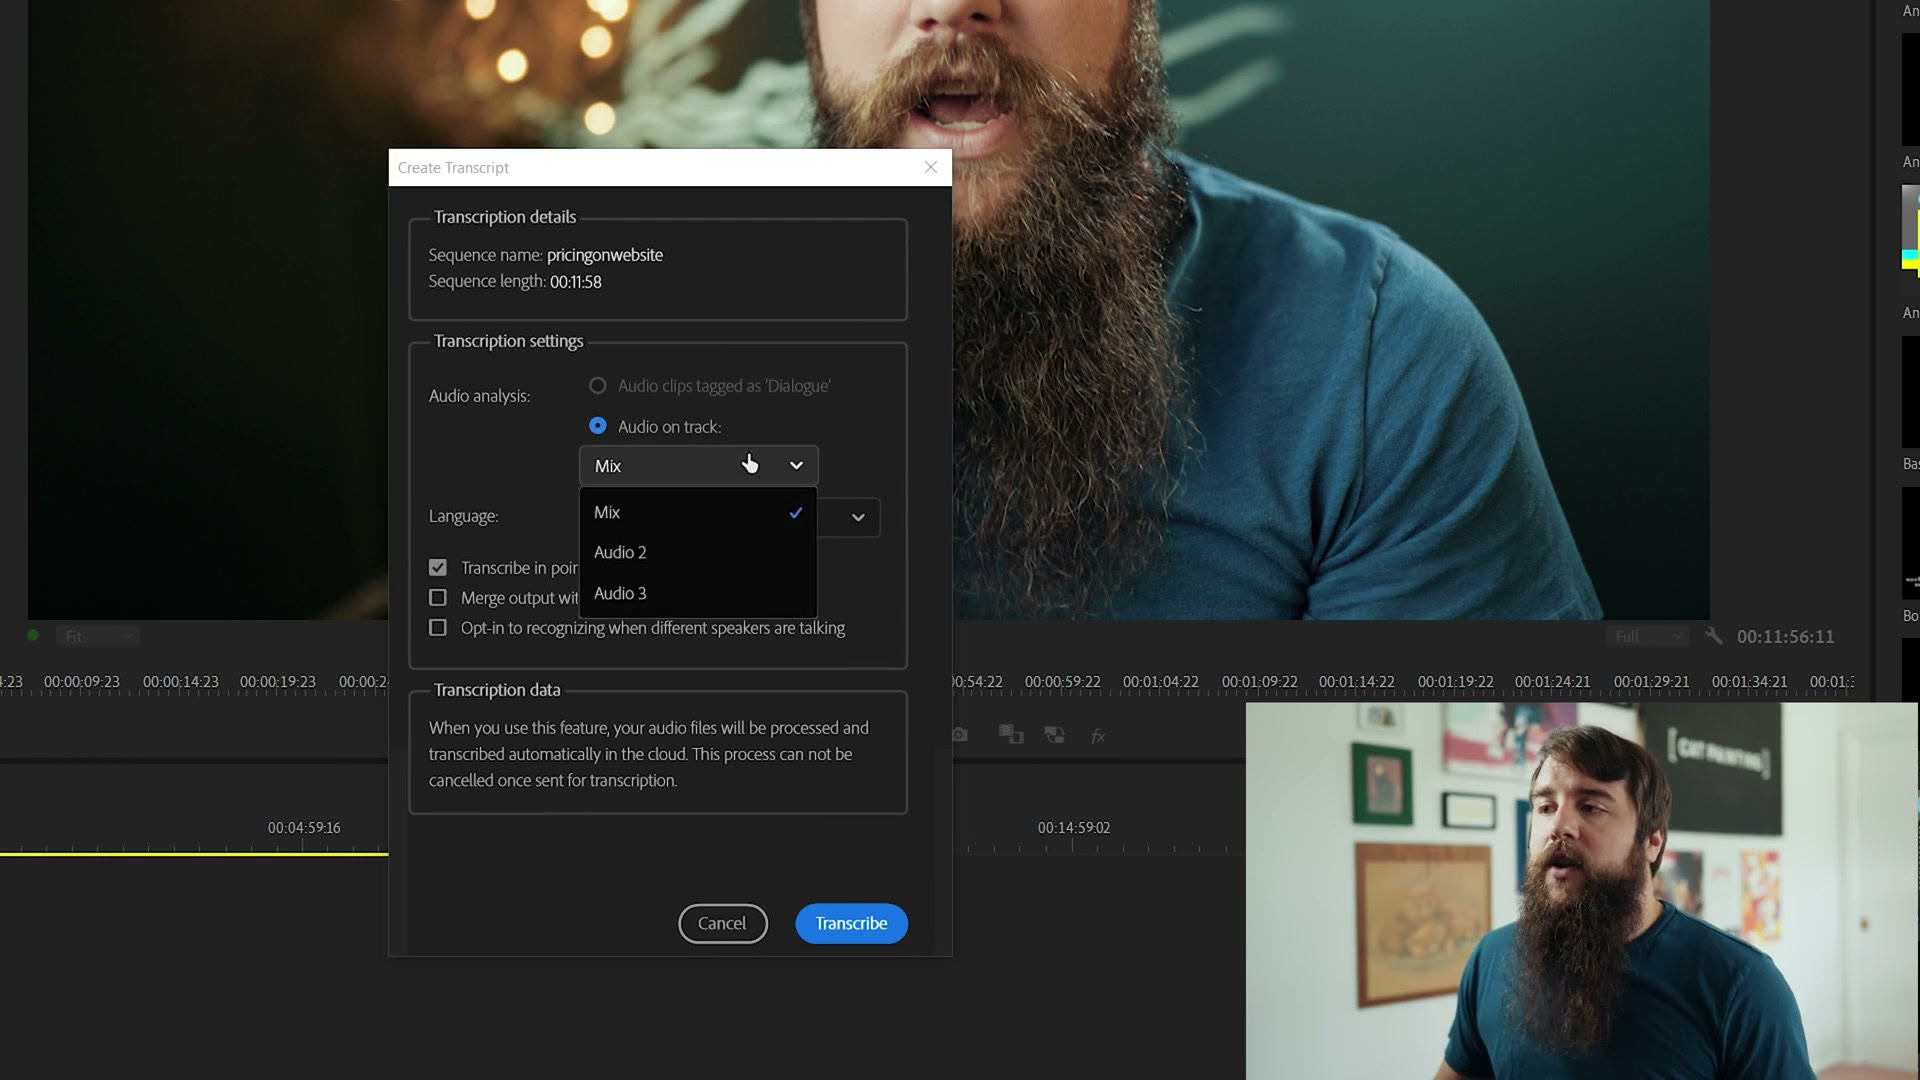
If your dialogue is spread across multiple tracks, select Mix instead. Be careful there though, because if you select Mix and you have music tracks as well as dialogue, Premiere will listen to those too, and there’s a chance it starts putting song lyrics into your captions.
Avoiding that is simple. Close the window, mute your music tracks, and as long as they’re muted Premiere will ignore them whenever you select Mix.
For language, choose English or whatever you’re speaking. If your video has multiple languages in it, I’d separate them onto different tracks, then transcribe multiple times, choosing a different language each time and checking the box to merge the output with the existing transcript.
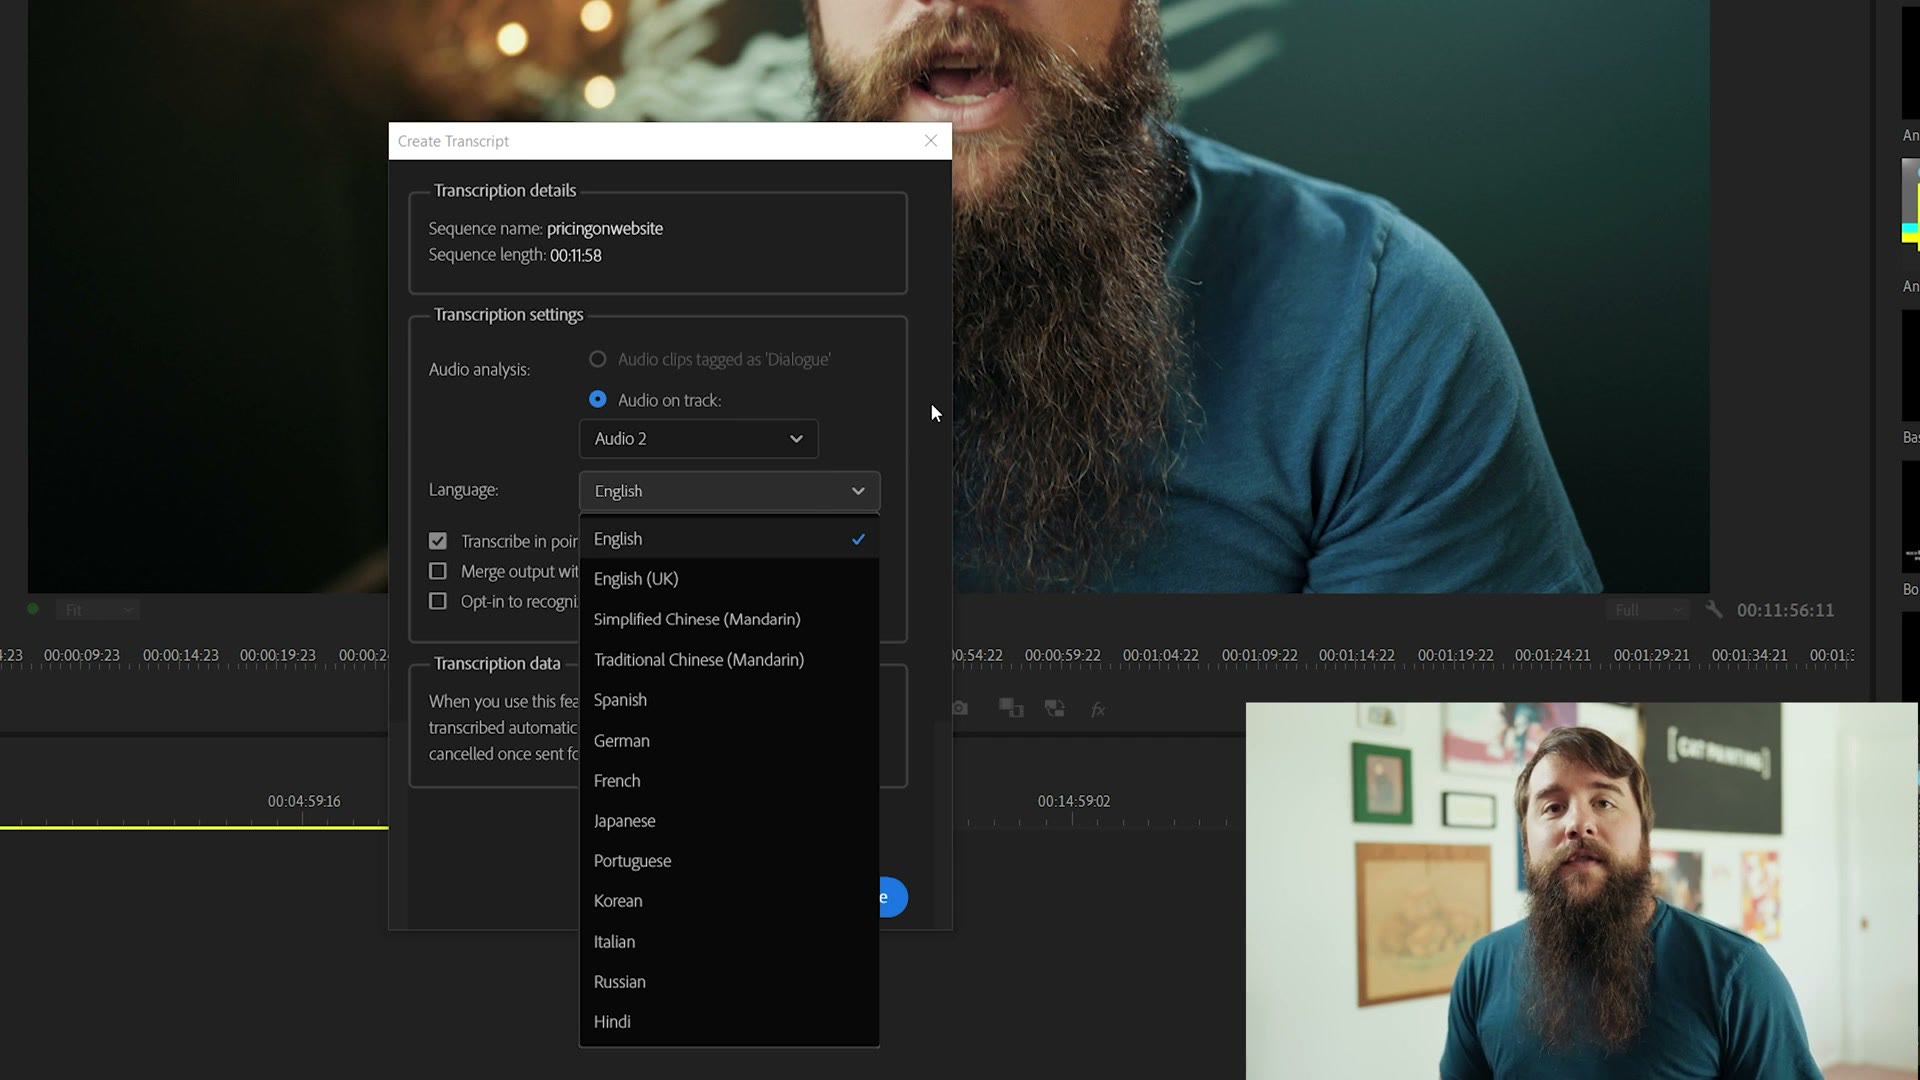
Leave “transcribe in point to out point only” unchecked if you want captions for the whole video. And if you have different speakers, the checkbox for recognizing when different people are talking can be really useful. This one was just me, so I left it alone.
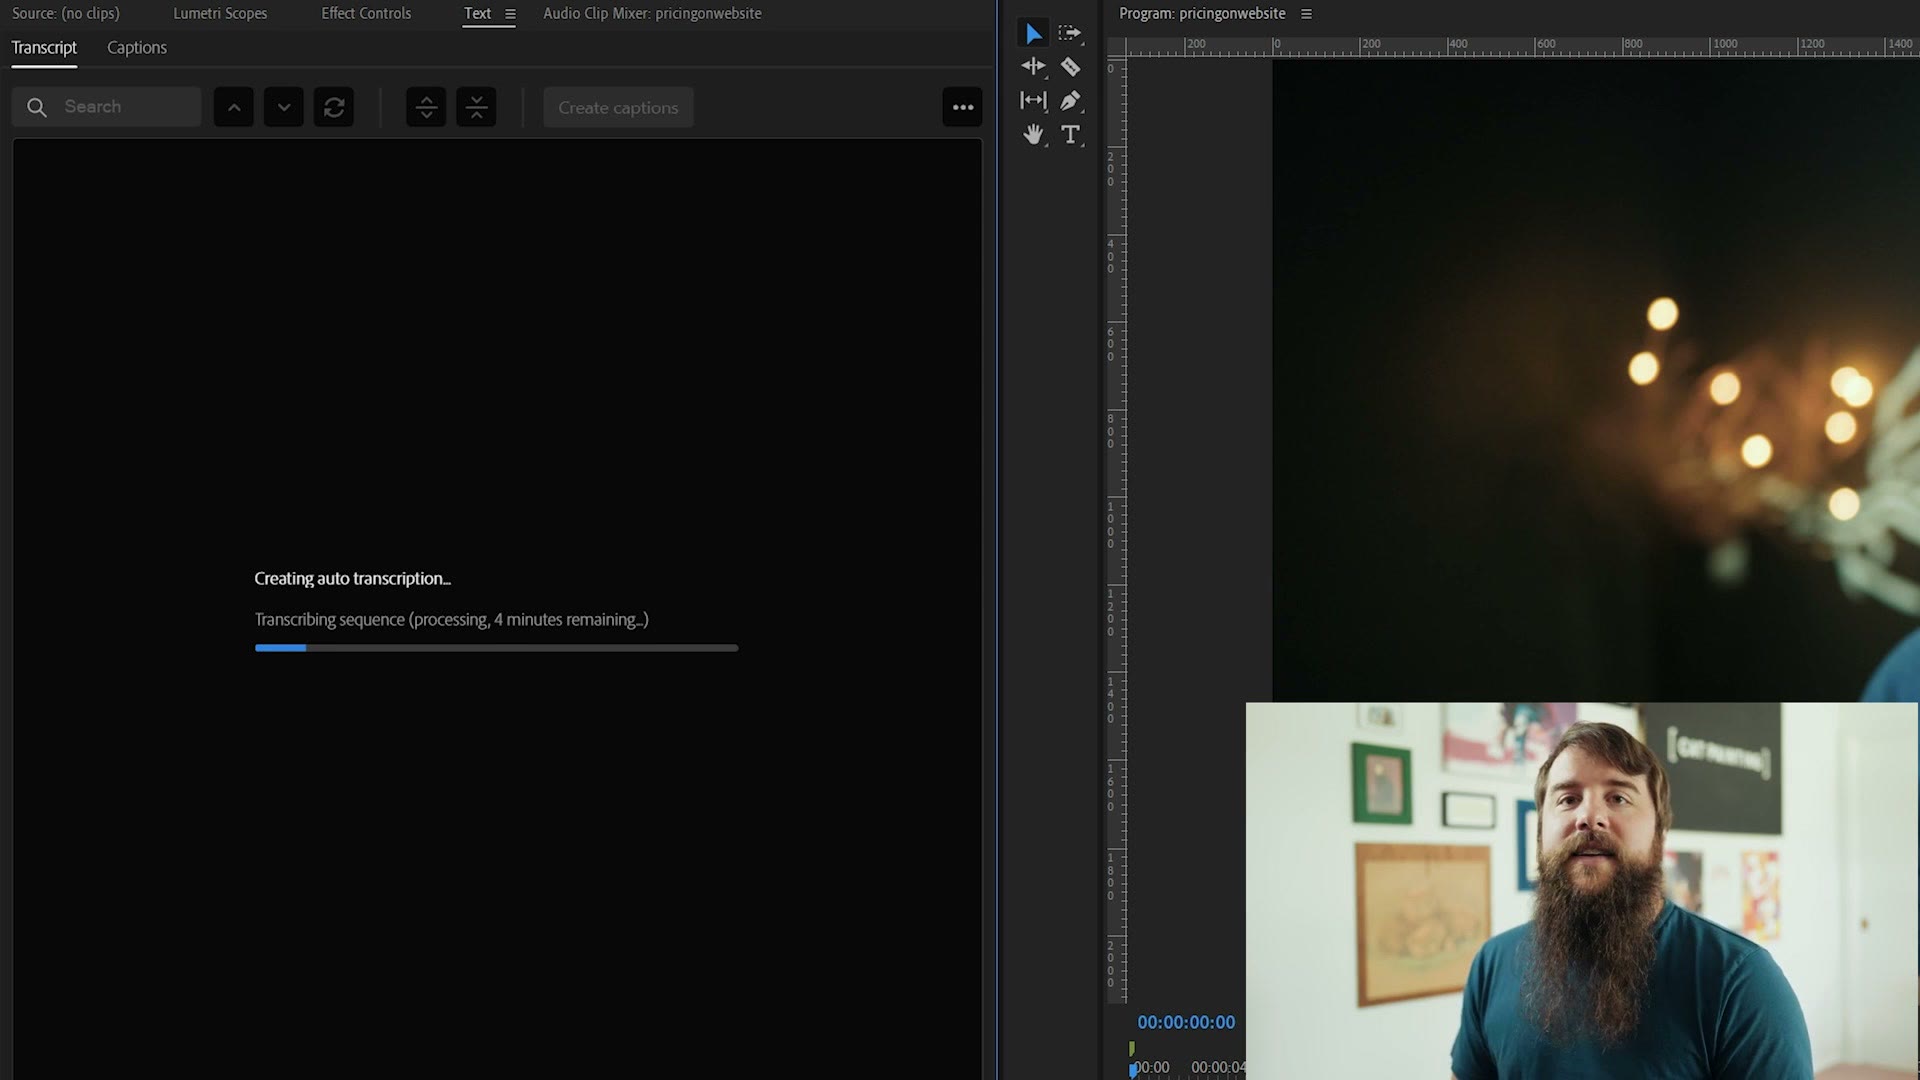
Then press Transcribe. Premiere renders out the audio, uploads it to Adobe’s servers where they have some very powerful speech analysis tools, and turns the speech into text. You get an estimate while it works. For a twelve minute video, Adobe told me four minutes.
Correct Any Transcript Errors
Once it’s done, the Transcript panel opens and look at that, Premiere has transcribed all the audio in your video into text and organized it with timings.
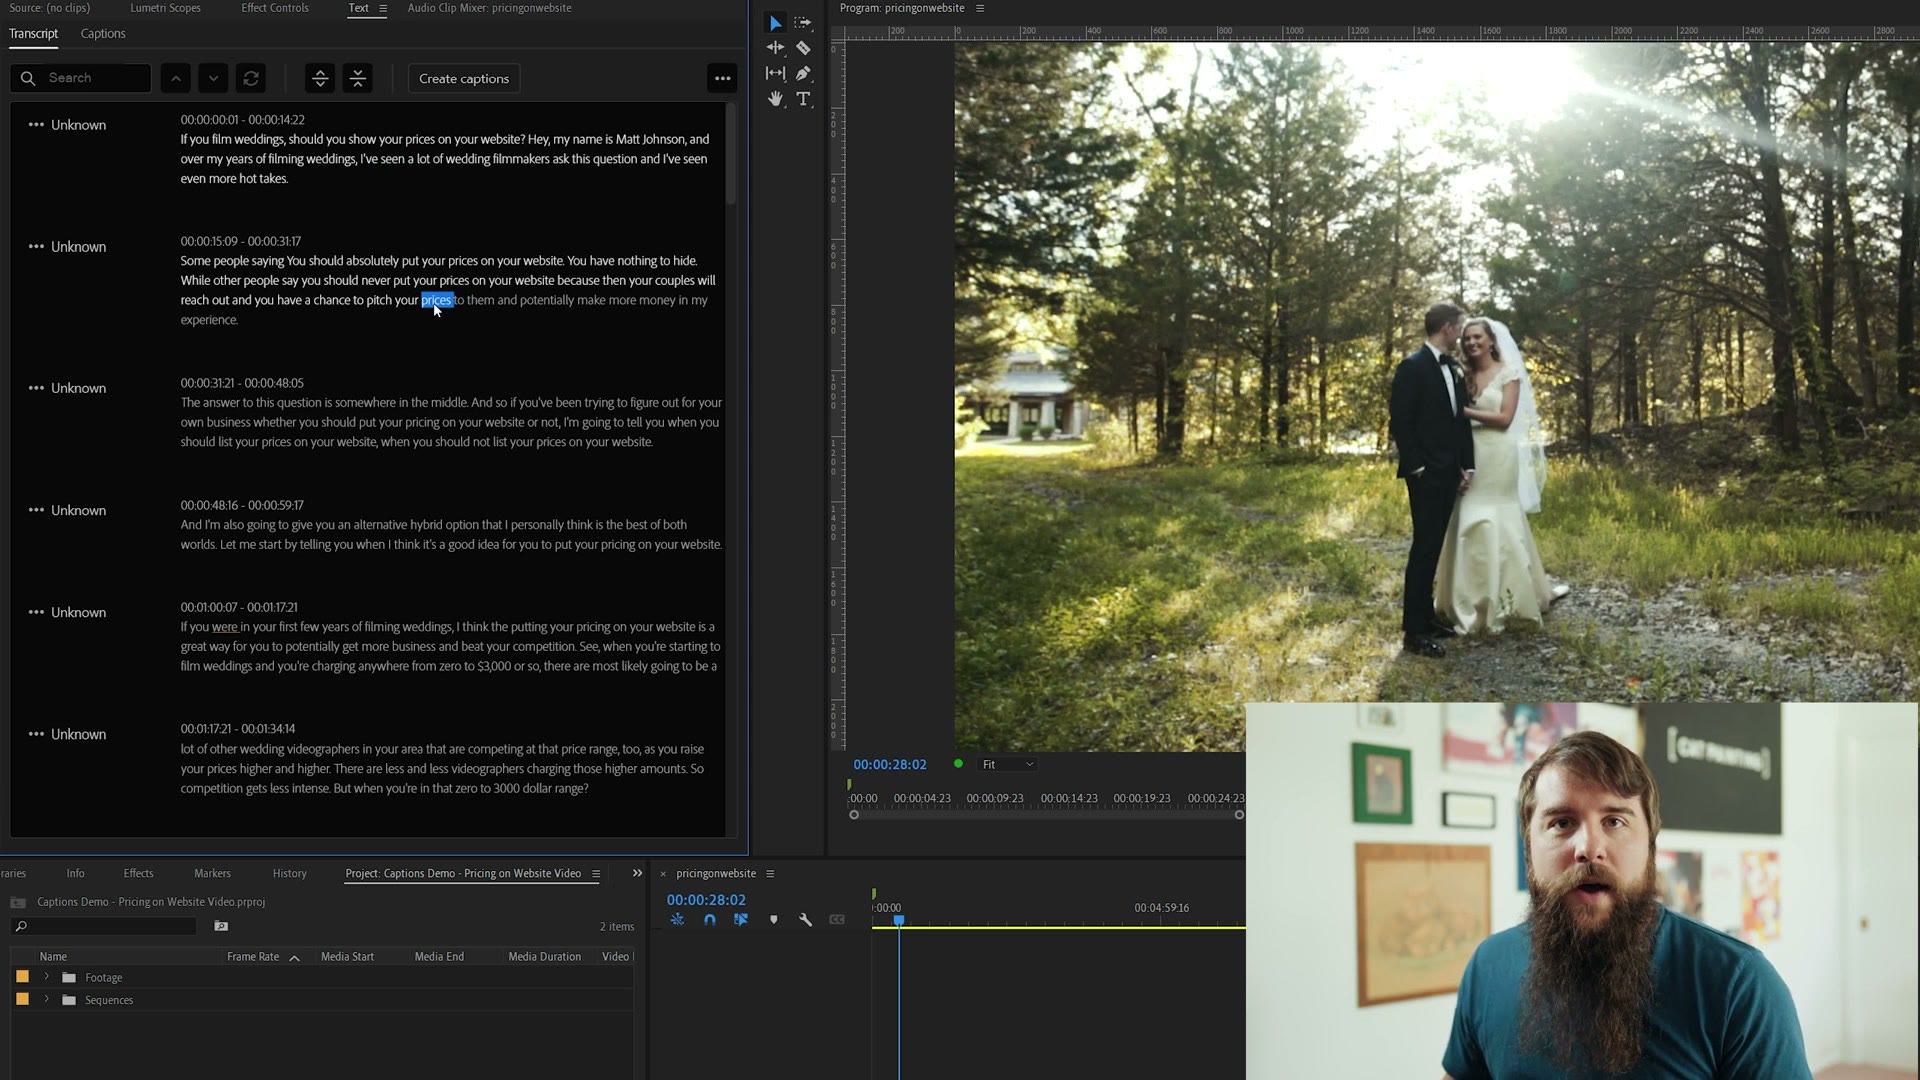
Here’s where it gets really cool. Click on any of that text and Premiere automatically scrubs to that part of the timeline. Hit play and it highlights each word as it’s spoken.
This is the point where I recommend either watching your video through or at least reading the transcript, because while Premiere’s captions are around 90% accurate, every once in a while a word throws it a curveball, or it formats something incorrectly.
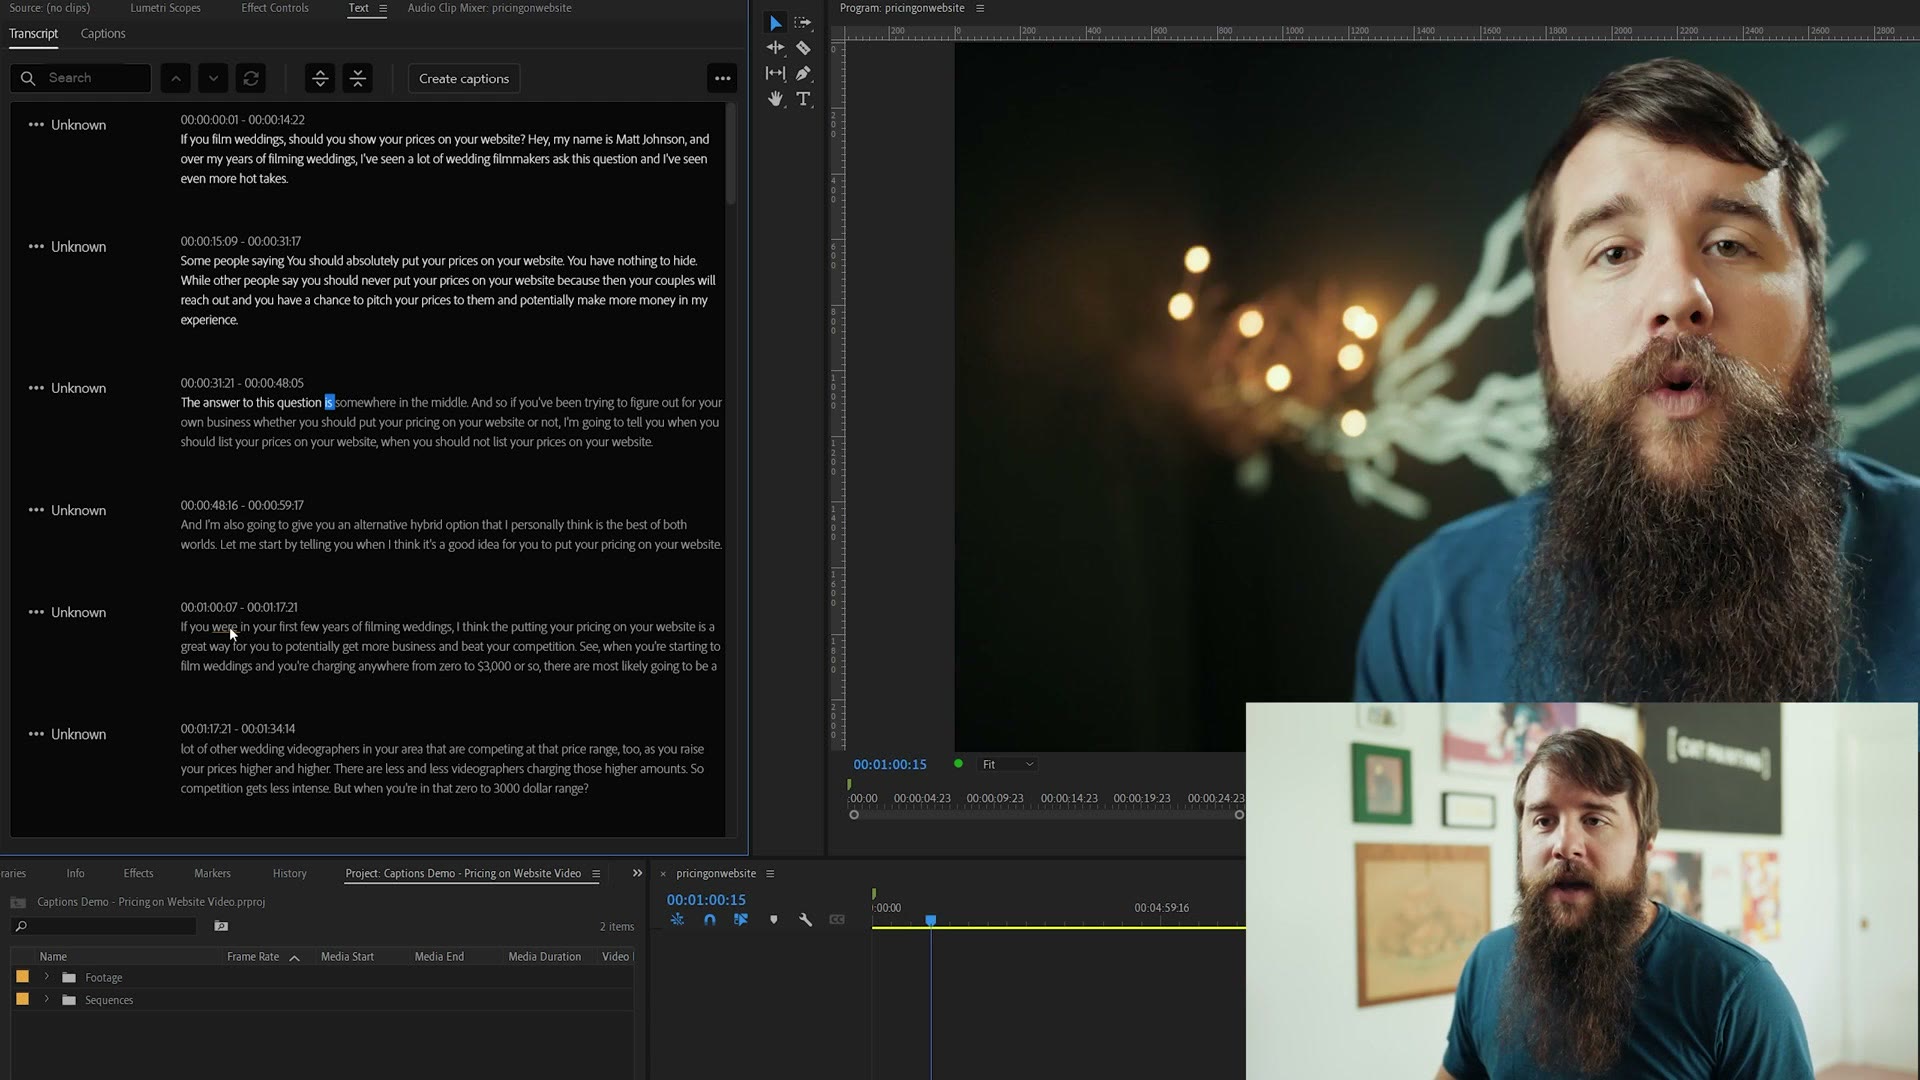
Fixing it is easy. Select the word, double click it, and start typing. Click away to save.
Create Your Captions
With your transcript proofread, it’s time to turn it into captions. Click the big Create Captions button at the top, and make sure Create From Sequence Transcript is selected, otherwise your captions come out blank.
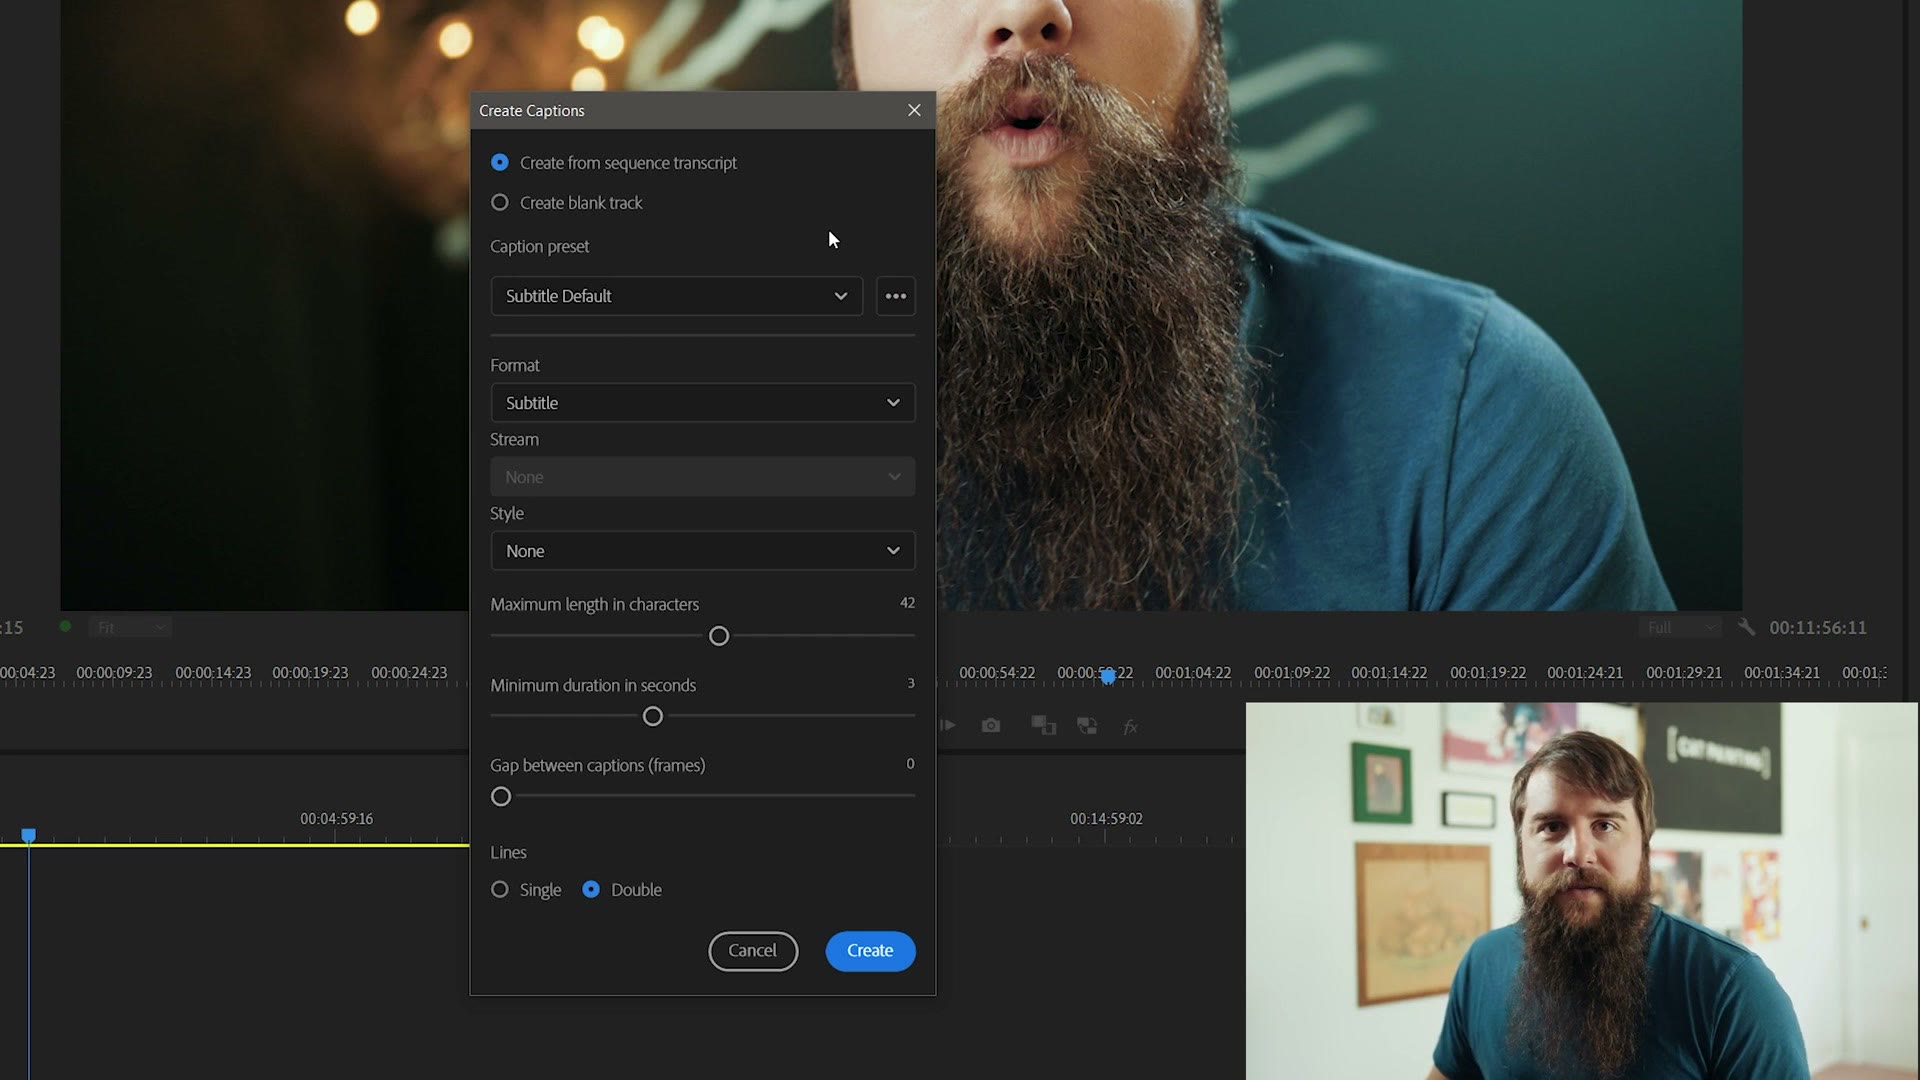
For caption presets I’d leave it on Subtitle Default, format Subtitle, style None. If you’re making captions for a client who wants something specific there are plenty of other options, but I’ve found the default works great for YouTube, Facebook and anywhere else that accepts captions.
For maximum length, maximum duration and gap between captions, I’ve found the defaults of 42, 3 and 0 to be great, and double lines works well too.
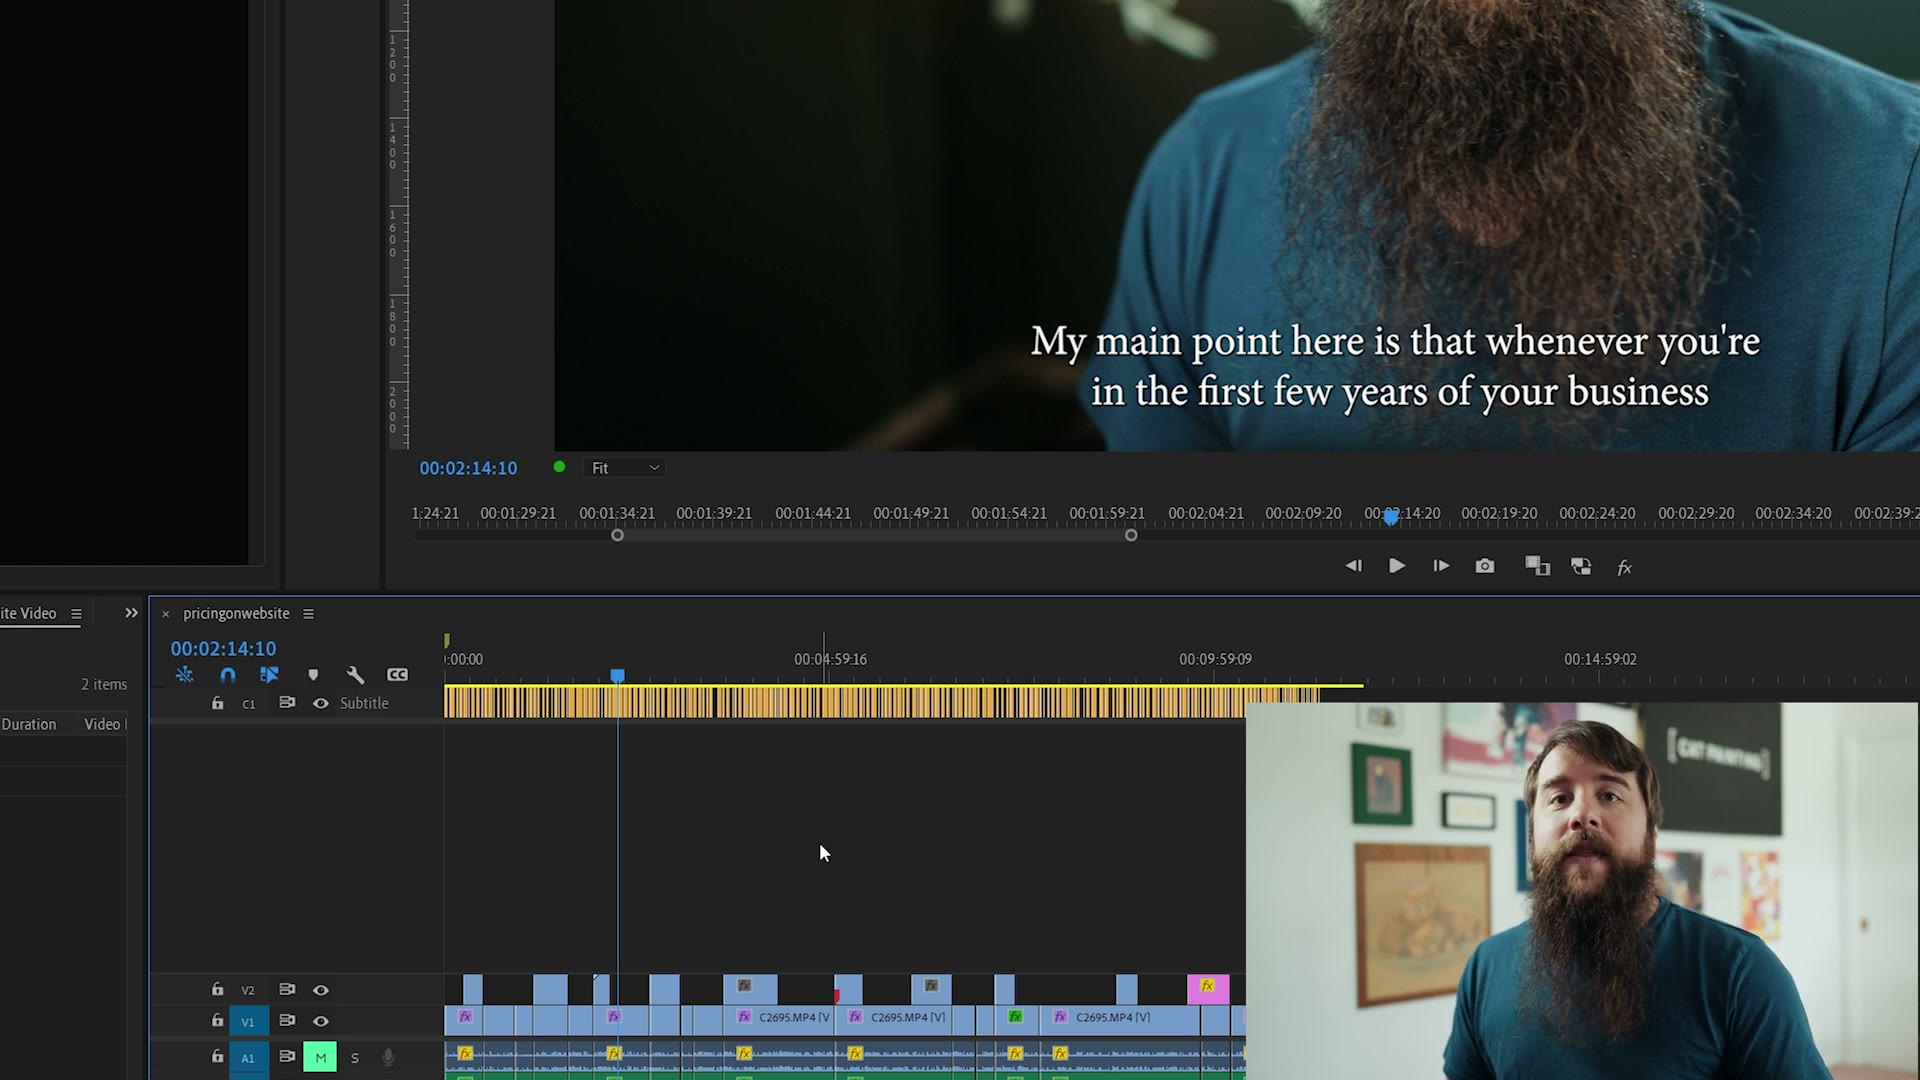
Press Create, and tada. A new track appears on your timeline labeled Subtitle, and suddenly you have hundreds, if not thousands, of little clips representing every piece of text in your video.
Bake Captions In Or Create An SRT File?
Now you need to make a decision, because you have two options. Either you bake your captions into the video, where they’re always visible and are literally part of the picture. Or you save them to a separate file, a sidecar file, that you upload to YouTube or Facebook alongside the video.
I typically go with the sidecar approach, so we’ll cover that first and then circle back to baking them in.
Create An SRT Sidecar File In Premiere 22.0
Remember how I said to update to version 22.0? Here’s why. In the past, if you wanted a sidecar caption file you had to export your entire video to get it, which could take a long time and is a real pain when all you want is a captions file.
With 22.0, all you do is go up to the three dots and select Export To SRT File. Name it and press save.
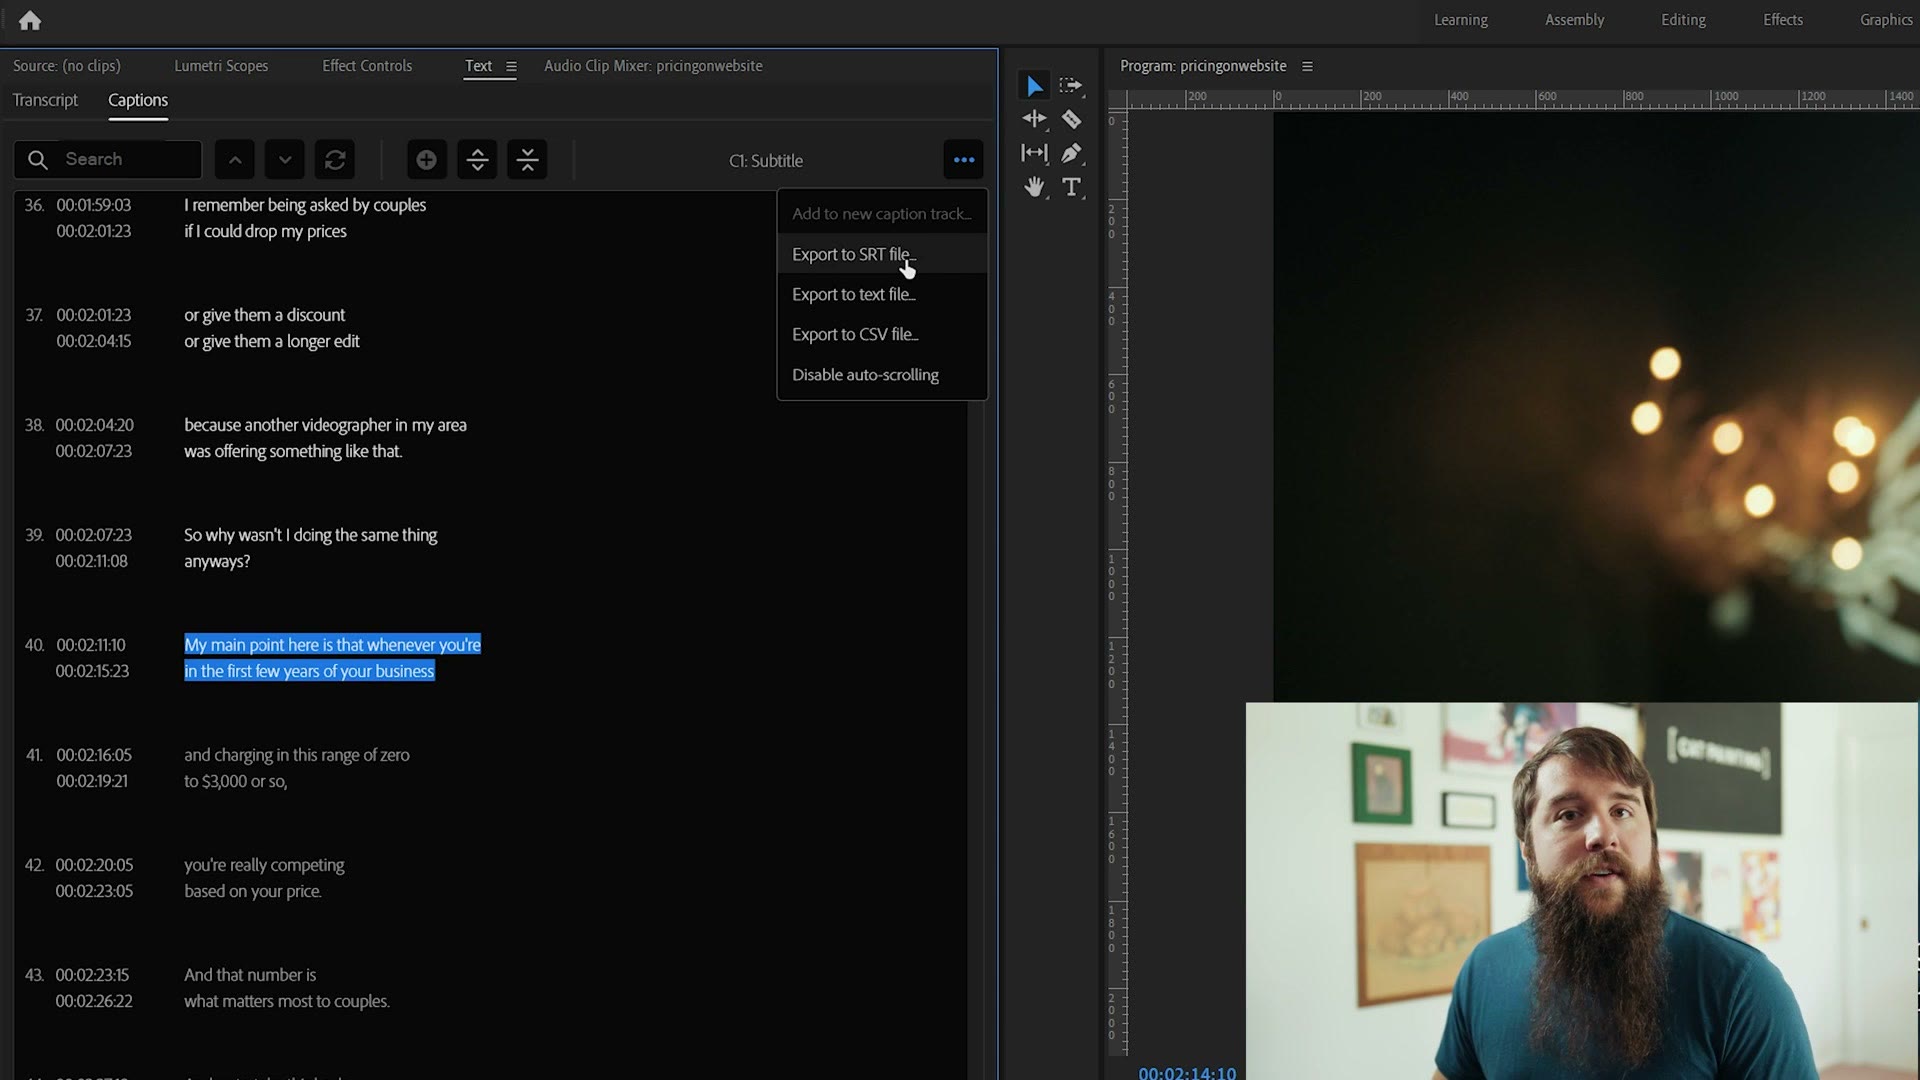
Now you have a file with all of your captions and all of their timings. Upload your video to YouTube, go to Subtitles, click the little dots, select Upload File, choose With Timing, continue, pick your SRT, and you’re done.
Editing in something else? I covered How To Create Captions Quickly & Easily In DaVinci Resolve too.
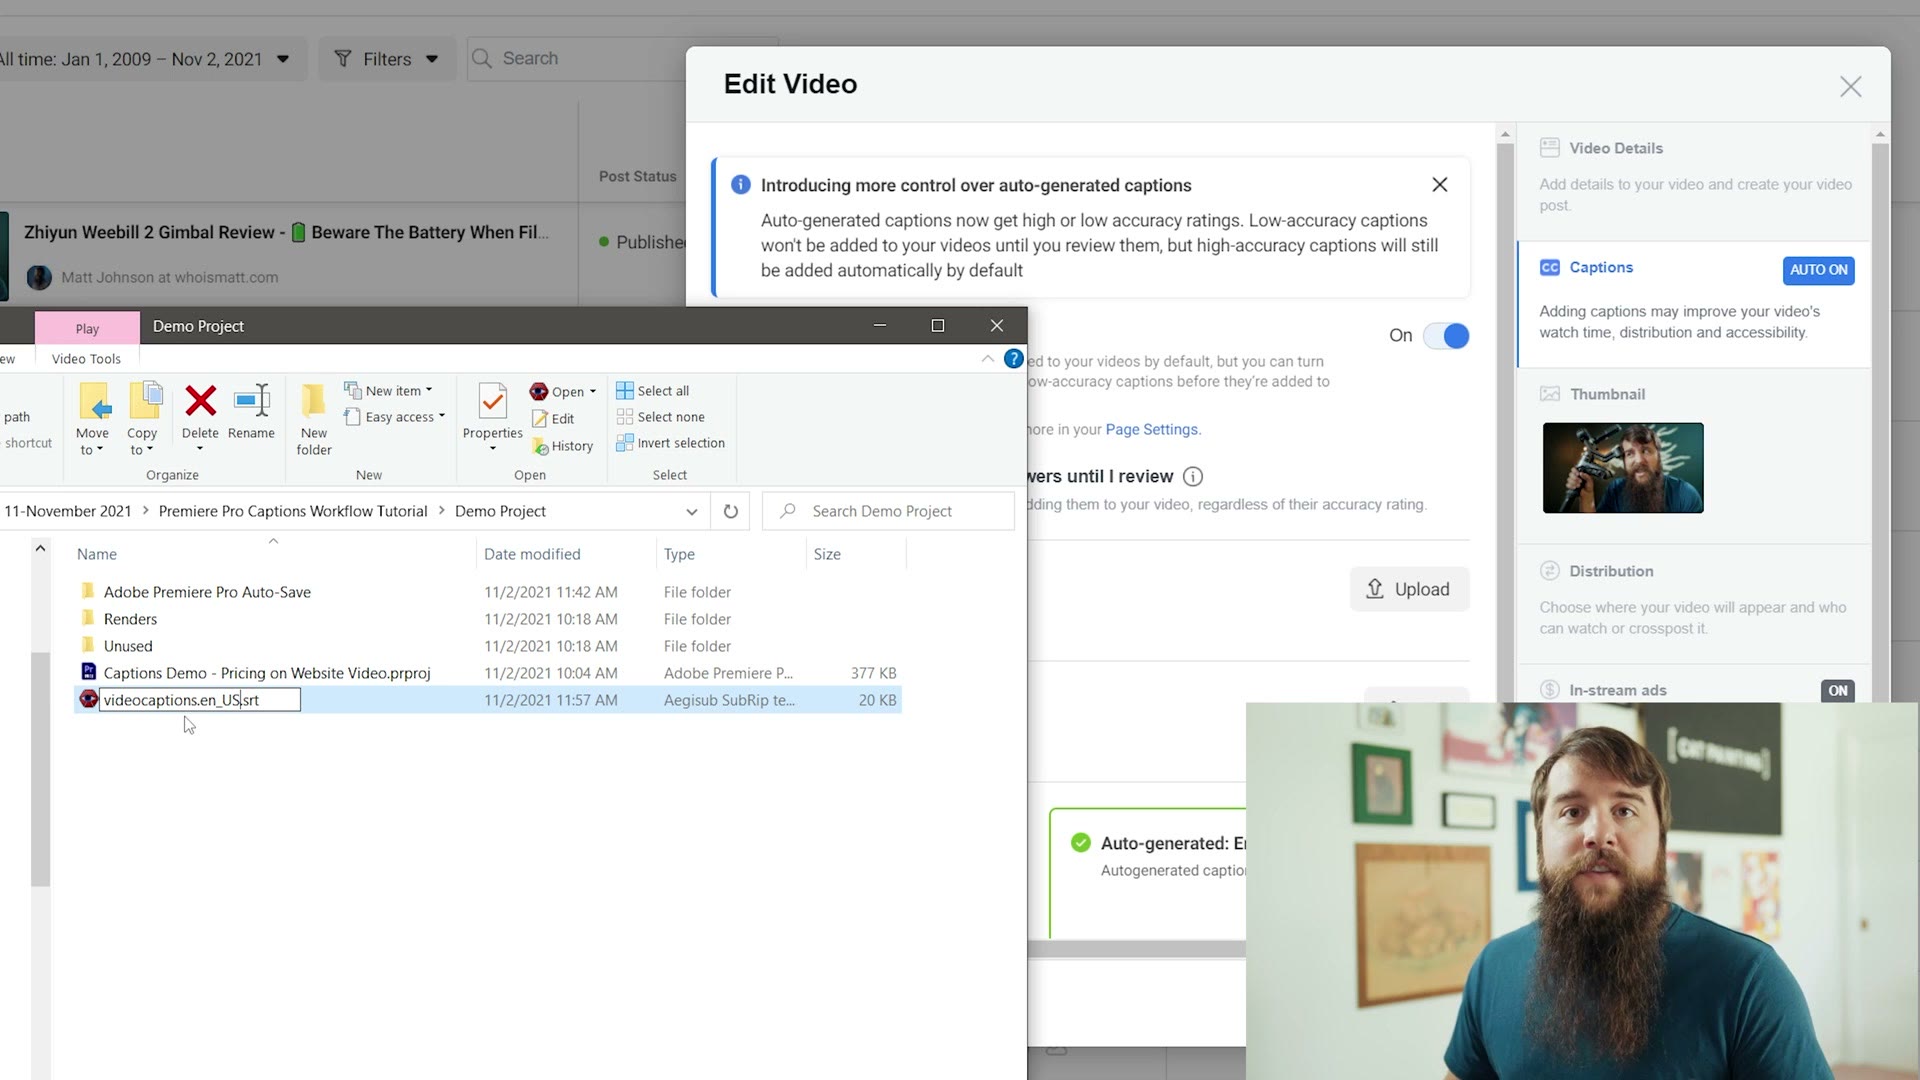
If you’re uploading to Facebook instead, you need to rename the file to include _en_US at the end, so it becomes something like videocaptions_en_US.srt. That tells Facebook these are English captions, and if you skip it Facebook throws an error. Then upload your video, go to the Captions tab, and upload the file.
Create An SRT Sidecar File In Premiere 15.0
If you’re on an older version like 15.0 and you don’t want to update, maybe for stability, it just takes one extra step.
Export your video as you normally would, opening the Export Media dialog with Control M on PC or Command M on Mac. Choose all your export settings, then go over to the Captions tab and under caption options select Create Sidecar File. Export as normal, and next to your video file you’ll find an SRT you can upload to YouTube, Facebook or anywhere else.
How To Customize Font And Color And Burn Captions Into Your Video
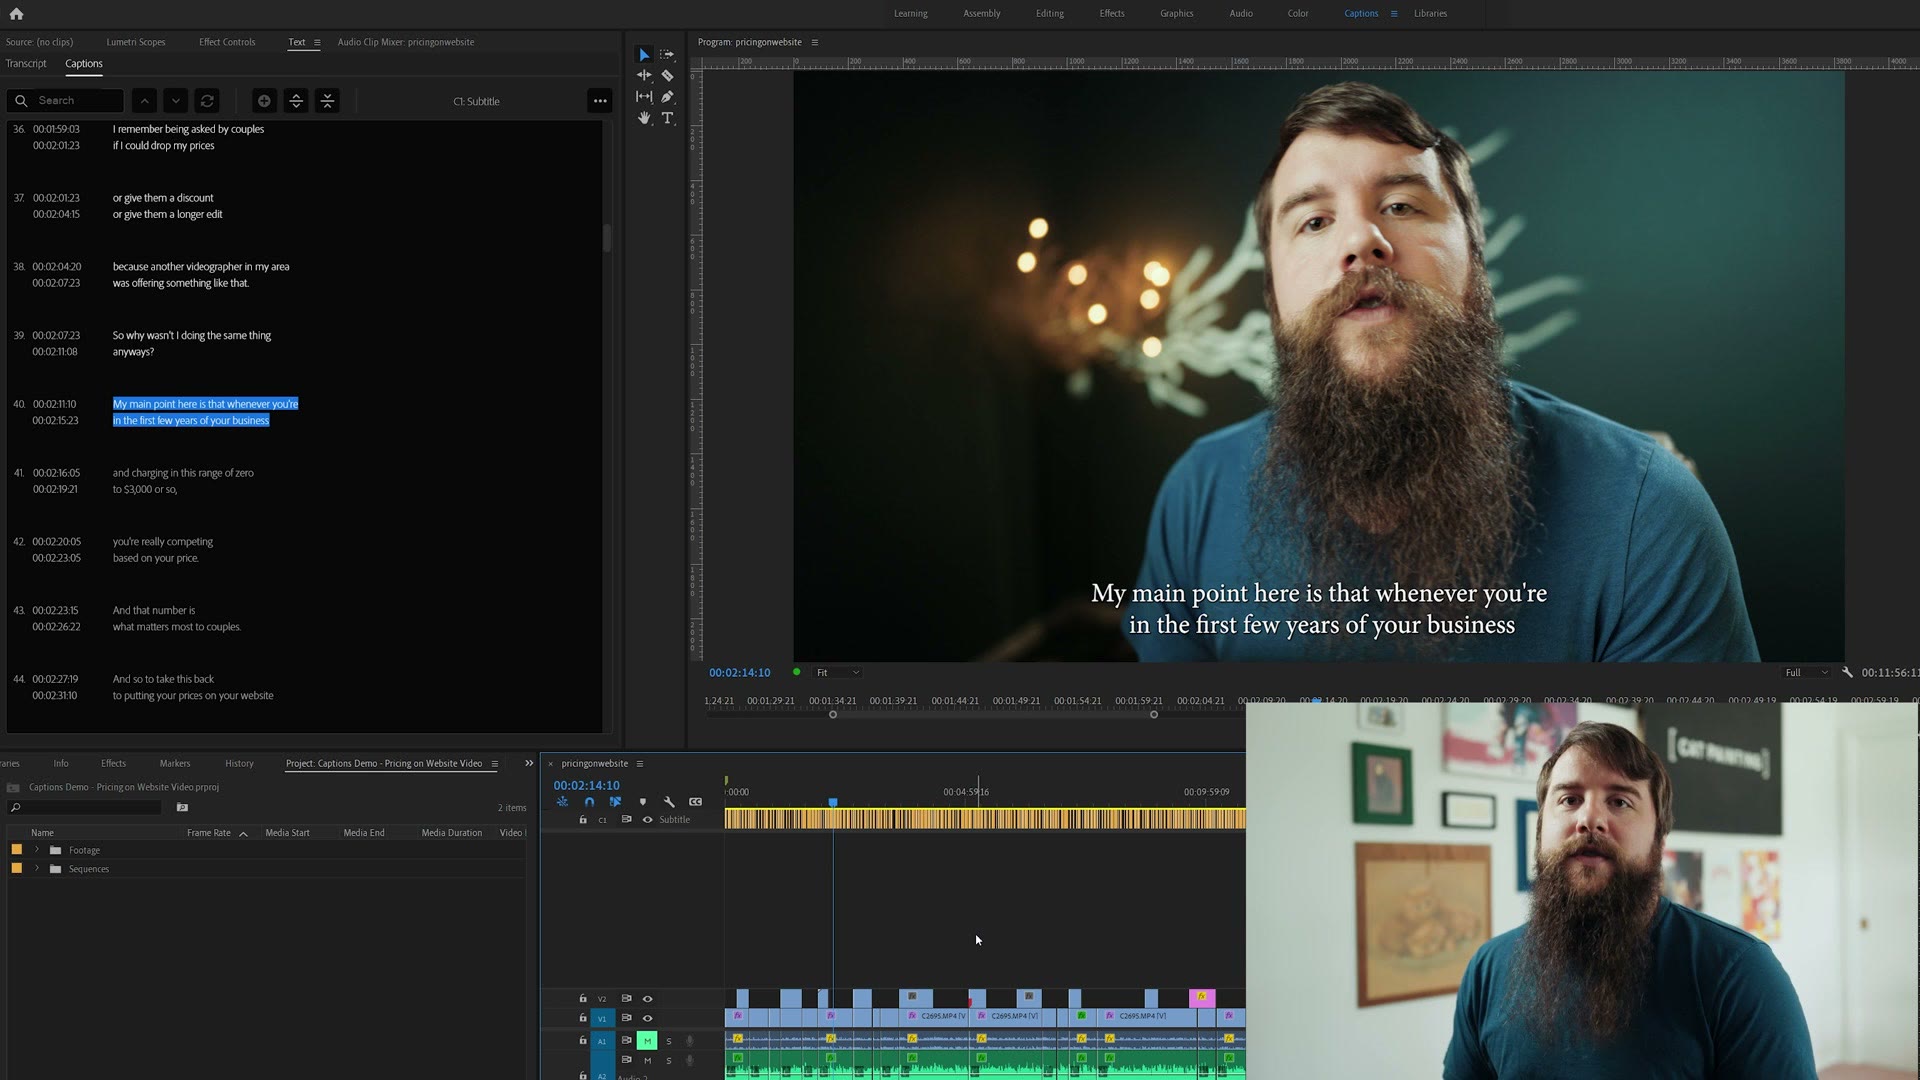
Now let’s tackle burning captions into your video so they’re always visible. This is super simple, and it’s also a great way to heavily customize how they look.
Go to the Type tool in the top middle, click on your captions, and a large red box appears around them. Over on the right the Essential Graphics panel opens up, and that gives you a lot of control.
Select all of the text and change the font to, say, Arial, and change the color to yellow.
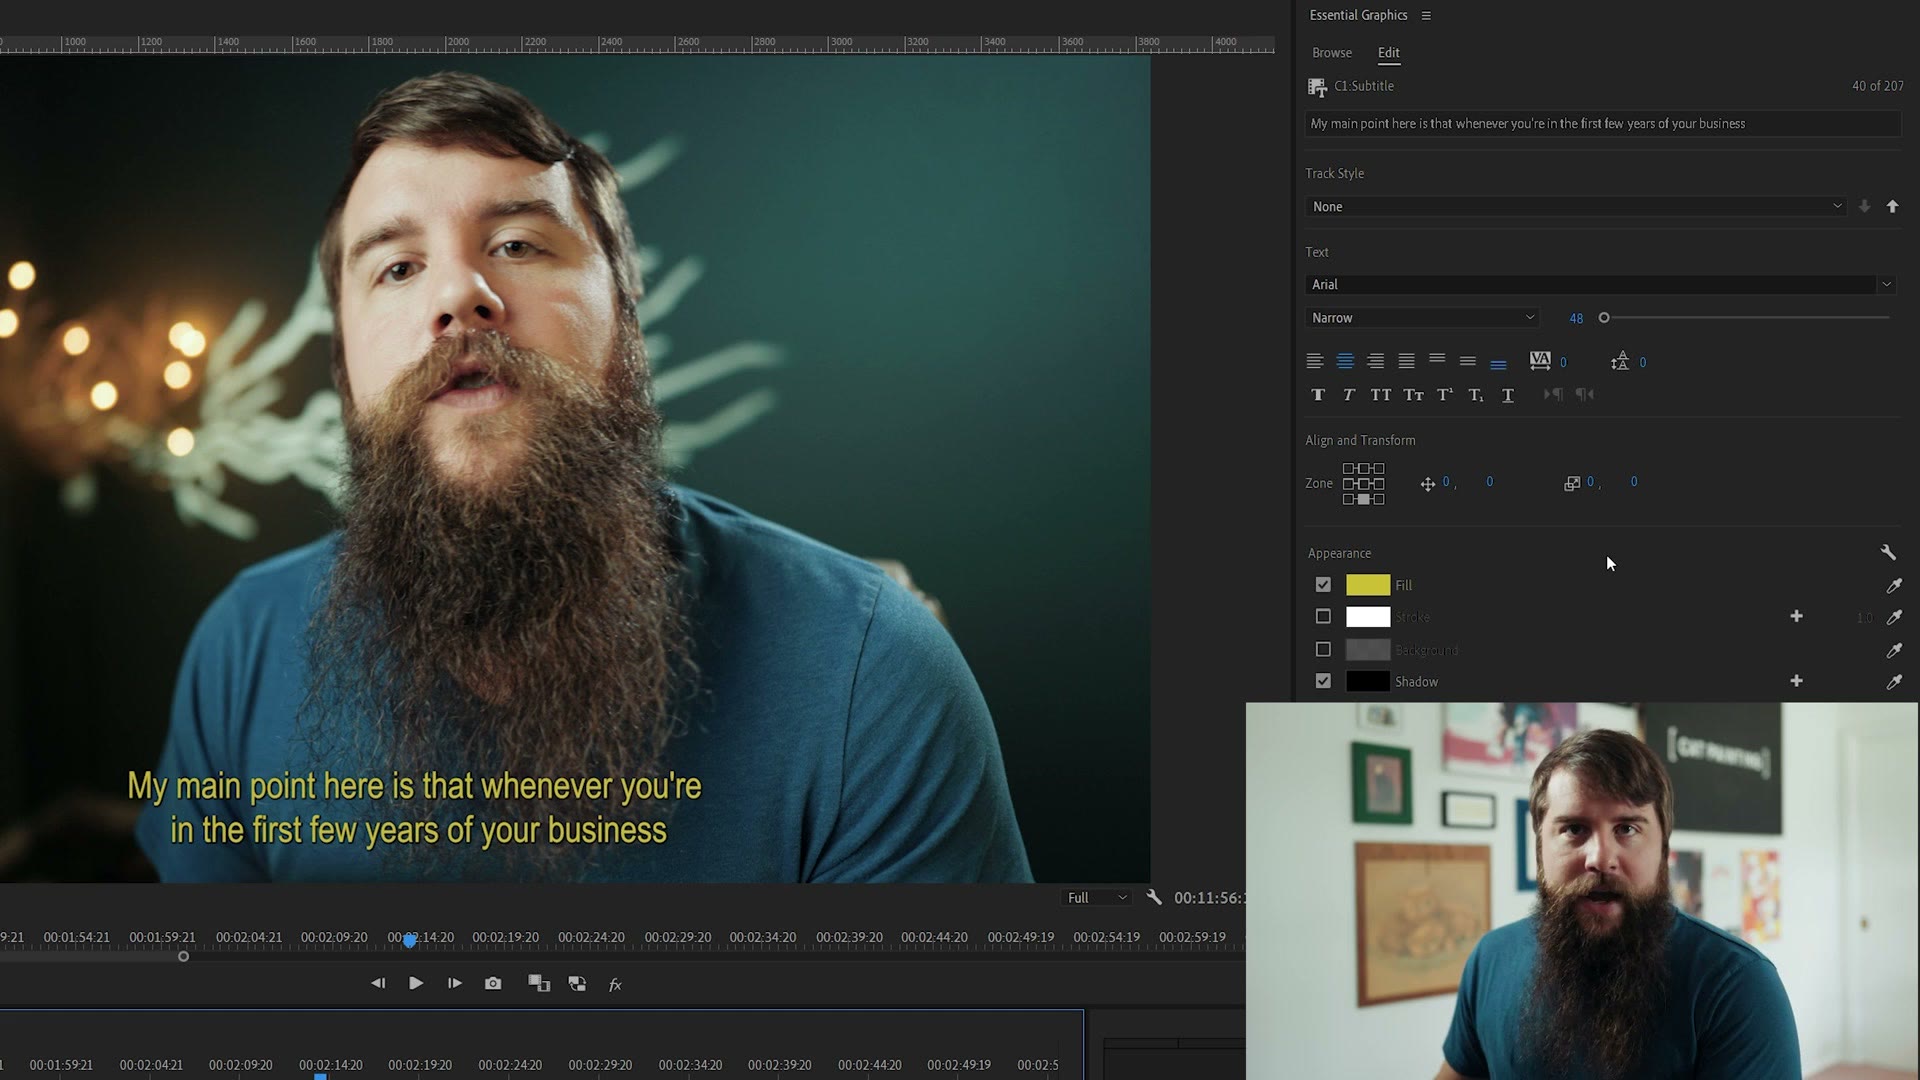
You’ll notice you’ve only changed that one caption. All the others are still white in the old font. How do you fix that? Don’t worry, you don’t have to change them all by hand, which would be a huge pain.
Instead, style just one caption the way you want, then go up to Track Style and click the up arrow, which says Push Style Attributes. Make sure All Captions On Track is selected, press OK, and voila. Every caption updates to your font and style instantly.
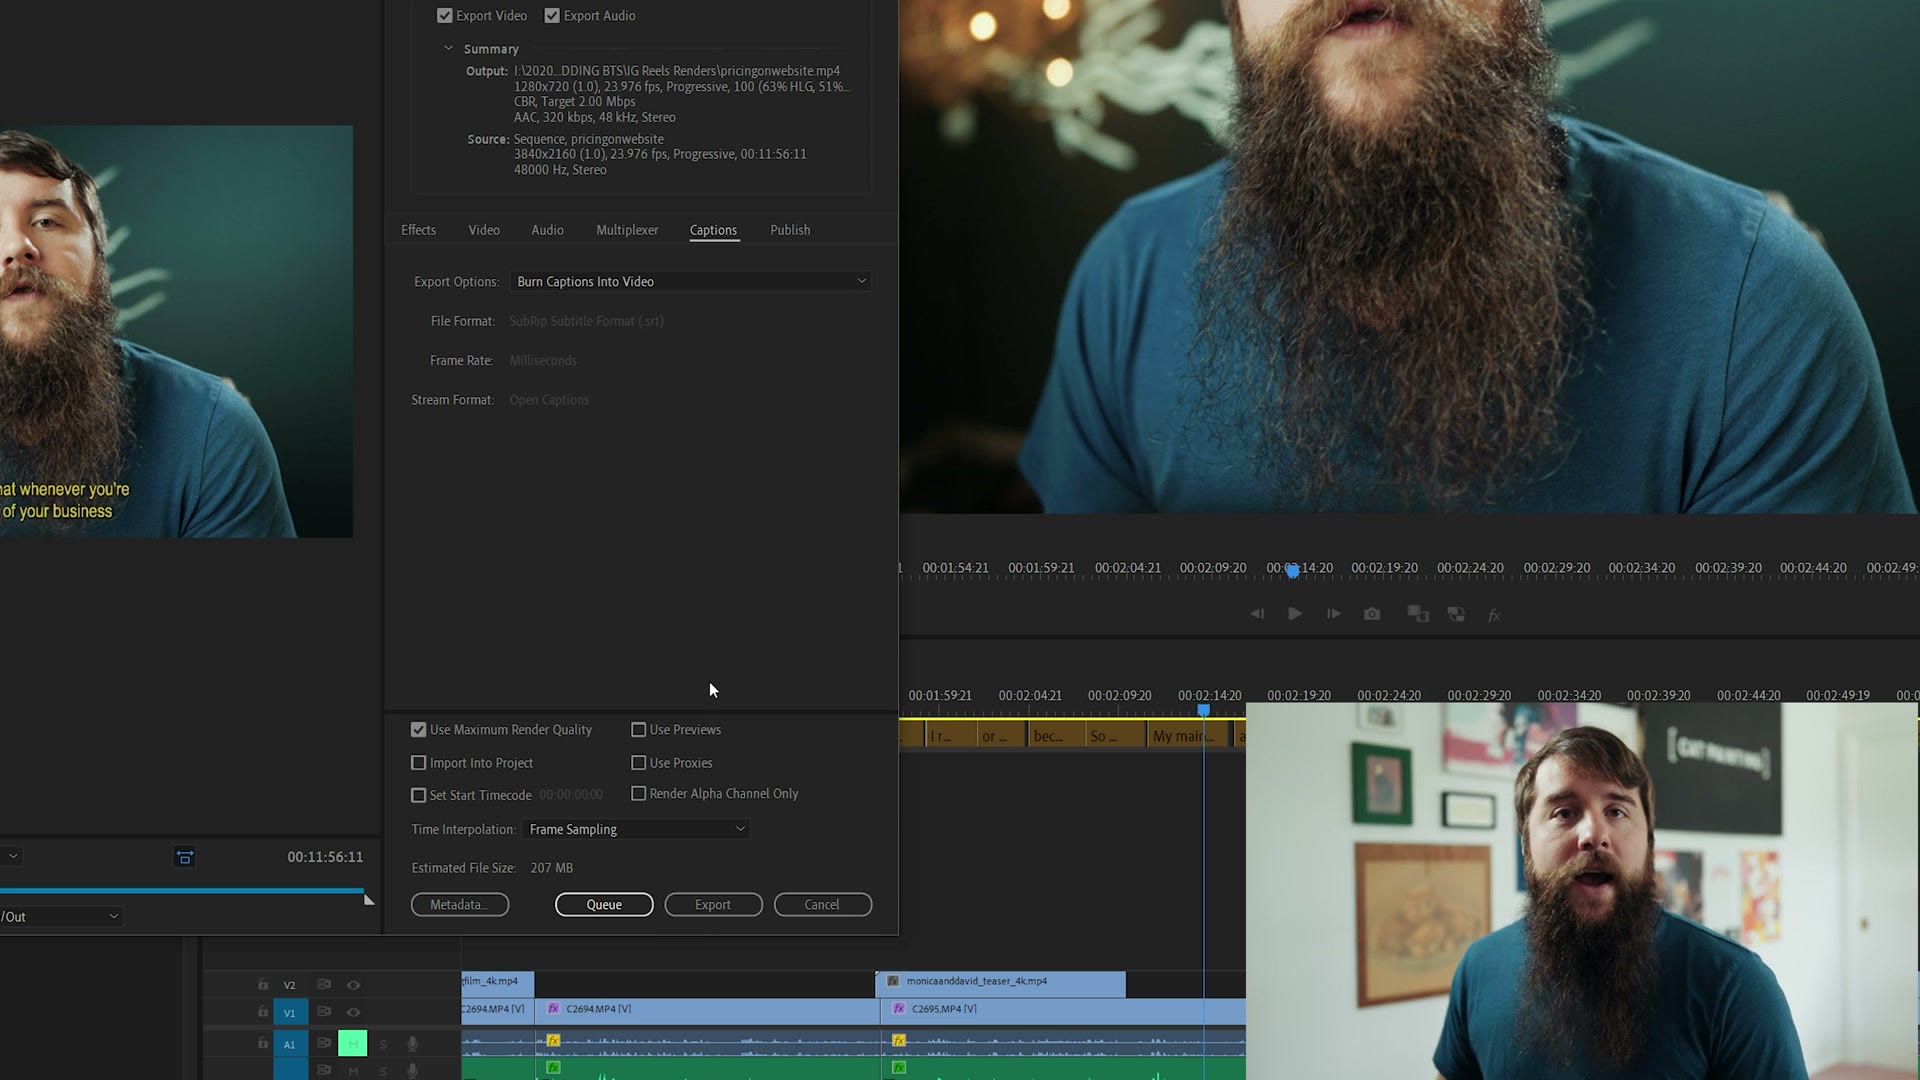
To export them baked in, press Control M or Command M to open the export settings, choose everything as usual, then go back to the Captions tab and for export options select Burn Captions Into Video. Queue or export, and your video comes out with the captions baked in, looking exactly the way you designed them.
Warning About Burning In Captions By Default
One final warning. If you create captions and then go to export but forget to visit the Captions tab, Premiere will by default burn the captions into your video, meaning you get a nasty surprise whenever you play it back.
To stop that, either select None in the export options, or cancel out of your export and click the little eyeball next to your subtitle track, which hides all your captions.
And now you know how to quickly and easily create captions in Premiere Pro. If you want the export settings to go with them, I’ve written up my 4K export settings and my HD export settings too.

The footage here is graded with my own color presets at whoismatt.com/luts, and if you film weddings, come join us in the Learn Wedding Filmmaking Facebook group.
Thanks so much for reading, and have a great day!