
Today I want to show you how to export extremely high quality 4K videos for YouTube, Vimeo, Facebook and everywhere else using Adobe Premiere Pro. And to save you time, I’ve created a set of free export presets that give you every one of these settings immediately, without you having to dial anything in manually. They even come with instructions showing you how to import them into Premiere. You can download those for free right here.
The New Export Tab In Premiere Pro 2022
Let’s open up Premiere. I’ve got a project with a 4K 24 frames per second clip imported and edited on the timeline, and let’s pretend this is a full video that I’m ready to export.
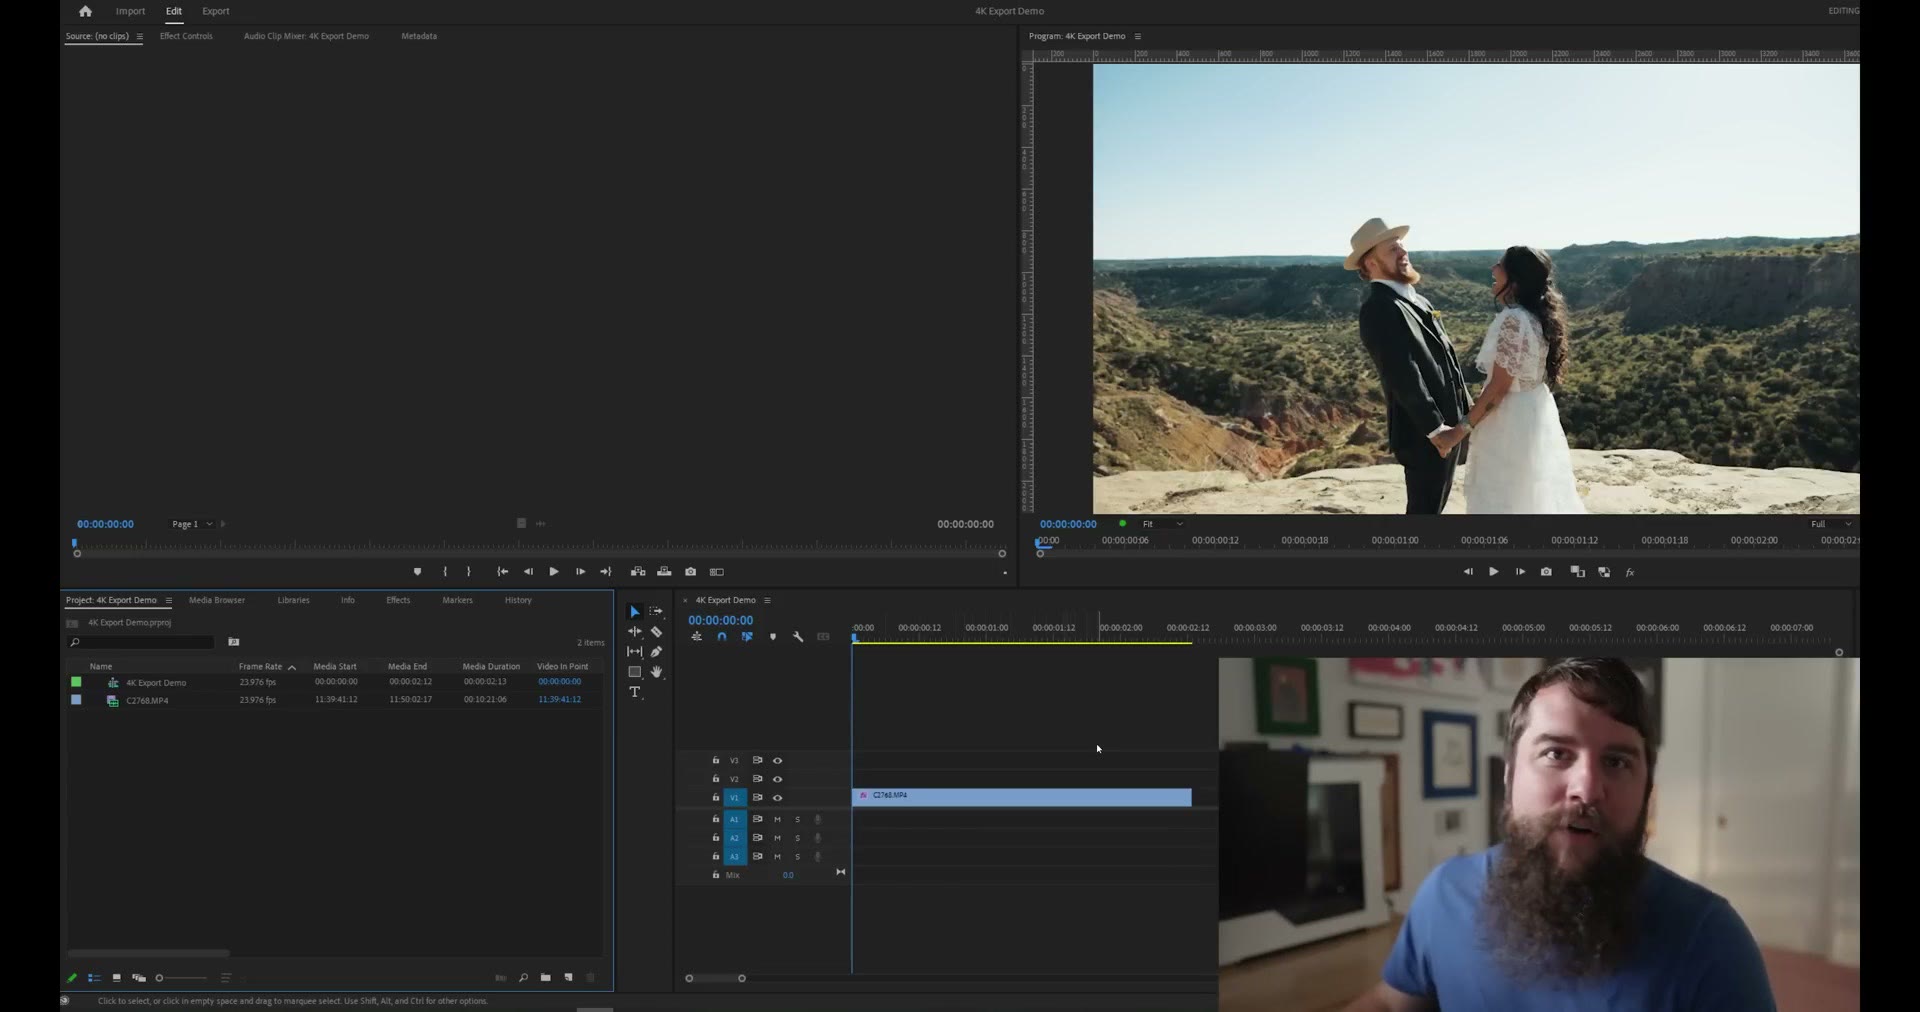
From there you can either press Control M on PC or Command M on Mac, or you can go up to the new Export tab that Adobe added in the 2022 version of Premiere Pro.

If you don’t see an Export tab, you’re probably on an earlier version of Premiere and your export setup is going to look different than what you see here. Good news though, I have a separate walkthrough for 4K exports in the older versions of Premiere Pro.
Export Settings
With the export settings open, make sure the little blue toggle next to Media File is enabled, and then over on the right you can name your file. Let’s call this one my4kvideo.
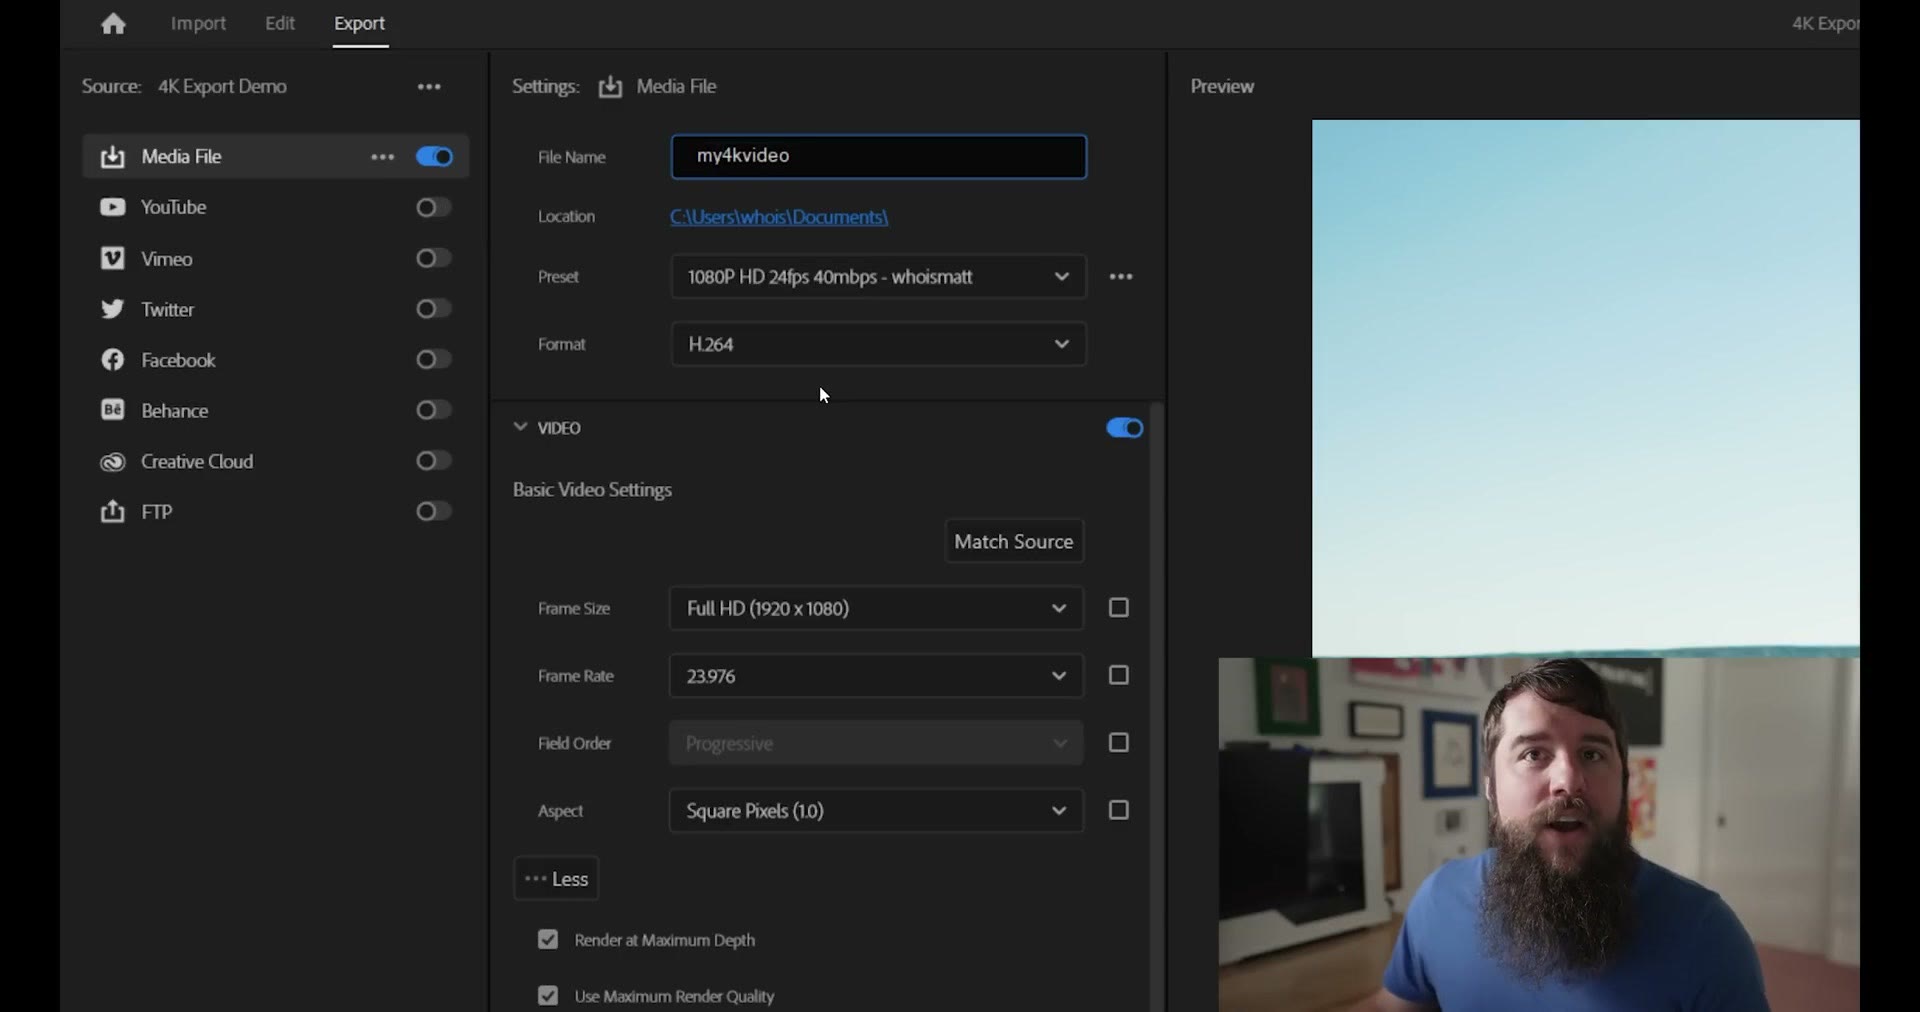
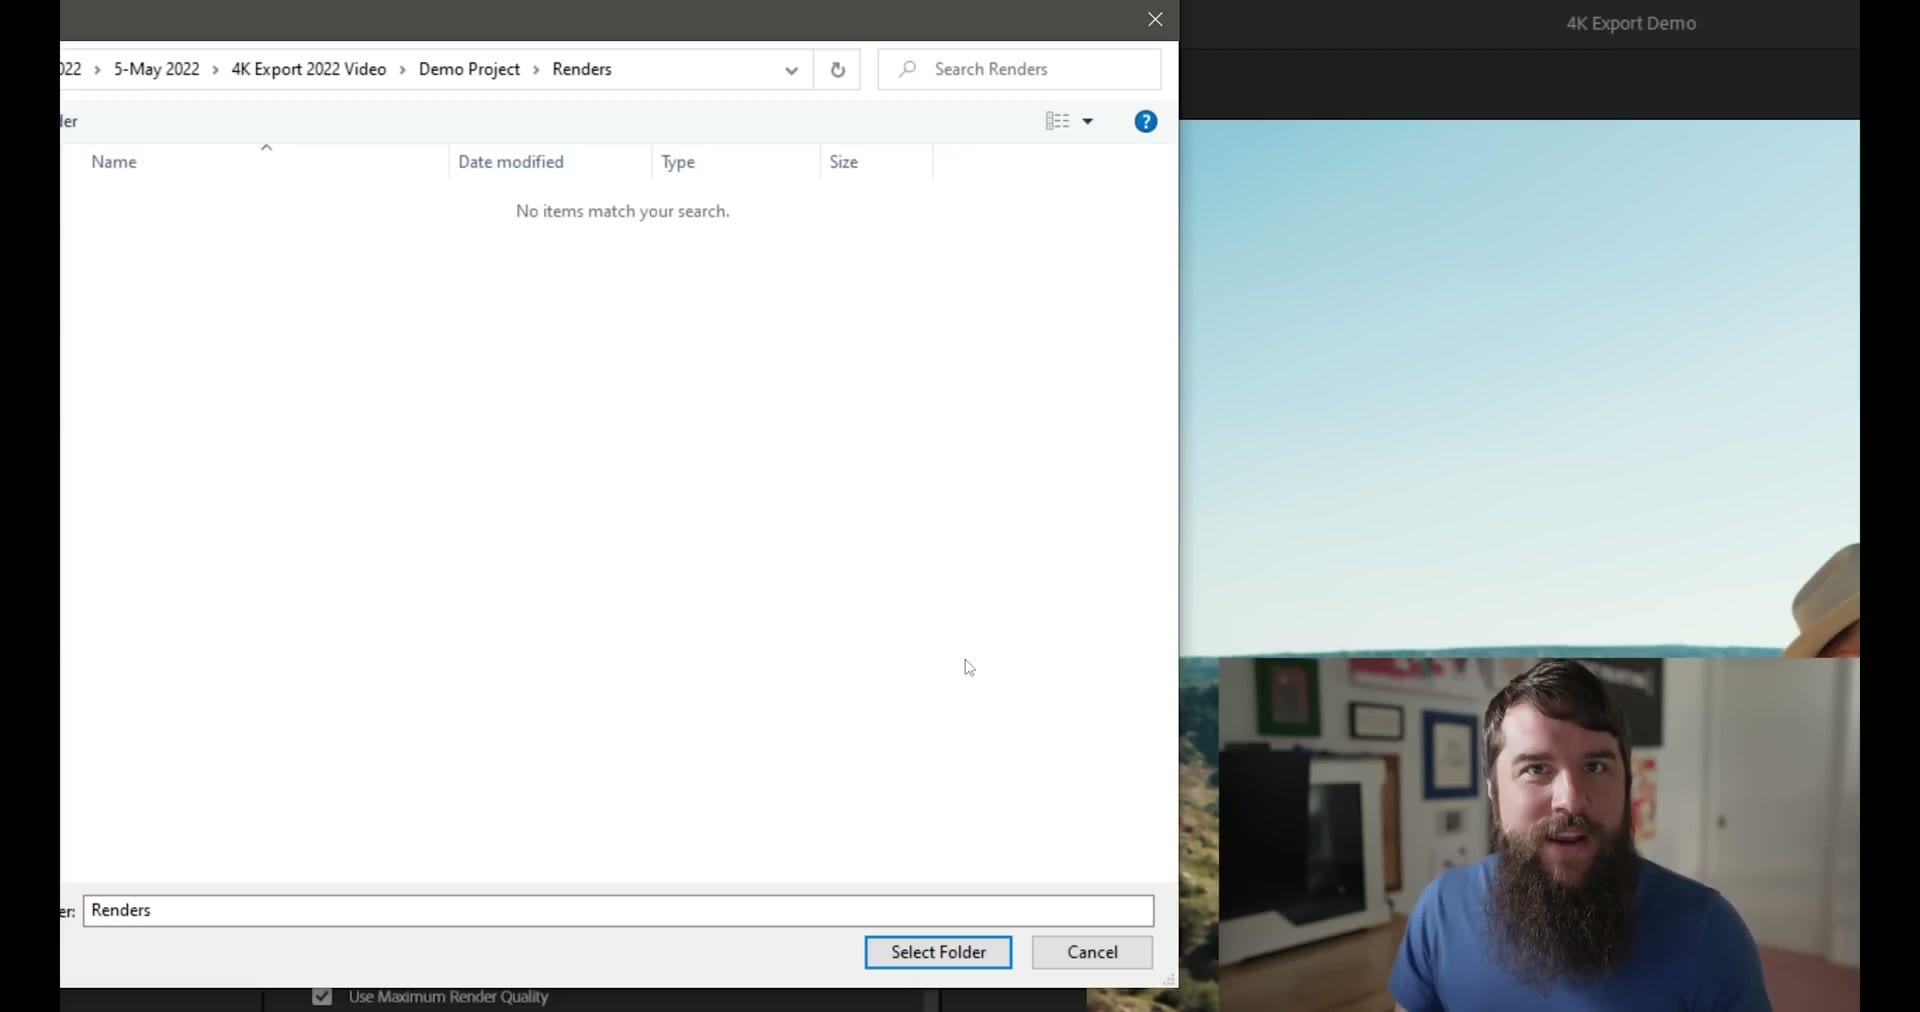
Then click on Location and select where you want the file saved. This one is very important, because if you don’t choose a location you are not going to know where your rendered file ended up, so definitely pick a place you’ll remember and be able to find.
With that done, go down to Preset and select High Quality 2160p 4K.

Then for Format, instead of leaving it set to H.264, click the dropdown and select HEVC (H.265), because that’s the newest format and it’s going to give you the highest video quality.
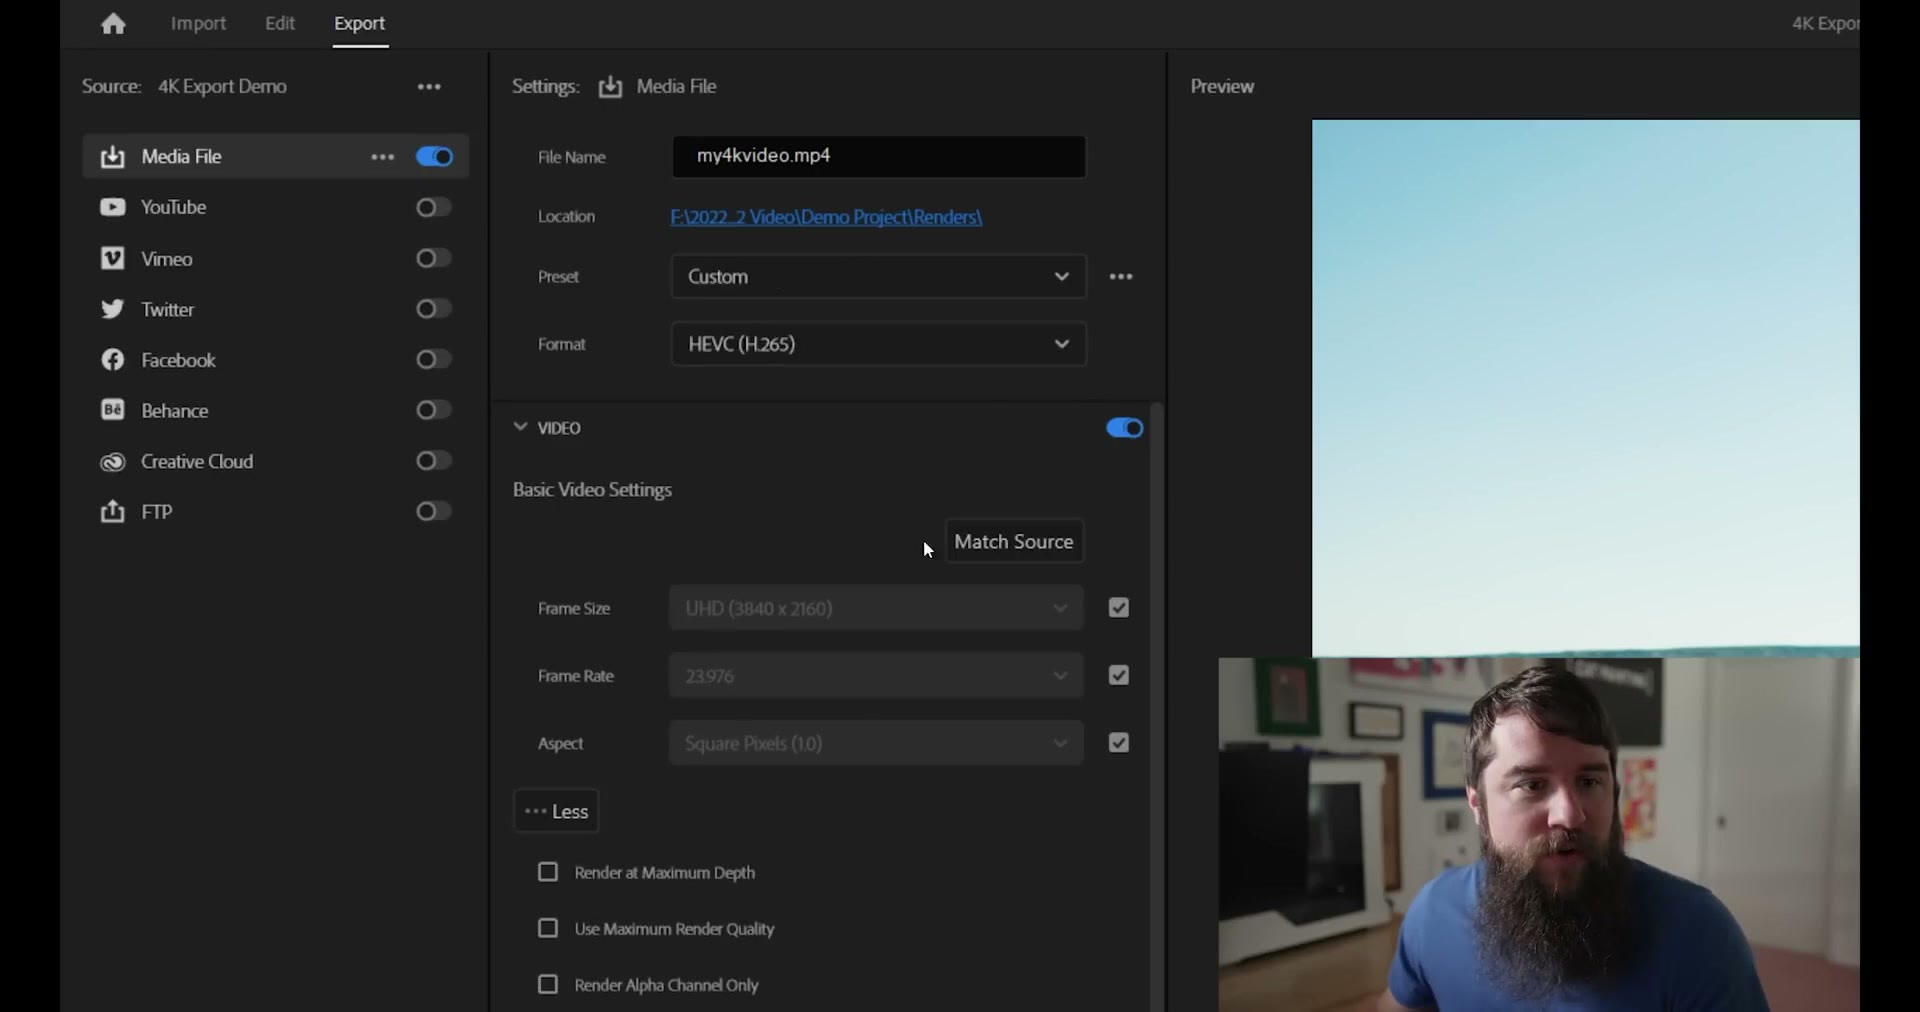
At this point you’re probably thinking, this is great Matt, I’ll just hit Export in the bottom right corner and I’m ready to go. No. Because remember, I told you at the start that I want to give you the best possible export settings, and by default Adobe is not going to give you the best. So we need to dig into the video settings. If yours doesn’t already show them, click the Video tab and you’ll see everything I have. And hold onto your beard for a bit, things are going to get a little complicated, but trust me, this is really important and I’m going to walk you through all of it.
Starting off, for Frame Size make sure 3840 by 2160 is selected. If your settings are grayed out and yours looks different from mine, click any of the checkboxes next to them and that will let you change them. For Frame Rate, make sure it’s set to 23.976, and for aspect, Square Pixels.

Next, if you don’t see the rest of these settings, click the More button and that’ll open them up. Then make sure Render At Maximum Depth is checked and Use Maximum Render Quality is checked. Both of those help enhance the quality of your file, and you definitely want the highest quality video, which is why you’re reading this.
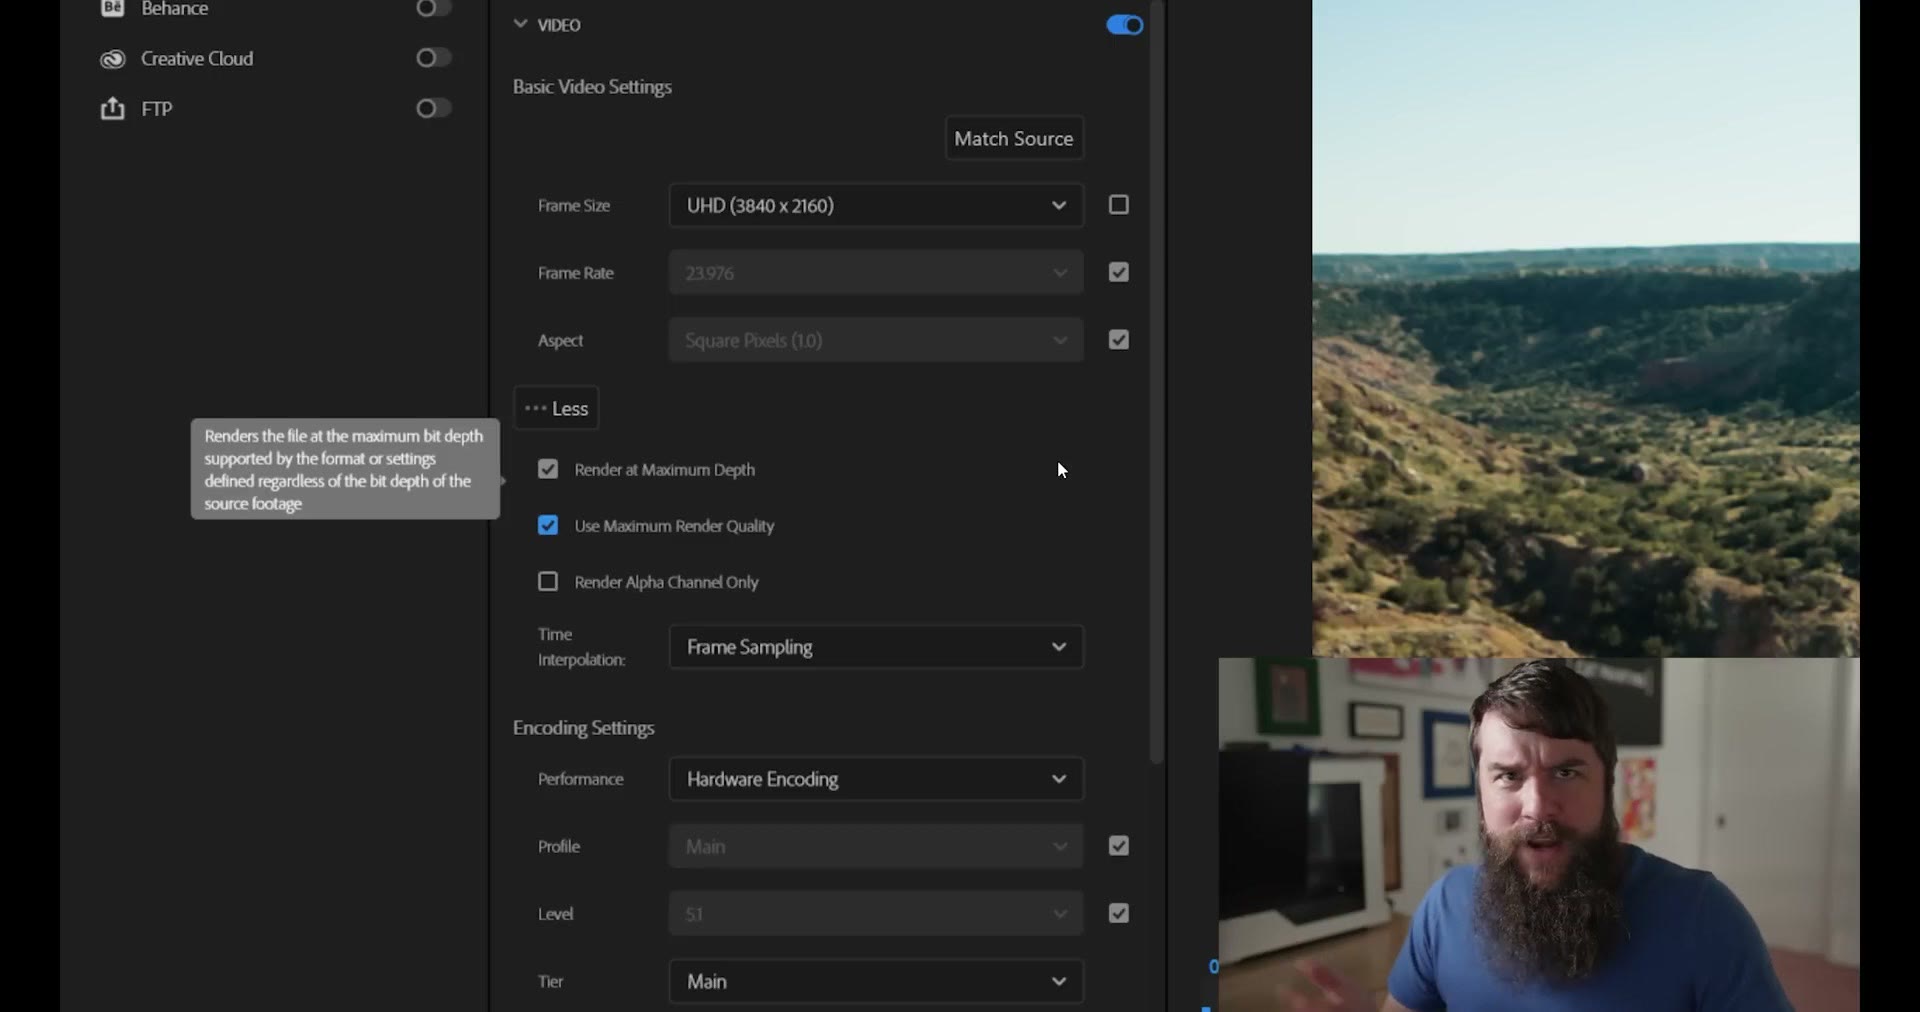
Under Encoding Settings, for Performance make sure Hardware Encoding is selected. If that’s not available and you can only select Software Encoding, that’s okay. But selecting hardware encoding lets you render dramatically faster, because Premiere is going to use your computer’s graphics card, so I highly recommend it whenever it’s available.
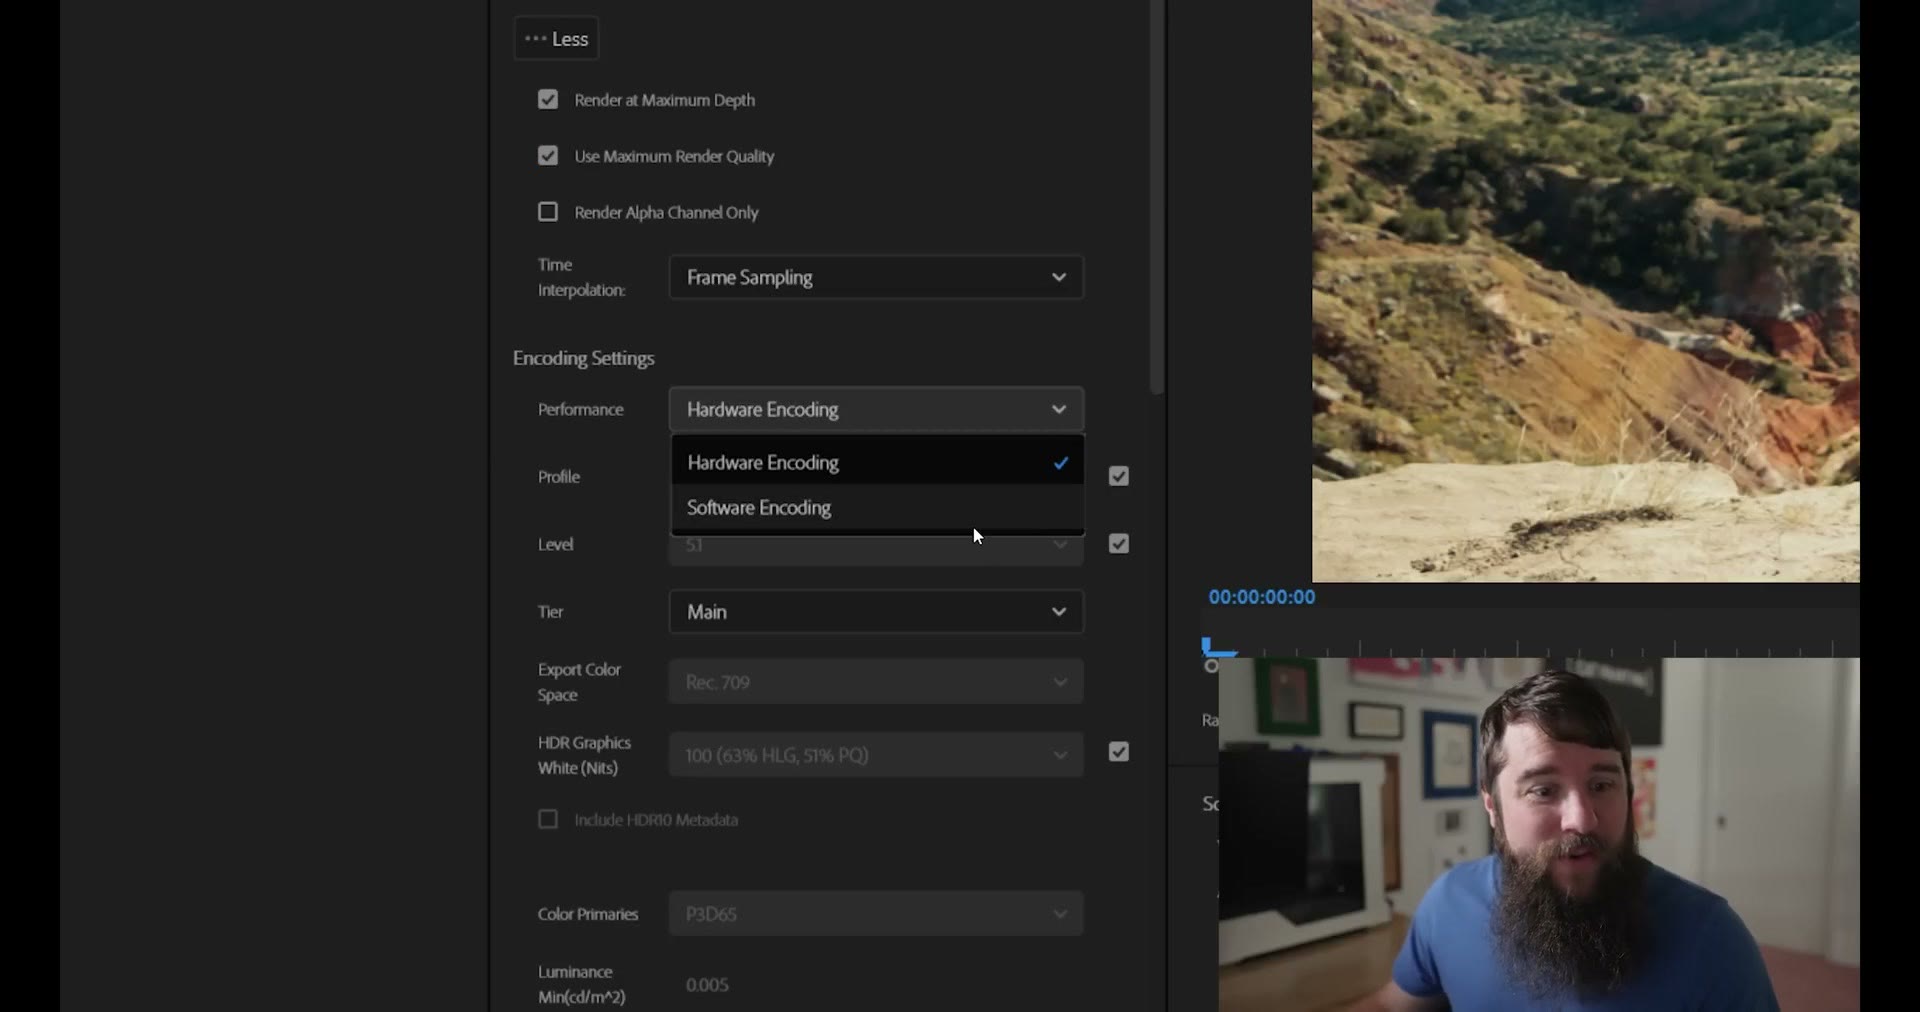
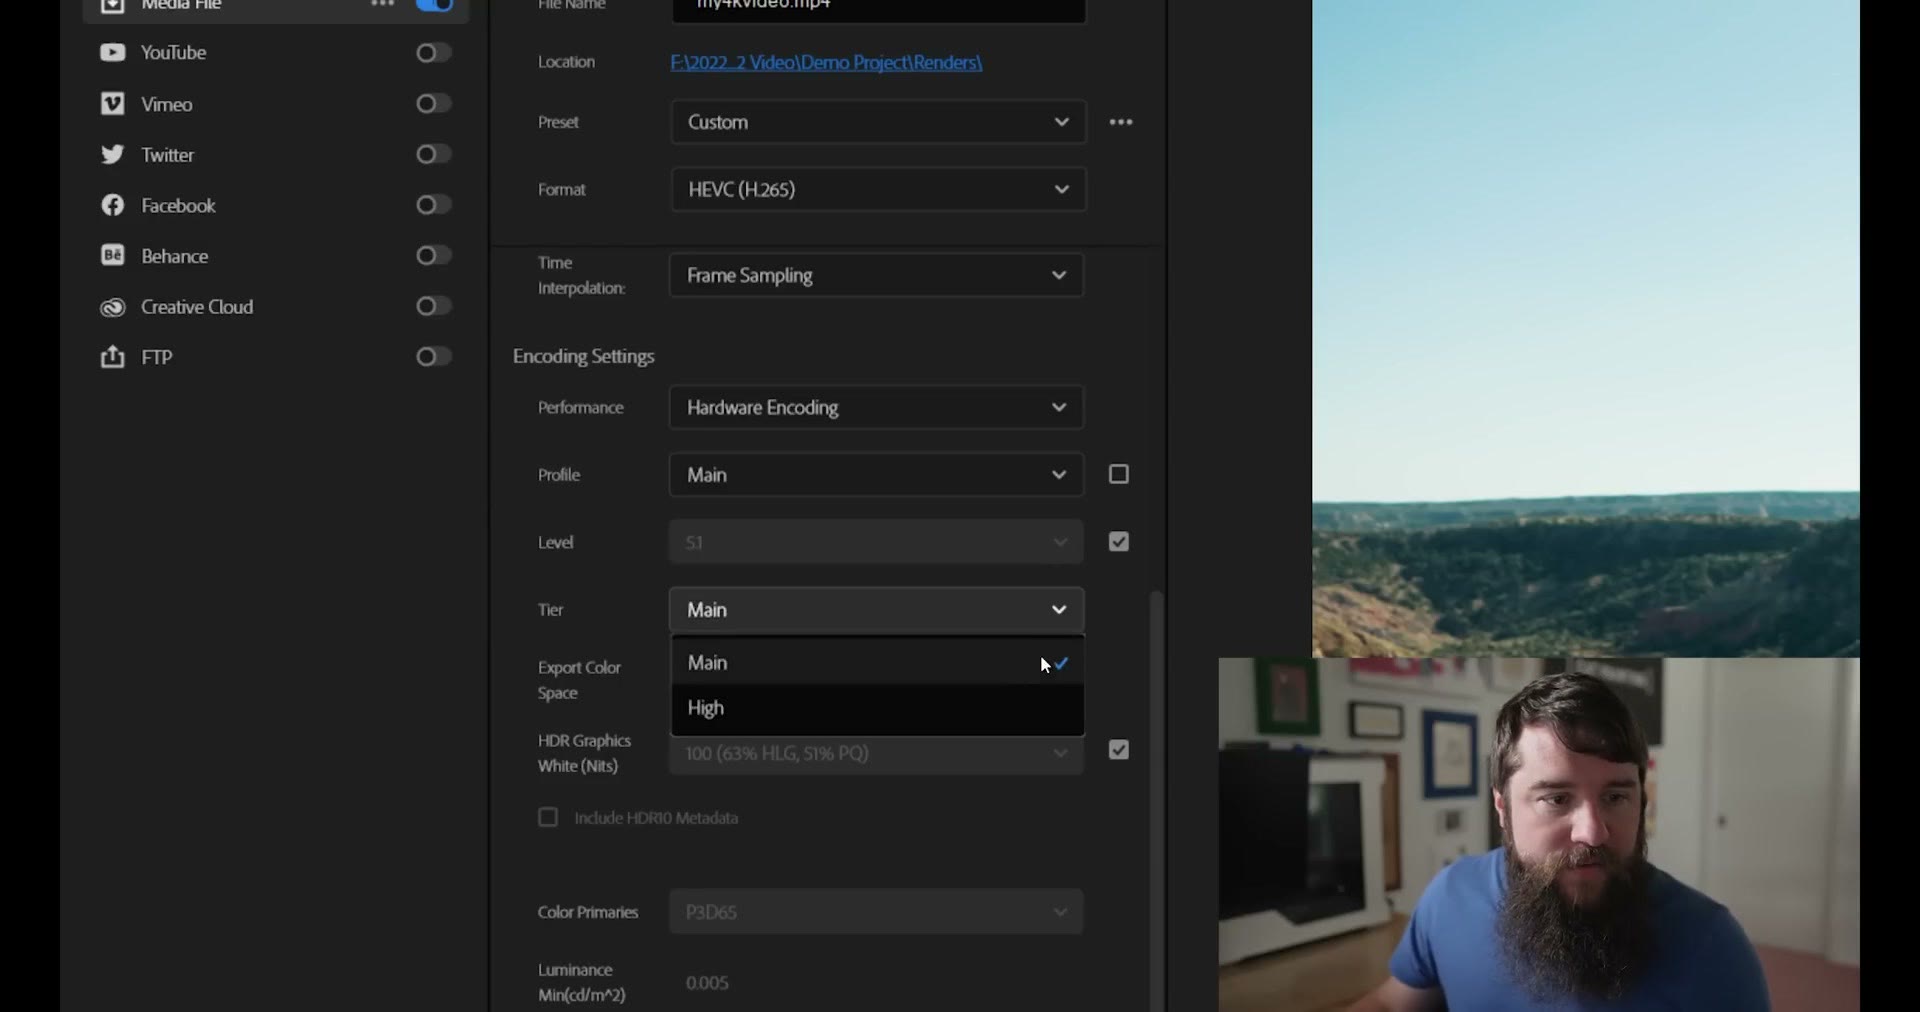
For Profile, make sure it’s set to Main. If you click there you’ll see you also have Main 10, but Main 10 requires an HDR exporting workflow, which is a whole lot more complicated, and for 99.9% of people Main is going to look great.

For Level, leave it at 5.1. But for Tier, change it from Main to High, which unlocks your bitrate so you can export at even higher quality. And lastly, for HDR Graphics White Level, leave it set to 100. If it’s set to something else, put it back to 100.
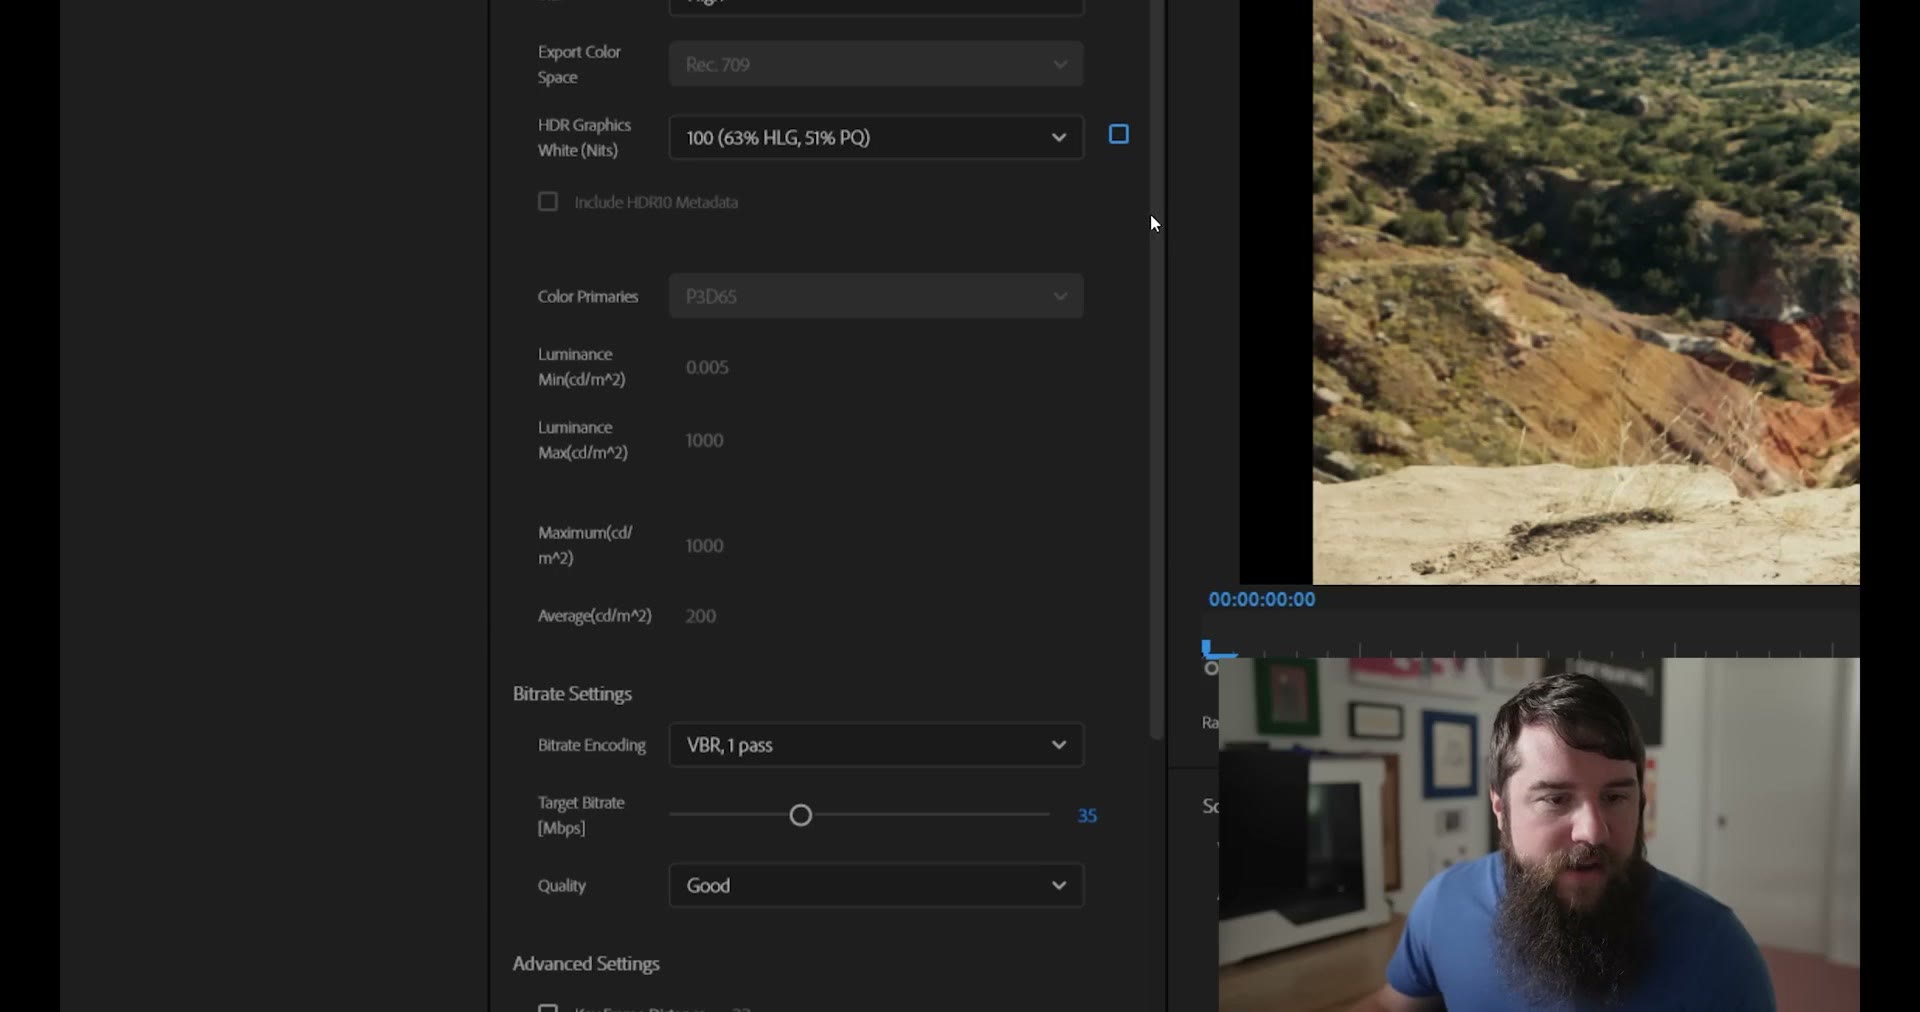
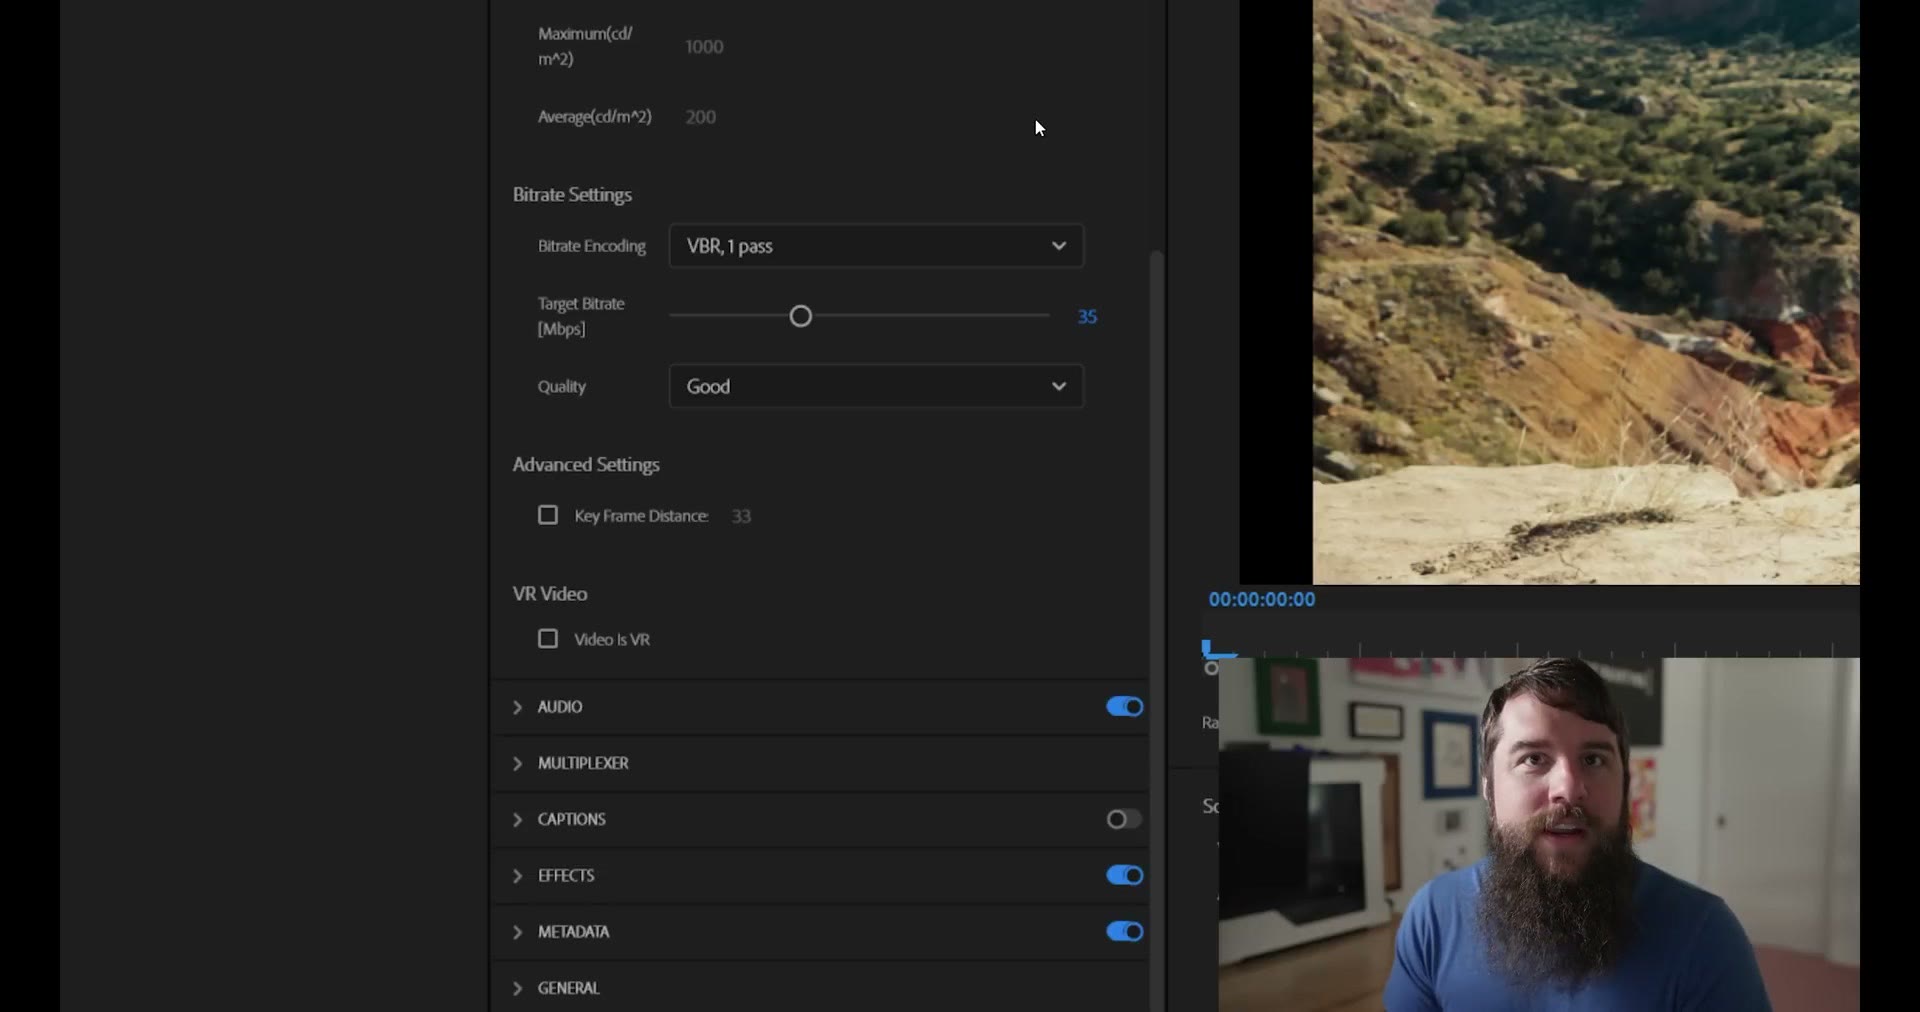
Now down to the bitrate settings, and this is the biggest and most important setting of them all, the one that affects the quality of your videos the most whenever you export.
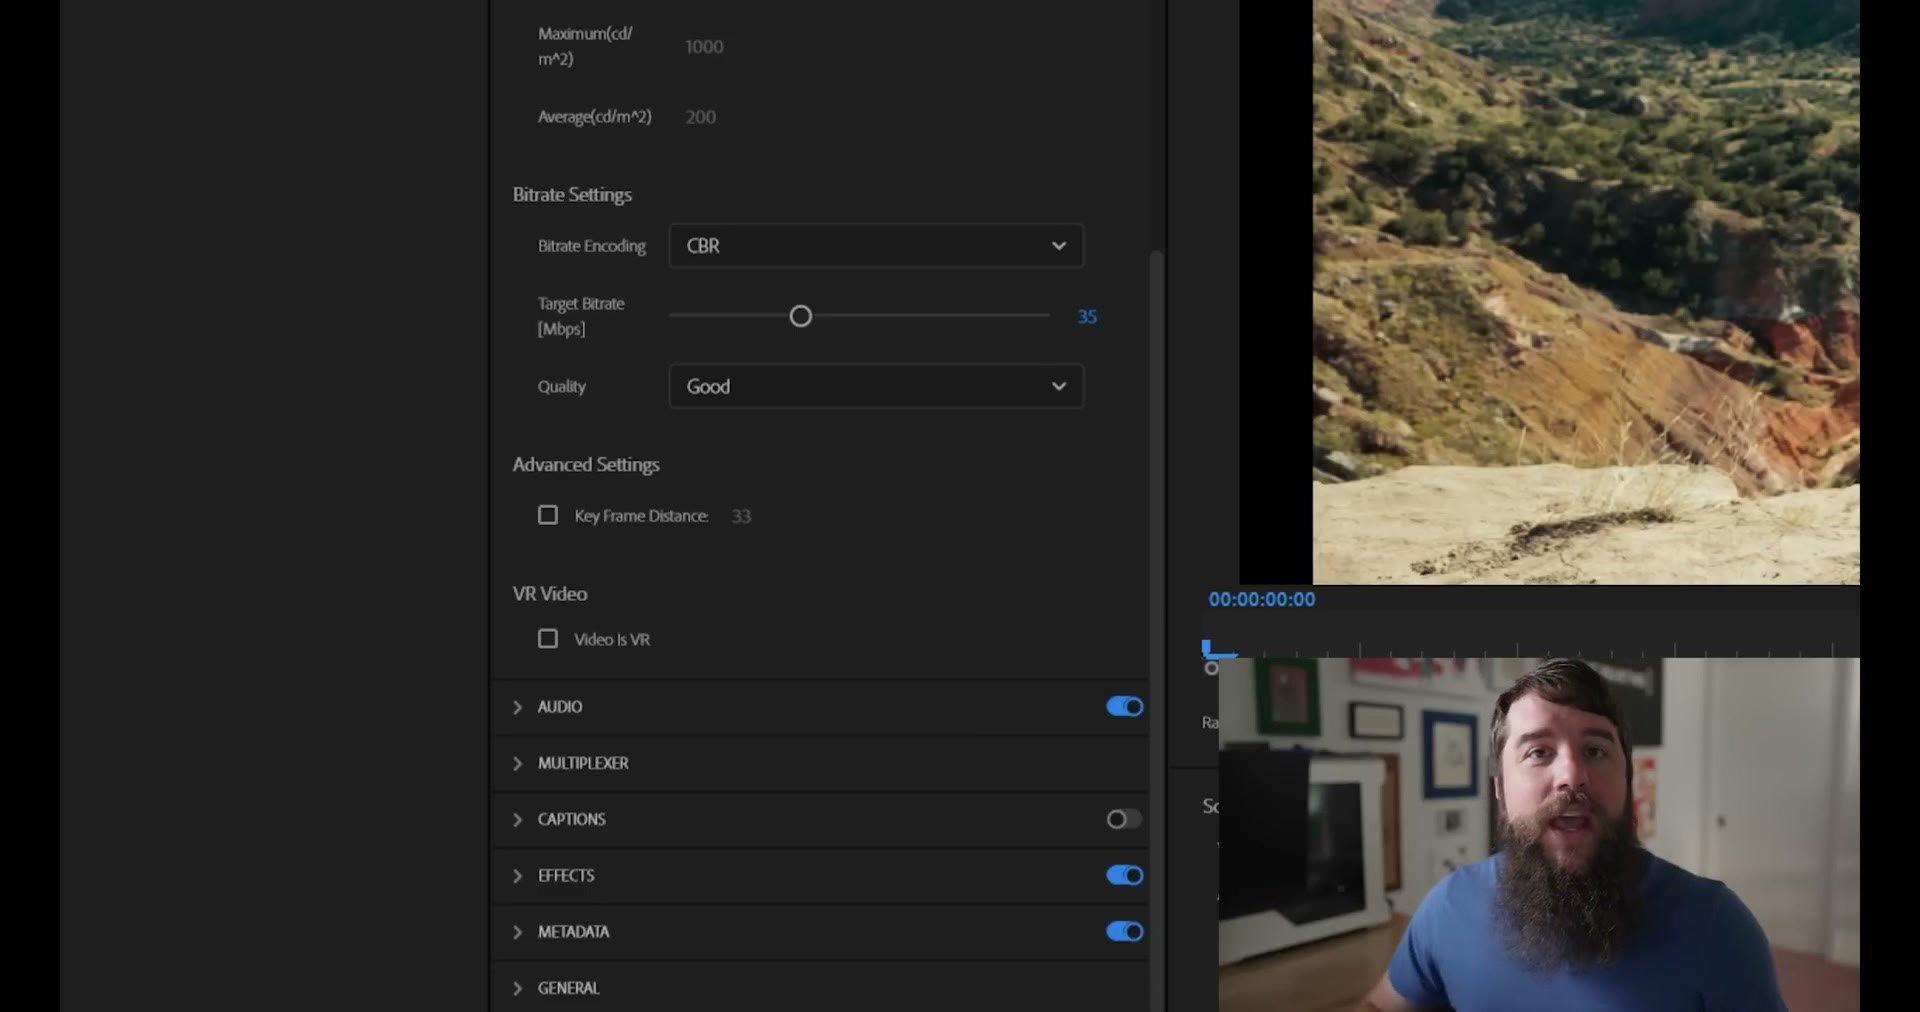
If you want the highest possible video quality, for Bitrate Encoding select CBR, which stands for constant bitrate, meaning Premiere is always telling your video to be as high quality as it possibly can.
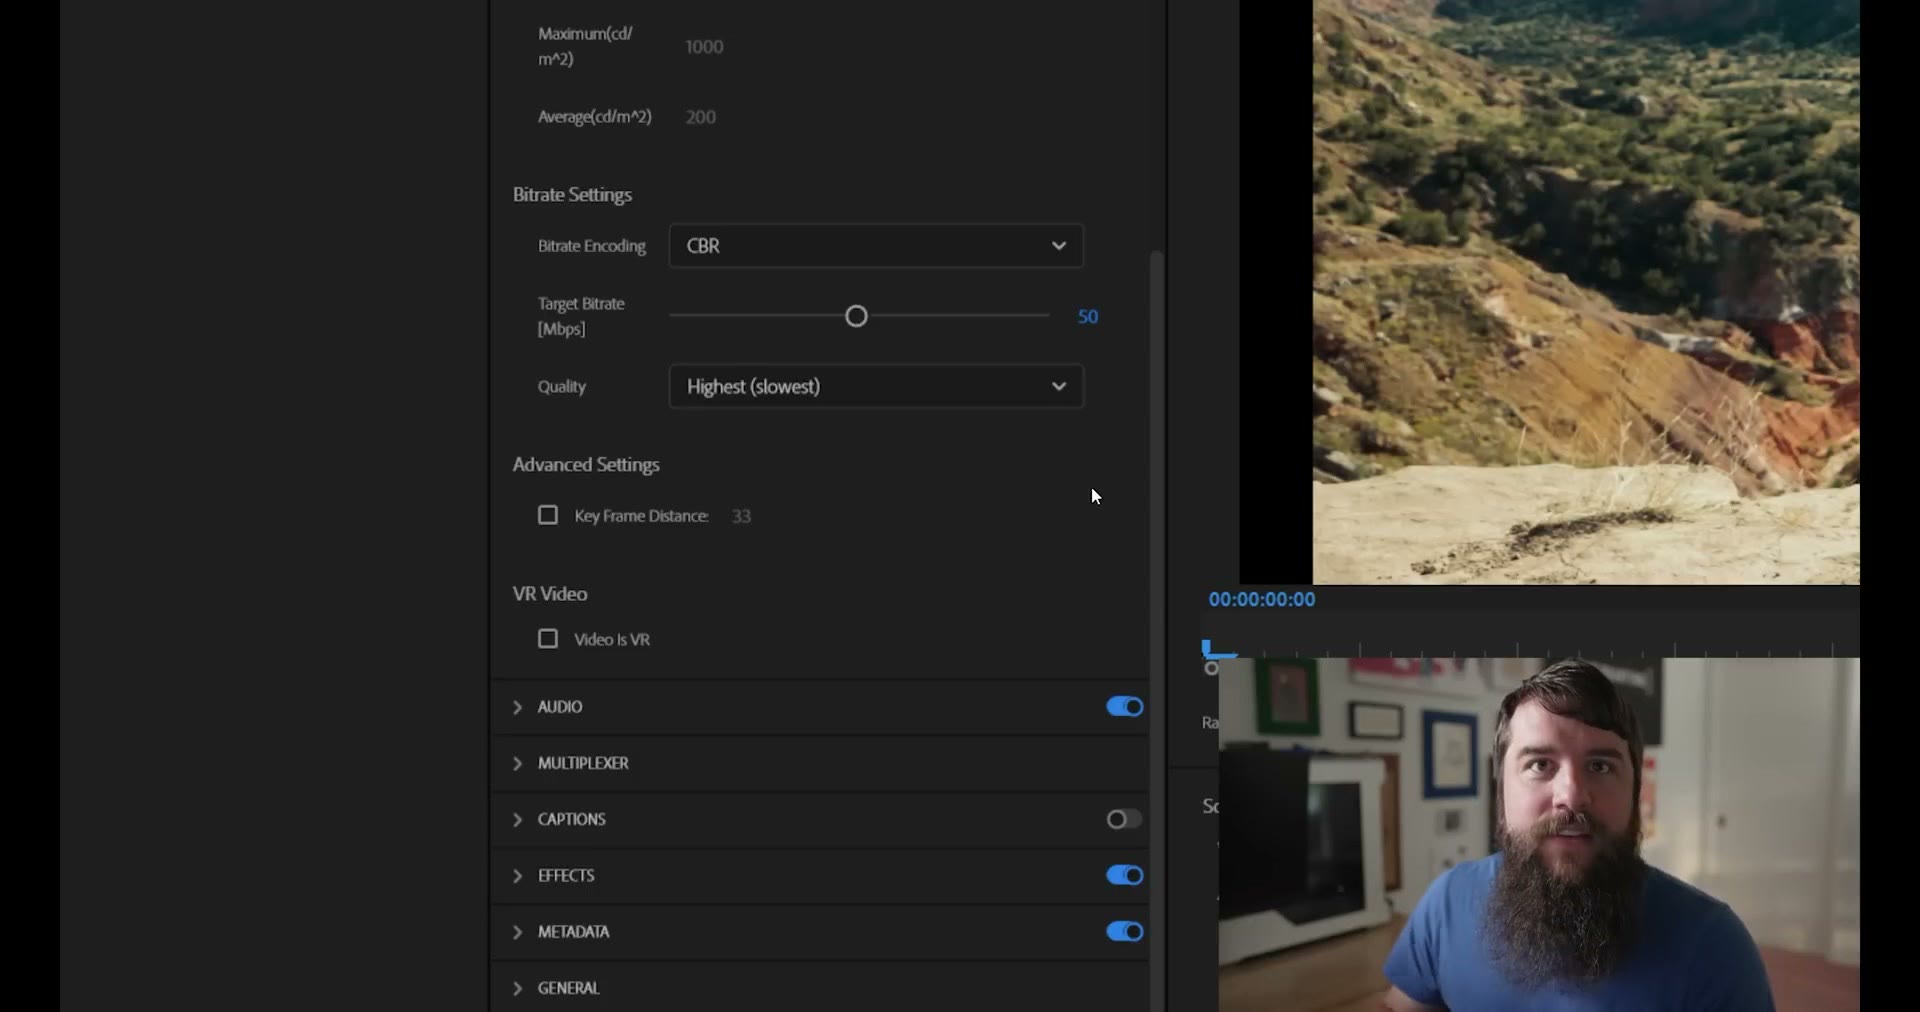
Then, if you’re uploading to YouTube or another site online and you want to guarantee the highest possible quality, set your Target Bitrate to 50. In the past, back when we were using the older H.264 codec, I would have told you to export at 100 megabits per second. But because we’re now using HEVC, which is a newer and much more efficient codec, you can export at half that bitrate and get there.
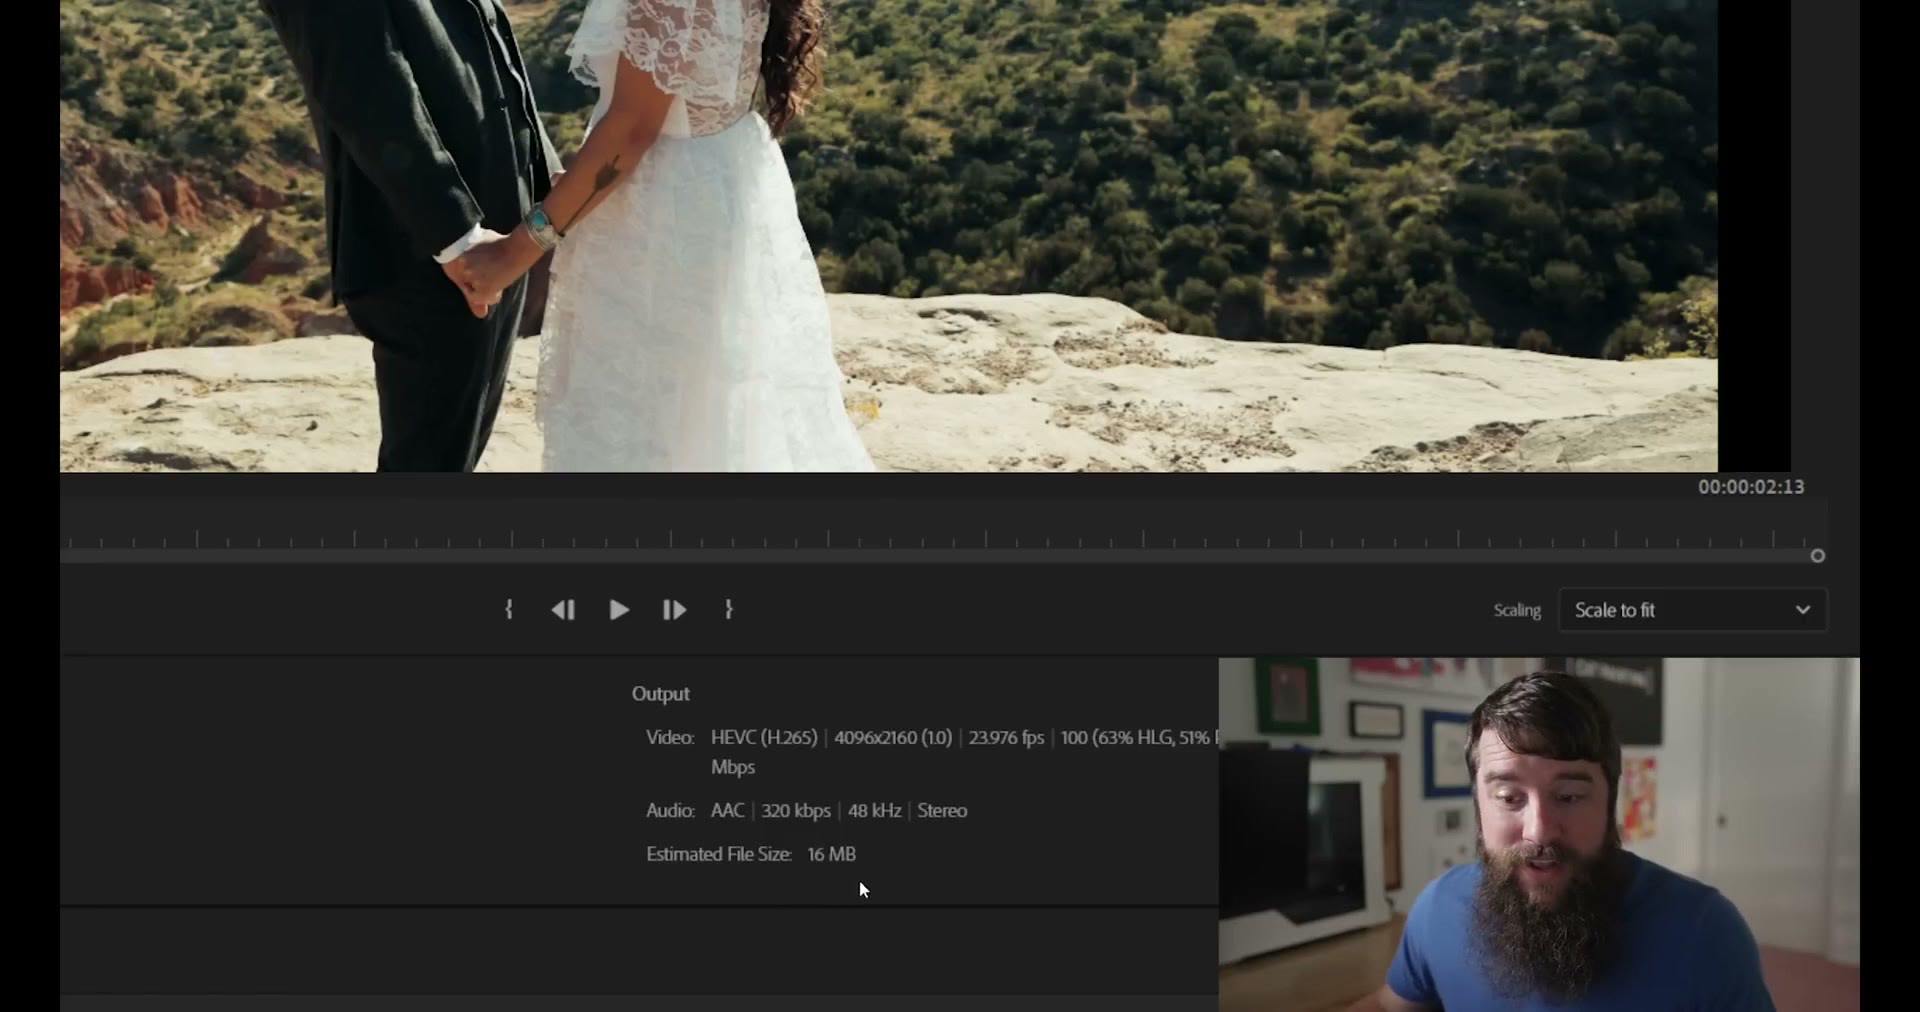
This is going to give you a reasonably large file. If you look under the estimated file size section, it’s telling me this clip is going to be 16 megabytes and it’s only a few seconds long, so you can get an idea of how that scales. Trust me though, the bigger file is completely worth it if you want the highest quality 4K video whenever you upload.
The Secret To The Highest Quality Videos On YouTube
Speaking of the highest quality videos on YouTube, here’s the part almost nobody knows. Even if you did not film your video in 4K, and you filmed it in 1080p for example, I would still recommend using these 4K export settings for basically everything you upload to YouTube.
Here’s why. If you upscale your lower resolution files to 4K and then upload them, YouTube uses a significantly higher bitrate whenever it plays your video back, and the quality is going to be dramatically better than if you had uploaded the same video in HD. So in short, always upload to YouTube in 4K, and you can do that for pretty much any other site too, Facebook, Vimeo, whatever. It will pretty much always help you to upload in 4K.
If you’re not using this one, I went through How To Export 4K Video In DaVinci Resolve 18 For YouTube, Facebook, Vimeo, & Clients as well.
If you genuinely do need a 1080p file, for a client to use internally or something that isn’t going up on a streaming site, I have a full HD export walkthrough over here instead.
Lastly, keep in mind that 50 megabits per second is just the bitrate I recommend if you’re exporting at 24 frames per second. If you’re exporting at 30 frames per second, I’d bump it to 60 megabits per second, and for 60fps footage I’d export at 120. Basically, whatever your frame rate is, your bitrate should be double that number and you’re good. Shout out to Casey Faris for that way of thinking about bitrates, it’s really easy to remember.
With that, make sure Quality is set to Highest (slowest), and those are all your video settings.
Next, go down to the Audio tab and make sure Audio Format is AAC, Audio Codec is AAC, Sample Rate is 48000 Hz, Channels is Stereo, and Bitrate is 320 kbps. These should already be selected by default, but it doesn’t hurt to check.
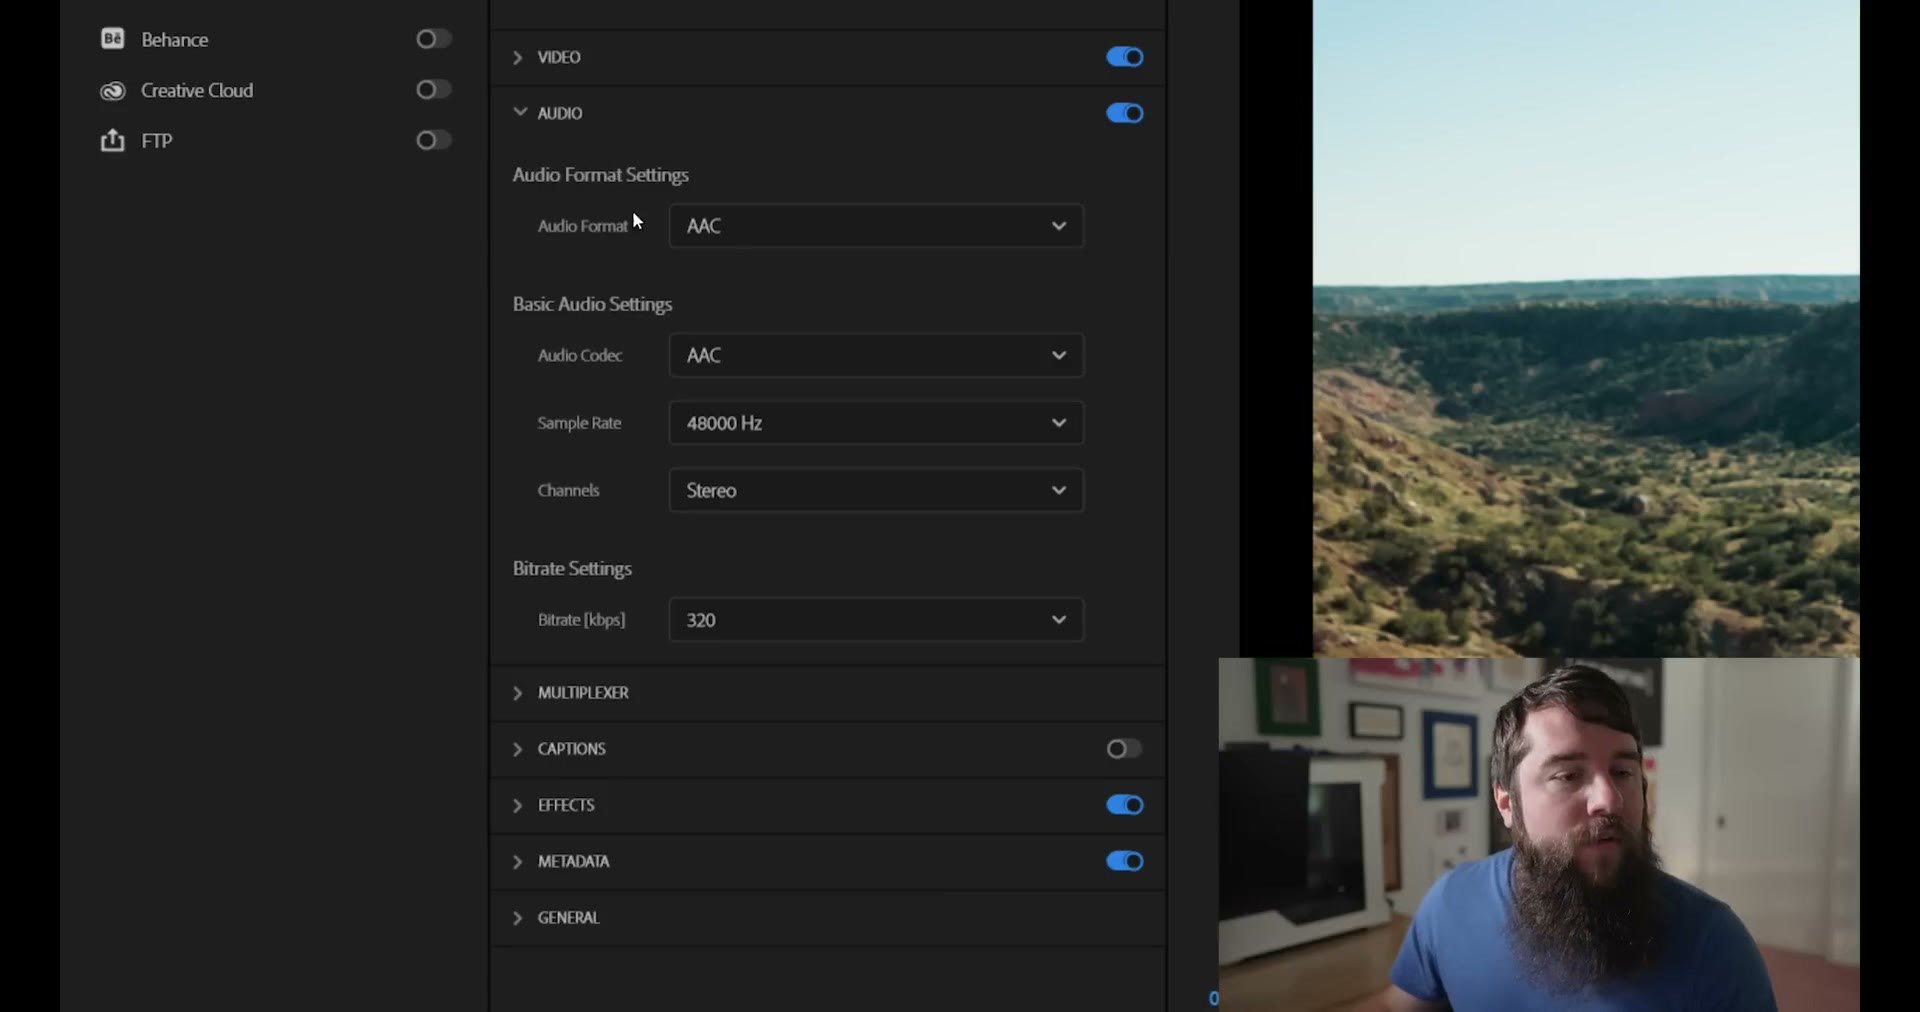
And congratulations, your settings are all done and you’re about ready to export.
But if you want to save time and avoid dialing all of this in every single time, you have two options. First, you can download my free presets, which give you everything we just covered. Or you can make your own by saving the settings we just built.
To do that, go up to the Preset dropdown, click the three dots to the right of it, click Save Preset, and give it a name. I go with the codec, the resolution, the frame rate and the bitrate, so something like h265, 4K, 24fps, 50mbps, whoismatt.

Press OK, and from then on, any time you want to export with these settings you can just go to the preset dropdown and select it.

Then go down and either select Send To Media Encoder or Export, and your video is done. That’s it.
Wanna Edit Videos Like A Pro?
Can I help you out even more though? I’ve put together a free guide called Edit Videos Like A Pro that walks you through some of my biggest tips as a video editor. These things took me years to learn, but you can use this guide to take a huge shortcut. You can download it completely for free right here.

The footage here is graded with my own color presets, which live at whoismatt.com/luts. If you don’t have Premiere Pro yet, you can download a free trial here. My full gear list is on kit.co, I have filmmaking courses if you want to go deeper, and if you film weddings, come join us in the Learn Wedding Filmmaking Facebook group.
Thanks so much for reading, and have a great day!