
My name is Matt Johnson, and today I am going to tell you how to easily edit and export stock footage that you can then upload to different stock footage licensing sites and start selling to make passive income.

If you want to save time, I have put together a free Stock Footage Jump Start Guide that is going to show you everything you need to know to get your first stock footage clips uploaded online and you making money, ideally in your first 30 days. If you want a huge shortcut to making passive income, you have got to check that out. If you want to see the money side of it first, here is how much I made selling stock footage in 2022.
With this video I am going to assume you already have some footage, either footage you specifically filmed to sell as stock, or maybe you are a wedding filmmaker like me and you have a ton of B-roll you filmed at various weddings over the years and you are wondering how you should edit and format that footage to have it ready to upload.
Edit And Export In 4K Or Higher If Possible
Whenever it comes time to edit and export your stock footage, the first thing I recommend is that you edit and export in 4K resolution or higher if you can. Meaning if you filmed in 4K, export in 4K, and if you filmed in a higher resolution like 6K or 8K, export at that resolution as well. If you only filmed in 1080p that is okay too, but I definitely would not recommend upscaling that footage to 4K, as that can result in your footage getting rejected because it does not look high resolution enough. Just export your HD footage in HD and you should be good.
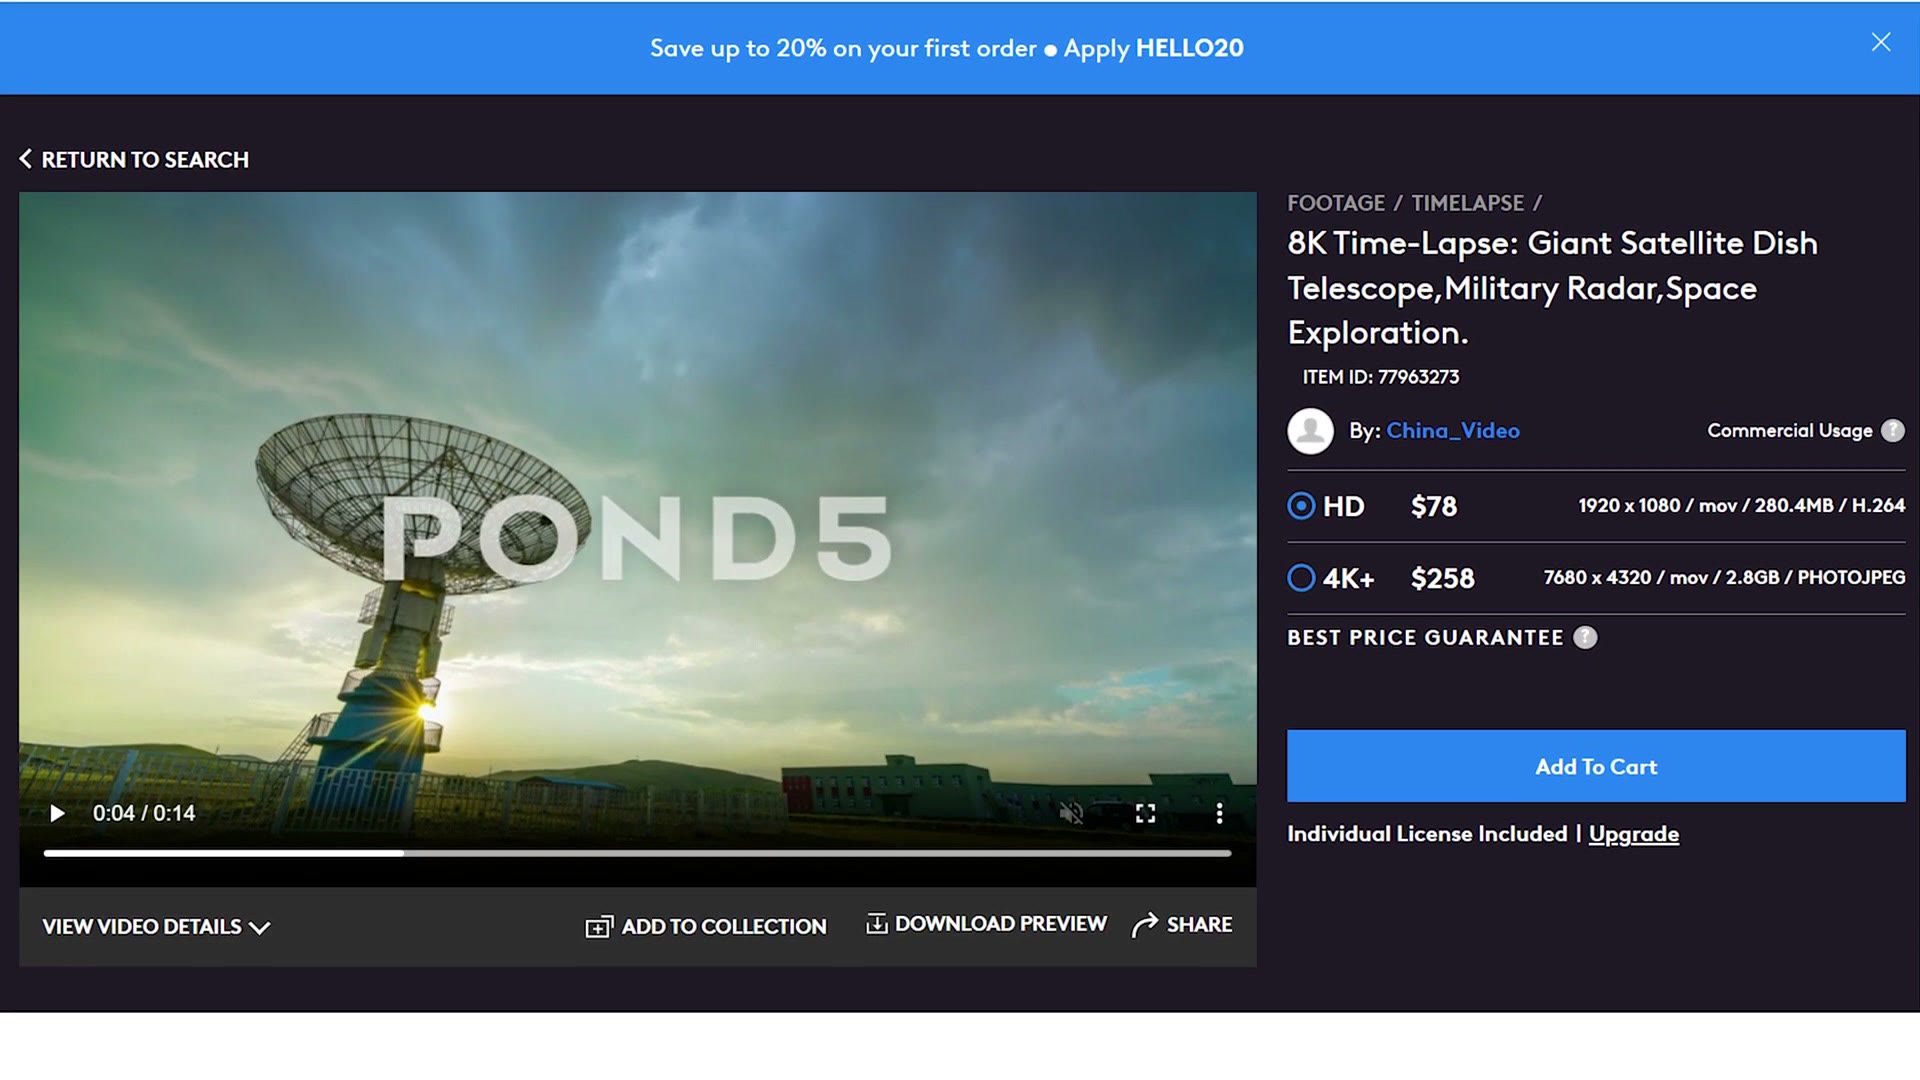
The reason you want to export in the same resolution you filmed is that the higher the resolution of your footage, the more many stock footage sites are going to charge people to download your clips. So if you filmed in 4K, 6K or 8K, you can make more money than if you had just filmed in HD.
Do You Need To Color Grade Your Footage?
Next you are probably wondering whether you need to color grade your footage or not, and the answer is yes. Every single stock footage licensing site out there is going to want you to upload footage that has already been color graded, so do not upload raw log clips straight from your camera. They are not going to like that.
If you filmed in a non-log picture profile that is already contrasty and saturated, I would still apply some color correction to the clip so it looks its best. Likewise, if you filmed in log, I would color grade and color correct your clip so it looks like a standard Rec. 709 image that is not flat or unsaturated.
Regardless of whether you filmed in log or not though, I would not go overboard with your color grade. Remember, people are going to want to download these clips to incorporate them into their own videos, and if you are uploading clips that are already heavily stylized with a custom LUT and colors that are over the top, the odds are fewer people are going to want to purchase your clip because it is too stylized. By sticking to basic color corrections that look good, the odds are that more people are going to want to buy your footage.
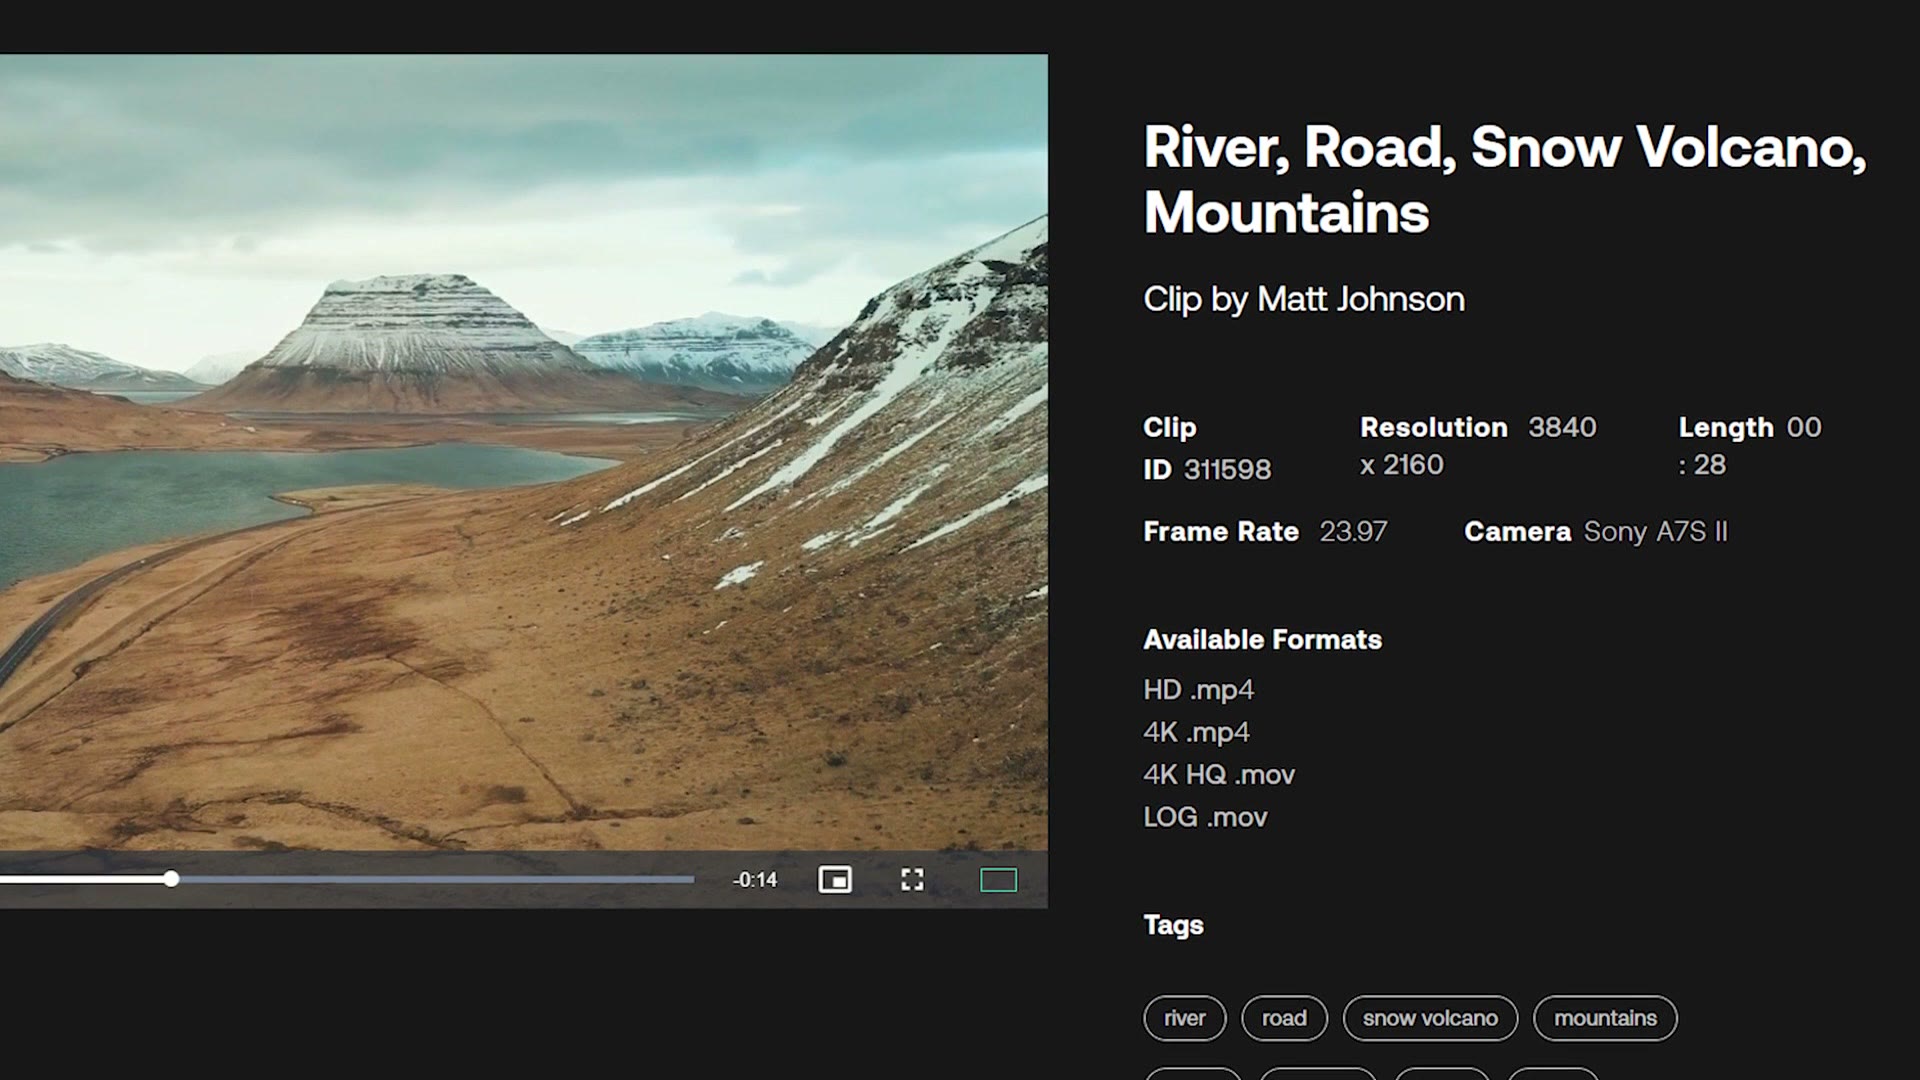
Lastly, in regards to log, I do want you to be aware that there are some sites like Artgrid that are going to want you to upload log footage in addition to standard footage. This way they can offer users both a graded and an ungraded version of your clip, and the odds are that more people are going to want to download your footage, which then results in you making more money. So in some situations you may need to export both a log and a non-log version of your clips. Do not worry, later on I am going to show you a super quick way to do that which will save you a ton of time.
What About Audio?
Next, what about audio? Do your stock footage clips need to have audio? No, they do not. The vast majority of stock footage licensing sites want you to upload your video clips with the audio muted. So unless the audio is very critical to the clips you are uploading, it is going to be in your best interest to mute the audio.
The Best Frame Rates To Export With
If you filmed at 24 or 30 frames per second, I would keep your footage at that frame rate. But if you filmed at 60 or 120 or 240fps, I would always recommend slowing that footage down to 24fps before you export.

This is going to make your footage slow motion, but keep in mind that anyone who wants their clip sped up can download it and speed it up themselves. By exporting slow motion you are also increasing the odds of your clip being selected, because slow motion is going to help remove any camera shake you may have introduced when filming, and stock footage sites prefer smoother shots, so keeping things smooth will be helpful to you.
Video Clip Length
Closely related to frame rate, we also have the length of the video clips you should edit, and the vast majority of stock footage sites are going to want clips that are between 5 seconds and 60 seconds long. There are some sites that accept shorter clips and some that accept longer clips up to 90 seconds, but the majority of sites are going to want clips that are 60 seconds long max, so be very careful whenever you are editing and make sure your clips fall into that range.
Likewise, whenever you are editing, most of these stock footage sites are going to want you to include edit handles on your clips, which is a fancy way of saying leave some footage at the beginning and the end of the clip.
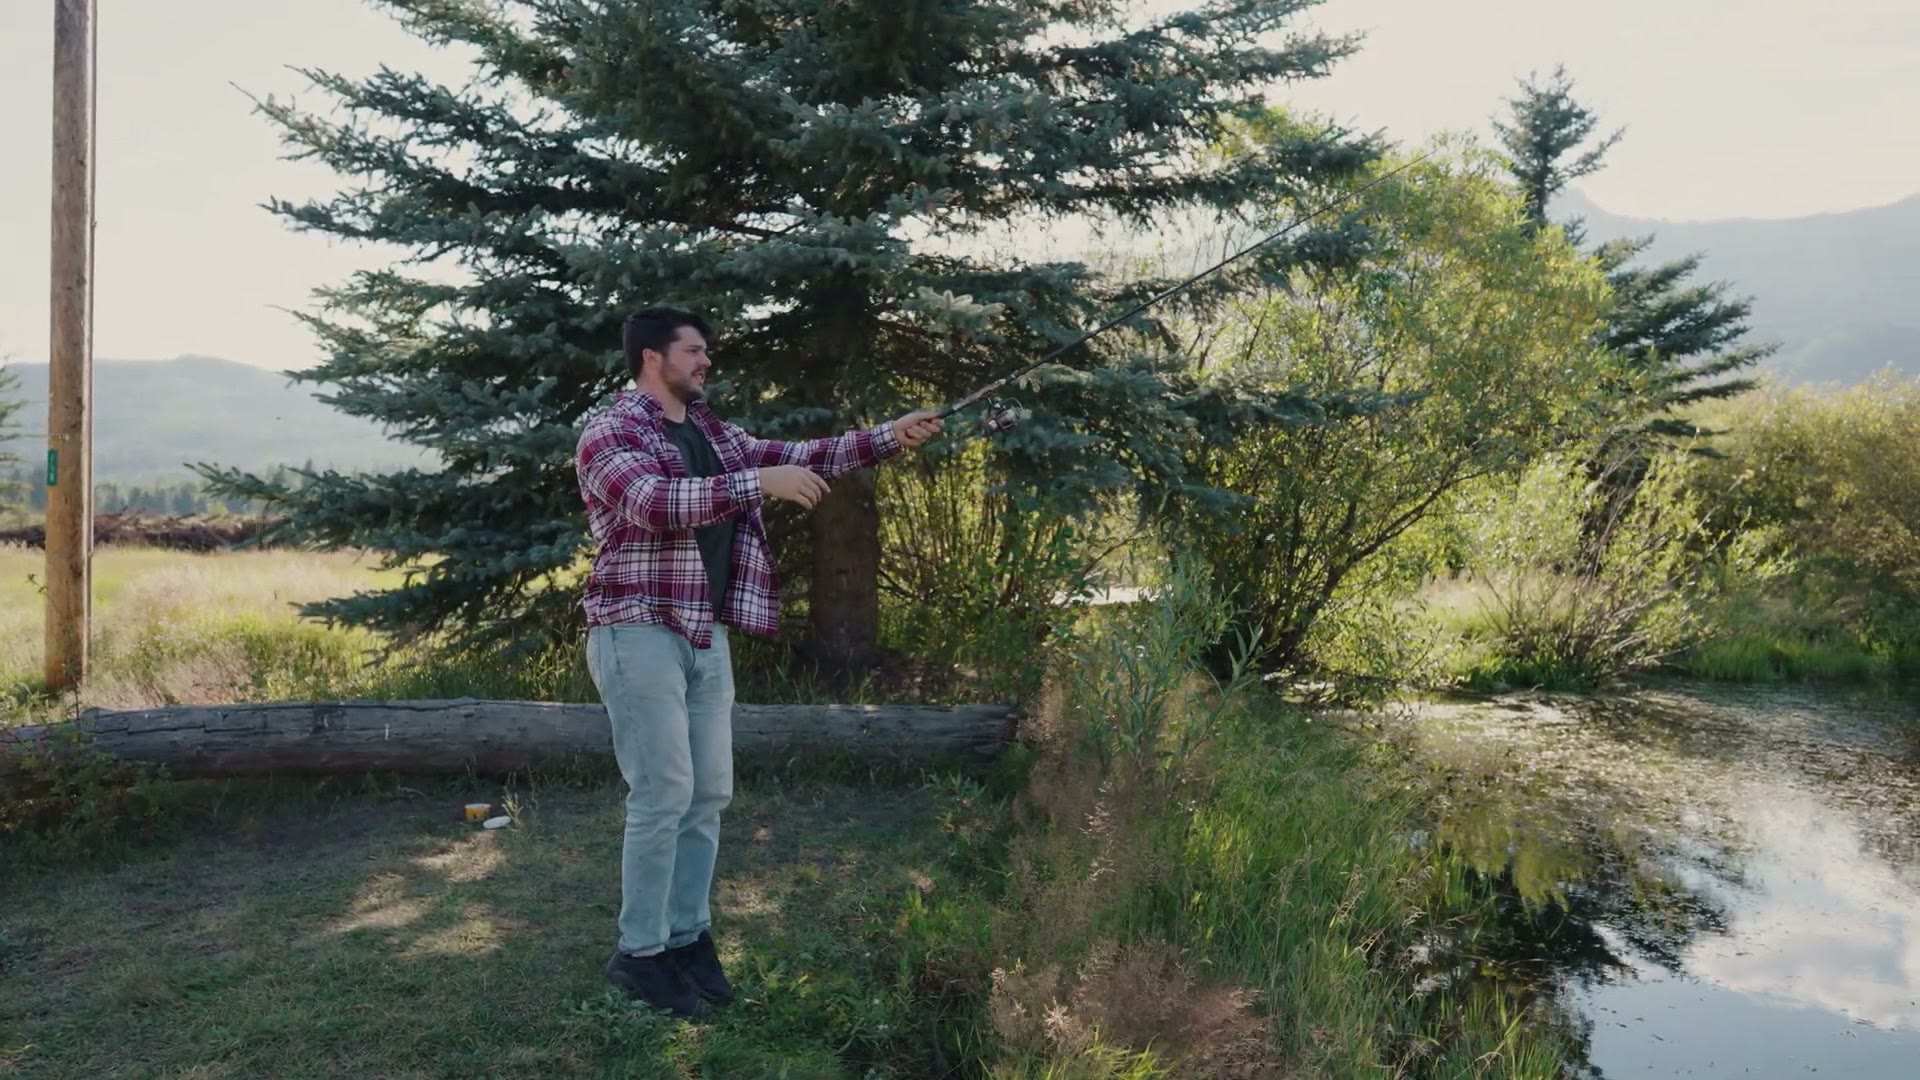
So for example, if you are filming someone casting a fishing pole into a pond, make sure you do not start your first frame right as the person is casting. Instead, start your first frame a few seconds before they start casting the rod. That way, if someone is editing, they can more easily incorporate the footage into their edit.
Beware File Size Limits
Now what about exporting your clips? The first rule you need to be aware of is that most stock footage licensing sites have a file size limit of four gigabytes, meaning that if you upload any video clip larger than four gigs it is going to be rejected. Some sites have smaller file size requirements and some have larger, so it is really going to depend on where you are uploading to.
To make sure your stock footage is compatible with the widest variety of websites, I recommend exporting a master file of each video clip. This is an incredibly high quality video file that you can upload directly to stock footage sites if they accept unlimited file sizes, or, if the file size is too large, you can easily convert it into a smaller video file for other sites.
Exact Export Settings You Should Use
If you are on a Mac editing with Final Cut, Premiere Pro or DaVinci Resolve, I recommend exporting in ProRes 422 HQ, which is going to give you a very high quality video file without being too obnoxiously large. They still get pretty big though.
Speaking of which, How To EASILY Film Stock Footage For Passive Income and Film THIS Stock Footage To Make The Most Passive Income In 2024 are worth a look too.
You can also export ProRes 422 if you are editing in Premiere Pro on Windows, because Premiere Pro supports ProRes on Windows. Unfortunately, DaVinci Resolve on Windows does not support ProRes yet, so as a workaround you are going to want to export in the DNxHR HQX codec, which is very similar in quality to ProRes 422 HQ.
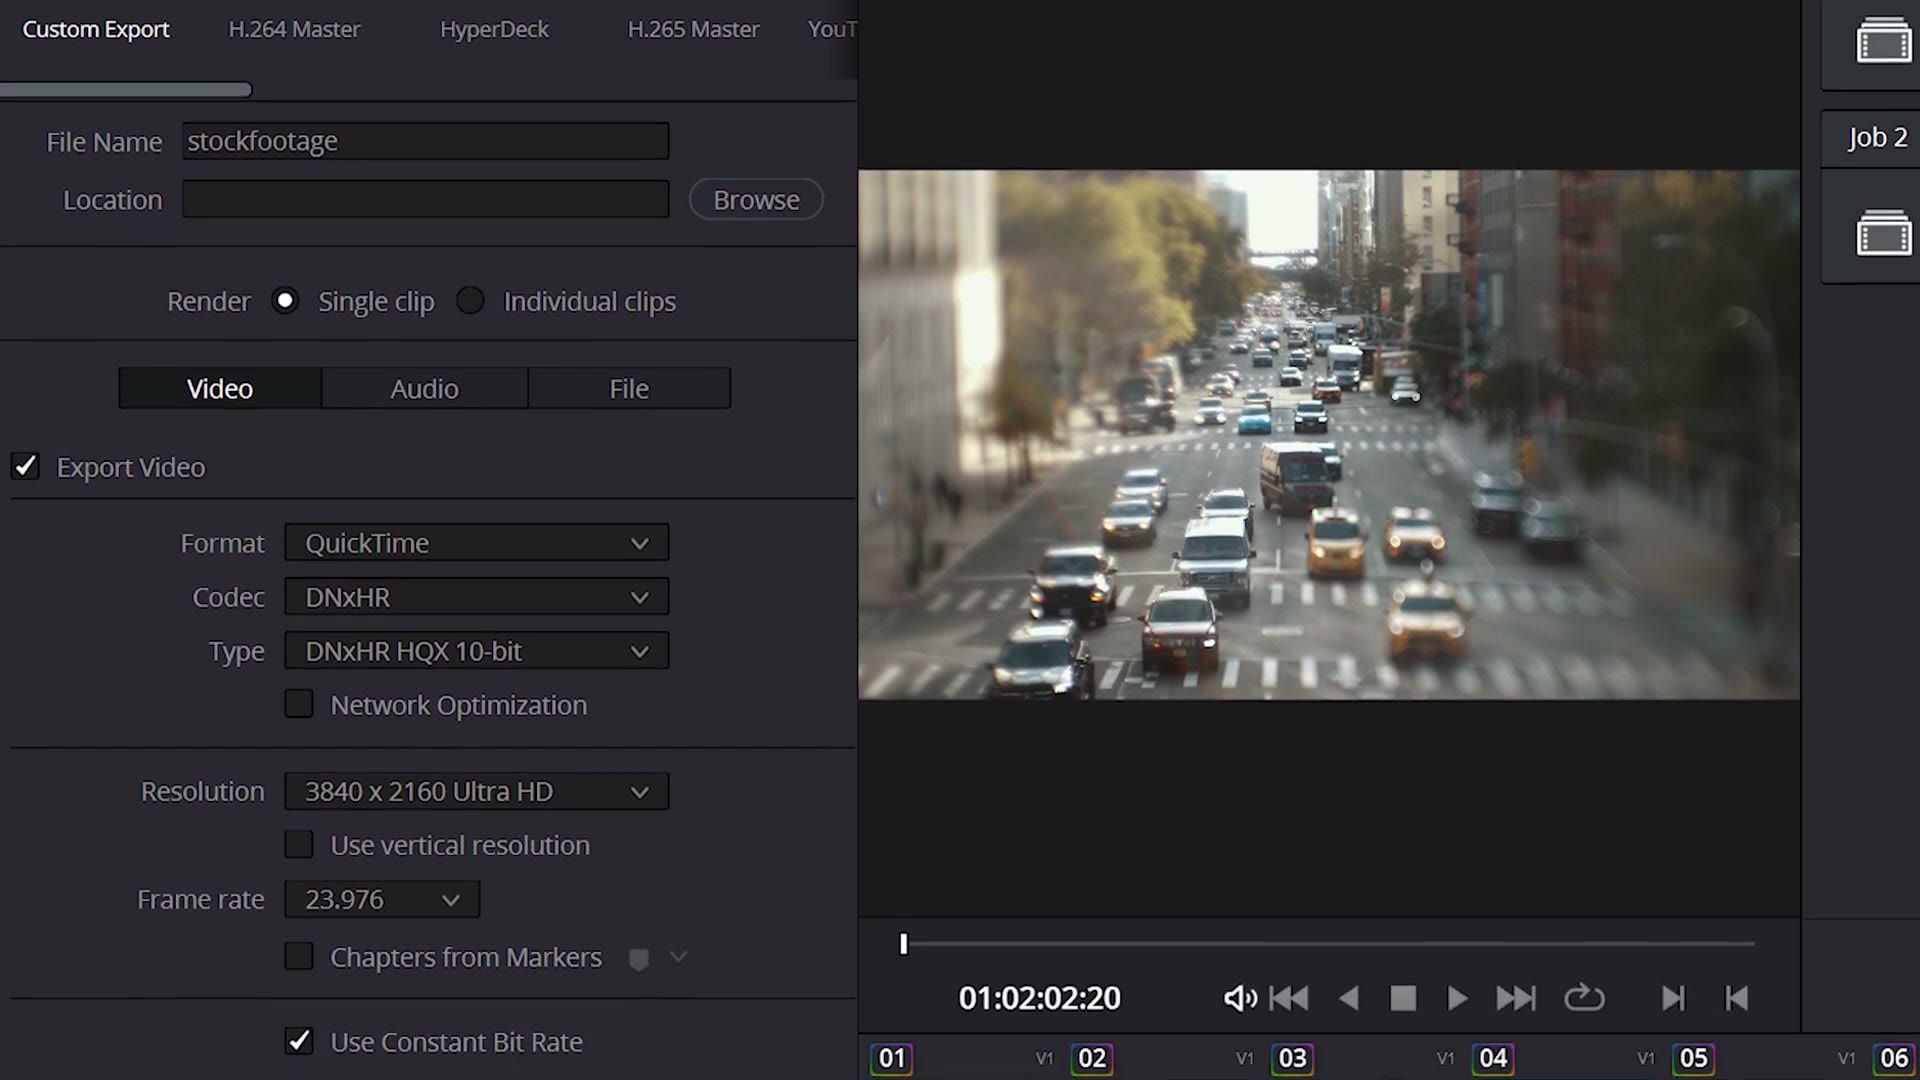
Once you have exported a video clip as a master file in one of these high quality formats, in the event that your file size is too large to be uploaded, you can always use something like Adobe Media Encoder or Apple Compressor to decrease the file size by exporting in ProRes 422 instead of ProRes 422 HQ, for example.
A Huge Time Saving Shortcut For Exporting Clips
Now, do you want to save time? Of course you do. Whenever you are editing stock footage, the odds are you are going to end up with a ton of video clips from a shoot. For example, here is footage I filmed in Hawaii last year, and as you can see there are just a ton of clips.
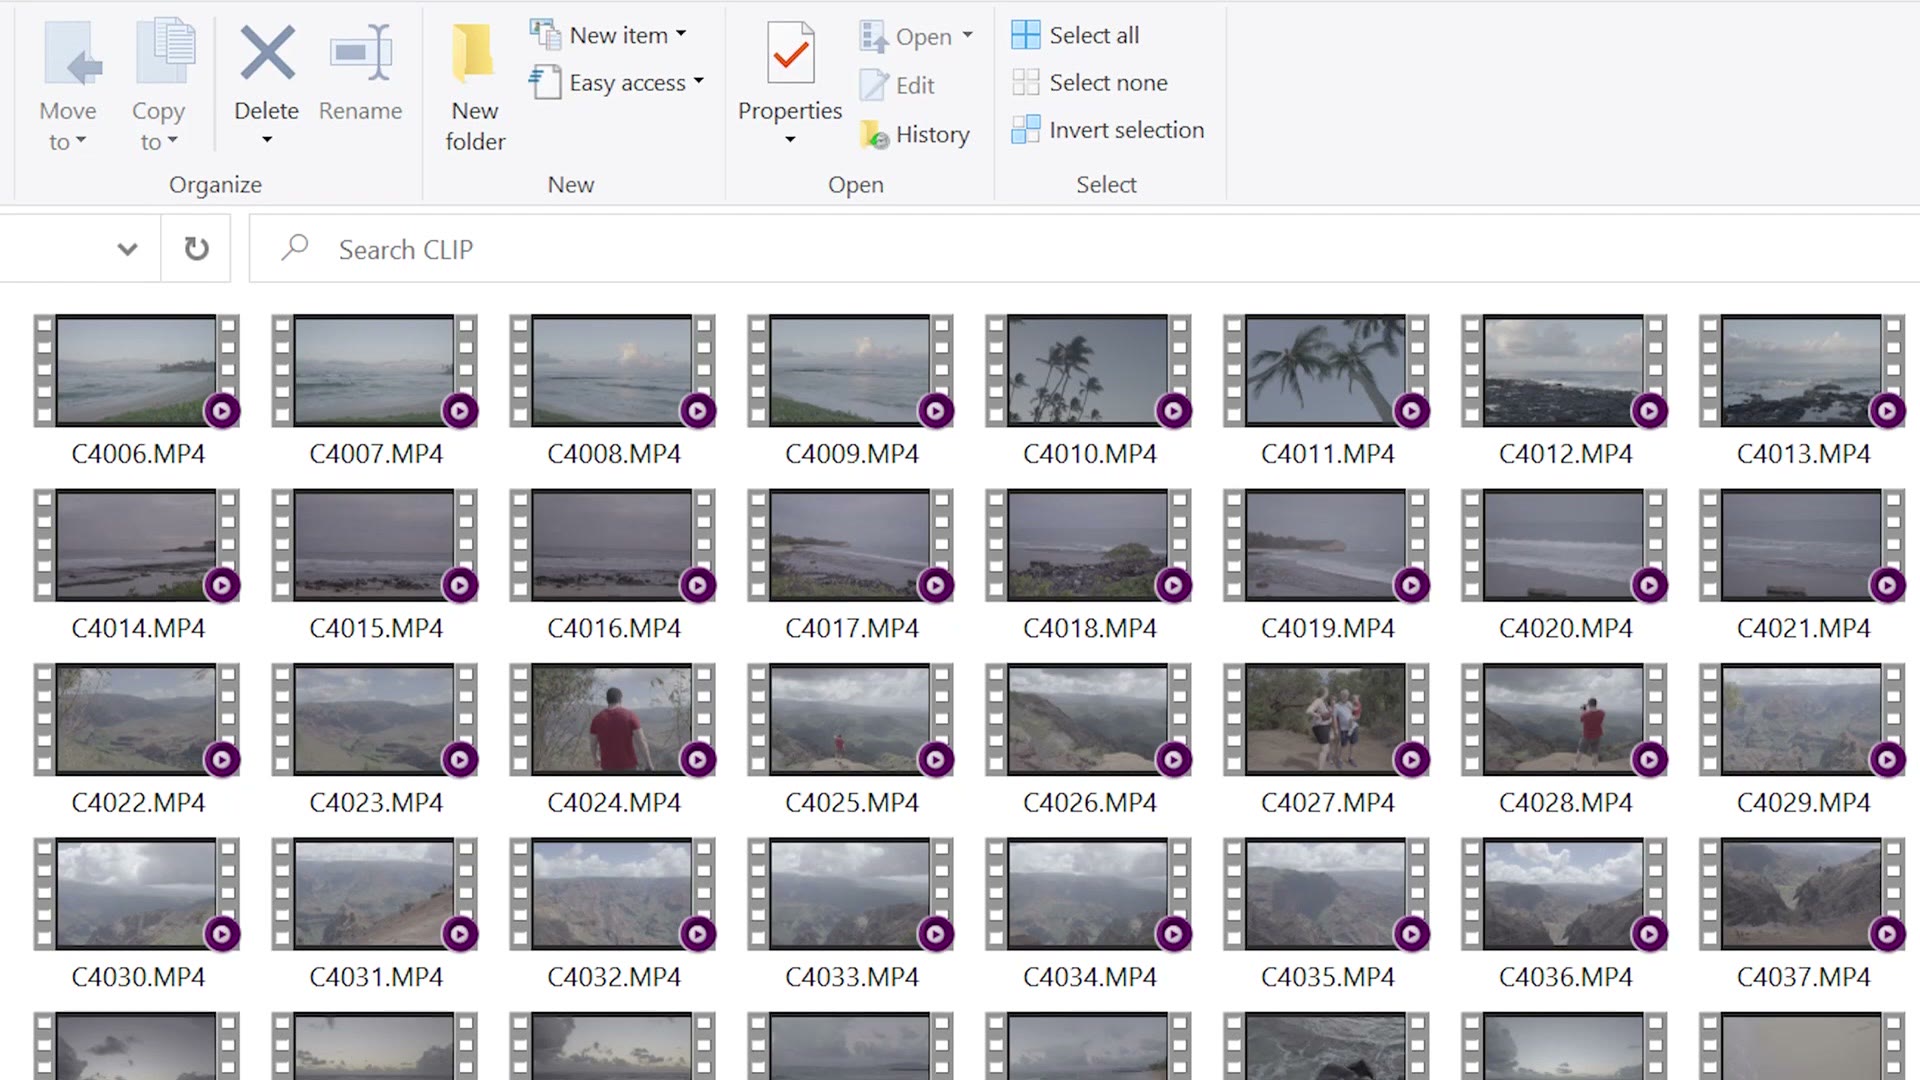
If you are editing in Premiere Pro, I am sorry, but you are going to have to select each of these clips individually, set in and out points around each one, and then export each clip individually using the export dialog box, which can take some time.
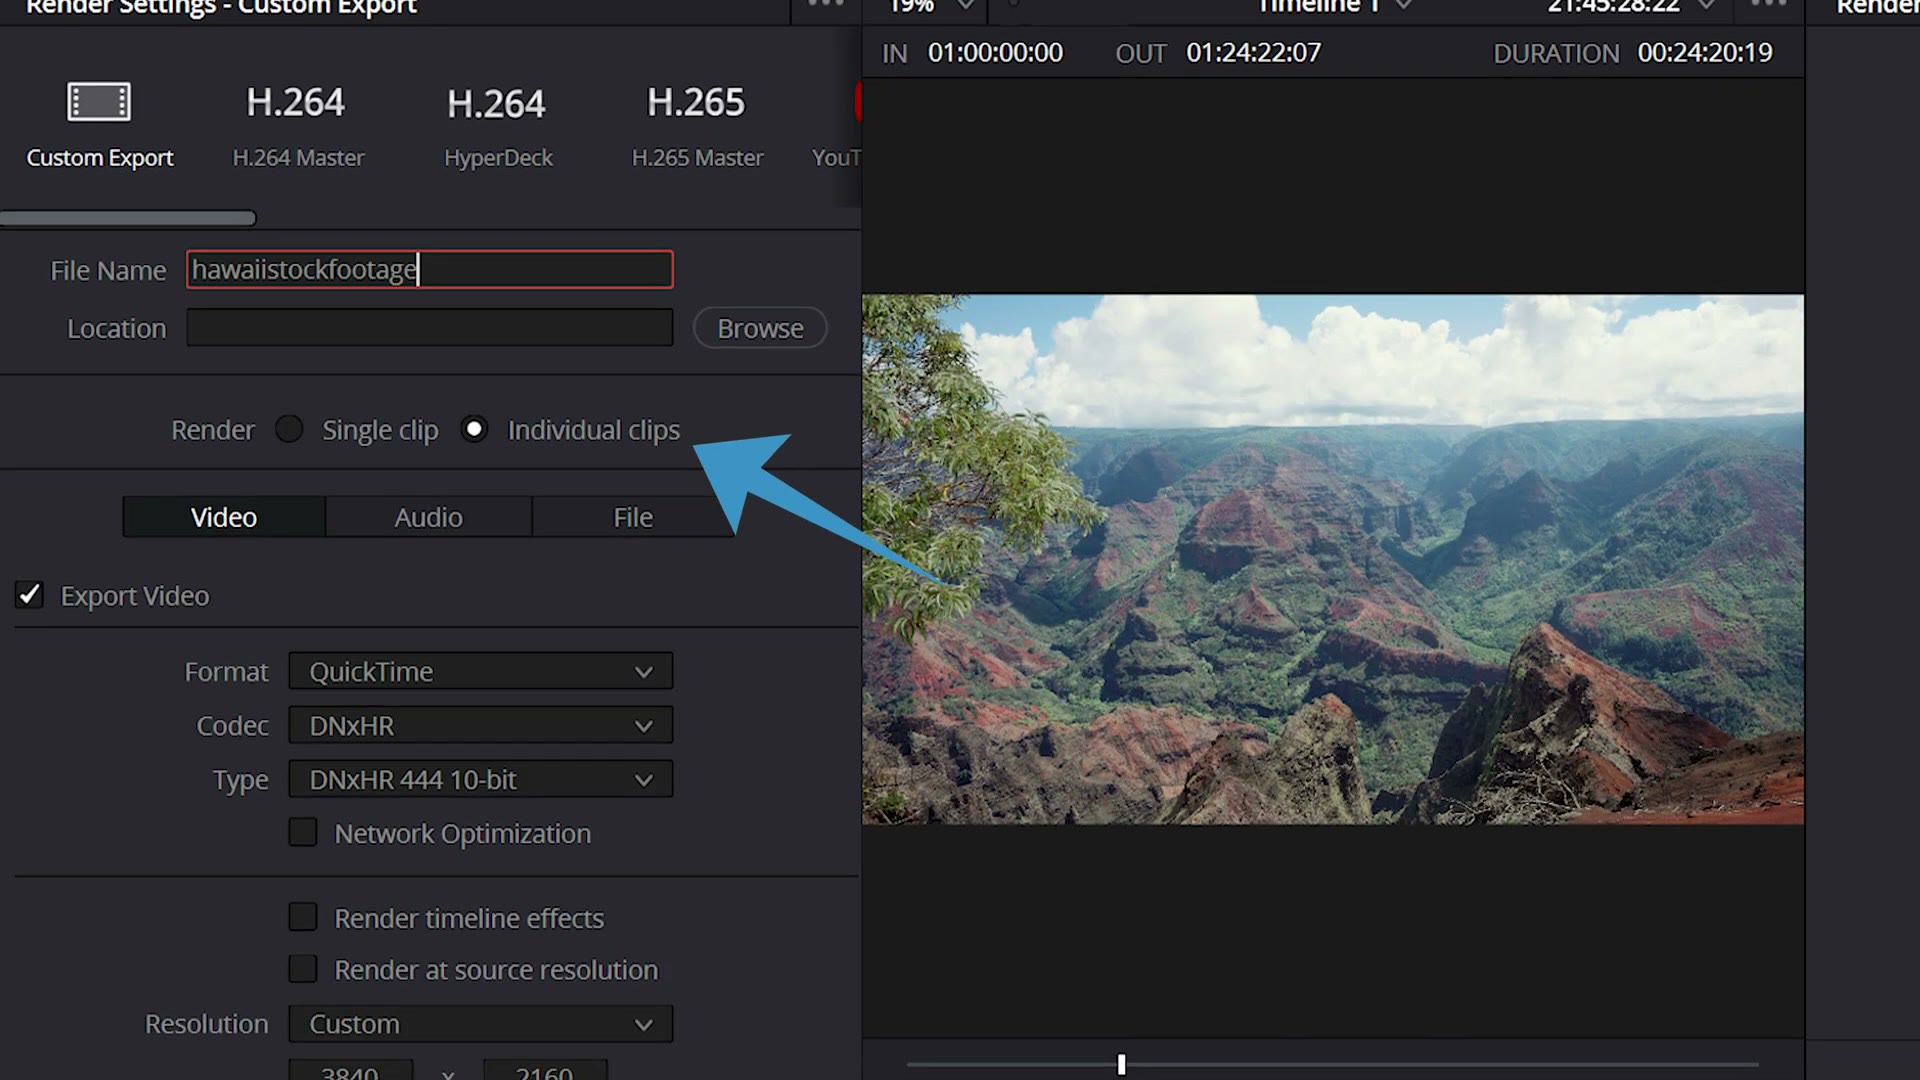
Alternatively though, if you are using DaVinci Resolve, there is a much faster way. Simply edit all of your clips on the timeline like you normally would, and then whenever you go to export, make sure the Individual Clips option is selected, which is going to export all of your clips, as it says, individually, meaning you end up with a video file for every single one of your clips. This is fantastic.
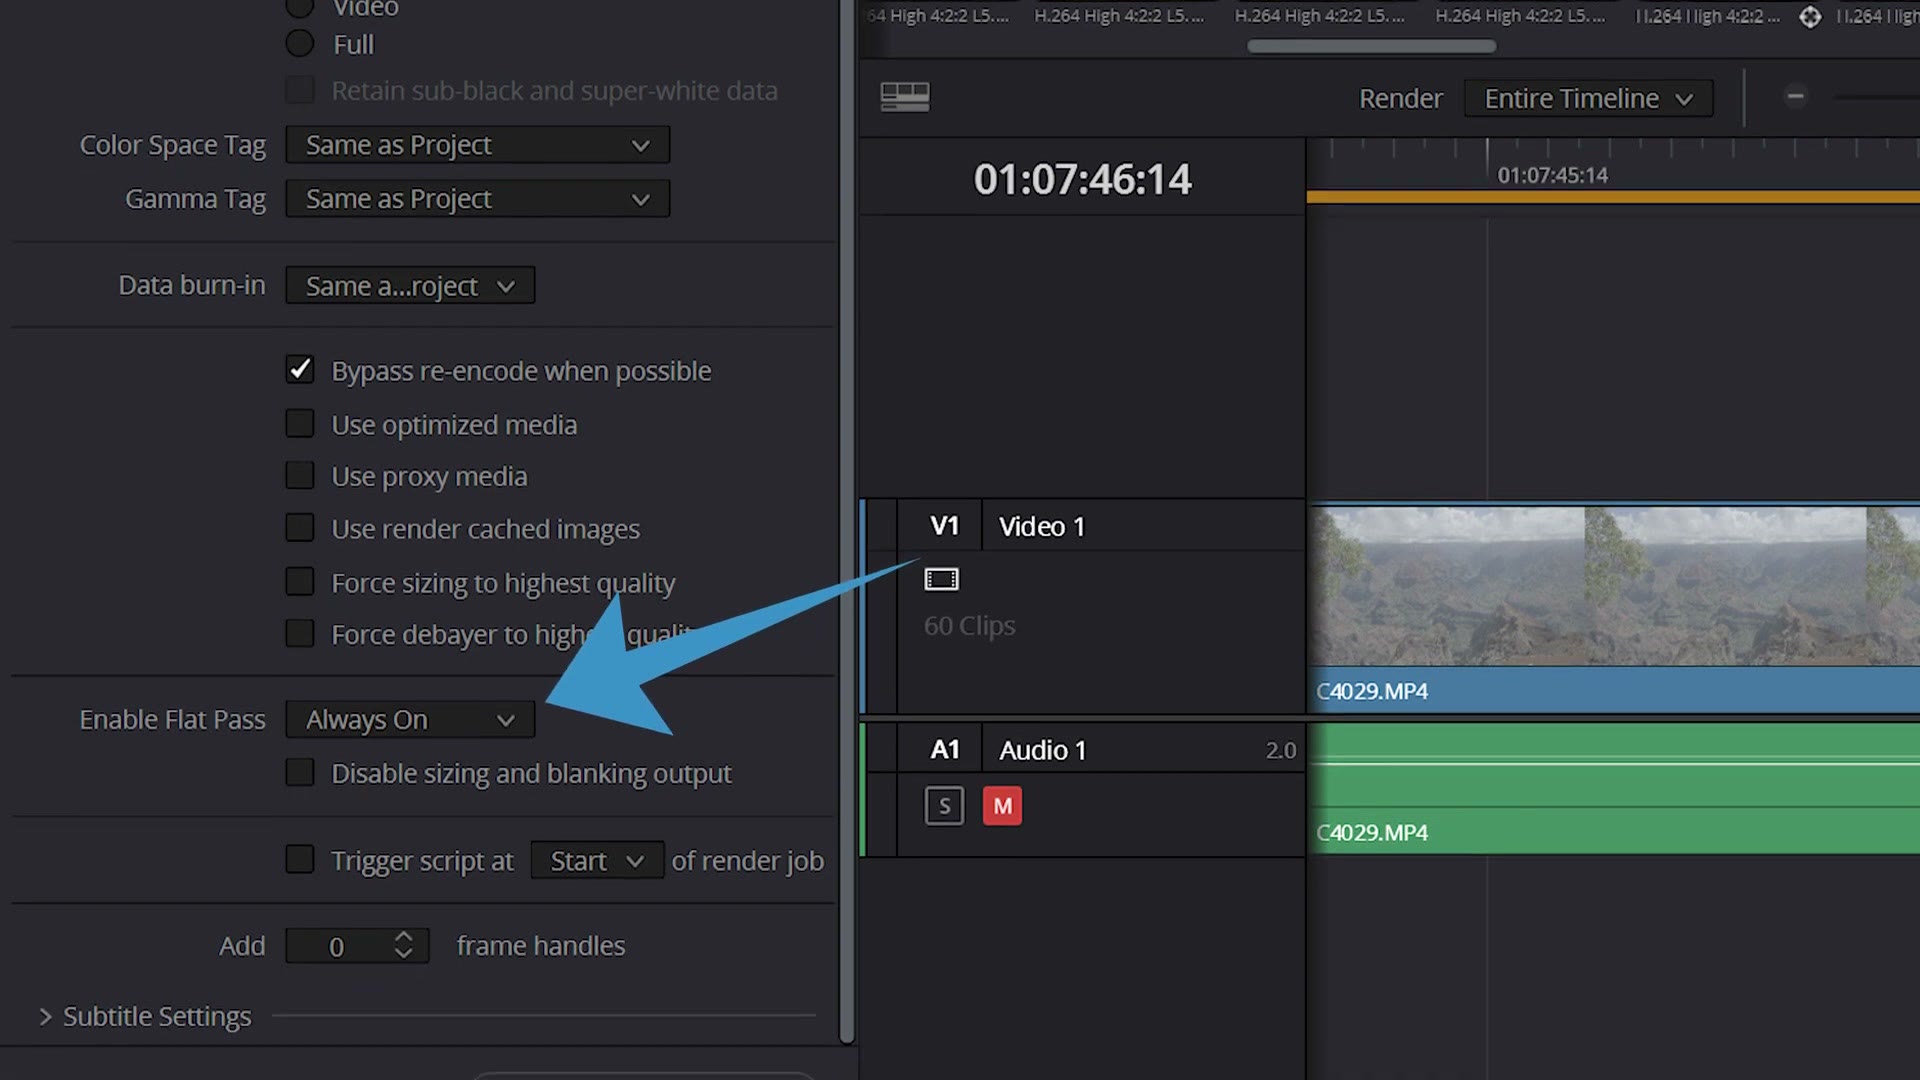
And as a bonus, if you want to export log versions of your clips without the color grades, you can go down to the Enable Flat Pass menu and turn that setting on, which is going to export all of your clips without any color grades or effects applied. It’s pretty awesome.
At this point you have now edited all of your stock video clips, and they are the proper size and format and are ready to be uploaded to any of the stock footage licensing sites out there.
Download My Free Stock Footage Jump Start Guide
I am sure you are wondering now though, Matt, what do I do next? What sites should I upload to? How do I title and tag my videos? Do not worry, I am here to help.
To give you a shortcut, here is my free Stock Footage Jump Start Guide again. This guide is not only going to tell you what to film, but also what to edit like we covered here, as well as where to upload, how to title your video clips, how to tag them and so on. If you want to save time, I would love for you to check it out. It’s completely free.

I colored all of the footage you see here with my color presets. If you want to go deeper, I have filmmaking courses here, and here is my full list of filmmaking gear.
Thanks so much for reading, and have a great day!