
Today I’m going to explain everything you need to know about the DaVinci Resolve stabilizer as quickly as possible. So if you’re a filmmaker looking to get smooth footage, this one is for you.
And to save you time, I’ve put together a free one page stabilization cheat sheet you can reference at a glance to know all of these settings, which is going to be even faster than reading this.
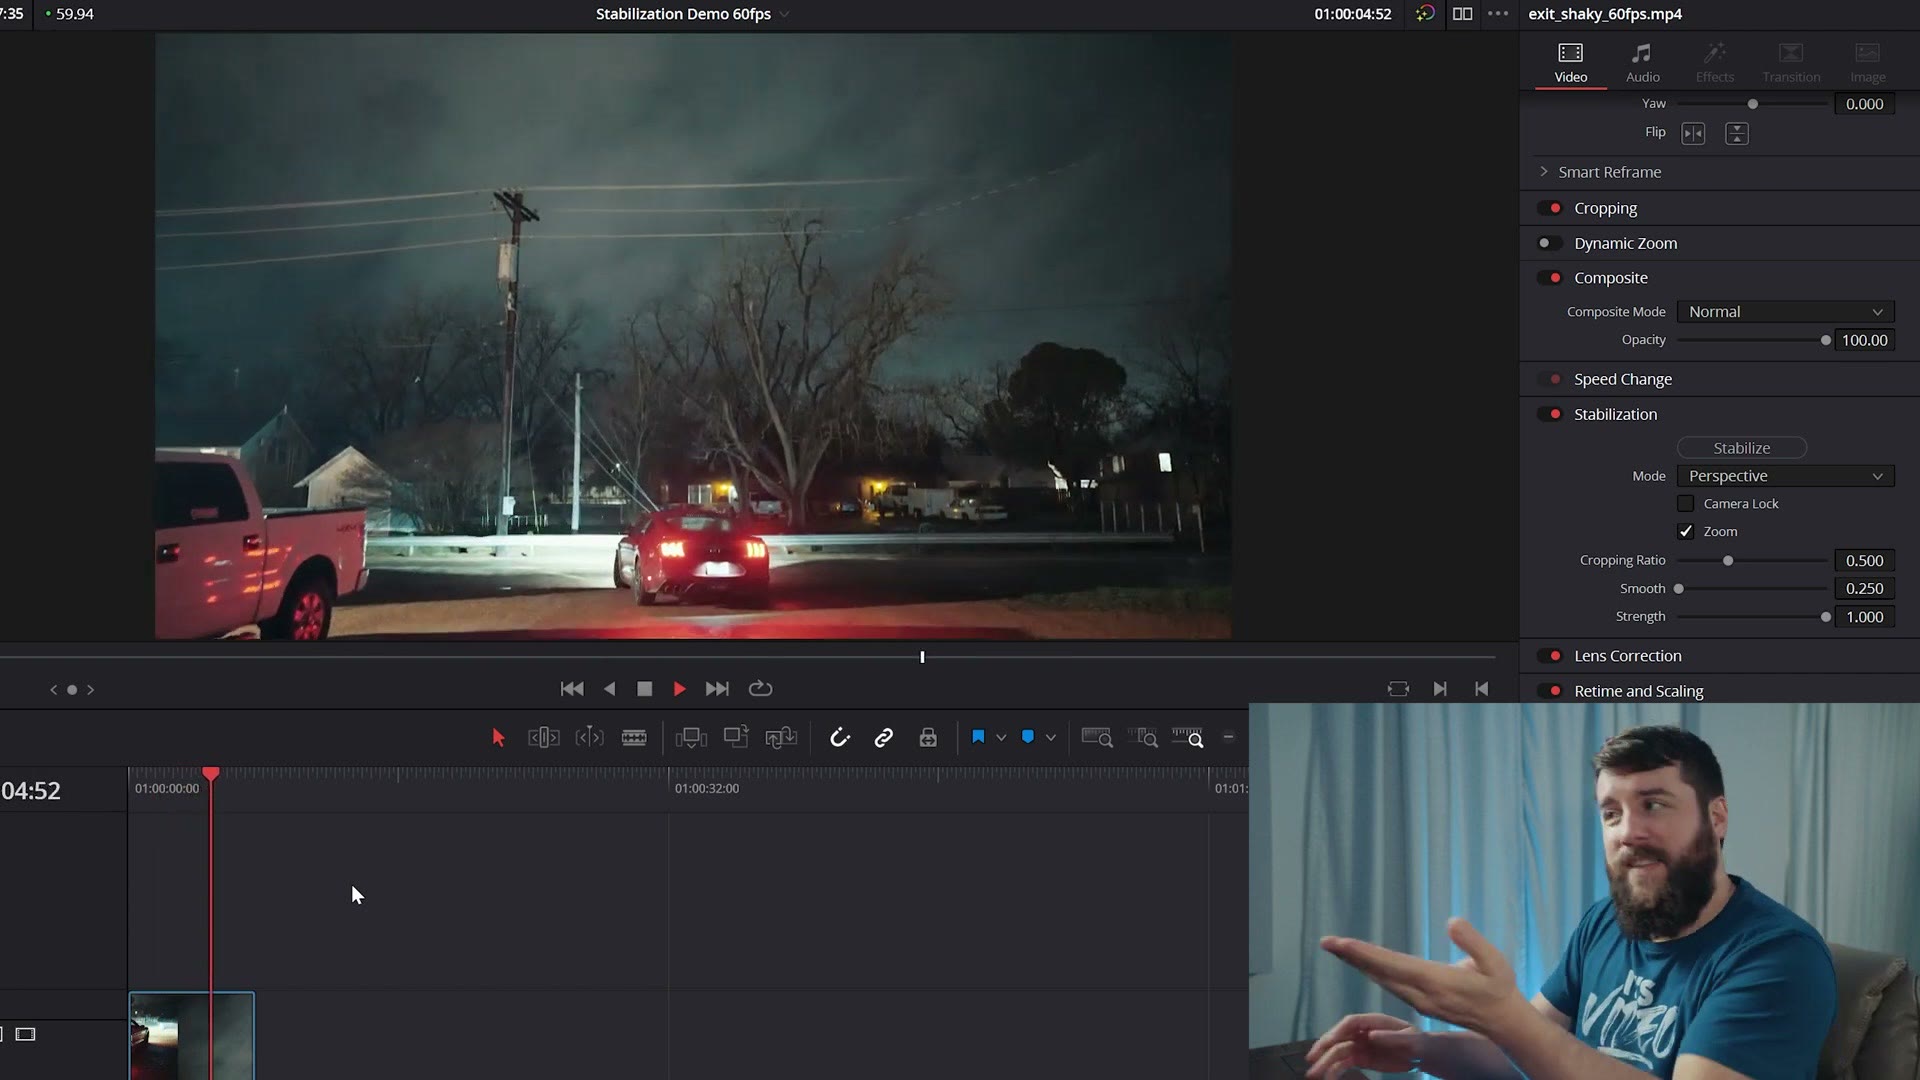
Let’s say you have a clip you’re editing that’s shaky and you want to stabilize it, like this one I have here that got a bit shaky because my gimbal was being a little overly sensitive. A lot of that wobble you can head off before you ever get to the edit, which I covered in my moves for fixing shaky gimbal footage in camera.
Select your clip, go over to the Inspector, scroll down to Stabilization, and click Stabilize. Resolve does its thing and hopefully stabilizes your footage.
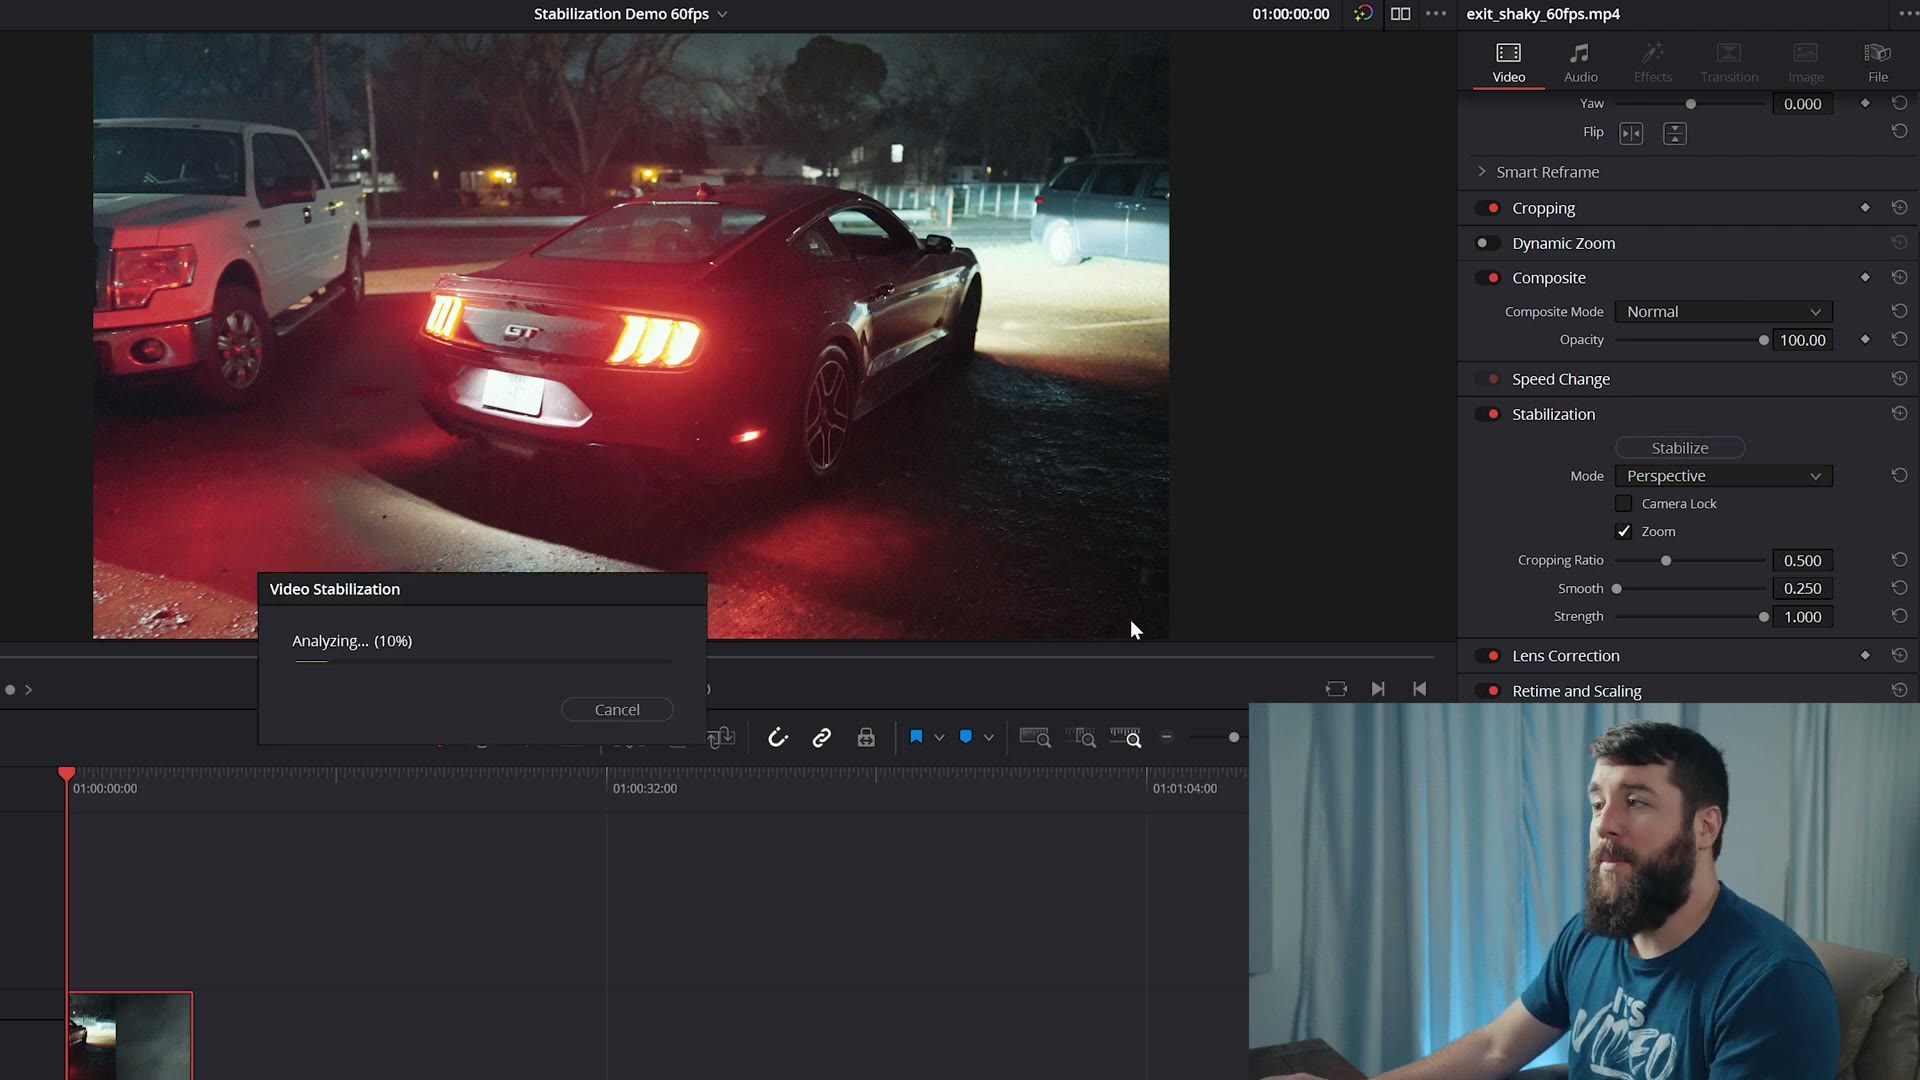
But if that doesn’t work for some reason, say you’re seeing a wobbly jello effect, or the motion blur looks weird, or your video gets cropped in too much, you have other options.
Perspective Stabilization
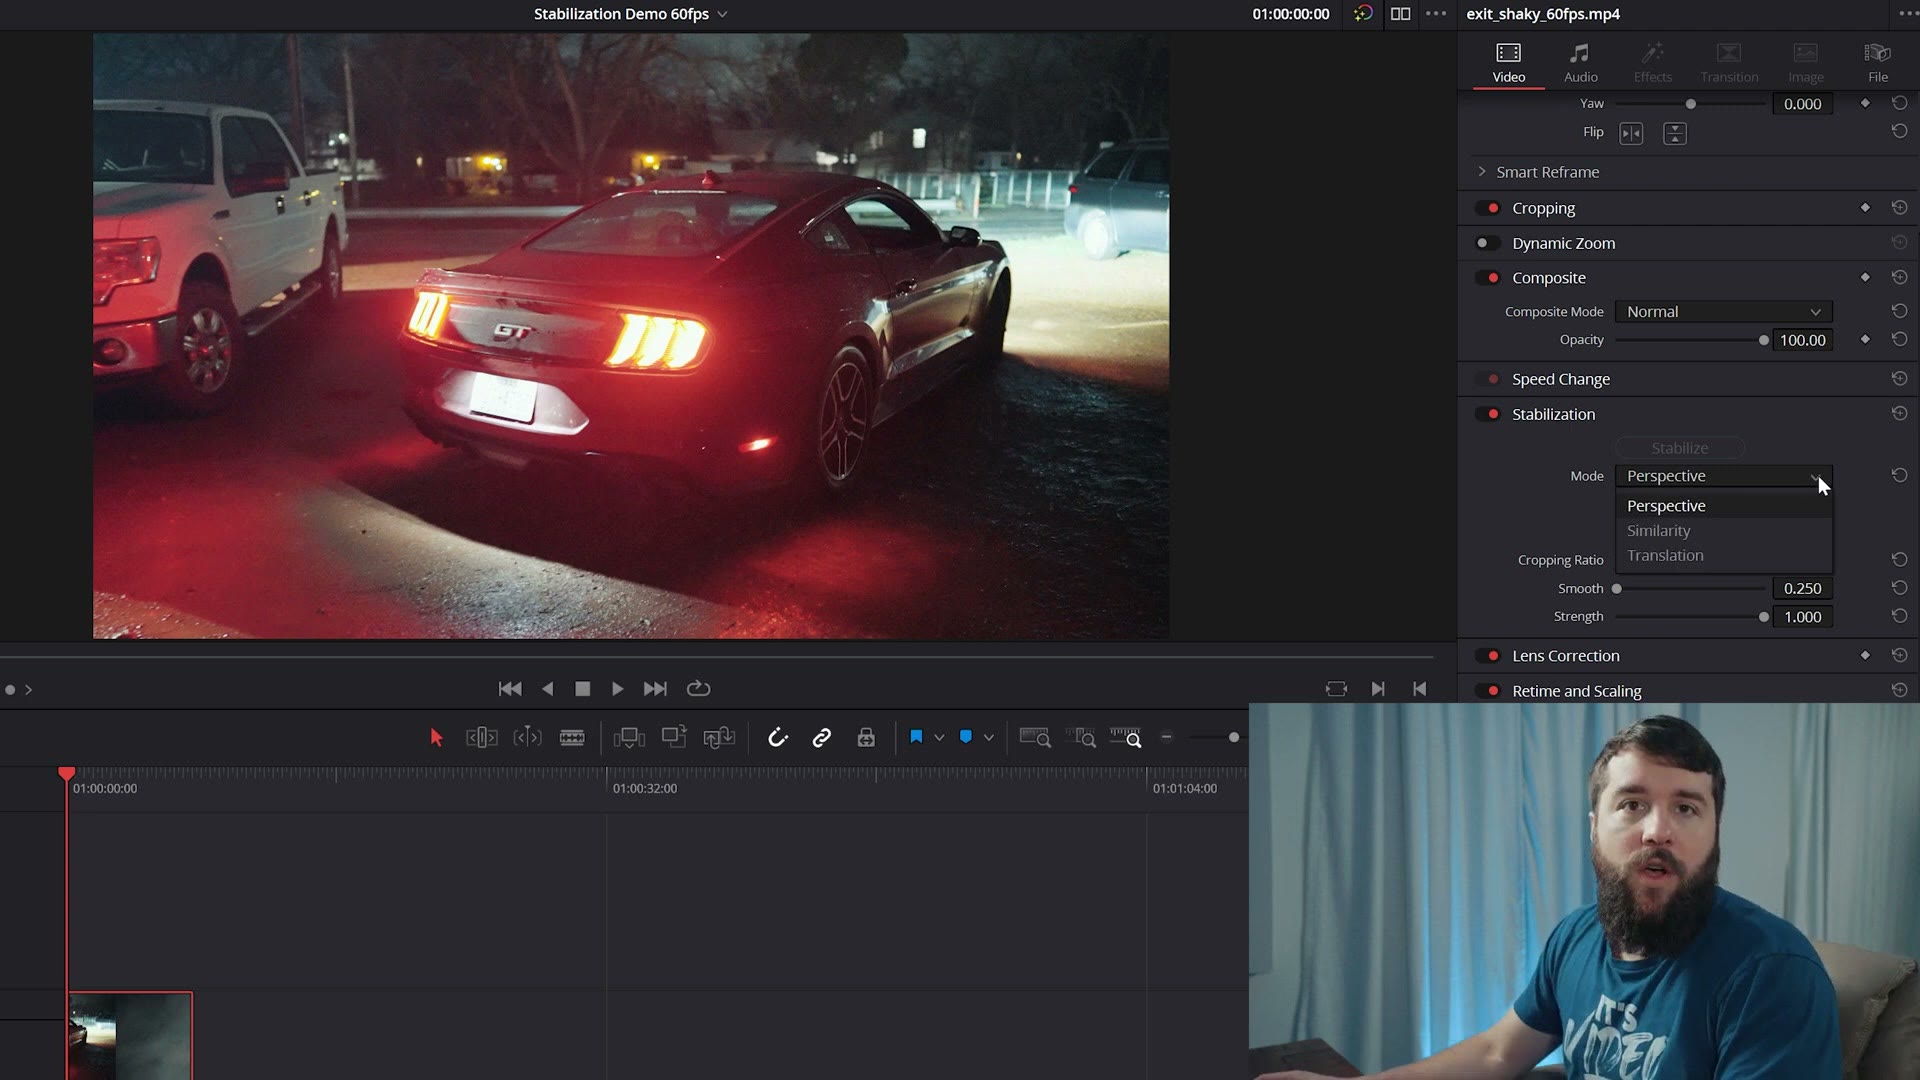
In the first dropdown you’ll see that by default Resolve uses Perspective, which means it’s analyzing your camera’s pan, tilt, roll and zoom to figure out how to stabilize the image.
This usually works really well out of the box, but sometimes it can introduce unwanted jello or other wobbly effects in your shot. If that happens, you have two other options.
Similarity Stabilization
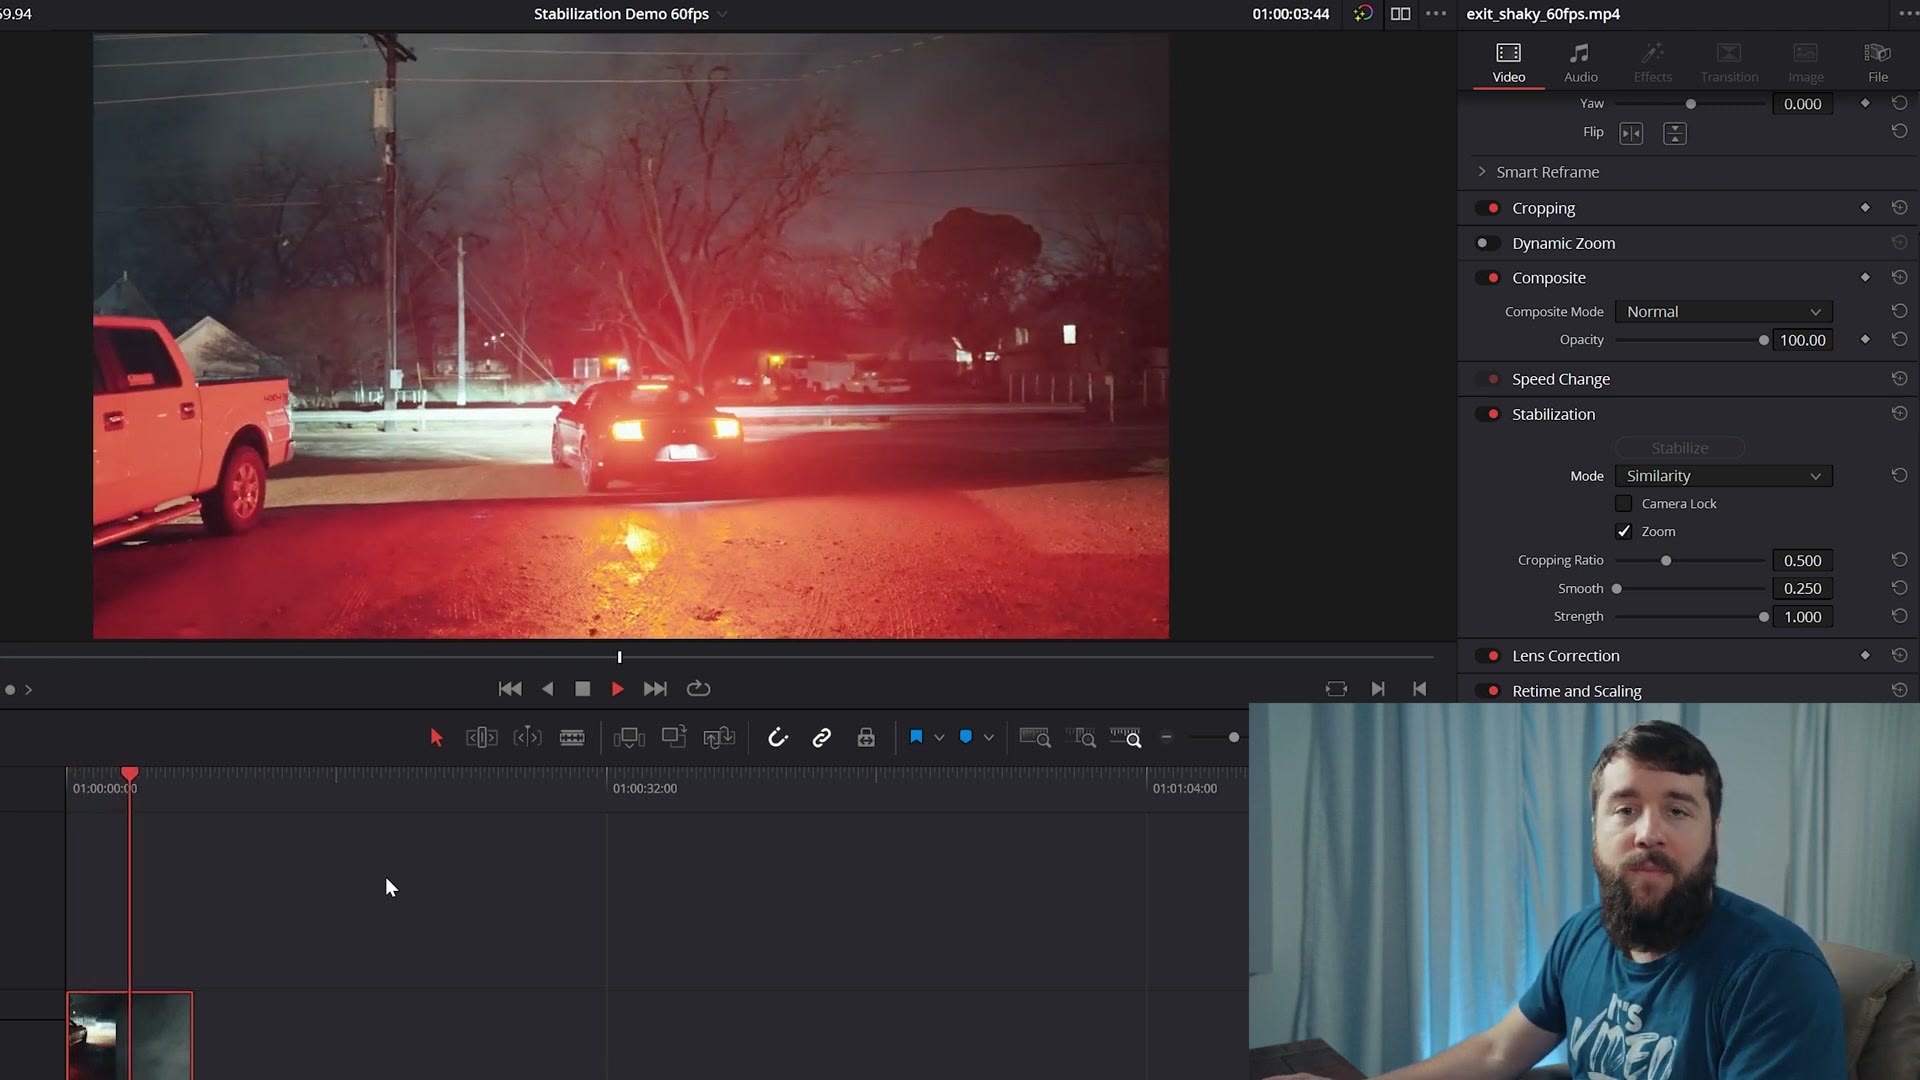
You can select Similarity and hit stabilize again. Similarity analyzes the exact same things as Perspective, but uses a different algorithm to do it, which can result in significantly better stabilization depending on what you’re filming.
This would be my first recommendation. If your footage isn’t looking so good, simply try Similarity, and there’s a good chance it will look a lot better.
Translation Stabilization
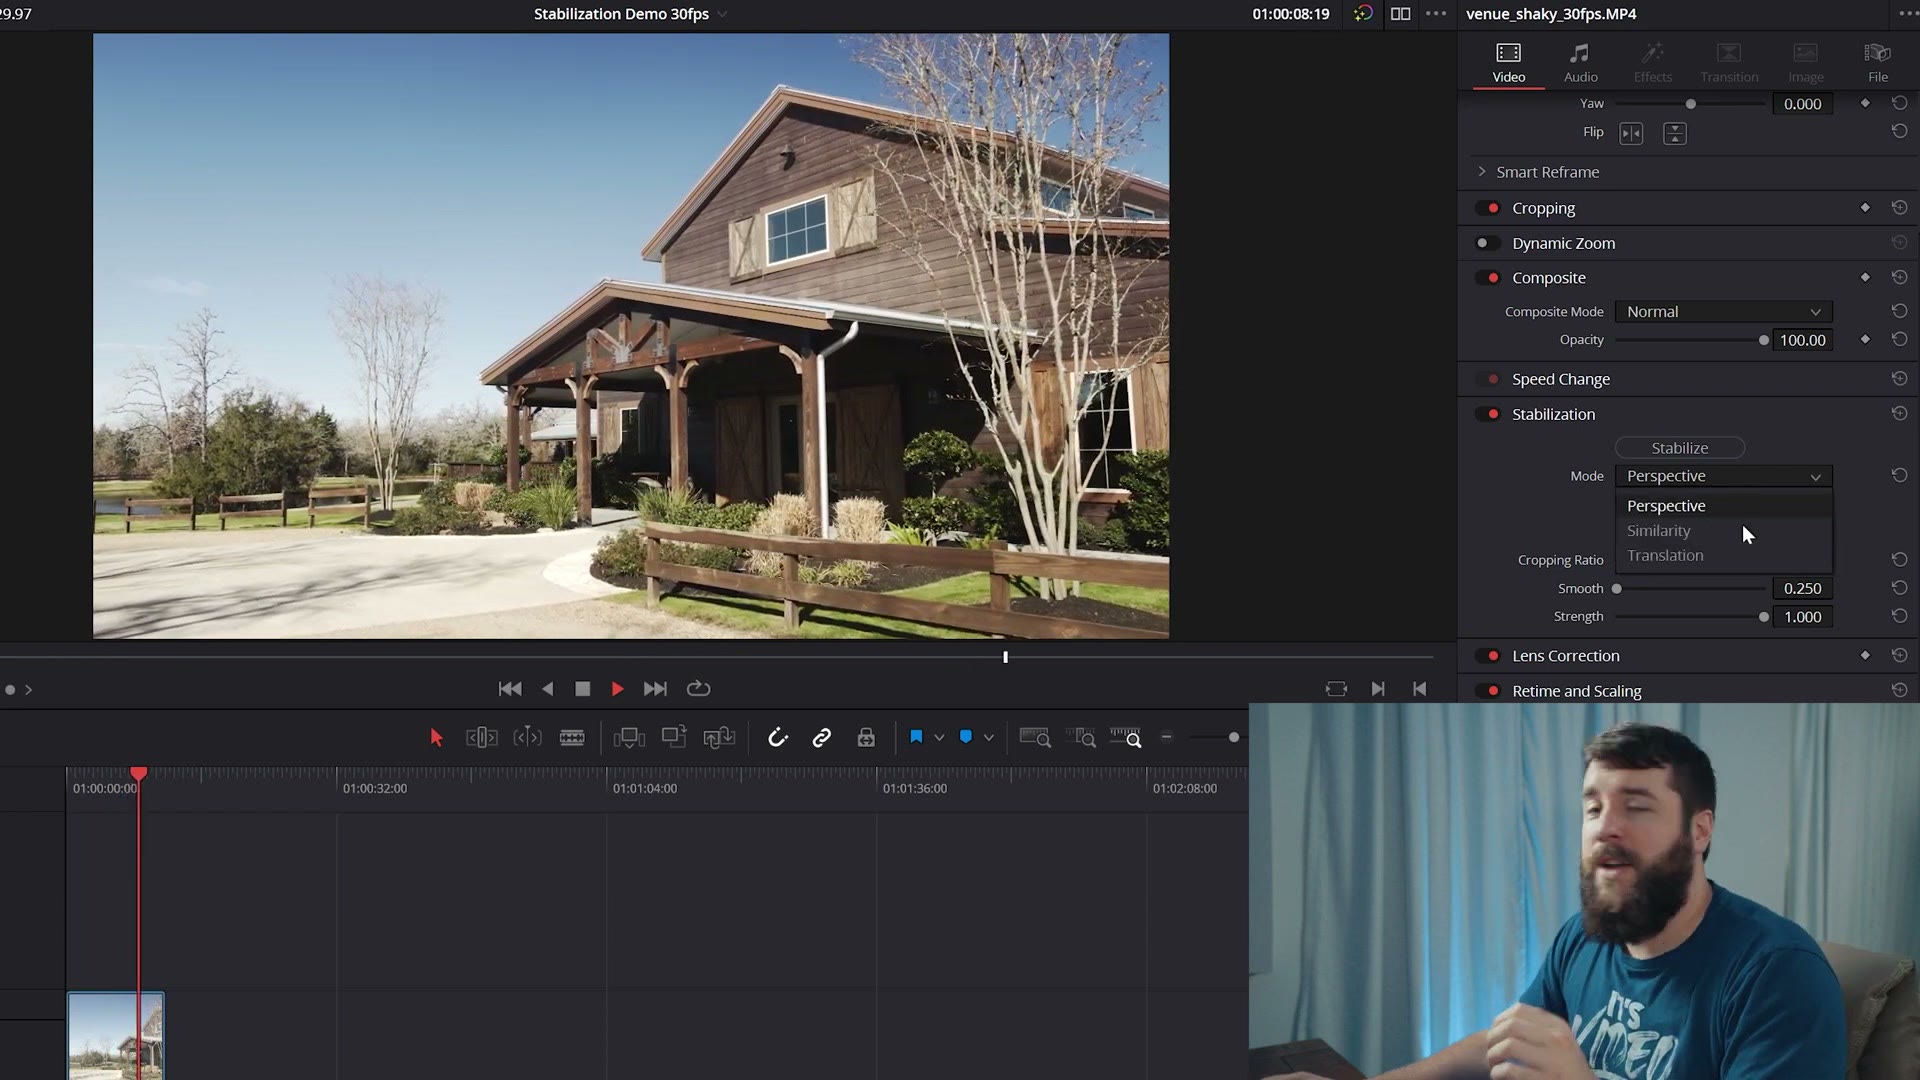
If your footage still doesn’t look good, and especially if you’re filming something on a gimbal like, say, a barn at a wedding venue, where there isn’t a subject in your shot and the barn itself is the subject, Translation may be the best choice, because it can help remove subtle camera shake.
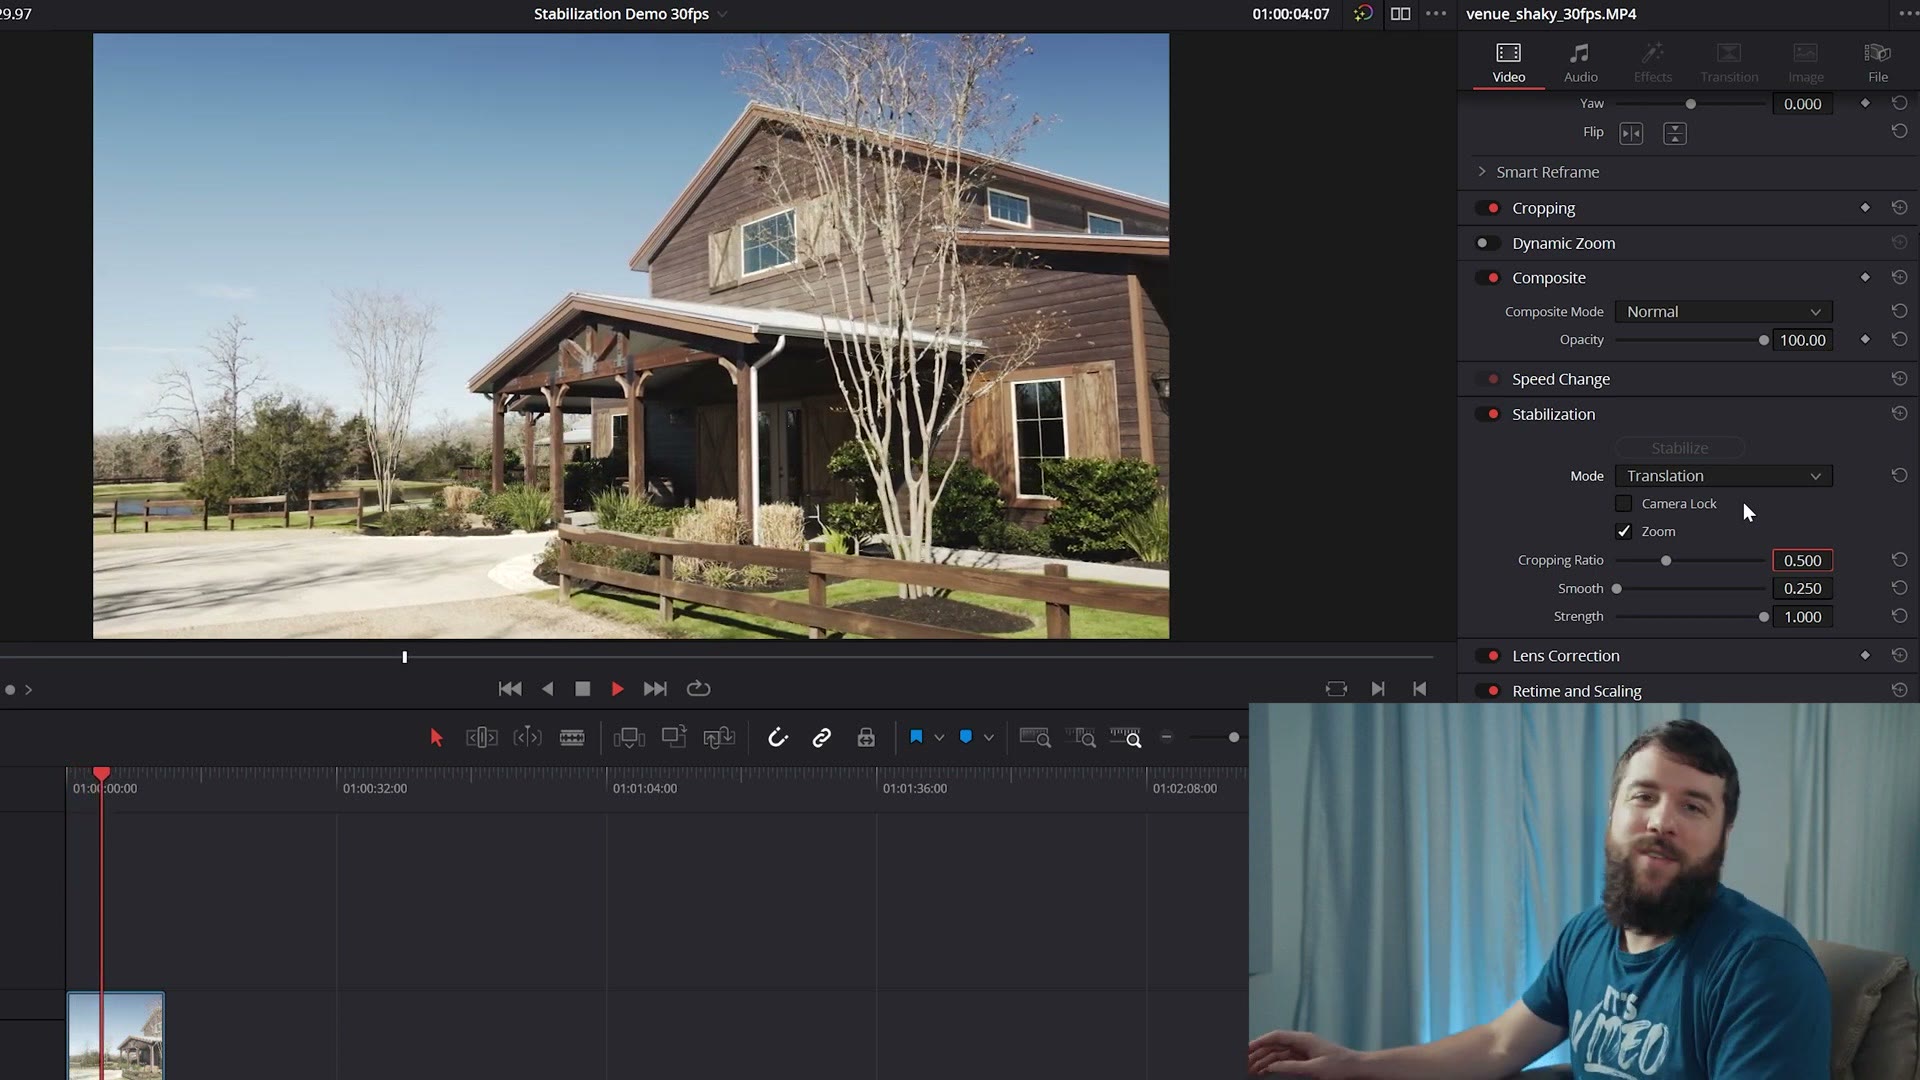
Hit stabilize and voila. Look how much smoother that shot is with Translation.
Camera Lock
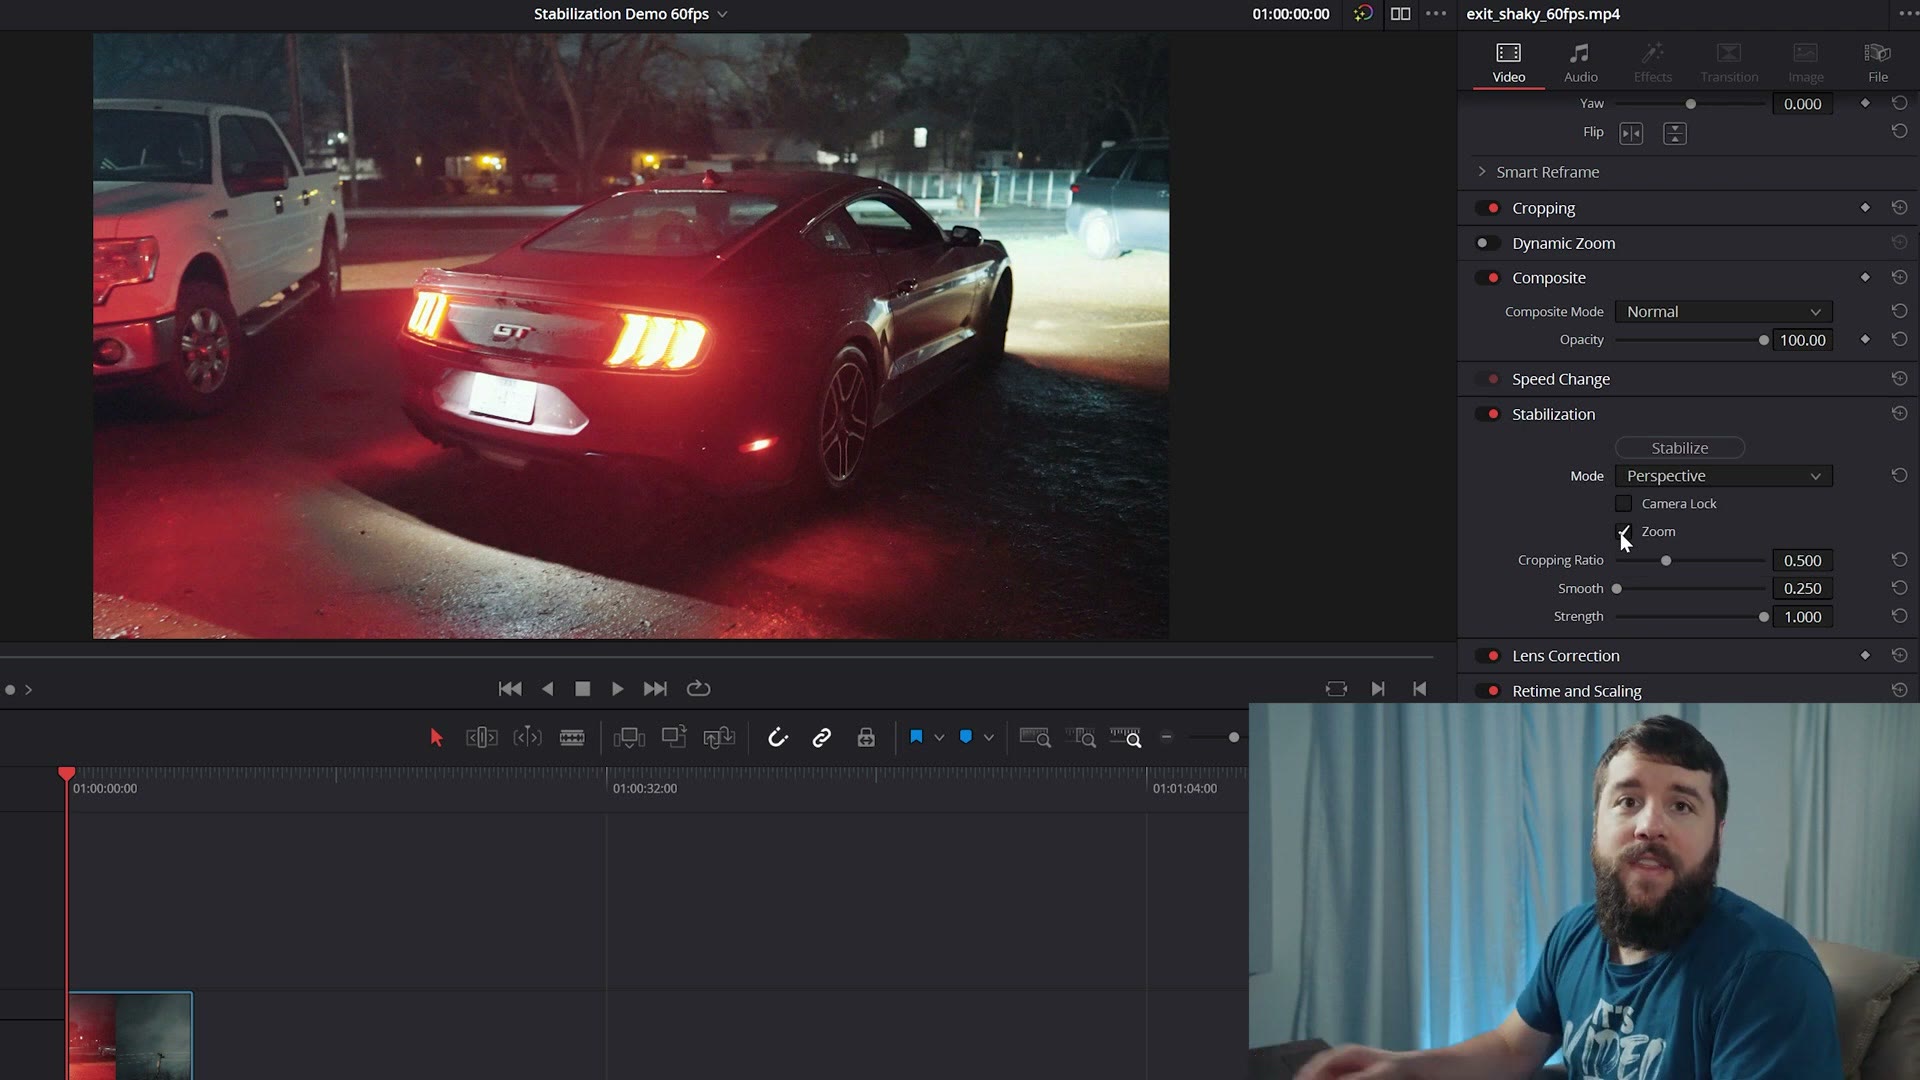
Back to our first clip, which is still being a little stubborn. Underneath the mode you’ll see a checkbox that says Camera Lock, unchecked by default.
If you filmed something handheld and you want it to look like it was shot on a tripod, this is the box you want, because it essentially tries to lock your image in place.
Keep in mind that if things look weird, you can go back up to Mode and choose Perspective, Similarity or Translation with this box checked, which may give you a better result. Don’t be afraid to try that.
Zoom
Below Camera Lock you have the Zoom checkbox, and this is one you’re going to want checked, because whenever you stabilize footage in Resolve it needs to zoom in a bit to do the job.
Cropping Ratio Slider
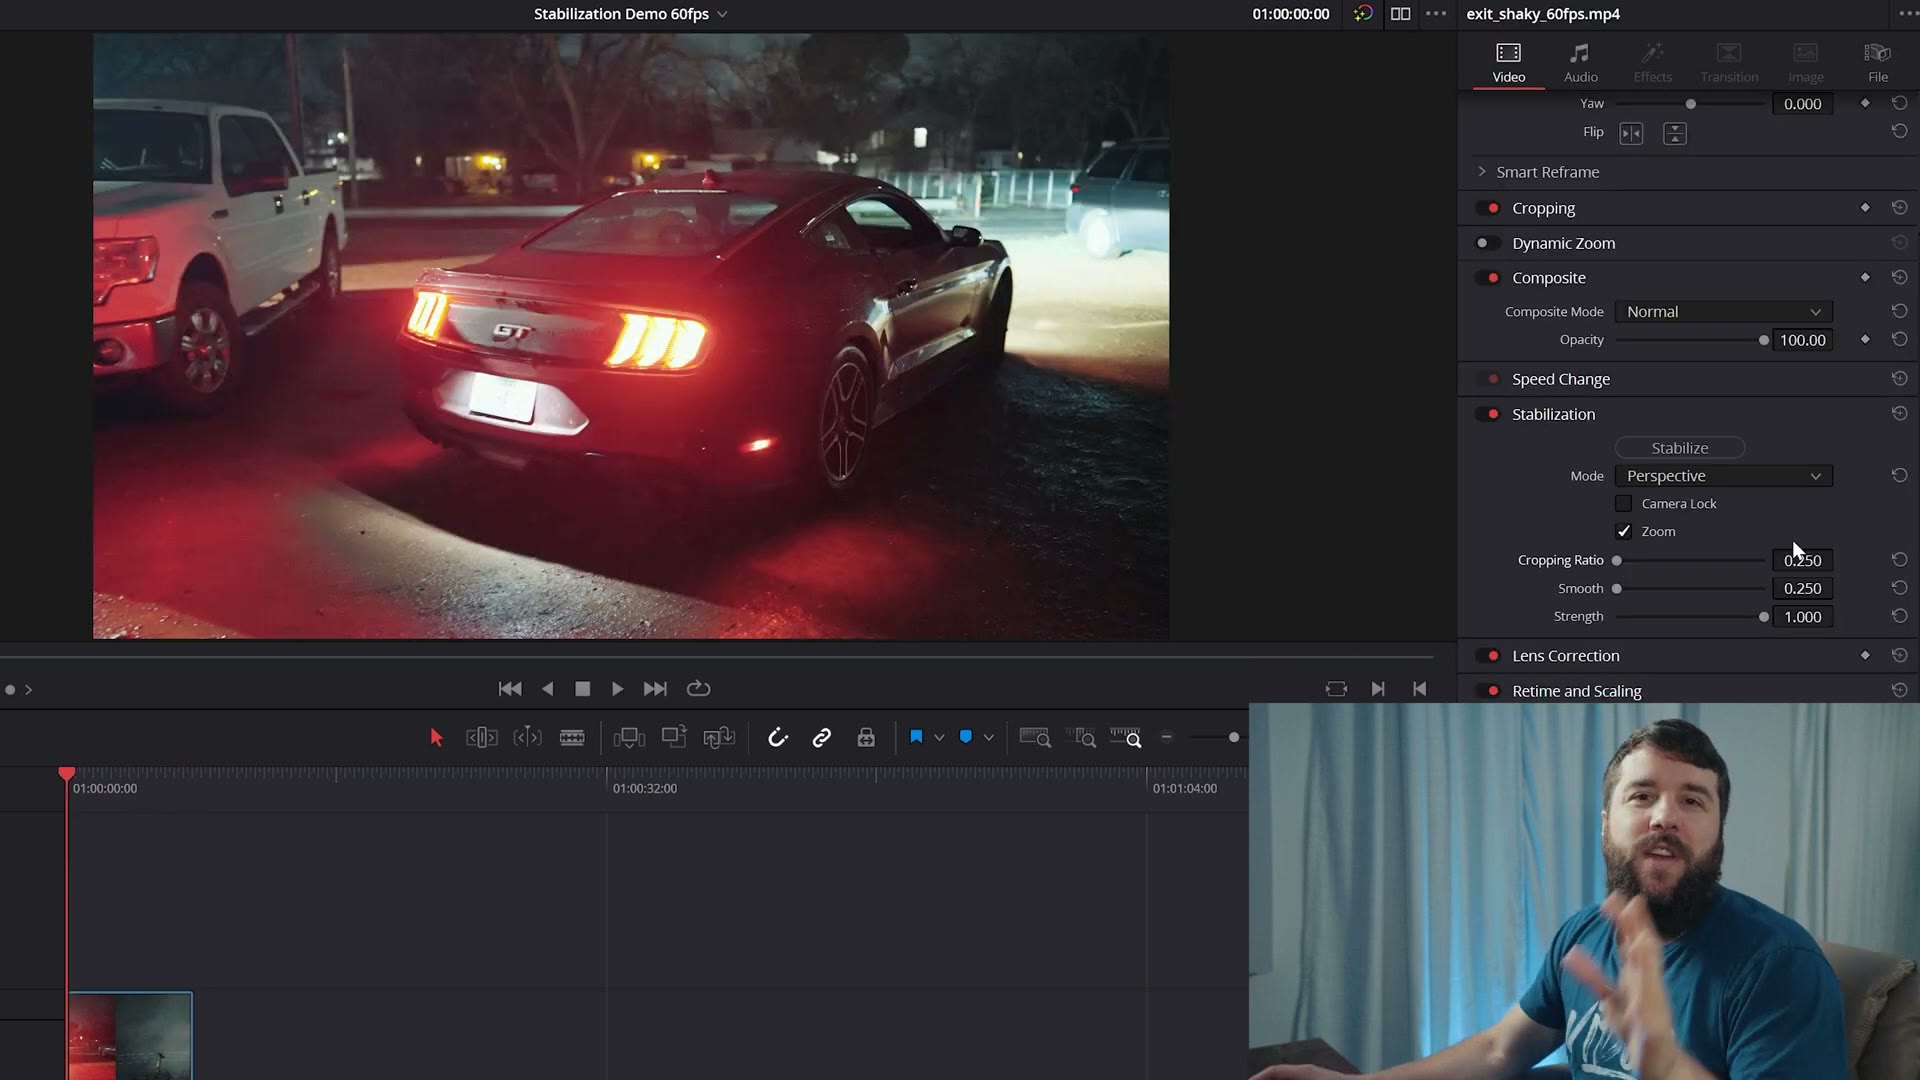
If you want to control how much it zooms, use the Cropping Ratio slider, which by default is set to 0.5.
Editing in something else? I covered Warp Stabilizer EXPLAINED – Fix Shaky Video in Premiere Pro too.
Increase it to 0.8 and Resolve barely crops in on your footage, but stabilizes it less. Decrease it down to 0.25 and Resolve crops in more, but stabilizes more as well.
You normally shouldn’t need to mess with this, but if you’re noticing your footage is zooming in too much, try increasing the cropping ratio a bit and that can help.
Smooth Slider
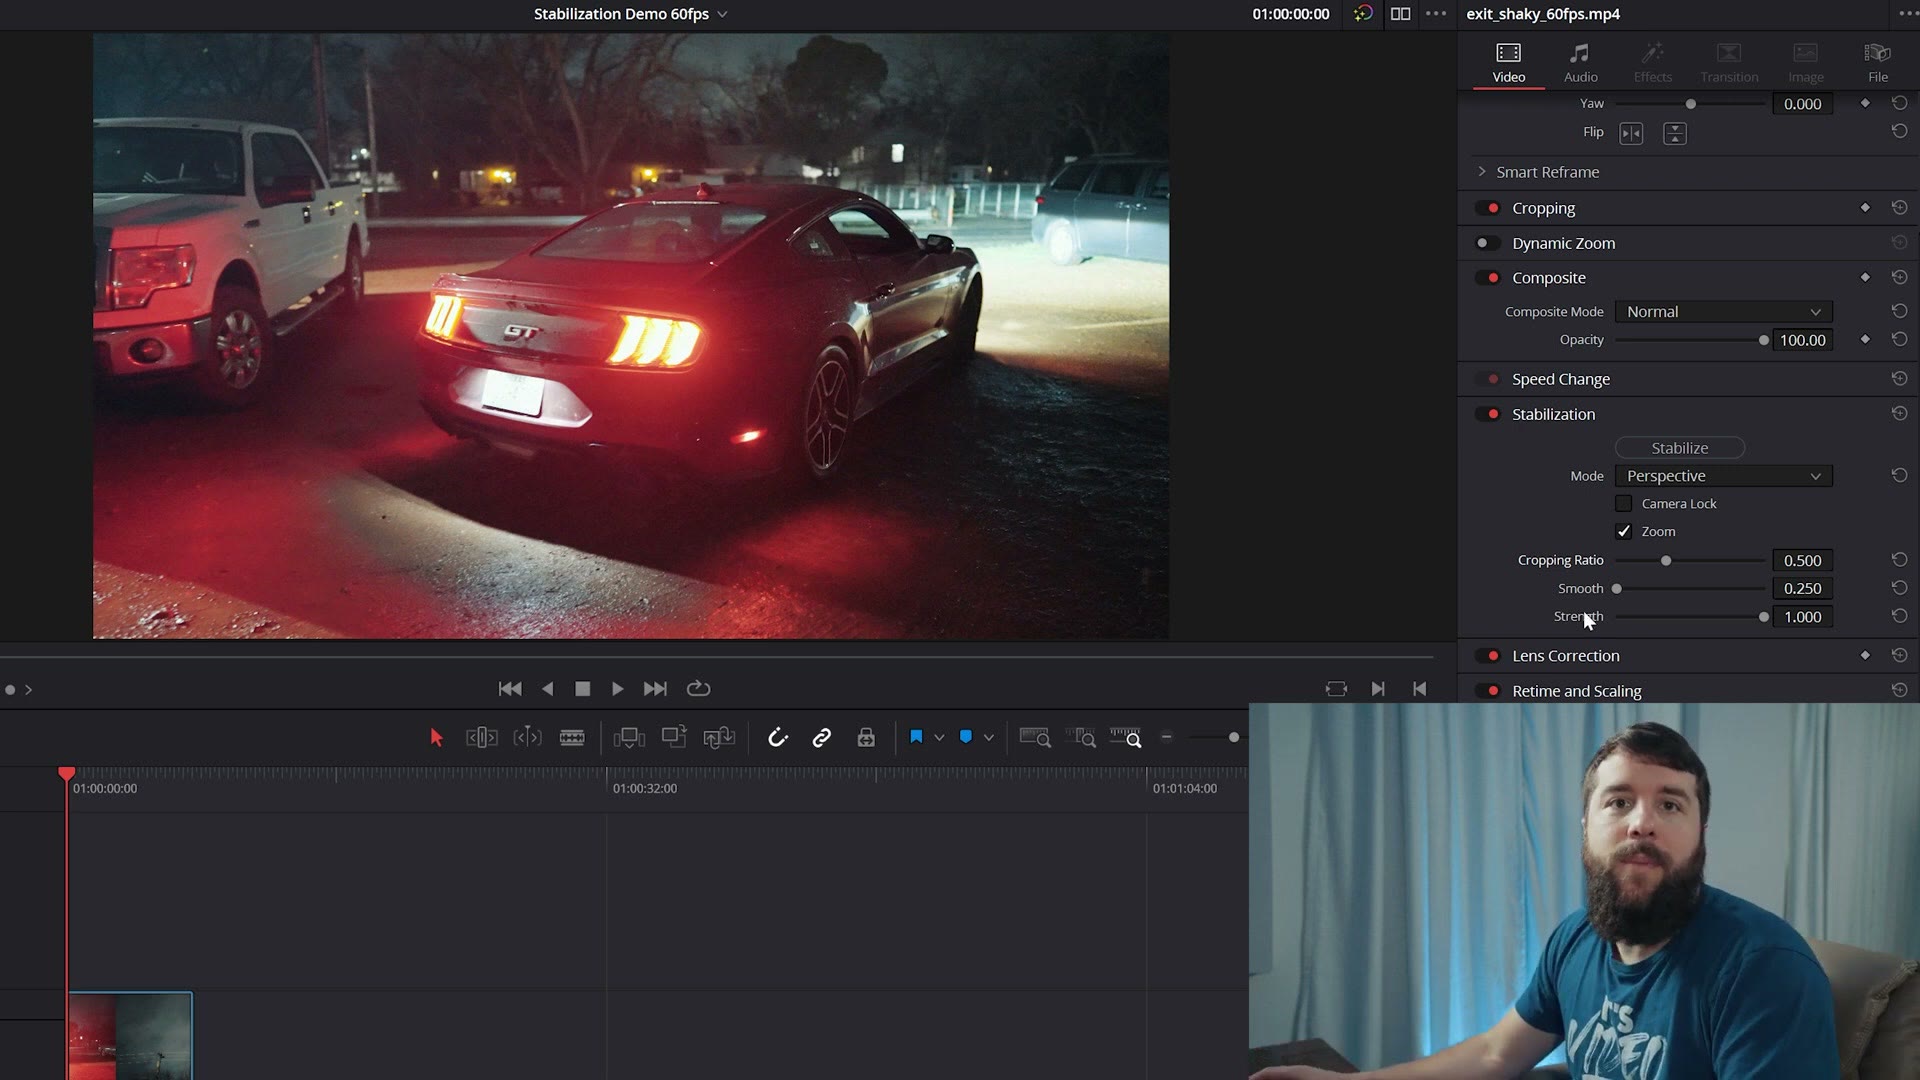
Smooth is, as the name implies, going to make your video smoother, and by default it’s set to the lowest setting, which usually makes footage look smooth without overdoing it.
If you have a particularly shaky clip you’re trying to tame, feel free to increase it. But be aware that if you do, Resolve is going to crop in on your image even tighter. You can get rid of some of that crop by increasing the cropping ratio, but that offsets some of the smoothing. It’s all a balance, and how much smoothing versus ratio you choose really depends on the clip.
Strength Slider
Strength is there to help with the micro jitters you commonly see when filming handheld. By default it’s set to full strength.
But if you’re noticing any subtle jello or warping, especially in the upper corners of your frame, decreasing the slider to 0.5 or even 0 can help with that.
For this particular clip, I found that choosing Similarity mode and setting the cropping ratio to about 0.8 really tamed the jello and warping and made it look great.
Download My Free Stabilization Cheat Sheet
And that is the DaVinci Resolve stabilizer explained. Remember you can download my free stabilizer cheat sheet so you have all of this at a glance.
And if you want even more help with your editing, I’ve created a free guide called Edit Videos Like A Pro, which walks you through some of the biggest secrets I’ve discovered over the years.
Thanks so much for reading, and have a great day!