
Today I’m going to show you how to edit super fast using proxies in DaVinci Resolve. You’re going to go from editing videos slow and clunky, where it takes a second to load at times, especially whenever you’re scrubbing around on the timeline…
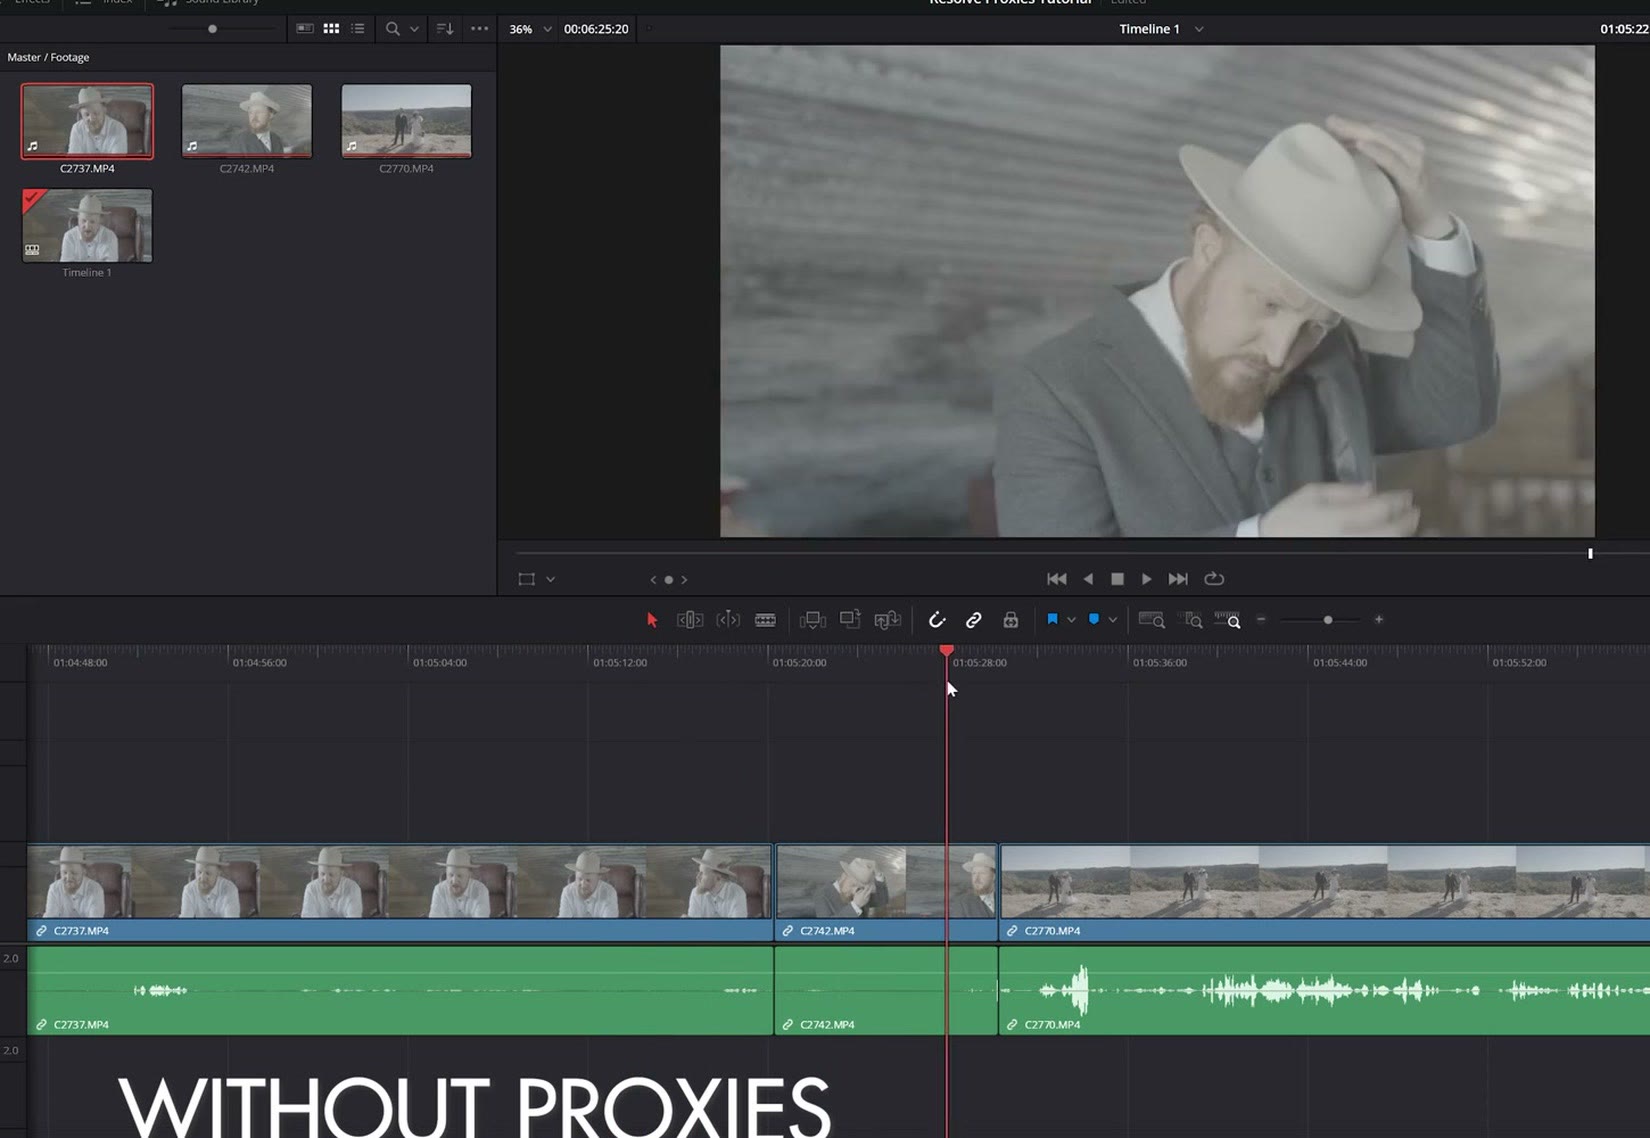
…to this, where you can scrub through your timeline like a hot knife through butter. And now I’m really hungry. Dang it.
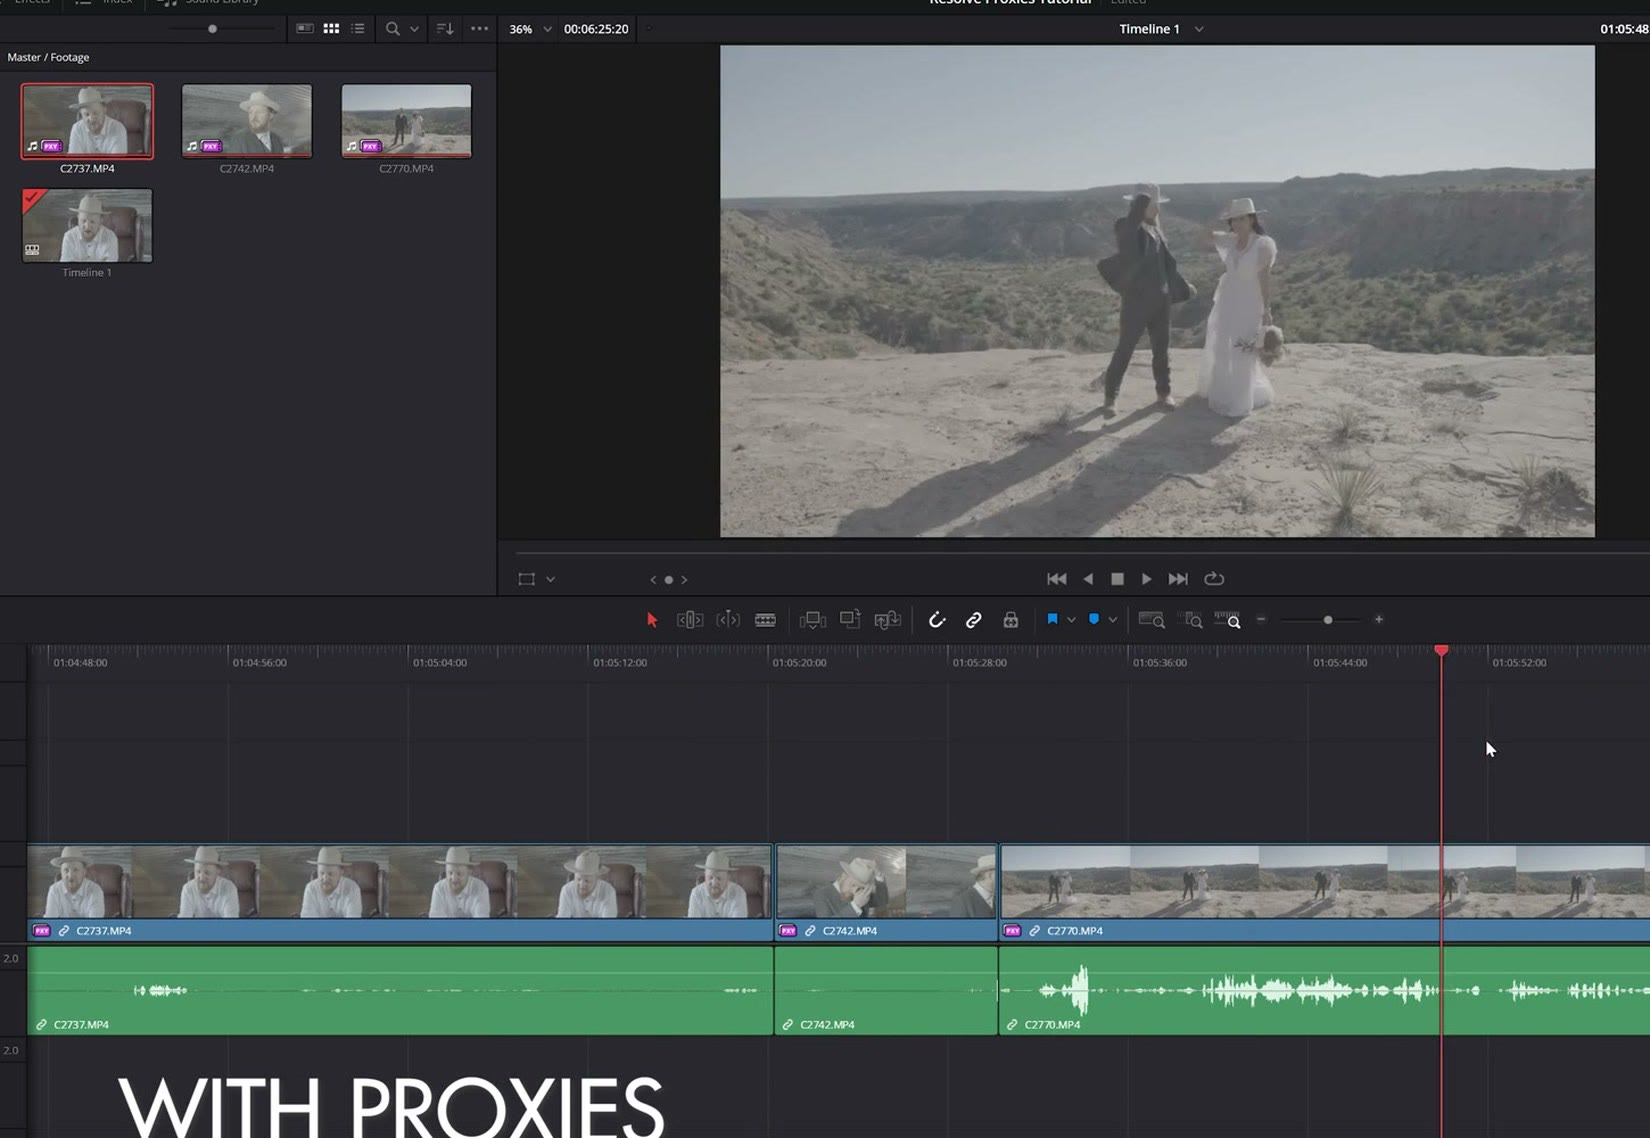
You see how smooth that is? What’s great is that these proxies are going to make your editing fast even if you’re on a very old computer, or using a slow external hard drive. It doesn’t matter. Your editing is going to be super fast.
I’ve also put together a free DaVinci Resolve proxy cheat sheet that shows you all of the exact settings you need to create proxies. It’s completely free, so please download it, because it’ll save you time.
More good news: this applies whether you’re using the paid or the free version of DaVinci Resolve. Everything here works either way. And if 10 bit footage is giving you trouble in the free version, there is a fix for that.
Lastly, if you’re editing videos with mixed frame rates, which I have a separate tutorial about, there is one quirk we need to talk about, and I’ll cover that at the end.
The Best Settings For Proxies
The first thing to do is go to your Project Settings in DaVinci Resolve, then scroll down to the Optimized Media and Render Cache section, where it says Proxy media resolution. This is where you select the resolution of the proxies Resolve is going to create.
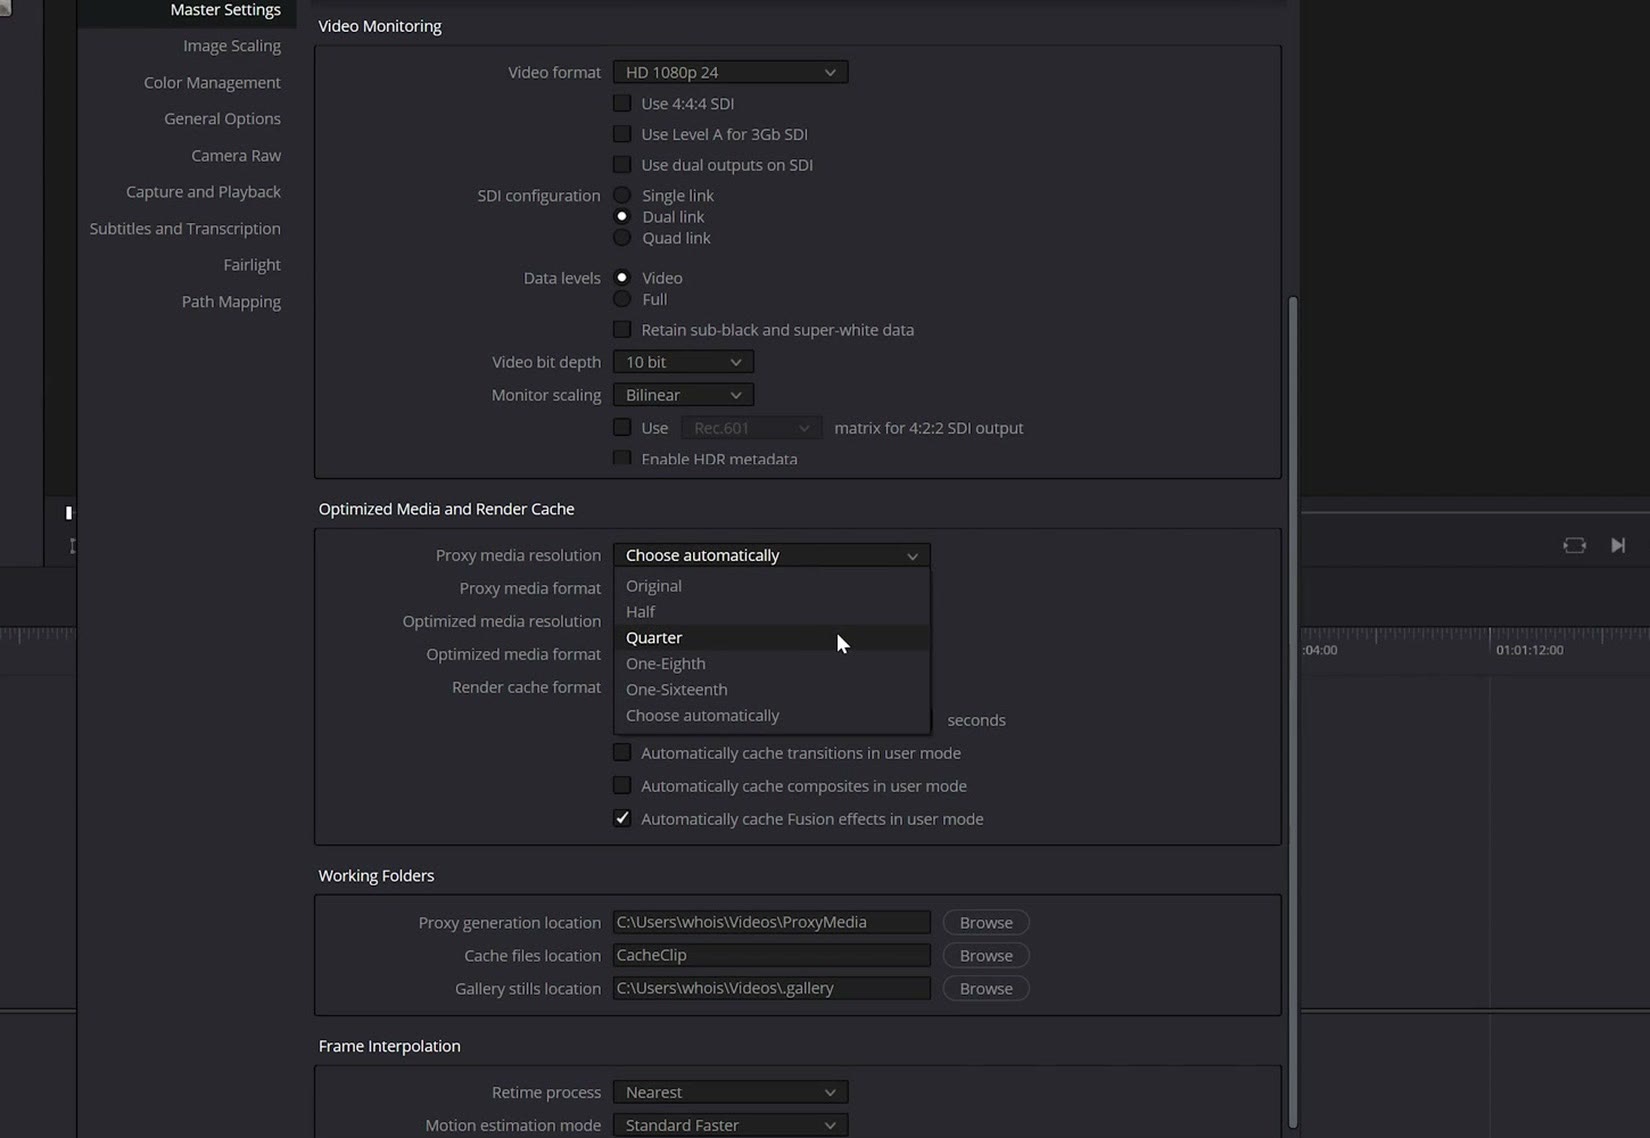
By default it says Choose automatically, but you don’t want it to do that. We want to tell Resolve what we want. Specifically, I recommend Quarter, because that gives you a good resolution proxy that still plays back very smoothly. Be aware though that if you’re on a much older computer and your playback is still slow and stuttery after making proxies, you can drop this down to One-Eighth or One-Sixteenth. We’ll leave it on Quarter.
Then for Proxy media format, I recommend H.264, which will play back smoothly on pretty much any computer these days. And most importantly, it gives you a very small file size, so your proxies aren’t clogging up your hard drive.
Below that, under Working Folders, you’ll see an option to choose where your proxy generated media gets put. You’re actually not going to use that setting. Completely ignore it, because there’s a better way to tell Resolve where to save proxies. Hit Save, because those are all the settings you’re customizing in this menu. But now we need to go to another menu.
Yes, go up to DaVinci Resolve, then Preferences. There is a completely separate settings menu, because Resolve loves having a lot of menus. Go to Media Storage, and look at that, next to Proxy Generation Location.
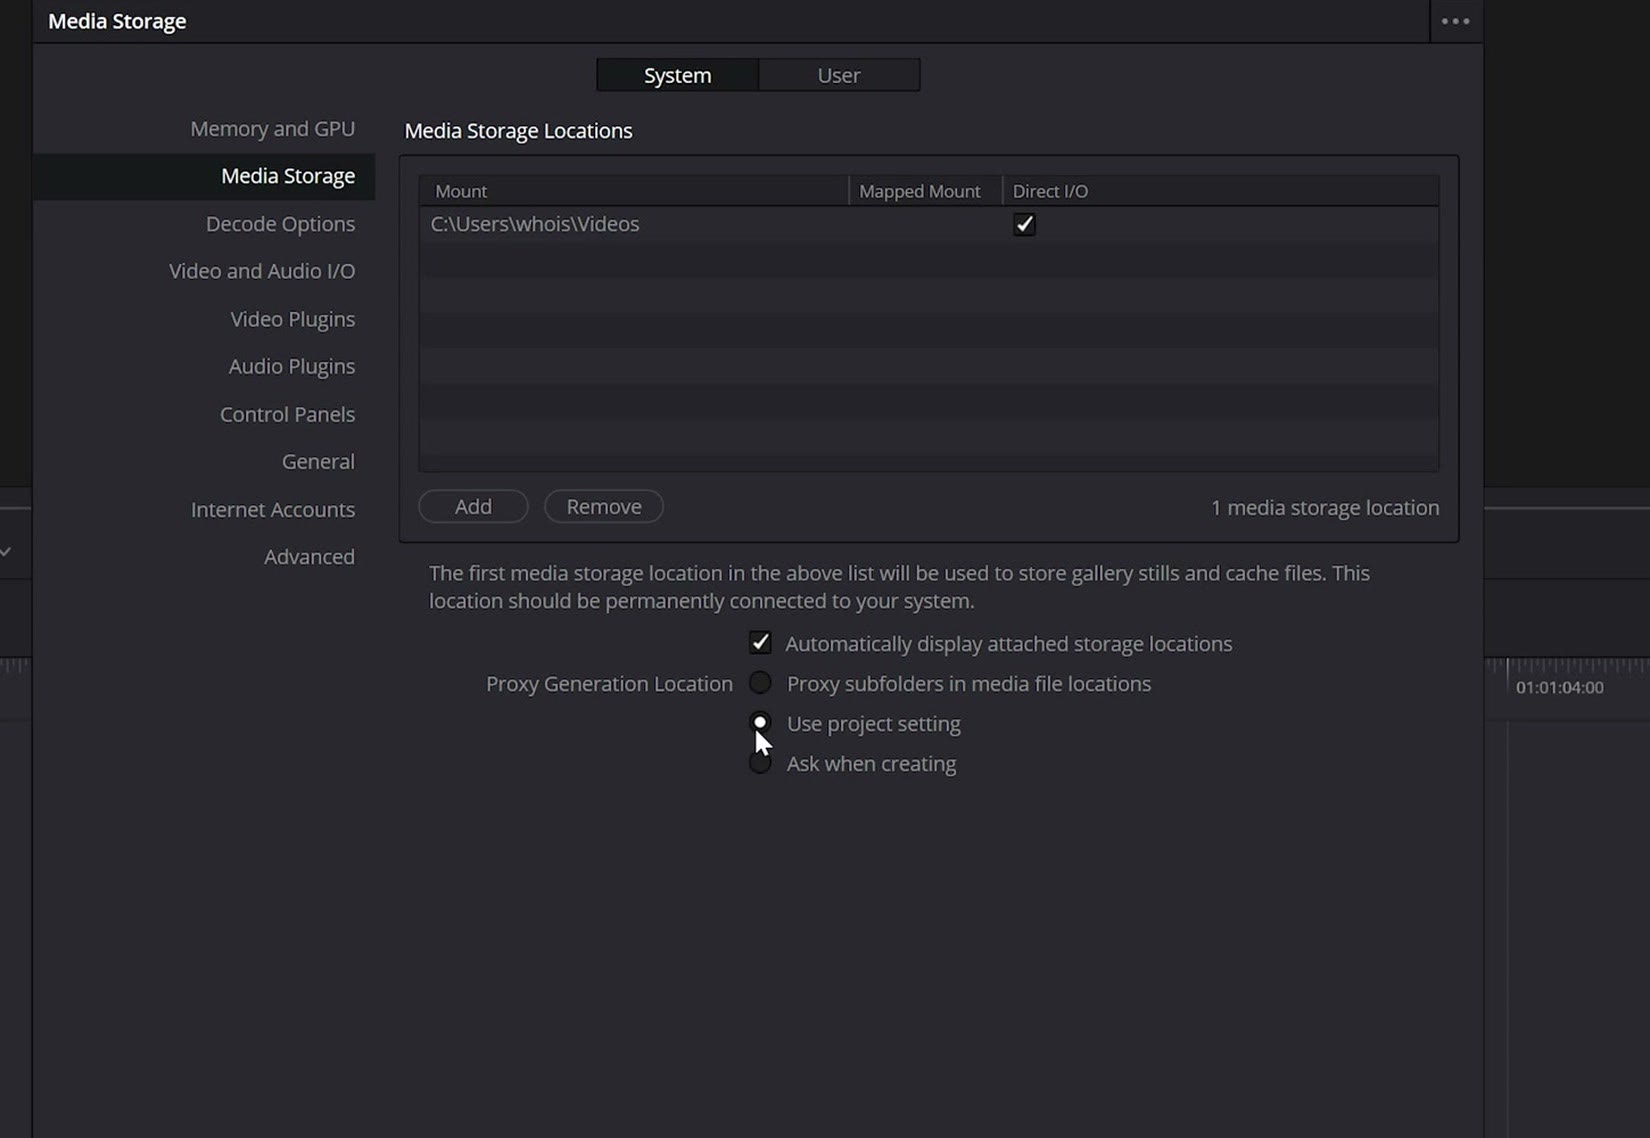
By default this is set to Use project setting, which is the setting from the previous menu that we ignored, the one that lets you choose a specific folder. The reason we ignored it is that you do not want Resolve putting all of your proxy files for all of your projects into the same folder. If you’re editing one project it may be fine, but every new project would keep filling up that same folder, you’d forget to delete it, and it would be a huge pain.
So instead, select Proxy subfolders in media file locations. That means any time you generate proxies, they go into a neat and tidy folder right next to the native files, so you always know where they are and you don’t have some random folder filling up your drive. As a bonus, whenever you’re done editing, you can very easily find those proxies and delete them to free up space.
How To Create Proxies In Resolve
Once those basic settings are dialed in, creating proxies is incredibly simple. If you notice your footage isn’t playing back smoothly, or the program takes a second or two to respond, let’s make some proxies.
Import your footage, select it by clicking and dragging or by holding Ctrl on PC or Command on Mac, then right click on one of the clips and select Generate Proxy Media.
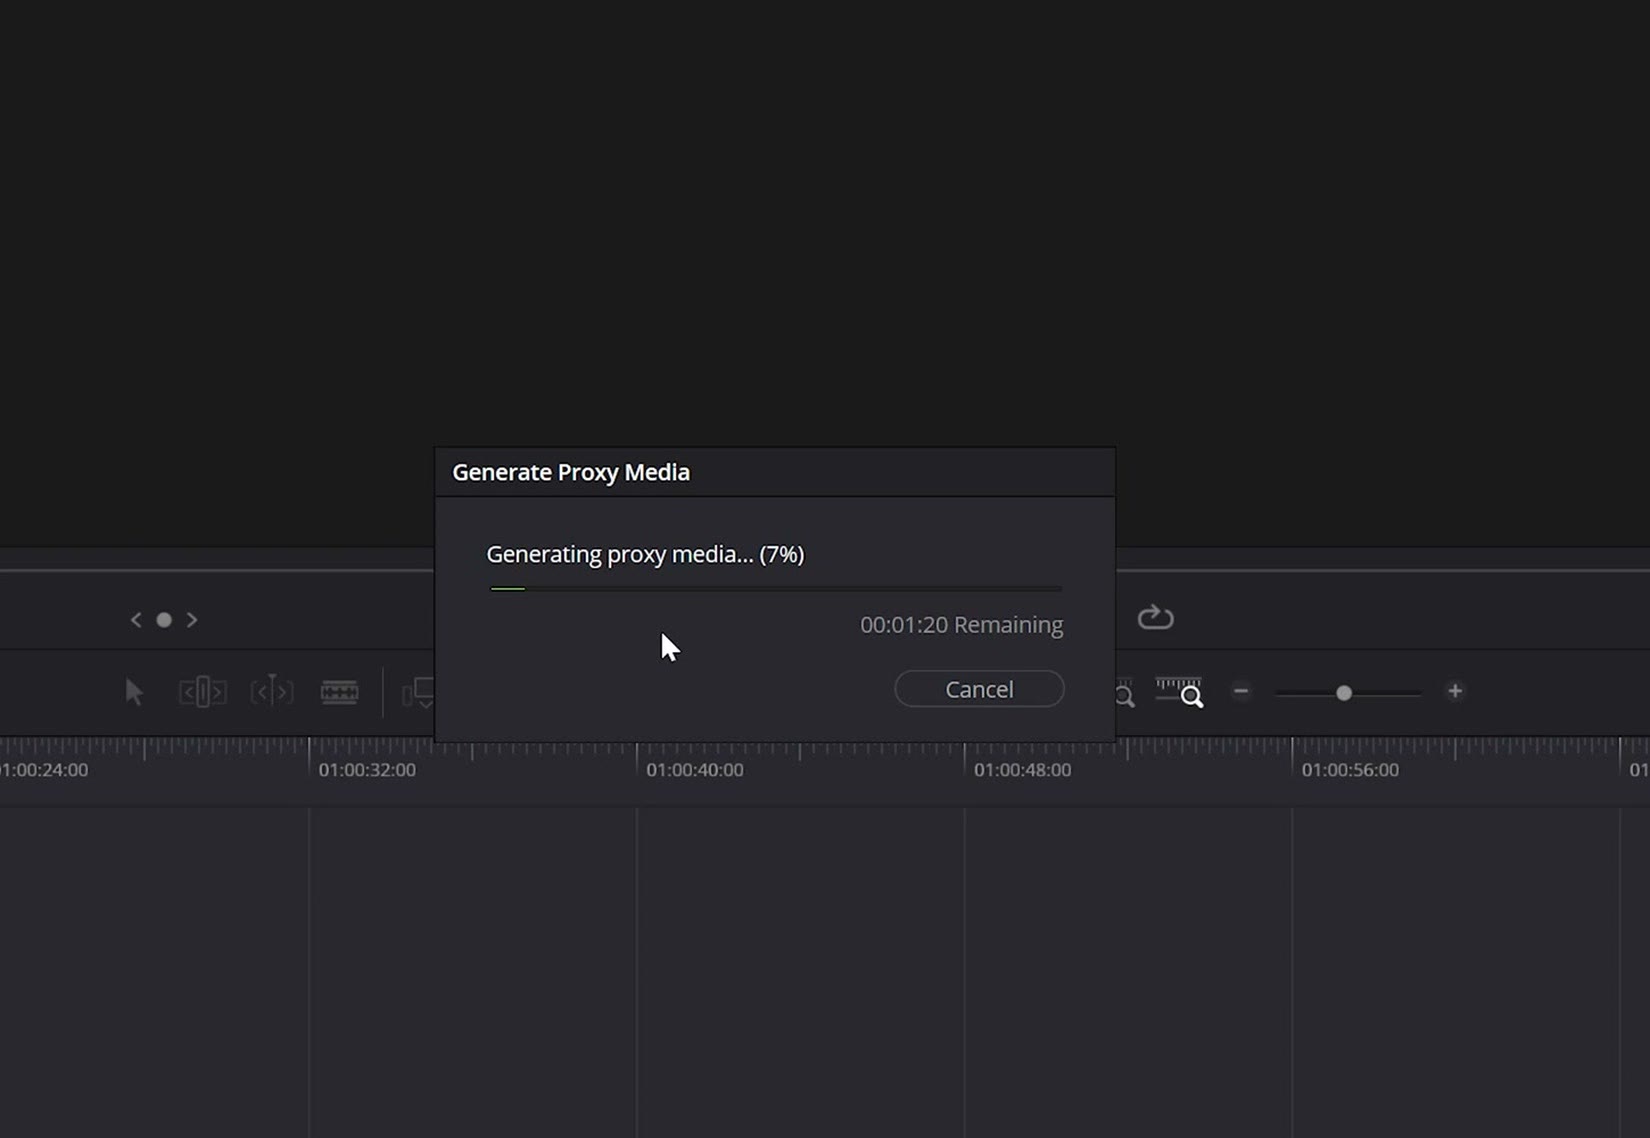
Resolve immediately pops up a window saying it’s generating your proxies, and depending on the speed of your computer and how many you’re generating, this could take anywhere from a few seconds to a few minutes to a few hours. For this tutorial it only took about a minute.
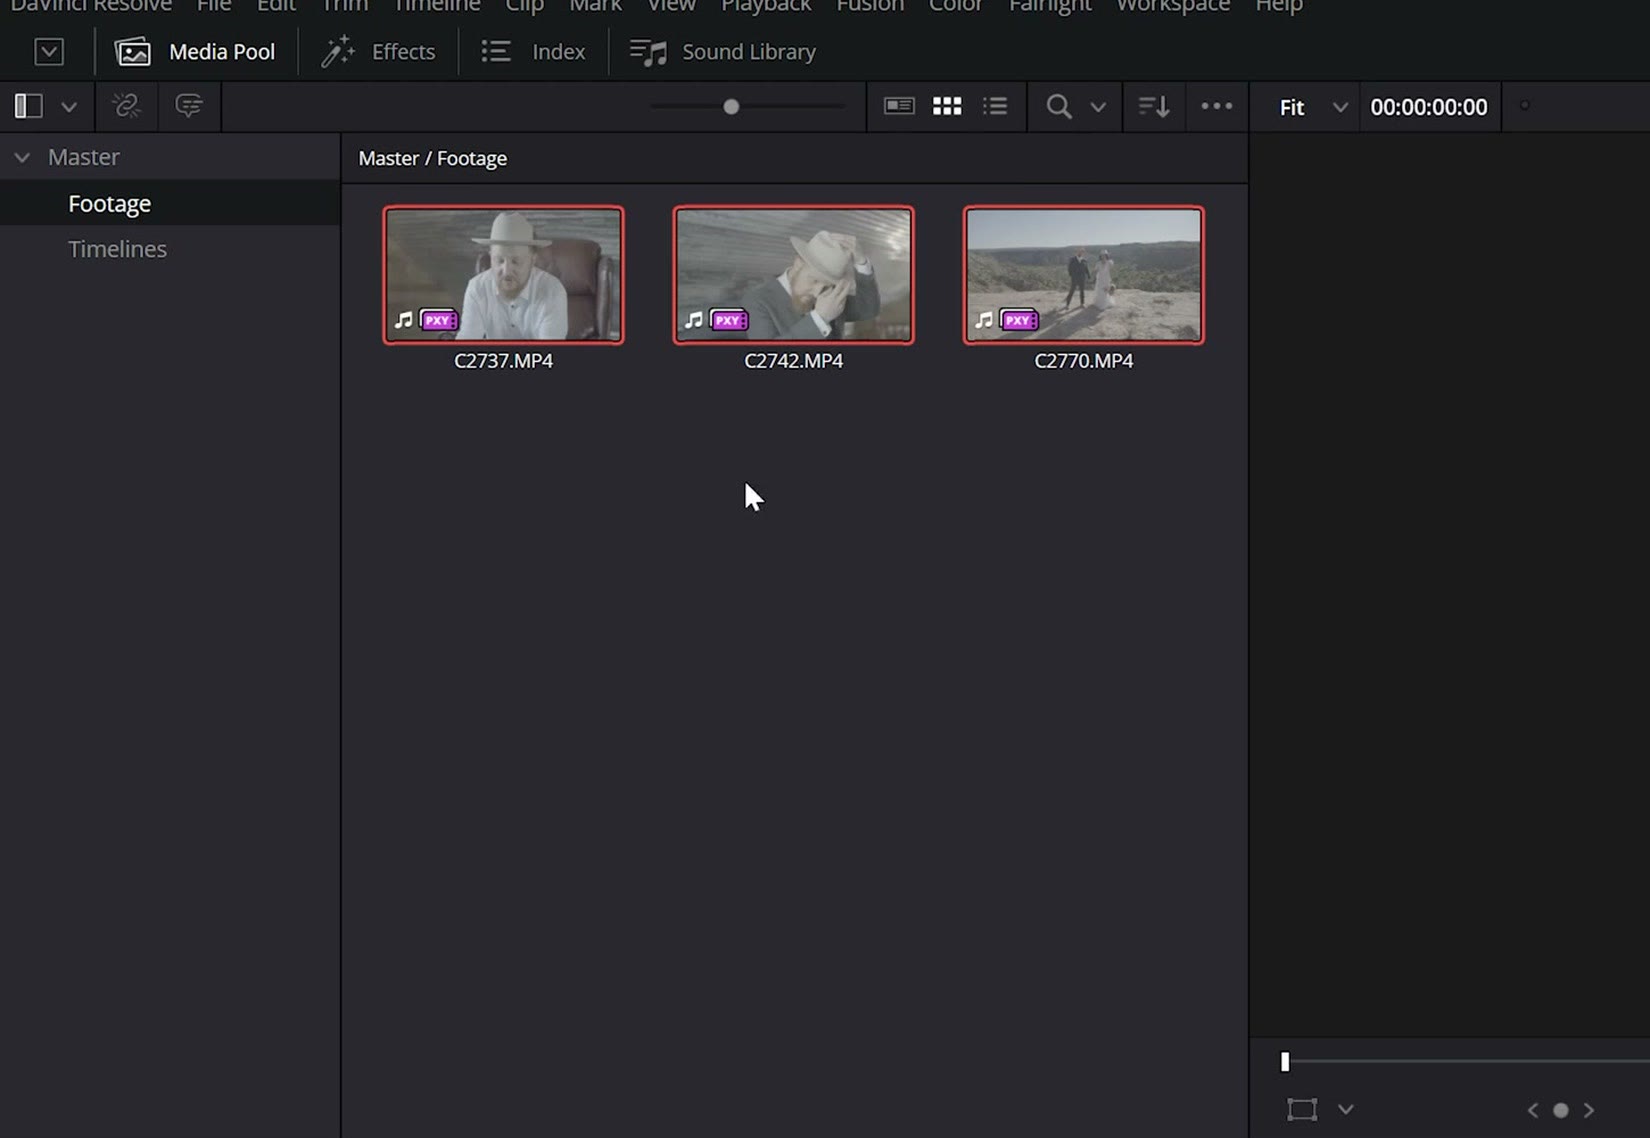
Then, as you can see on the clips, there’s a new icon that says PXY, which stands for proxy, indicating Resolve is using the proxy for that clip. Drag a couple down to the timeline and start scrubbing around and look how smooth that is. Lightspeed fast. I love it.
Side note, that proxy icon also appears on the clips down on the timeline, not just in the media pool, so you’ll always know whether you have proxies or not.
How To Disable And Enable Proxies
Let’s say you want to turn your proxies off, maybe because you want to see how the native files look, or you need to zoom into the 4K file while color grading and want to make sure it holds up.
Go up to Playback, then Proxy Handling, and select Prefer Camera Originals. Resolve switches back to the native camera files and stops using proxies, and you’ll see the PXY icon swap out for an HQ icon, which stands for high quality.
To switch back, go to Playback, Proxy Handling, Prefer Proxies. And if you ever want to completely turn them off, the same Proxy Handling menu has Disable Proxies, which is a way of telling Resolve you really don’t want to use these.
Will Resolve Use Proxies When Exporting?
You may be wondering: if I create proxies and then go to export, is Resolve going to use those proxies and render out a low quality gross looking video?
No. Resolve is smart enough to know you’d never want to export from proxies, and by default it always chooses the native files whenever it comes time to export. So you don’t need to stress or hunt for some obscure setting. Resolve handles it.
How To Batch Create Proxies Fast
We aren’t done yet though. Stick with me, because this next part is super cool and completely worth your time, especially if you have a lot of footage.
Let’s say you’re editing a wedding and you have 300 or 400 clips, or more. That same technique of selecting everything and right clicking Generate Proxy Media becomes a problem, because Resolve pops up that box and it won’t let you do anything else in the program until the proxies are finished. You’ll be clicking around and it just won’t respond, because sorry, I’m making proxies right now.
That’s fine with a handful of clips. But with hundreds it could take hours, and you’re going to be really unproductive. Wouldn’t you like to keep editing while the proxies are being made? I think that’s a great idea, and thankfully so does Blackmagic.
On Windows, go to your Start menu and search for Blackmagic Proxy Generator. On Mac you’ll find the same program in your Applications folder.
Editing in something else? I covered Use AI To Edit Wedding Ceremony Videos FAST In Premiere Pro, Here’s a free watermark for your Adobe Premiere Pro CC Proxy Files, and EDIT FASTER with ANY Sony Camera – In Camera Proxy Guide too.
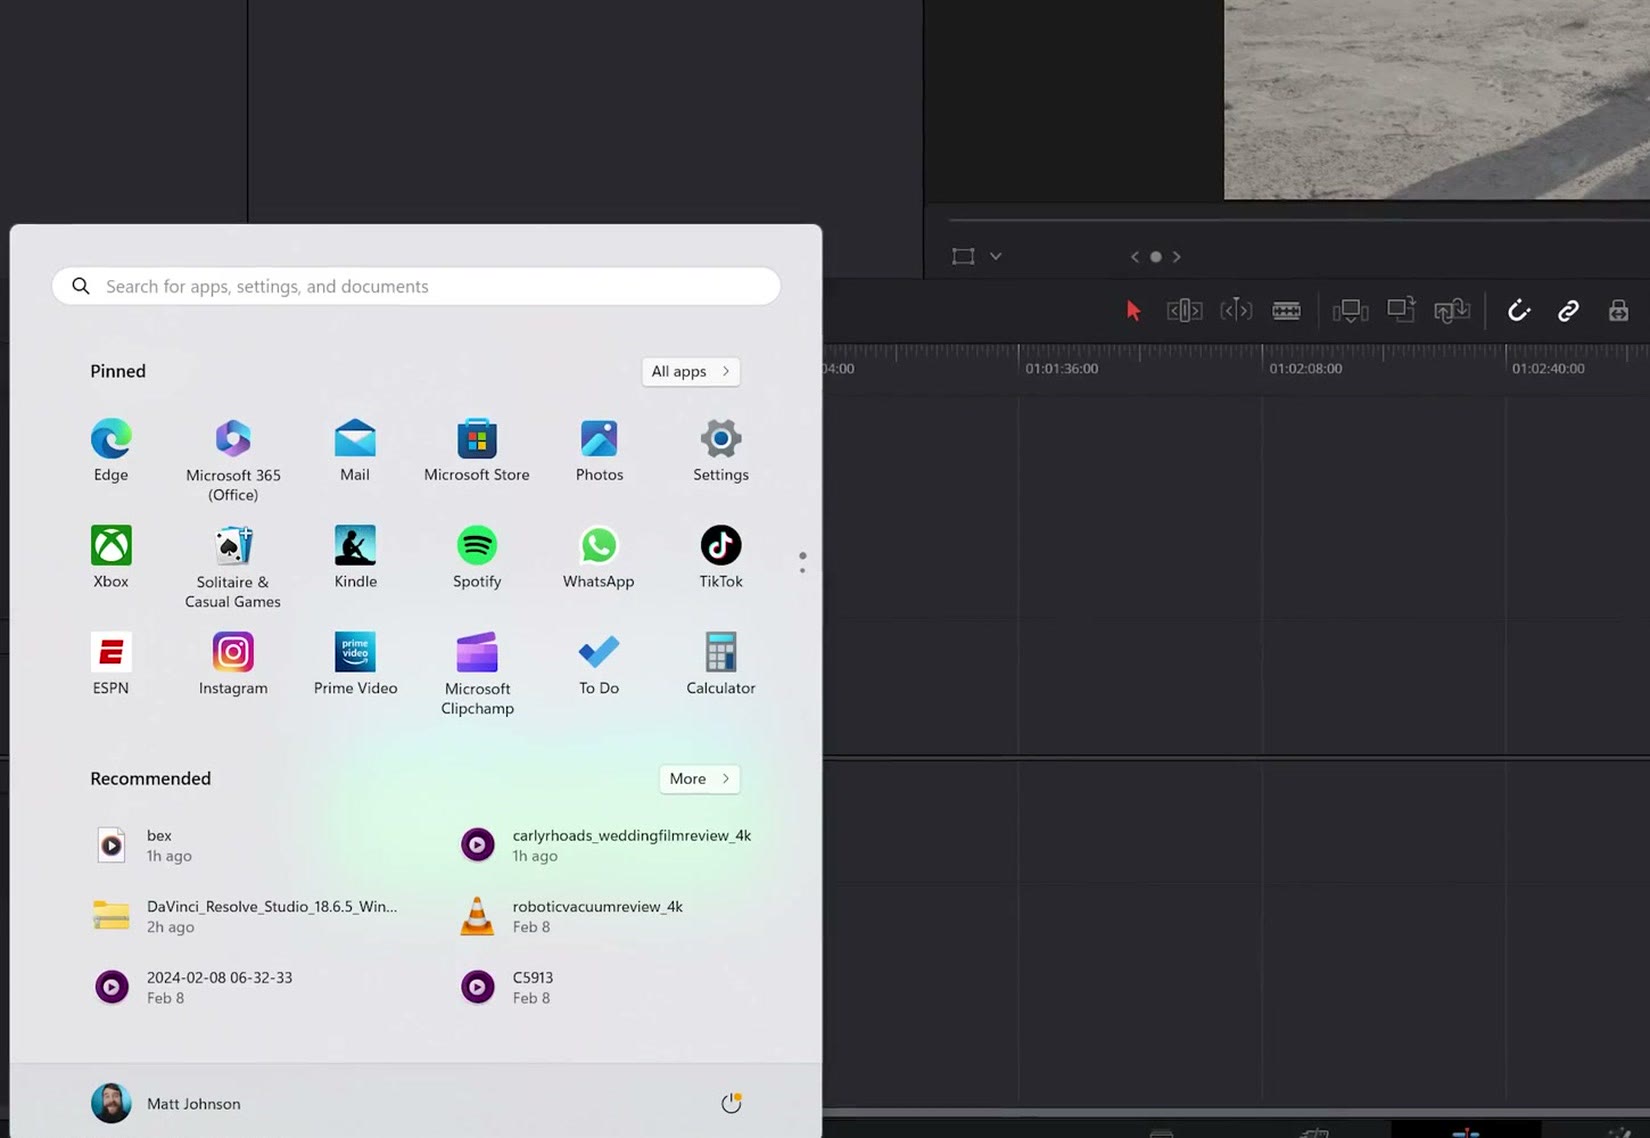
Here’s the great news: whether you’re on the paid Studio version of Resolve or the free version, this app is included with both. With the free version it’s called Blackmagic Proxy Generator Lite, but it’s almost exactly the same, with the only difference being that it can’t export 10-bit proxies. You’re not going to be using 10-bit proxies anyway, so it doesn’t matter, and the Lite version works great.
Open the program and you’ll discover it’s very basic, which is a good thing. Under Proxy Format you have three options: H.264 8 bit 4:2:0 Half Res 1080p, H.264 8 bit 4:2:0 1080p, and H.265 10 bit 4:2:0 1080p.
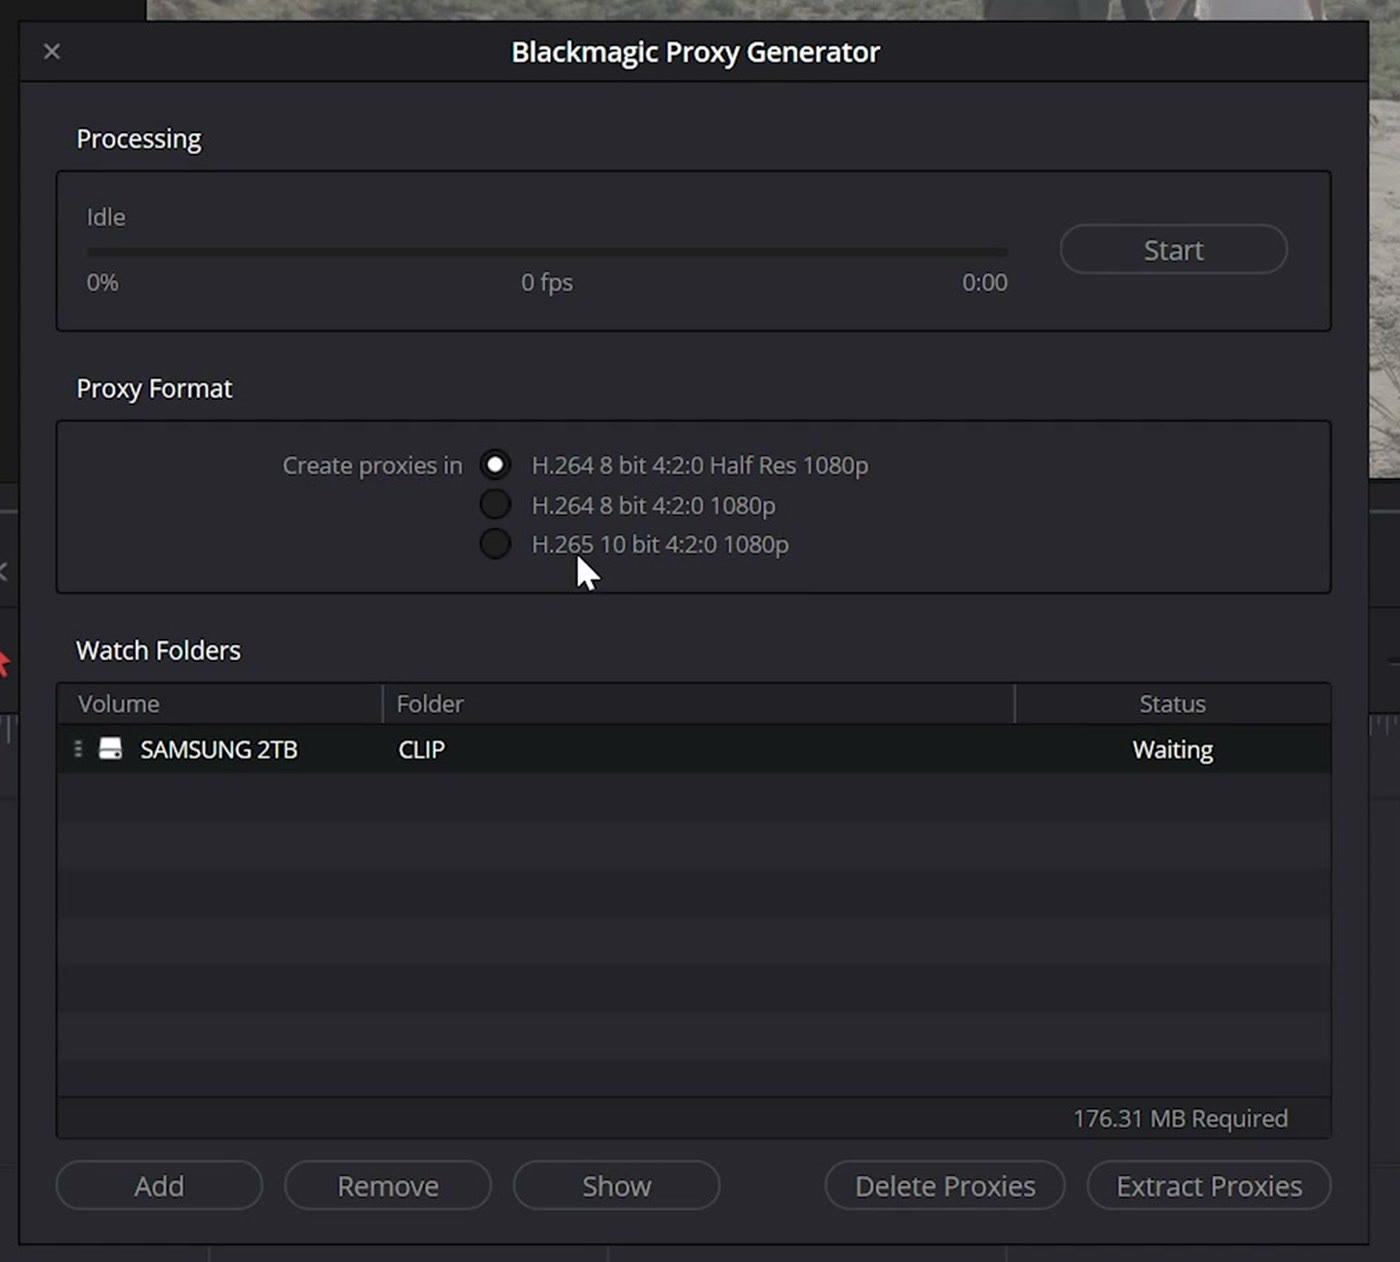
You’re going to want the first one, H.264 8 bit 4:2:0 Half Res 1080p, which is the lowest quality proxy you can make with this program and the one that should play back the most smoothly while editing.
Next, there’s a Watch Folders section at the bottom, and this is where you tell the app where the video files are. Click Add, navigate to the folder where your files live, and click Select Folder, and it’ll appear in the list. If you have footage from multiple cameras in different folders, just click Add again and add all of them, so you have multiple watch folders.
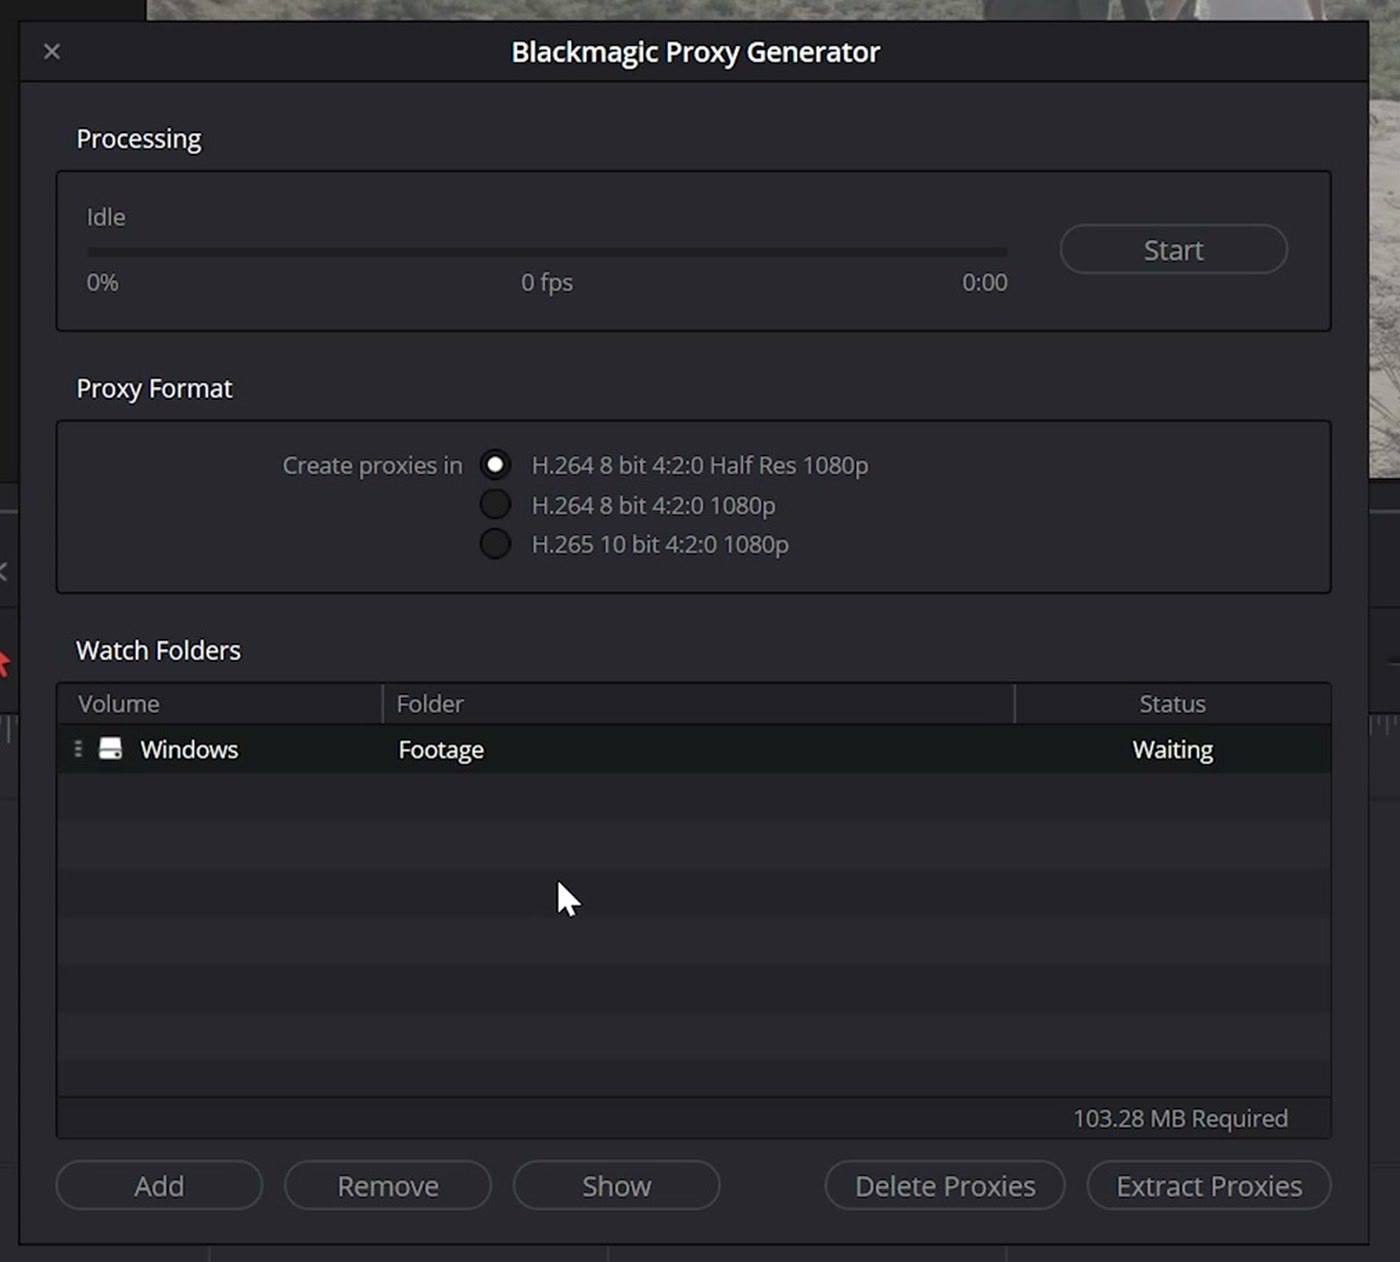
Lastly, here’s the best part. Click Start at the top and the Blackmagic Proxy Generator begins making proxies, and you can go back to DaVinci Resolve and keep editing while this separate app works in the background. As the proxies are generated you’ll see the proxy icon appear on your clips inside Resolve as you edit. It’s really magical, and once you start using proxies you’re not going to want to go back.
The Weird Quirk With Mixed Frame Rates
Like I said at the start, there’s one caveat, and it has to do with making your footage slow motion and creating proxies at the same time.
If you’ve followed along with my mixed frame rates tutorial for Resolve, that shows you how to make all of your footage slow motion at once regardless of the frame rate you filmed it at, which saves you a ton of time because you don’t have to go into every clip one by one and tell Resolve to make this one 40 percent speed.
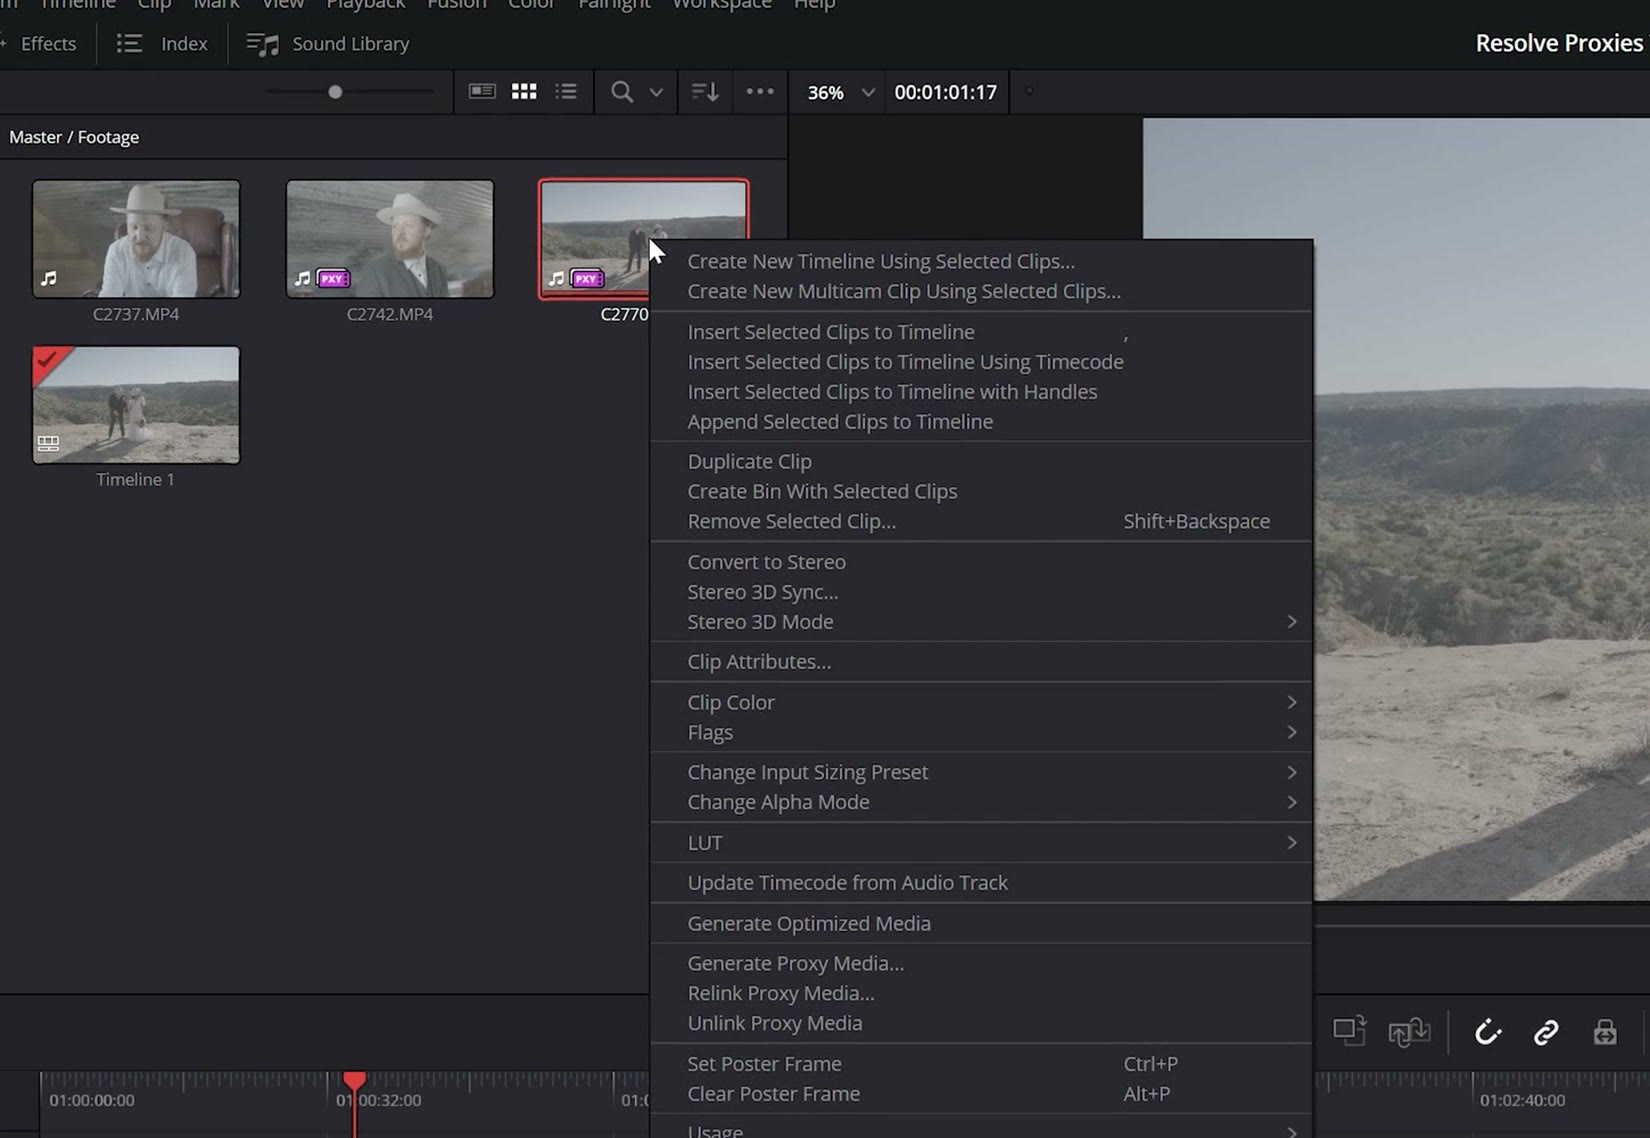
But if you do what I show you in that tutorial, where you import your footage, right click a clip in the media pool, select Clip Attributes, and change the video frame rate to 23.976, you need to be careful about how you create proxies.
Because if you use the external Blackmagic Proxy Generator app, it does not recognize that you’ve made those clips slow motion, so it won’t link the proxies to the native files automatically. And when you try to link them manually, Resolve gives you an error saying the frame rates do not match.
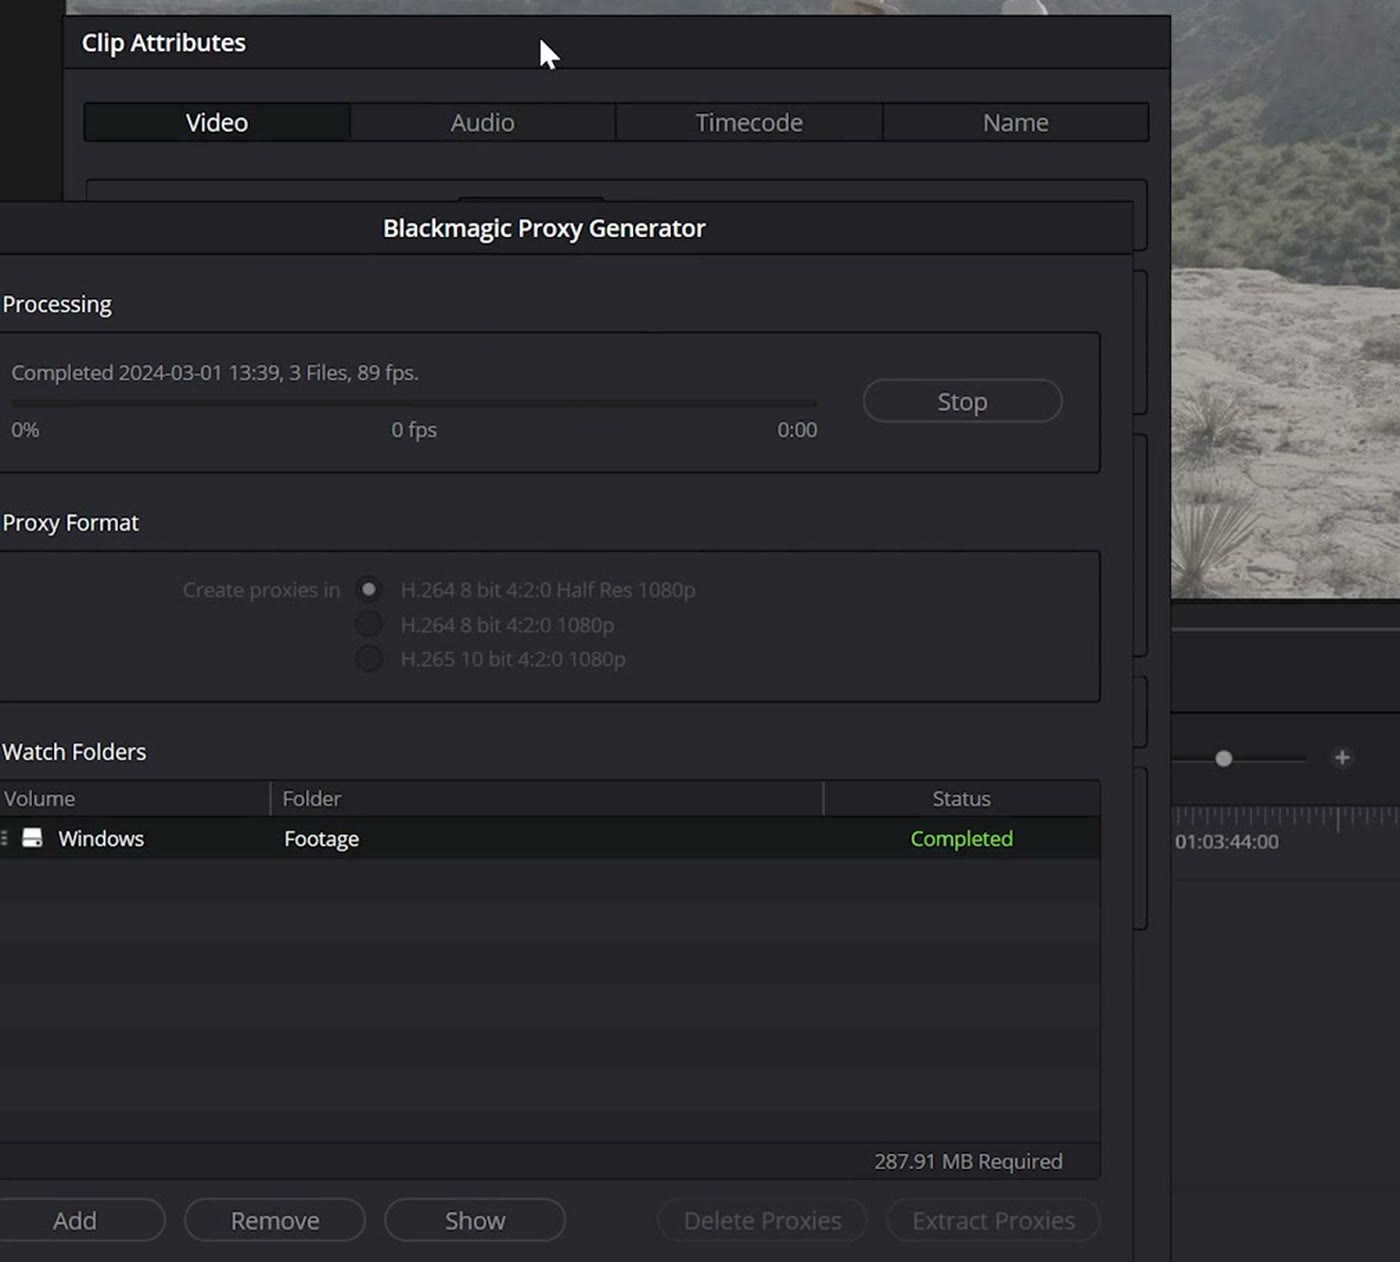
So here’s the workaround. If you make your proxies with the Blackmagic Proxy Generator app before you go into Clip Attributes and change the video frame rate, you’ll be fine, the proxies will attach correctly, and you won’t get an error.
But I hear you saying you already imported all your footage, started putting it on the timeline, changed the frame rate in Clip Attributes, and only decided later that you wanted proxies. Is there still a way?
Yes. In that case use the built in proxy generation tool in Resolve, like I showed you earlier, by selecting your clips, right clicking, and choosing Generate Proxy Media. Generating them this way, Resolve knows you interpreted your footage to be slow motion, so it makes the proxy slow motion as well, and everything matches up properly.
Trust me, once you set proxies up and see how fast and smooth your editing can be, you’re never going to want to edit without them.
Remember you can still download my proxy cheat sheet for DaVinci Resolve, which is going to be really helpful as you get these set up. It’s completely free. And I also have a Wedding Film Framework for DaVinci Resolve course that walks you through editing an entire wedding film in Resolve, which I’d highly recommend checking out.
Thanks so much for reading, and have a great day!