
Since last November, I’ve been filming weddings exclusively with the Sony A7Sii in 4K. Due to the large file sizes this produces, I often end up with hundreds of gigabytes of footage from a single wedding. As I edit these weddings, I’ve realized that I will soon need to either buy a new computer to help handle the high-resolution footage, or implement a proxy based workflow where I edit lower quality video clips, then re-link the high-quality clips for final rendering.
That is why I was incredibly excited to see that the 2015.3 update of Premiere Pro added a built-in proxy workflow. Instead of having to watch as my computer bogs down from playing back the native 4K files of the A7Sii, or having to implement a round-trip through Da Vinci Resolve to create proxies, Premiere now lets me create them in Adobe Media Encoder and automatically links them to my existing footage. Once linked, it is a simple button press to switch between the native file and the proxy.
As I was working through implementing the update, I realized that it was a little TOO good. Due to the high quality proxies I was generating in Premiere Pro, it was impossible to at-a-glance tell whether I was working with the native file or the proxy file. I needed an immediate way to tell, and after a bit of research, I hit upon this a solution.

By adding a PNG file I created to the proxy export settings in Adobe Media Encoder, all my proxy files now include a transparent “Adobe Proxy” logo on the final rendered video. This makes telling the difference between native and proxy incredibly fast and easy.
To save you the work of creating your own transparent PNG logo, I’ve included a download link below. Simply download this file and follow the steps below to incorporate it into your Adobe Premiere Pro CC proxy workflow.
Follow these steps to add the adobe PNG logo to your Adobe Premiere Pro proxy workflow.
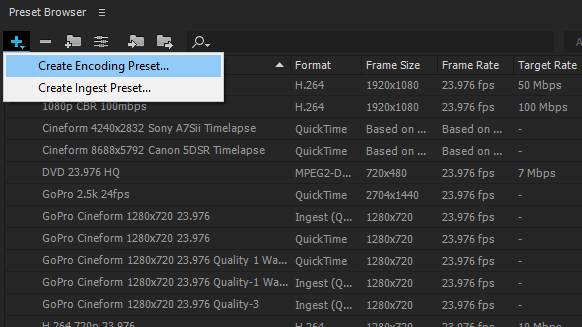
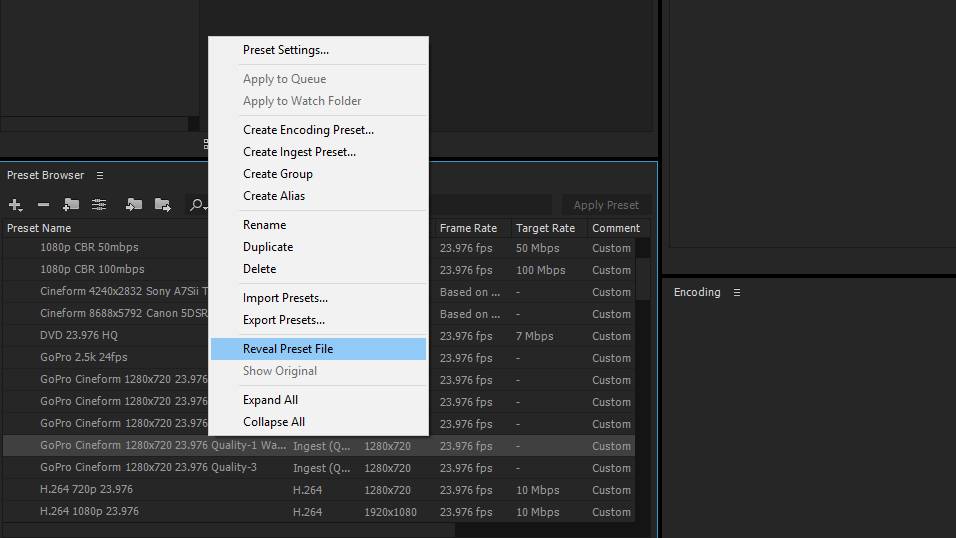
1. Open Adobe Media Encoder and in the “Preset Browser”, select the “Plus” sign and select “Create Encoding Preset.”
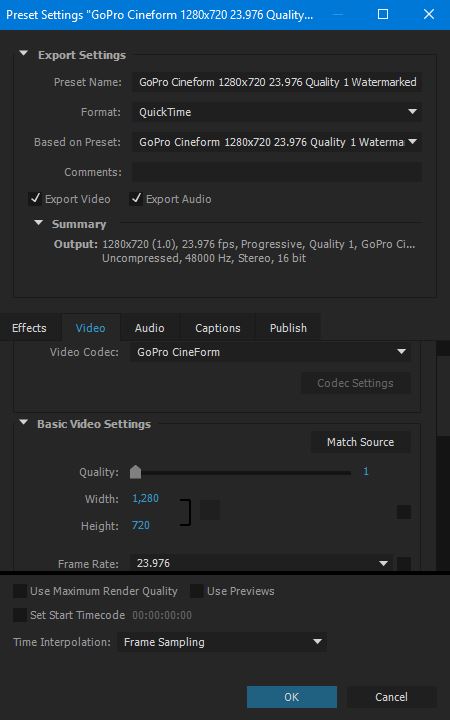
2. Create your proxy preset. In my case, I use GoPro Cineform at 720p.
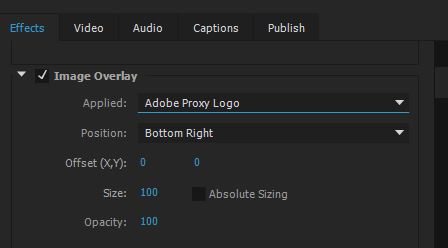
3. Open the “Effects” tab, and check the “Image Overlay” box. Click the drop down menu next to “Applied” and browse to the Watermark PNG file. Make sure you put the PNG file in a place where it will be consistent between video projects. For “Position” select “Bottom Right” or wherever you would like it to appear over your proxy video. Select “OK” and your Encoding Preset will be saved.
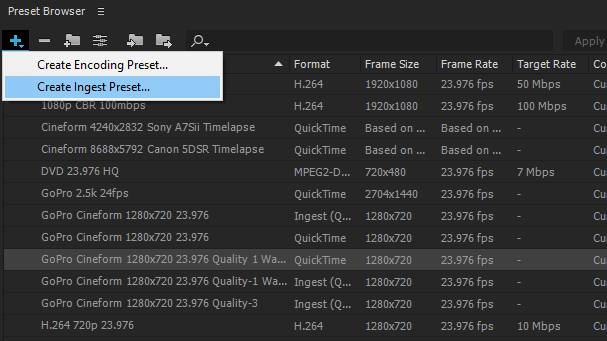
4. Select the “Plus” sign again in the “Preset Browser”, and this time select “Create Ingest Preset.”
5. Name your Preset. I named mine the same as my Encoding Preset but added the word “Ingest” at the end. Check the “Transcode files to Destination” box.
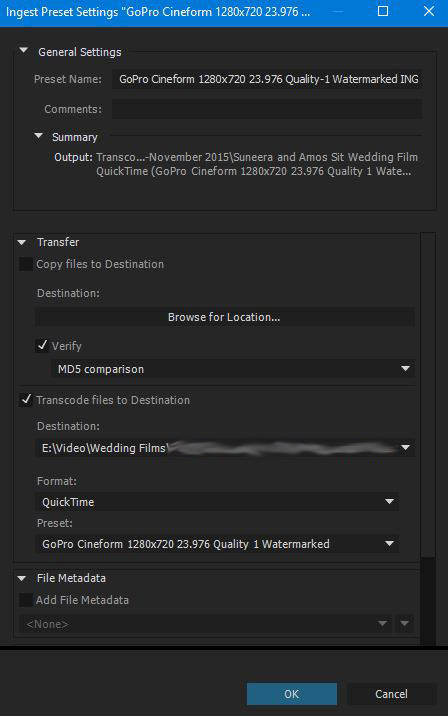
6. For “Destination” navigate to your current video project. Note: It really doesn’t matter where you tell it to navigate to, because when generating Proxies, Premiere will ignore this location and by default put the proxy files generated in the same folder as the native files. For “Format” and “Preset” select the Format and Preset you created as your encoding preset. In my case, it was “Quicktime” and “GoPro Cineform.” Click “Ok” and your Ingest Preset will be saved.

9. Right click on your Ingest Preset in the “Preset Browser” box and select “Reveal Preset File.” Make a note of where the file is in your computer’s file system.
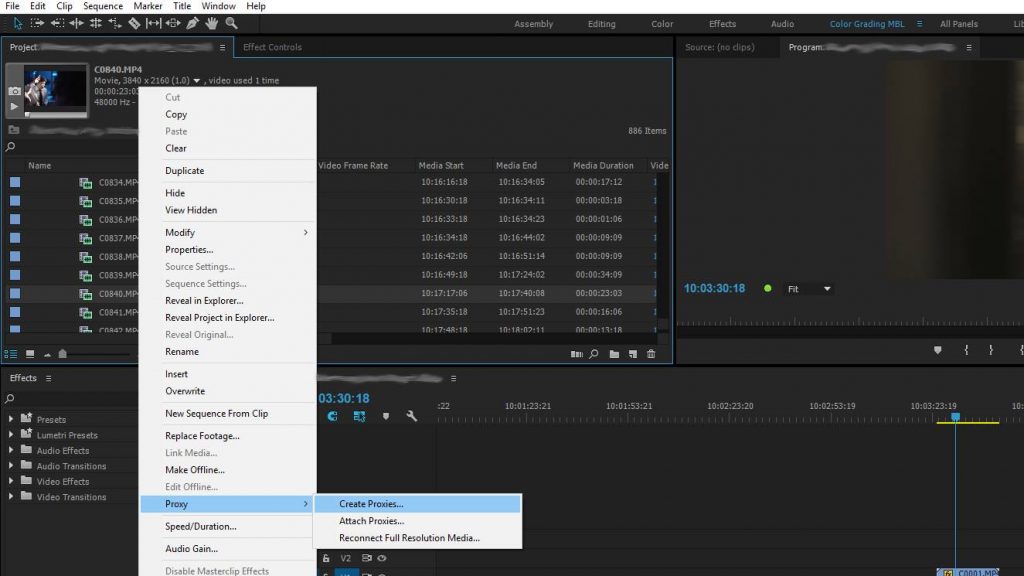
10. Open Premiere CC 2015.3, import your native video files, and in the “Project” window, select your video clips, right-click, and select “Proxy > Create Proxies…”
11. In the “Create Proxies” window, select “Add Ingest Preset” and browse through your file system to the Ingest Preset that you created. Select it and click “Open.”
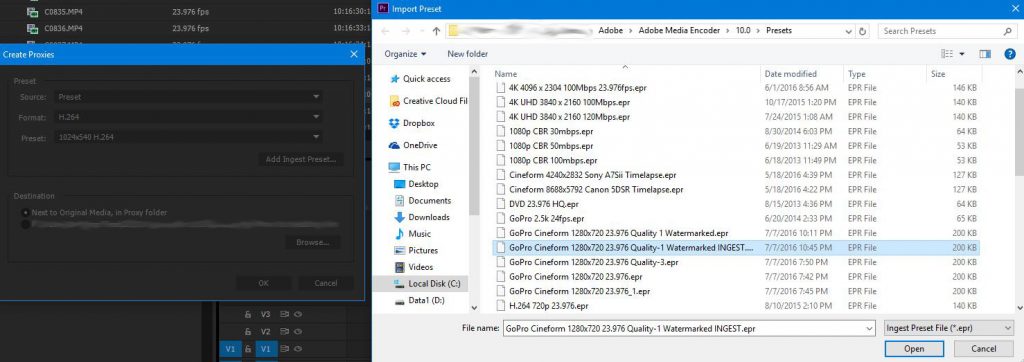
12. The “Format” and “Preset” should now match your ingest preset you created in Adobe Media Encoder. Under “Destination,” select “Next to original media, in Proxy” folder, which will cause Premiere to ignore the destination you set in step 10.
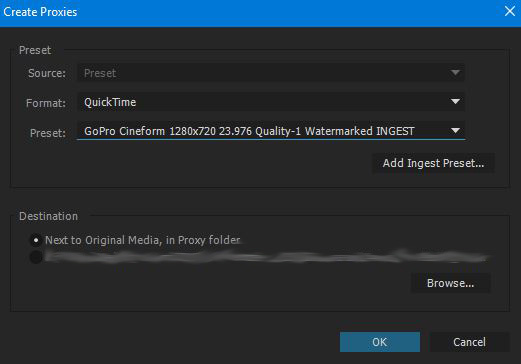
13. Click OK and sit back as Adobe Media Encoder opens up and renders all your proxy clips with the settings AND watermark that you added.
That’s it! Now all it takes is a quick glance to see if you are editing the native video files, or their proxies.
If this video has been helpful to you, you may also enjoy my wedding filmmaking training videos and tutorials. If you have any questions or comments, please do not hesitate to leave one below, or get in touch.