
Today I’m going to show you how to fix an issue that many of you have been emailing me about over the years, where your colors look great in Premiere Pro’s preview window but are washed out when you export the file.
First on Mac, then on PC.
And I’m sure some of you are thinking, wait, Matt, you edit on a PC, how do you know the Mac fix actually works? Because this fix doesn’t come from me, it comes directly from Adobe. Their support page details exactly why your colors are washed out in your exports.
To sum it up: Premiere uses colors meant for broadcast television, while many applications on your Mac use colors that match a different video standard, one that doesn’t have quite as much contrast. Adobe’s article goes into more detail, but the purpose of this is to show you how to fix it, not to tell you why it happens.
How To Apply The LUT
The good news is the fix is simple. Adobe has created a free video LUT you can download that will make your exported videos look exactly the same as your previews. I’ve mirrored it on my site as well, in case it ever gets deleted.
Once you’ve downloaded it, save it somewhere you’ll remember, because you’re going to need it in a minute.
Now open your project, edit it normally, and color grade it normally so it looks great in Premiere’s preview window. Make sure you only apply this LUT after you’ve color graded your film, not before.
With your timeline selected, outlined in blue, press Ctrl+M on PC or Cmd+M on Mac to open the export settings.
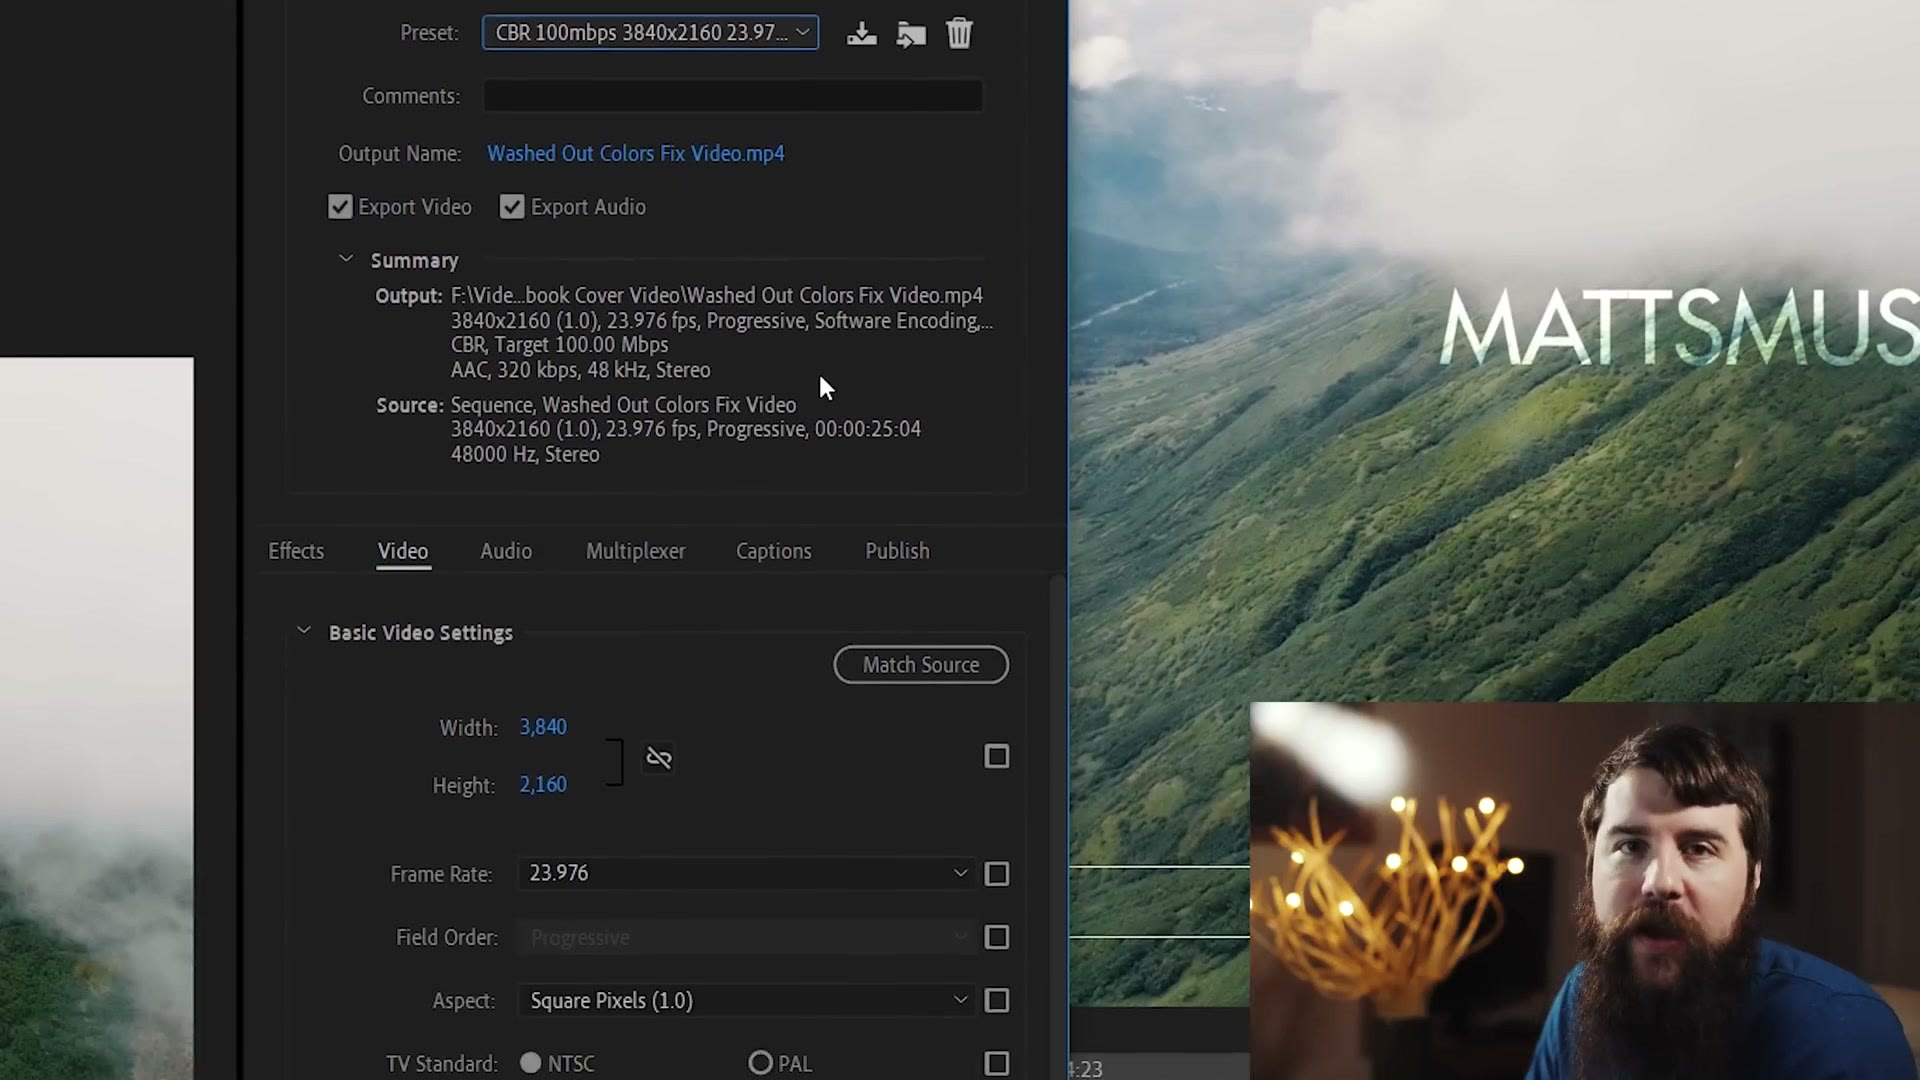
The first thing you’ll see is a lot of settings: where to save the video, resolution, bitrate and so on. If that’s overwhelming, I have a whole playlist on how I export in 1080p and 4K. For speed here I’m just going to pick one of my own presets.
With your export settings selected, it’s time to apply the correction LUT. Go over to the Effects tab, where you’ll see Lumetri Look/LUT. Check that box, and then for Applied, click the dropdown.
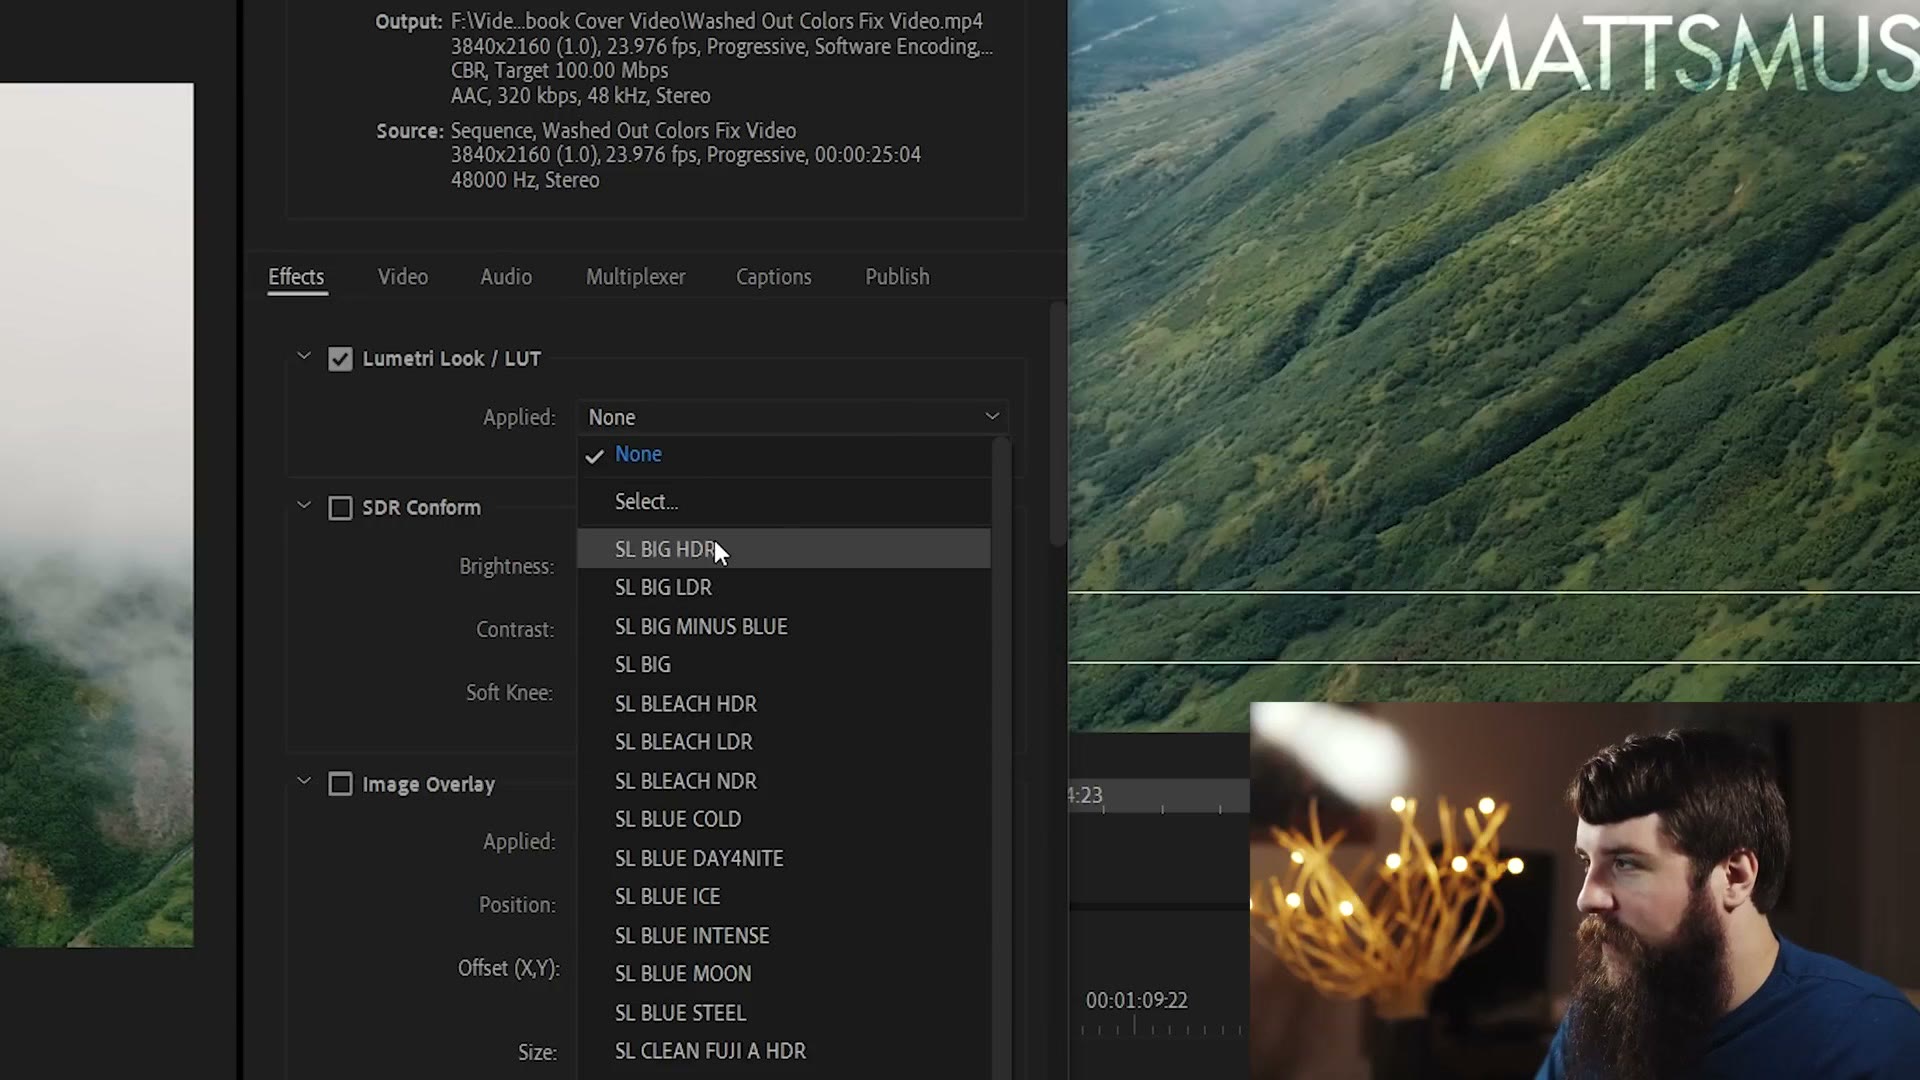
Ignore all of those. You want Select. That opens a file dialog, so navigate to where you saved the correction LUT.
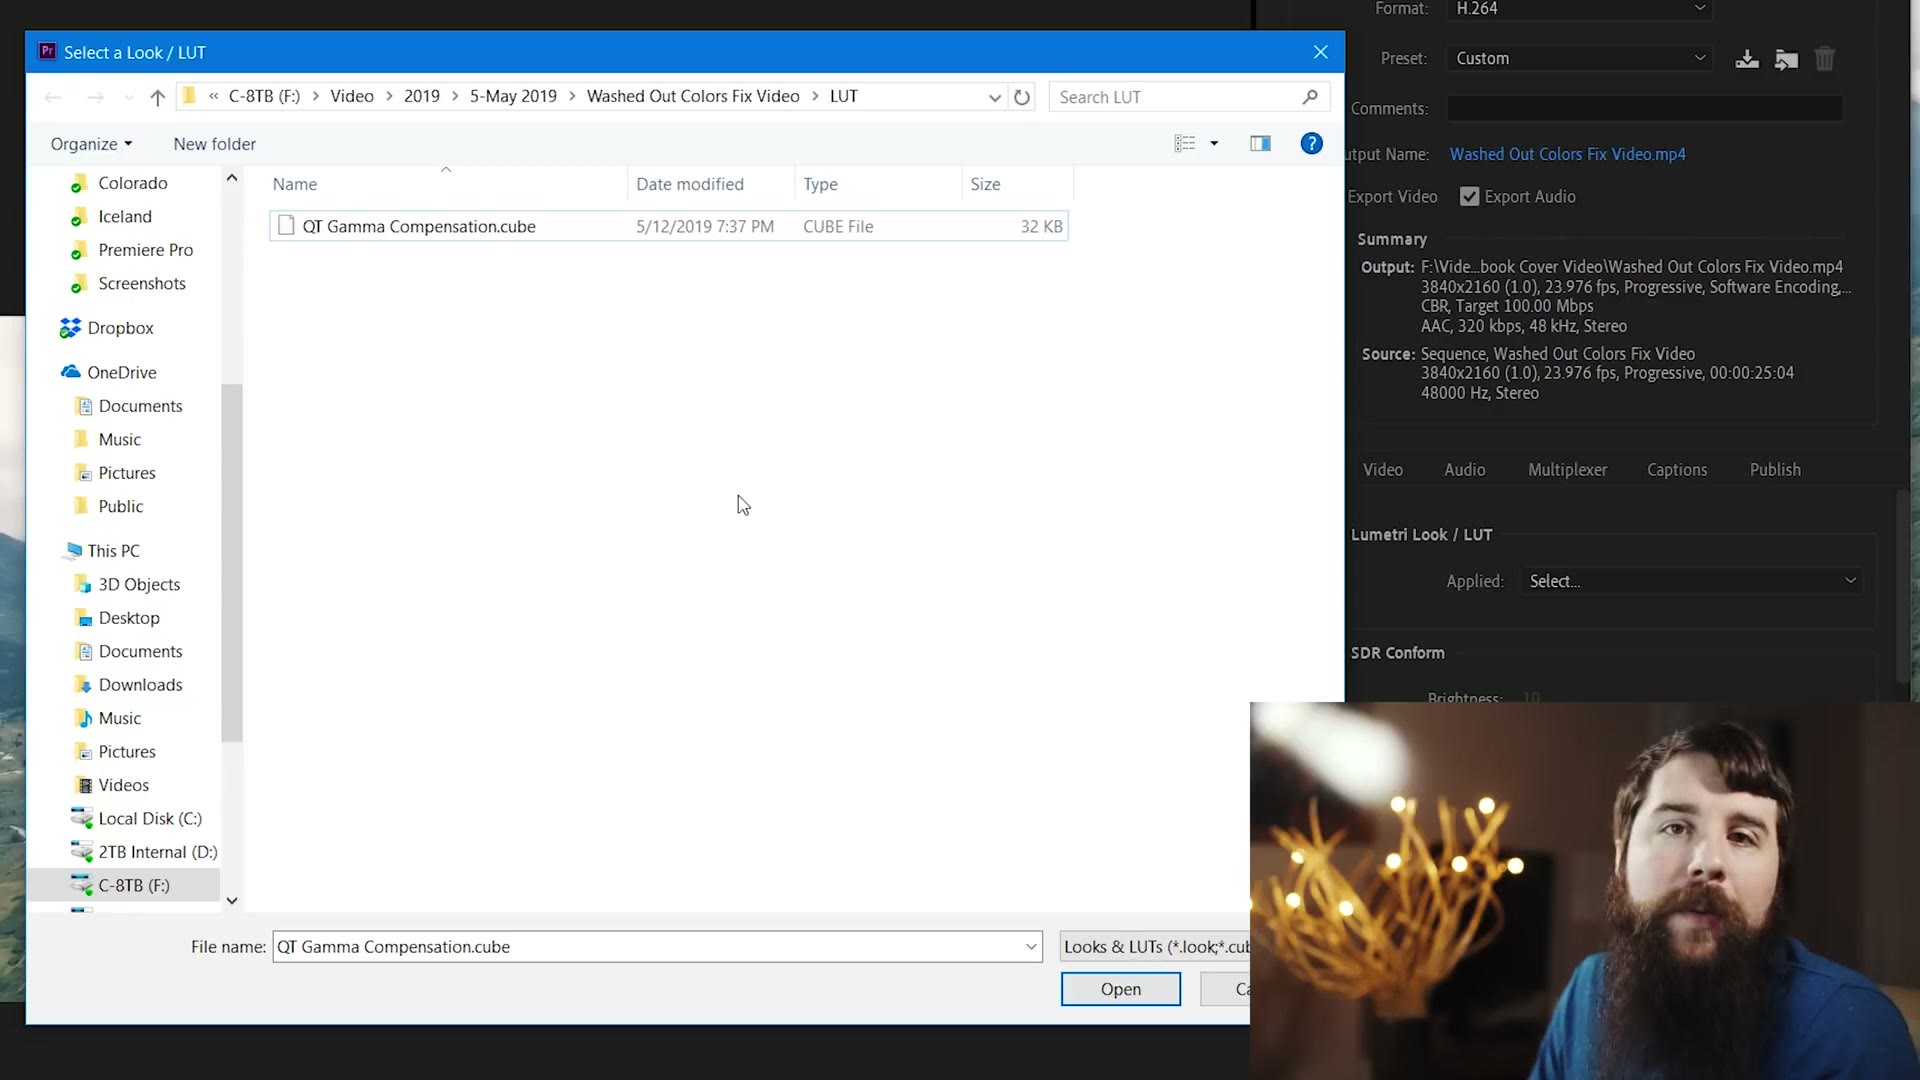
With it selected, click Open. And you’ll see immediately that the footage gets darker, and also that it says None was applied.
Ignore that. Even though it says none, it has applied the LUT. You saw it get darker. It’s just a bug in Adobe. It is working.
At this point you’re ready to export. Select Export at the bottom, or Queue to send it to Adobe Media Encoder. Both give you the exact same video. And don’t worry: because you added this LUT to the export, your exported file should look just as colorful and contrasty as the preview inside Premiere.
How To Fix Washed Out Colors On PC
One big caveat first. I only know how to fix this on PCs with an NVIDIA graphics card, because my computer has an NVIDIA card, I had this issue, and I figured out how to fix it. If you have an AMD card, I’m not even sure you’d be dealing with washed out colors, and if you are, I unfortunately don’t know how to fix it.
The first thing you need is the NVIDIA Control Panel. If your computer doesn’t have it installed, you can get it by going to NVIDIA’s website and downloading the latest drivers. If you don’t know which graphics card you have, download the NVIDIA GeForce Experience app and it will detect your card and install the right drivers and control panel for you.
To open it, go down to the bottom right of your task bar, right-click the NVIDIA settings icon, and select NVIDIA Control Panel.
NVIDIA Control Panel
Once it’s open, go to Adjust Video Color Settings under the Video heading. First, make sure that under “How do you make color adjustments?”, “With the NVIDIA settings” is selected.
Then click the Advanced tab, where you’ll see Dynamic Range.
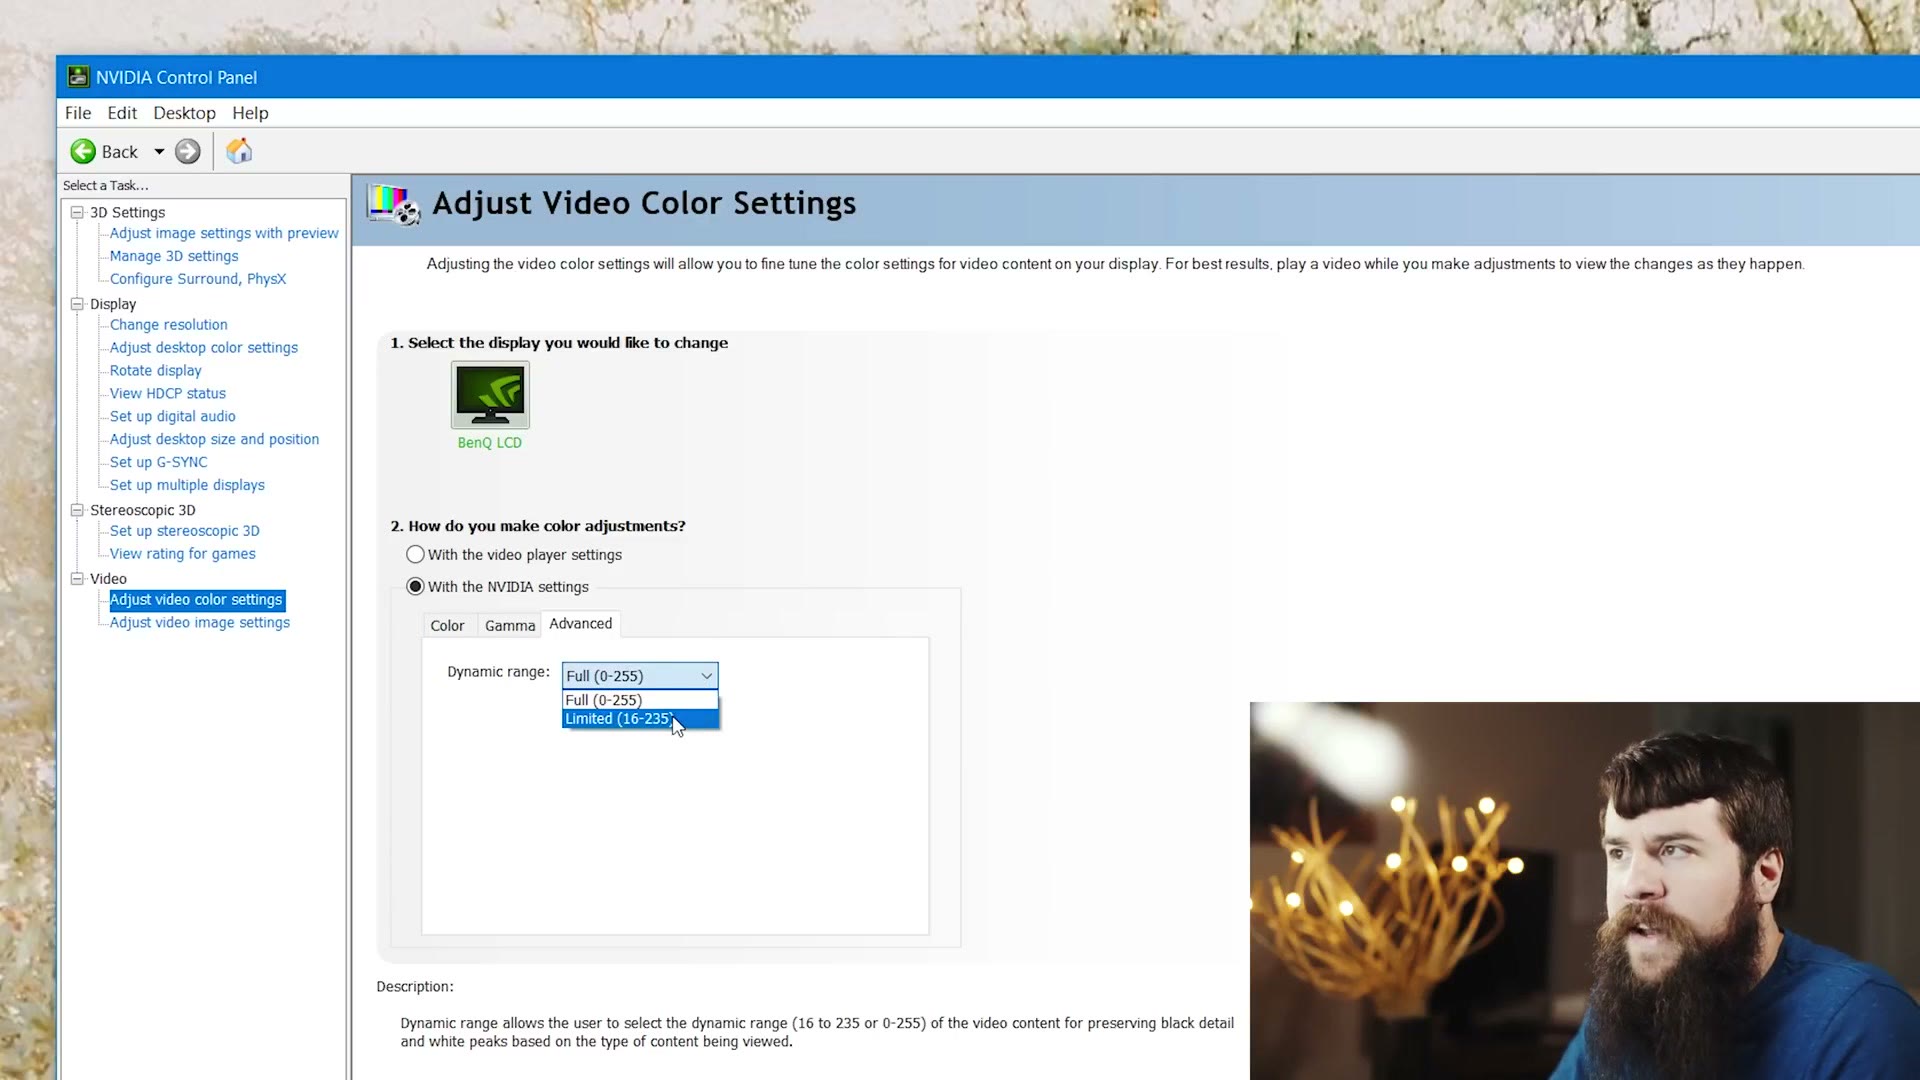
Mine says Full (0-255), which is correct. If yours says Limited (16-235), change it to Full.
The reason is that Adobe Premiere uses full range. It’s showing you the full range of colors and contrast. But if your computer is set to limited, then of course your exports are going to look washed out, because they aren’t showing the full range you’re seeing inside Premiere.
So click Full, then click Apply in the bottom right, and that should give your exported videos the full range of colors.
And that’s how you fix washed out colors on Mac and on PC. If you have a friend struggling with this on either platform, please consider sending this to them.
While we’re on the subject of exports, there’s also how to export 120fps video, which runs into a completely different Premiere limitation. And if you want my whole wedding editing workflow rather than one fix at a time, that’s Wedding Film Framework.
Also, if you happen to be a wedding filmmaker, you probably want to book more couples and film more weddings. To help you out with that I’ve created a free quick tips guide. It’s a completely free gift to you.