
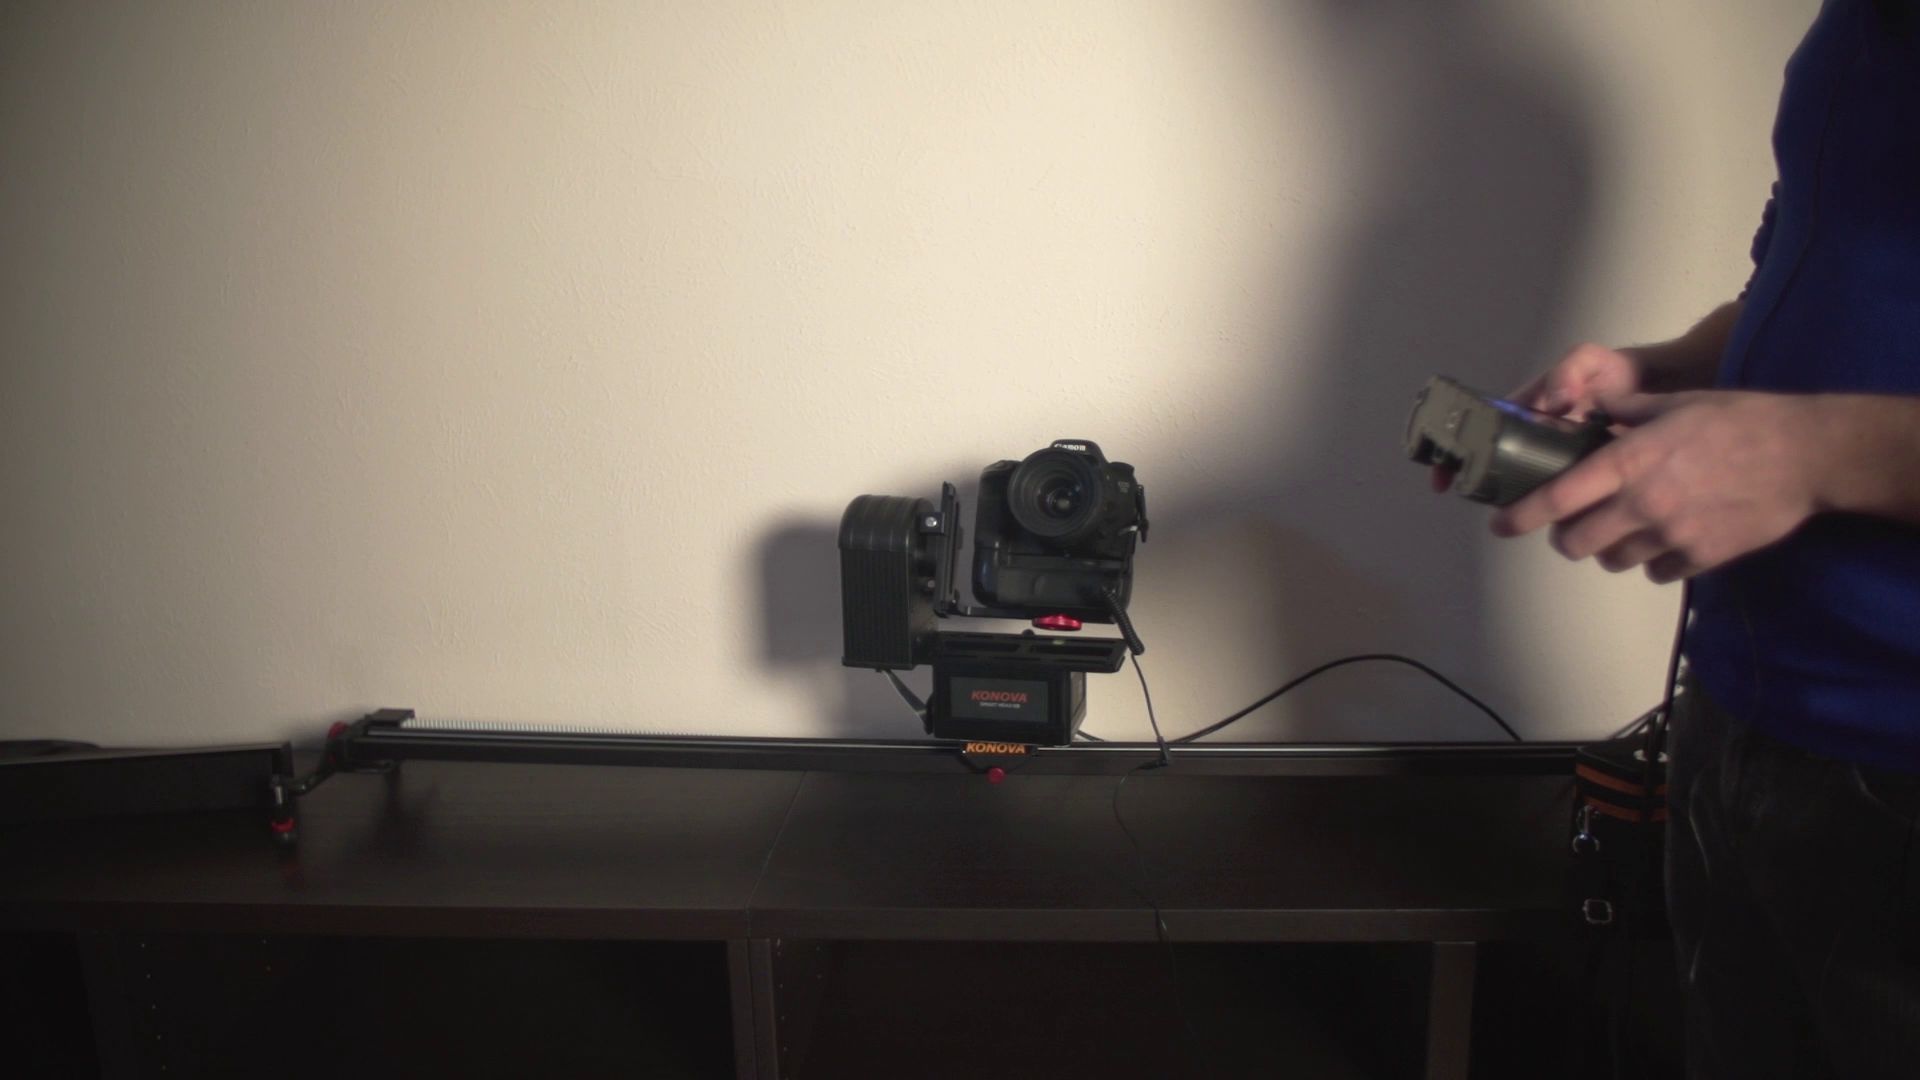
 In the 8 months since I posted my Pagosa timelapse short film, I have become even more obsessed with shooting timelapses. For most of the weddings I film, I now bring along my Konova motion control rig and try to shoot a few timelapses of every venue. It adds an amazing dynamic to the video, and makes for some really unique shots. The setup has been quick and easy, and I can often program it and leave it to run while I film other things. I’ve really begun to wonder how I shot timelapses without it. With that in mind though, I still come across shots and angles where a better perspective is needed than even the slider allows. This is where the Konova Smart Head really shines. Konova sent me one a while back and I have been bringing it along to the weddings I shoot. The Smart Head has been great for adding two extra axes of motion to my current setup.
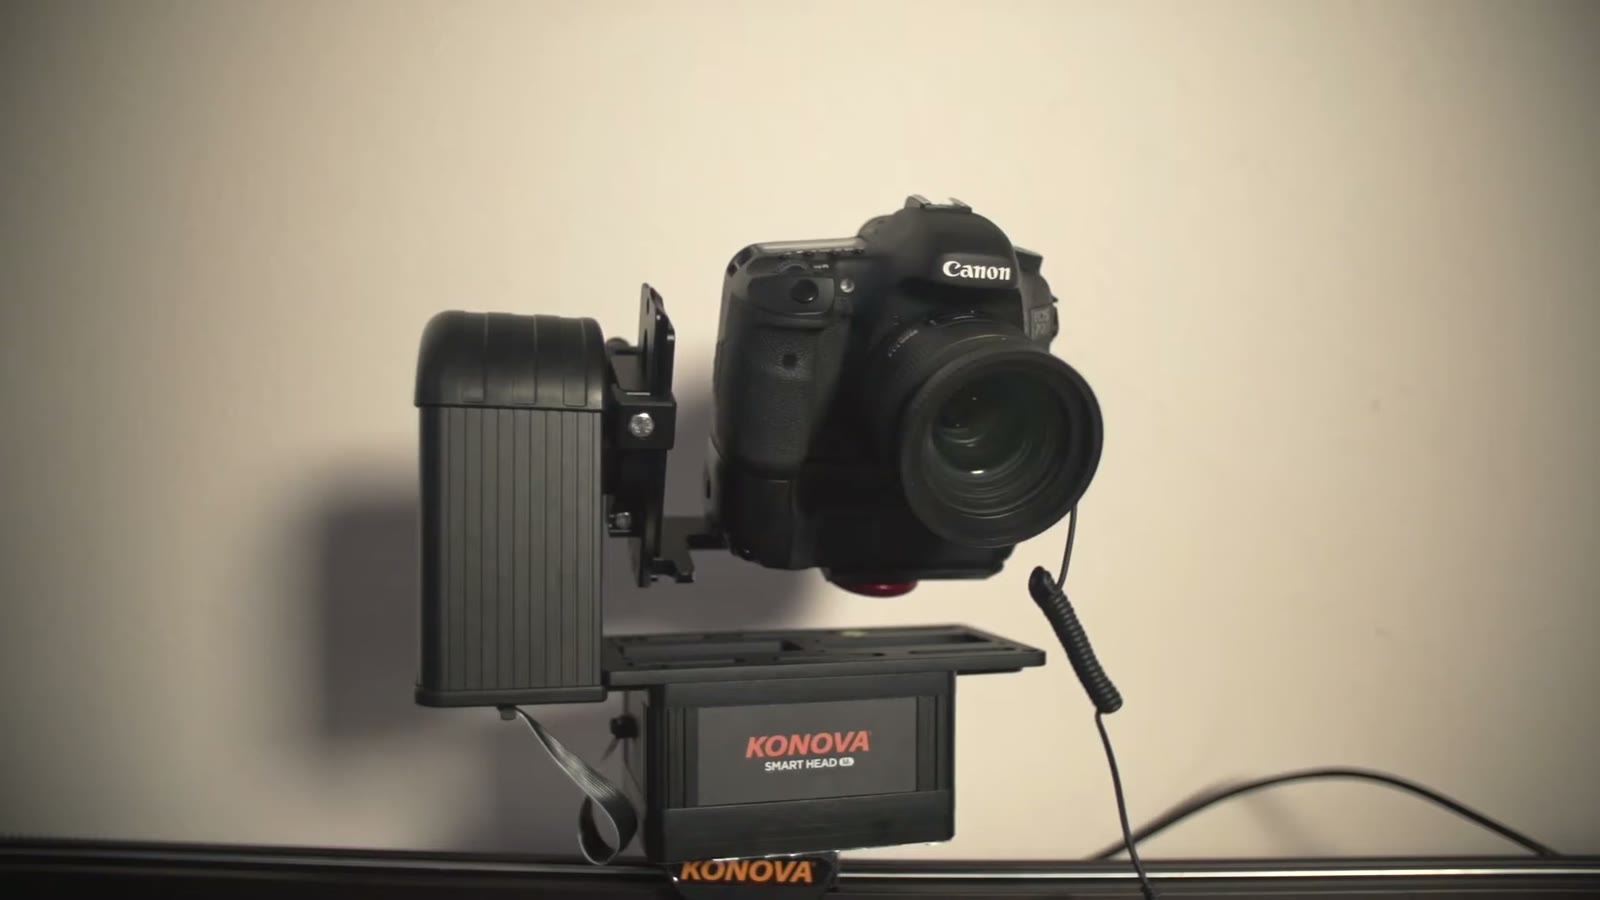
So in this video I’m going to show you how to set the Smart Head up on a tripod for basic panning and tilting, and then how to set it up on a slider rig so you can get pans and tilts while it’s sliding, which should add a lot to your timelapse videos. Let’s go in closer.
Setup: Taking It Apart Before You Put It Together
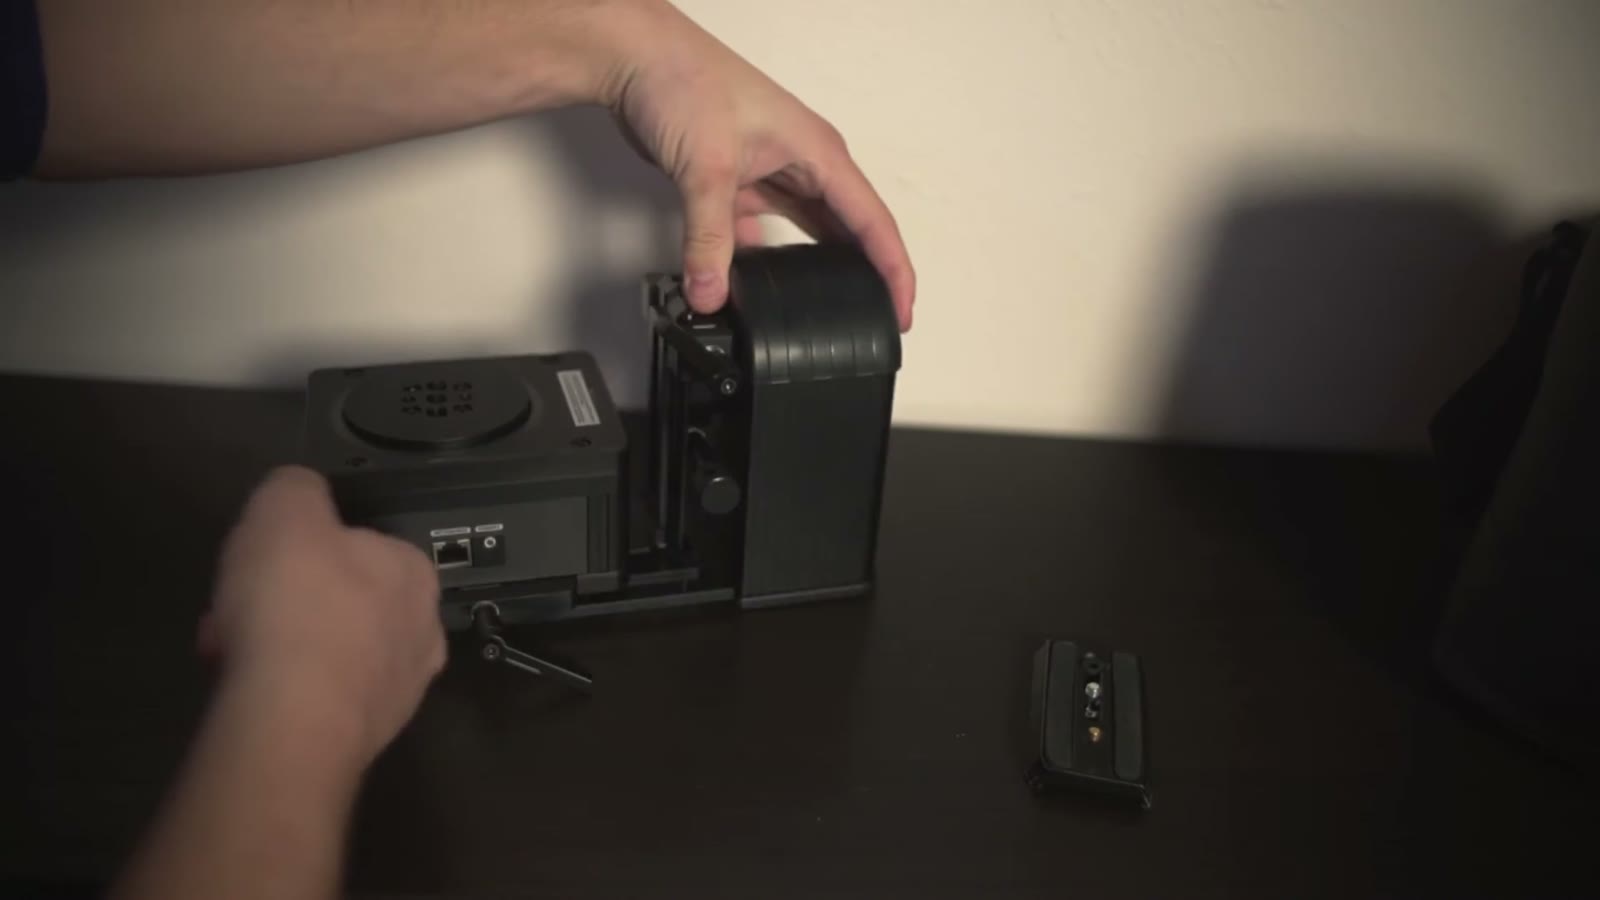
Whenever this first came out of the box I was a little confused, because I didn’t understand how it was all connected and how it should be set up. Reading the instruction manual definitely helps, and so does taking little visual cues, like oh, the logo is upside down, hmm, this probably should be flipped over. But that doesn’t look quite right either.
What I’ve found is easiest is to turn it around so you can see the two levers. Twist the lever about halfway and the whole thing detaches, so you can set that piece to the side. From there it’s much like a Manfrotto sliding tripod plate. Loosen it and give it a good pull. Mine was a little sticky and took a bit to remove, and then the plate separates into two distinct pieces. You can see why it’s difficult to move, because it has rubberized pads on it to hold it in place, which is nice to have but is a definite pain when you’re trying to take it apart.
Three other items should have come in the box with your Smart Head:
- A short data cable, which connects the pan motor to the tilt motor
- A longer Ethernet cable, which runs back to the controller
- A little red screw
Mounting The Pan Motor To The Tilt Motor
The thing to keep in mind whenever you’re mounting these together is that they have to be connected by that little data cable. So look at the ports. One side has the tilt block plug, and the bottom of the other has a tilt block plug too. Mount it so that side matches up with that side, both plugs on the same side, and it just slides right in, much like a Manfrotto tripod plate would. Pretty cool.
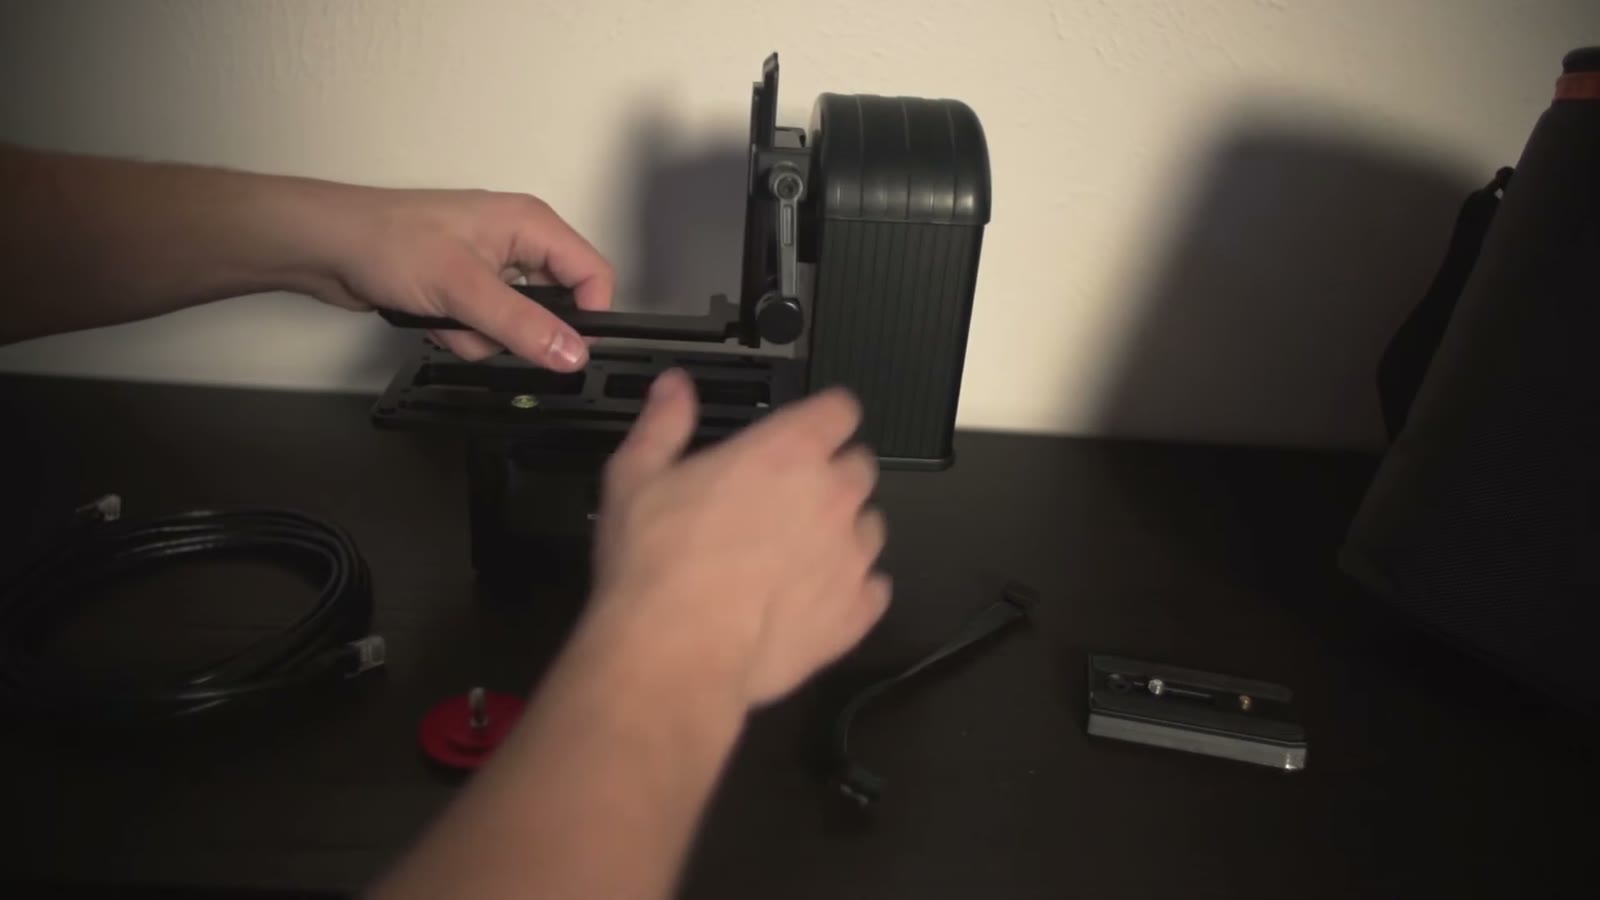
Slide it into place, rotate it around, lock it down, and make sure it isn’t angled up or anything like that where it might interfere with the pan and tilt. Then take the little piece that was holding the pan motor and slide it down into place, about that far. It really doesn’t matter exactly how far.
Here’s the one that will bite you. Whenever you lock that down, make sure the little tightening arm is not pointed at any angle toward the tilt motor. Because what will happen, and you can see it as soon as you loosen the piece and tilt, is that it’s going to swing up and hit. Keep it at a vertical angle instead, up or down or off to the side, basically anywhere that isn’t on that side. Do that and it rotates freely. How cool.
Now attach the data cable connecting the pan motor to the tilt motor. Move it over on its side, plug one end directly in here, the other end directly in there, and those two are talking to each other. You’ll have a little cord just hanging there, and that’s okay, just don’t pull on it.
You’re also going to need a way to mount your camera to the plate. They include one, but what I’d really recommend, and what I’m planning on doing in the future, is getting another quick release plate and mounting that onto it, so this thing works with all the rest of my camera support gear. Since we don’t have that here, I’ll show you how the included one works. There are three grooves in the plate, and the little screw attachment goes in right at the end. Start to twist it and you’ll notice the ends are slightly wider and are made to let it rotate up into position. Once it’s seated you can slide it around to where you want it.
Mounting To The Tripod
On the bottom of the Smart Head there are different tripod mounts for different sizes. I’m using a Manfrotto quick release plate here, and I’d definitely recommend tightening it down with a screwdriver of some sort. Once that’s done you’re ready to mount. Slide it onto the tripod, lock it into place, and rotate the whole thing around so you can see it in all its glory. This looks pretty cool, I’ve got to say. I feel like it’s some sort of robotic monster, and that’s kind of neat.
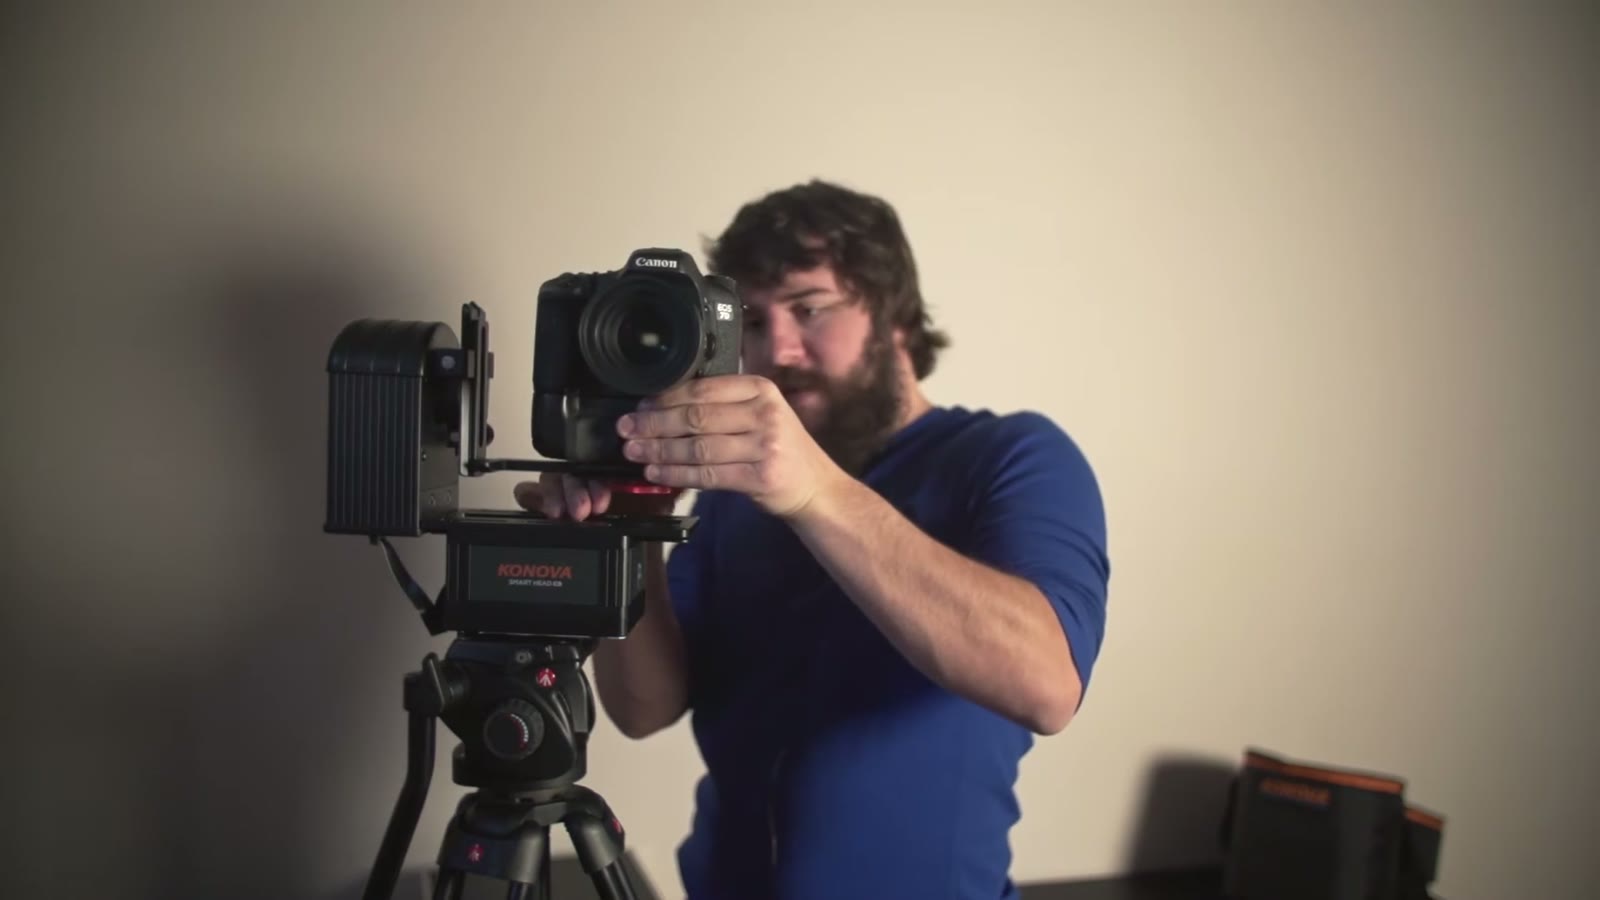
Now mount the camera. The first thing to keep in mind is that the camera has to face the proper direction, so that the Smart Head understands which way is up. Otherwise it’ll try to tilt down whenever you told it to tilt up and it’ll be confused. The front of the unit is this way around. Loosen it, rotate it all the way around, and now the front is facing you. From there it’s like mounting anything to any tripod you’ve ever used in your life, hopefully. Screw your camera in and it’s mounted.
The nice thing is that you can then adjust it. Loosen it slightly and slide the camera closer or farther away, or off to the side if you need to get at your memory cards, which is really helpful.
Plugging In The Smart Motion Controller
I’m going to assume you’ve already watched my Konova Smart Motion Controller setup tutorial and review, where I show how to get everything plugged in, how to use it, and what I think of it. Watch that one first, because I’m skipping past that setup so we can get straight to using the Smart Head with it.
The only genuinely new piece of equipment you need with the Smart Head is the Ethernet cable, and I’m sure this would work with any other cable, because it’s just a basic Cat 5 patch cable. You can literally walk into any computer store and buy a shorter one or a longer one depending on what you want. So if you want the controller sitting a long way away from the rig, you can absolutely make that happen.
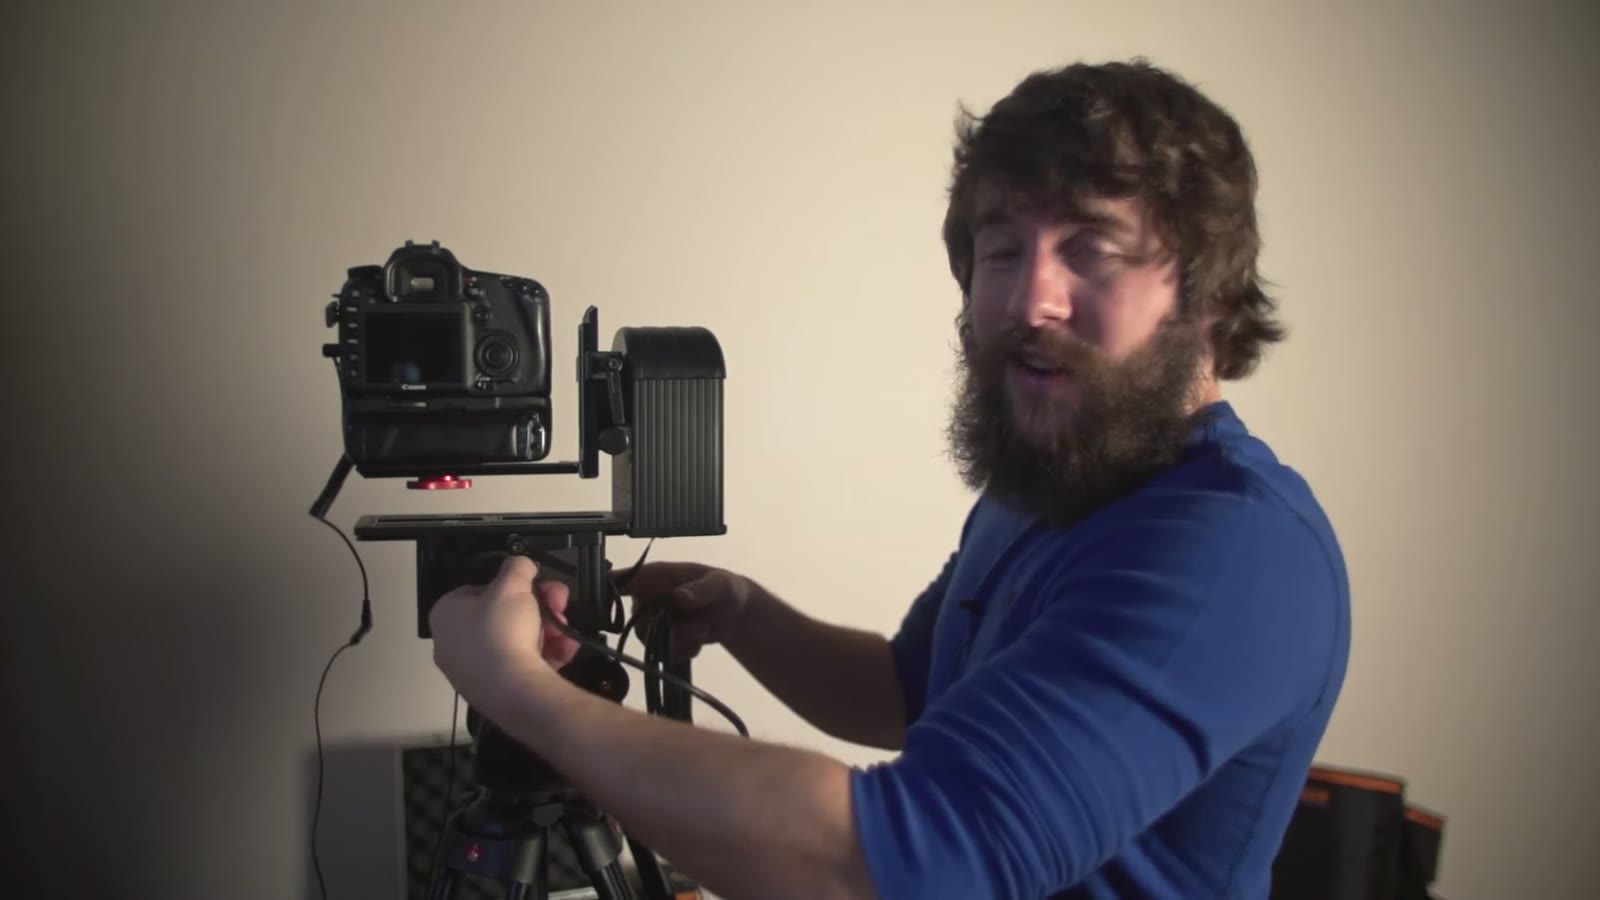
Only two things actually run into the Smart Head. One is the camera cord, the other is the controller’s Ethernet cable. Plug the little camera plug in first, then the Ethernet, which if you have ever used a computer you already know how to do. Good job. The other end of the Ethernet goes into the controller port.
The genuinely cool thing here is that the one data cable handles both jobs. It carries the instructions from the controller and it tells the camera how many photos to take. So you’re not running a camera cord plus a separate connection cord. It’s all one cord.
Go into pan and tilt move and you can drive it around right now. Left and right rotates it like this, up and down rotates the camera. And you can combine them, so you can be tilting down while it pans. Pretty sweet.
The Settings Menu
Power it on by holding the power and enter key. Your basic menus are Time Lapse, Live Motion, and Settings.
Start in Settings, where you’ll find pan and tilt direction. You can set pan and tilt to either normal or reverse depending on which way your camera is facing. So if you absolutely have to have the camera pointed the other way because of the space you’re working in, go into settings, flip it to reverse, and it does everything backwards. Very helpful.
Live Motion has four options: slide move, pan and tilt move, pan and tilt plus slide, and auto move. You’ve already seen slide move if you watched the controller video. Under pan and tilt move you get a pan speed, a tilt speed, and something labeled RF. I’m assuming that stands for something like rate falloff. Set your pan speed wherever you want, mine is at 100, and use it whenever you need to rotate the rig into position before you start.
RF is essentially a slowdown effect. Whenever you let off the joystick, instead of the head panning and then just stopping dead, it pans and then eases down before it stops. That is really helpful if you’re using this for live video rather than timelapse, because you get a gentle acceleration and a gentle slowdown instead of a hard start and stop.
Pan and tilt plus slide gives you all of it at once: slider speed, RF for how quickly it comes to a stop, pan speed, and tilt speed. Mine are both at 100 percent. Hit enter and you can drive the whole thing left or right.
Time Lapse: Cut Angle, Total Cut, And Delay Cut
This is the one I’m sure you’re all here for. Start at the bottom of the timelapse menu with the tilt motor settings.
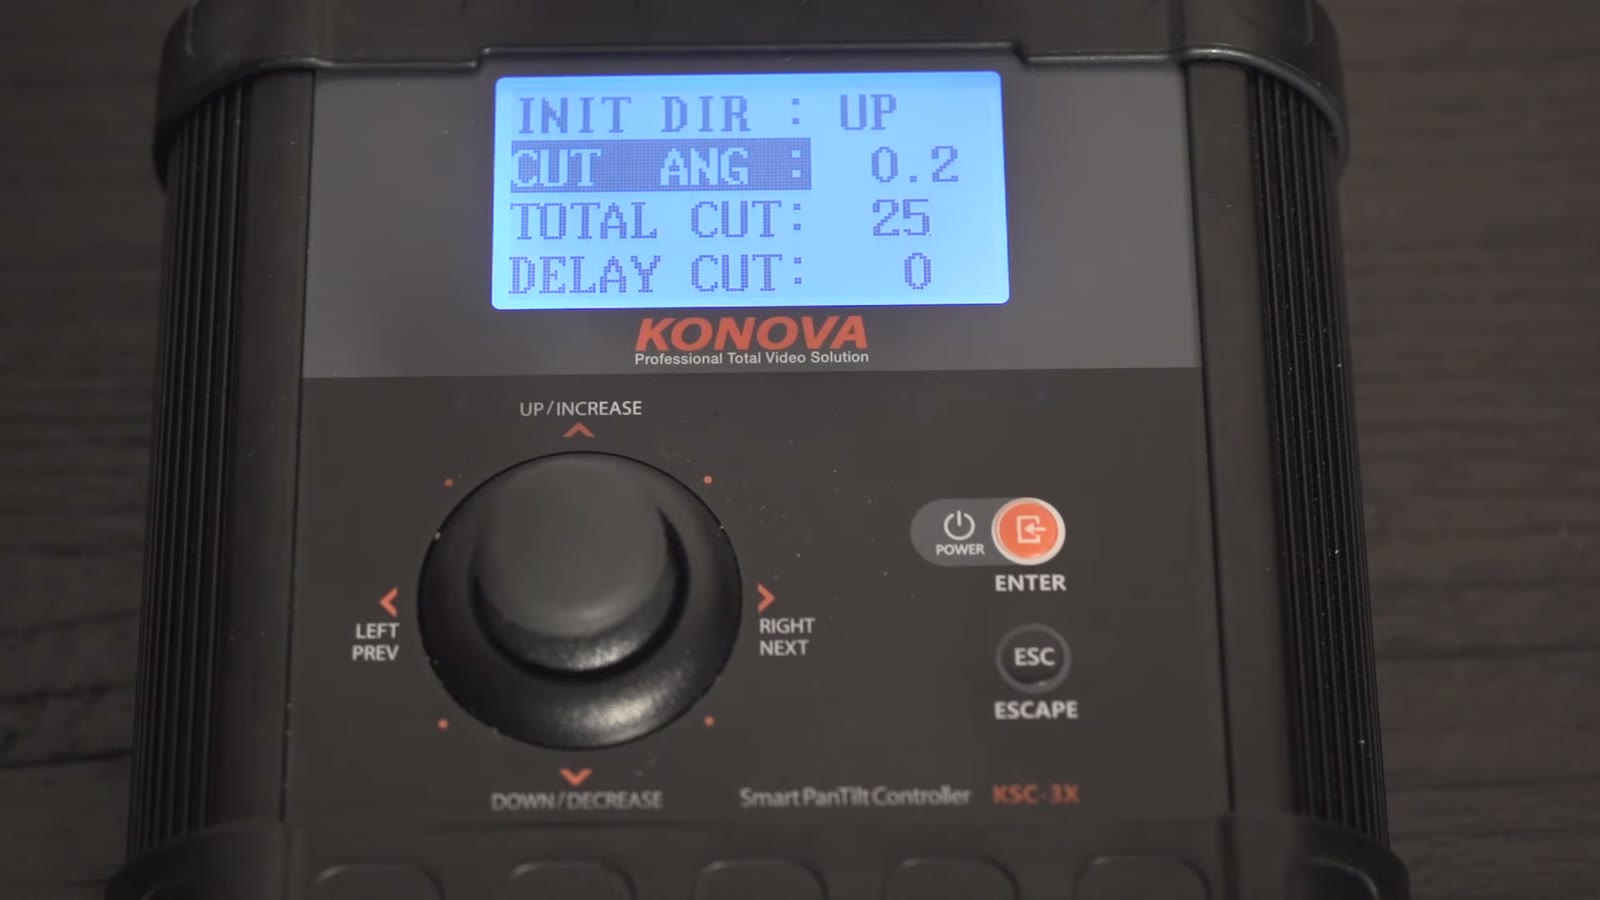
- Initial direction, which here is up. Pretty straightforward.
- Cut angle, which is how much of an angle you want it to move per photo. I’m fairly sure this is in degrees. Mine is currently set to move 0.2 degrees per photo, and you can set it anywhere from 0.2 up to a full degree.
- Total cut, which is total photos. Remember we’re in the tilt settings, so this is saying that while it’s tilting up, I want it to take 25 photos.
- Delay cut, which is how many photos it takes before this motor starts moving at all.
Delay is where this gets a little complicated, but I swear once it clicks you’ll think this is actually incredibly informative and easy to use. So let’s look at the pan settings, which look exactly the same.
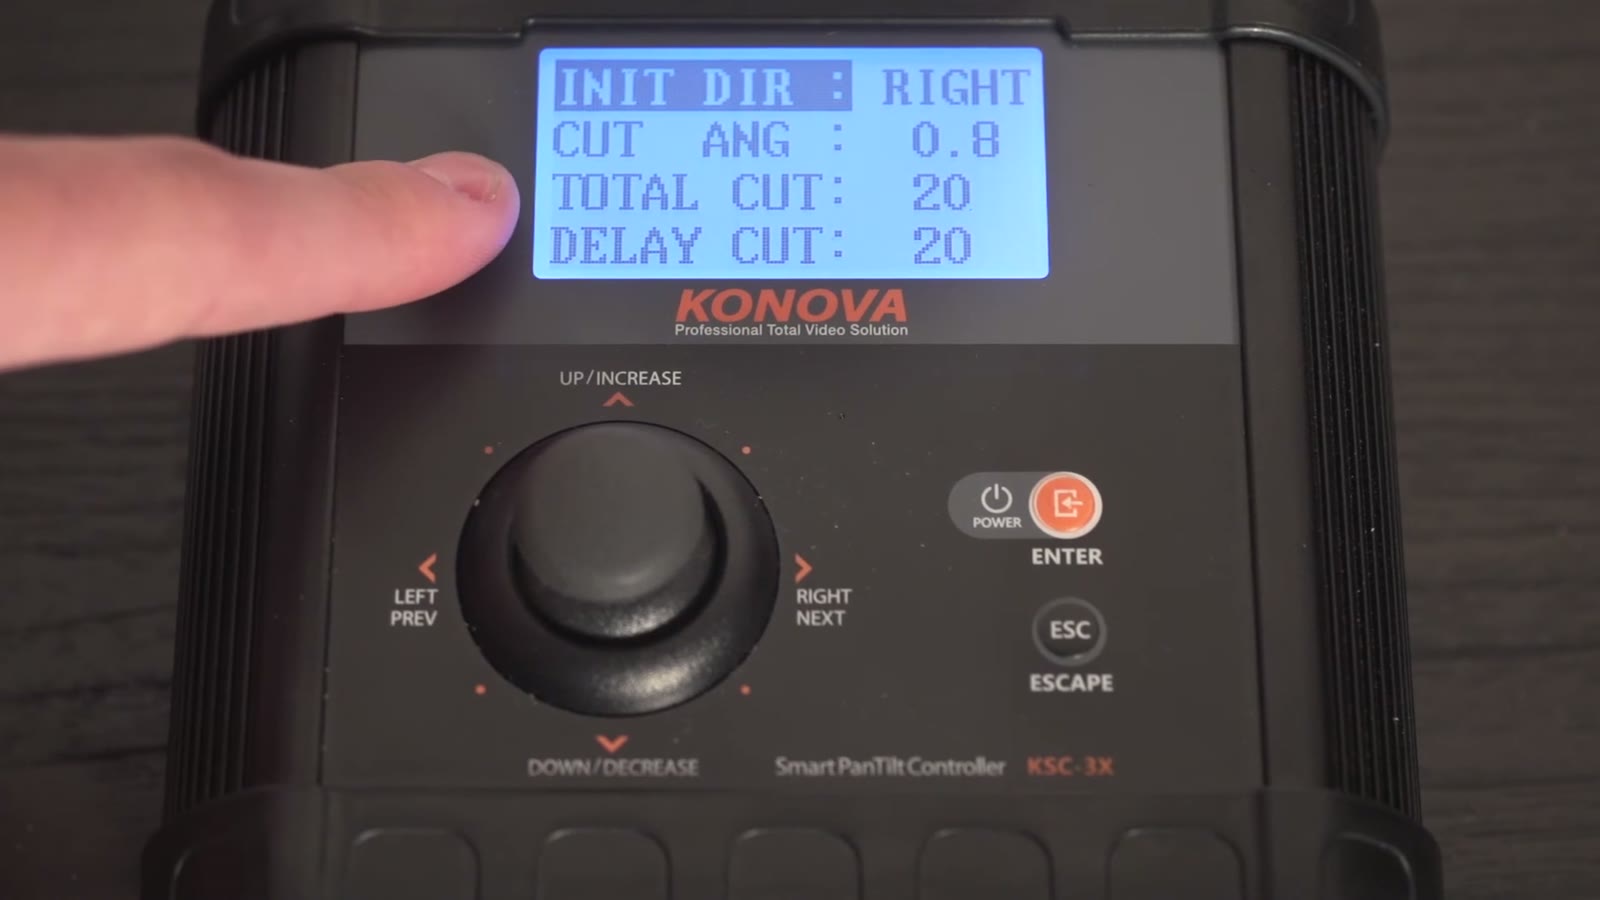
Initial direction is right. Cut angle is 0.8 degrees per photo. Total cut is 20, and delay cut is 20. So what that means is I want it to take 20 photos while panning to the right, but I want it to wait for 20 photos before it starts panning at all.
Now put the two together. The tilt motor has delay zero and total 25, so it starts tilting up immediately as soon as I hit start and it tilts for 25 photos. The pan motor has delay 20, so once 20 photos have gone by, the pan motor kicks in and pans right for its own 20 photos. Total, the rig is going to shoot 45 photos: some of them tilting up, some of them panning right, and an overlap in the middle where it’s doing both.
Say you’re following something that’s moving up and to the right, like the moon. That’s how you tell the rig to follow it. Play around with it and you’ll get it. It really isn’t that complicated, and it lets you preset some really, really cool movement.
Camera Settings
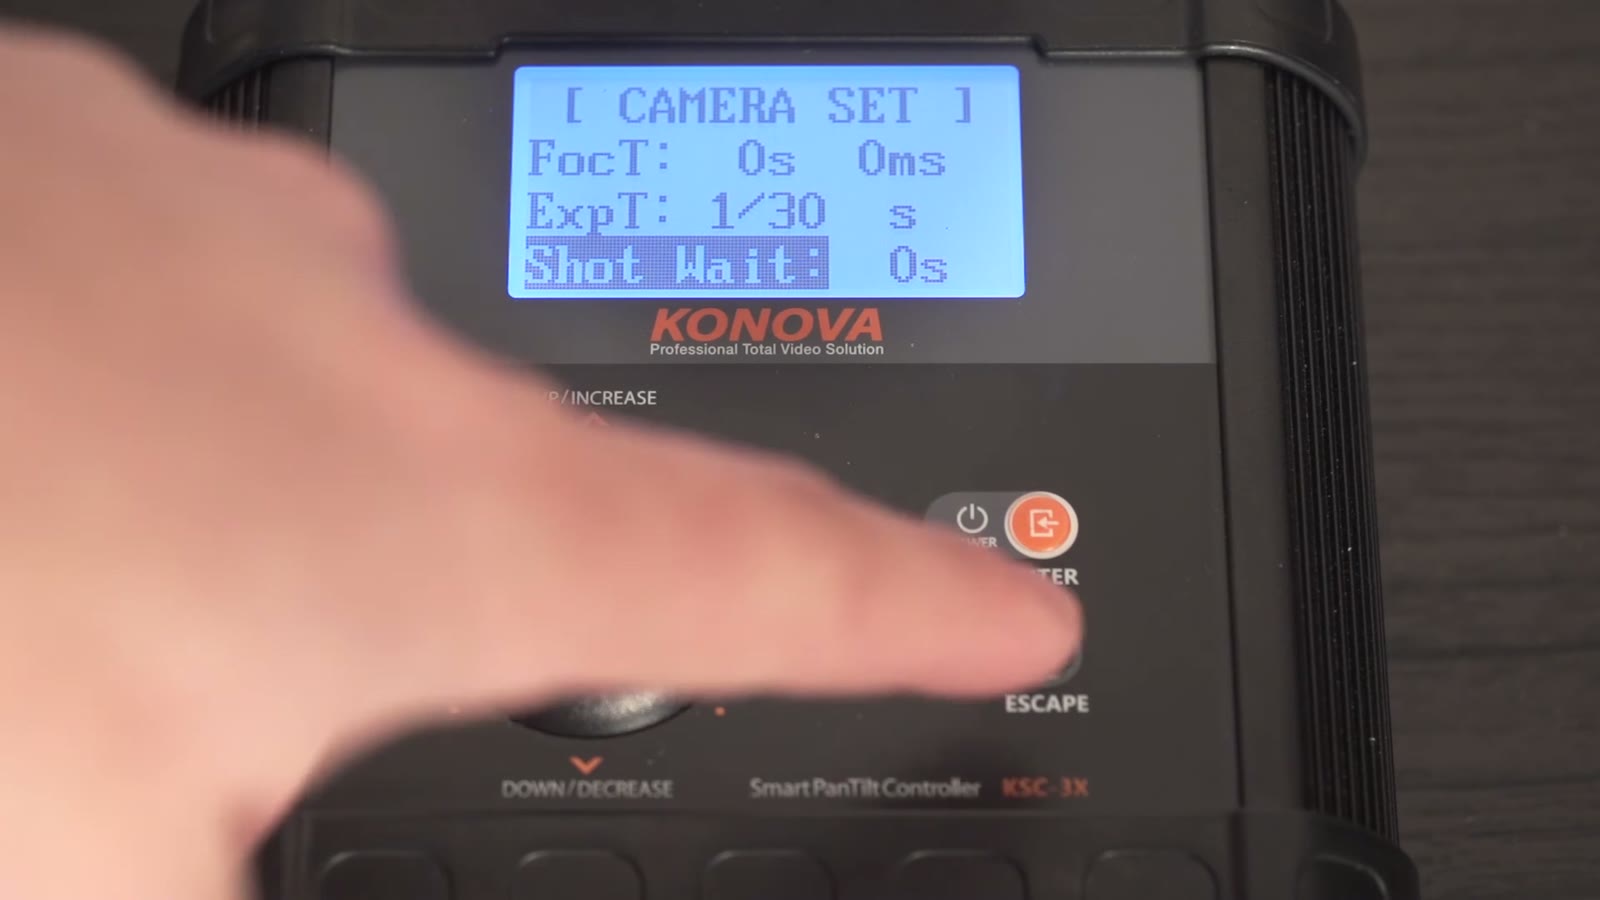
Camera settings are pretty darn standard, and we covered these before. Focus time you can leave at zero, because for a timelapse you shouldn’t be autofocusing anyway, you should be manually focused. Exposure time tops out at a thirtieth of a second on the fast end, but you can slow it way, way down, into tons of seconds if you want. I’m leaving it at a thirtieth because this is daytime. Shot wait is how long to wait between photos, which is where you’d set a global buffer if your camera needs time to write to the memory card.
Then interval move, where you set left or right movement. This is the slider setting, so if you’re on a tripod you can just leave it at 1 and it’ll ignore it. If you’re on a slider, this is where you tell it how many millimeters to move per shot.
Total frames is a different number from the total cut and delay cut in the motor settings. Frames are also called cuts, I guess, which is confusing, but this one is your overall total for the whole timelapse. Mine is at 942 because that’s a very high number and I’m planning to come stop it manually before it gets there. That’s actually a nice way to work if you have to go do something and just want the rig running until you get back. Set it high and don’t worry about it.
Just make sure this number is always larger than your total cuts and delay cuts, or it’ll stop your timelapse before the motors finish their moves. Interval time on mine is set to 2 seconds, so the camera has enough time to write to the card, and 2 seconds is about right if I want to catch clouds moving.
Then you just hit start.
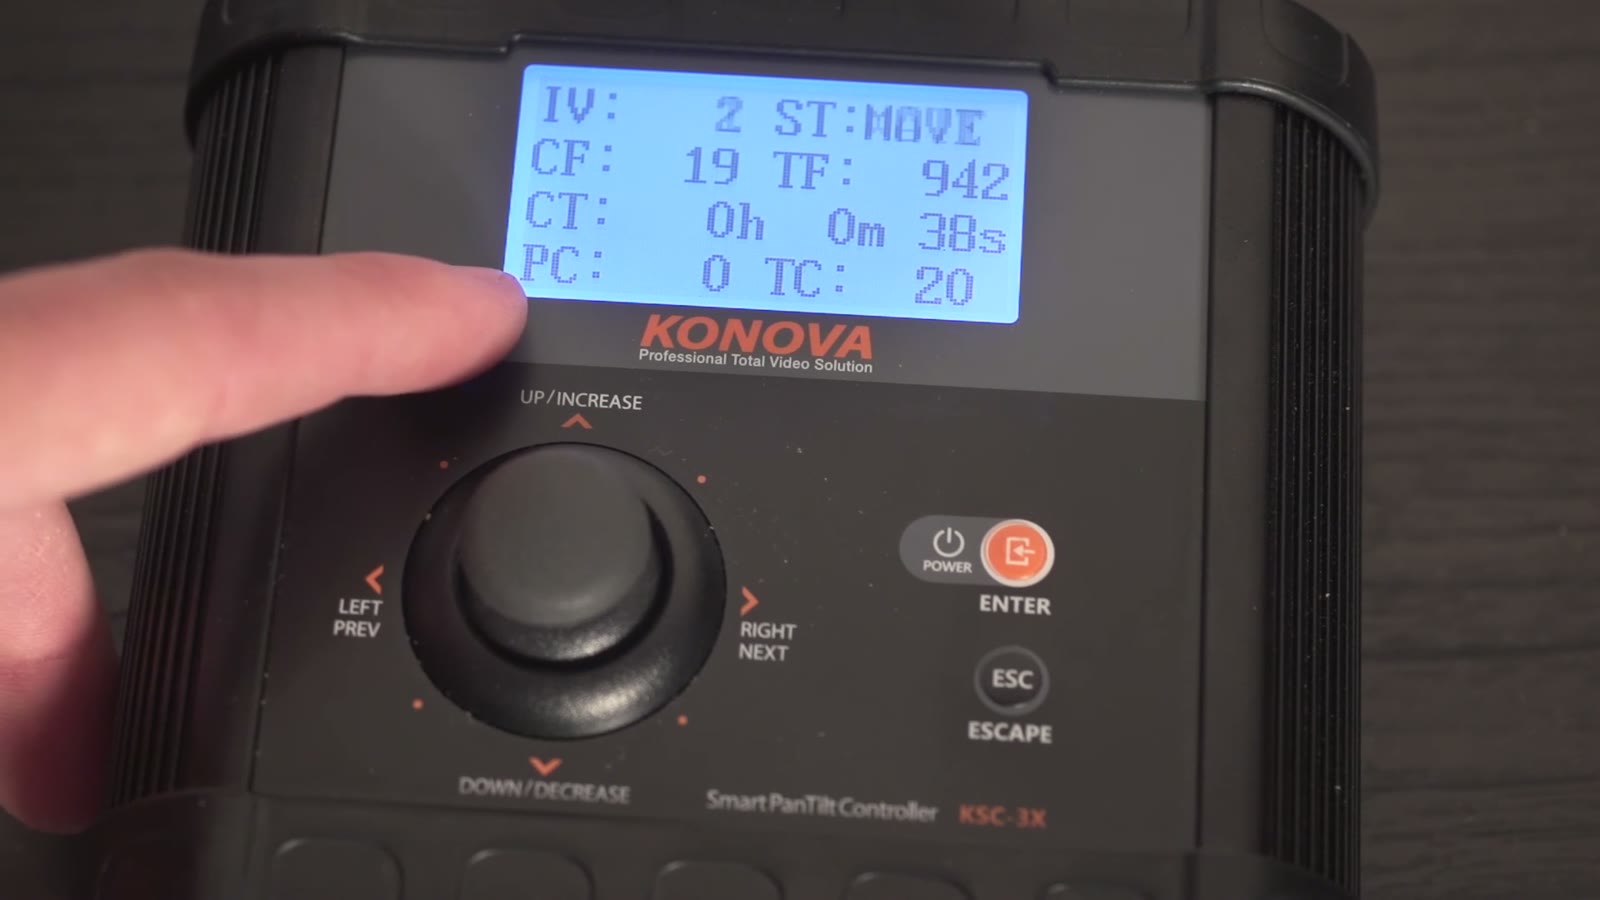
The display gives you a countdown. IV is interval time, ST tells you whether the motor is moving or waiting, and it’ll flip between move and wait pretty quickly. It’s showing me it has captured 10 frames out of 942, capture time so far is 26 seconds, and it has taken 17 tilt photos and zero pan photos. And then watch, once it hits 20, the pan capture number starts climbing, because that’s exactly how we set it up. It’ll run out to 25 and be done.
Putting It On The Slider
Here’s the slider rig, and we’re going to mount the Smart Motion Controller directly onto it. On the bottom of the controller there are three really big screw holes, so pick the middle one, put it on, and rotate it until it’s snug. It’s a little easier to do this if you don’t have a camera mounted yet, but I left mine on and we’re already committed at this point, so, yes.
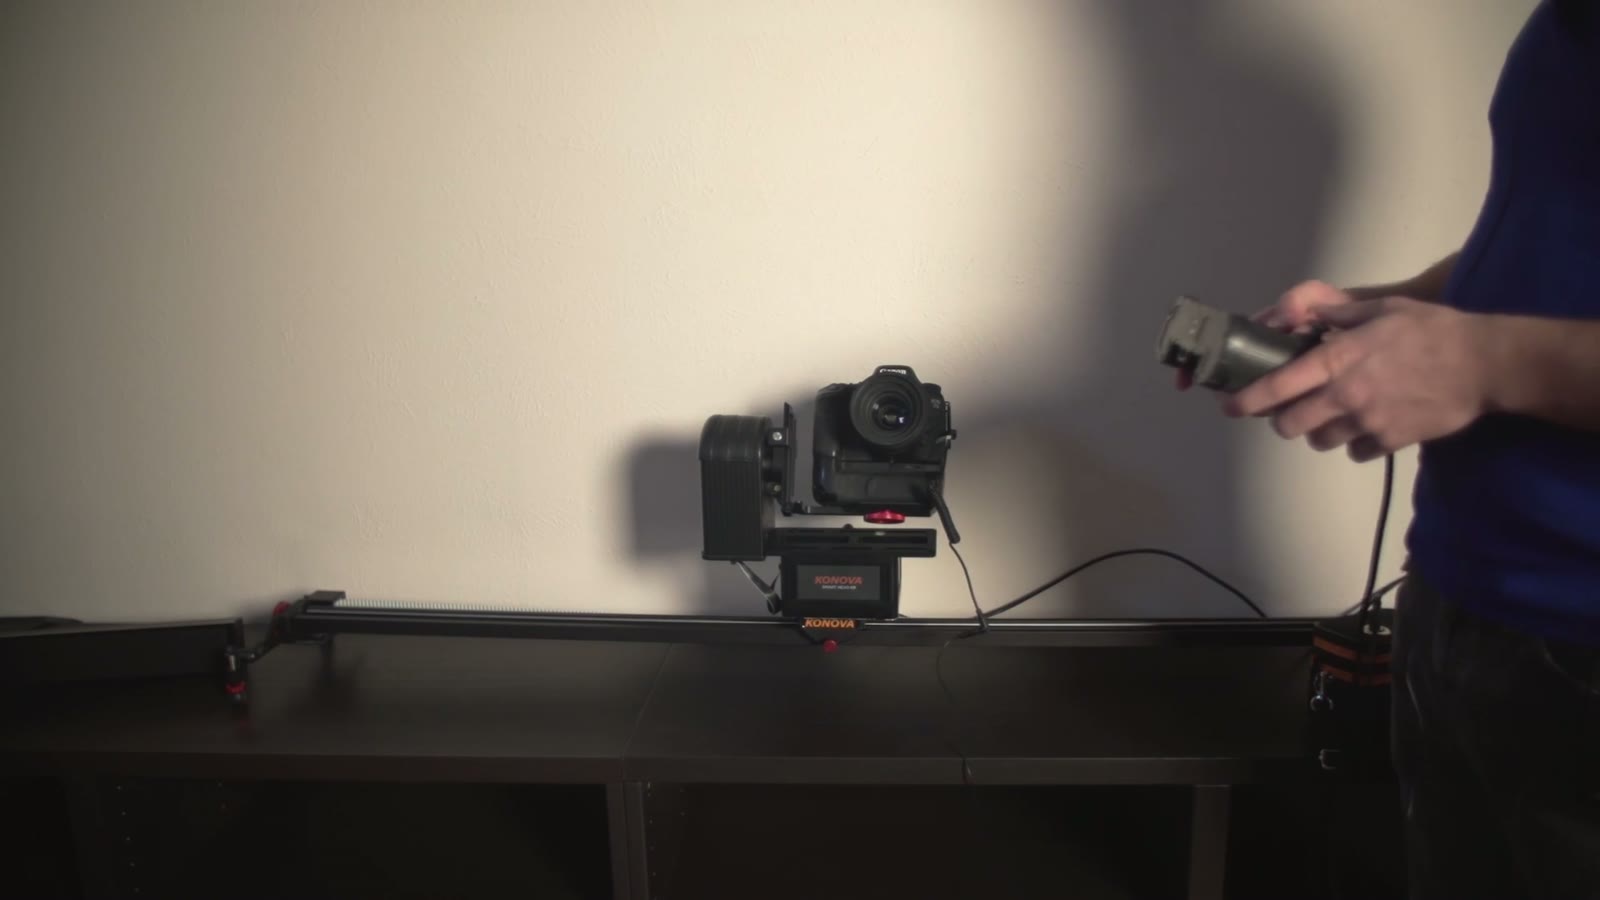
Plug the motor into the slider and everything is connected. Do a slider move and it runs back and forth so you can get into position, and you can still go into the pan and tilt settings and rotate from there. Once you understand the basics of it, you’re able to do some really cool stuff.
Why This Rig Works So Well Together
The best part about the Smart Head, aside from letting you pan and tilt during a timelapse, is how it integrates with the other Konova products. It was purpose built to mount to my slider, so it all works in harmony.
That’s ideal for cinematographers who build their equipment up over time. You can start with a slider, add a motion control rig to it, and later add the Smart Head. I can expand further if I buy one of the Konova slider jibs. And if you didn’t want to buy a slider first, you could just get the Smart Head and the Smart Motion Controller and run those together on a tripod for great results.
All that expandability has been great for my business, because I’ve had people start hiring me specifically because I have a motion controlled timelapse rig now. It isn’t financially feasible to spend a lot of money and buy everything at once, but the ability to expand and upgrade exactly when I want to is great.
The Konova Smart Head is a great choice, especially if you already own a Konova slider and Smart Motion Controller. NAB is coming up in a few months and I’m excited to see what video equipment Konova releases next. I’m sure it’ll be great and integrate well with my current rig. I’m still learning this gear, but I have high hopes for it, and I fully intend to be a timelapse fanatic and do this all the time.
As always, I am not being paid by Konova for any of this, but they did send me the Smart Head for testing and review purposes.
The Rest Of The Konova Rig
- Unboxing the Konova Smart Head, which is the video that came right before this one
- The Konova Pan Tilt Controller setup tutorial and review, which you should watch before this one
- Konova K3B2 slider review
- The Konova MS Series motorized system setup tutorial and review
Timelapse Films Shot With This Rig
- Pagosa // A timelapse of the Colorado wildfires
- Ozarks // A timelapse film of the Big Buffalo Valley in Arkansas
- Hawaii // A timelapse film of Mark Twain’s favorite islands
Interested in having me film a review of your company’s gear? Please contact me!
A note on timing: this was filmed in January 2014. The controller firmware, the menu labels, and Konova’s product lineup have all moved on since then, so treat the specific screens here as a snapshot of that era rather than current documentation.