
If you’ve been using the free version of DaVinci Resolve and you import some footage you filmed on a 10-bit camera, like a Sony a7S III for example, you may be surprised to discover that Resolve is showing those video clips as audio files, and if you try to play them on your timeline you’re just getting a black screen.
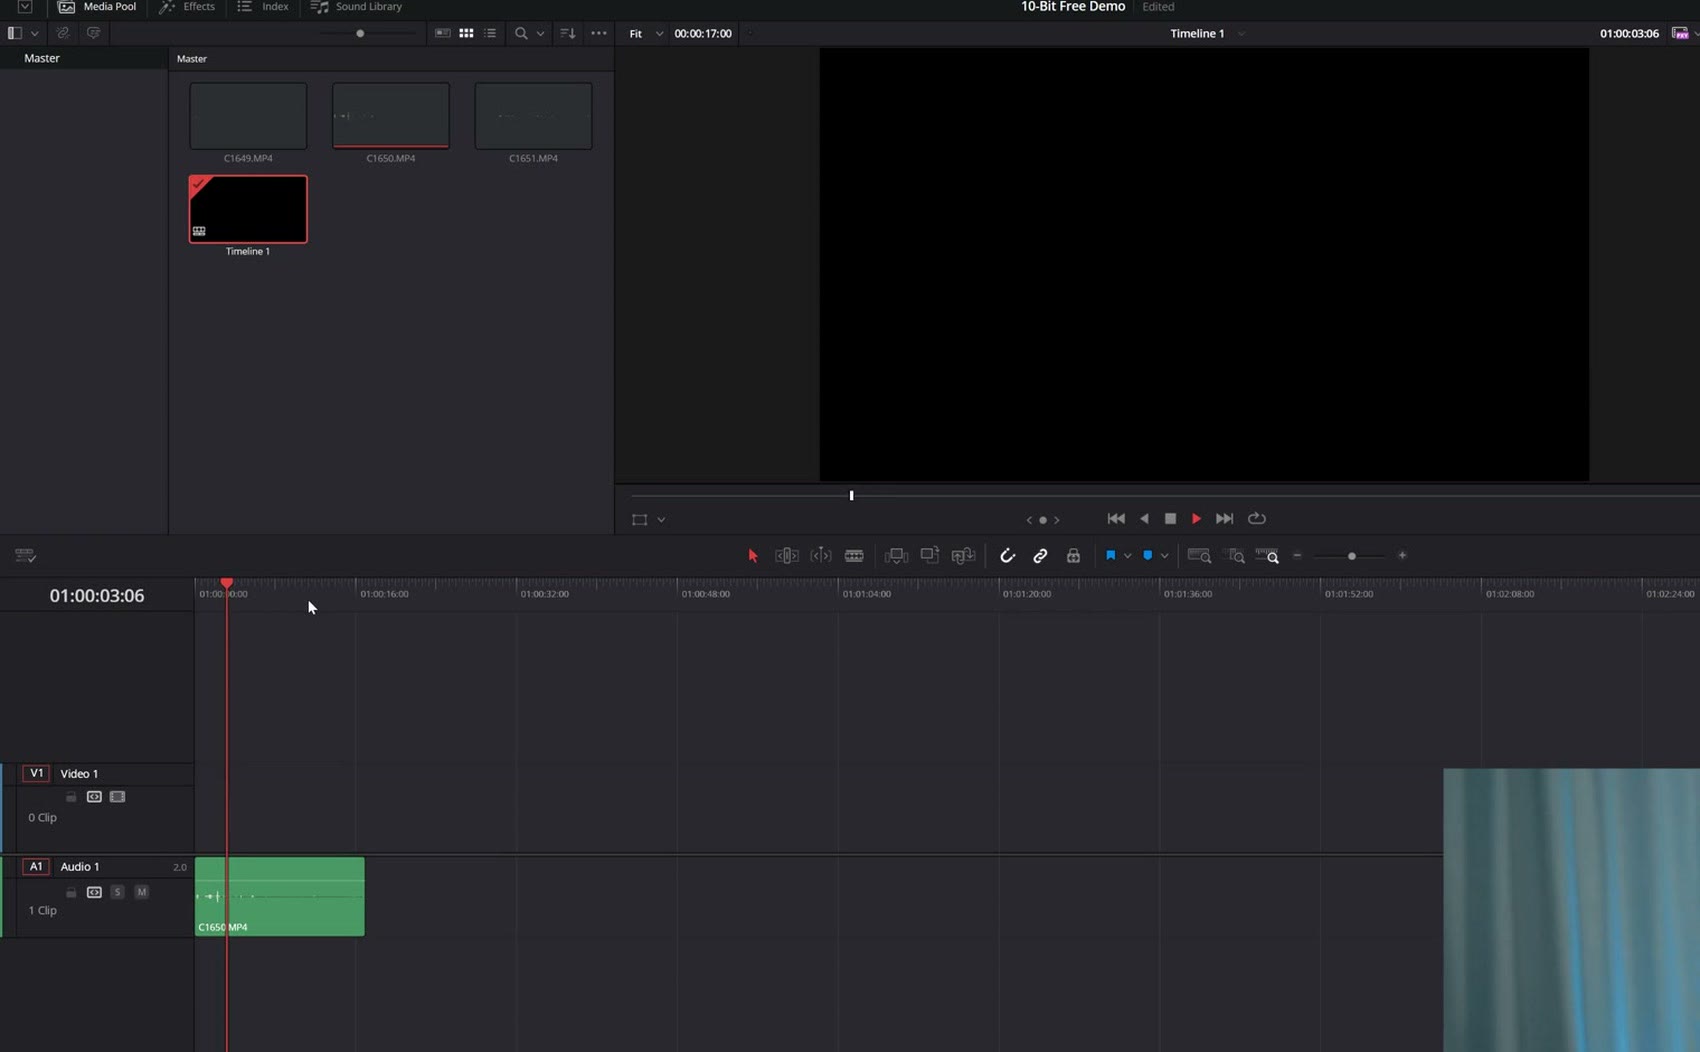
This is because the free version of DaVinci Resolve does not support playing back 10-bit video in the 4:2:2 color space. But do not worry, because in this tutorial I’m going to show you how you can easily import and edit 10-bit video using the free version of Resolve. And keeping with this free theme, we’re going to use a free tool to do it.
That free tool is called Handbrake, and it’s designed to convert a whole lot of different video formats. It works on both Mac and PC.
Once you’ve downloaded and installed Handbrake, your goal is going to be to use it to convert your high quality 10-bit files that were recorded in the 4:2:2 color space on your camera into a similar quality 10-bit video in the 4:2:0 color space, so DaVinci Resolve can open and play it back, and you can save $300 by not having to buy the Studio version of Resolve.
And don’t worry, I’ve tested this, and even with the conversion the video quality is still virtually identical, so you don’t need to worry about losing quality when you convert your files.
Change These Handbrake Settings First
Open Handbrake and the app is going to give you the option of choosing either one video file or a folder full of files. I’m going to assume you probably have many video files you want to convert at once, so select Folder (Batch Scan) and then navigate to the folder where your 10-bit files live. Click Select Folder and Handbrake will start scanning your video files to confirm it can convert them. Depending on how many files you have, this may take a bit of time based on the speed of your computer and your hard drive.
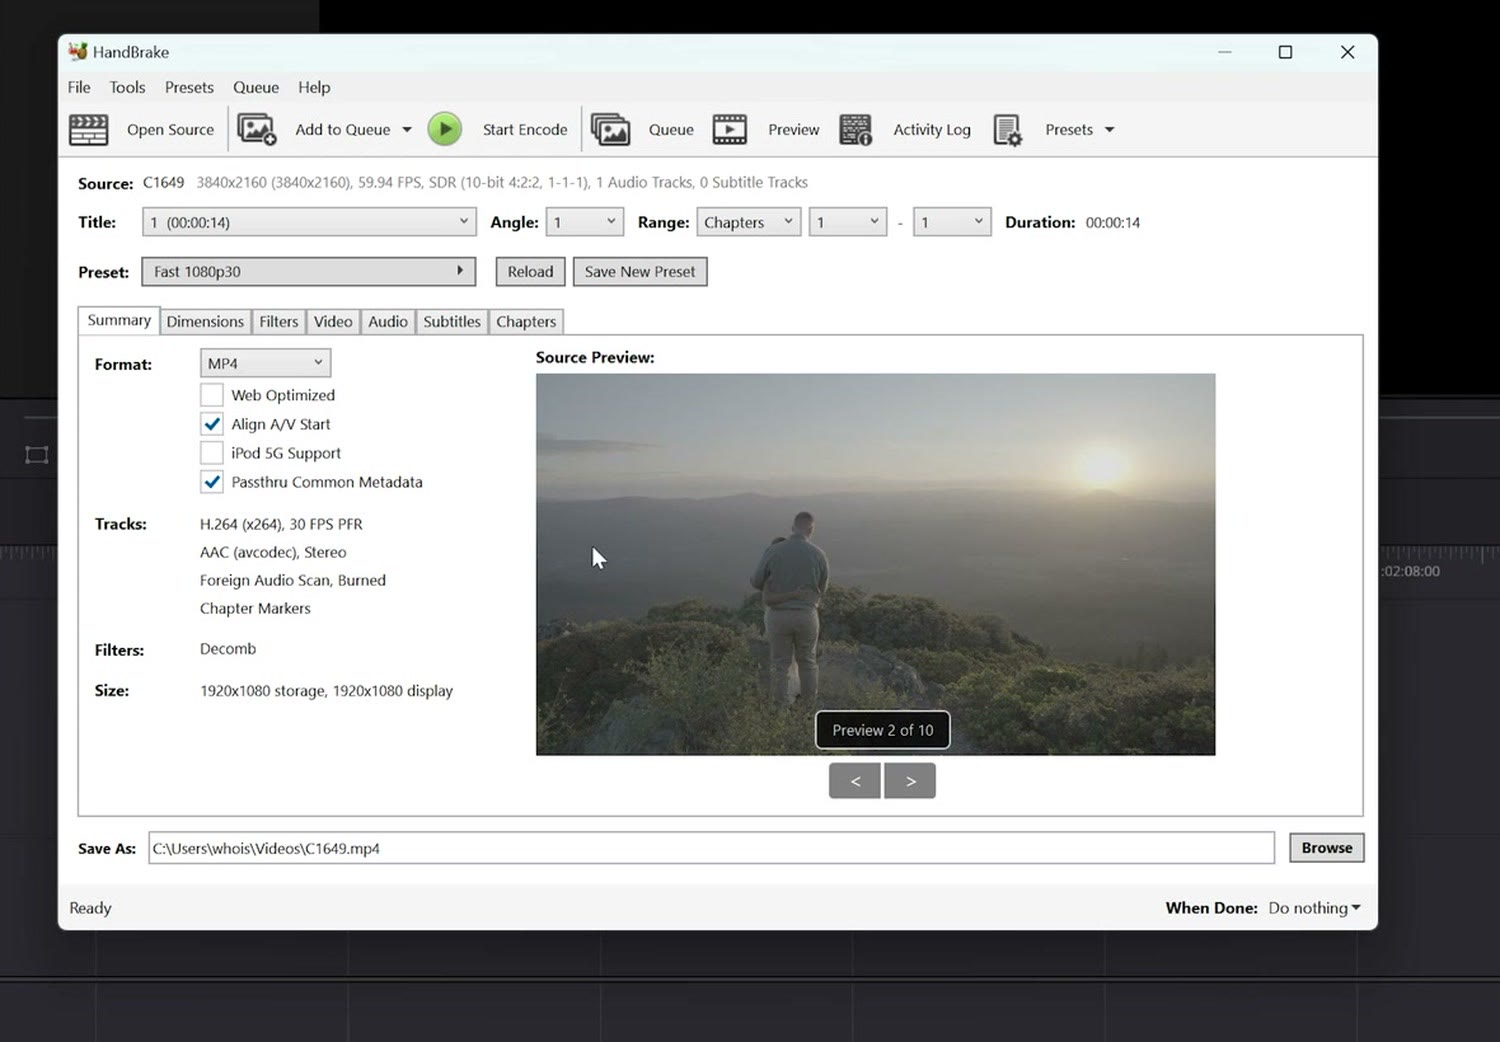
After the analysis is complete, Handbrake is going to give you a ton of complicated options here, but don’t worry, I’m going to make this super simple for you.
First, go up to Tools, then Preferences, and under Output Files make sure that “Automatically name output files” is checked. In addition, make sure “Always use the default path for each new name generated” is unchecked.
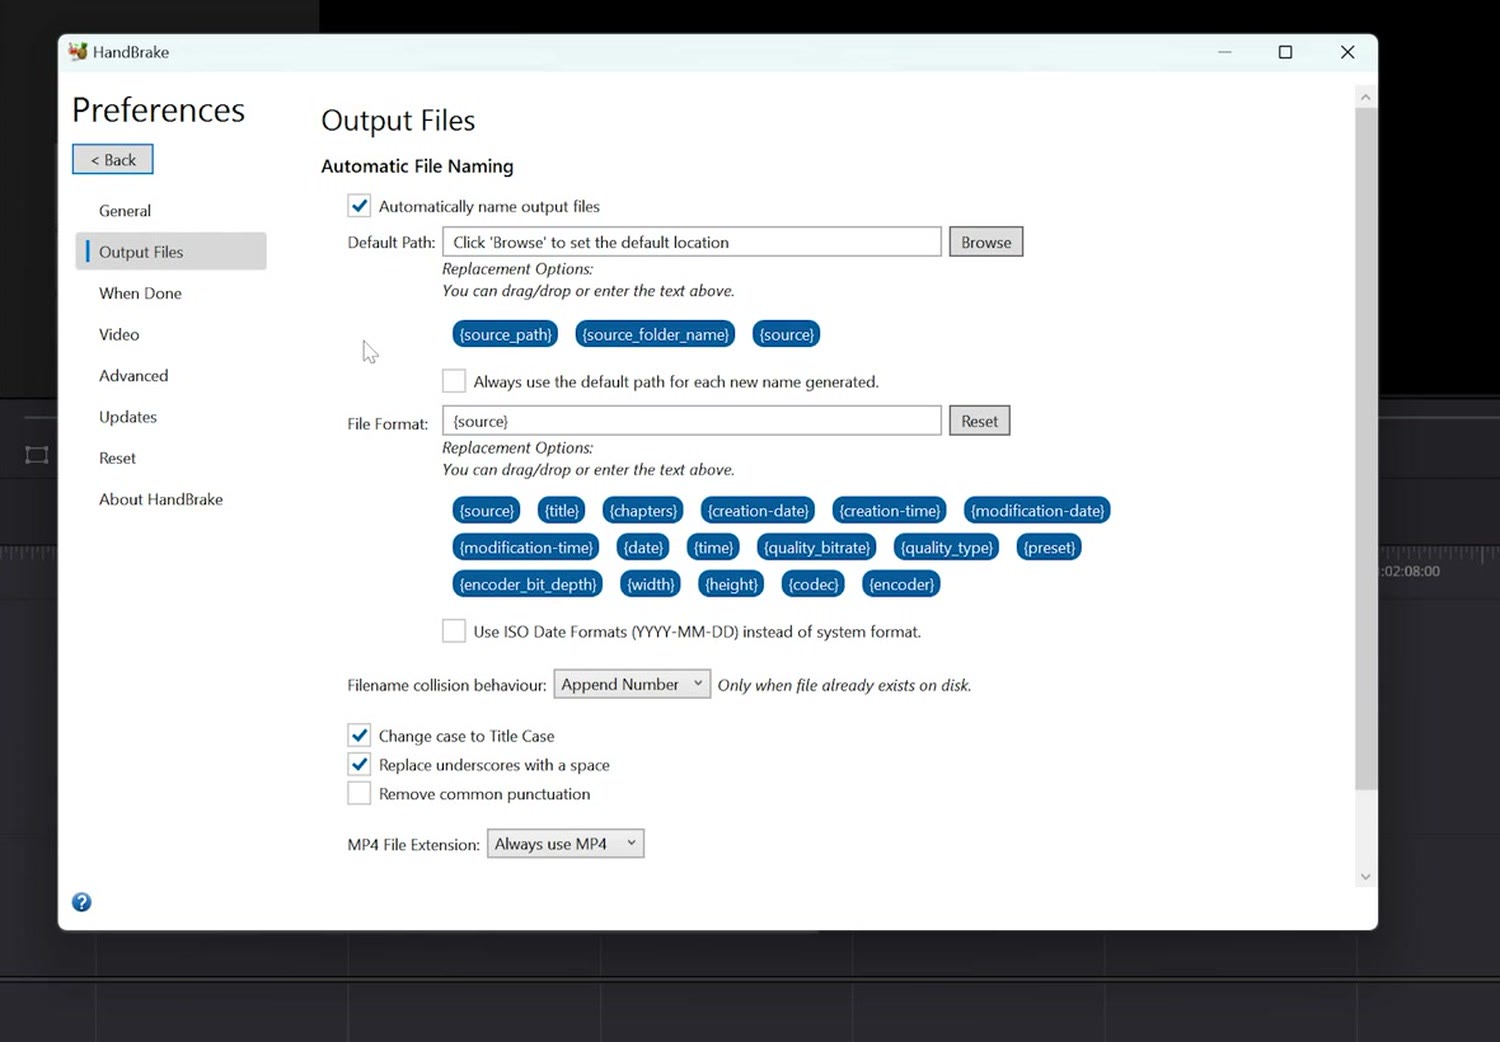
That way, whenever we tell our first video file where we want it saved, Handbrake is also going to tell all the other video files that they need to be saved in that same location, which is going to save you a lot of time and keep you from having to tell it where to save every single file. Then click Back.
Choose This Preset For High Quality Files
Next go up to the Preset dropdown menu, where it probably says Fast 1080p30, and change it. Scroll all the way down to the bottom where it says Production, and select Production Max.
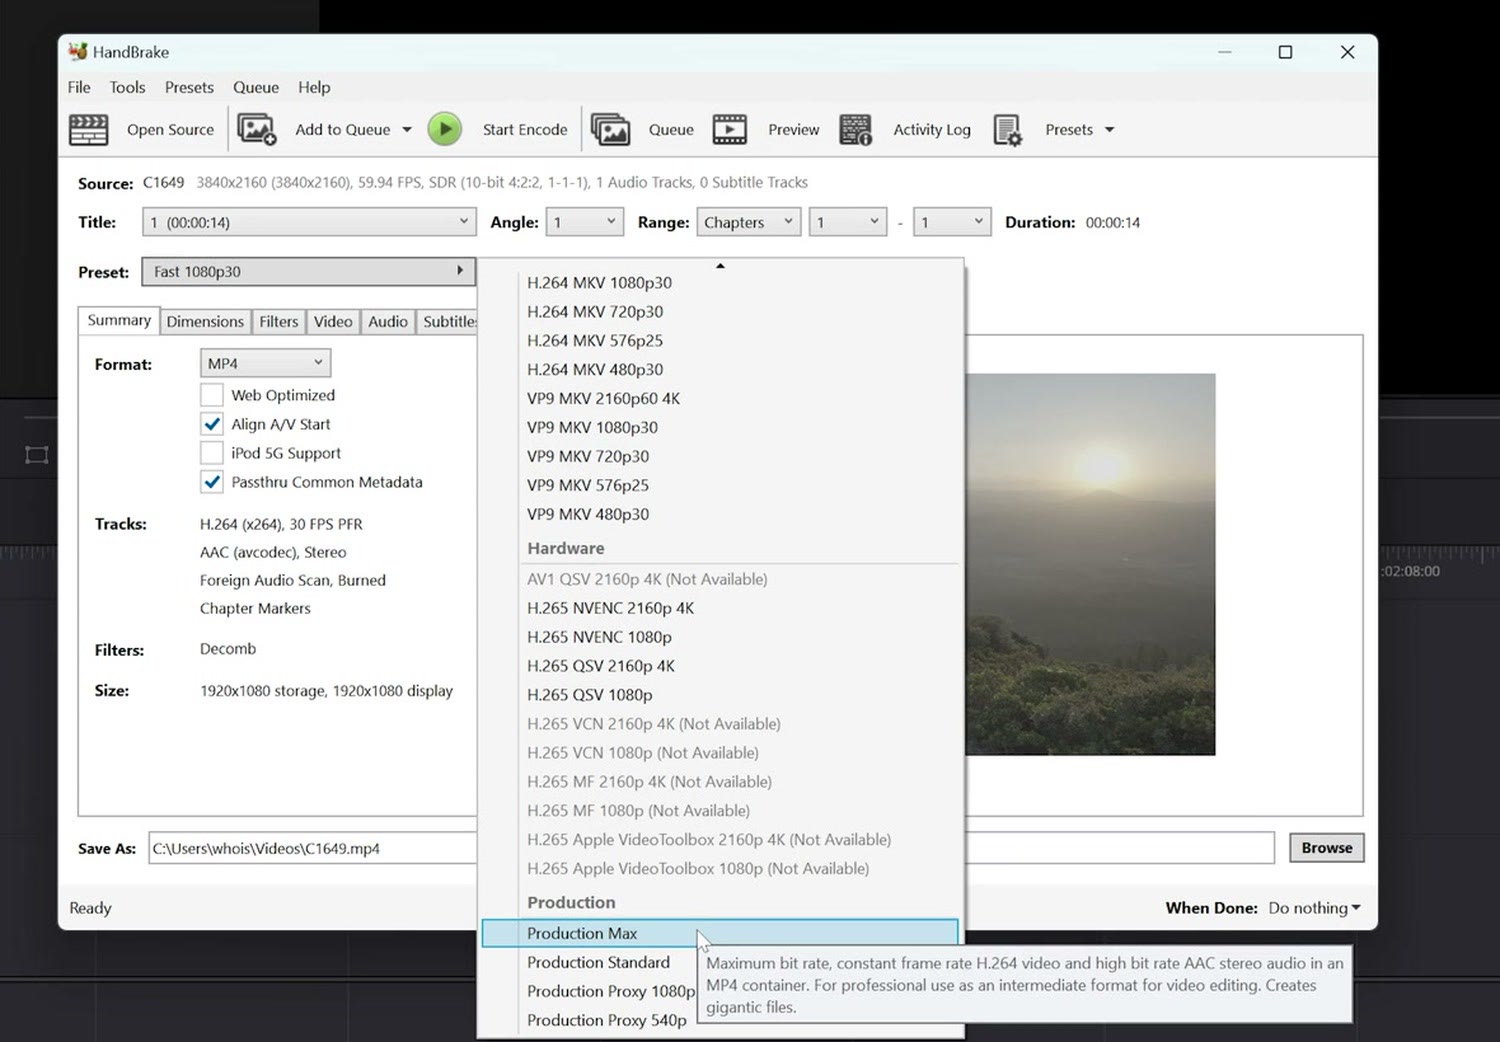
This is basically the Handbrake preset that tells the program you want to edit a video using these files, so keep them as high quality as possible when converting. With that selected, Handbrake should change all of the settings on all of these other tabs to make them as optimal as possible.
But I want you to notice that up at the top it says this video file is 10-bit 4:2:2, which, as I said at the start, is the reason the free version of DaVinci Resolve isn’t capable of playing back your video. So let’s fix that now, in three clicks.
3 Clicks To Enable Your Clips In DaVinci Resolve
First, go to the Video tab in the middle. This is going to show you even more complicated options, but what you need to do is click the Video Encoder dropdown and change it from the default of H.264 (x264) to H.265 10-bit (x265).
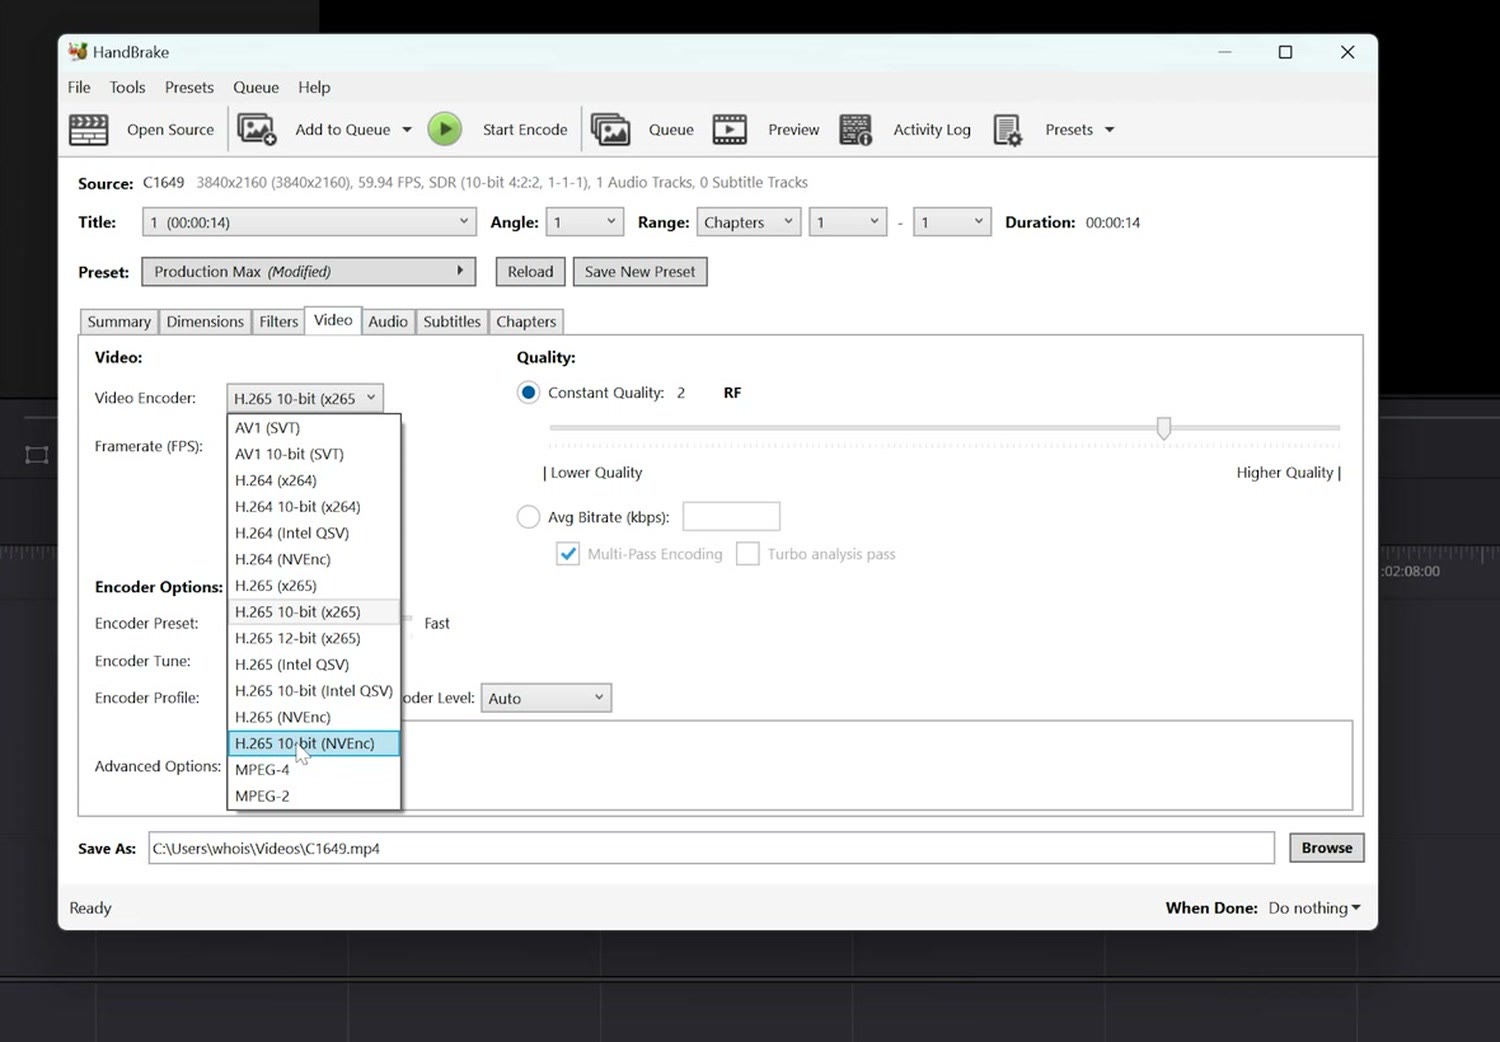
This essentially tells Handbrake to keep this a high quality 10-bit video file, but change it from the 4:2:2 color space to 4:2:0. And that’s all you have to change as far as video settings go.
Side note though, if you see other options in there like H.265 (Intel QSV), or H.265 10-bit (NVEnc), or others, just know that you can try selecting one of those and they should give you similar video quality, but they may convert your video even faster, because they’ll use your computer’s dedicated graphics card to do the work. If you have a lot of files to convert and you want it done quickly, try experimenting with one of those. Just make sure you select one of the H.265 10-bit options when you do. In our case, we’re going to stick with H.265 10-bit (x265).
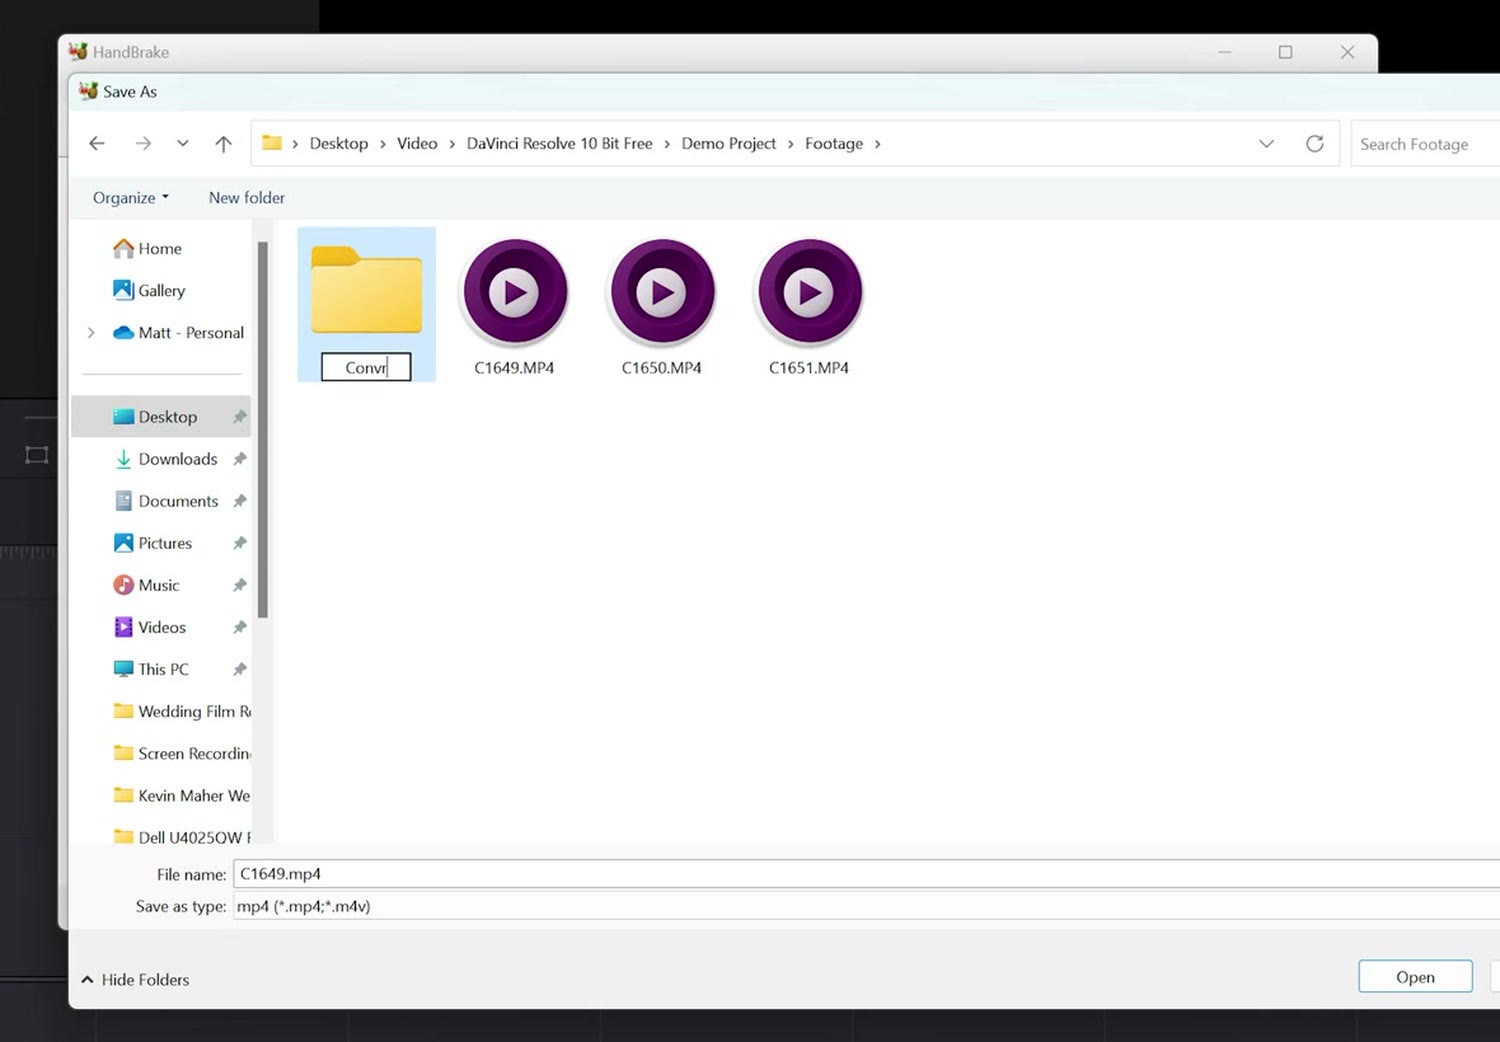
To finish, go down to Browse next to Save As and select where you want your converted files to go. What I would do is go to where your original files are, right click, make a new folder, and call it Converted, so that way you always know where your converted files are. Select that folder and click Save.
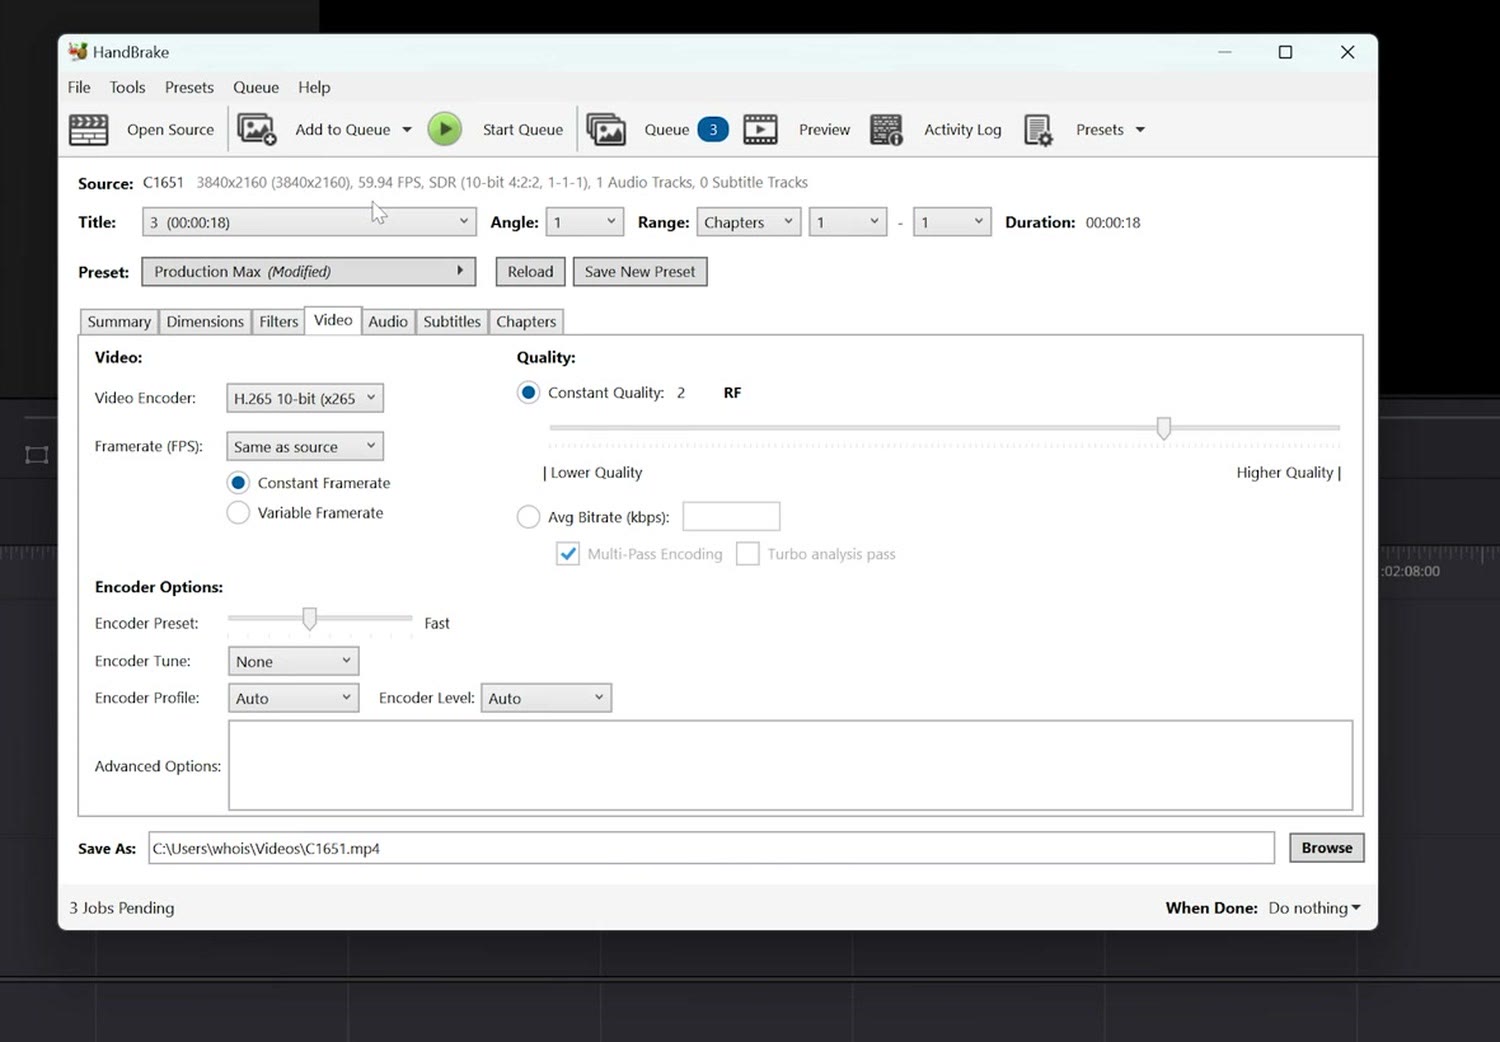
Lastly, go up to the Add to Queue button, hit the dropdown arrow, and select Add All, which adds all of the video files from your folder to the queue. You should then see that the Queue icon says the number of files that are going to be converted. In my case there were three in that folder, so it says three.
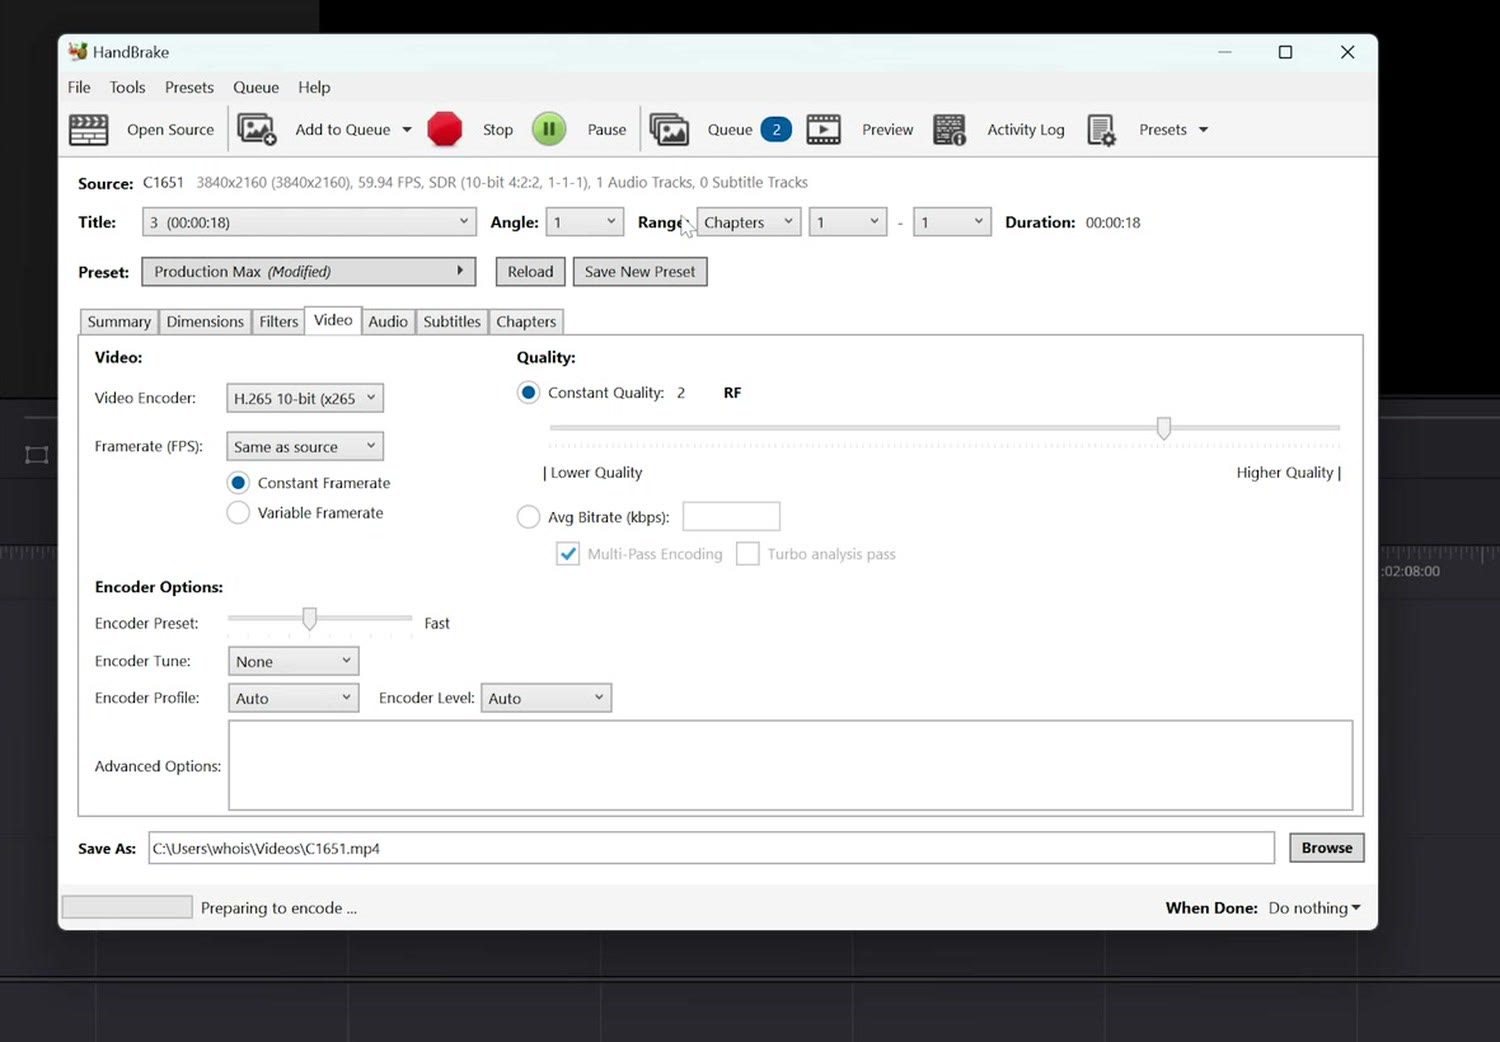
And then all you have to do is click Start Queue, and Handbrake will start converting your clips into a format that’s compatible with the free version of DaVinci Resolve.
Once all of your videos have been converted, all you have to do is navigate to that folder of converted files and import those into DaVinci Resolve, where you’ll be happy to see that all of your clips are now visible. You can bring them down to the timeline, you can play them, you can view them, and they work. It’s magical. We did it, and now you’re ready to edit without needing to pony up 300 bucks for the paid Studio version of Resolve.
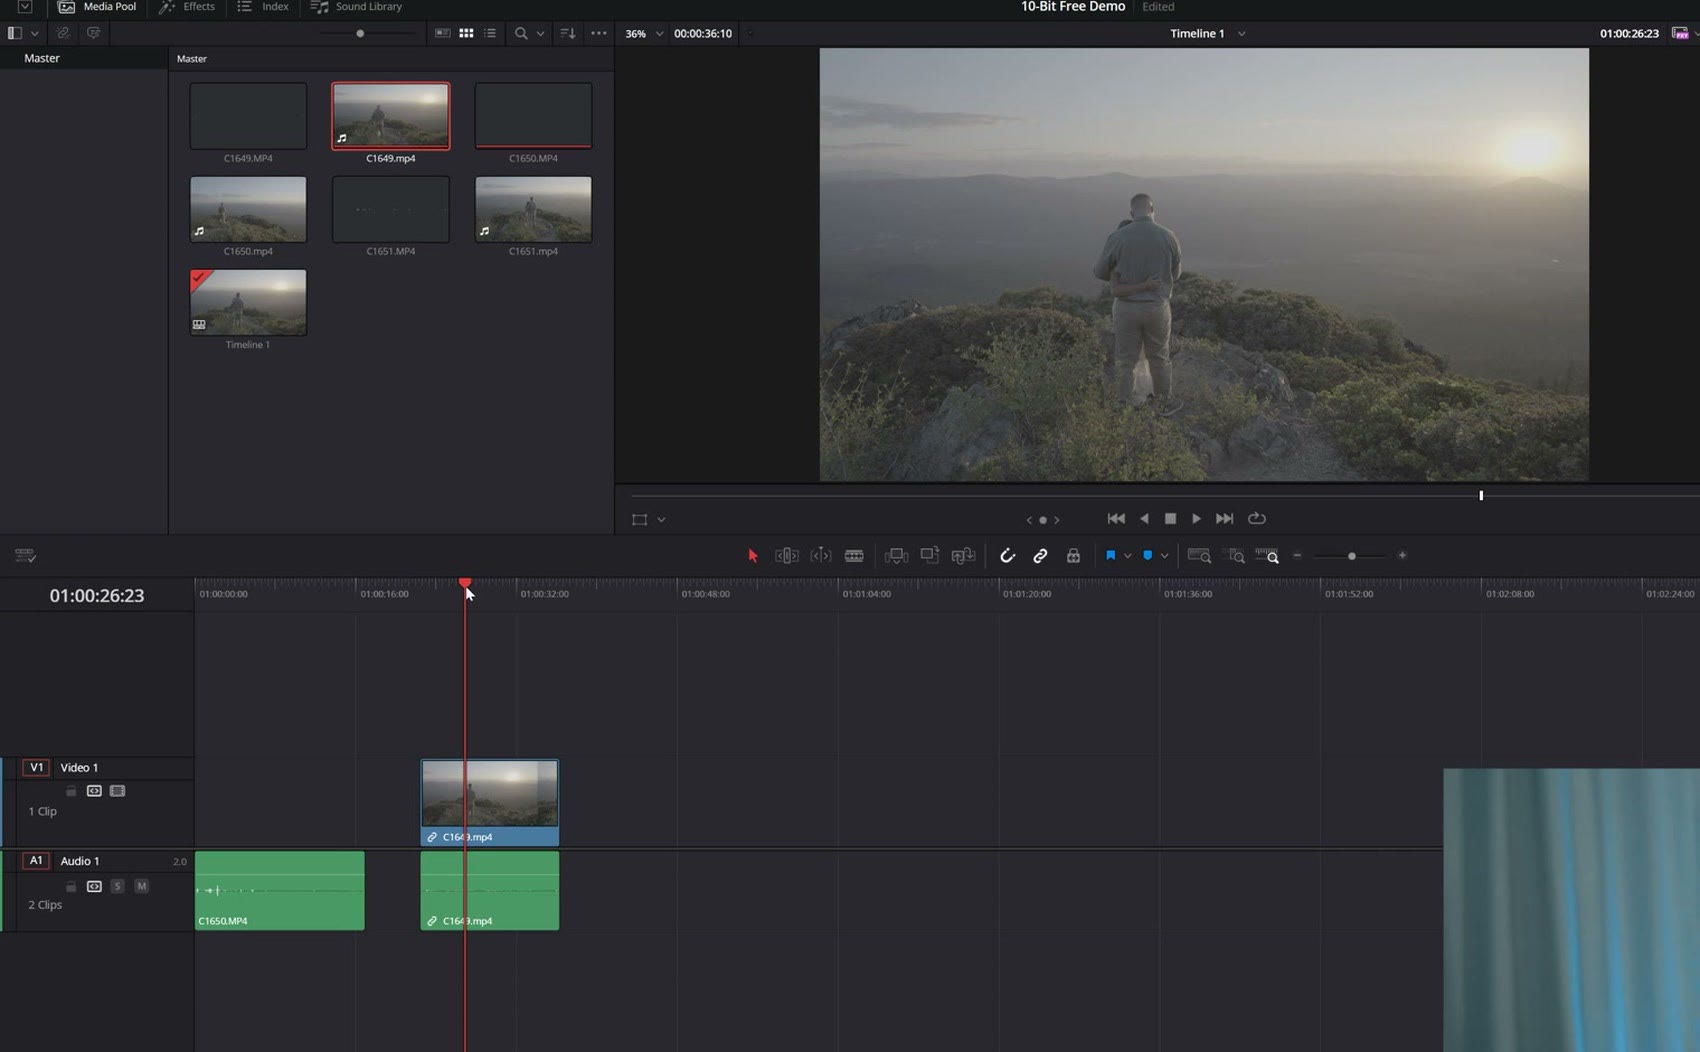
Videos Still Not Working On Windows? Here’s The Fix
Now, that said, if you did all of that and for some reason you tried to import your converted clips and they didn’t work, specifically if you’re on Windows and you brought them in and it said Media Offline and you’re like, what the heck?
Just know that I’ve tested this process of converting files on multiple computers. On one of them it worked perfectly fine. The other one gave me issues and would not let me import the files, telling me the converted files were offline even though I had just converted them and they were properly linked.
If that happens to you and you’re on Windows, the workaround is to go to the Microsoft Store. Yes, your version of Windows has a Microsoft Store. Nobody ever uses it, but here it is. What you’re going to want to download is the HEVC Video Extensions plug in.
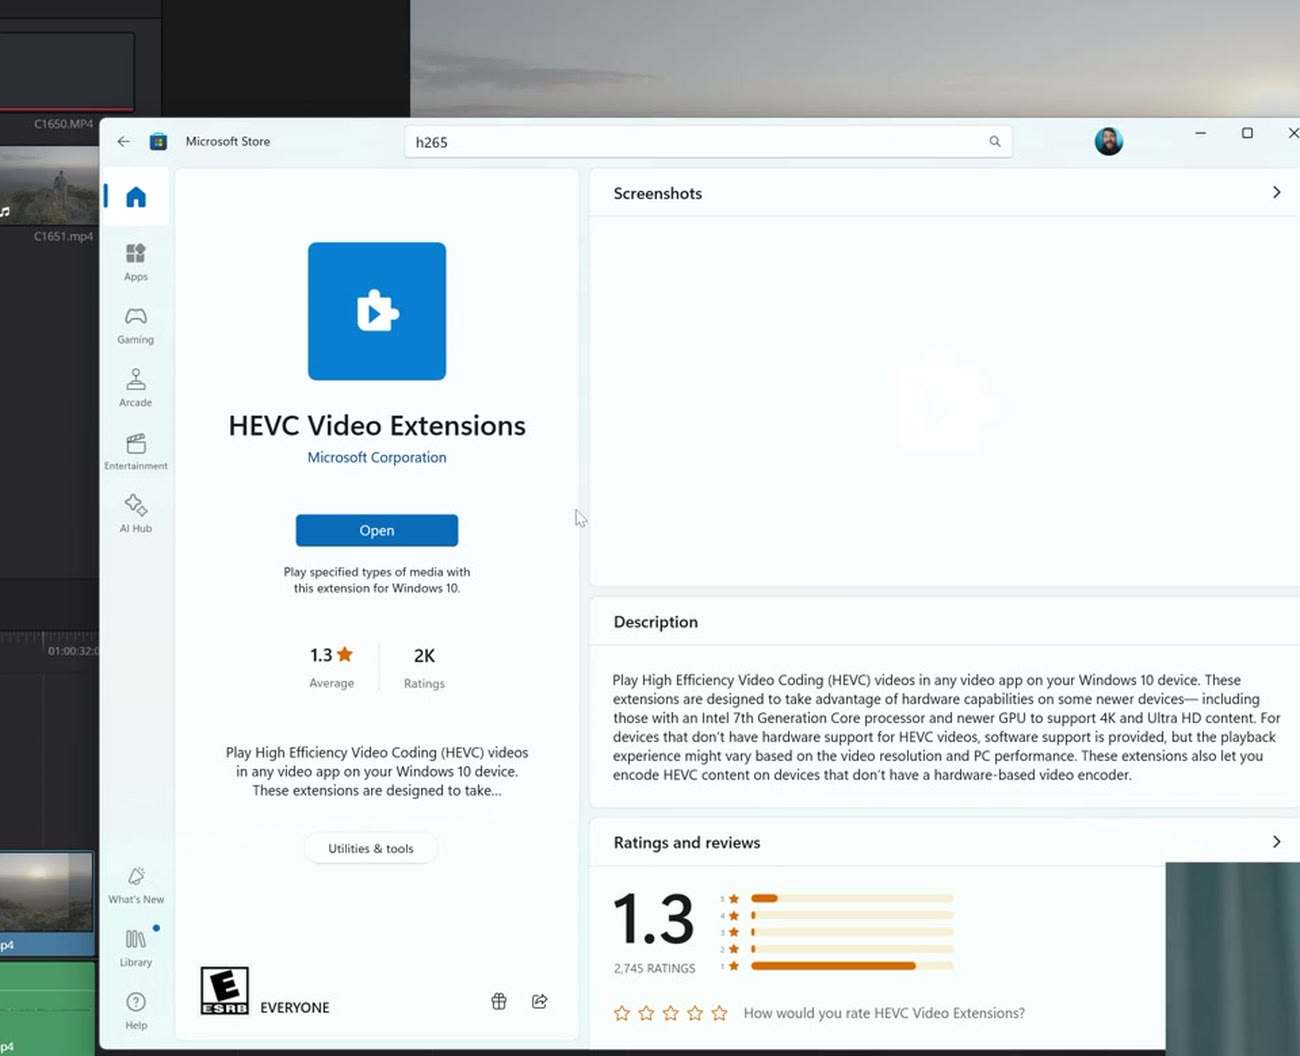
I know I said at the start that everything here is free, and ideally it will be free for you and it should have just worked. But if it doesn’t, I hate to break it to you, we may have to pay 99 cents. Yes, really. They charge a dollar for this. I don’t know why Microsoft charges for it, but they do. So pay the 99 cents, install it, and then it should work perfectly. It’s a bummer that you have to do that, but at least I’m showing you how to fix it.
Anyways, thank you so much for reading. I also want to point you to my Edit Videos Like A Pro guide, which is a free guide I put together that teaches you the most important things I’ve learned as a video editor. It’s going to be super helpful to you if you’re learning how to use DaVinci Resolve.
Thanks so much for reading, and have a great day!