
I took a 14 minute video export down to four minutes. Same project, same settings, same computer. The only thing that changed is that Premiere started using my graphics card to do the encoding instead of my processor, and that one switch makes exports up to four times faster.
Premiere Pro supports hardware encoding now, and if you’re on a PC with a dedicated graphics card there is a very good chance you already have everything you need and just haven’t turned it on. This walkthrough covers the exact steps to get it enabled, plus what to do whenever the Hardware Encoding box is greyed out or is quietly using Intel Quick Sync instead of your actual graphics card.
One heads up before we start. From all my research, this does not work on macOS. Hopefully that changes, but for now this is a PC thing.
Update Premiere
Open Premiere Pro and go up to Help, then About Premiere Pro. You need to be on version 14.2.0 or higher. If you’re on anything earlier than that, none of the rest of this is going to work.
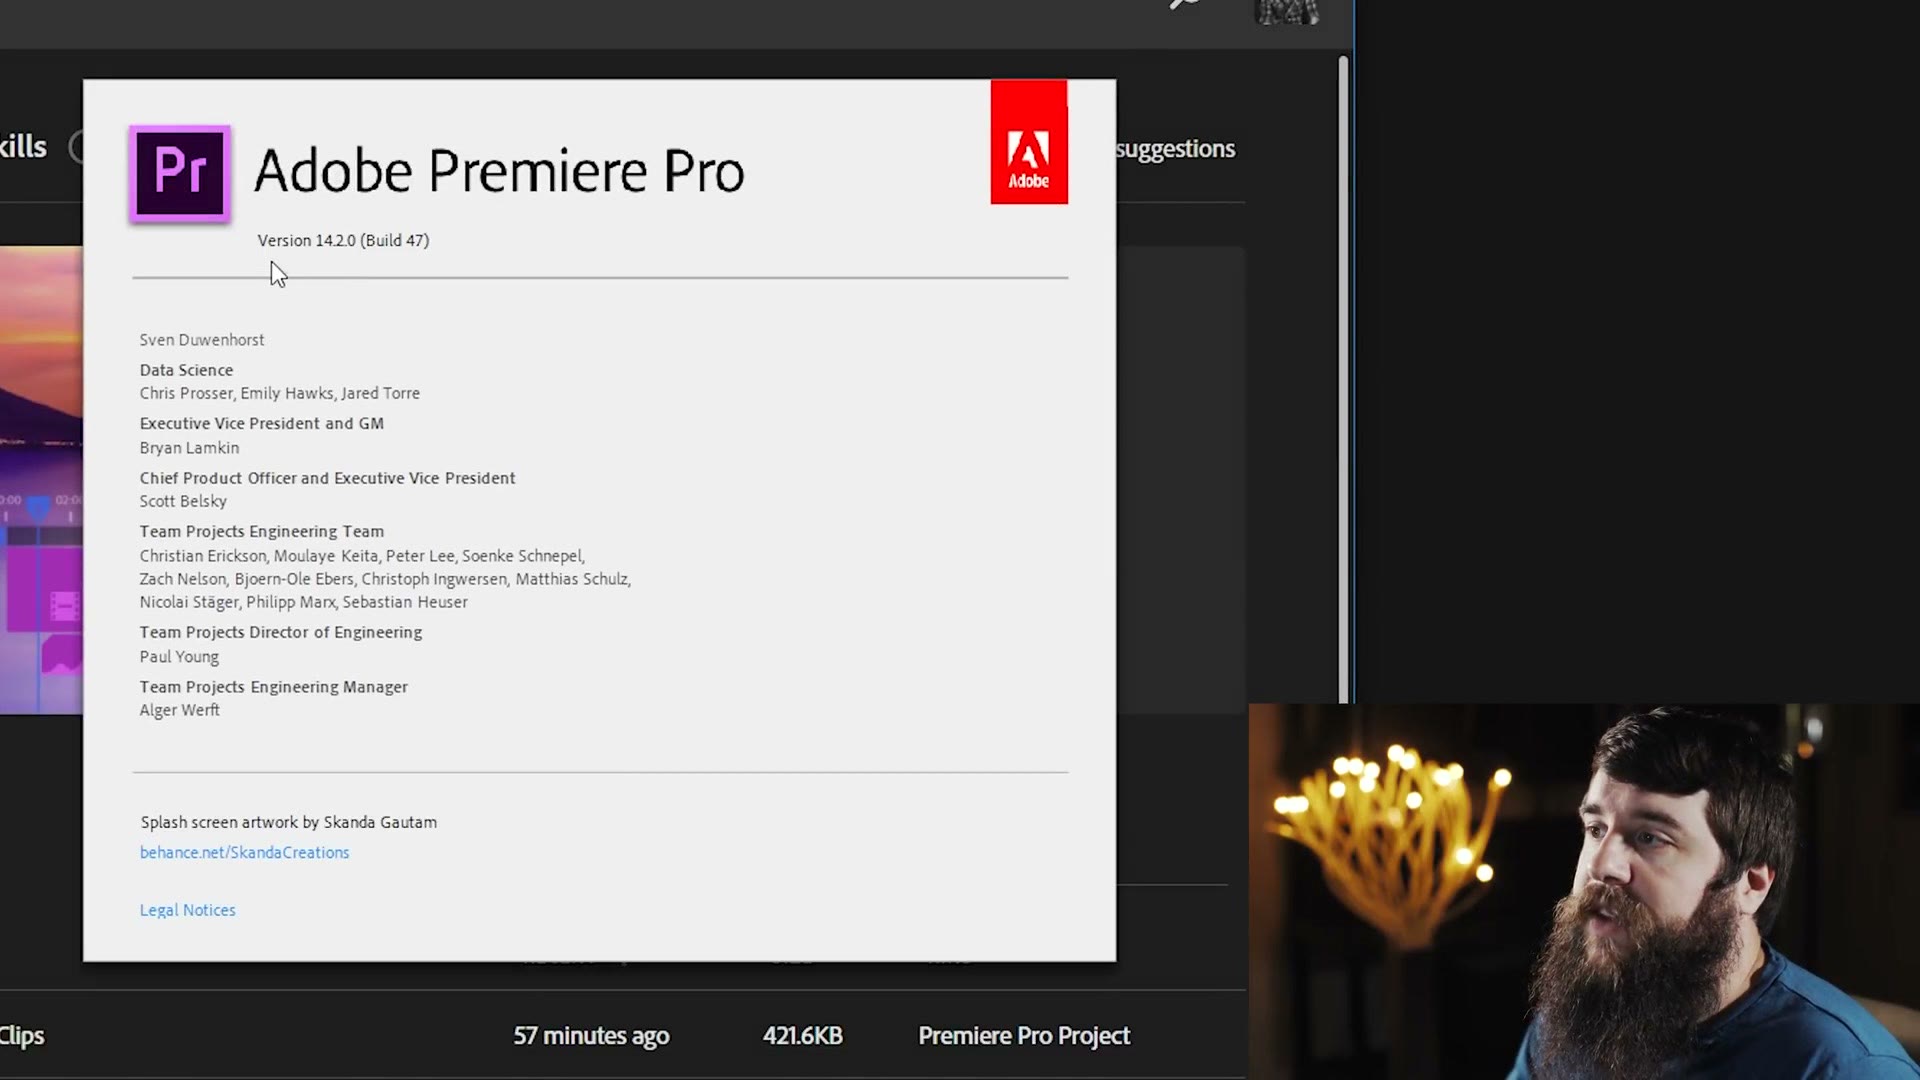
To update, open the Creative Cloud desktop app, click Updates, and hit the blue update button next to Premiere Pro. Once it says 14.2 you’re good. If you don’t have Premiere at all, there’s a free trial here.
Turn On GPU Acceleration
Reopen Premiere and click New Project. Name it, choose where to save it, and then under General look at Video Rendering and Playback. This part is very important. Your renderer needs to be set to Mercury Playback Engine GPU Acceleration. Because I have an NVIDIA card it says CUDA in the parentheses. If you’re on AMD it will say OpenCL.
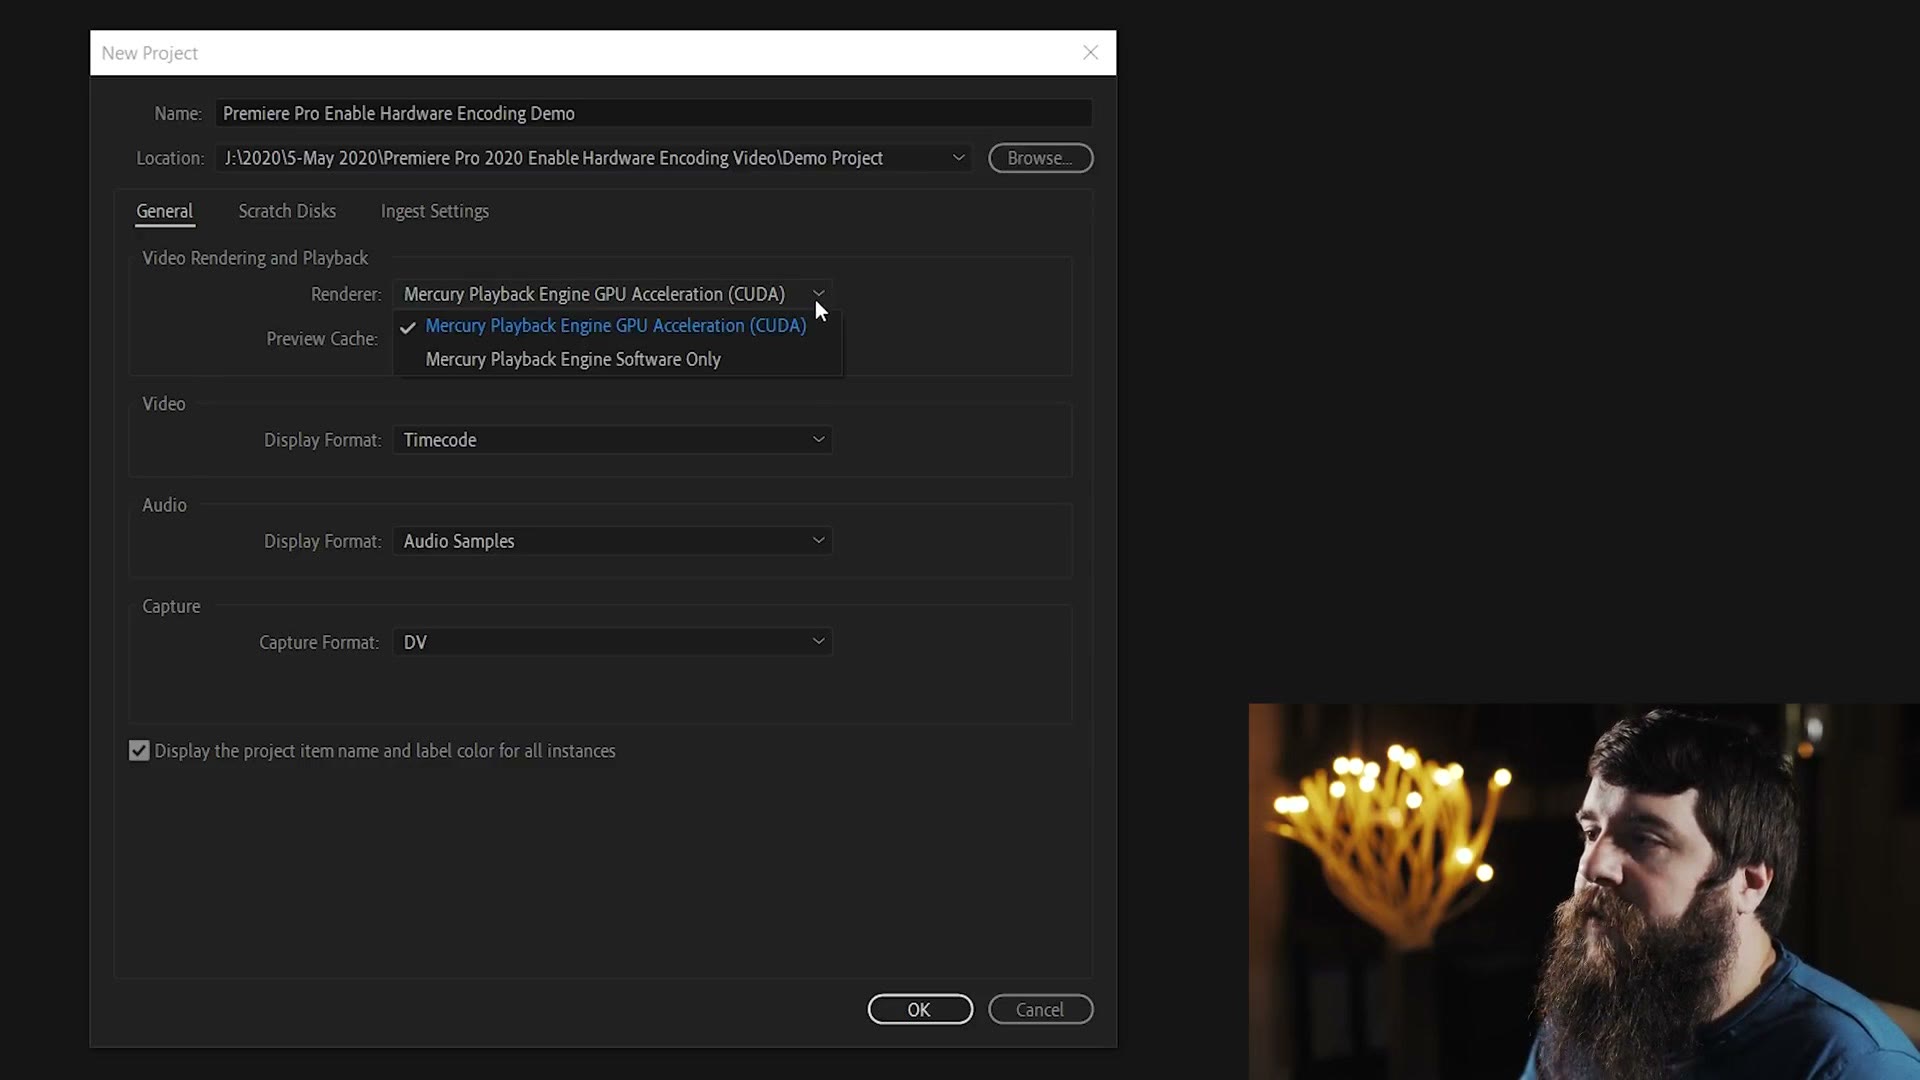
If you’ve already started editing a project and you want to switch it over, you can get to the exact same menu by going to File, Project Settings, General. Same dropdown, same setting, click OK.
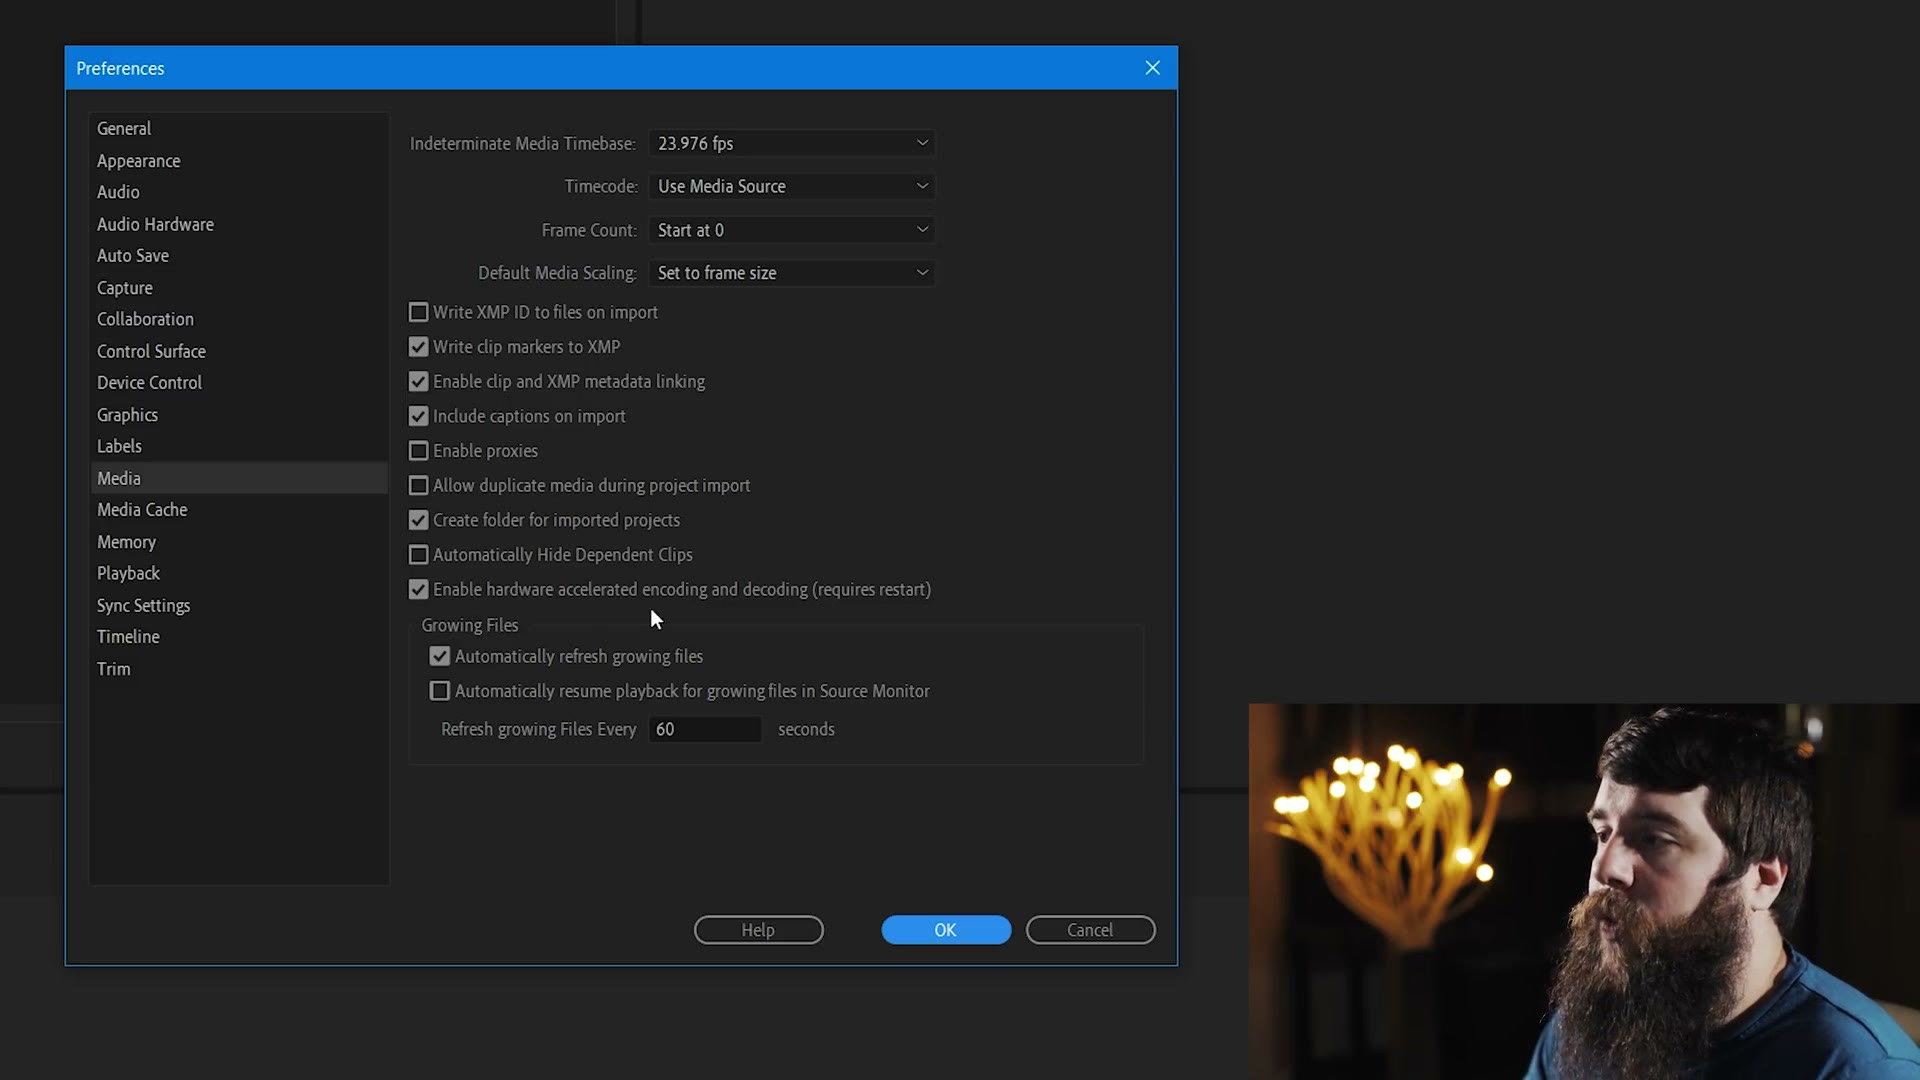
Then, whether it’s a brand new project or one you’ve been working on for weeks, go up to Edit, Preferences, Media, and make sure “Enable hardware accelerated encoding and decoding” is checked. Hit OK. That one wants a restart.
At this point you can go edit your video like you normally would. The rest happens at export.
Export Settings
Press Control + M to open the Export Settings dialog. For Format you need to pick either H.264 or HEVC (H.265), because those are the two that hardware encoding works with. If you aren’t sure, stick with H.264.
I’m not going to walk through every basic video setting here, because I’ve already built export presets that handle all of it. You can download my 1080p export presets and my 4K export presets and just load one instead.
What you actually need to change is down under Encoding Settings. For Performance, select Hardware Encoding. Mouse over it and you should see it say “Utilizes available NVIDIA hardware for quicker encoding,” which is Premiere telling you straight out that it’s going to use your graphics card. On an AMD card it will say AMD hardware instead.
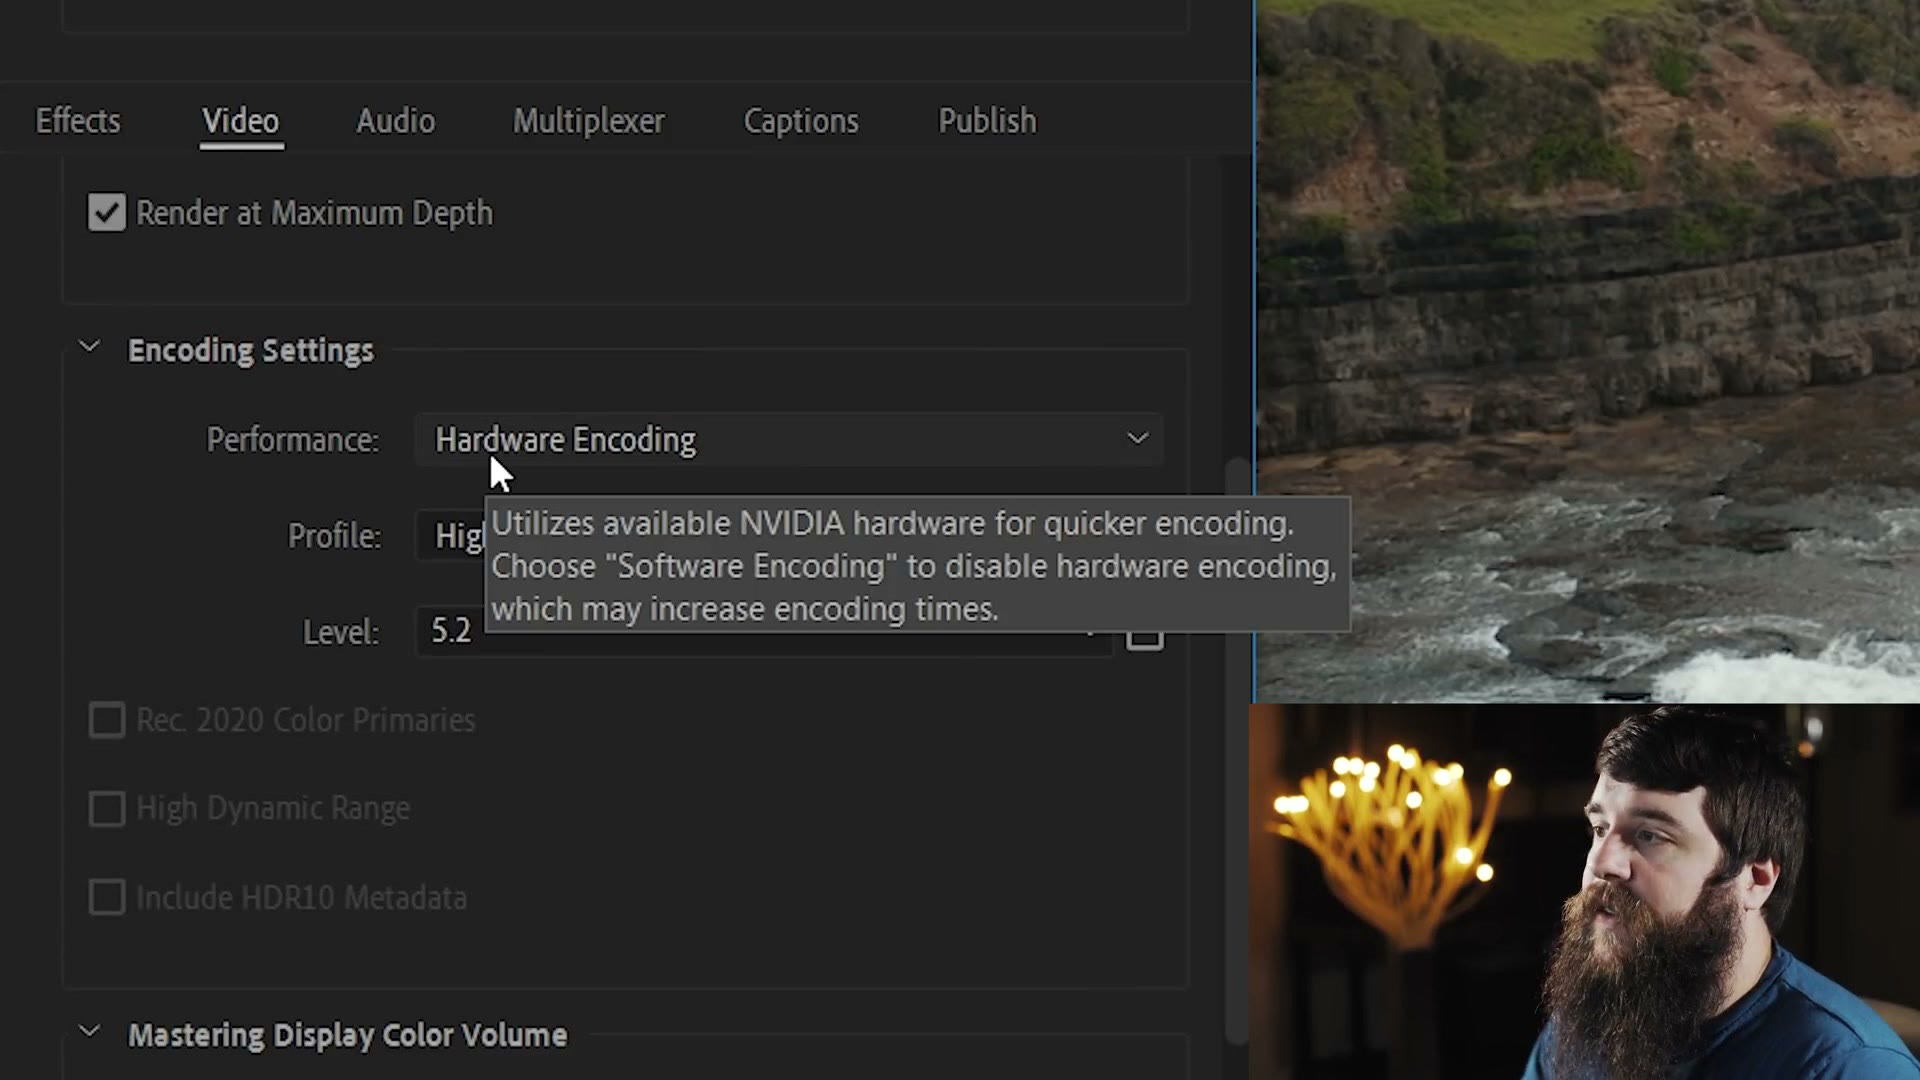
Mine has Profile set to High and Level set to 5.2, but that is going to vary with the resolution you’re exporting, which is another reason the presets are handy.
Bitrate Settings
Here’s the one that trips people up. If Hardware Encoding is greyed out and you can’t click it at all, scroll down to Bitrate Settings and look at Bitrate Encoding.
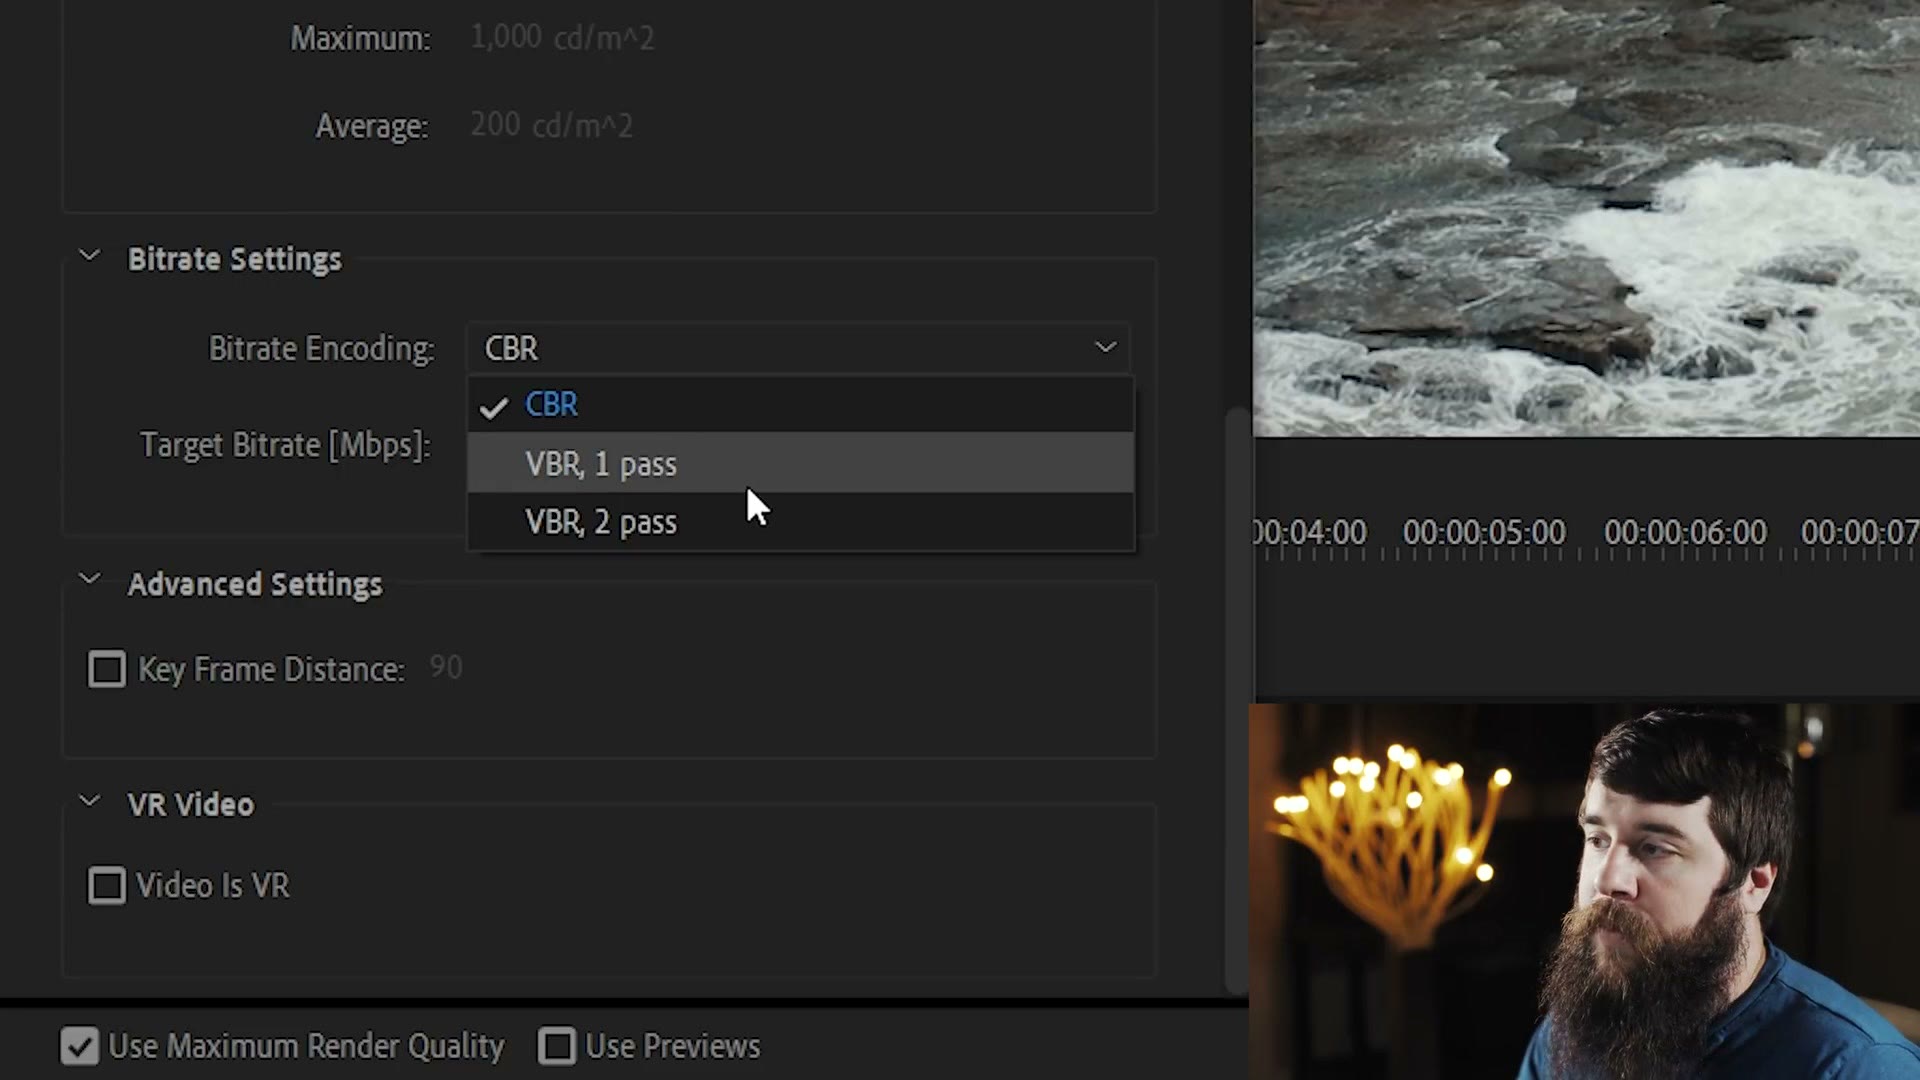
Hardware encoding works with CBR, and it works with VBR 1 pass. It does not work with VBR 2 pass. Select VBR 2 pass, scroll back up, and you’ll see Performance has quietly changed itself to Software Encoding, and if you try to switch it back it tells you your system’s hardware does not support it.
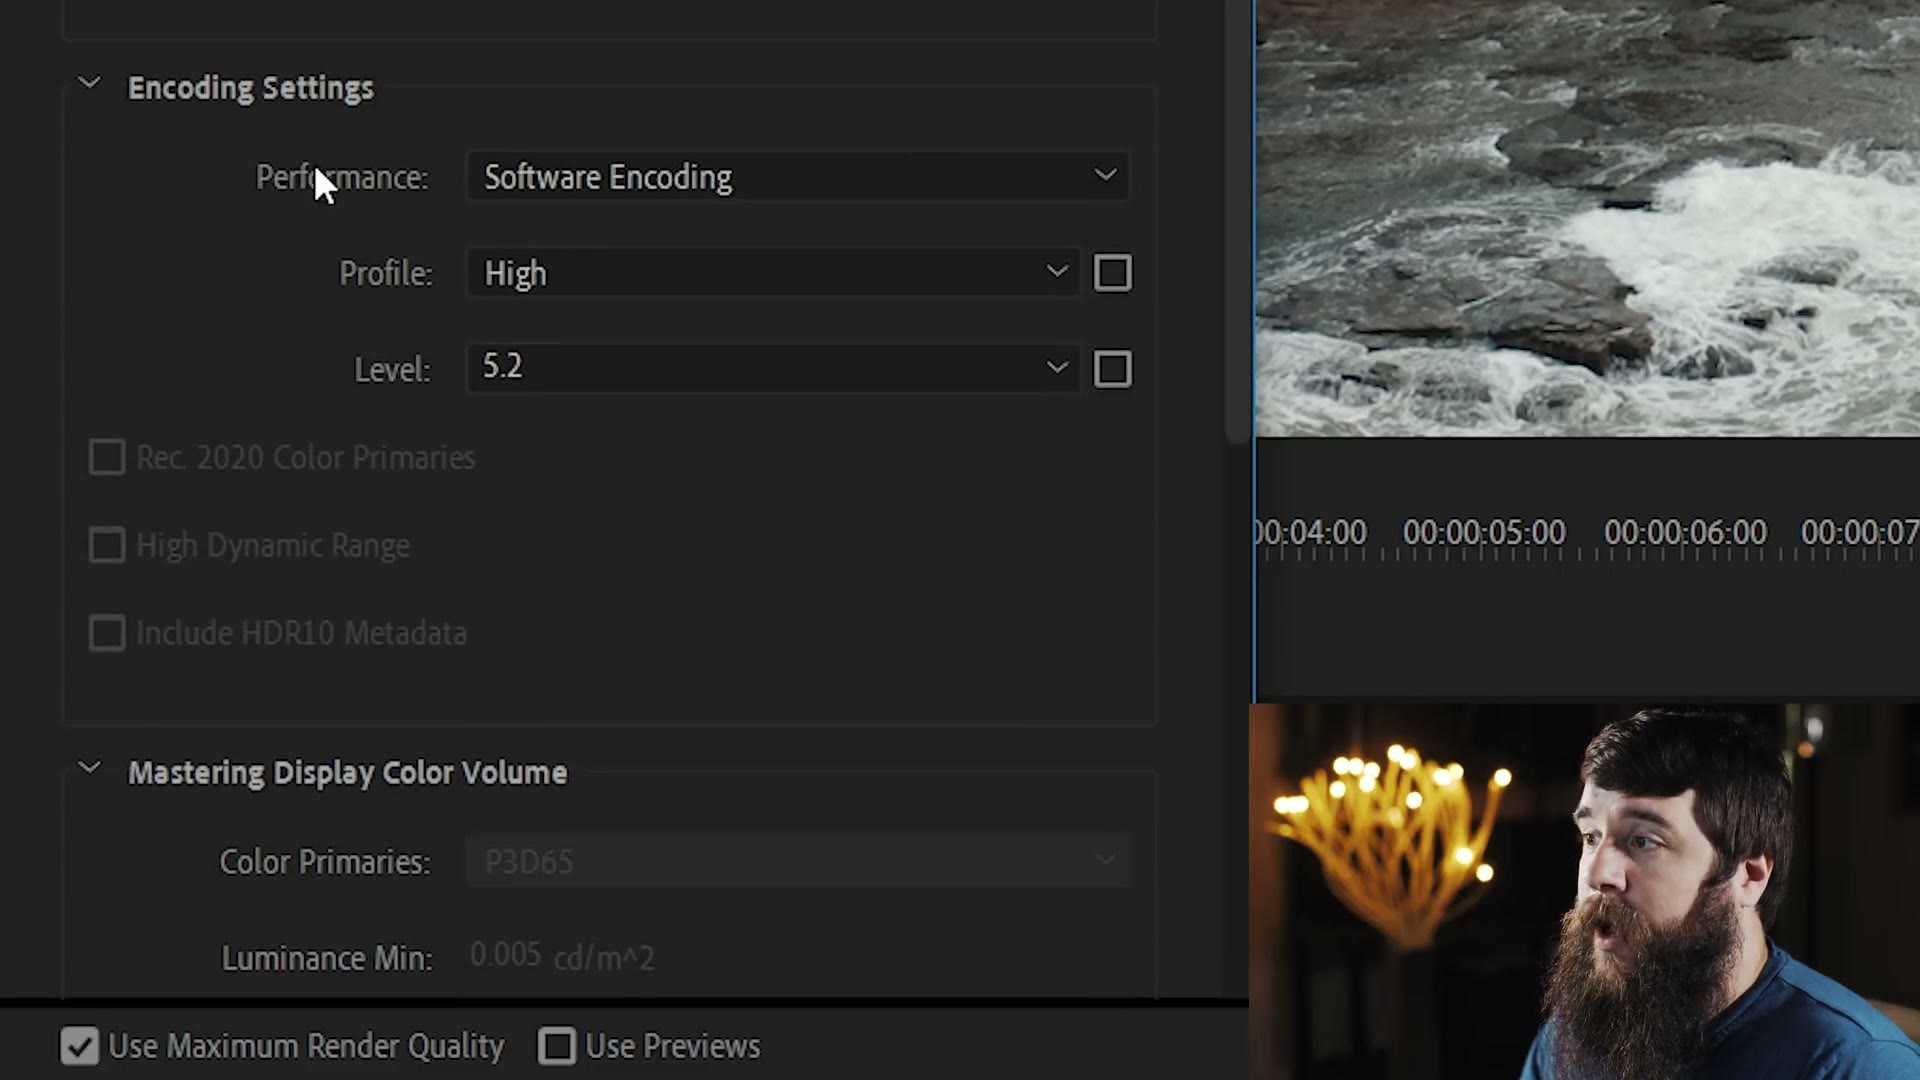
So it wasn’t your graphics card, it was the bitrate setting the whole time. I’d recommend CBR. That’s what I choose for every one of my exports anyway.
Encoding Settings and Bitrate Settings really are the only two things you have to change to get your videos exporting fast off the graphics card.
Export Or Send It To Media Encoder
You can hit Export right there and Premiere will do it. But if you’d rather keep working while it renders, click Queue and let Adobe Media Encoder handle it instead.
Once Media Encoder opens, look down next to Renderer and you should see our old friend, Mercury Playback Engine GPU Acceleration, CUDA on NVIDIA or OpenCL on AMD. What you do not want to see there is Software Only, because if you see software, you ain’t using the graphics card, and we want that graphics card speed. Hit the green play button and off it goes.
If Hardware Encoding Is Greyed Out
If you’re stuck on Software Only under Project Settings, or Hardware Encoding still isn’t available at export, here’s where to look.
First, check that your computer actually has a graphics card capable of it. On Windows 10, search Device Manager from the taskbar, open it, expand Display adapters, and see what’s listed. If it says Intel integrated graphics, I’m sorry, but this form of hardware encoding is not going to work for you.
If it’s an NVIDIA card, they publish a full support matrix for NVENC, which is what Adobe uses for hardware encoding. Basically, if your card is a 1050 or newer, you should be fine.
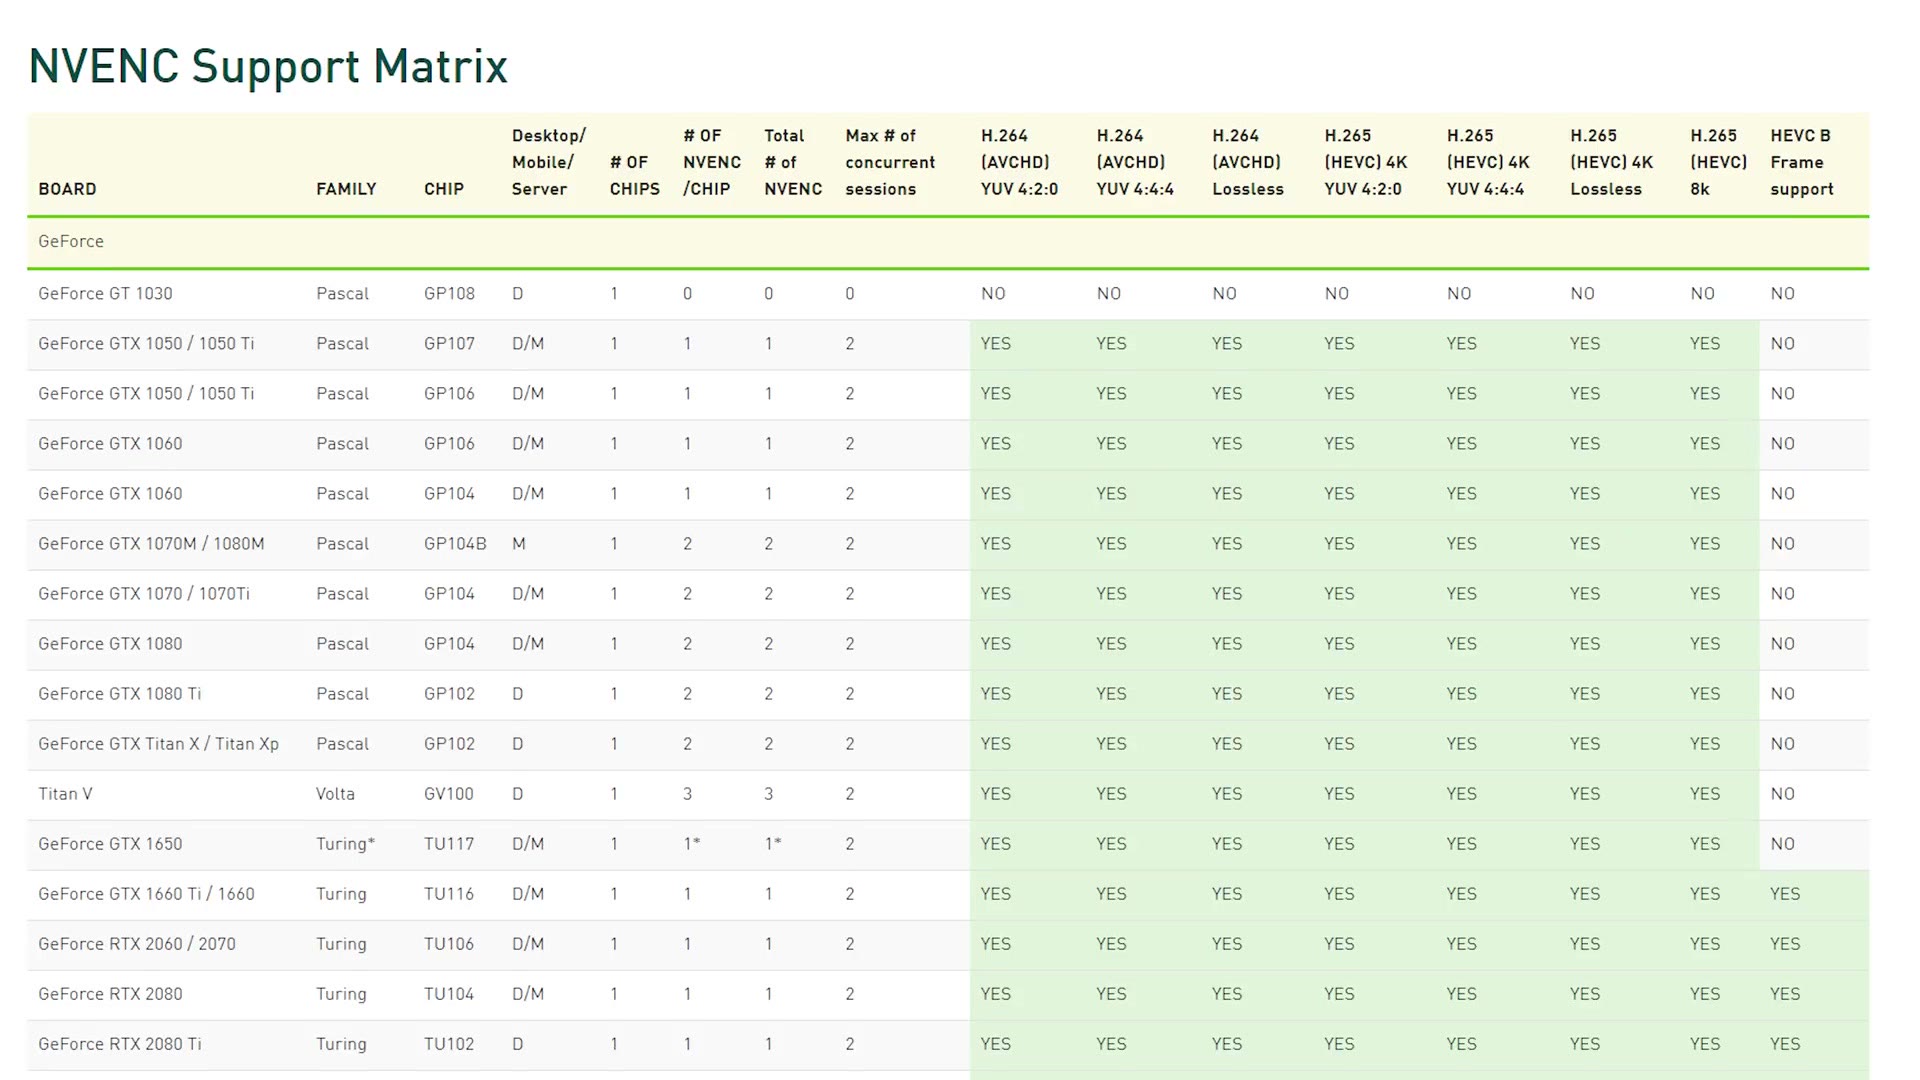
On AMD, Adobe’s own Premiere Pro system requirements page lists what’s supported. And regardless of which brand you’re on, update your graphics drivers to the latest version before you conclude anything. That fixes this more often than you’d think.
How To Disable Intel Quick Sync
Last one. Mouse over Hardware Encoding in your export settings and read the tooltip carefully. If it does not specifically say NVIDIA hardware or AMD hardware, and instead says something generic like “utilizes available hardware,” that may mean your computer is reaching for Intel Quick Sync instead of your graphics card. In that case I would not use hardware encoding at all, because Quick Sync has a chance of degrading your video quality.
I can’t give you exact steps for turning it off, because it depends entirely on the motherboard in your machine. But the short version is this: if you have a dedicated graphics card and it isn’t showing up in that tooltip, go into your computer’s BIOS and disable the integrated graphics. That should shut off Quick Sync and hand hardware encoding back to the card you actually paid for.
That’s the whole thing. Two settings to change, a handful of things to check whenever it misbehaves, and exports that finish in a quarter of the time. Don’t forget to grab those 1080p and 4K export presets while you’re here, since they have all of this baked in already.