
I’m going to show you how to edit a wedding ceremony in seconds with AI in Premiere Pro. Literally. I’m going to take an entire wedding ceremony that has multiple cameras, multiple speakers and multiple sources of audio, and take it from completely unedited to having all of the cuts made, basically ready for you to deliver to your couple as a finished video, in a few seconds.
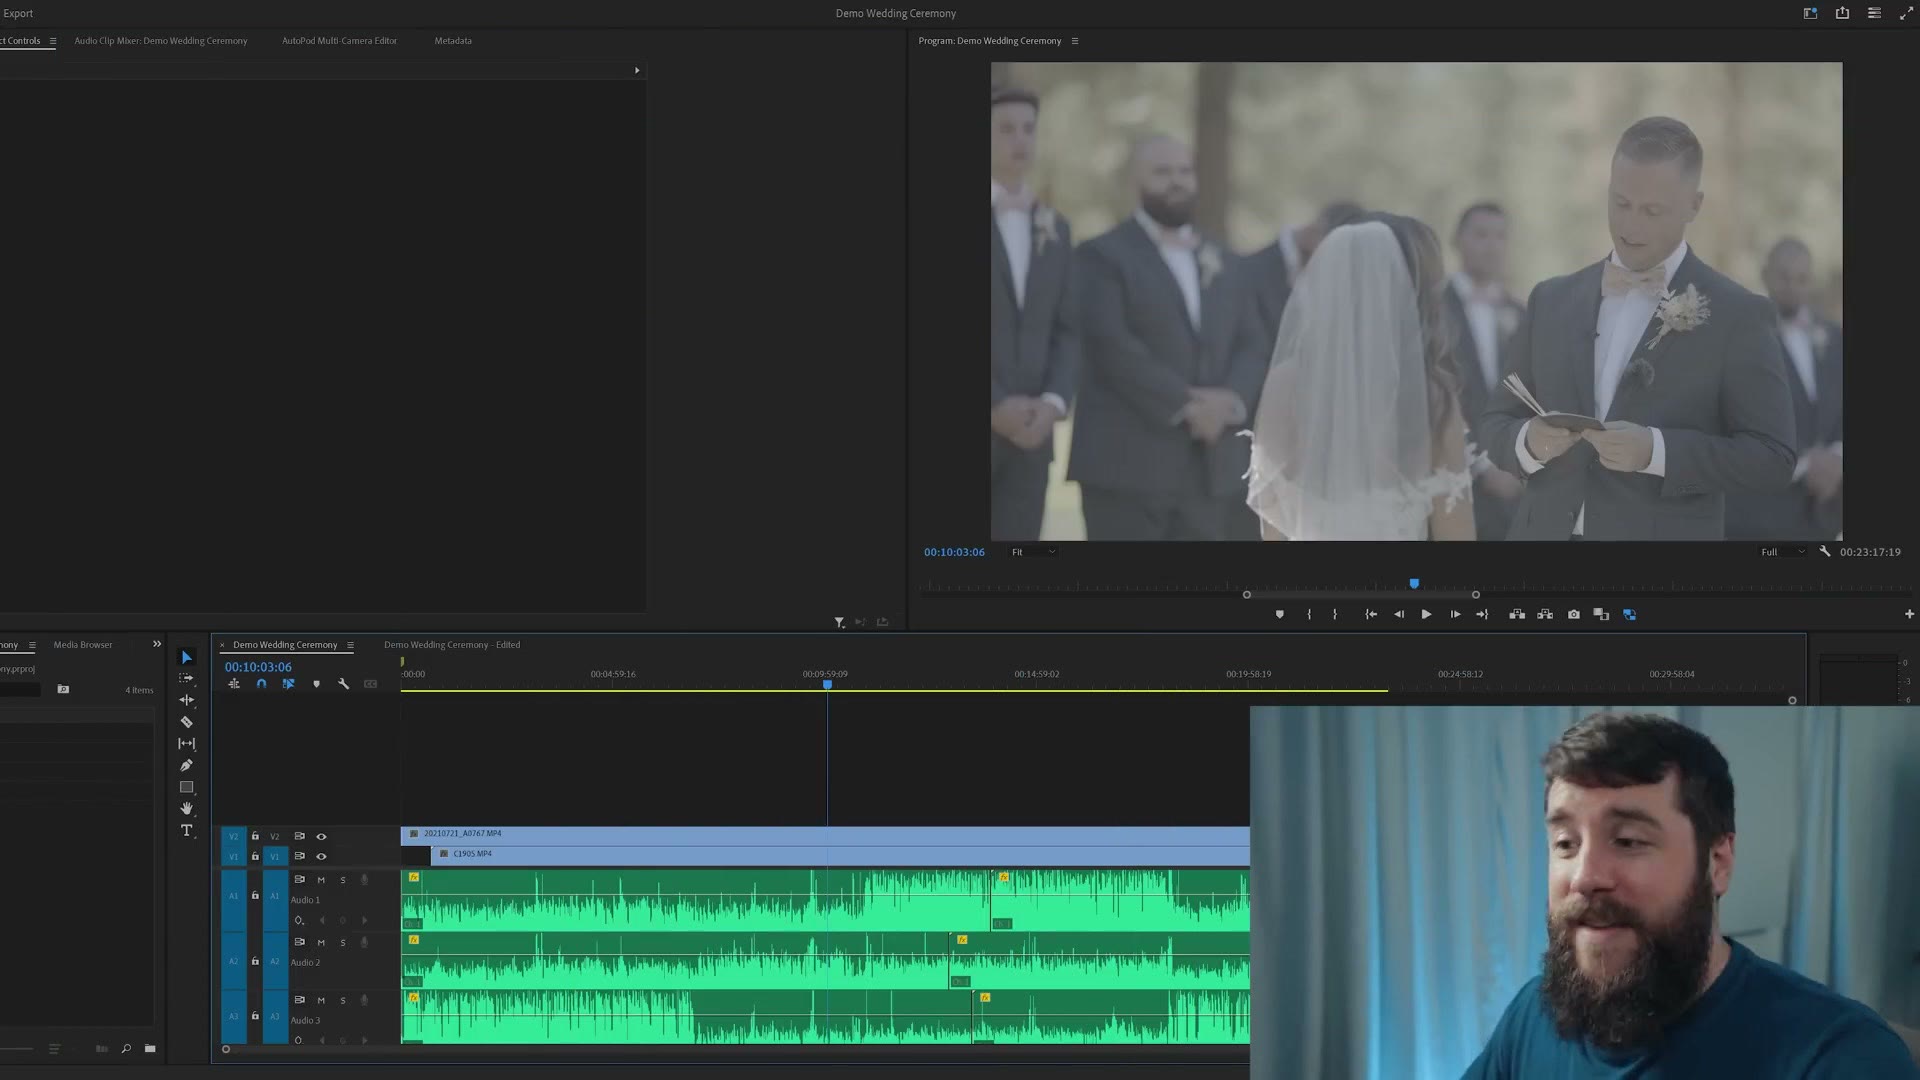
What this means is that if you film weddings, editing the ceremony is about to be a lot less tedious. And what’s better is that if you wanted to sell your couples a standalone wedding ceremony video, which I highly recommend doing, you’ll be able to make one in a few minutes. It’s like printing money. It’s awesome.
Start By Downloading A Free Trial Of AutoPod
To do this you’re going to need an extension for Premiere Pro called AutoPod. You may have heard of AutoPod because early in 2023 it took the podcasting world by storm, since this extension will essentially edit a video podcast for you, saving you minutes, if not hours, of tedious work cutting between camera angles.
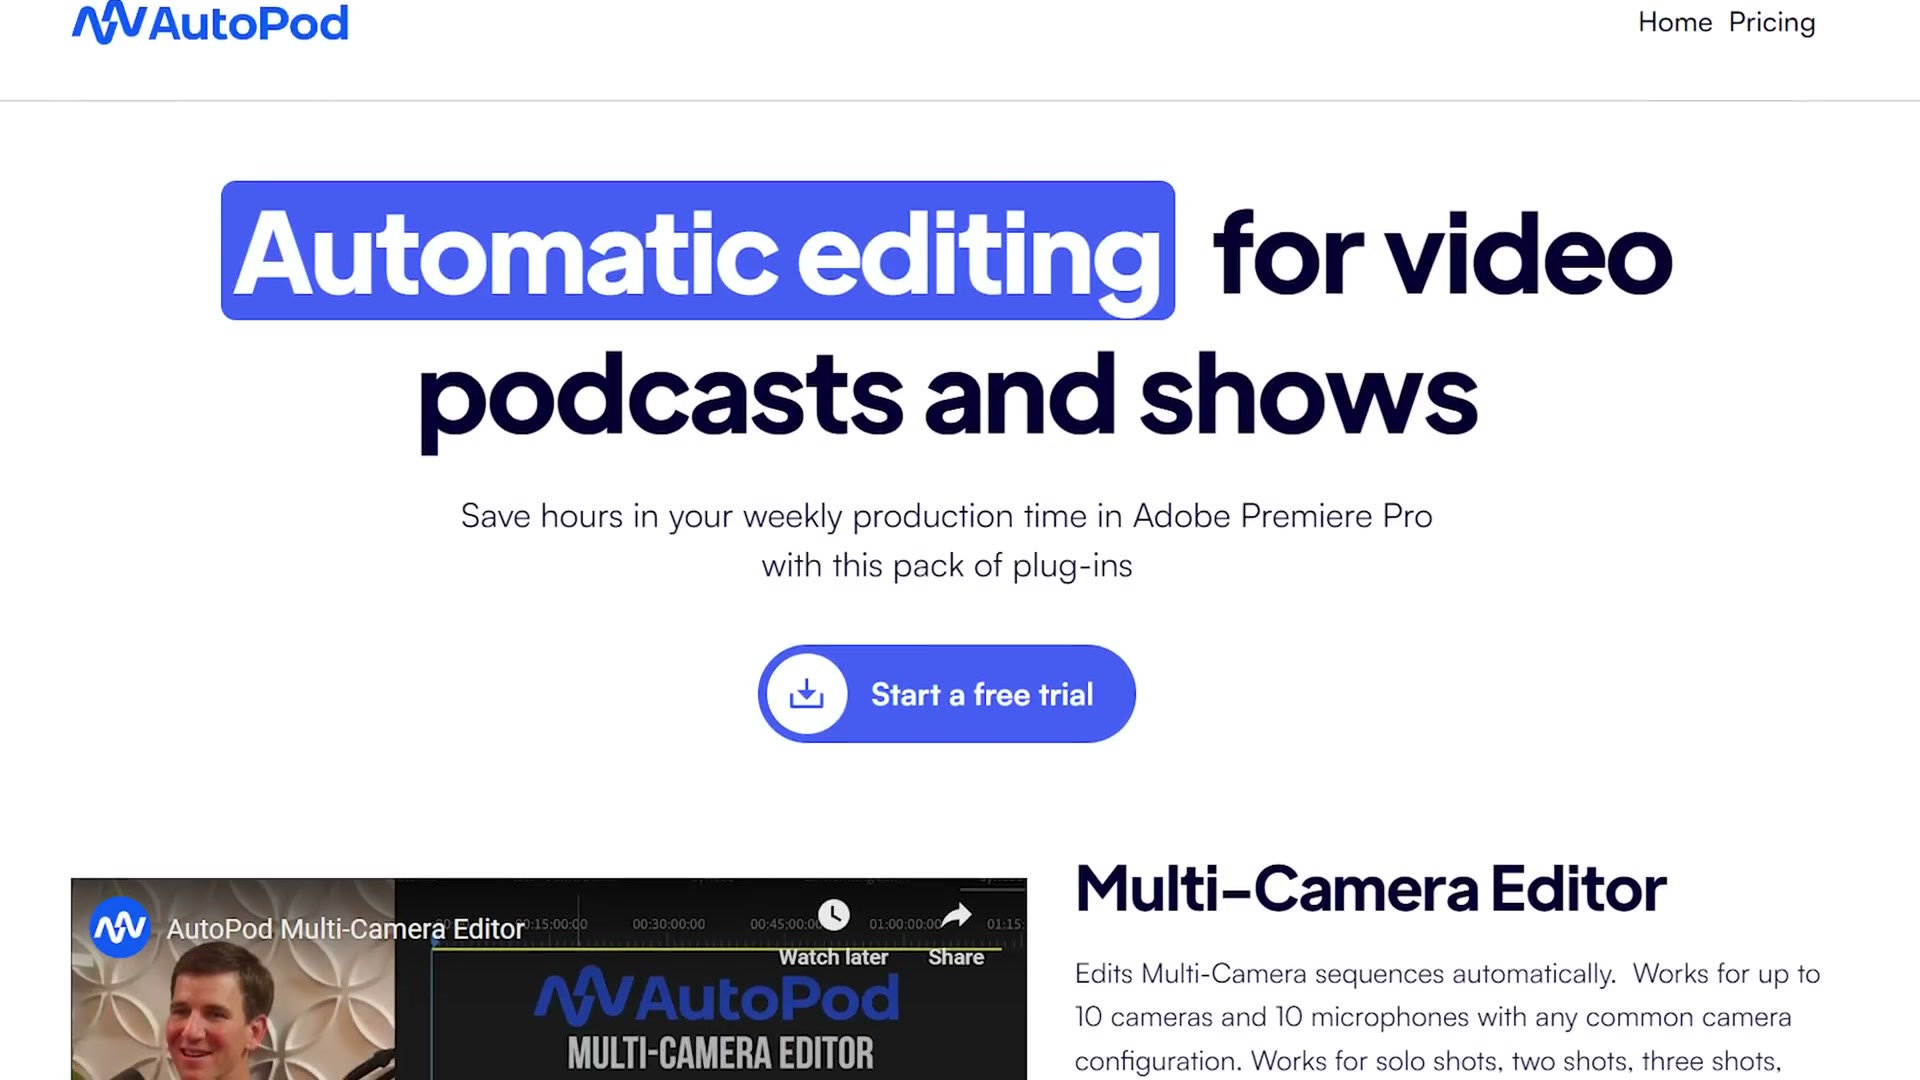
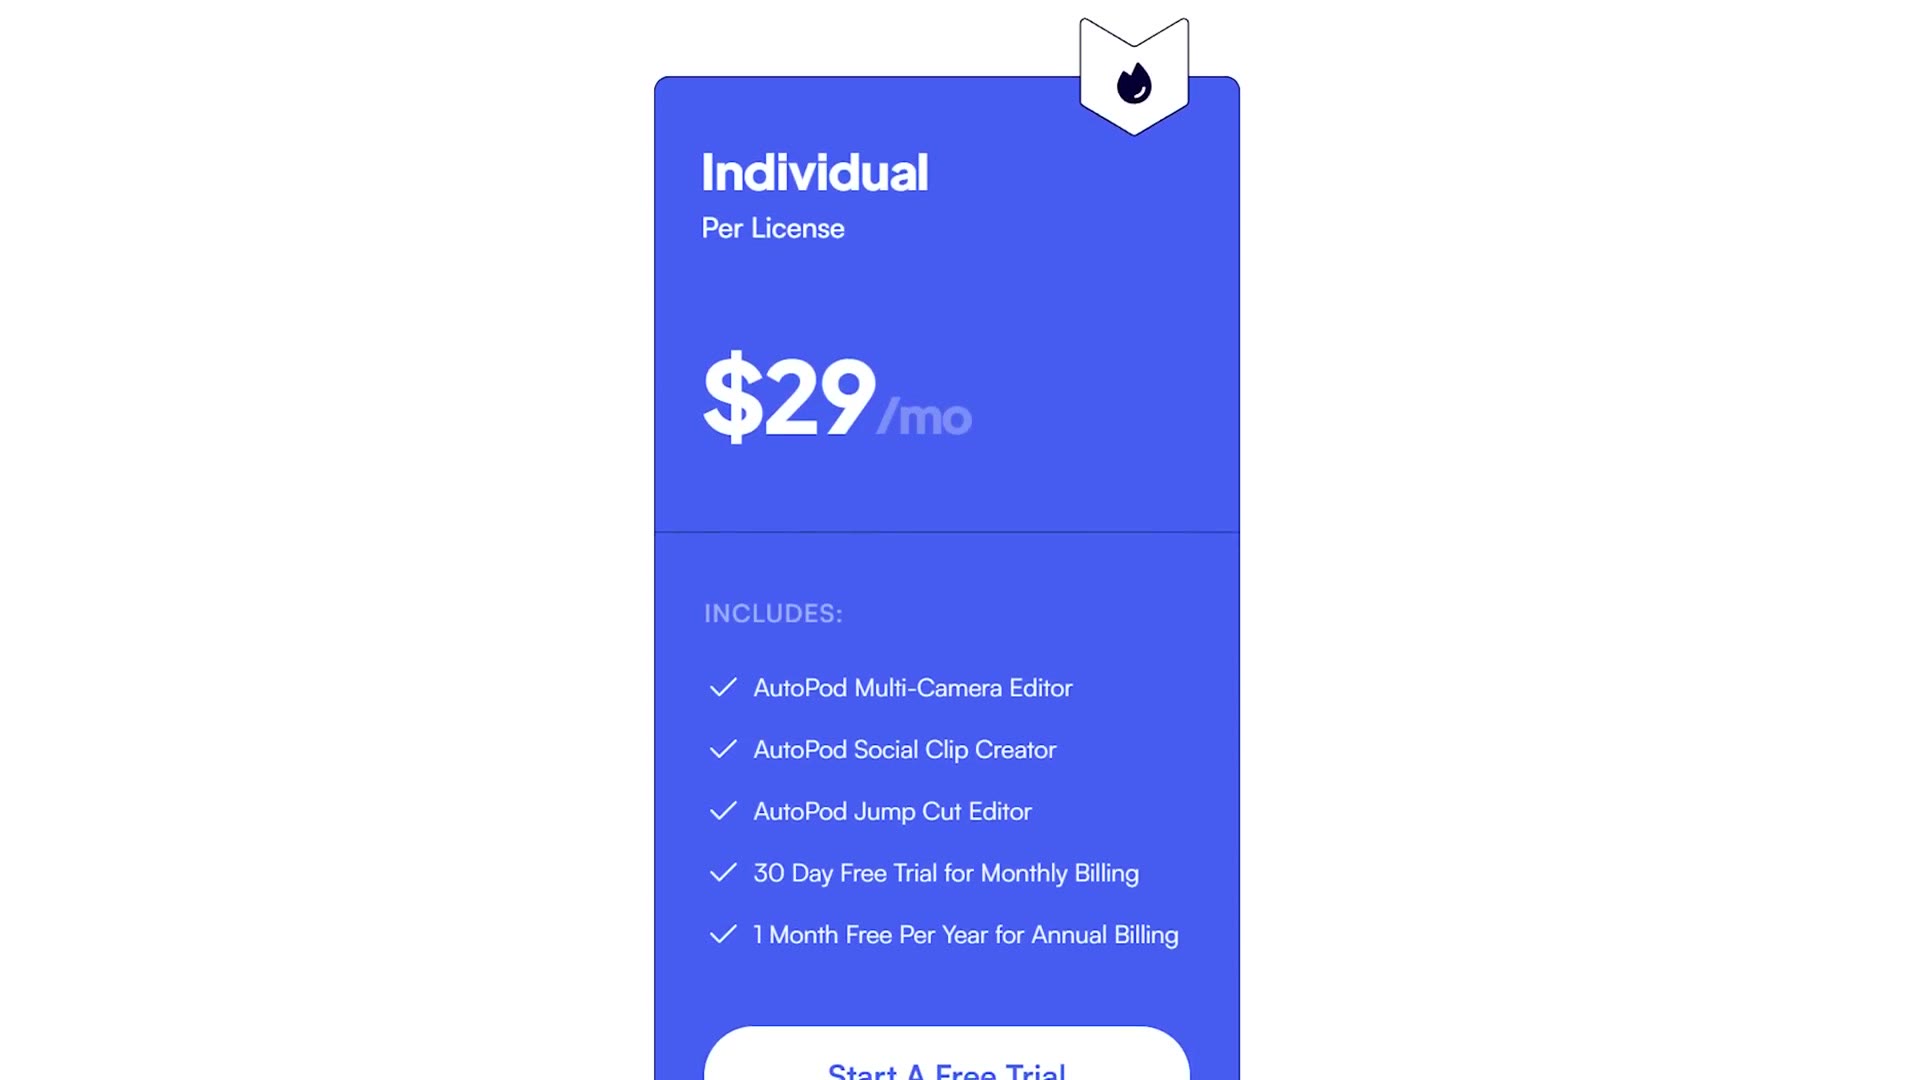
Sorry, AutoPod is not free, but they do offer a one month free trial, so you can download it like I did, test it out, and if you like it and it works, then you keep paying for it once the trial is up.
Now, as I said, AutoPod was made for editing video podcasts. But whenever I saw it, I realized, wait a second, a video podcast is just a group of cameras and audio recorders that cut from camera to camera depending on who is speaking. You know what else is really similar to that? A wedding ceremony, where you have a group of cameras and audio recorders that cut from camera to camera depending on who is speaking.
And so that got me thinking. Could you use AutoPod to edit a wedding ceremony video? The answer is yes, you can. Here’s how to set it up.
Setup Your Sequence
Download AutoPod, install it, open up Premiere Pro and go to the AutoPod extension. But before you can dial in the settings, you’re going to need to prep your sequence for AutoPod to edit.
This is really simple to do. All you need is the video clips from your cameras on their own video tracks, and all of the audio recorders you used on their own audio tracks.
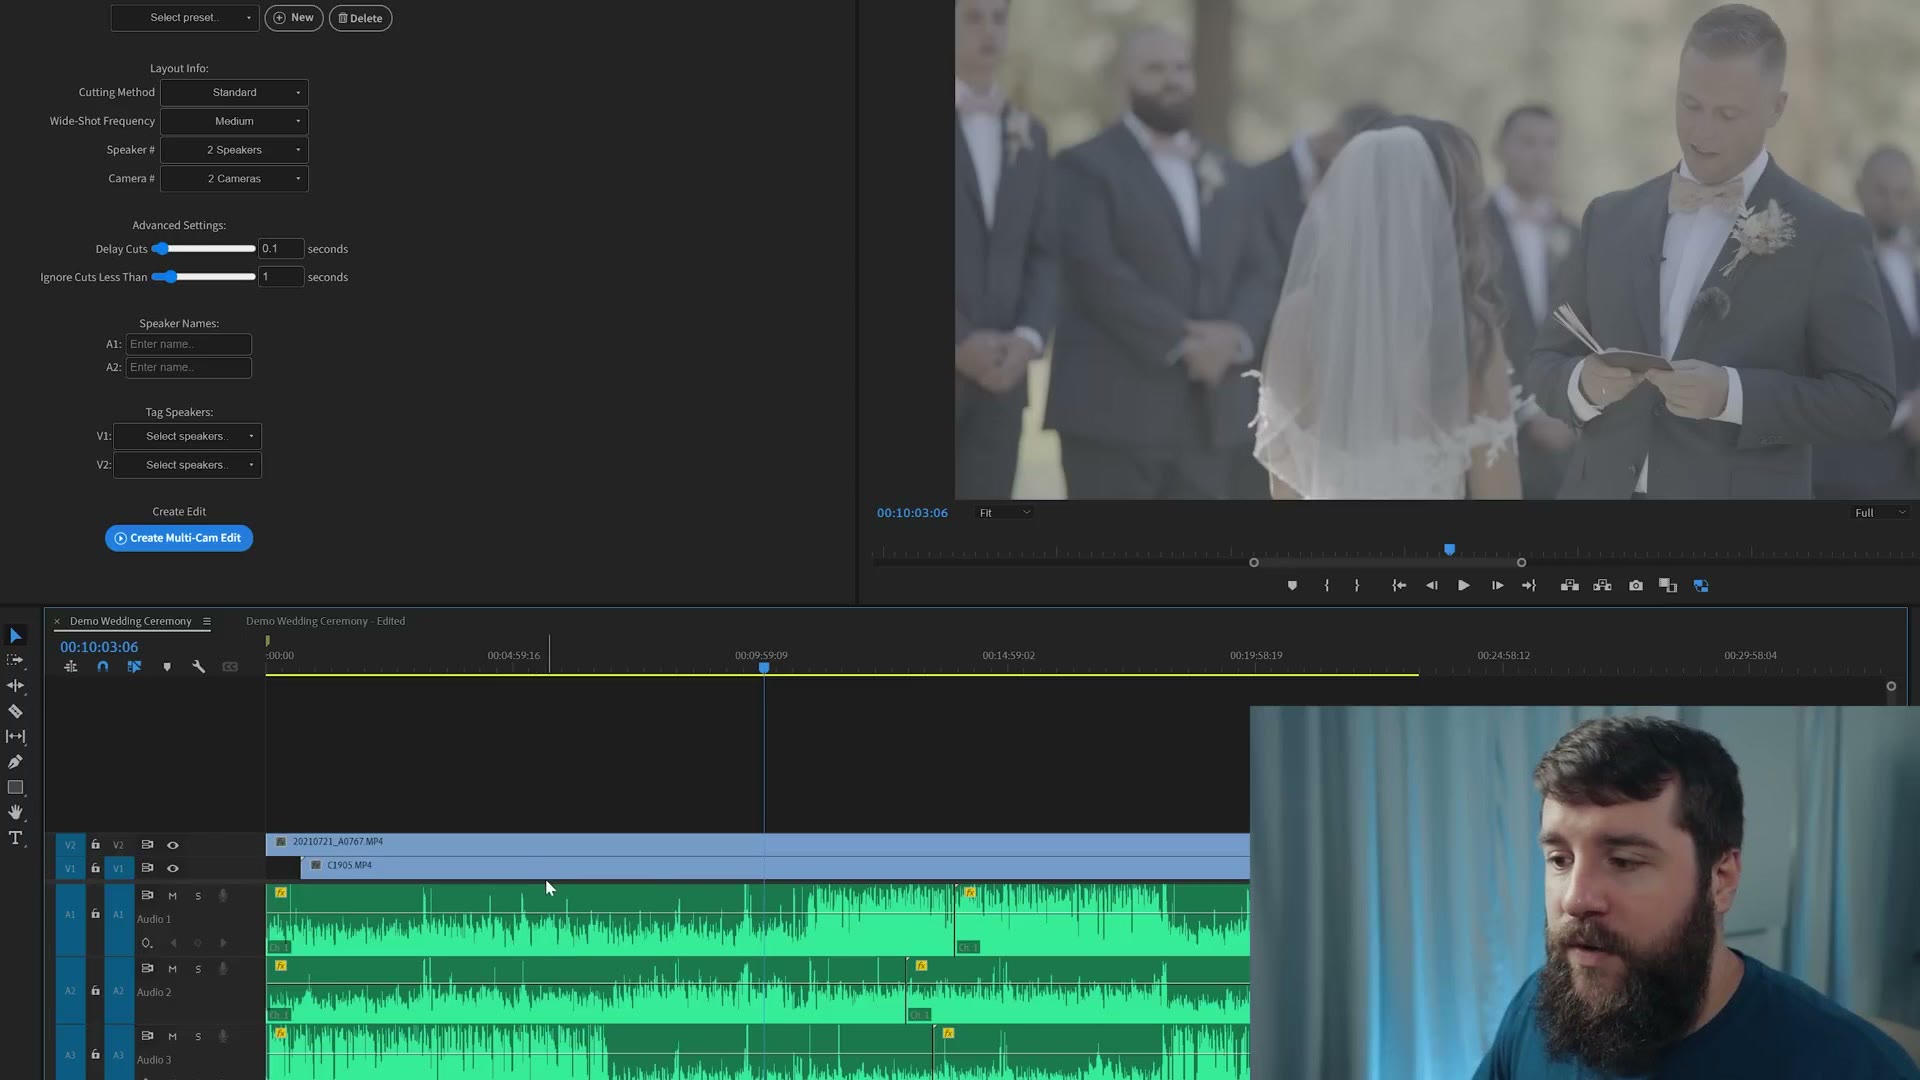
So in this case, I have the camera I used to film the bride and the officiant on video track one, and the camera I used to film the groom on video track two. If you have more cameras, and I know many videographers like to have a wide angle setup in the back as a safety angle, feel free to put that camera on its own track as well.
If you’re a wedding filmmaker who likes to roam with one camera and film lots of different things, AutoPod isn’t really going to work best for you, and you’ll need to add those roaming clips in manually. But thankfully that shouldn’t be too much work, because AutoPod is still doing 80 to 90% of the job.
Likewise, I have all of the audio recorders I used on their own tracks. A microphone on the bride on audio track one, a microphone on the groom on audio track two, and a microphone on the officiant on audio track three.
Please note that if you’re recording from something like the house audio, where you plug into the venue’s soundboard and get one mixed file with the officiant and the couple all in it, AutoPod is not going to work, because it requires all the audio sources to be separated onto their own tracks.
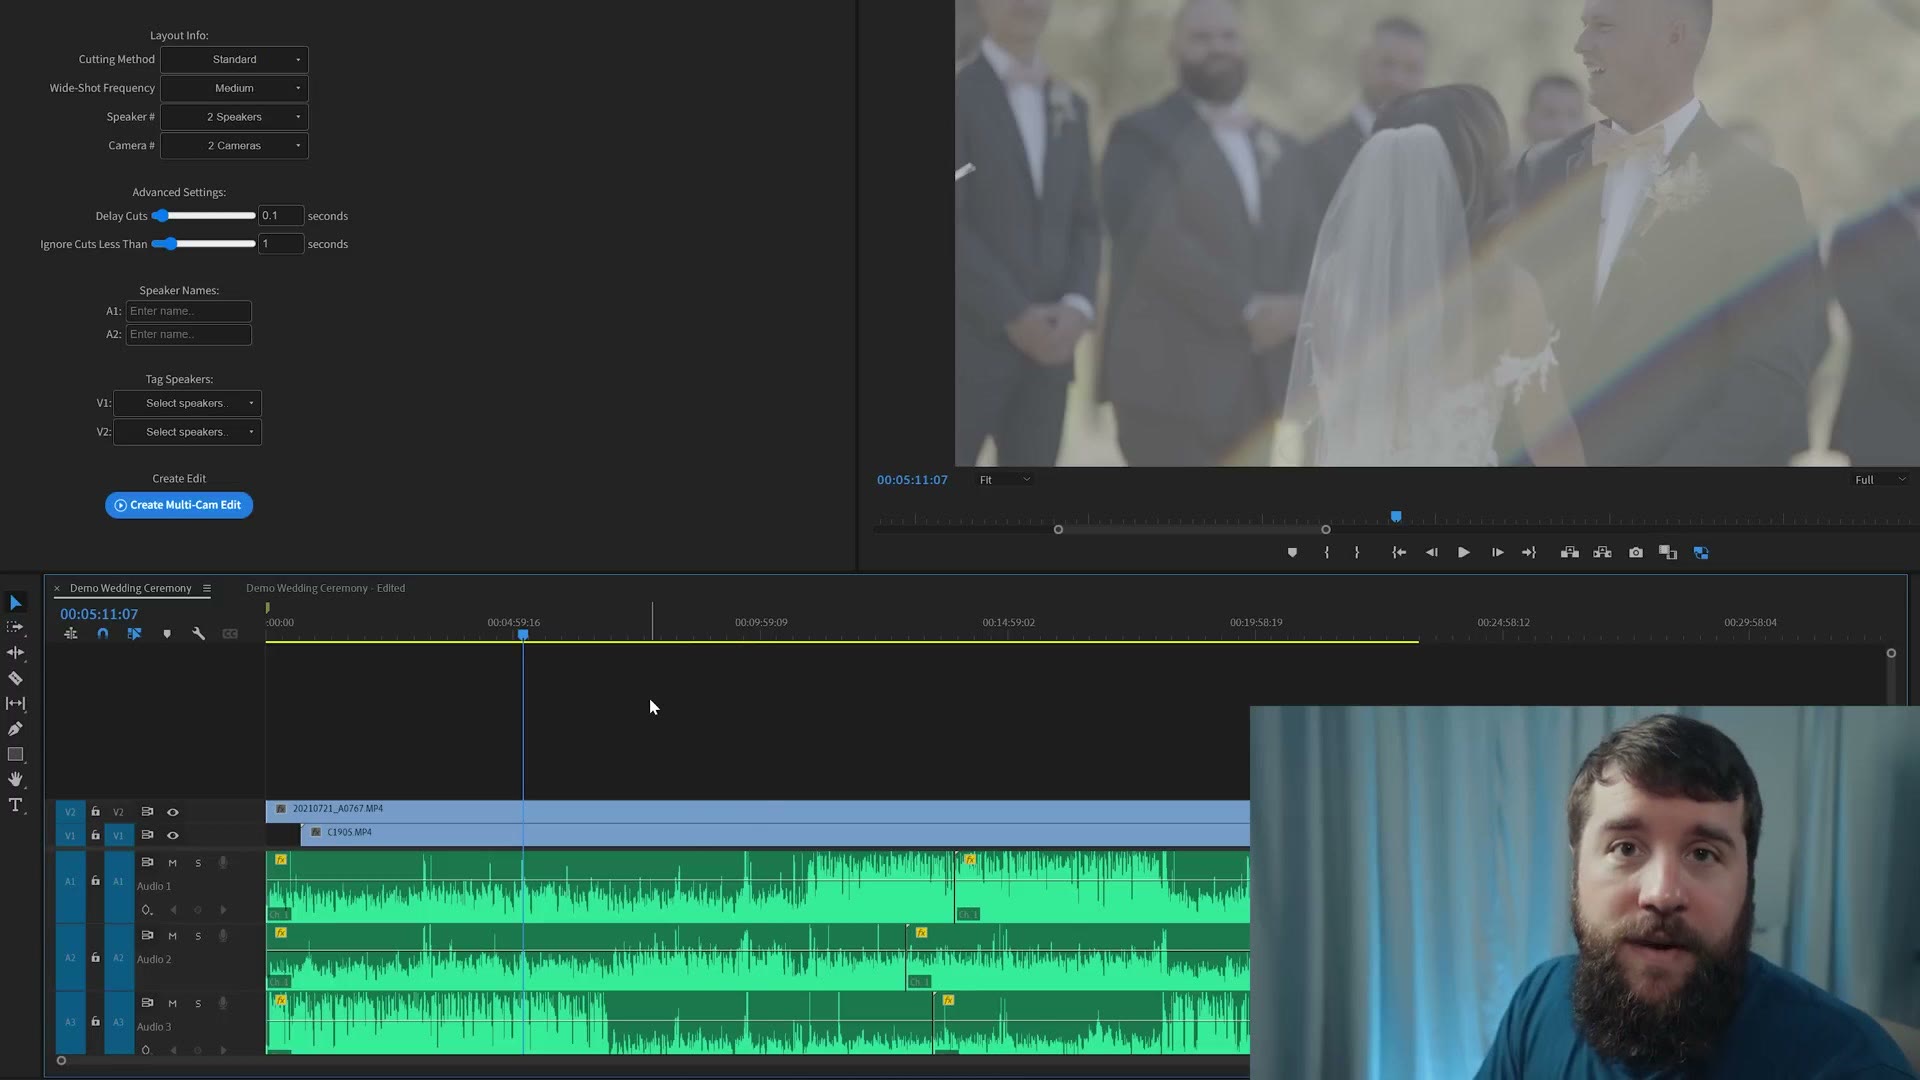
Next, you need all of your audio and video clips synchronized, so they’re lined up and playing back at the same time. You can see here on the waveforms that everything matches up, because I’ve synced it. If you aren’t sure how to synchronize all of your clips, I have a tutorial on doing that with the tools in Premiere Pro.
The last thing to do before you dive into AutoPod is make sure all of your video clips start at frame zero at the beginning of your timeline. Which means that if one clip is longer than another, and it definitely will be, because this is a wedding ceremony with multiple cameras spaced around a ceremony site, you’re going to need to shorten your longest clips to the length of your shortest one.
Do not worry though, this is not destructive. If you’re thinking, Matt, I have important footage in the earlier portions of some of these clips, don’t freak out. You’ll be able to go back and extend them after AutoPod does its thing and makes its cuts.
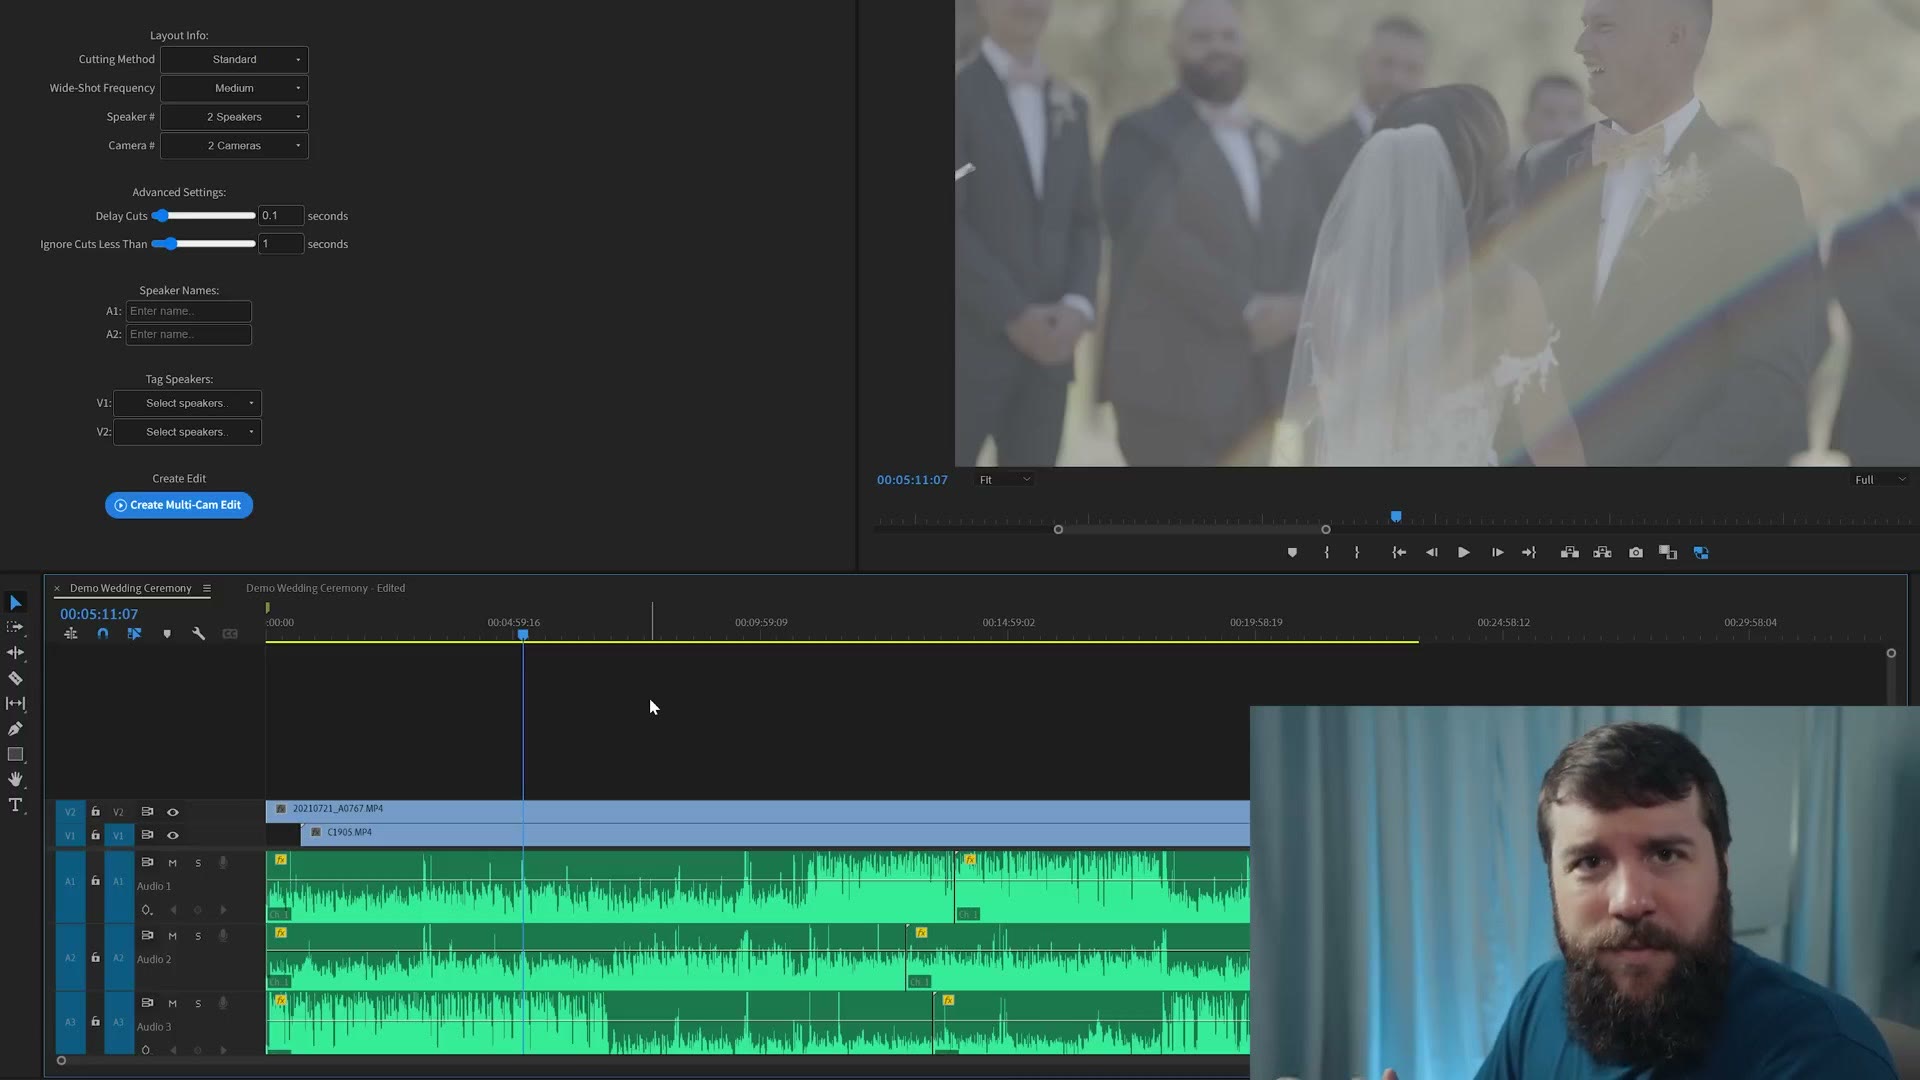
So in this case we just need a little tweaking, because the video clip on track two is longer than the one on track one. Select all your audio tracks, bring those over, go back to the beginning, press delete, and everything lines up. Now all of our clips start at frame zero.
AutoPod Setup
This is super simple to set up. First go up to Layout Info, and for Cutting Method you have the option of either Standard or Enable/Disable. You want Enable/Disable, because what that means is that AutoPod is not going to delete your video clips, it’s only going to disable them when they’re not being used.
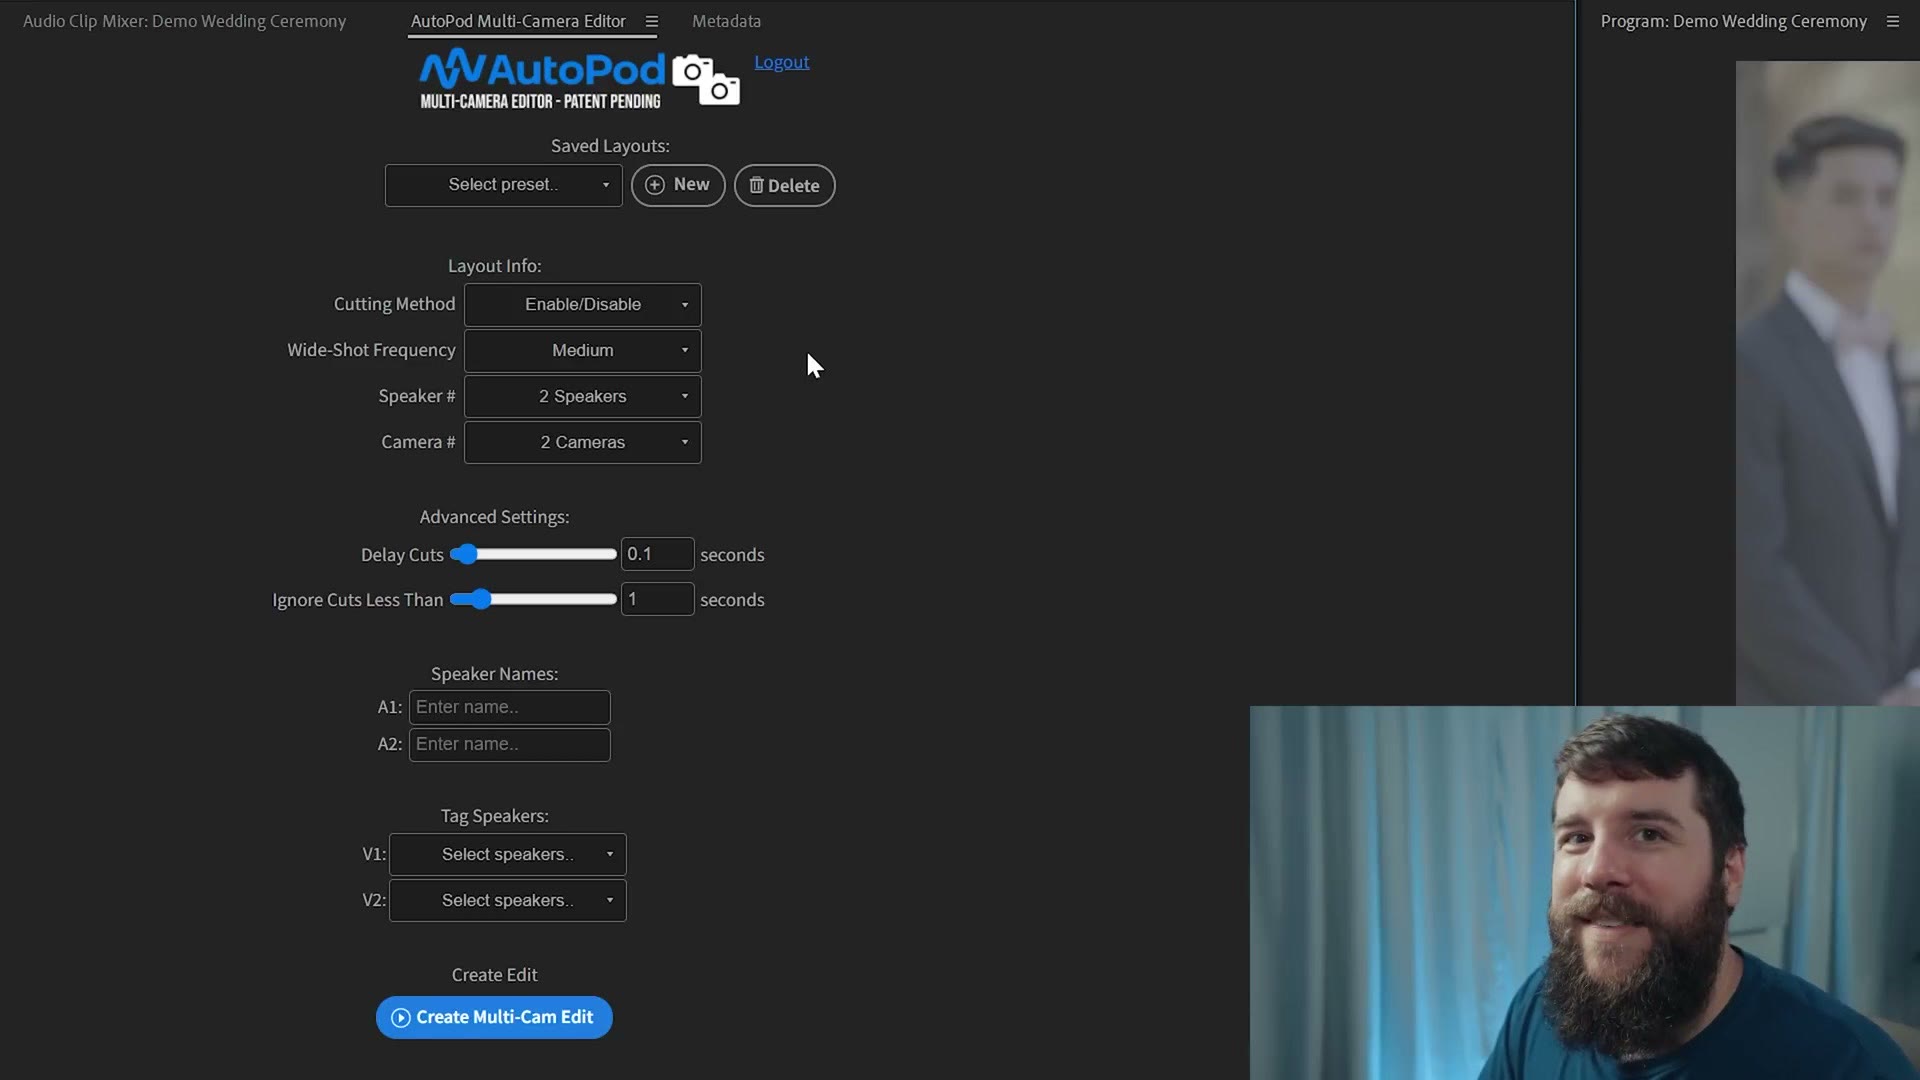
The reason this matters is that this is a wedding video, and if AutoPod gets a little overzealous, you may want to re-enable some clips to bring back footage that got disabled. I find that just makes the edit quicker.
Next you have Wide-Shot Frequency, and this is another area where podcasts line up with wedding ceremonies, in that both are videos where filmmakers like to have a wide safety angle. In this demo I do not have a wide ceremony angle, so I’m going to ignore this setting and leave it on Medium. But if you do have a wide ceremony shot, this setting lets you tell AutoPod how often to cut to it.
Then you select how many people are speaking during the ceremony. Spoiler, this is often going to be three, the officiant plus the couple. In my case I have a bride, a groom and an officiant, so I’m selecting 3 Speakers, and then for cameras I’m telling AutoPod I have 2 Cameras. You can choose up to ten, so if you’re going really crazy with a ton of angles, you should still be able to make this work.
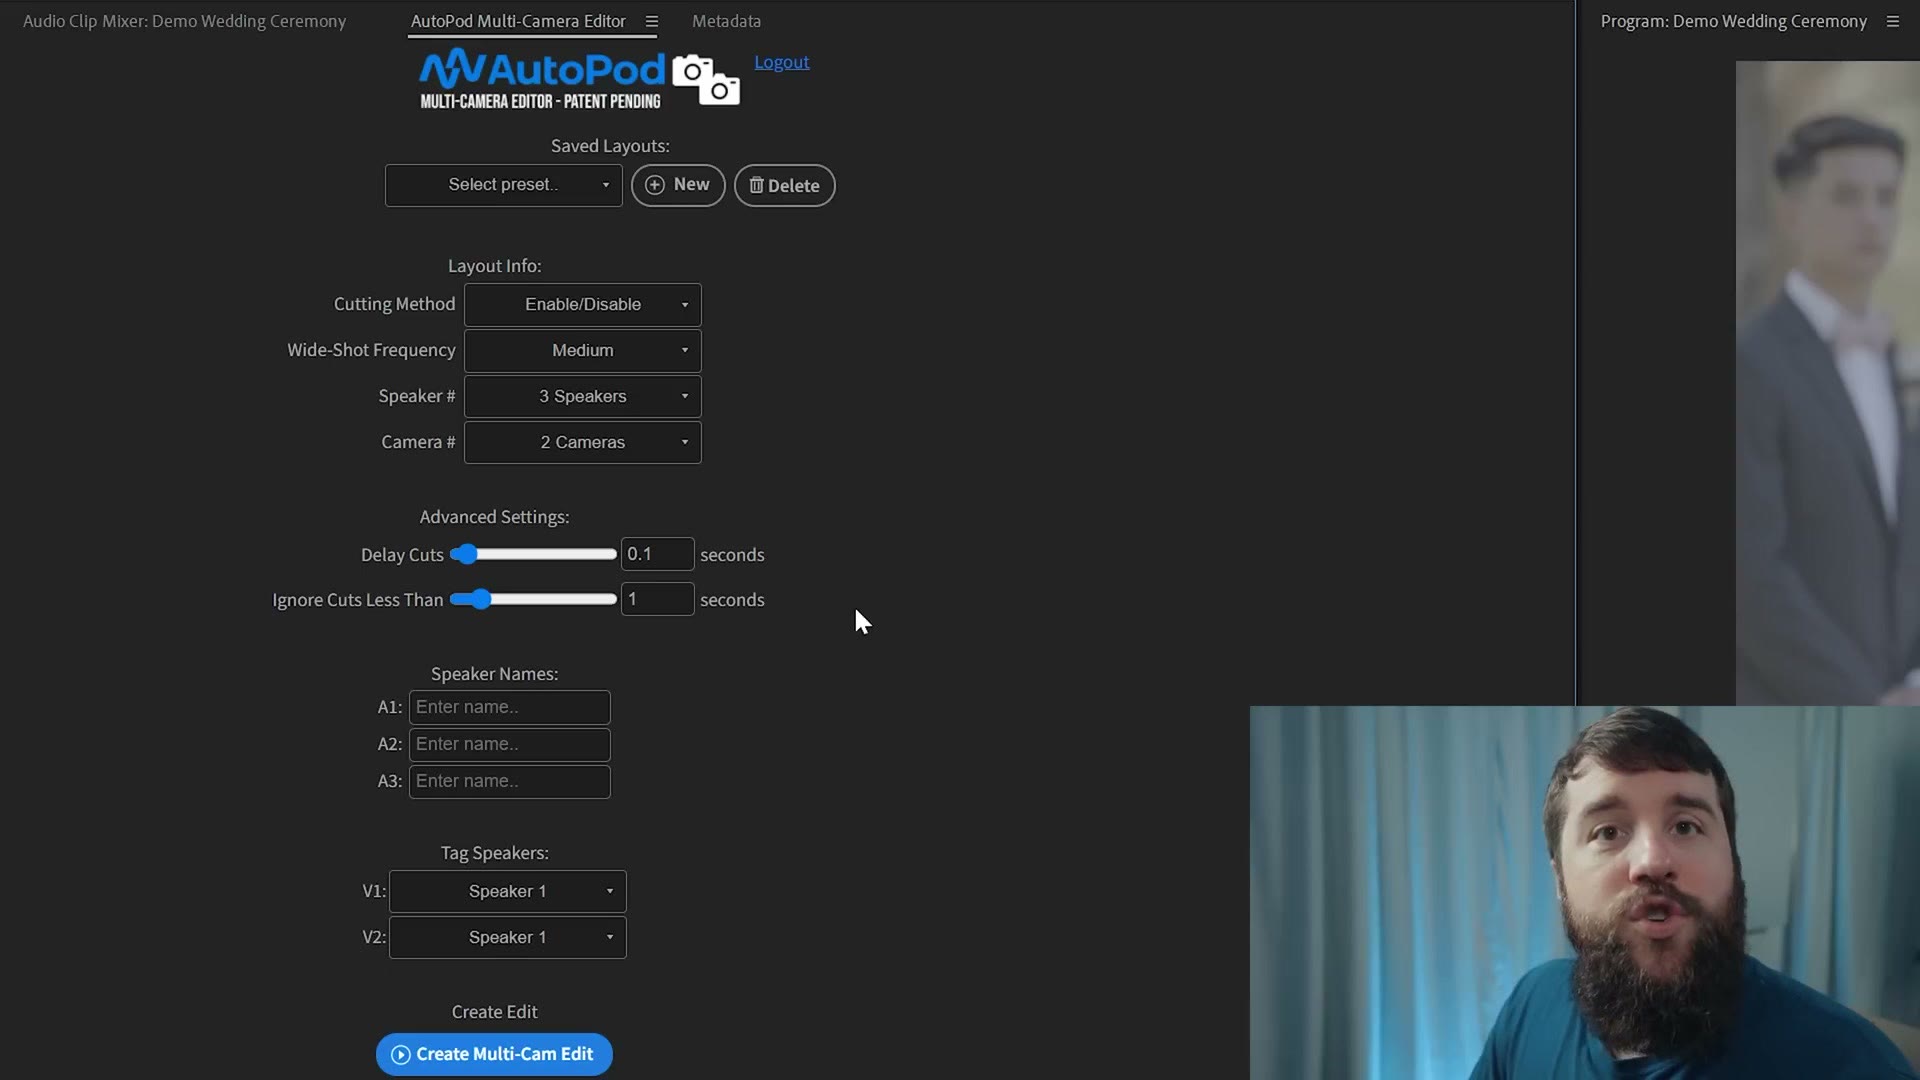
After that you have some advanced settings that basically control how often AutoPod cuts from one person speaking to another. By default, Delay Cuts is set to 0.1 seconds and Ignore Cuts Less Than is set to 1 second, and those should work well.
But if you notice AutoPod is getting really zealous about how much it’s cutting between people, and say the reason it’s cutting so much is that the bride is crying or the groom is breathing heavily, so it keeps cutting back to them and showing them ugly crying or something like that, you can extend Ignore Cuts Less Than from one second up to two or three seconds and see if that removes some of the unwanted cuts.
Almost done. Now you need to label your audio tracks so AutoPod knows who is speaking. In this case the bride’s microphone is on audio one, so I’ll label that Bride, the groom is on audio two, and the officiant is on audio three.
Now, in a perfect world you would have a separate camera angle for all three people in the ceremony. But things don’t always work like that. At this wedding I had one angle that stayed on the groom the whole time, while my other angle went back and forth between the officiant whenever they were speaking and the bride whenever she was saying her vows.
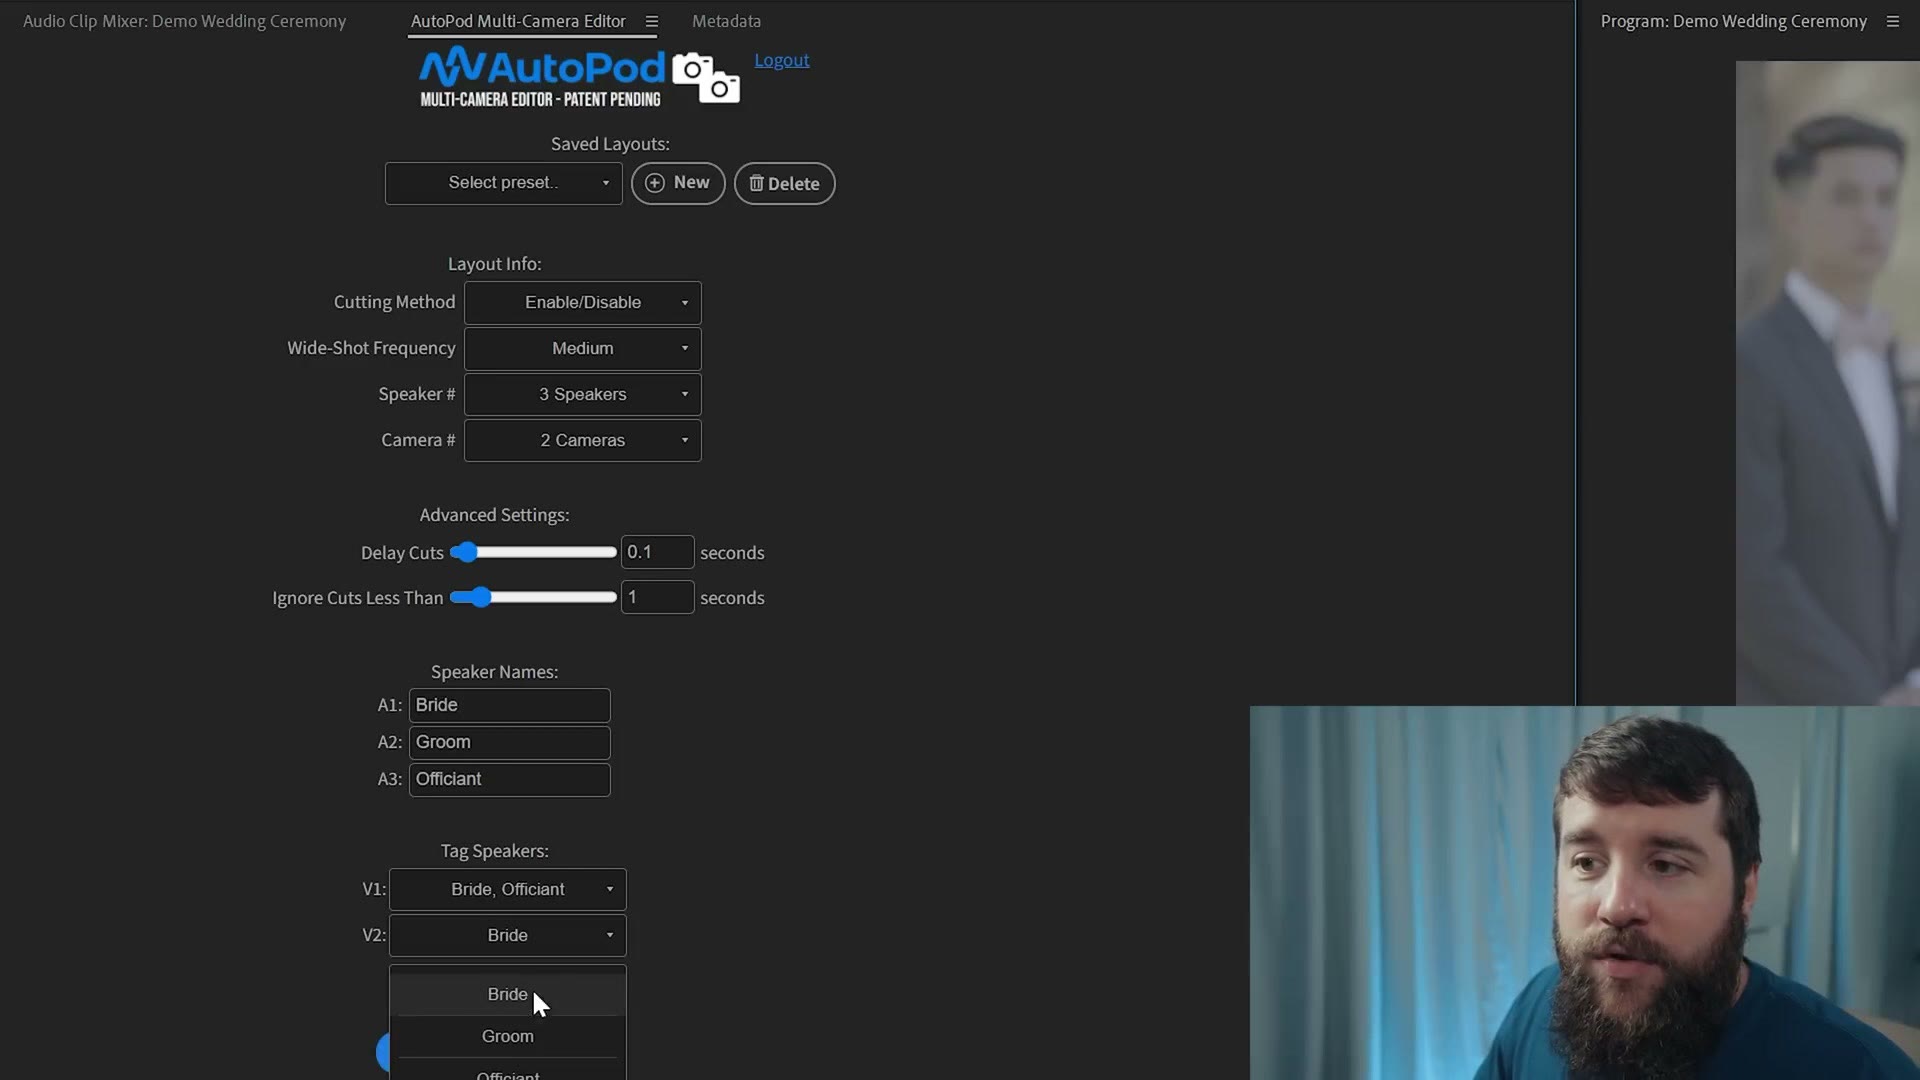
Thankfully AutoPod can work with even more complicated camera setups like this using the Tag Speakers section. I click on video one and tell AutoPod that both the bride and the officiant are on video track one, and that video track two is the groom. Notice that you also have a lot of other combinations to choose from, including All Speakers, which you can treat as that wide shot.
With that, we have dialed in all of our wedding ceremony settings. AutoPod does give you the option to save all of this as a preset, which is great if you’re filming a podcast where you always have the same people speaking with the same camera angles. But in our case we’re editing a wedding ceremony, which is going to be different every single time, so I don’t see much value in making a preset.
The MINDBLOWING Results
What we are going to do is pretty darn magical, because it’s finally time to click Create Multicam Edit at the bottom and let AutoPod do its thing.
Look how fast that is. Oh my goodness.
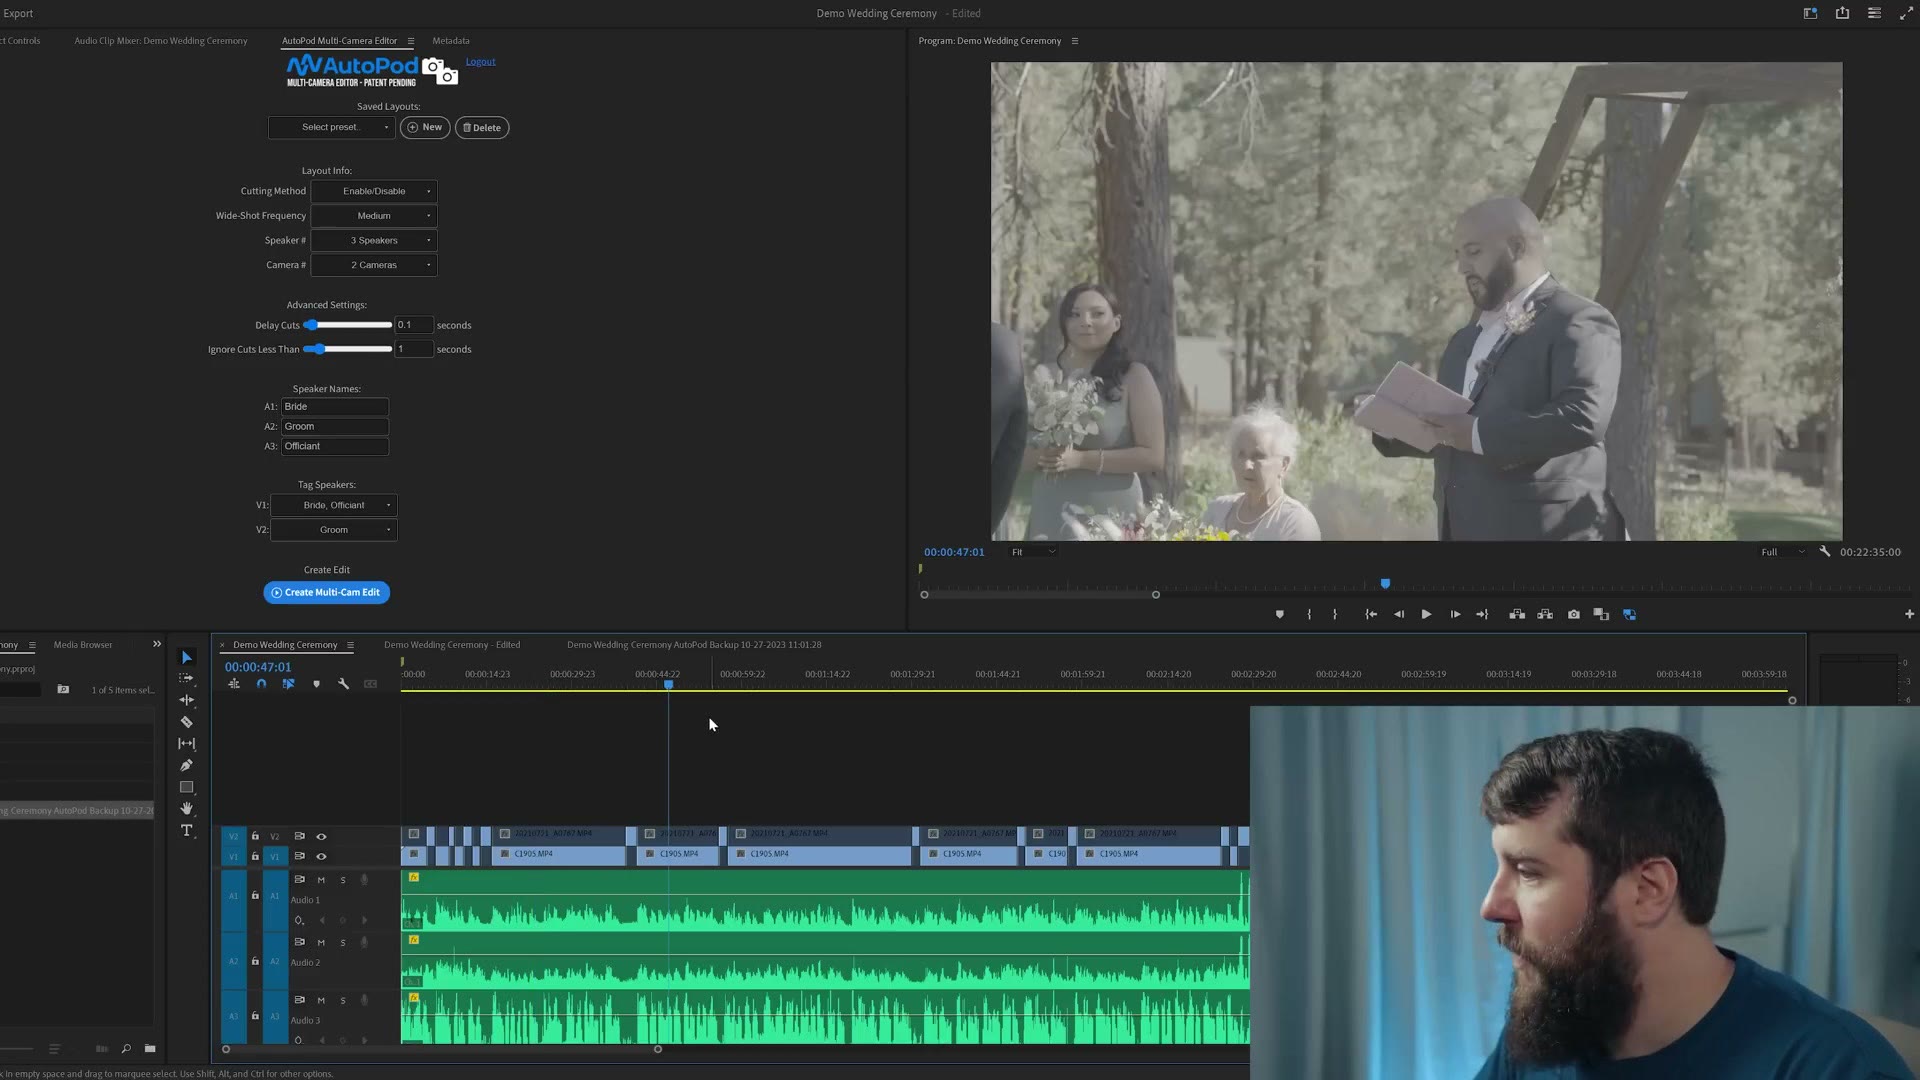
AutoPod has now gone through and made camera cuts between every single person speaking, enabling and disabling video tracks. Let’s see how it did.
At the start of the ceremony it was mostly focused on video track one, because that’s the track with the officiant in it. And then occasionally it would cut to an angle of the groom reacting, which looks really good. Notice that it’s usually cutting to the groom in moments where the officiant is not speaking, whenever he pauses. I don’t think those cuts are bad at all, because it can often be boring to keep the camera on the person speaking the entire time, so I’m going to leave them.
Next is where things get even more impressive, when we get to the vows. AutoPod recognizes that the groom is now speaking, so it cuts to his angle and hangs out on him while he gives his vows. Can you see how much time this is already saving you? This is a 20 minute long ceremony and all of these cuts were made in a few seconds.
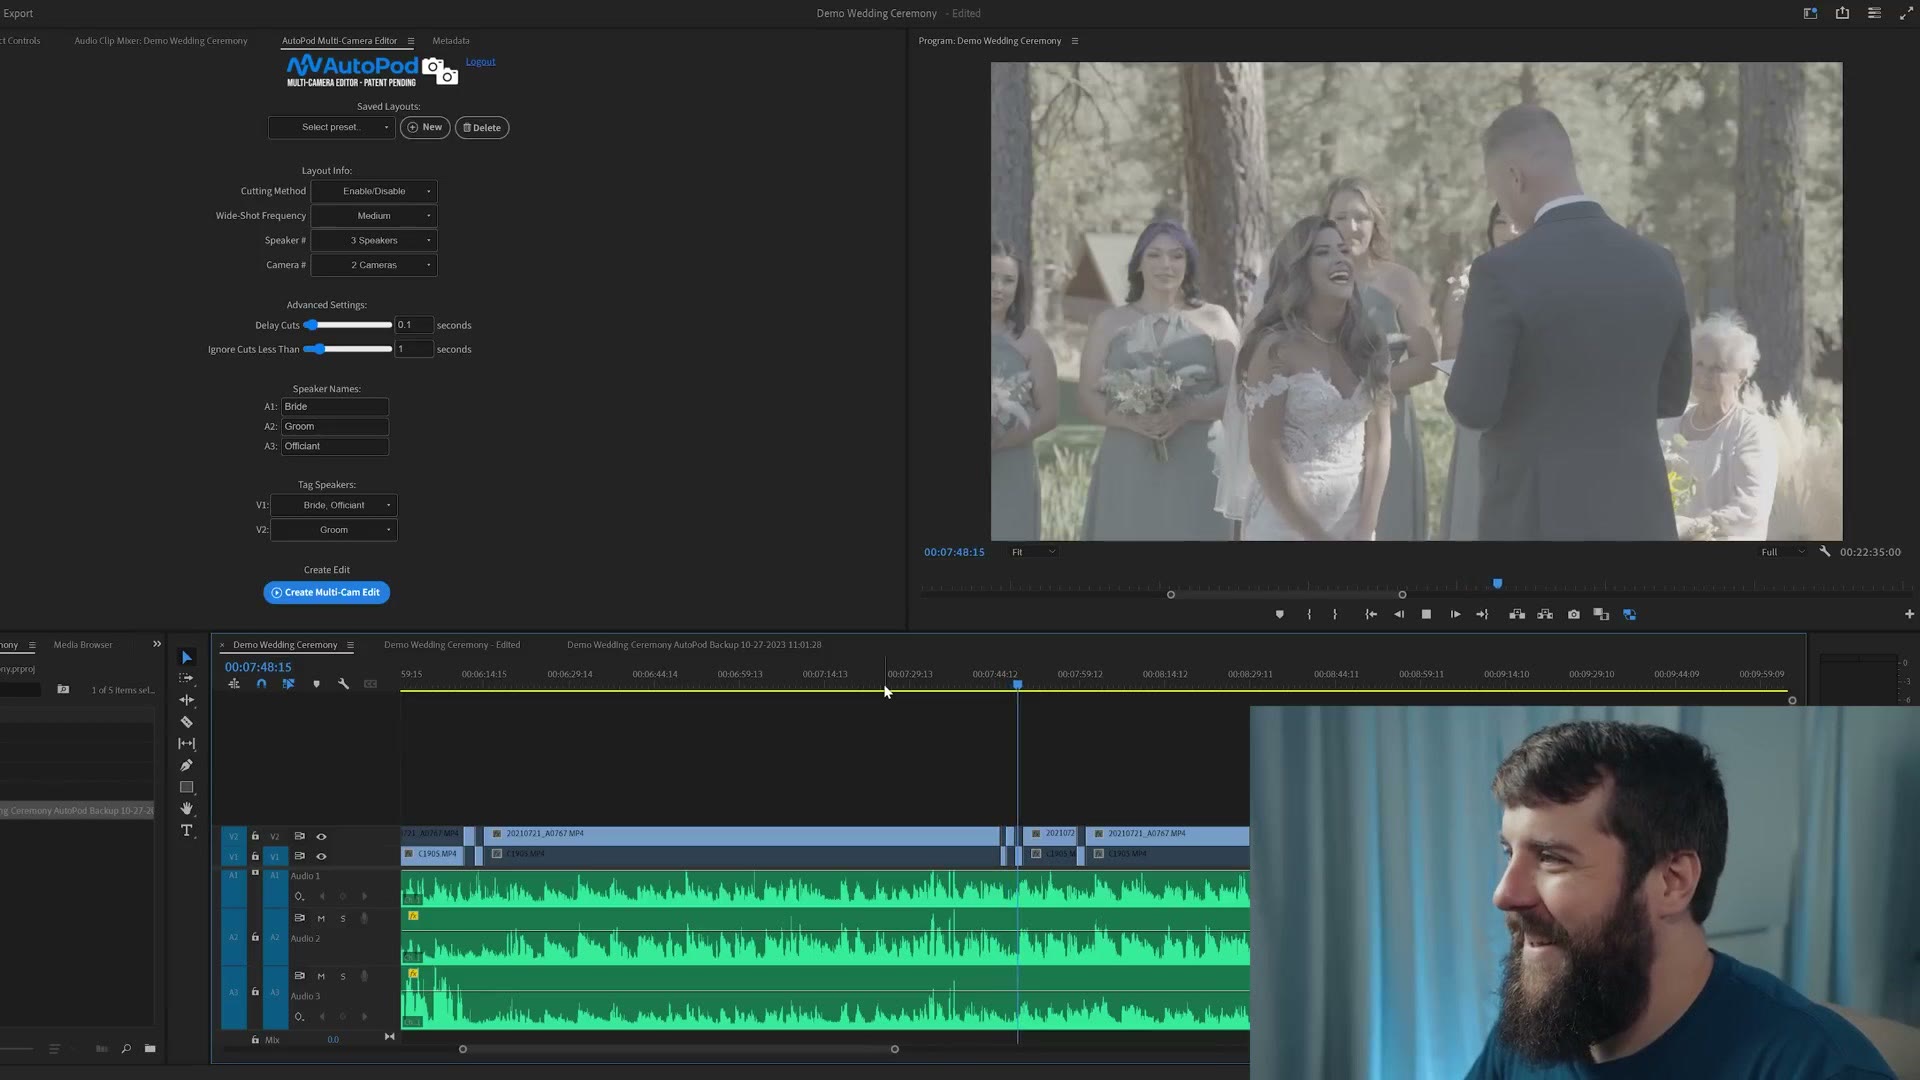
All right, now it’s time to blow your mind. Here’s the groom giving his vows, but there’s a moment where the bride starts to speak a bit and gives some commentary. Watch how AutoPod handles it. It shows the groom speaking, then it recognizes the bride is speaking, cuts to her, then back to the groom.
This is so great, and it’s pretty much exactly what I would have done editing this ceremony by hand. It hit the right humor beat and then went right back to the groom.
Overall, I feel like AutoPod got this entire edit about 90% of the way there, and while there are a few tweaks I’m going to need to make, this is still saving so much time.
Where AutoPod Struggles
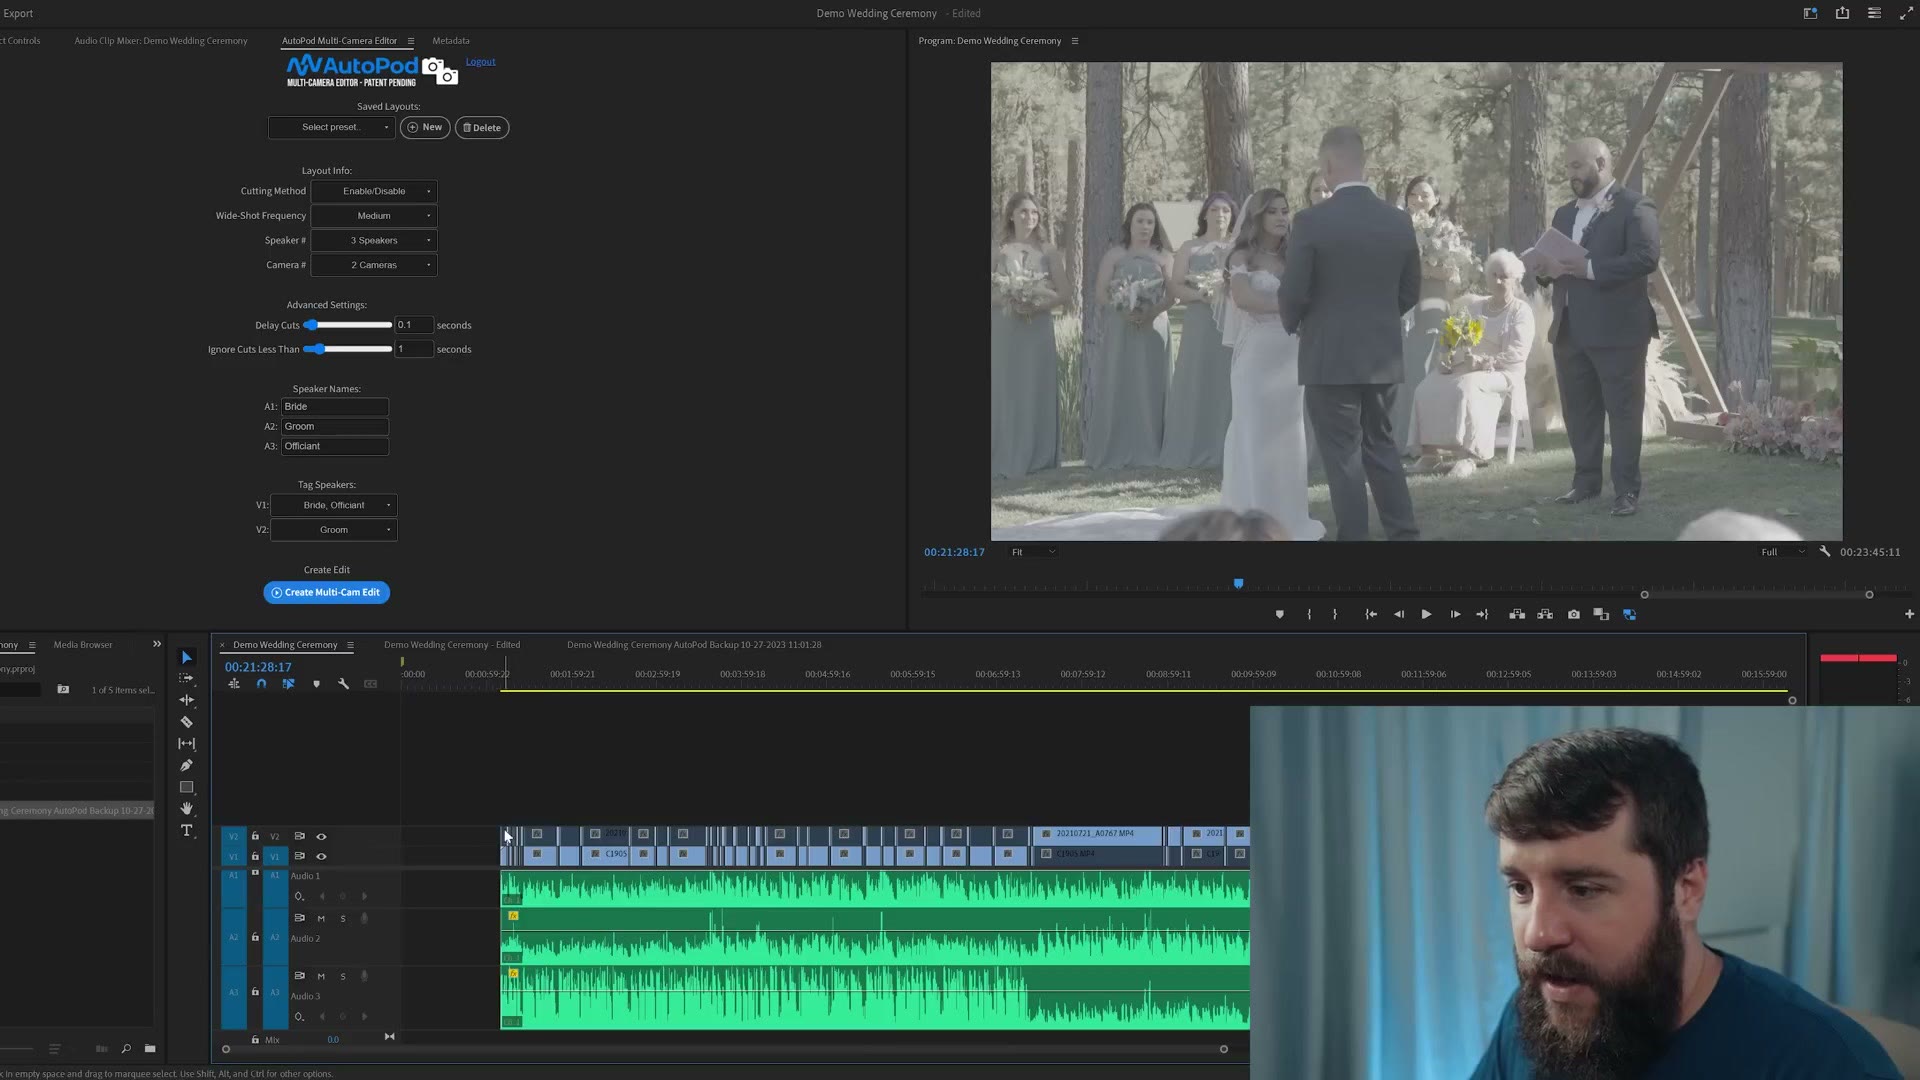
As far as the tweaks, I want you to notice that at the end of the ceremony AutoPod got a little cut crazy. It got the groom kissing the bride, which is great, but then it started cutting back and forth a lot, and you can see just how often it’s cutting.
One reason that’s happening is that AutoPod is just analyzing the audio and choosing the loudest source to cut to. And in this case there are so many people cheering and clapping that it doesn’t really know what to focus on. It’s like, okay, people are being loud on both of these angles constantly, so just cut back and forth quickly.
In short, AutoPod doesn’t know that it’s editing a wedding ceremony, and that this is a joyous moment where it should hold on each of these clips for a while. Maybe someday it will understand that. But for now, it’s just focusing on audio volume.
Also, remember how I said we’d need to shorten those clips to get them all to the same starting point? What’s great is you can zoom out, go back to the beginning, select all the clips, drag them over, then select the first clip, drag it out, re-enable it, and tada, you have the entire clip back. If there were moments from the beginning you needed, you can easily get to them, because AutoPod is nondestructive in how it edits.
What About DaVinci Resolve & Final Cut Pro?
Now I hear you already saying, Matt, can I do this in DaVinci Resolve or Final Cut? Unfortunately, at the time of recording this, AutoPod is only available in Premiere Pro. But leave a comment if you’d like to see them add it to one of those other programs.
Also, grab my free guide called Edit Videos Like A Pro. It covers some of the most important things I’ve learned as a video editor that took me literally years to learn, and it’s going to save you a ton of time. Completely free.
Thanks so much for reading, and have a great day!