
If you’re a wedding filmmaker who wants to deliver your wedding films on a USB flash drive that your couples can watch on their TV, I’m going to show you which USB sticks to buy and the exact video format and settings to use so they’ll play on virtually any smart TV. And hey, if you’re not a wedding filmmaker and you just want to put videos on a USB stick to play on your own TV, this is going to be super helpful to you too.
I do have one caveat before we get started, and that’s that while these instructions should work for the vast majority of smart TVs out there, what you need to keep in mind is that there is no standard format every single TV manufacturer has agreed on whenever it comes to playing videos from a USB stick. Which means there is a small chance these settings may not work. I’m sorry. I wish I could guarantee things.
So as a wedding filmmaker in particular, if you’re promising your couples that you’ll give them a USB drive they can play on their TV, you may want to put an asterisk at the end of that guarantee and give yourself some wiggle room to say, hey, it may not work, because they may have a really old TV or a weird TV. Just keep that in mind and make sure your couples know it.
USB Flash Drives You Should Buy
If you’re just putting videos on a USB stick that you’ll watch in your own house, you can go on Amazon and buy pretty much any USB 3.0 flash drive and you should be good to go.
That said, if you’re a wedding filmmaker in particular, it’s going to look kind of tacky to deliver a generic looking USB drive to a couple. Remember, you want to be giving them a premium experience, and that means spending a bit extra on a nicer looking USB stick that isn’t plastic and shiny with SanDisk slapped across the front of it is probably a good choice.
So with that in mind, there’s a company called Photo Flash Drive, and I recommend buying a USB 3.0 drive from them. These drives look significantly prettier, and you can even customize them with your name and logo. They look really cool.
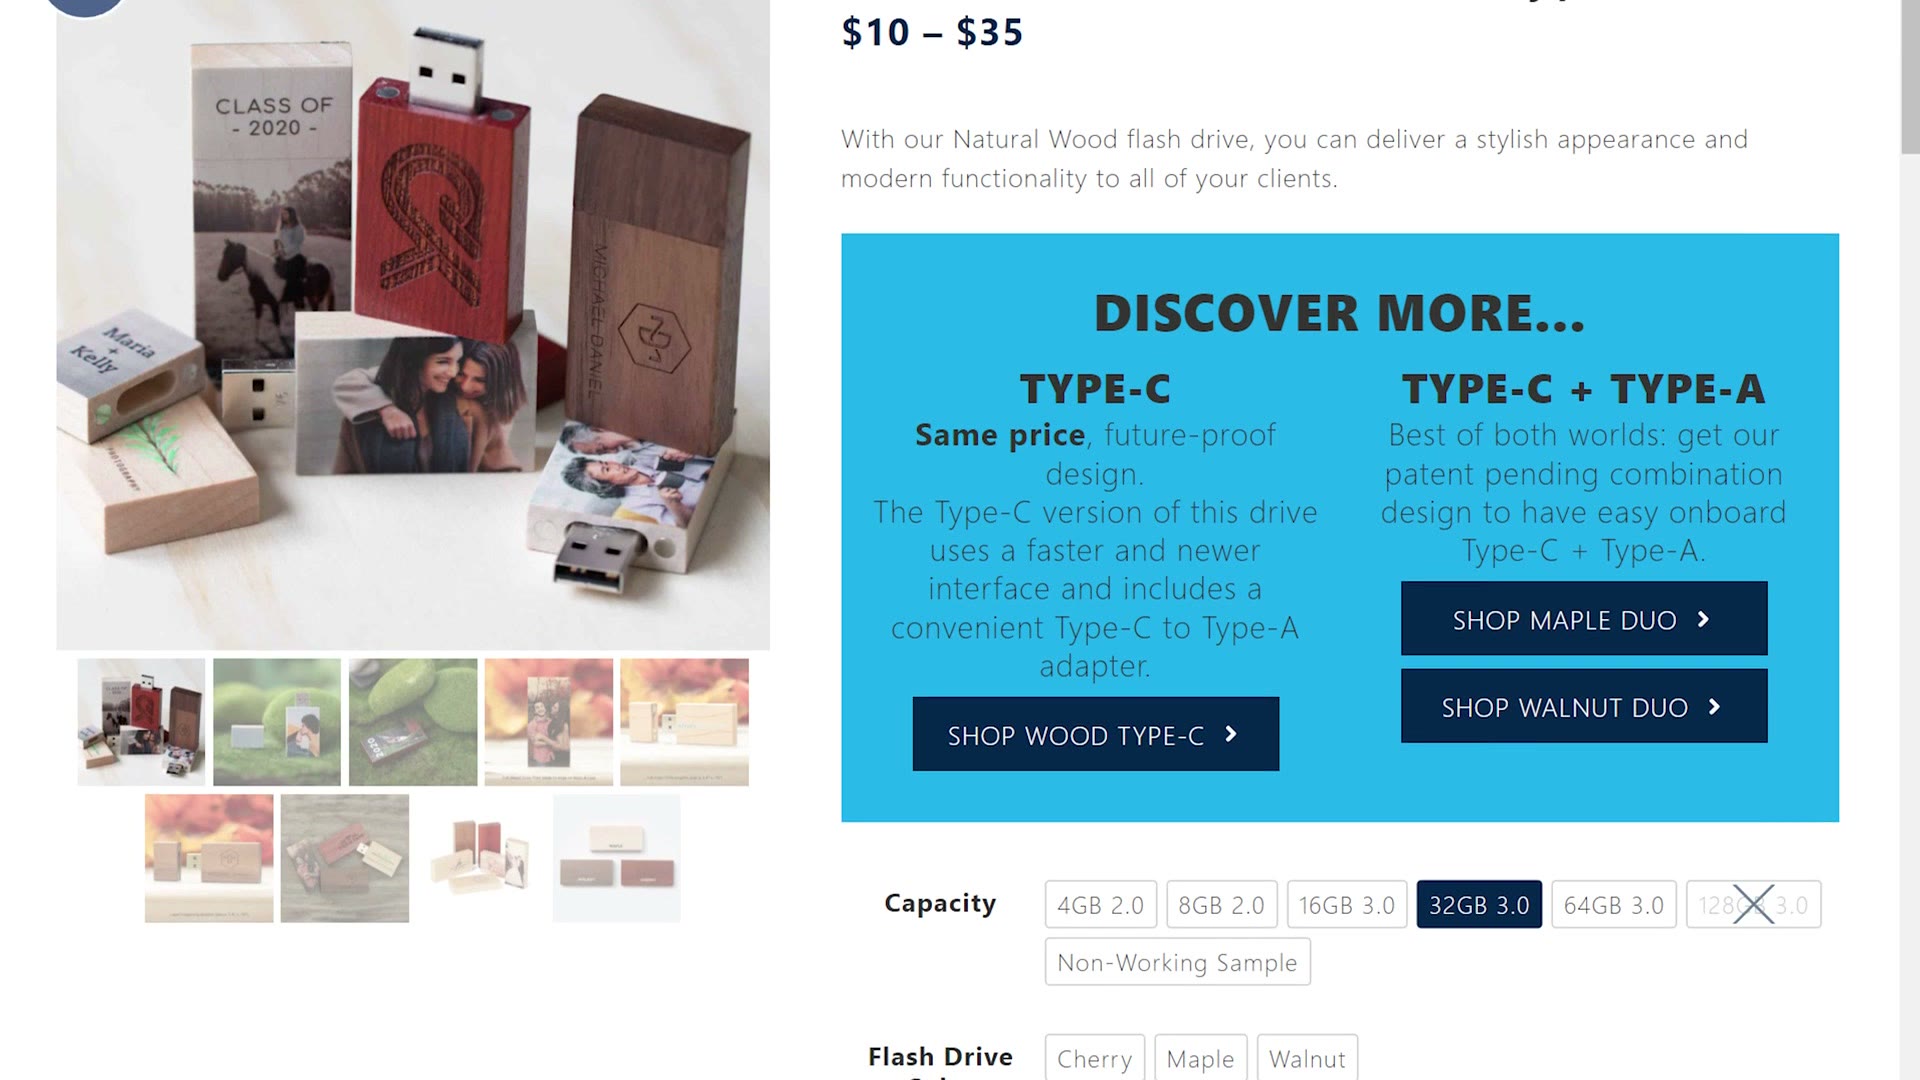
And yeah, they are a bit more expensive, but you can always pass that cost along to your couples and it’ll be fine.
How To Format Your USB Flash Drive
Once you have your USB stick, we need to talk about how you’re going to format it. And no, we’re not talking about the video format yet. We’re talking about the file system this drive is going to use.
Different computers use different file systems, with Windows using one called NTFS, Apple Macs using one called APFS, and there being a couple of other formats that work with both Mac and PC, which is what we want to focus on. Specifically, if you want the maximum amount of compatibility between not only computers but smart TVs, you are going to want to format your USB drive as FAT32.
To do this on Windows, insert your drive, go to This PC, which lists all of your drives, right click on it and go to Format. Set the file system to FAT32, leave everything else the same, give it a volume label, in this case I’ll call it Wedding, make sure Quick Format is selected, then press Start and OK.
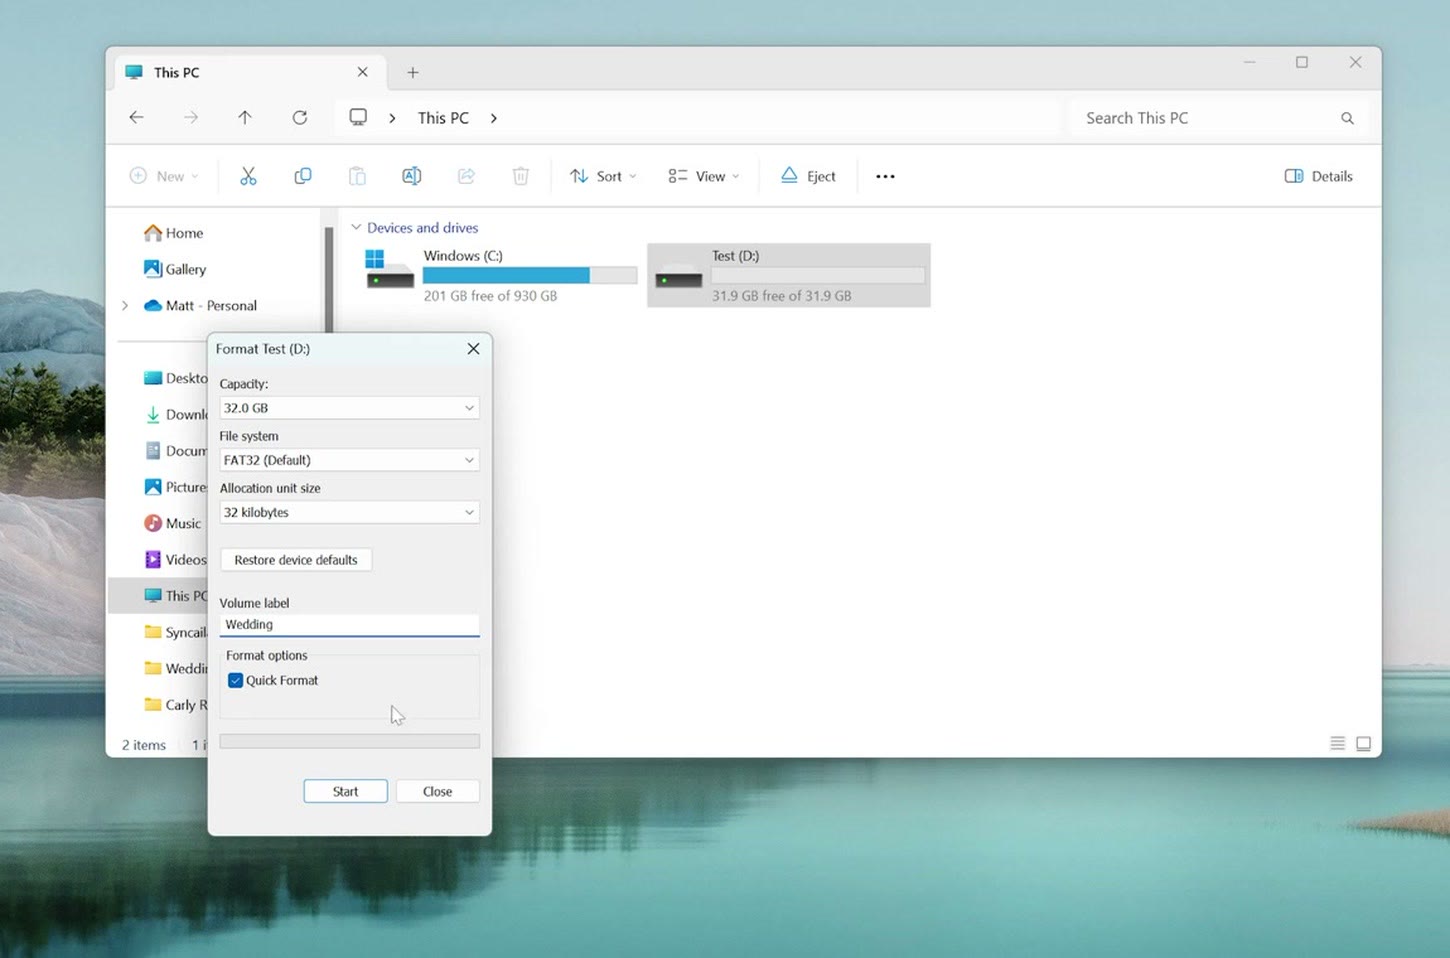
That’s going to format the flash drive and make it compatible with most TVs.
Now, FAT32 is a very old format. It’s been around virtually forever, and the reason you want a format that’s been around forever is that it maximizes your compatibility with other devices. Pretty much any computer or TV out there should theoretically support FAT32.
It does have one big caveat though, and that is that you are limited to a maximum file size of four gigabytes on a FAT32 drive. Which leads us nicely into the video settings.
The Exact Video Format And Settings To Use
Regardless of whether you’re using Premiere Pro or DaVinci Resolve or Final Cut, all of the settings are going to be the same. I’m going to show you in Premiere Pro, but you’ll choose the same settings in any other software.
Edit your video, go to the export page, and make sure you export in the H.264 video format. Then for the preset, select High Quality 2160p 4K if you’re exporting 4K, or High Quality 1080p HD if you’re exporting HD. In this case I’m selecting 4K because that’s the quality of the wedding film I’m exporting.
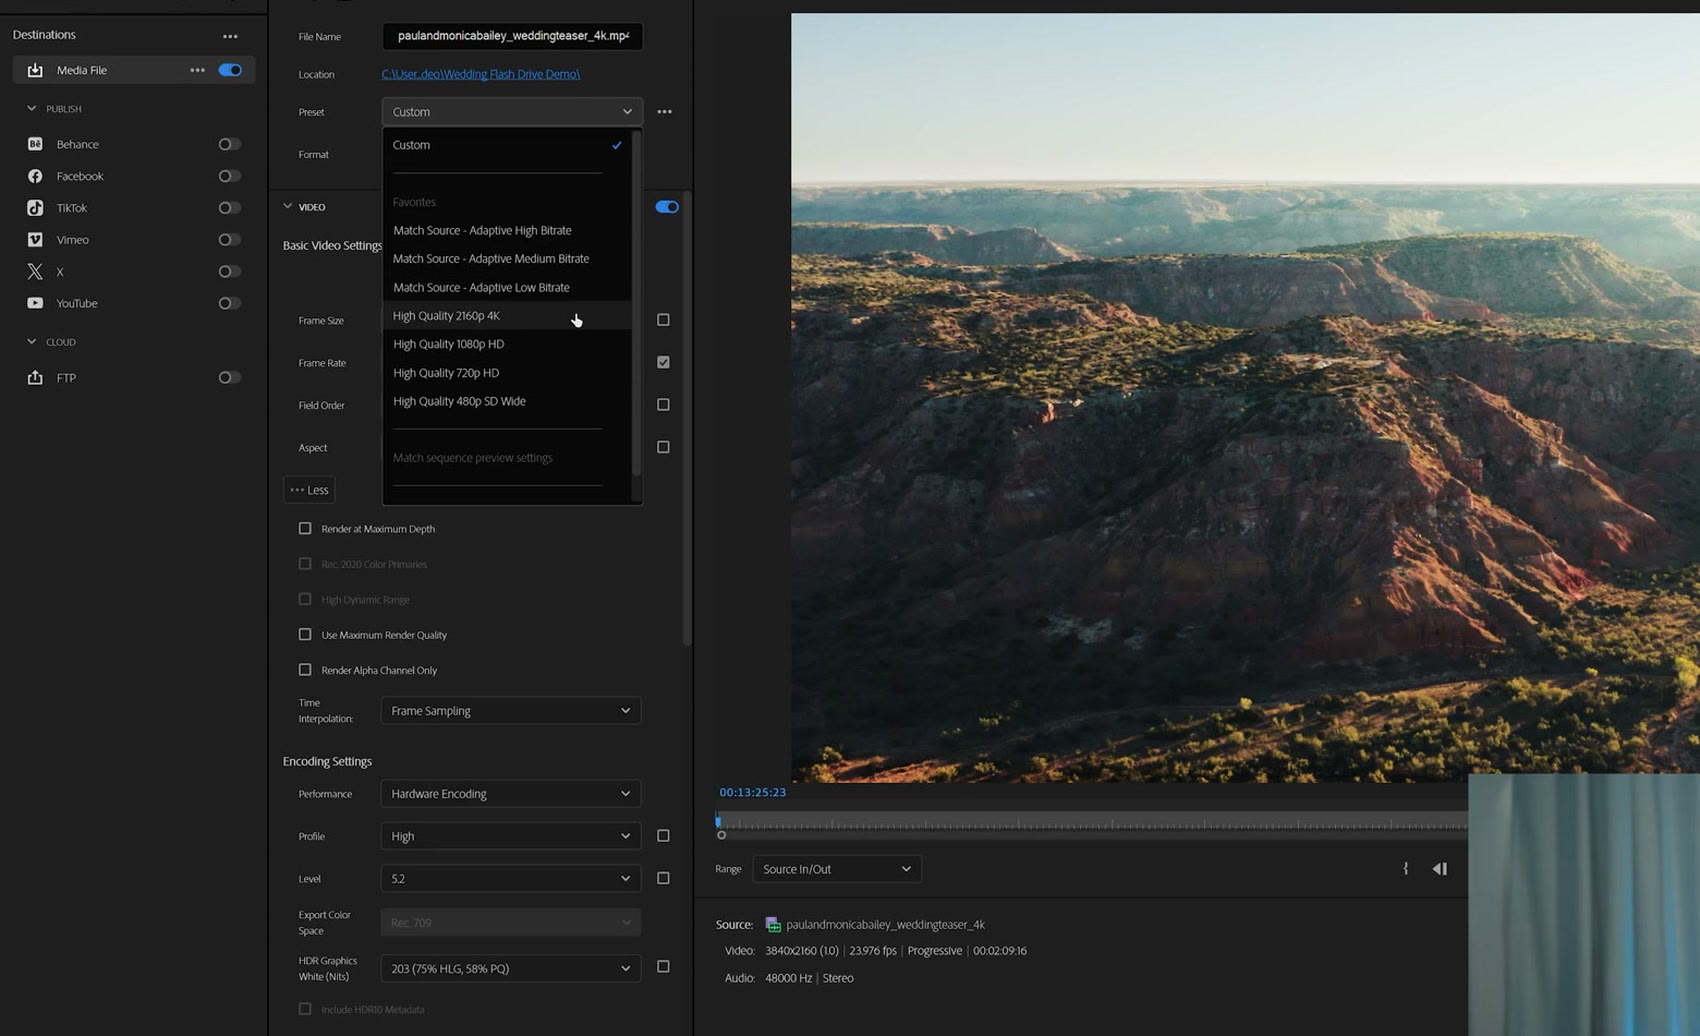
The reason we’re choosing H.264 is very important, because it’s one of the most widely supported video formats and it’s been around for quite a few years, which means the odds are that pretty much any smart TV you try to play this on is going to play it properly. So we’re not only choosing a flash drive format that will play well, but also a video format that maximizes compatibility with any television.
Next, the most important thing after the video format is the bitrate you export at. Why is bitrate so important? Because the bitrate you choose dictates how large your video file is. And remember, because you’re putting this file onto a FAT32 flash drive, your video cannot be larger than four gigabytes or it’s not going to work.
Thankfully, Premiere Pro helpfully tells you an estimated file size for your film. In this case at the preset’s default target bitrate of 80 Mbps it’s telling me 1303 MB, which is under the roughly 4000 MB that would fill four gigabytes.
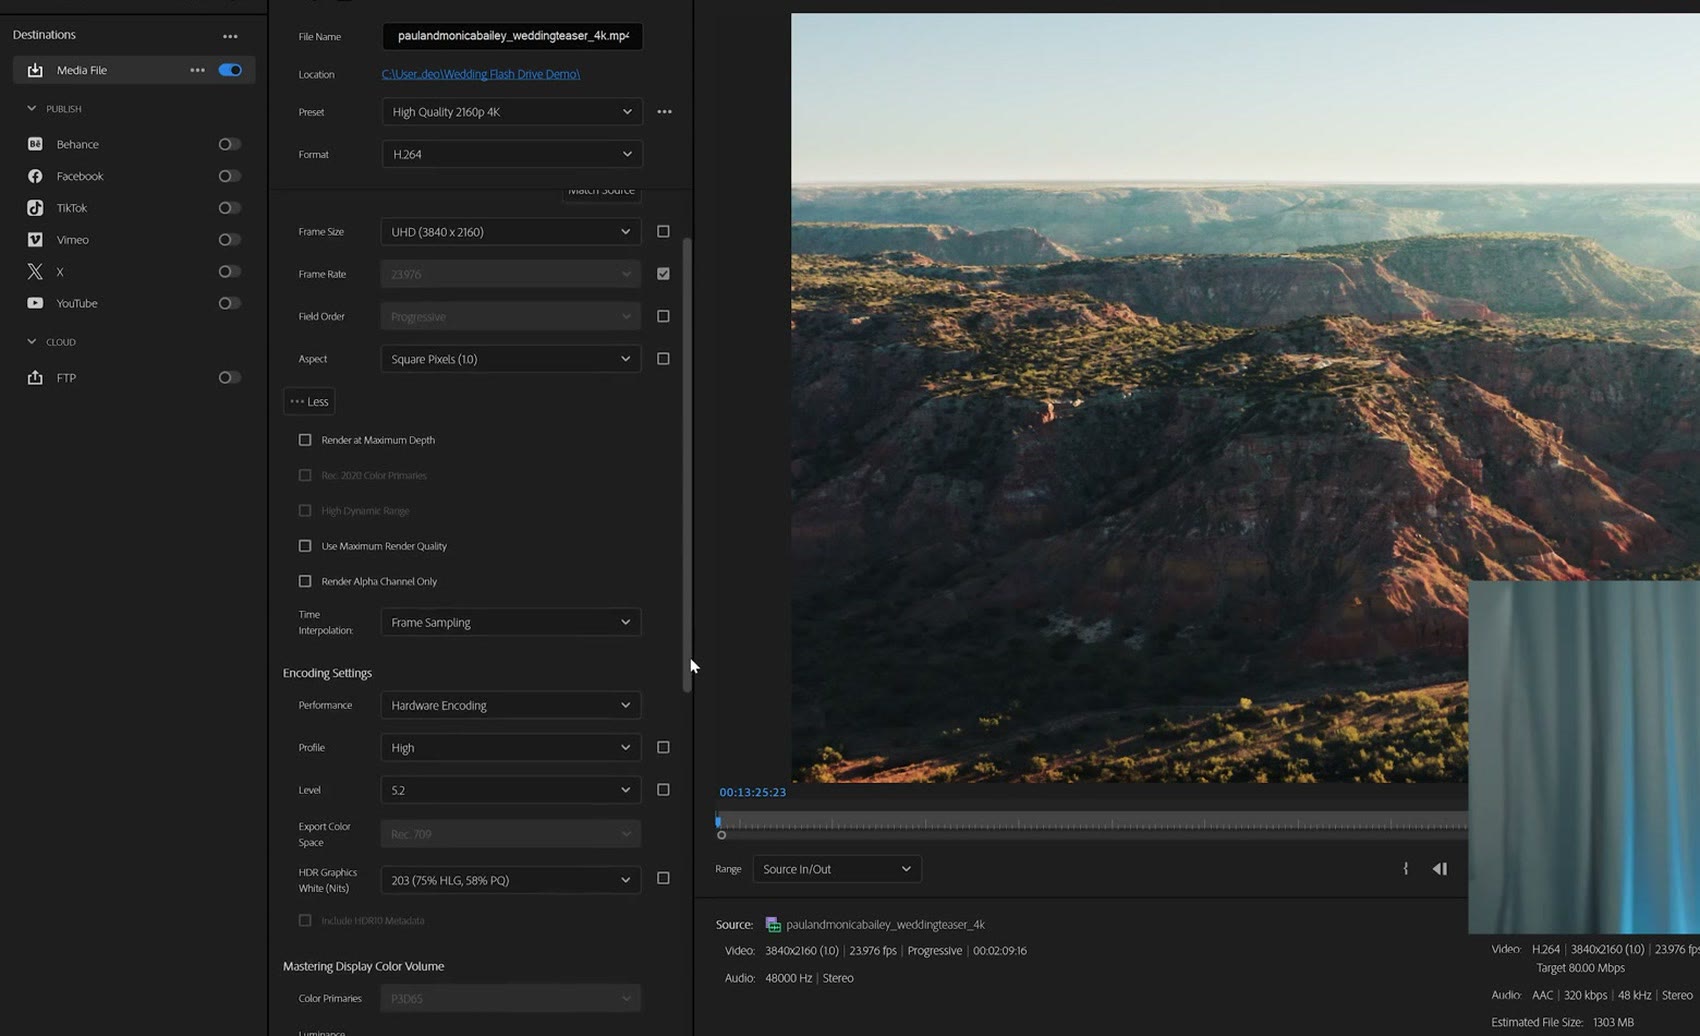
But 80 is a bit high, so we’re going to lower it. As a rule of thumb I would export with a bitrate of about 50 Mbps for a 4K video, and I’ll change this to CBR. Alternatively, if you’re exporting a 1080p HD video, I’d choose 25 Mbps. That gives you a great mix of file size to quality, and in this case the estimated file size is now only 816 MB, well under the four gigabyte maximum.
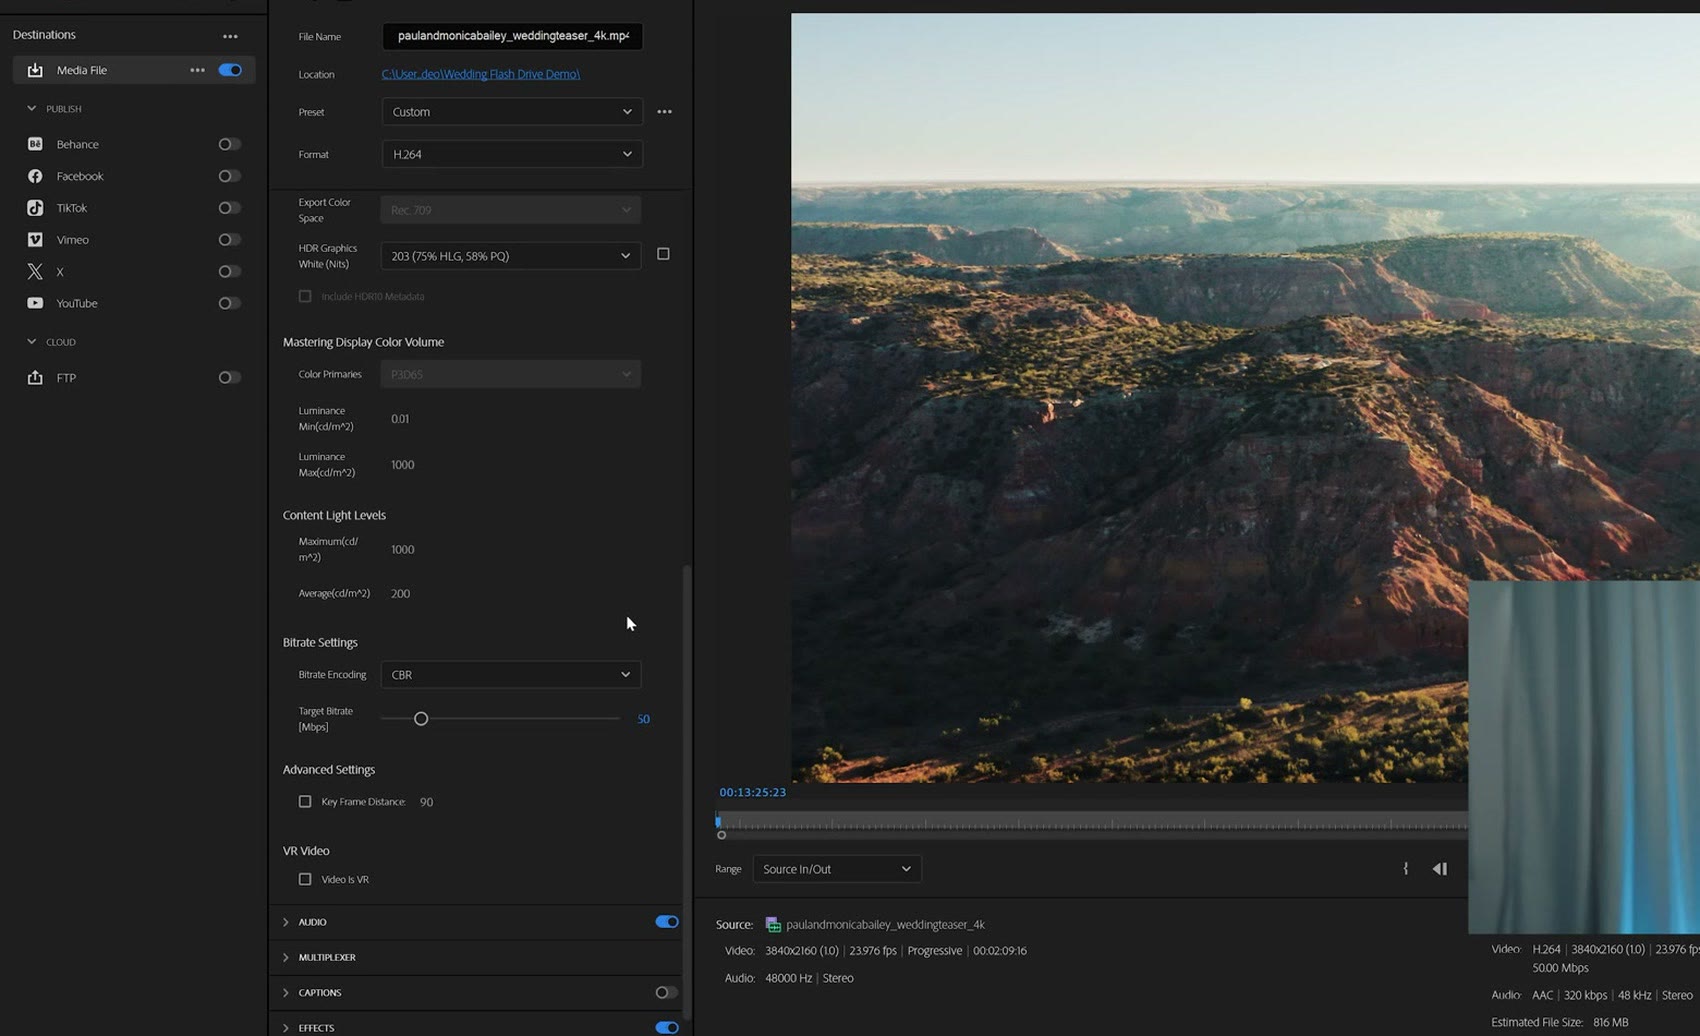
Now, I know I just said set your bitrate to 50 Mbps as a rule of thumb, and you may be thinking you could raise it to like 200 and look, it still fits, it’s not over 4000 MB, so it would still fit on the flash drive. And you’re right. But your television may struggle with playing back a video at that bitrate, and remember, we’re trying to maximize compatibility across all these different TVs. That’s why I’m recommending 50.
File And Folder Setup To Guarantee Your Drive Works
Lastly, you’re going to want to make sure your video files and folders are set up on the flash drive properly.
First, go to where you exported your video and make sure it ends in .mp4, because that’s the most commonly supported file extension for smart TVs. If Windows isn’t showing you the extension, on Windows 11 you can go up to View, then Show, then File name extensions, and tada, it says MP4 there.
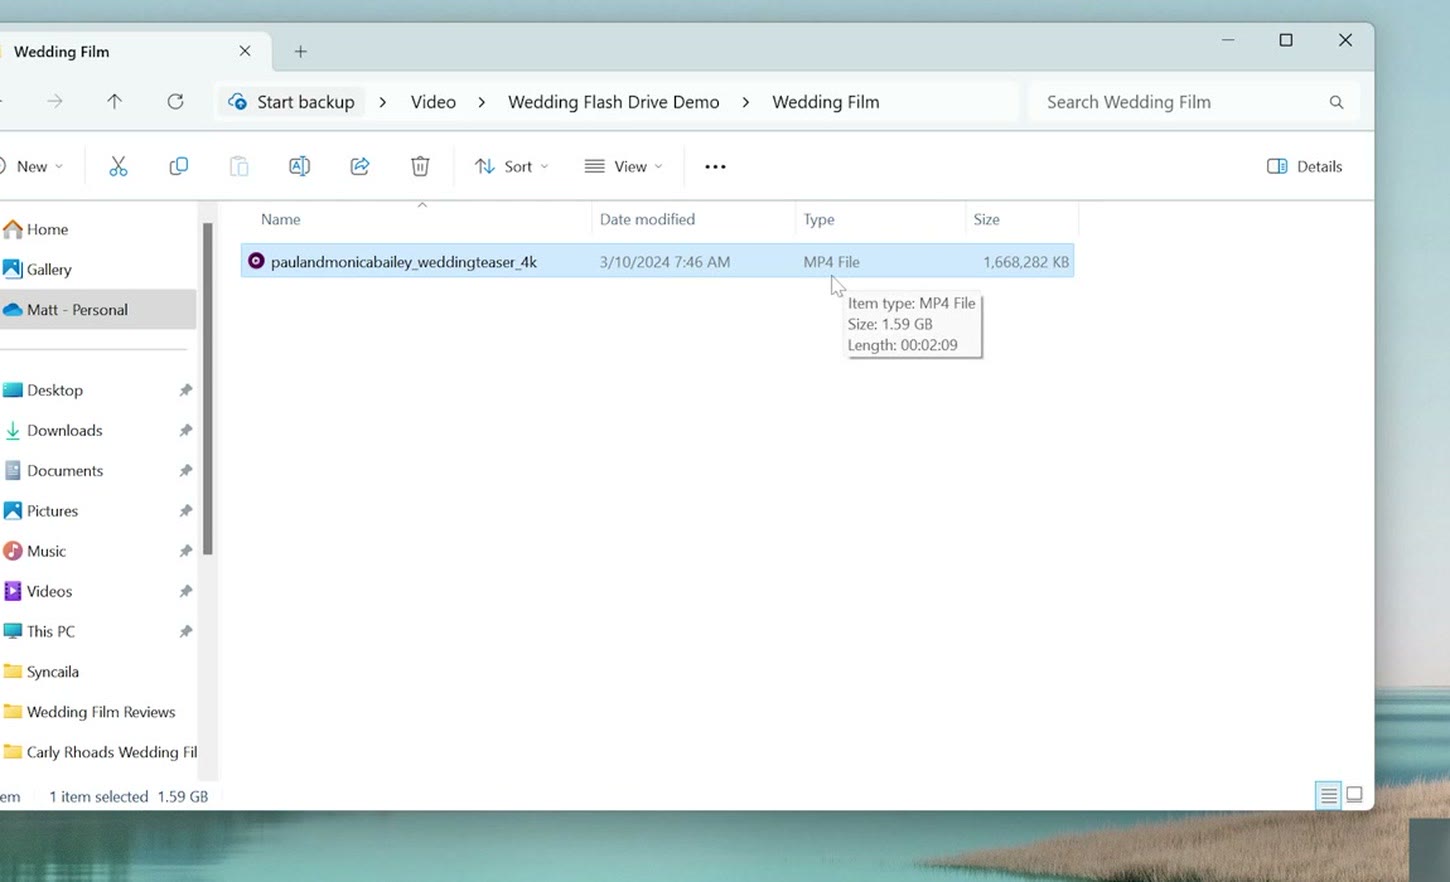
If it says something different, like .mov for example, all you have to do is click on the video once, backspace, type mp4, press enter. It may give you a warning, just hit OK. Then double click your video to make sure it still plays and you’re good to go.
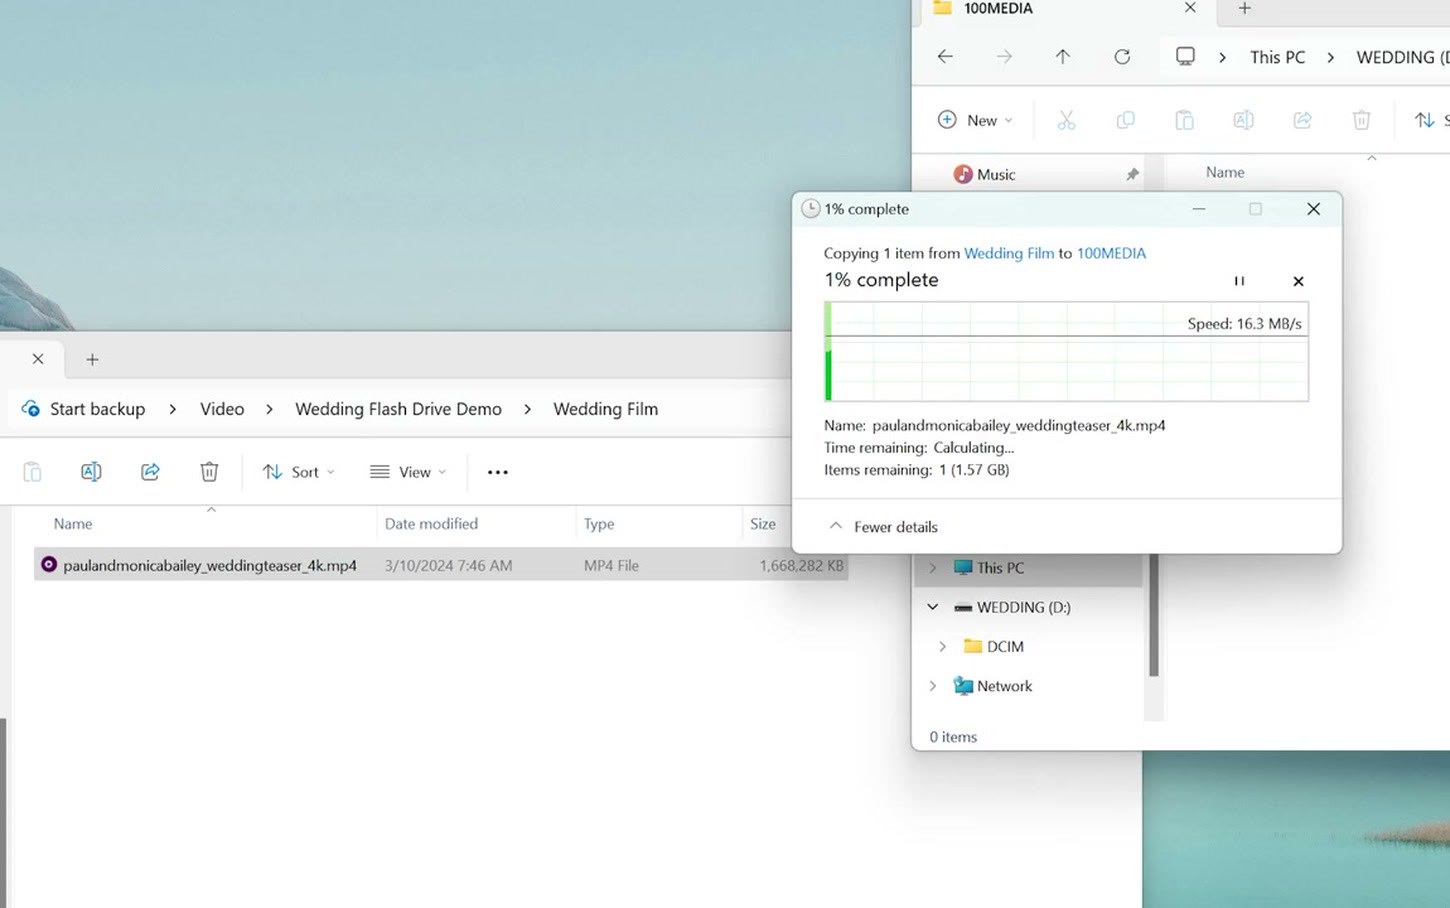
Next, connect your USB flash drive and open it up, because we have two very important folders you need to make. With your flash drive open, go up to New Folder, or right click and create a new folder, and call this first one DCIM.
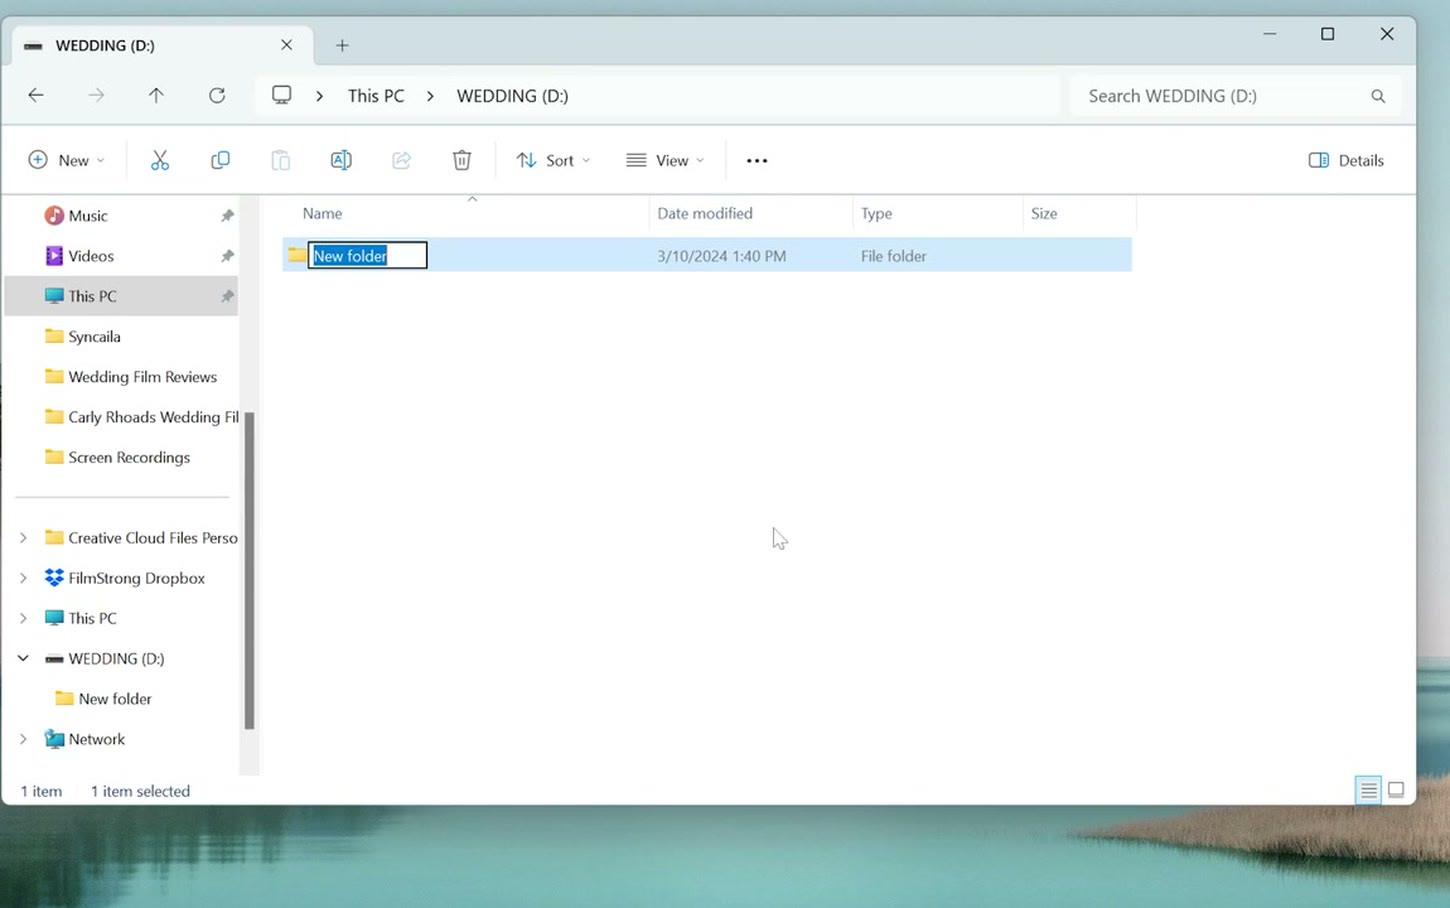
Then open the DCIM folder by double clicking on it, create another new folder, and call this one 100MEDIA. It is inside this 100MEDIA folder that you’re going to put your video files.
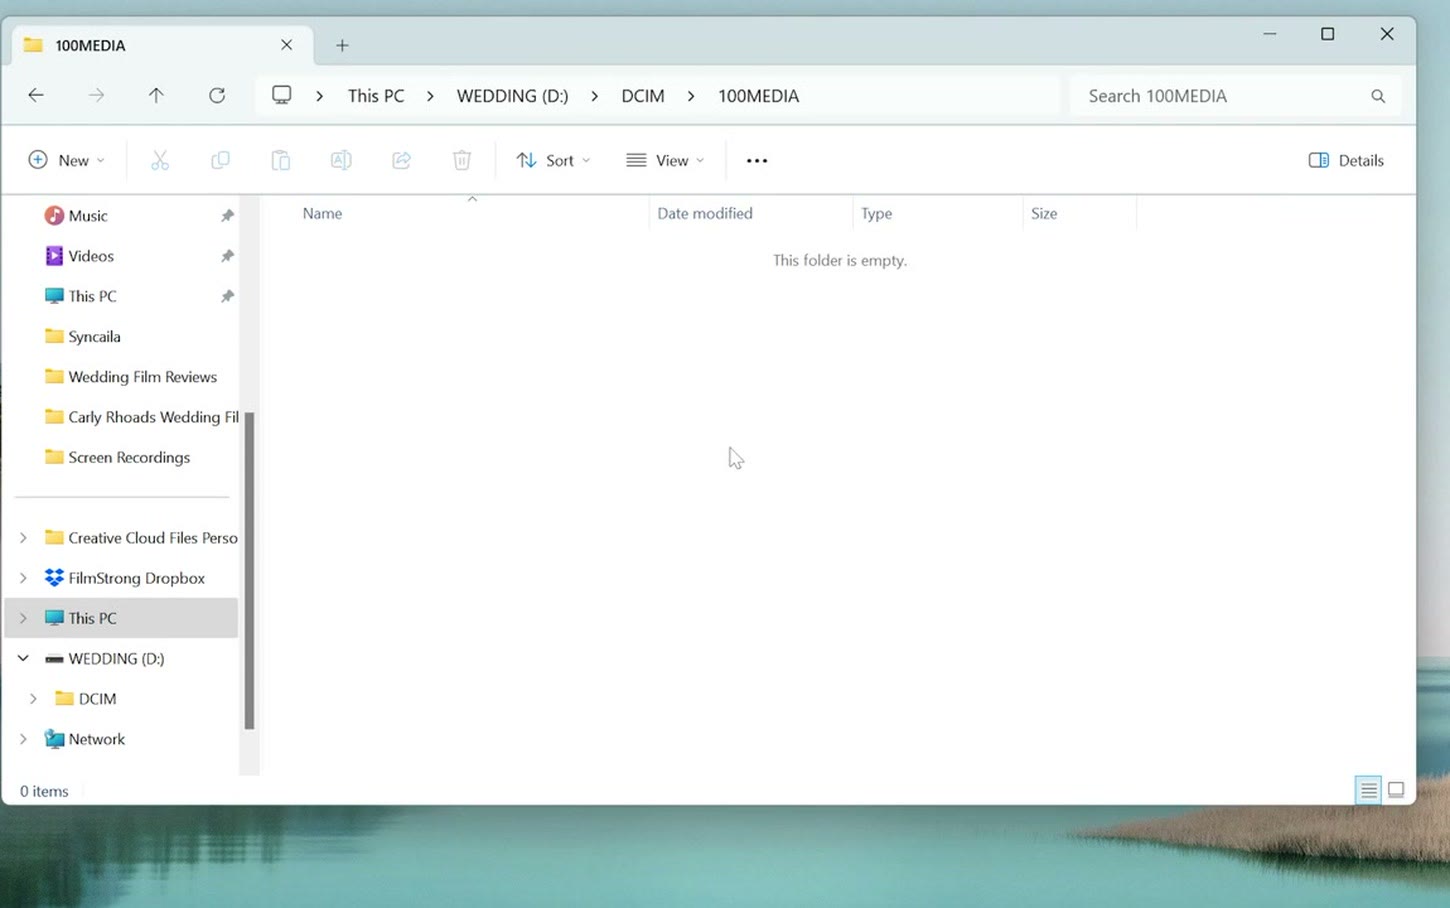
The reason you want to do it this way and add these specific folders is because many camera memory cards use folders exactly like this to hold videos. So whenever you connect your USB drive, your smart TV is going to think, oh, this is a memory card, and it’s going to know how to open up these folders and show you the video files inside. This is basically a cheat code to help you with older smart TVs and make sure they can open your drive to play your videos.
Next, copy your exported video files to the flash drive. Click and drag it over and it’ll start copying.
Test Your Video On A TV
Here comes the most important step of this entire process. You need to be sure to test your video clips on a smart TV that you own, to make sure it plays them back smoothly.
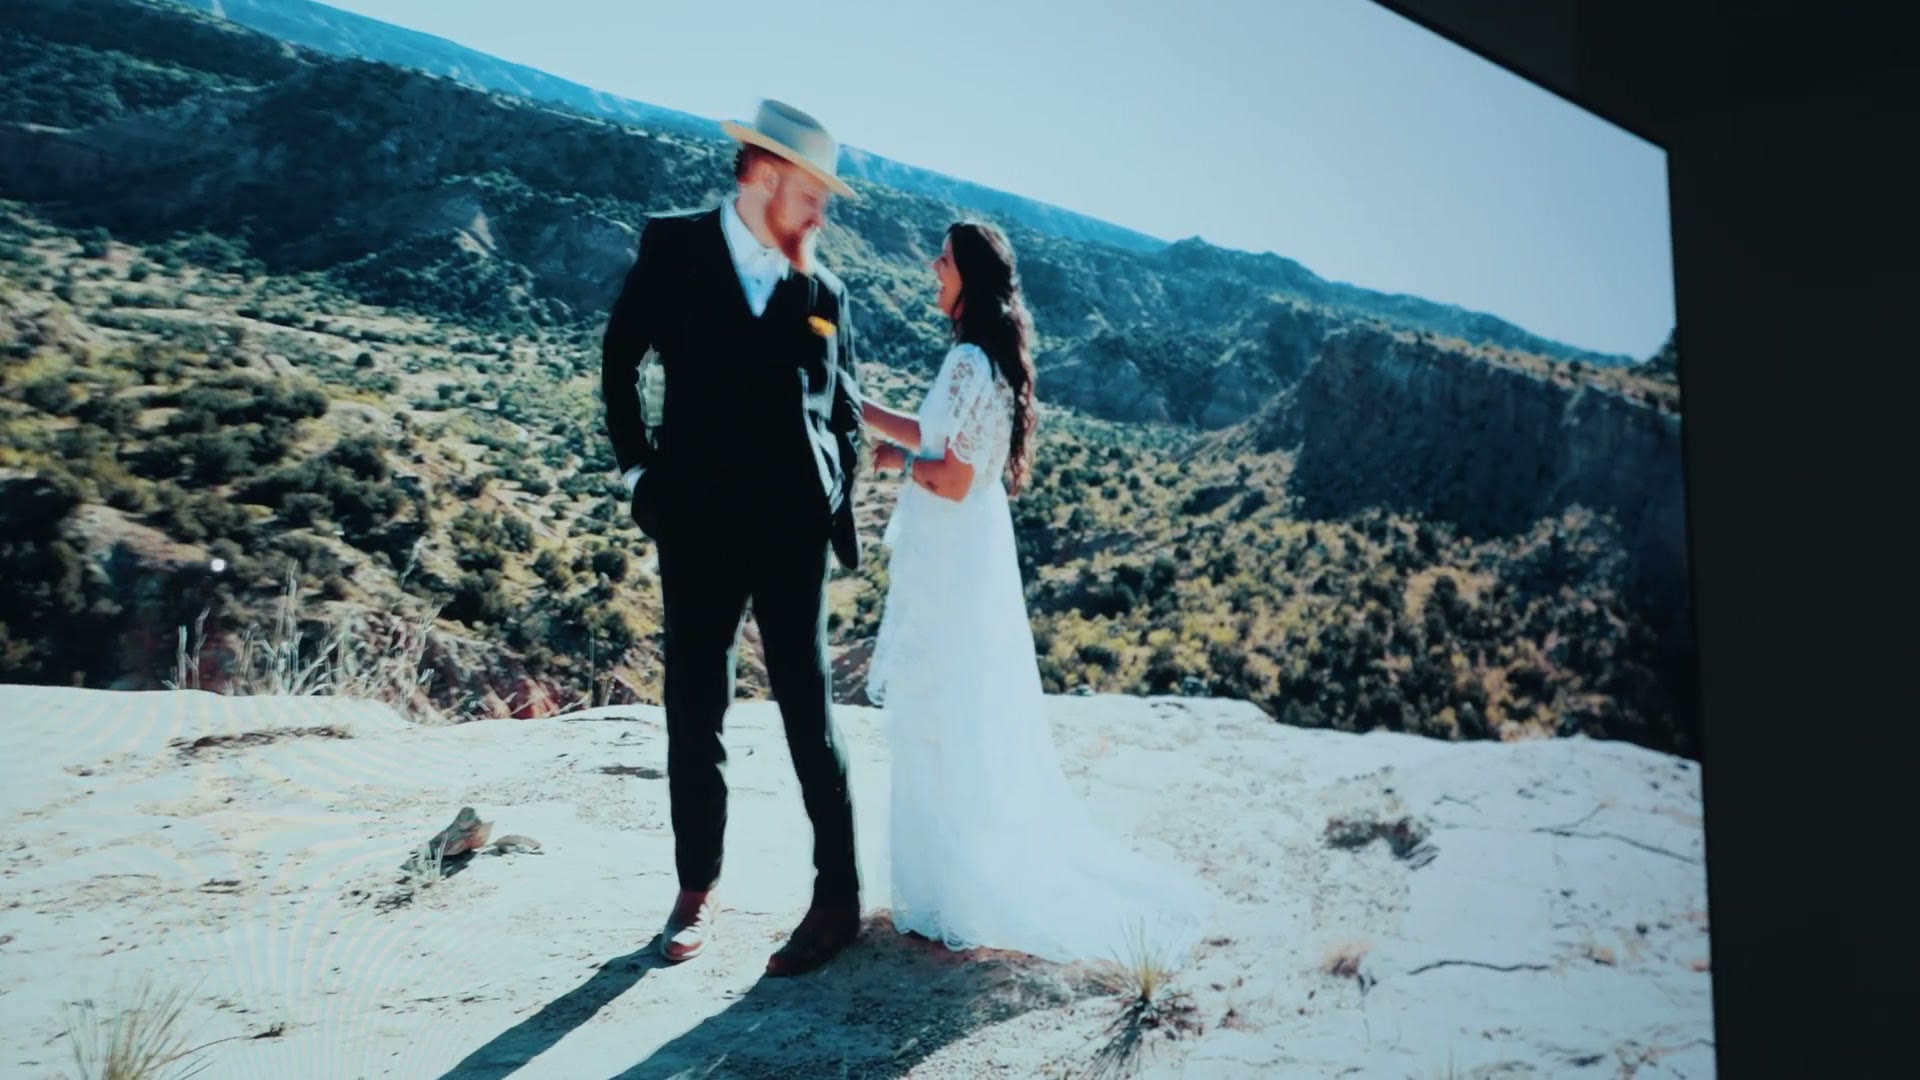
The odds are you’re not going to have the exact same model and year of TV as the couple you’re sending the flash drive to. But the good news is that if your drive plays on your TV, there’s a very good chance it will play on theirs as well.
Once you’ve done that, congratulations! You’ve now created a USB drive that’s compatible with the widest variety of smart TVs, and you can sell these drives to your couples for a profit.
If you want more help with wedding filmmaking, I’ve put together a free gear guide for wedding filmmakers that shows you all of the gear I recommend you buy for wedding filmmaking. Aside from USB flash drives, that is. It’s completely free.
Thanks so much for reading, and have a great day!