
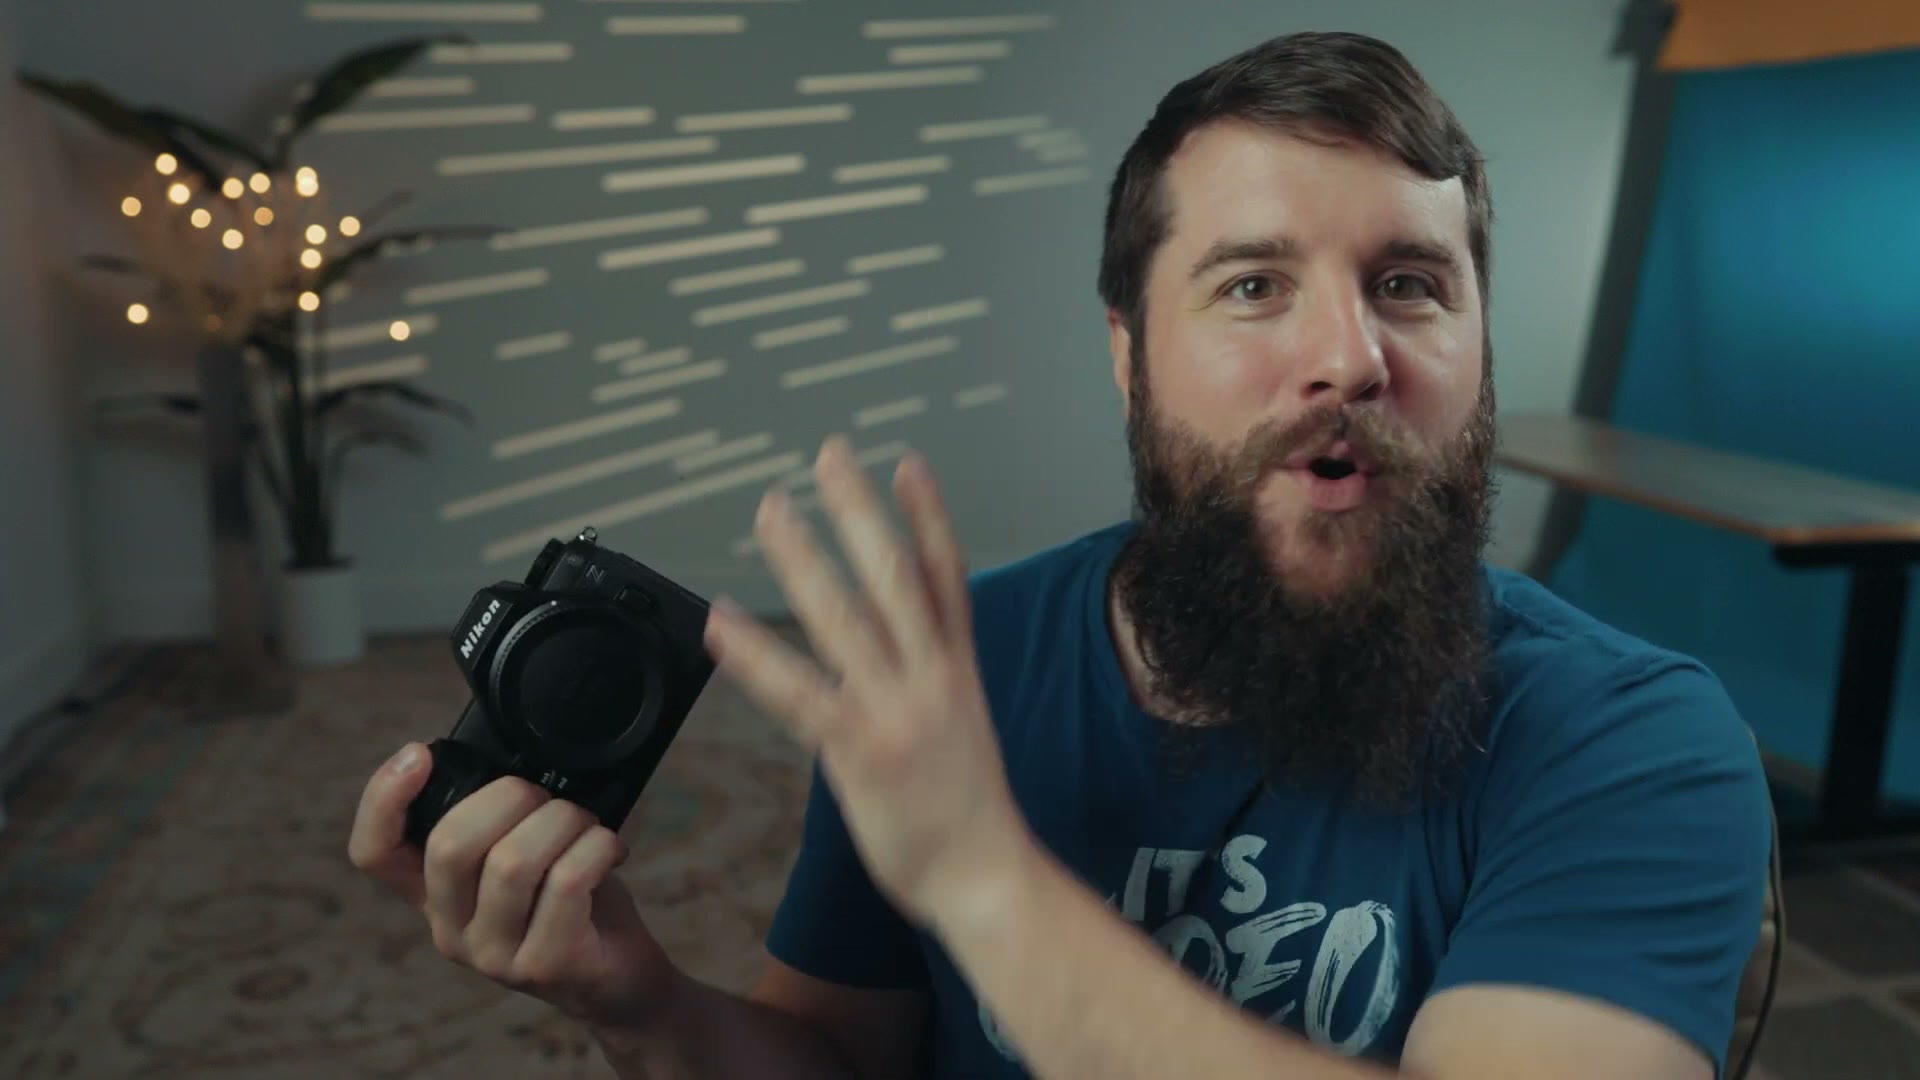
This one is sponsored by Nikon, and I’m going to show you the best video autofocus settings for Nikon cameras. I’m doing this with the brand new Nikon Z6 III, which has fantastic autofocus, so if you are a wedding videographer or a documentary filmmaker or a YouTuber, or honestly anyone who just wants video autofocus that is going to track people and objects well, keep reading.
To save you time and help you keep track of all of these settings, I want you to know that I’ve created a free Nikon video autofocus cheat sheet that you can download completely for free. It gives you a nice reference page with all of the settings on it in case you forget them, so you can dial them into your camera easily. Please go download that. Like I said, it’s free, and it’ll be really helpful to you.
Best Video AF Settings For Filming People
Grab your Nikon camera. In my case, like I said, I’m using the Z6 III. And let’s talk about what is arguably the most important and most common thing you’re going to be filming, the thing you want to guarantee is in focus, and that is people.
If you’re like me and you’re filming weddings, or corporate, or commercial videos, or documentaries, it doesn’t matter which one. The vast majority of the time all of the A roll you’re filming is going to be of people. So let’s get your settings dialed in to film people and focus on them properly.
Side note, if you are not going to be filming people, please don’t skip this part, because a lot of these settings are going to apply to filming other things too, aside from one menu tweak we’re going to make later on. So keep reading and don’t skip ahead.
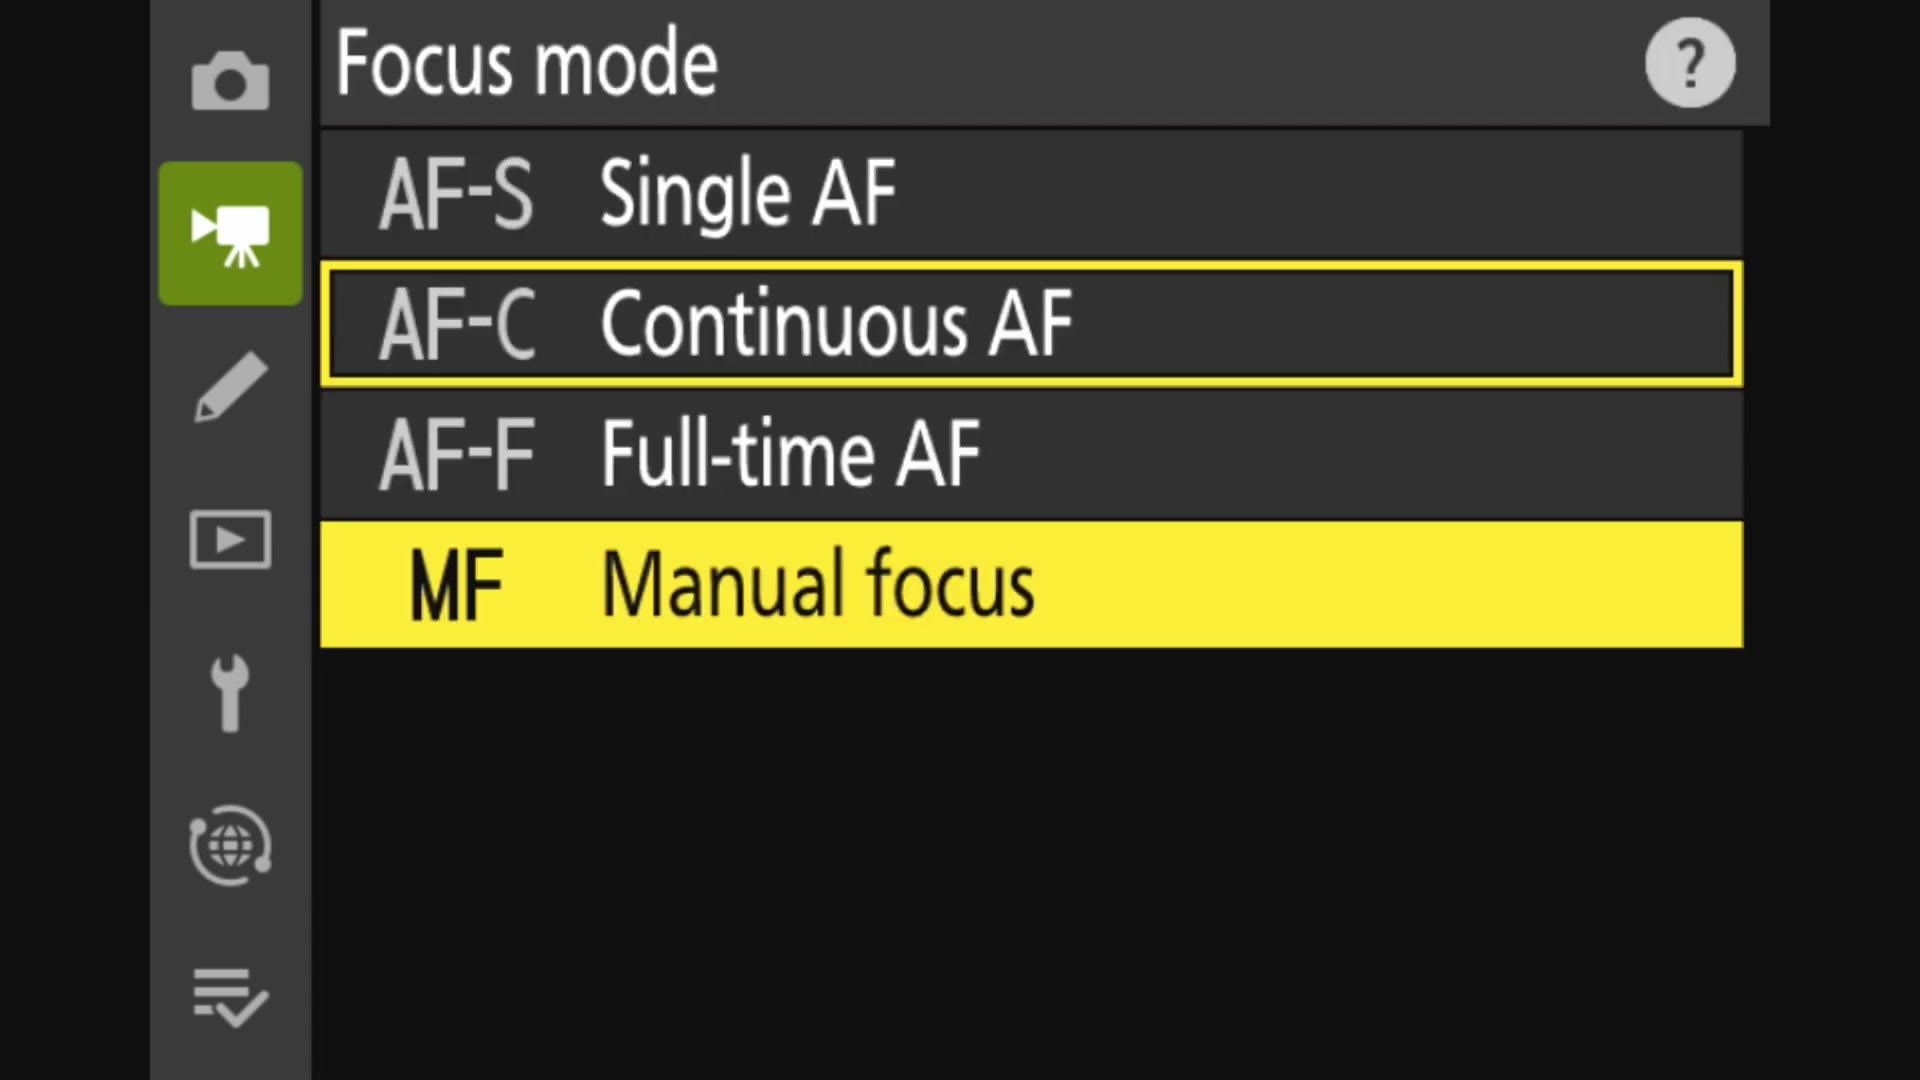
Focus mode: AF-F
First, open your menu settings, open the video recording menu, and scroll down to Focus mode. For this you’re going to want to choose AF-F, full-time AF, which is the mode Nikon made specifically for filming video.
AF-area mode: Auto-area AF
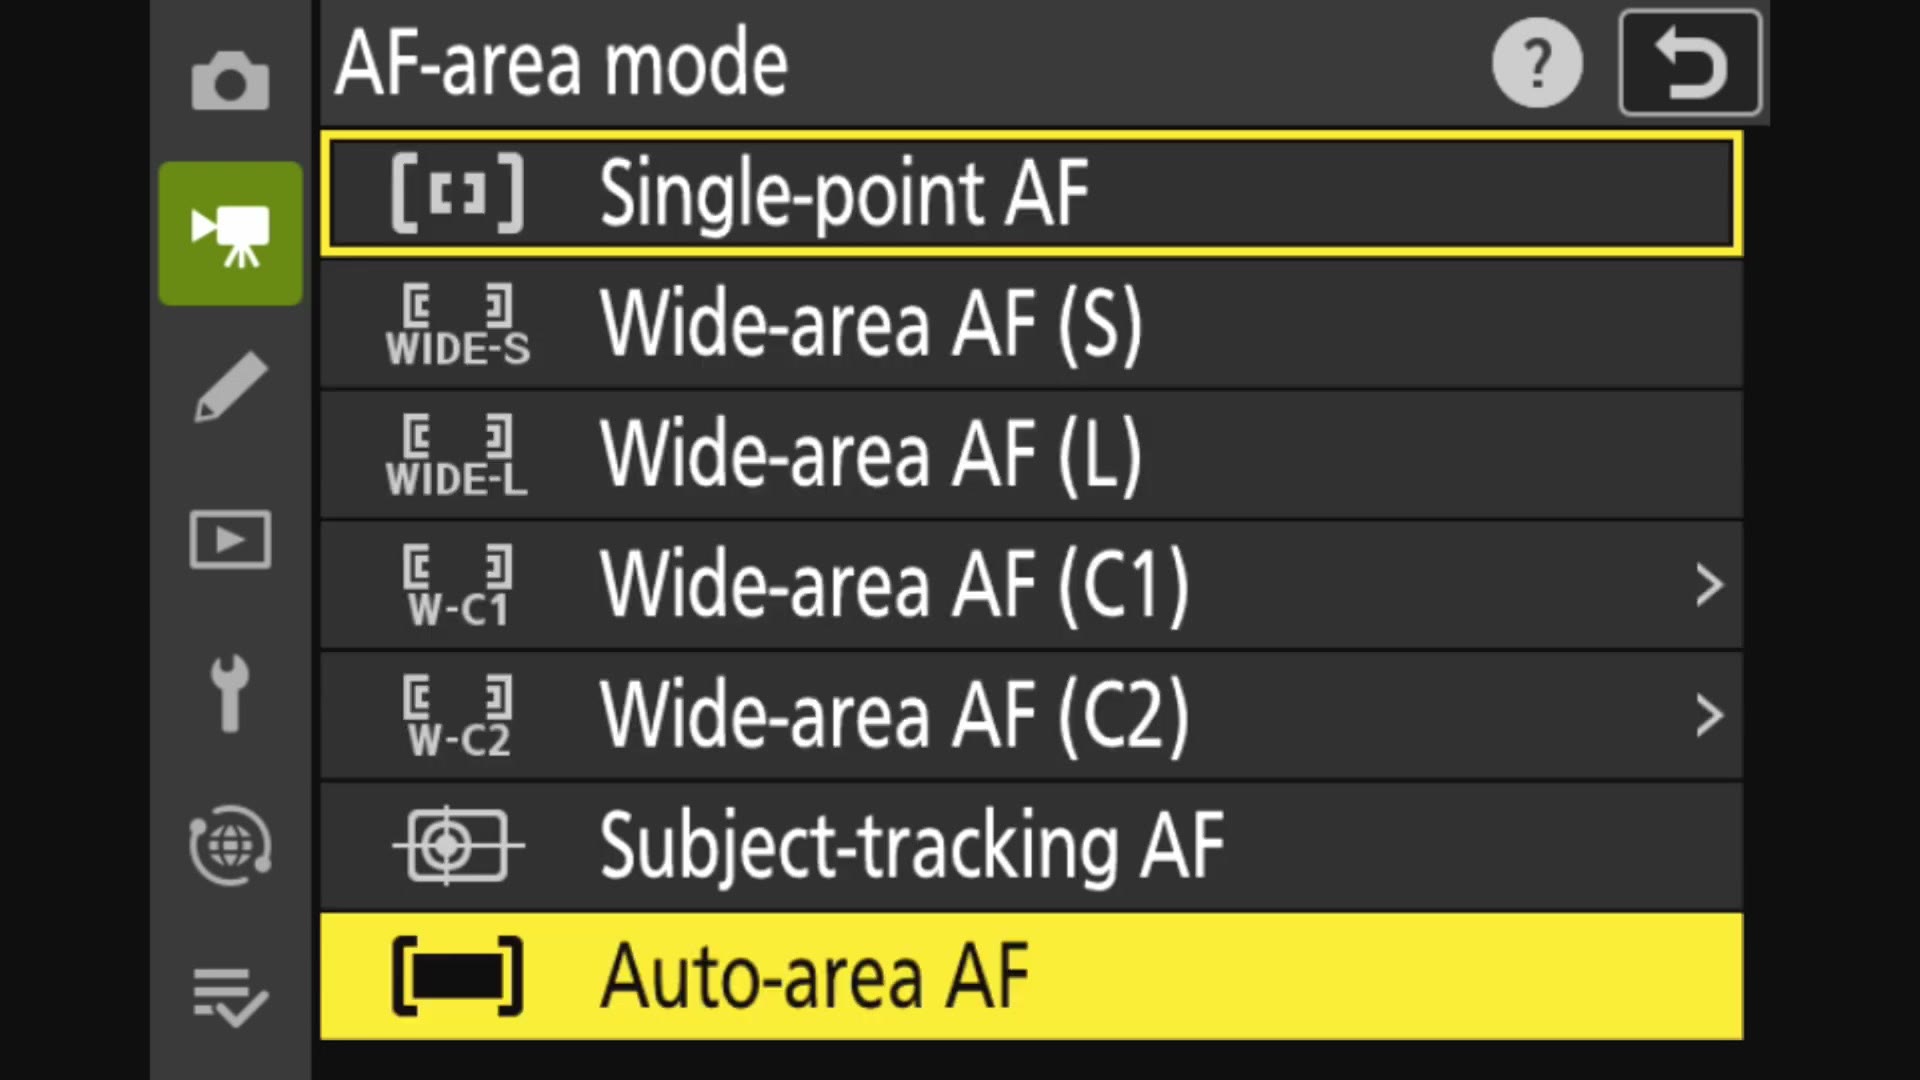
Next, scroll down to AF-area mode, which gives you a ton of options for where you can have the camera focus. You’ve got a single point you can move around, you’ve got the different wide areas, you’ve got subject tracking. But the one I use most often, and the one I recommend for filming most videos, is Auto-area AF, which uses the full width and height of the sensor for focusing. In my experience it does a really great job, whenever you pair it with the next feature we’re about to talk about.
AF/MF subject detection options
Back in the menu, below Focus mode and AF-area mode, you’re going to see a setting called AF/MF subject detection options, and this is another really important one. First, go in there and make sure that “AF when subject not detected” is on, because you always want your autofocus to be working.
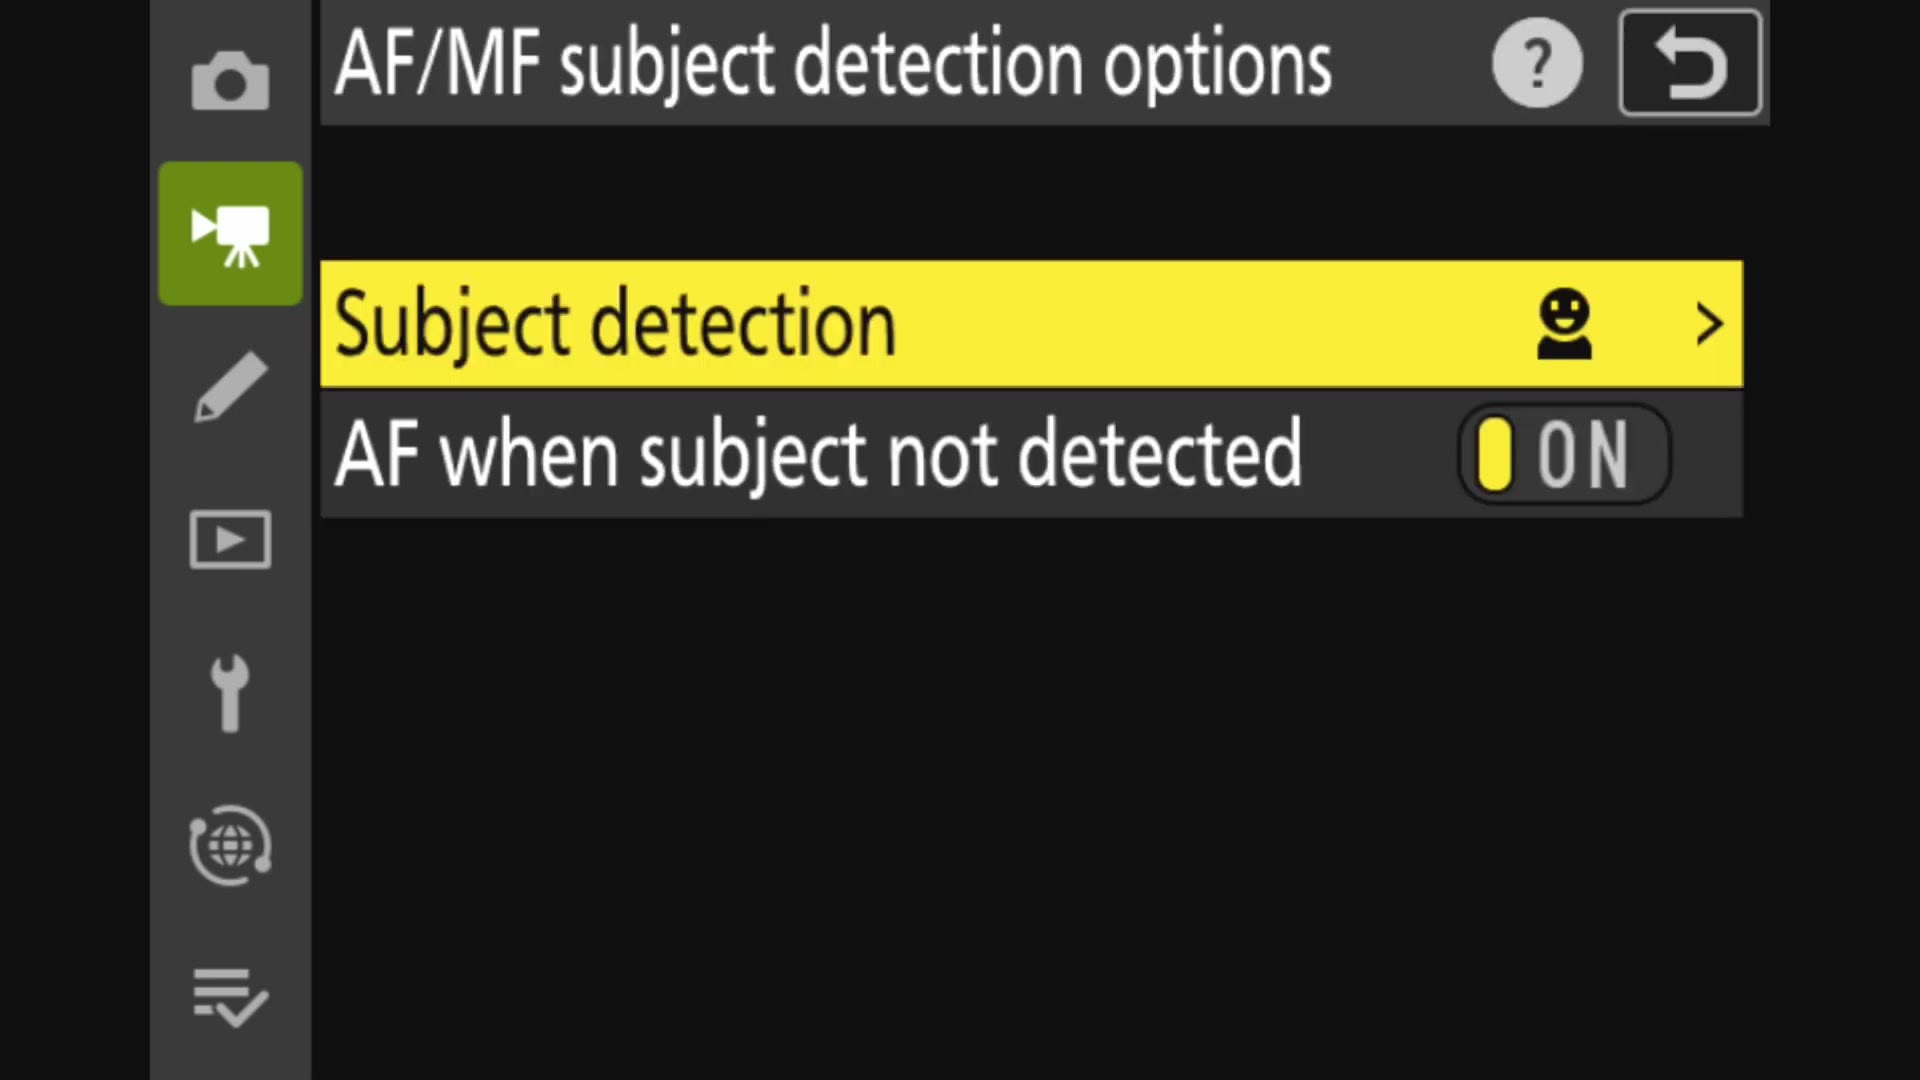
Then for Subject detection, by default this is set to Auto, but you have a lot of other options in there including People, Animal, Vehicle and Airplanes, which technically I would argue that airplanes are vehicles, but I digress.
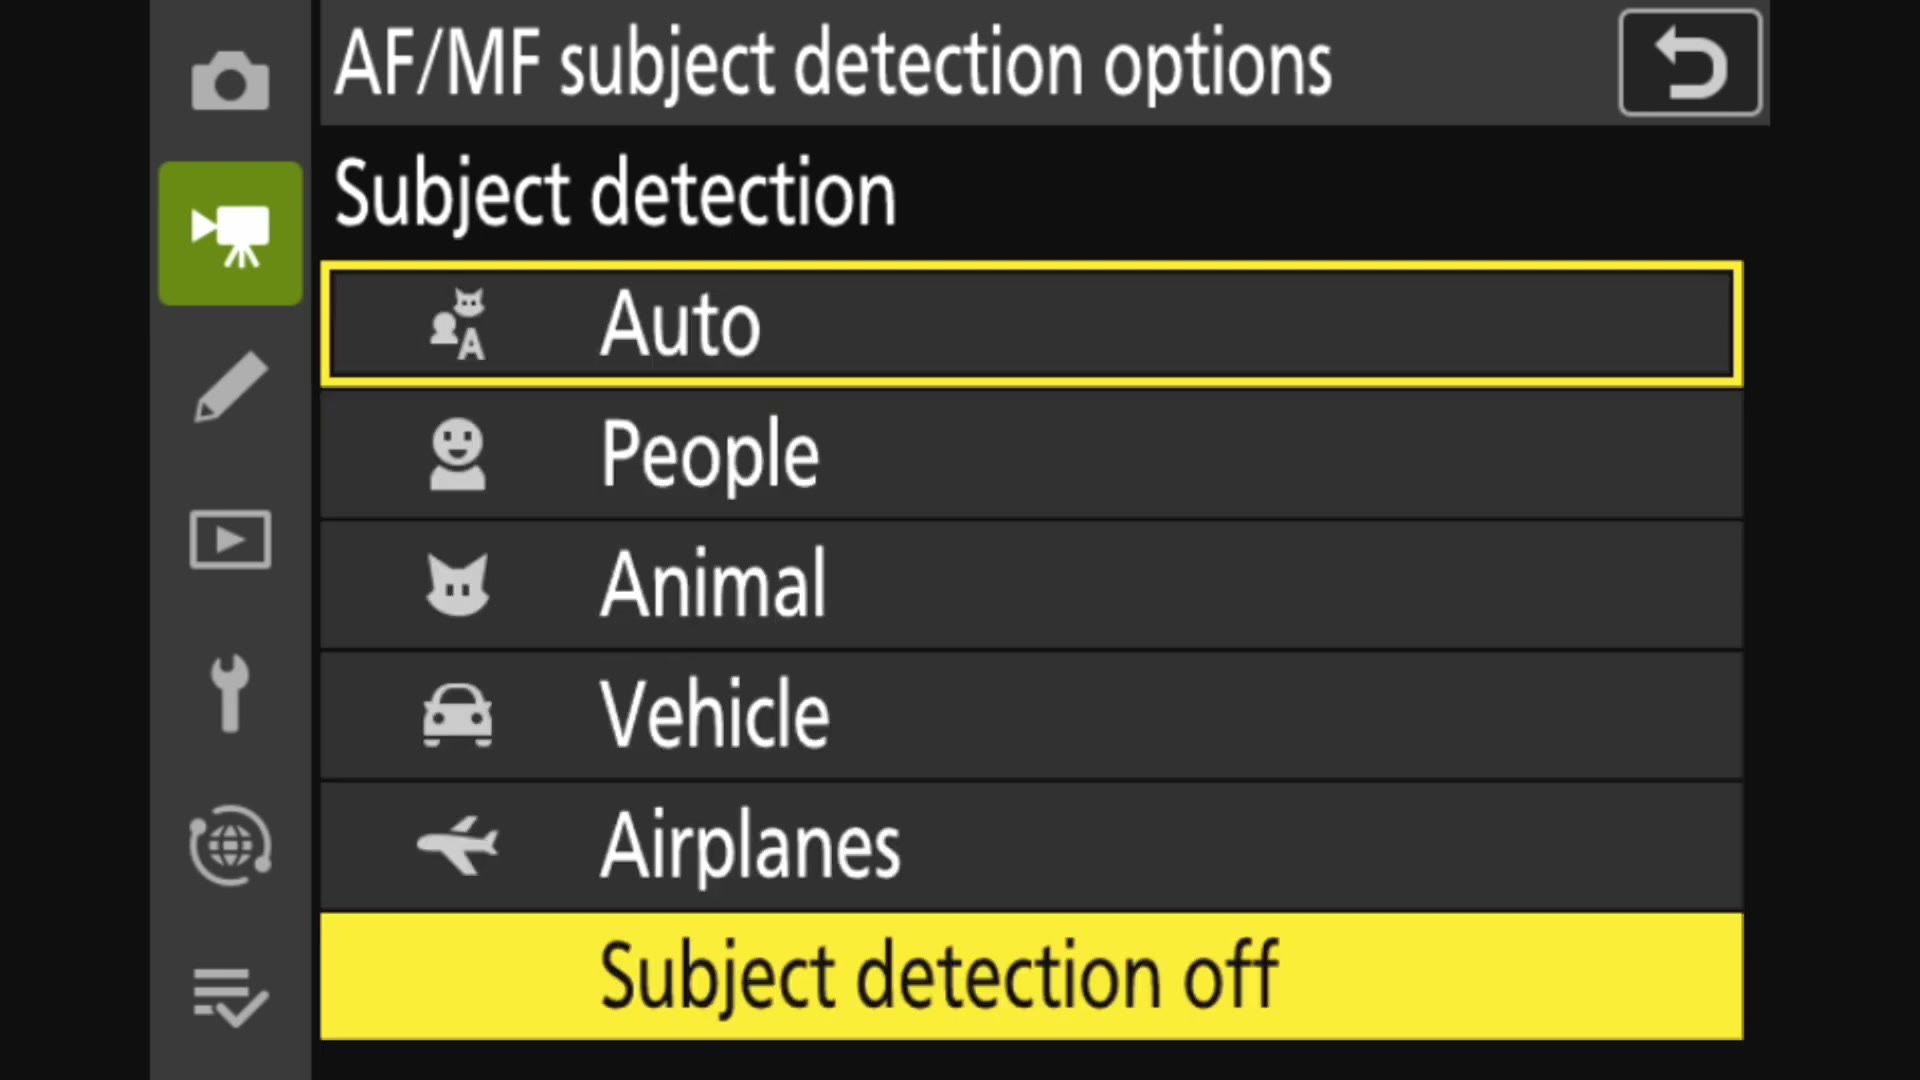
If you’re filming people, and you know you’re filming people, and you don’t want the camera getting distracted if say an animal wanders by, or heaven forbid an airplane flies between you and the person speaking, which I think would give you a whole lot more issues than just the camera losing autofocus if that happens, you’re going to want to switch Subject detection from Auto to People.
g5 AF speed: -2, applied Always
Next we have two more settings to dial in, and these are in a completely different part of the menu. To get to them, go to the pencil menu, scroll down to the magenta g for video, and go to g5, which is where you select your autofocus speed.
By default this is set to zero, but as you can see, Nikon gives you the ability to dramatically speed this up or slow it down. In my experience, increasing this setting will, yes, make the camera autofocus faster, but it also results in a significantly more digital and electronic feeling autofocus that is almost too fast and jarring for the viewer.
So to compensate, I recommend turning the AF speed down lower, to negative two. Then for “When to apply,” select Always.
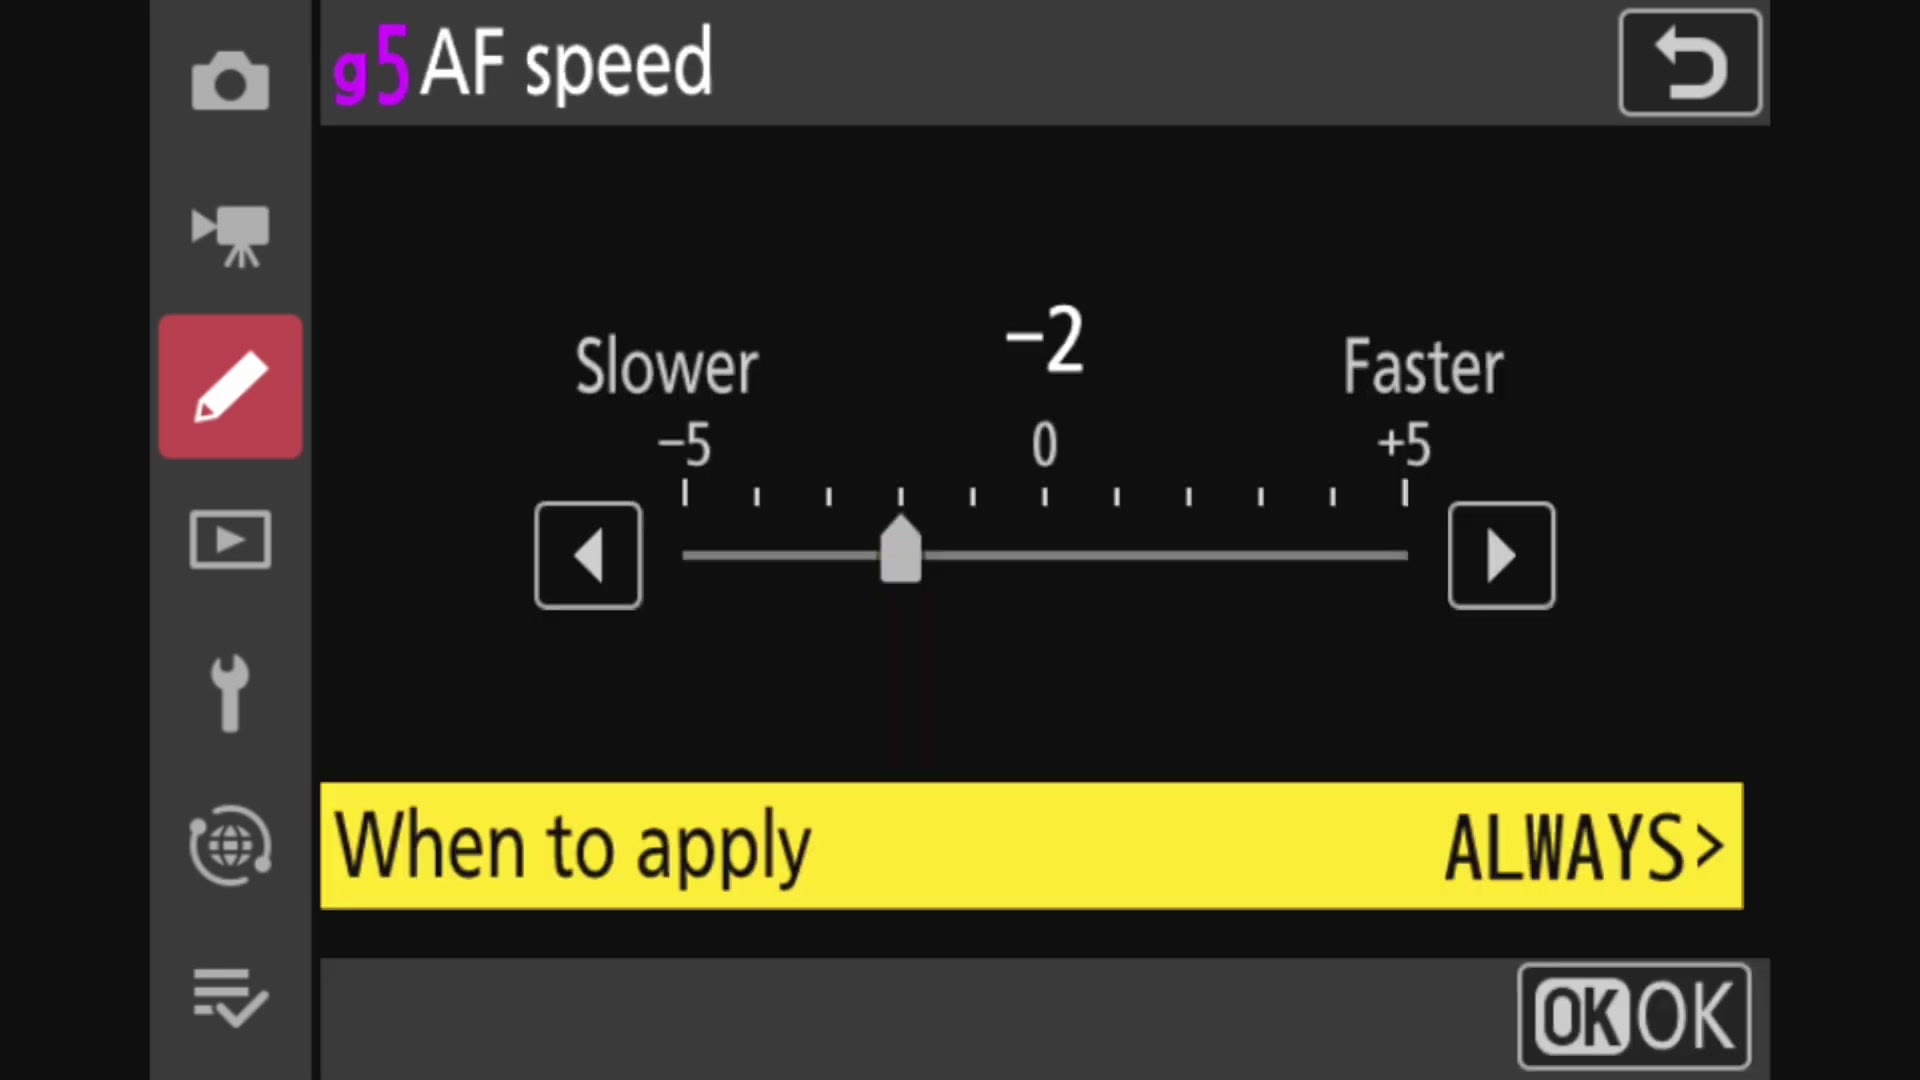
This gives the autofocus a much more organic feel to it, and I find that whenever I’m moving around, especially whenever I have the camera on a gimbal, the autofocus feels a lot smoother and more natural, almost as if a human was pulling the focus and not the camera.
g6 AF tracking sensitivity: 5
Lastly, go back to the pencil, back to g for video, and select g6, AF tracking sensitivity. This setting determines how sticky the autofocus is going to be on the subject the camera has chosen, before it shifts to something else in the frame, because ideally you want the camera to stay focused on whatever it is you’re filming.
The scale runs from 1 on the High end to 7 on the Low end, and my recommendation is to turn the sensitivity a bit lower, down to 5, because that will help keep the autofocus from wandering and help make sure things stay in focus.
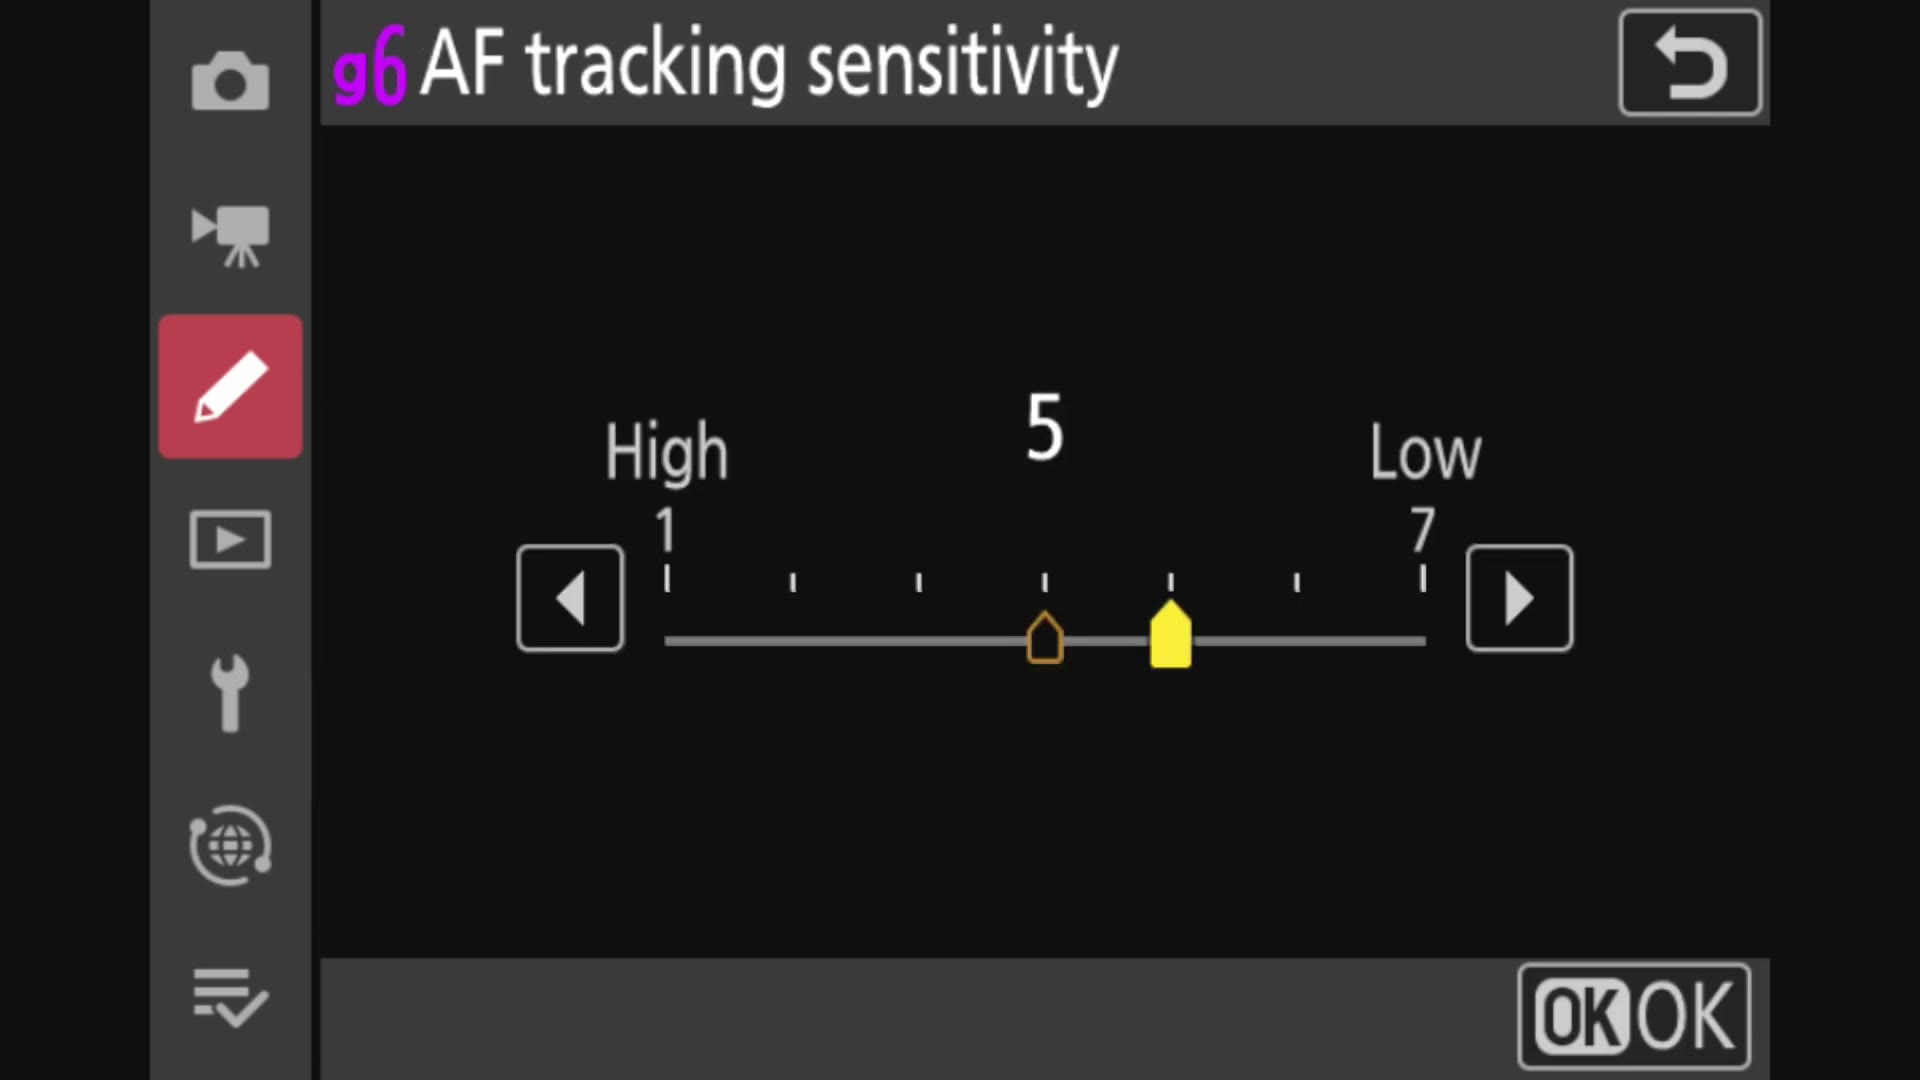
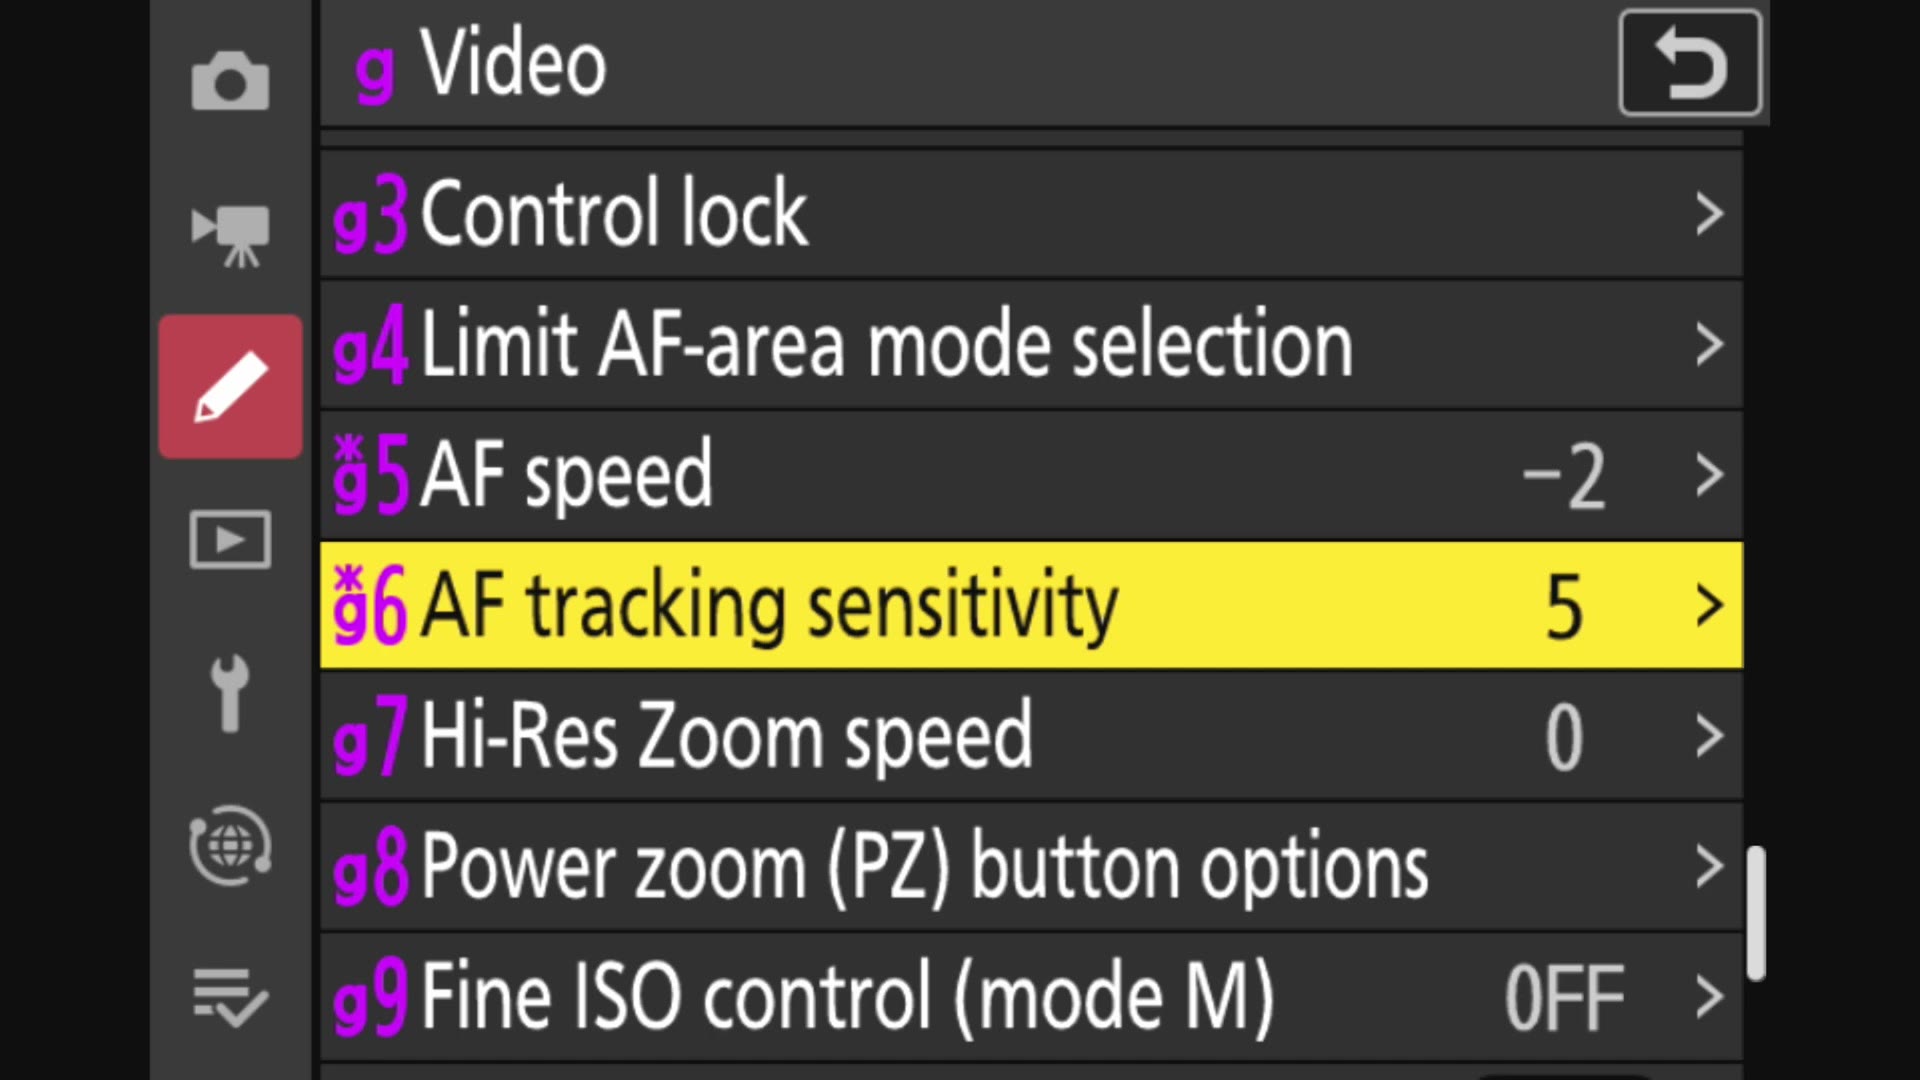
Congratulations! You have now dialed in all of the autofocus settings you need if you’re filming people.
Best Video AF Settings For Animals, Vehicles And Airplanes
But what if you want to film something else, like an animal or a vehicle or an airplane? Well, that’s really simple, because you’re not going to change any of the settings we’ve already dialed in except for one of them.
All you have to do is go back to the video recording menu, scroll down to those same AF/MF subject detection options, and for Subject detection choose whether you’re filming an animal, a vehicle or an airplane. That’s it.
Best Tracking AF Settings For Video
We’re not quite done yet though, because we need to talk about another filming scenario. Another area where your autofocus settings are really going to differ between photo and video is tracking autofocus.
For a photo, the camera is always going to be freezing movement. So unless you’re trying to do some sort of creative shot where you want to add motion blur by shaking the camera or something like that, 99 percent of the time when you’re taking a photo you’re trying to hold the camera as still as possible.
If you want to go deeper, I’ve also got A Wedding Filmmaker’s Review Of The Nikon Z6iii – Affordable 6K Raw Video Camera!.
Video is different. Unless you’re filming on a tripod or a monopod, the odds are you’re going to want to introduce some kind of movement to your footage. That can be a subtle handheld camera shake, it can be a smooth parallax move if you put the camera on a slider, or it can be really exaggerated movement if you put the camera on a gimbal and follow someone as you film them.
In all of those situations you want the camera to properly track the subject you’re filming and keep them in focus, and that’s more complicated, especially if you’re filming a subject that’s moving while you are also moving. The autofocus has to work harder to make sure that what you want in focus stays in focus. Thankfully the Z6 III is excellent when it comes to this form of tracking autofocus, and it gives you settings to dial in.
Here’s the great news too. We have already dialed in 90 percent of the settings we need for tracking autofocus. All you really need to do now is tell the camera you want to track a person or an object, and then tell the camera which person or object you want it to track.
Go into the video recording menu again, go down to AF-area mode, and change this from Auto-area AF to Subject-tracking AF, which is going to, as the name implies, track a subject.
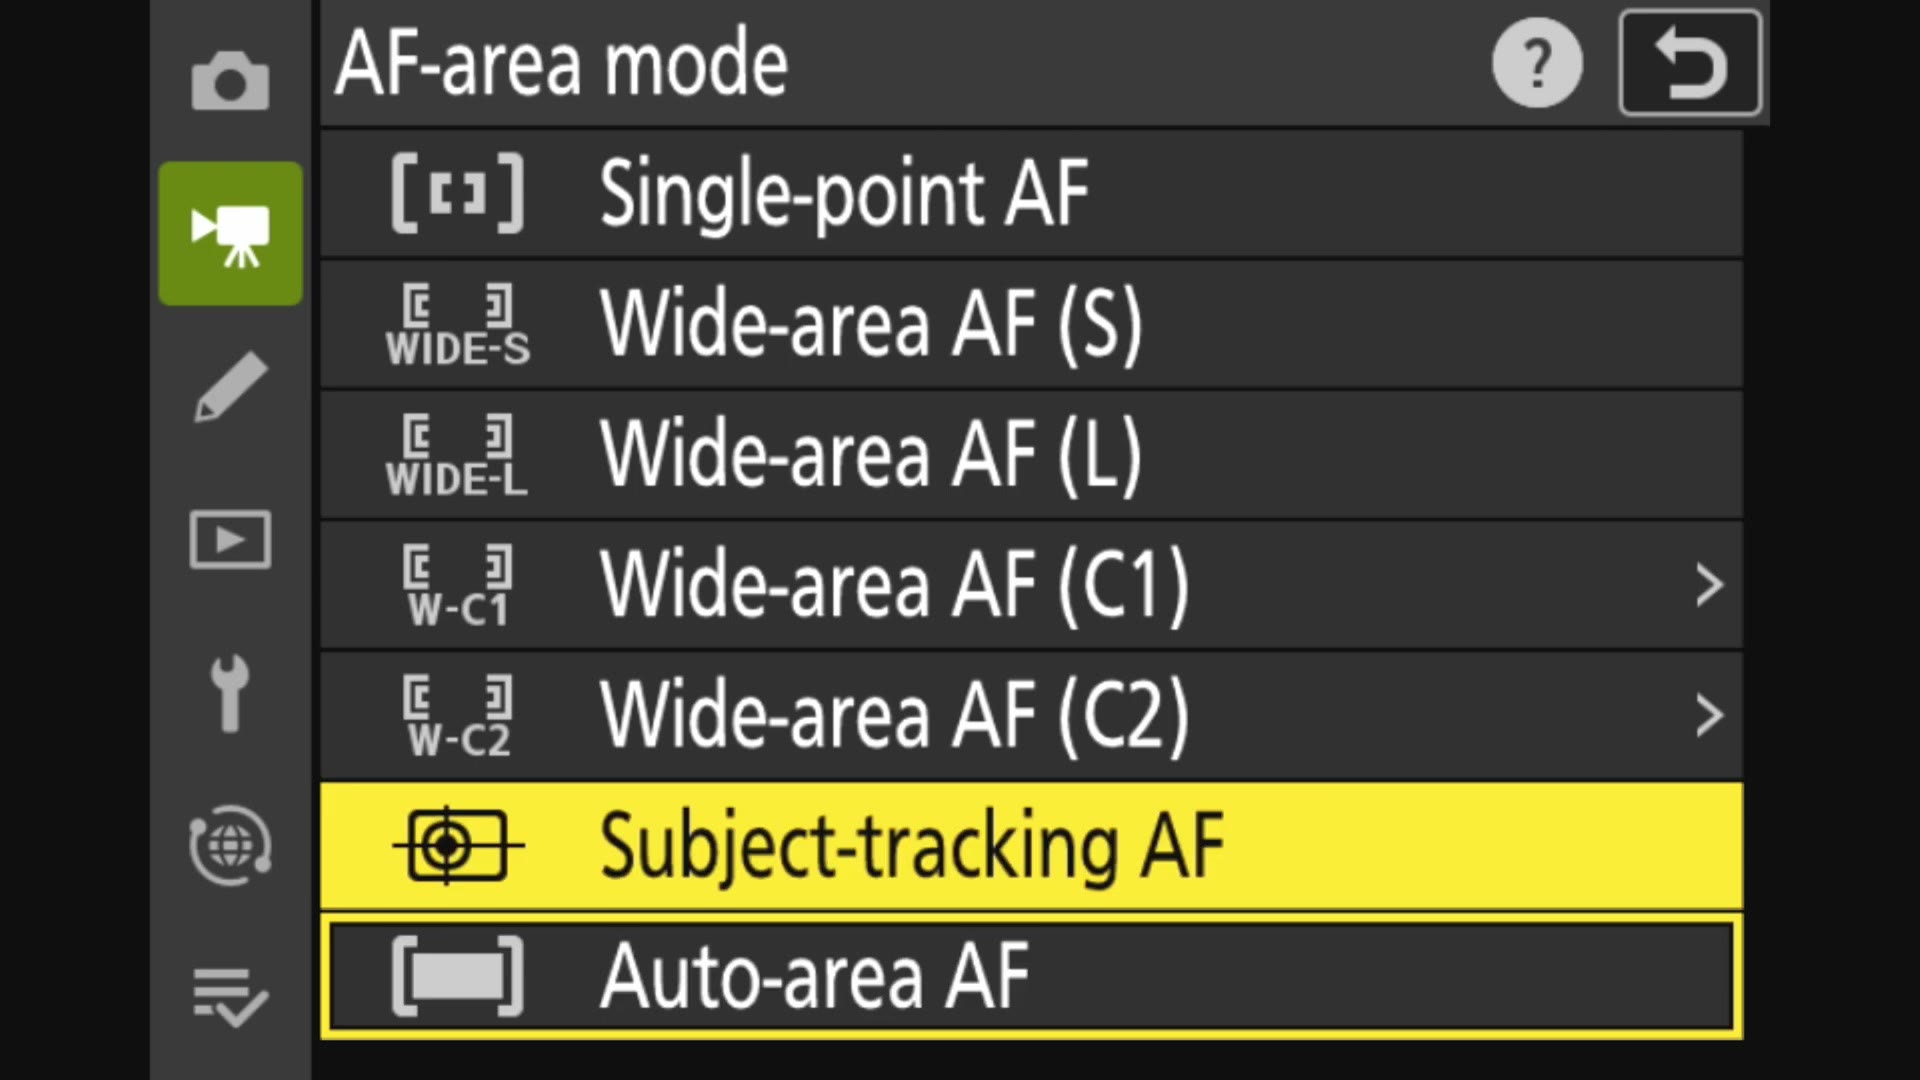
In addition, if you want to maximize the capabilities of this setting, go back to the video recording menu, back to those AF/MF subject detection options, and change Subject detection to Auto. That means the camera is going to choose whether it wants to focus on people or animals or vehicles or airplanes, and then you’re going to help it out a little bit by using this tracking mode with those settings dialed in.
Now close your menu so you can see the preview of what your camera is going to film. Whenever you do this you’re going to notice there’s a small white square in the middle of the screen, as well as the text that says OK, OK.
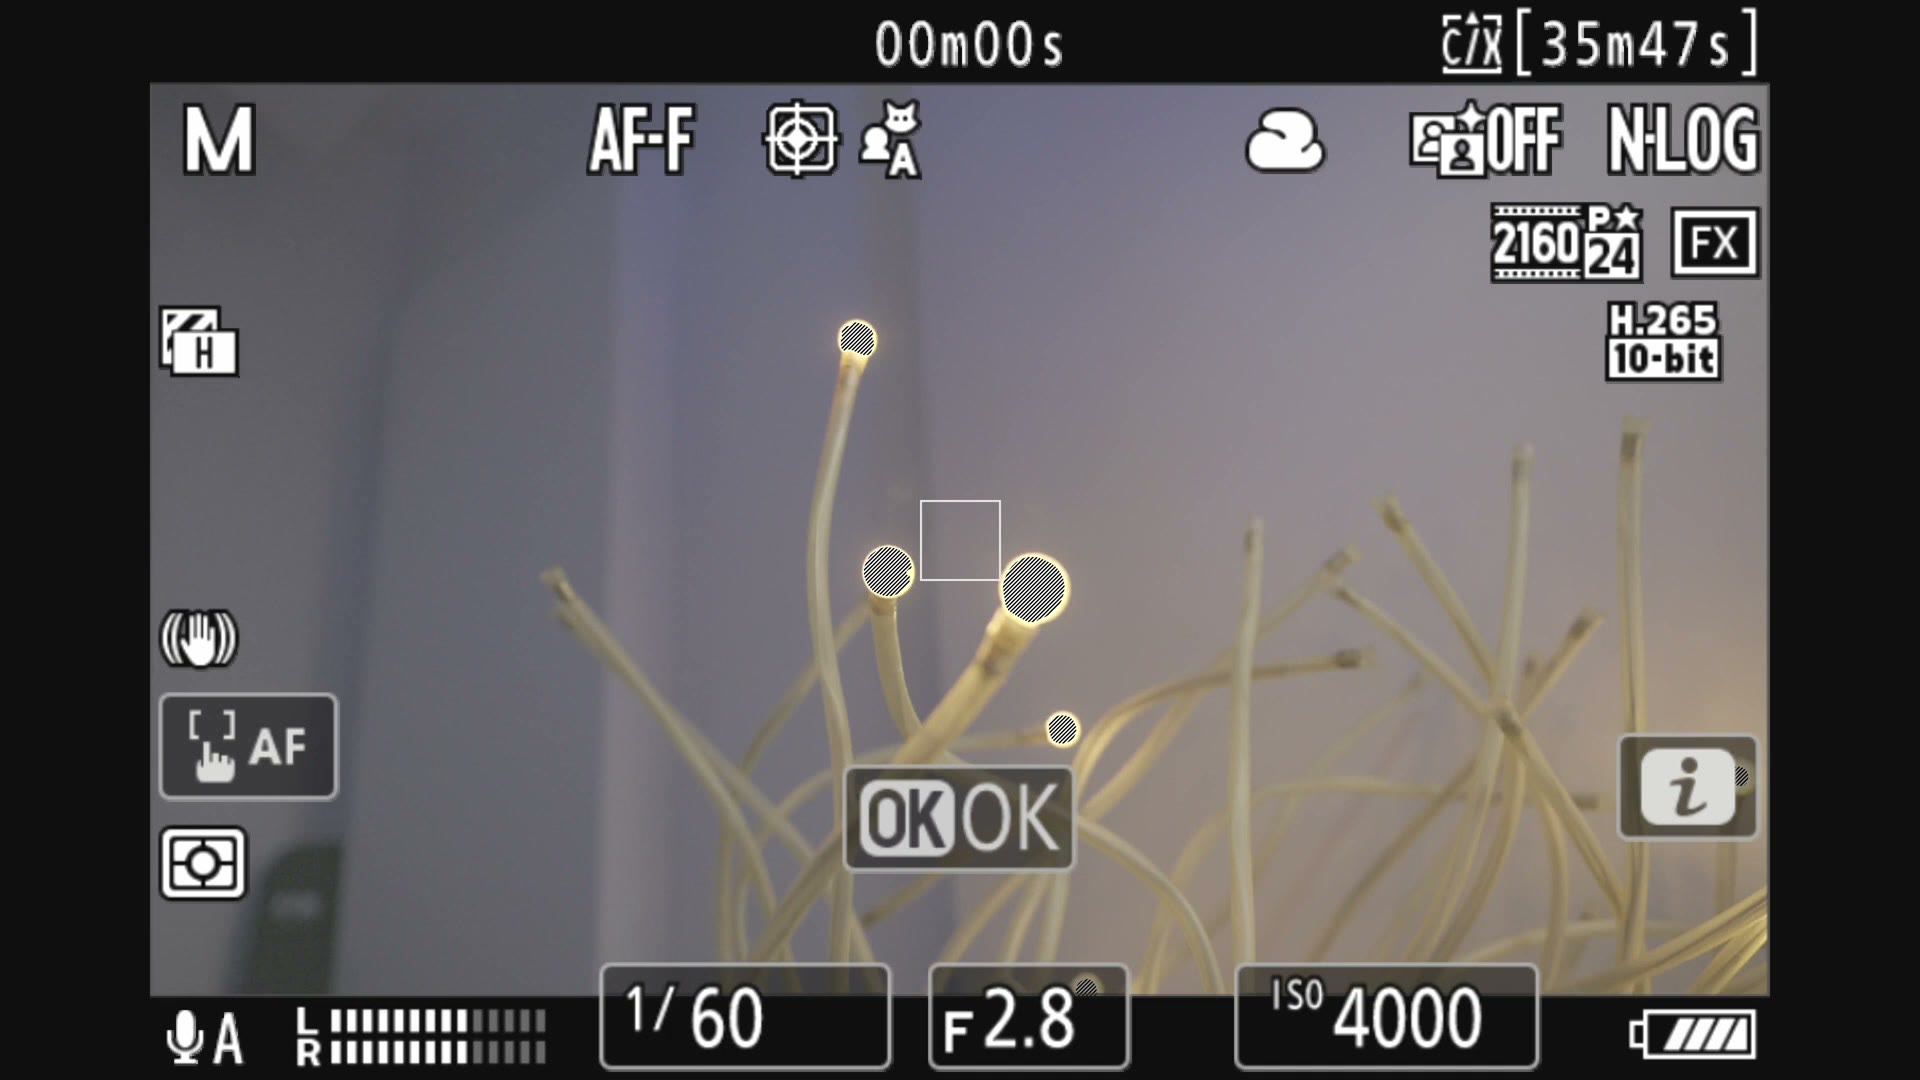
To track your subject, all you have to do is move that small white square over the person or object or anything else you’re trying to film, and press the center OK button on the back of the camera. Whenever you do that, one of the OKs on the screen changes to a flipping arrow, and you’ll notice the white box starts to track whatever was inside it.
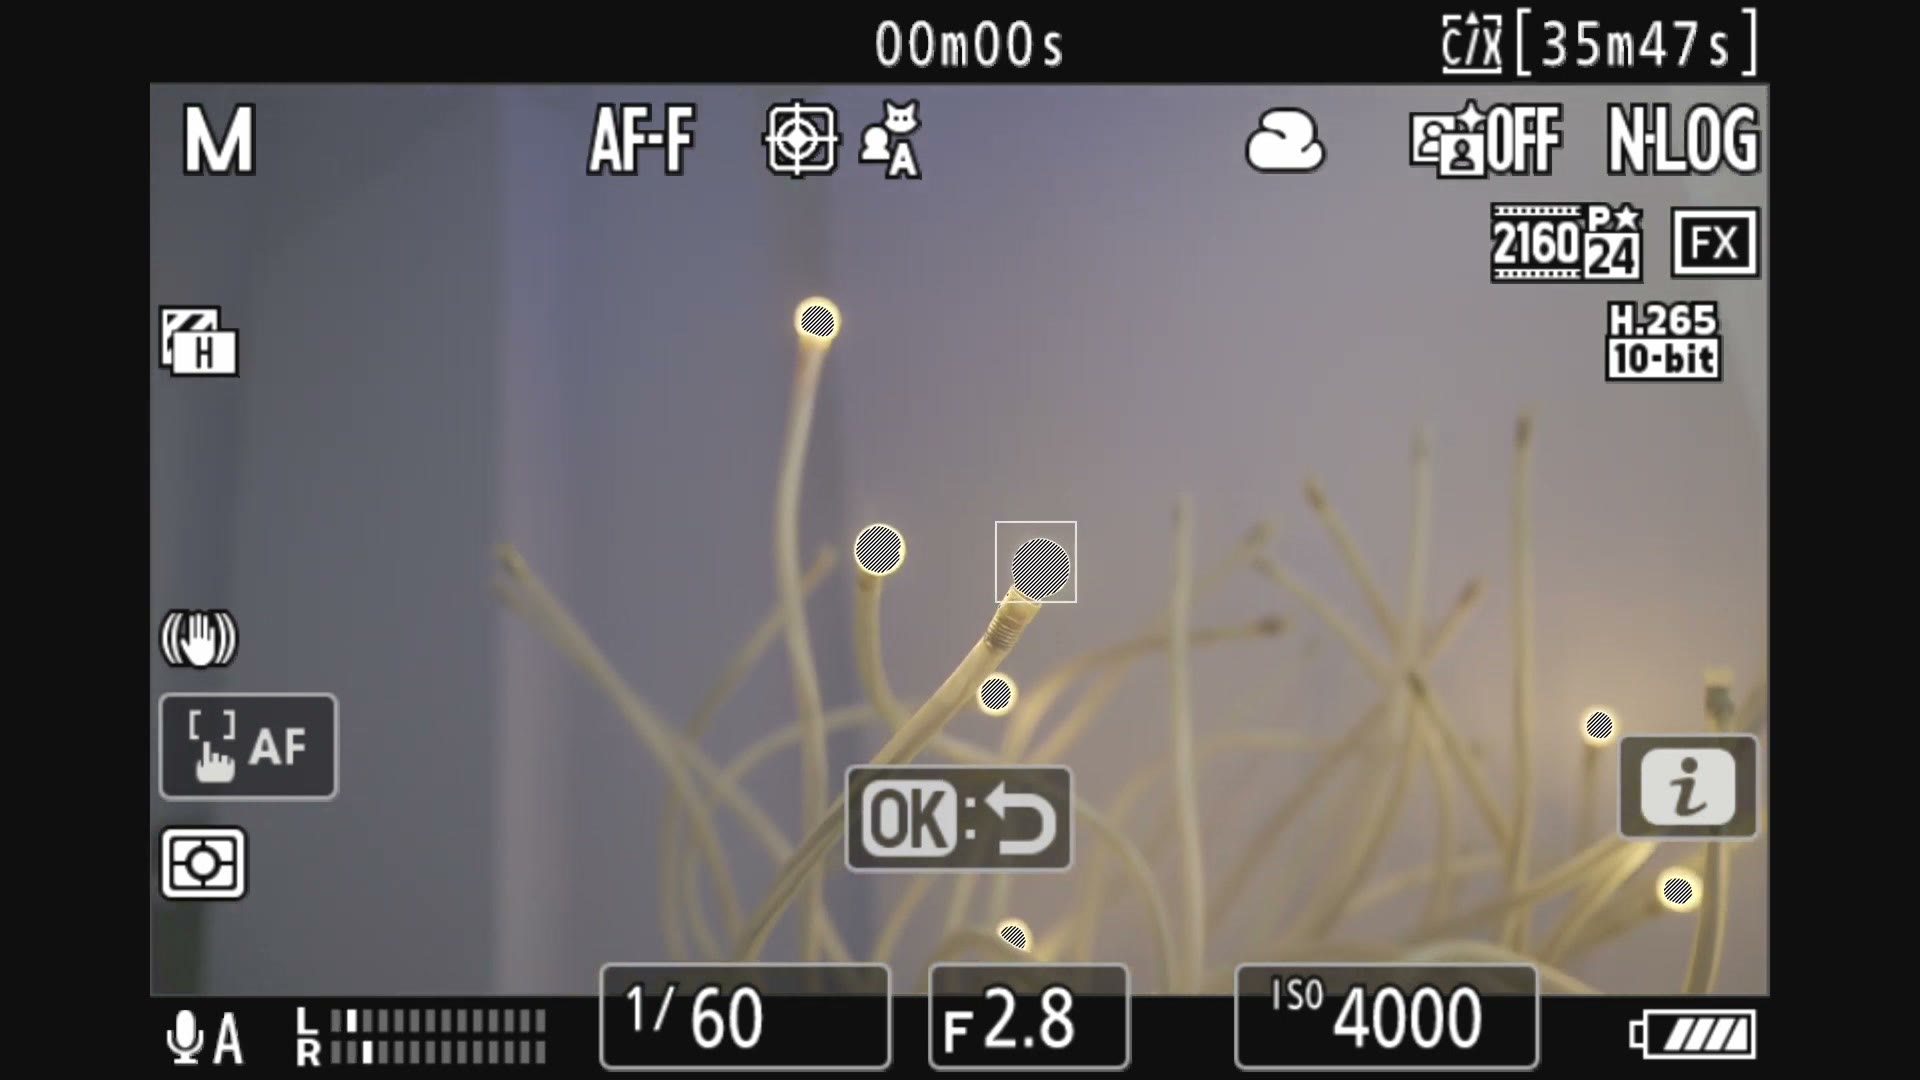
If it’s a person’s face, the camera is going to automatically recognize and focus on the face and the person’s eyeball, because it knows that’s probably what you wanted it to focus on. If you’re filming an object, the small white box moves around the screen as it tracks whatever you’re filming. Once you want to stop tracking, just press the OK button again to disable it.
This tracking setting is really useful and it’s going to be very helpful to you, especially if you’re filming something moving and you need to keep it in focus.
Grab The Free Cheat Sheet
And there you have it. You now know the best video autofocus settings for your Nikon camera, and you’re prepared to use the full strength and capabilities of it to film amazing footage that is as sharp and crisp as it can be.
You can check out the Nikon Z6 III at Amazon or at B&H, and if you want to know what I think of the camera itself, I made a full Nikon Z6 III review as well.
And grab my free Nikon video autofocus cheat sheet, which is going to be a great reminder if you forget any of these settings. It’s completely free.
Thanks so much for reading, and have a great day!