
I want to explain color management to you, because it is honestly the easiest way to get amazing colors in DaVinci Resolve in just one click, and I am not exaggerating about the one click part. You can take footage that comes out of your camera looking super flat and gray and lifeless, the way log footage always does, and by clicking one button in one menu it will immediately look saturated and contrasty, exactly the way it was supposed to look.
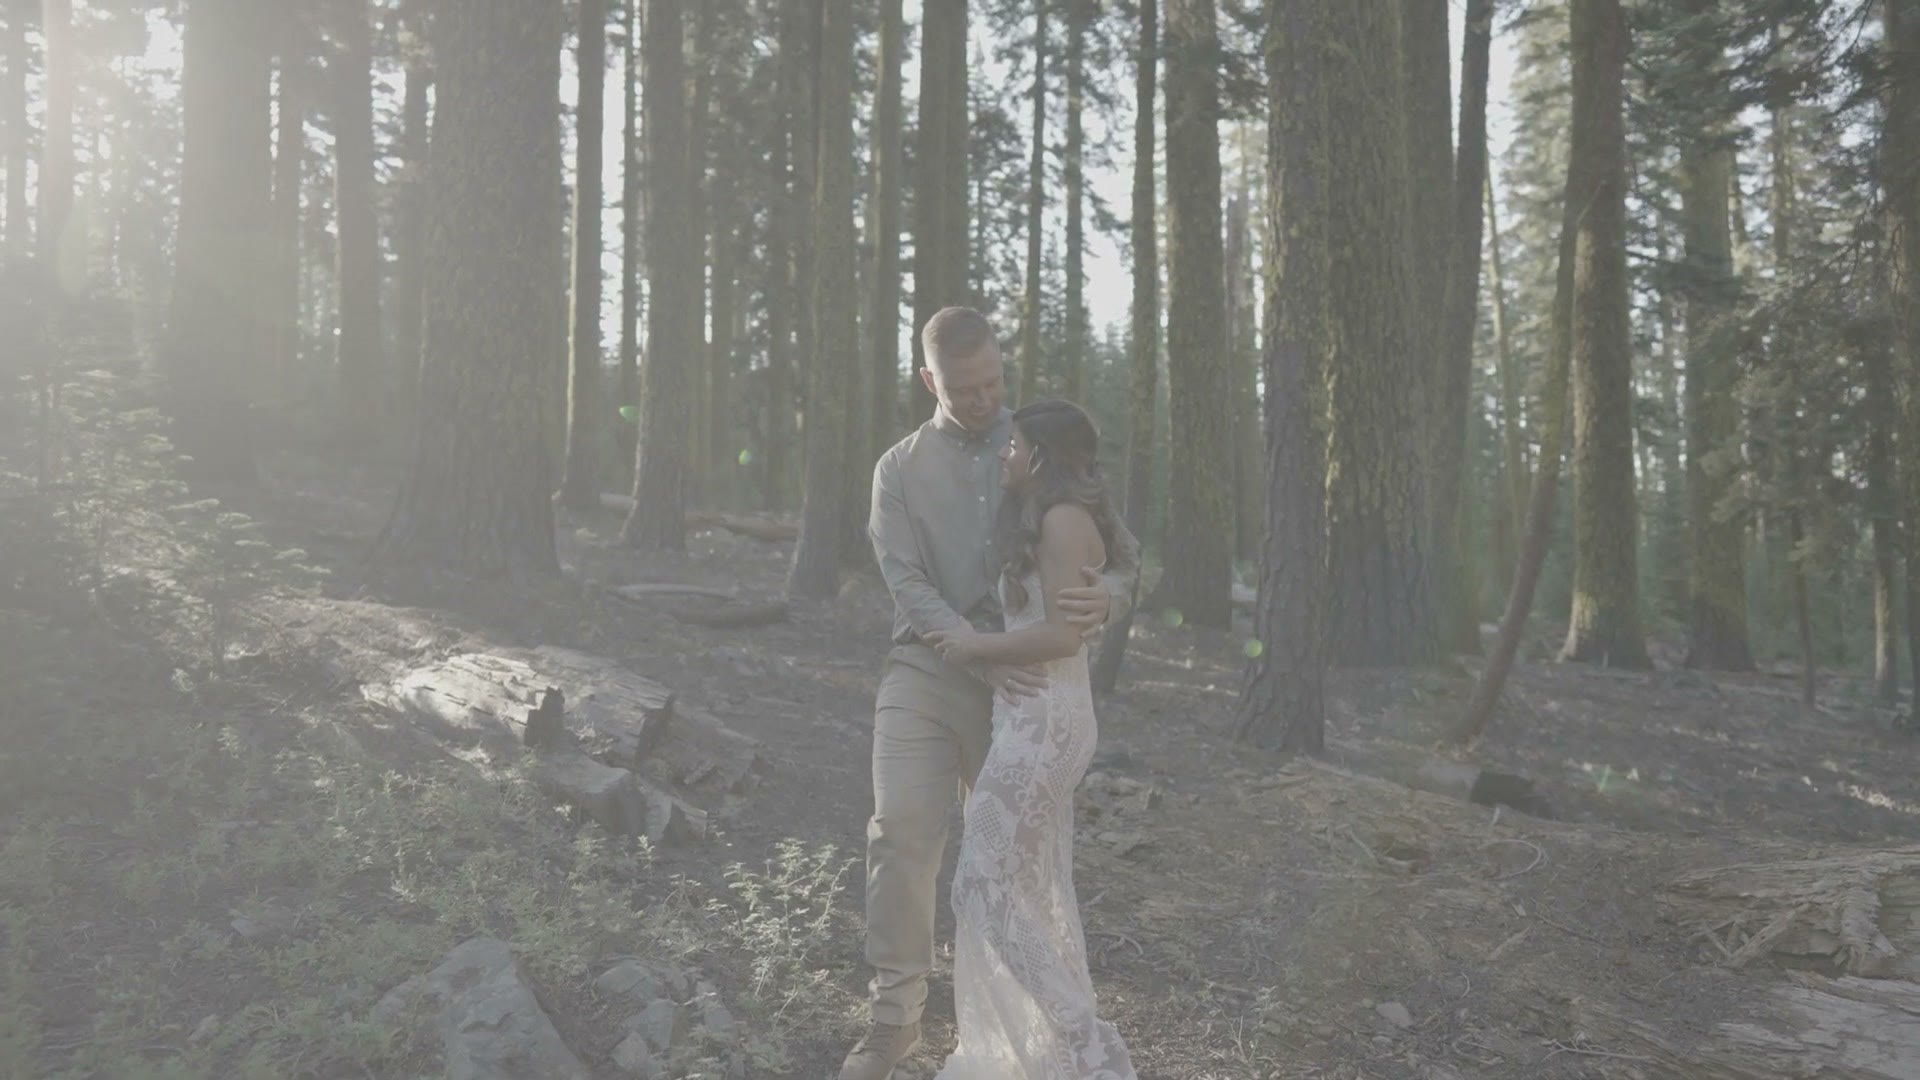
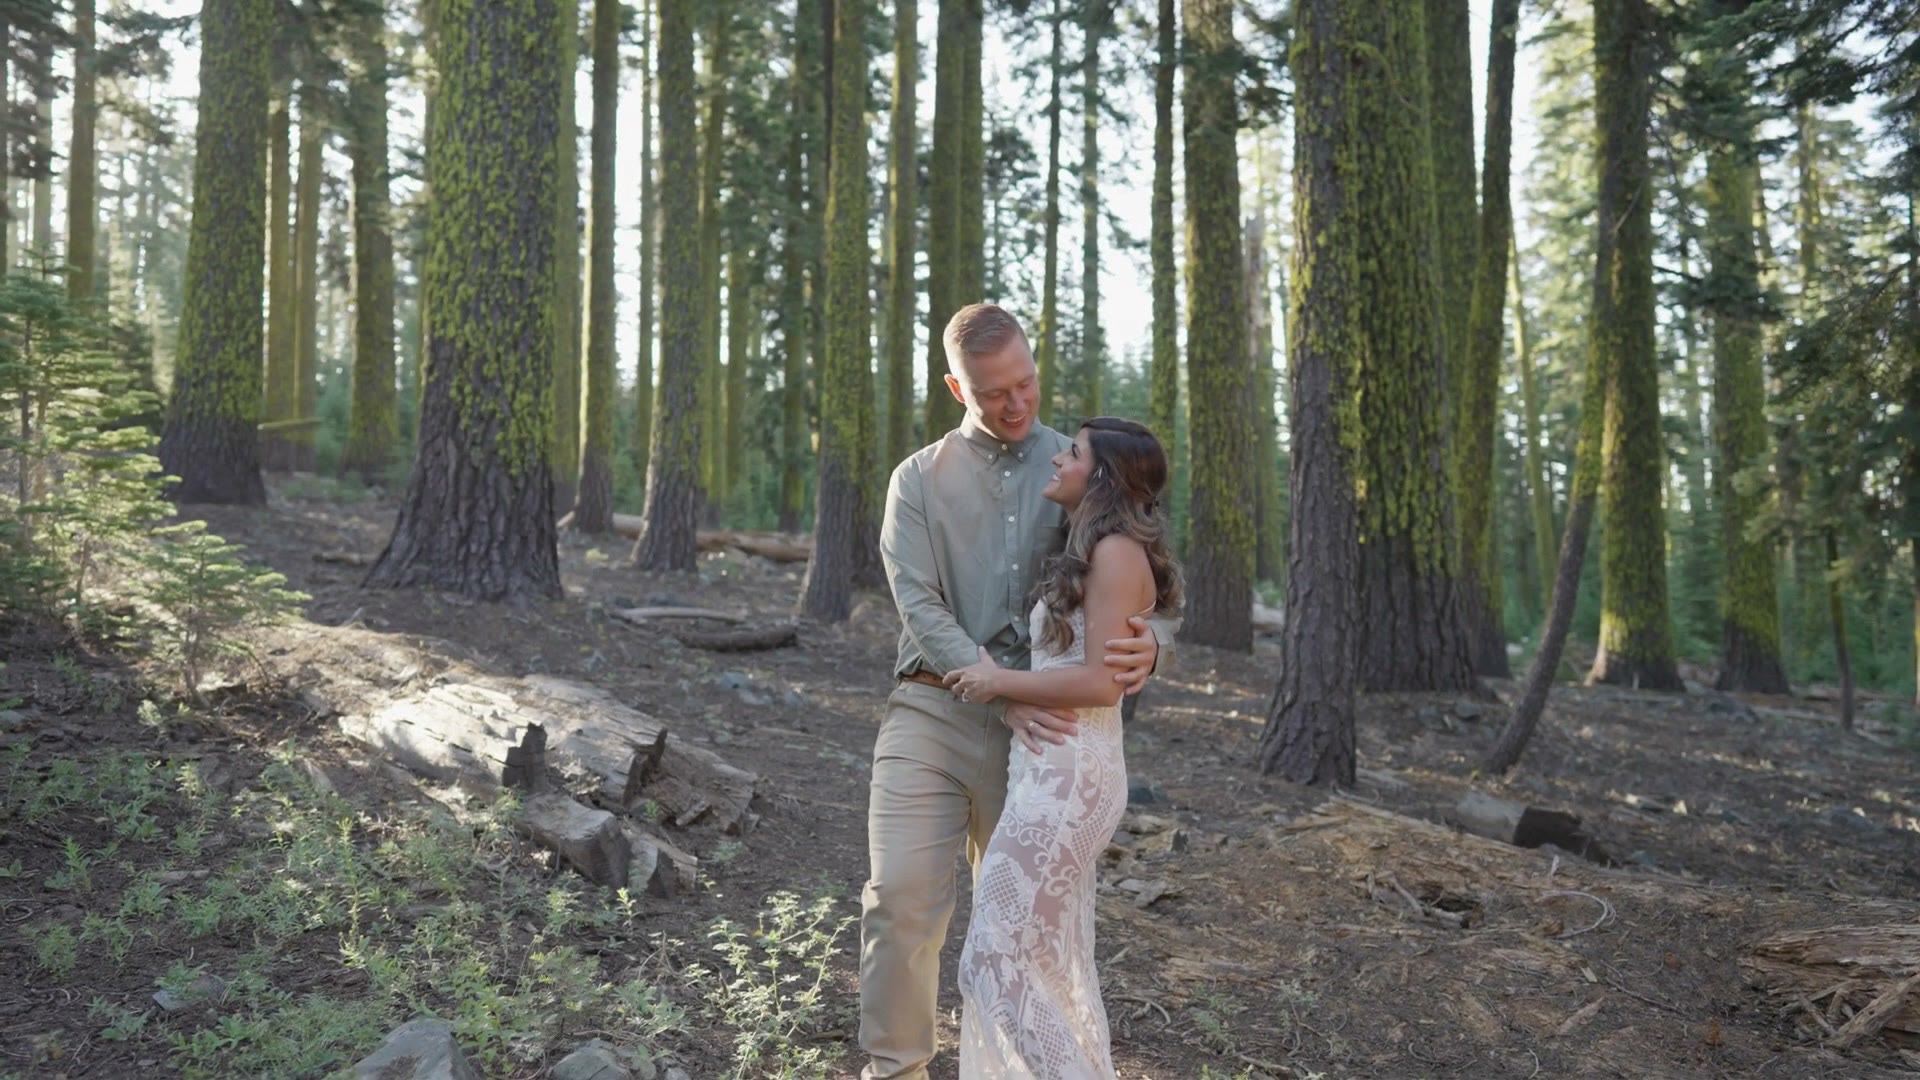
Same clip. One click apart. Isn’t that crazy?
My name is Matt Johnson, I’ve been filming weddings for over 15 years, and I’m here to help you become a better filmmaker and video editor. And because I’m all about helping you out with video editing, I want you to know that I’ve put together a free guide called Edit Videos Like A Pro, and you can download it completely free and learn a whole lot of secrets like the one we’re about to talk about here.
What Is Color Management?
Here’s the simplest explanation I can give you. At its core, color management is making sure that the colors of your video look the same on every single device that they get viewed on, meaning the colors you see on the back of your camera while you’re recording will look the same on the computer screen you’re editing on, and they will also look the same on whatever screen your audience is watching your video on, be it a computer, a TV, a phone or a tablet.
And that’s a good thing, right? You want your colors to look the same across all of those screens.
Thankfully the latest versions of most popular editing software include this color management feature, where you can turn it on and make sure your colors are going to look their best. And this part is very important: color management has the added benefit of saving you a ton of time and helping you color grade your videos very quickly. That is really the reason I use it.
In this post I’m explaining how to enable and work with color management in DaVinci Resolve, but just know that this is also possible in Adobe Premiere Pro. Leave me a comment if you’d like me to make a tutorial for Premiere as well.
Settings For Color Management
The first thing you’re going to want to do is import some footage that you filmed in a log picture profile. In my case I filmed this footage in S-Log3 with my Sony a7S III. We’re going to pretend that this video on our timeline is now fully edited and I’m ready to color correct and color grade it.
Once you’ve reached that point, go up to File, then Project Settings, and look at all of these settings. My goodness. The one you’re gonna want to focus on is the Color Management tab, so make sure you select that. Then, for Color science, change it from DaVinci YRGB to DaVinci YRGB Color Managed.
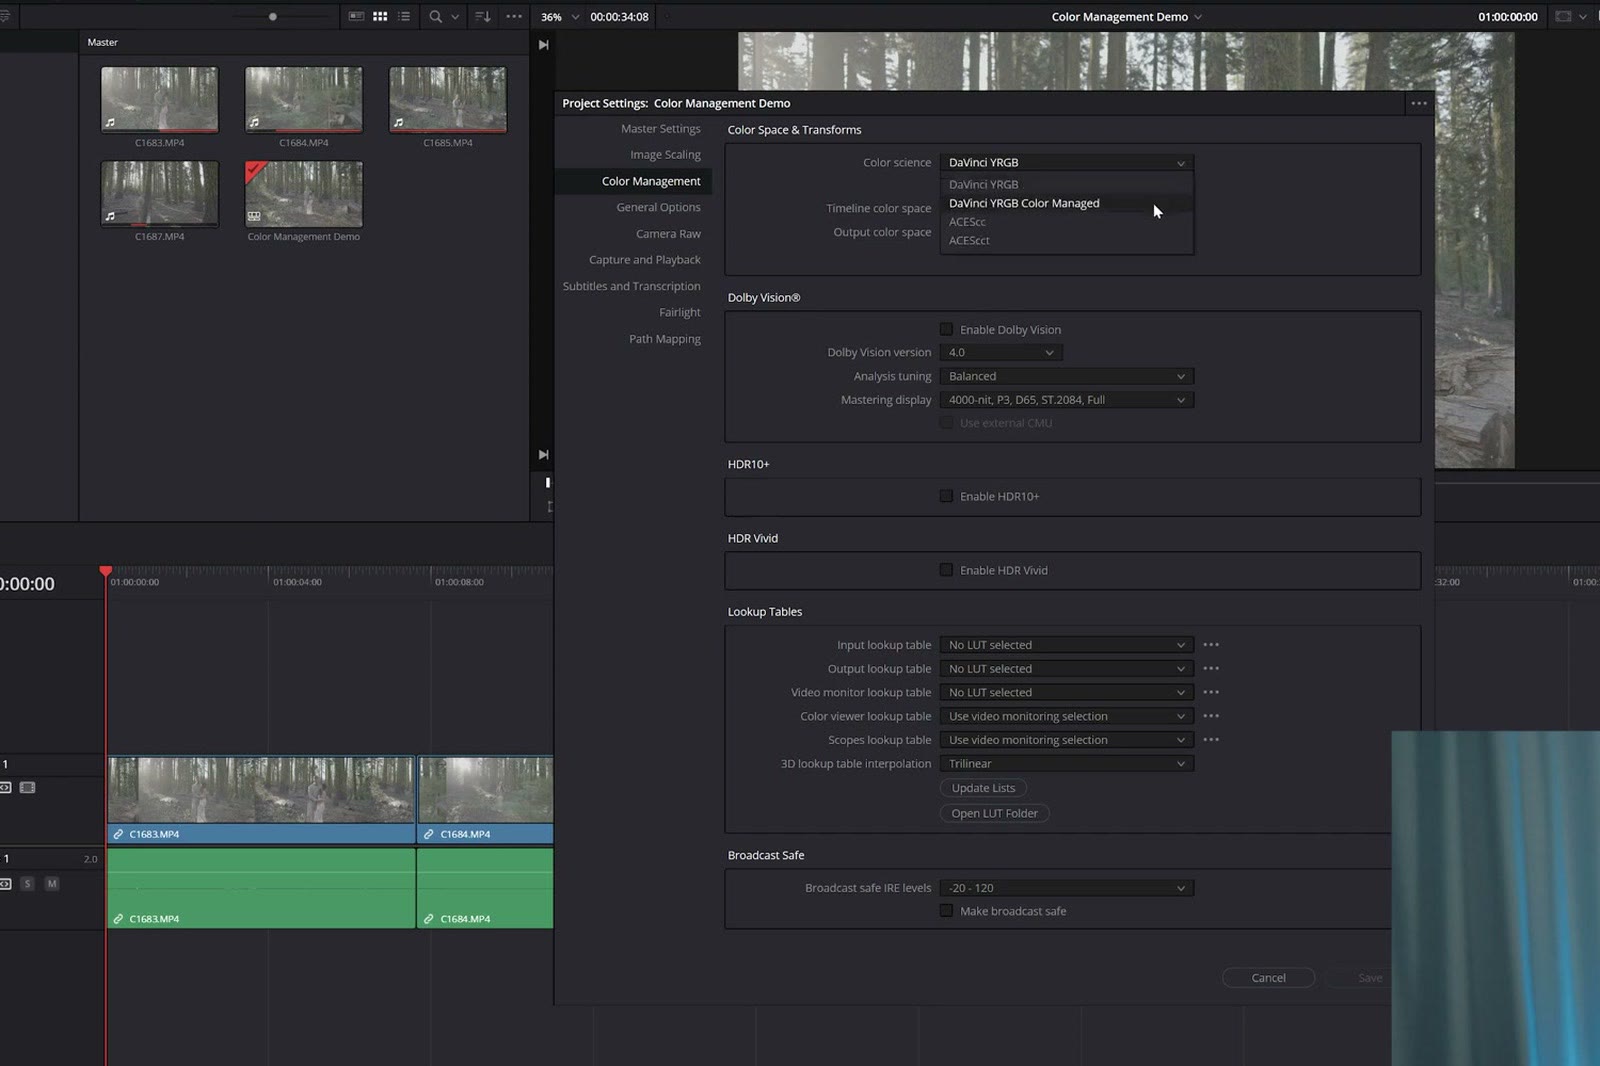
You have some other settings there too, color processing mode and output color space, and you can leave all of that at the default of SDR and SDR Rec.709. By enabling this color managed mode you’re essentially telling DaVinci Resolve that you want it to keep your colors consistent across the widest variety of screens, and you’re also enabling the program to automatically change the colors and the saturation and the contrast of any footage you import. Automatically. So that’s cool. It’s pretty cool.
All you have to do is click Save down at the bottom. And with that done, nothing has changed. Matt, what happened?
Well, hold on. Remember how I said color management is going to get you amazing colors in just one click? It’s time to do that now.
How To Enable Color Management
Head over to the Color page. We’ve got our nodes, we’ve got our preview, we’ve got our clips down at the bottom. Remember, we are working with log footage that is super flat and desaturated, and to turn it from log footage into Rec.709 footage that looks like what your eyes actually saw while you were filming, you would commonly go down to your curves and drag down to add some contrast back in, like okay, things are popping a little more now, right? And then you’d go over to your saturation and crank that up and look, we made it not log. Now it’s colorful.
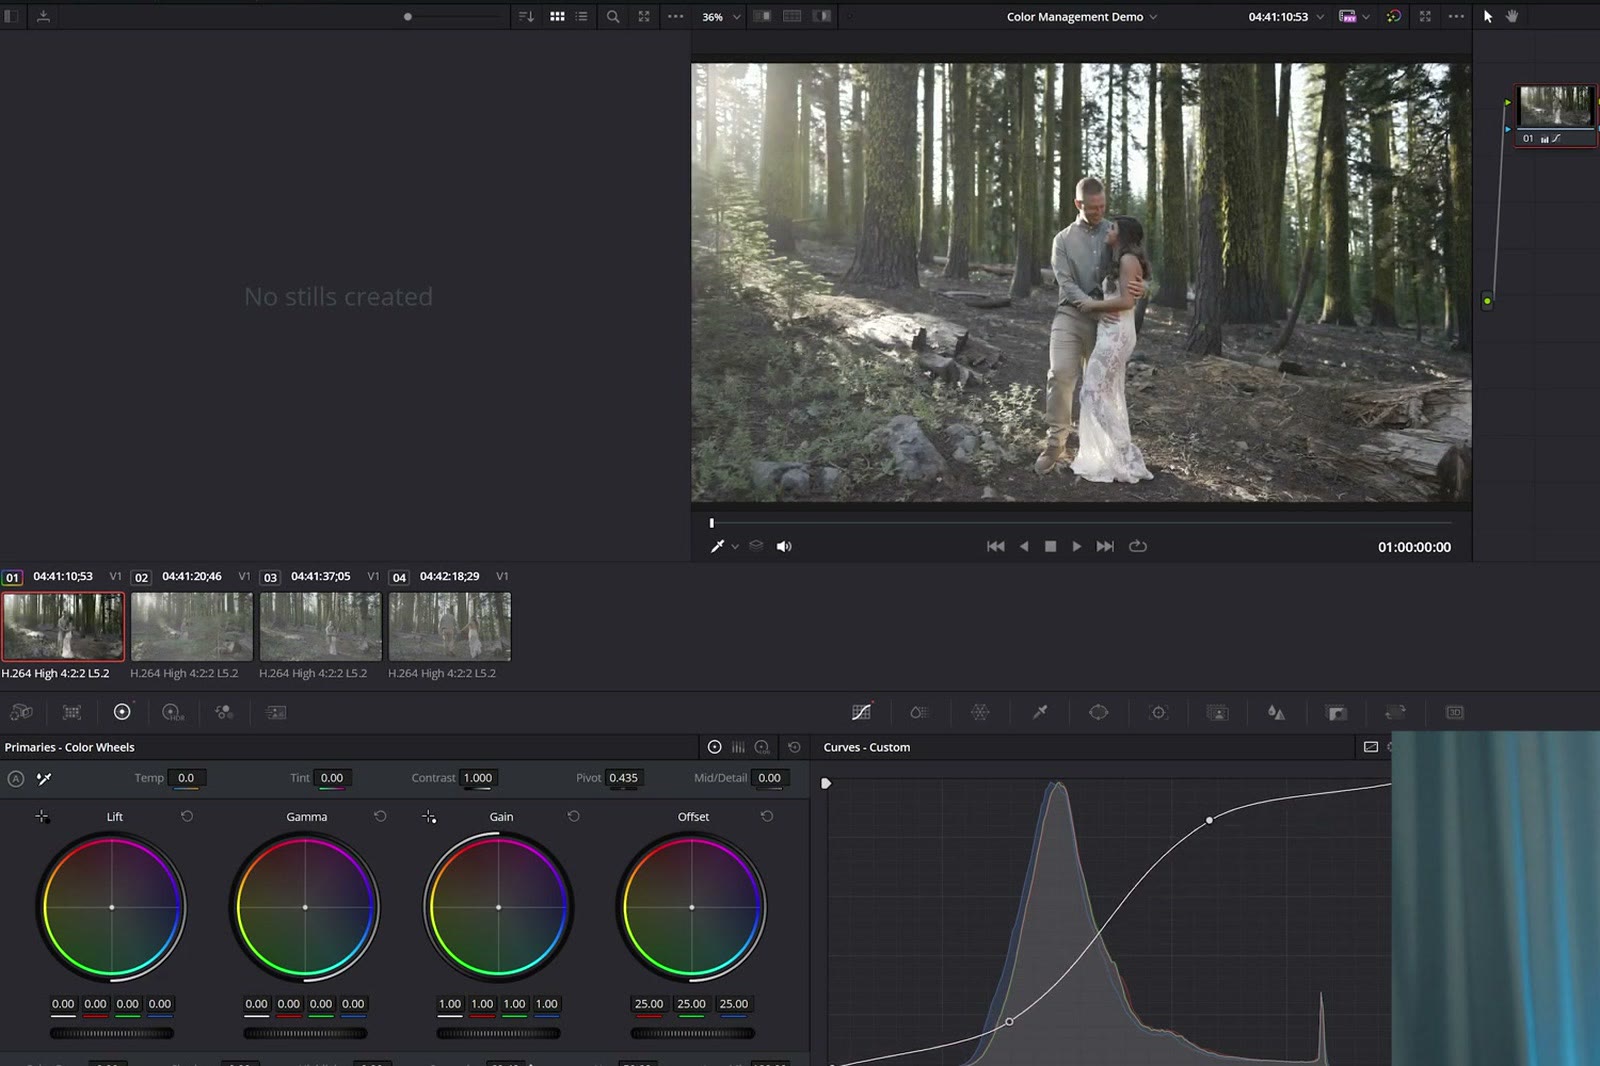
But with color management, Resolve is going to offer you a way easier way of doing this, and it’s going to give you the most accurate contrast and saturation and colors. So let’s use that instead. Right click on your node and hit Reset Node. Great. Get rid of that. Back to log.
We’ve already enabled color management in the settings, so now all we have to do is make one more change, and here it is. Right click on your clip down in the middle and you’re going to see a new menu option has appeared that says Input Color Space.
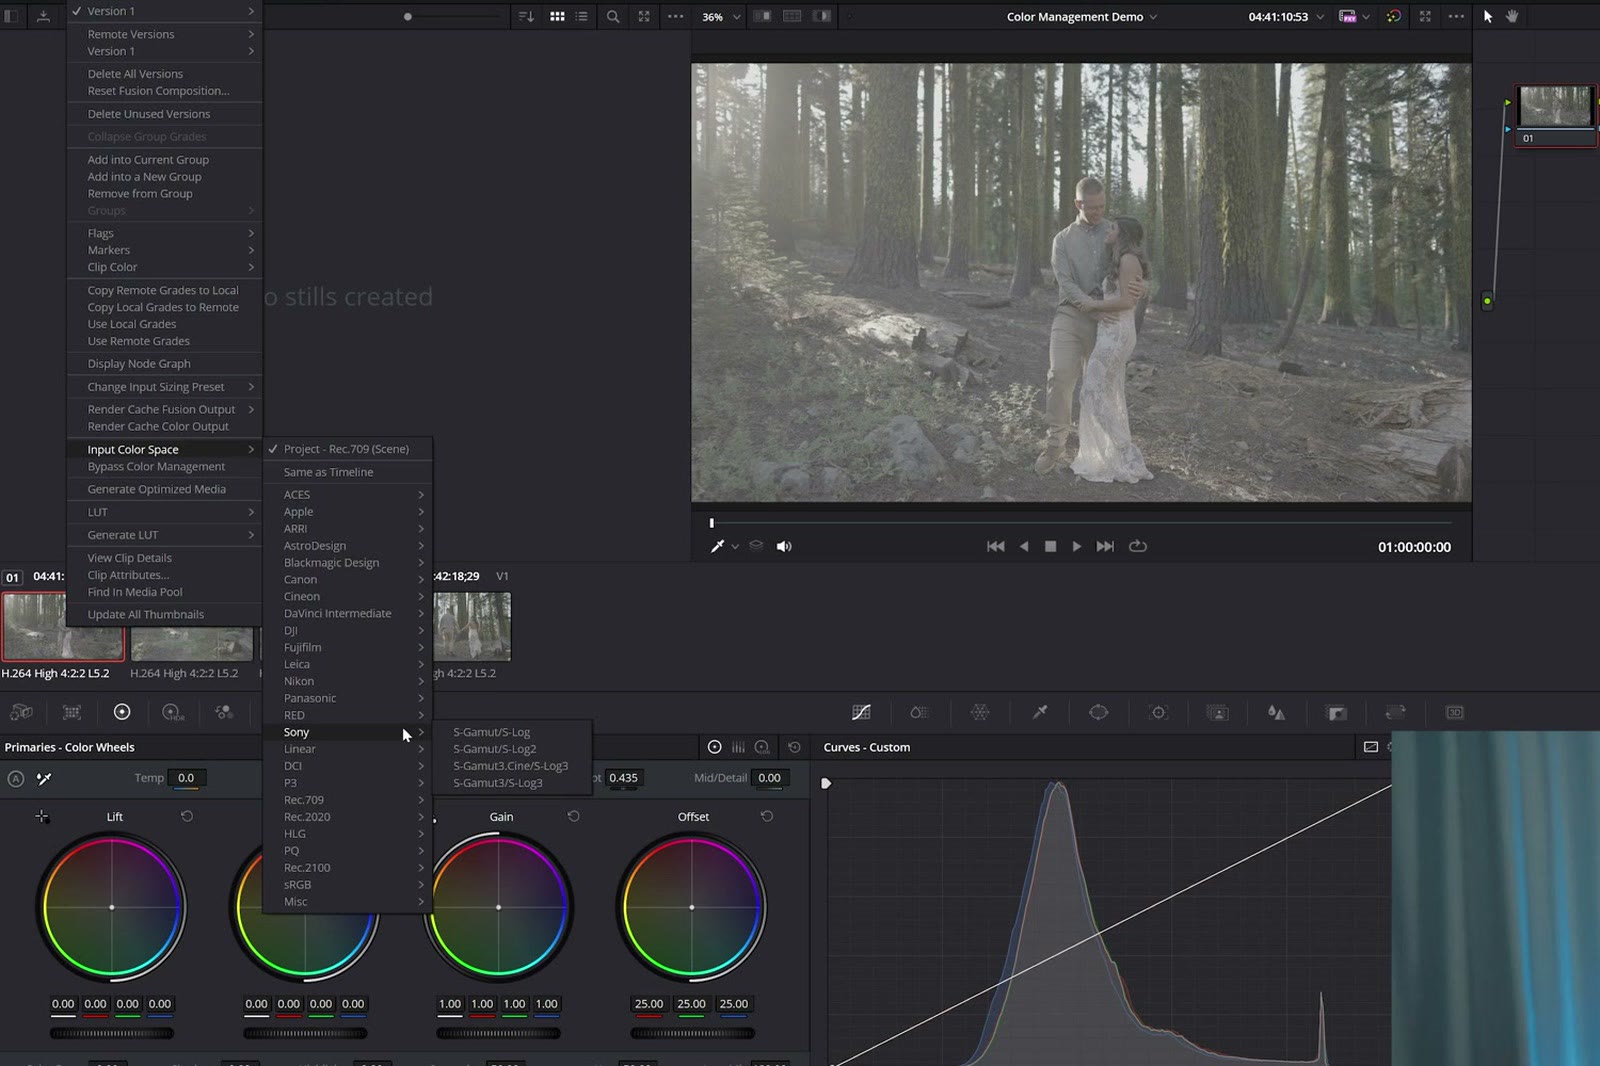
By default that’s set to Project – Rec.709 (Scene), but you have a ton of other options in there from a whole bunch of different camera manufacturers. Apple with Apple Log, Canon with C-Log 1 through 3, DJI with D-Log, Nikon with N-Log, and right down there the one we’re looking for, Sony with S-Log3.
Now this is arguably the most important part of color management, because this is where you need to know which camera and which picture profile your video was filmed in. If you filmed the footage yourself it’s probably a no brainer and you know what you shot it on. But if you’re editing footage a friend sent you, or you’re working for a client and they handed you footage, you’re going to need to confirm with them what picture profile they used before you use color management, because you have to know the camera and the picture profile.
Thankfully in this example I know I used a Sony camera filming in S-Gamut3.Cine/S-Log3, so we’re going to click on that.
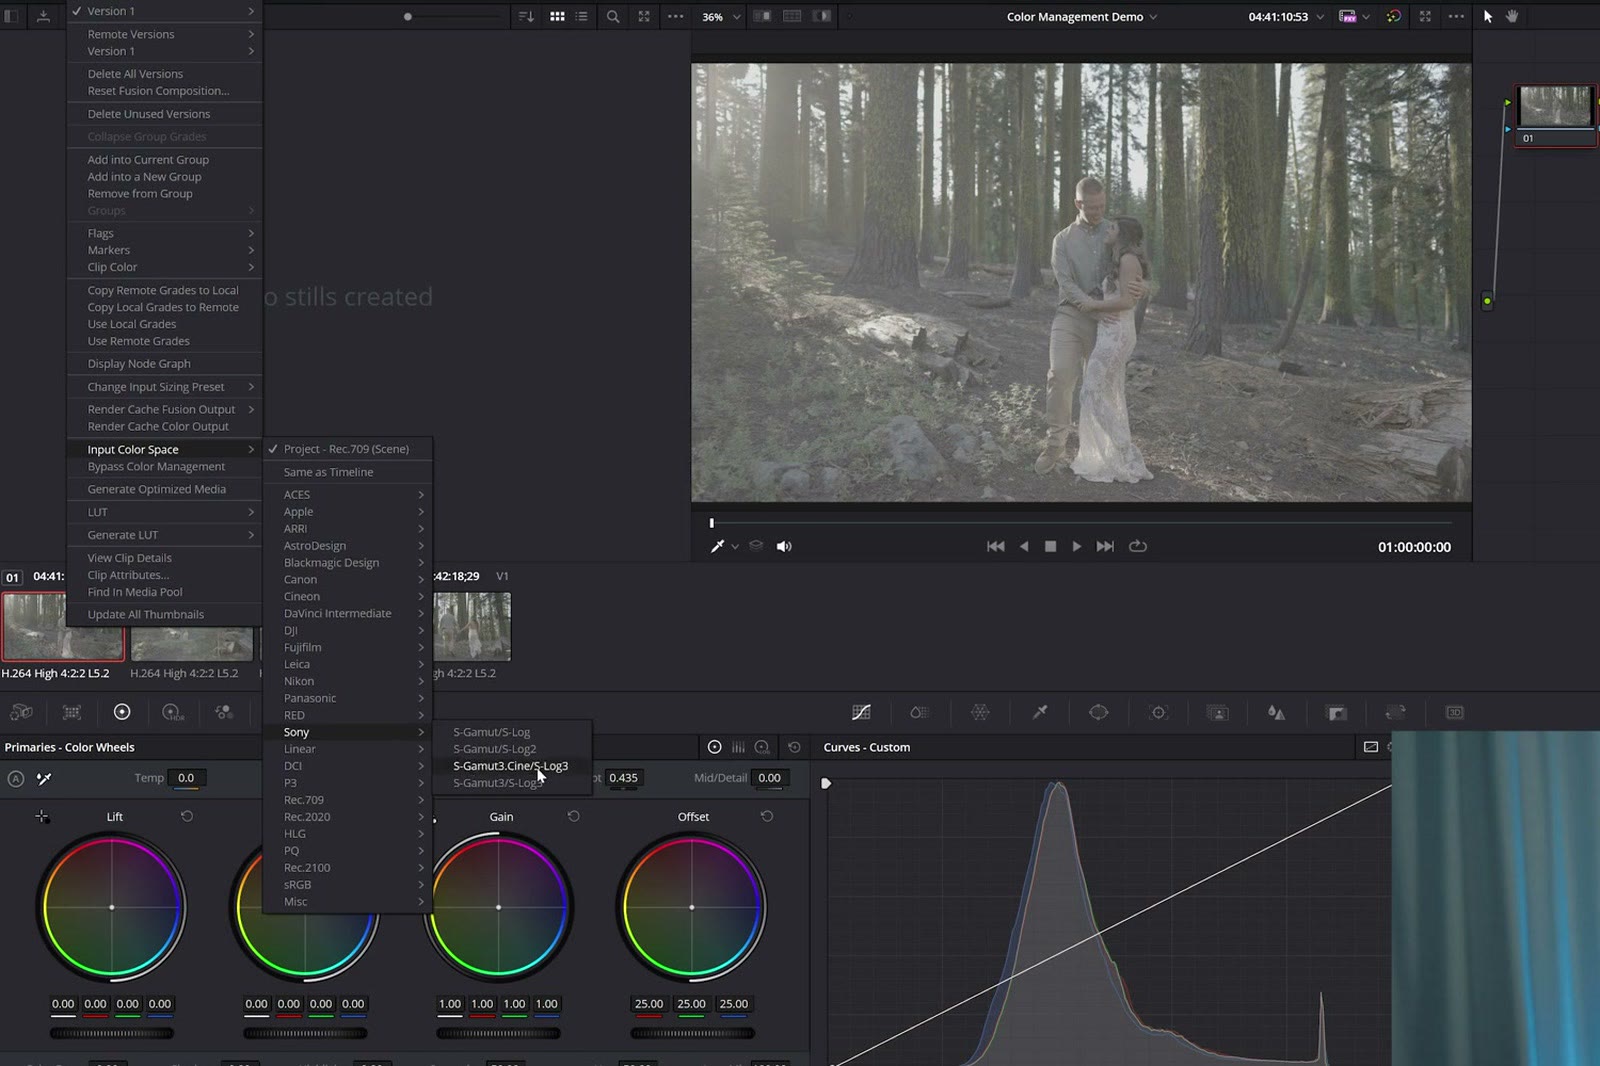
And bam! Look at that. One click. Colorful, saturated, that is looking good.
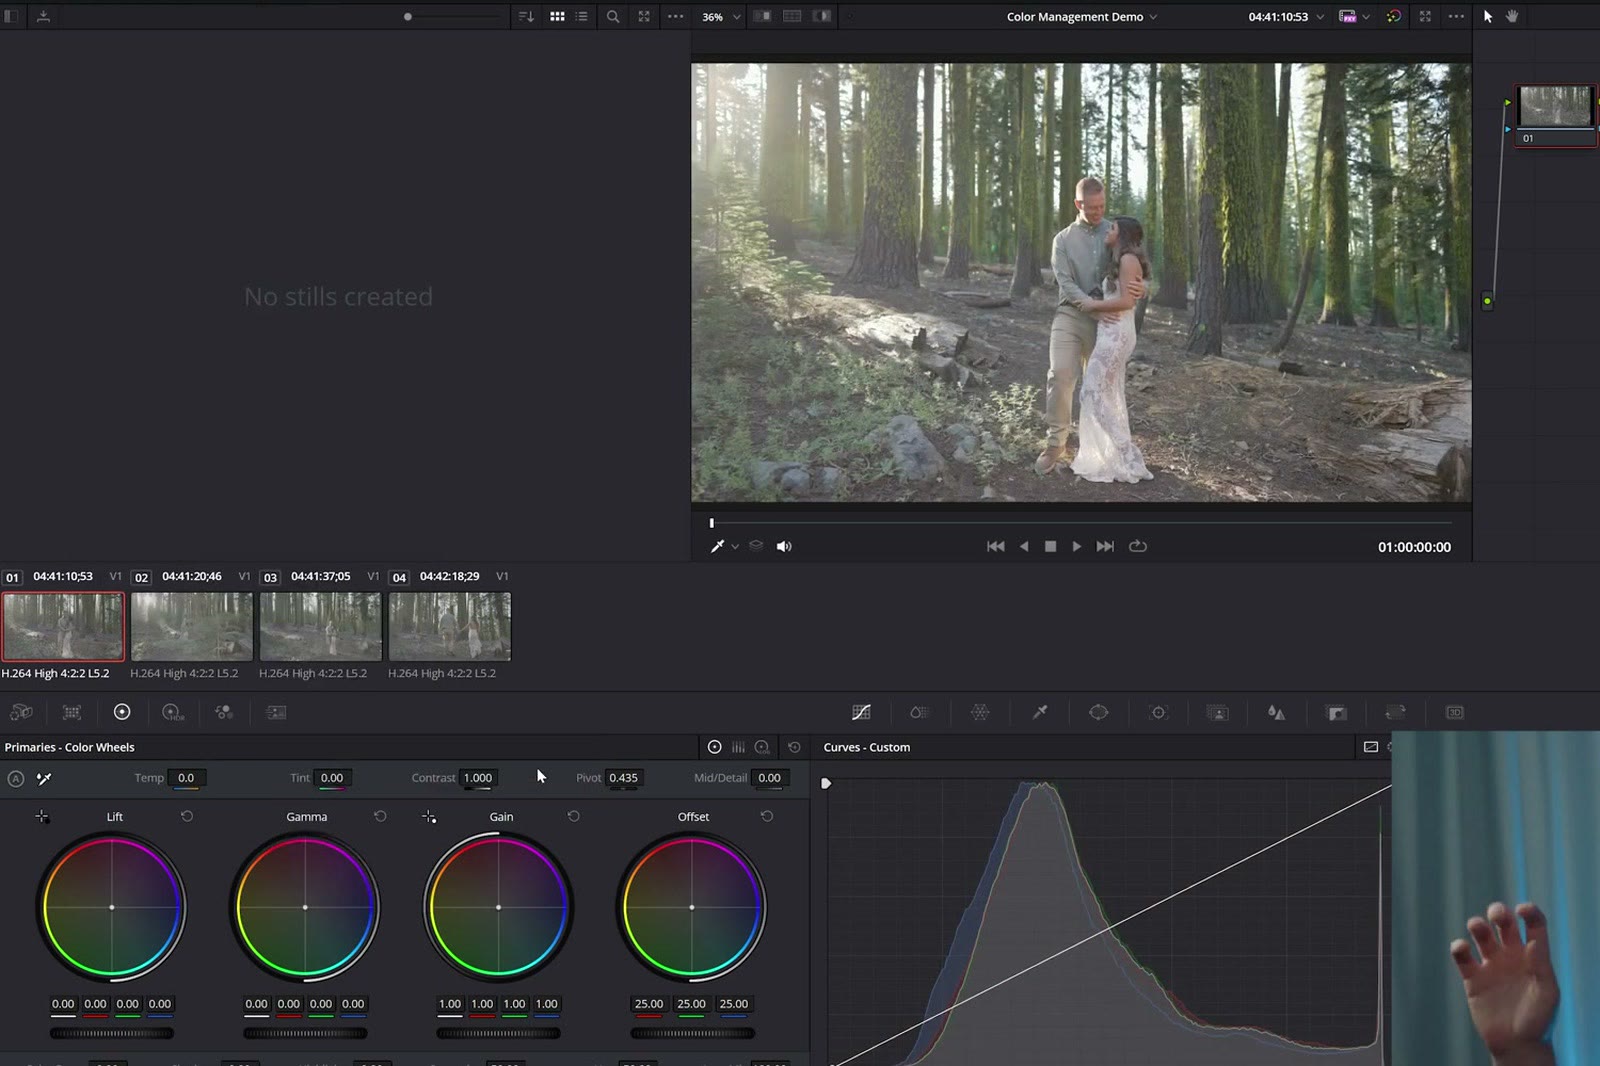
This footage just went from S-Log3, where it was super flat and desaturated, over to the contrasty and saturated Rec.709 color space, and this is the exact amount of contrast and saturation that needs to be applied to S-Log footage. It’s pretty darn magical.
And I can hear you already typing down in the comments. Matt, do I have to go down here and right click on every single one of these clips and go to Input Color Space and go down to Sony or whatever I used, for every single clip?
No, you don’t have to do that at all. You can hold Ctrl or Command and select the clips one by one, or you can click on one clip and hold Shift to select a run of them, or if you know you filmed all of them with the same camera and the same picture profile, just press Ctrl or Command A and it’ll select all of them. Then right click, go up to Input Color Space, pick Sony S-Log3, and bam, look at that. All colored, looking fantastic. One click, y’all. It’s amazing.
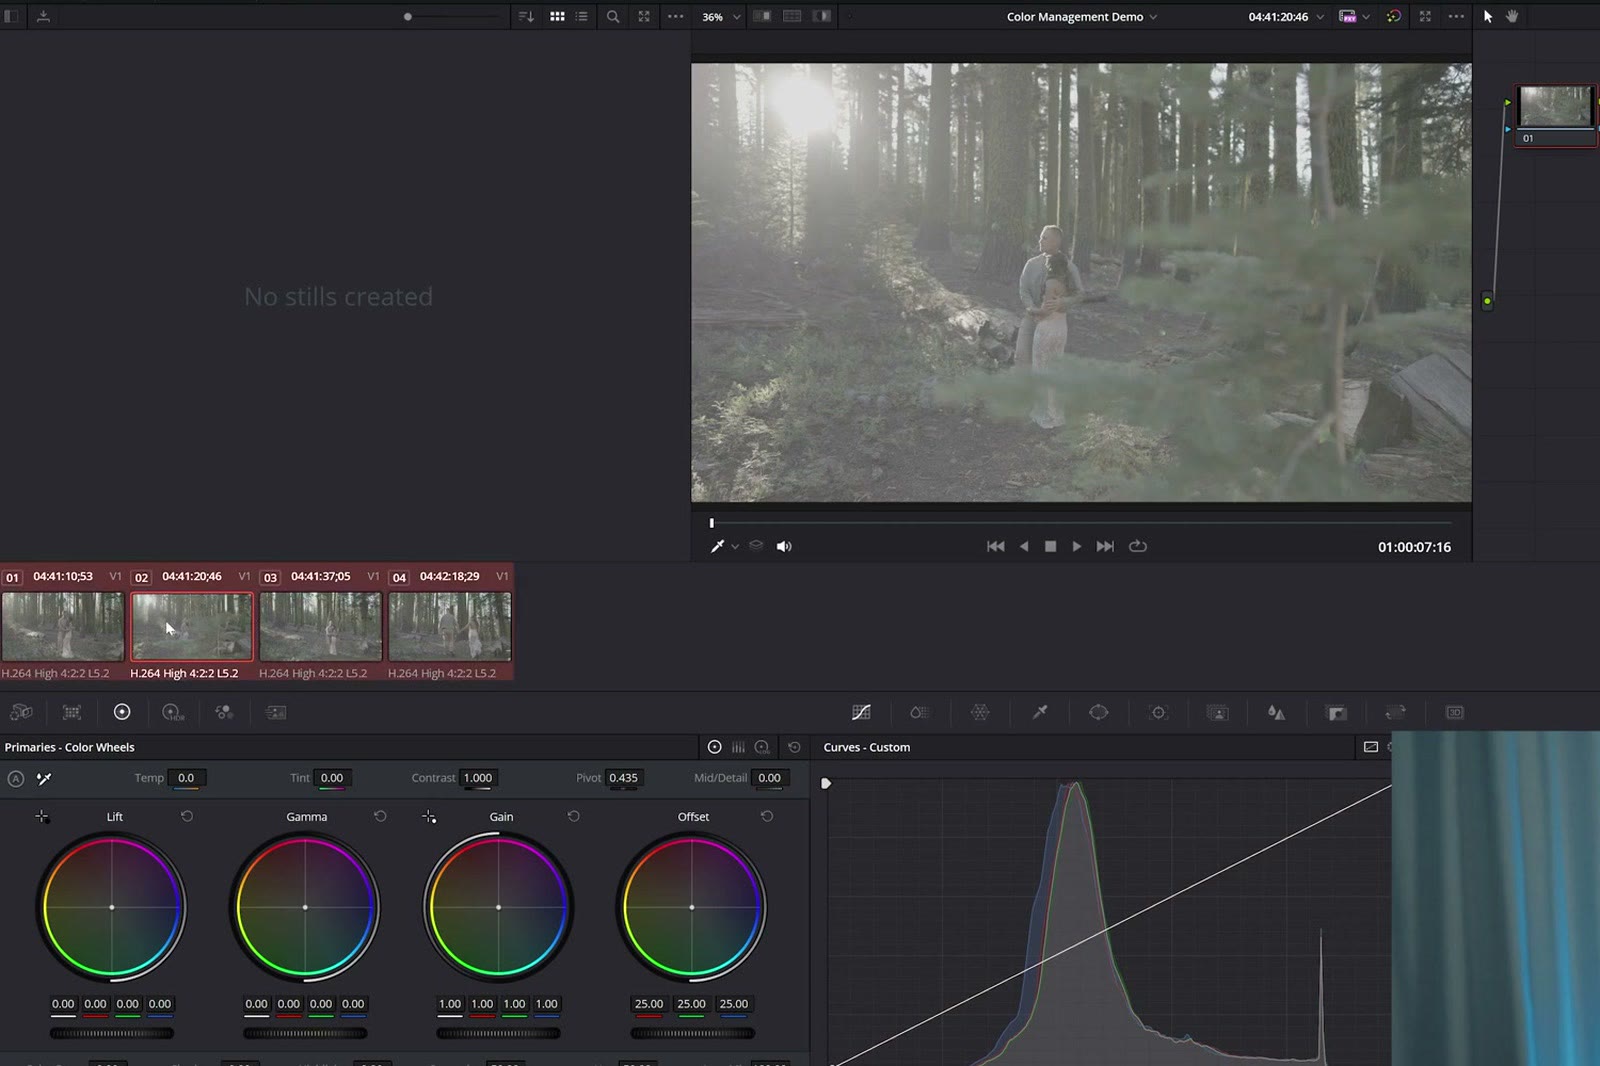
The one thing I would keep in mind is that using this color management tool is not going to save you if your camera settings were wrong whenever you were filming. So if your camera was overexposed, or your white balance was significantly off, color management is not going to fix your exposure or your white balance, meaning you’re still going to need to tweak that footage in post.
Do You Still Need To Use LUTs?
You may be wondering, Matt, does this color management thing mean I don’t need to use LUTs anymore? And my answer is yes and no.
In my opinion and experience, color management reduces the need to use a LUT that simply changes a color space, like the kind you’d use to shift your colors from log to Rec.709, because color management is handling that for you now. Of course, if you like the way a certain conversion LUT looks, by all means keep using it. There’s nothing stopping you.
But here’s the thing. While color management can help with converting your log footage so that it looks better, just shifting the footage from log to Rec.709 isn’t enough in my opinion. You really need to add a creative look on top of it. Remember, using a LUT isn’t just something you do to make your log footage not log anymore. A good LUT can change the emotion your audience is feeling whenever they watch a video, by altering the colors in a pleasing way, and this is where LUTs, especially creative LUTs, are really important.
Color management can get you closer to the look that you want, but in my experience it’s only about 50 to 75 percent of the way there, and there is still a lot of color grading work that needs to happen if you want your colors to look their best.
The Best LUTs For Color Management
This is exactly why my WhoisMatt LUTs come with two versions of every single LUT, a log version and a standard version.
The log version is great if you don’t want to mess with color management at all and you want an all in one LUT you can apply that will add contrast and saturation, convert your log footage to Rec.709, and add a unique look on top that gives you vibrant, true to life colors your viewers will love. Doesn’t that look great? I love how it looks.
But if you want to use color management you can totally do that too. Reset the node grade, go back to Input Color Space, change it back to Sony S-Gamut3.Cine/S-Log3, and then use the standard version of my LUTs that comes with every download. Click that and it looks incredibly similar. The difference is that the standard LUT is not going to add all that contrast and saturation, because it assumes you did not film in log, or that you already used color management to convert your footage from log to Rec.709.

This way you get the best of both worlds. You get LUTs that work with log footage as well as with standard color managed footage, and it’s awesome.
You can check out my WhoisMatt LUTs right here, and I’ll also point you to my free Edit Videos Like A Pro guide if you want some fantastic tips to level up your video editing. Regardless of whether you edit in DaVinci Resolve or Premiere Pro or Final Cut, I would love for you to check out that guide. It’s completely free.
Thanks so much for reading, and have a great day!