
Today I want to show you how to make high quality vertical videos for Instagram Stories using Adobe Premiere Pro. And to save you time, I’ve made a free set of Premiere presets that get you the exact resolution and frame rate Stories want. Honestly you could download those and not read the rest of this. But I’d like you to, so stick around.
One note before we start, because this is of its time: Instagram has changed its Story length limit since I made this, so check what the current one is before you cut to the number below. Everything about resolution, bitrate and getting the file onto your phone still applies.
Build A Sequence That Matches
First we need a sequence that matches an Instagram Story exactly. Press Control + N on PC or Command + N on a Mac to open the New Sequence dialog, choose the DSLR 1080p30 preset, then go to Settings.
Here’s what we’re matching. If you upload a Story and then pull the file back down, and I uploaded mine as a clip shot in 4K at 24fps, you’ll find Instagram is playing it back at 30 frames per second, 480×852, at a bitrate of around three megabits per second.
Because Instagram’s compression and resolution for Stories is so generally awful, all my testing says the important thing is to get your frame rate, bitrate and resolution as close as possible to how it will actually play, so the app and the site don’t have to compress your footage as hard.
Yes, that means even if you shot at 24 or 60fps, export at 30. Instagram is going to convert it to that regardless, so don’t worry, it’ll still look fine.
So set the horizontal frame size to 480 and the vertical to 852. Everything else can stay as it is. Then click Save Preset and name it something like “IG Stories Vertical 480×852 29.97fps”, so it’s waiting under Custom the next time and you never have to type any of this again.
Drop In Your Footage And Fill The Frame
Import your clip and drag it onto the timeline. You’ll immediately get a Clip Mismatch Warning, and you want Keep Existing Settings. You do not want to resize the sequence to fit the clip. You want to resize the clip to fit the sequence.
Now you’ll have huge black bars top and bottom. You could export it exactly like that and post it wide, but come on. We want it to fill the screen.
Select the clip, go to Effect Controls in the top left, and there are only three numbers you need. The first position number moves the clip left and right. The second moves it up and down. And Scale makes it bigger or smaller.
Because mine was a 4K clip it comes in at 12.5%. Take it to around 40 and it fills the whole window, then nudge the horizontal position until the part you care about is centred.
And if you’d rather make people turn their phones sideways, you can do that too. Put position and scale back to where they started, go down to Rotation, rotate the clip by 90, then scale it to about 24 and it fills the frame the other way. That’s more work for your viewer, and I hear people don’t love doing it, but the option is there.
Trim It And Set Your In And Out
Your clip needs to be under the Story length limit or it’ll be split into multiple clips, which is fine but not usually what you want.
Click in the timeline so it’s outlined blue, press plus a few times to zoom right in, drag the playhead to one frame before your limit, and drag the end of the clip back to meet it.
Then tell Premiere what to export. Playhead to the start, press I. Playhead to the end, and if you don’t want to scrub for it, press the down arrow to jump straight there, then press O.
Export Settings
Control + M, or Command + M on a Mac, to open Export Settings.
Format H.264. For preset, pick Match Source High Bitrate. It genuinely doesn’t matter much because we’re about to customise everything, but starting there saves a few clicks.
Then Output Name, which matters. Click it and choose where the file is going. I keep a renders folder inside the project.
Make sure Export Video and Export Audio are both ticked, then go to the Video tab. Because of the preset most of this is already right: width 480, height 852, frame rate 29.97. Tick Render at Maximum Depth for better quality.
Now Bitrate Settings, which is where the real work happens, because we want our export bitrate as close as possible to what Instagram will actually play. And that is low.
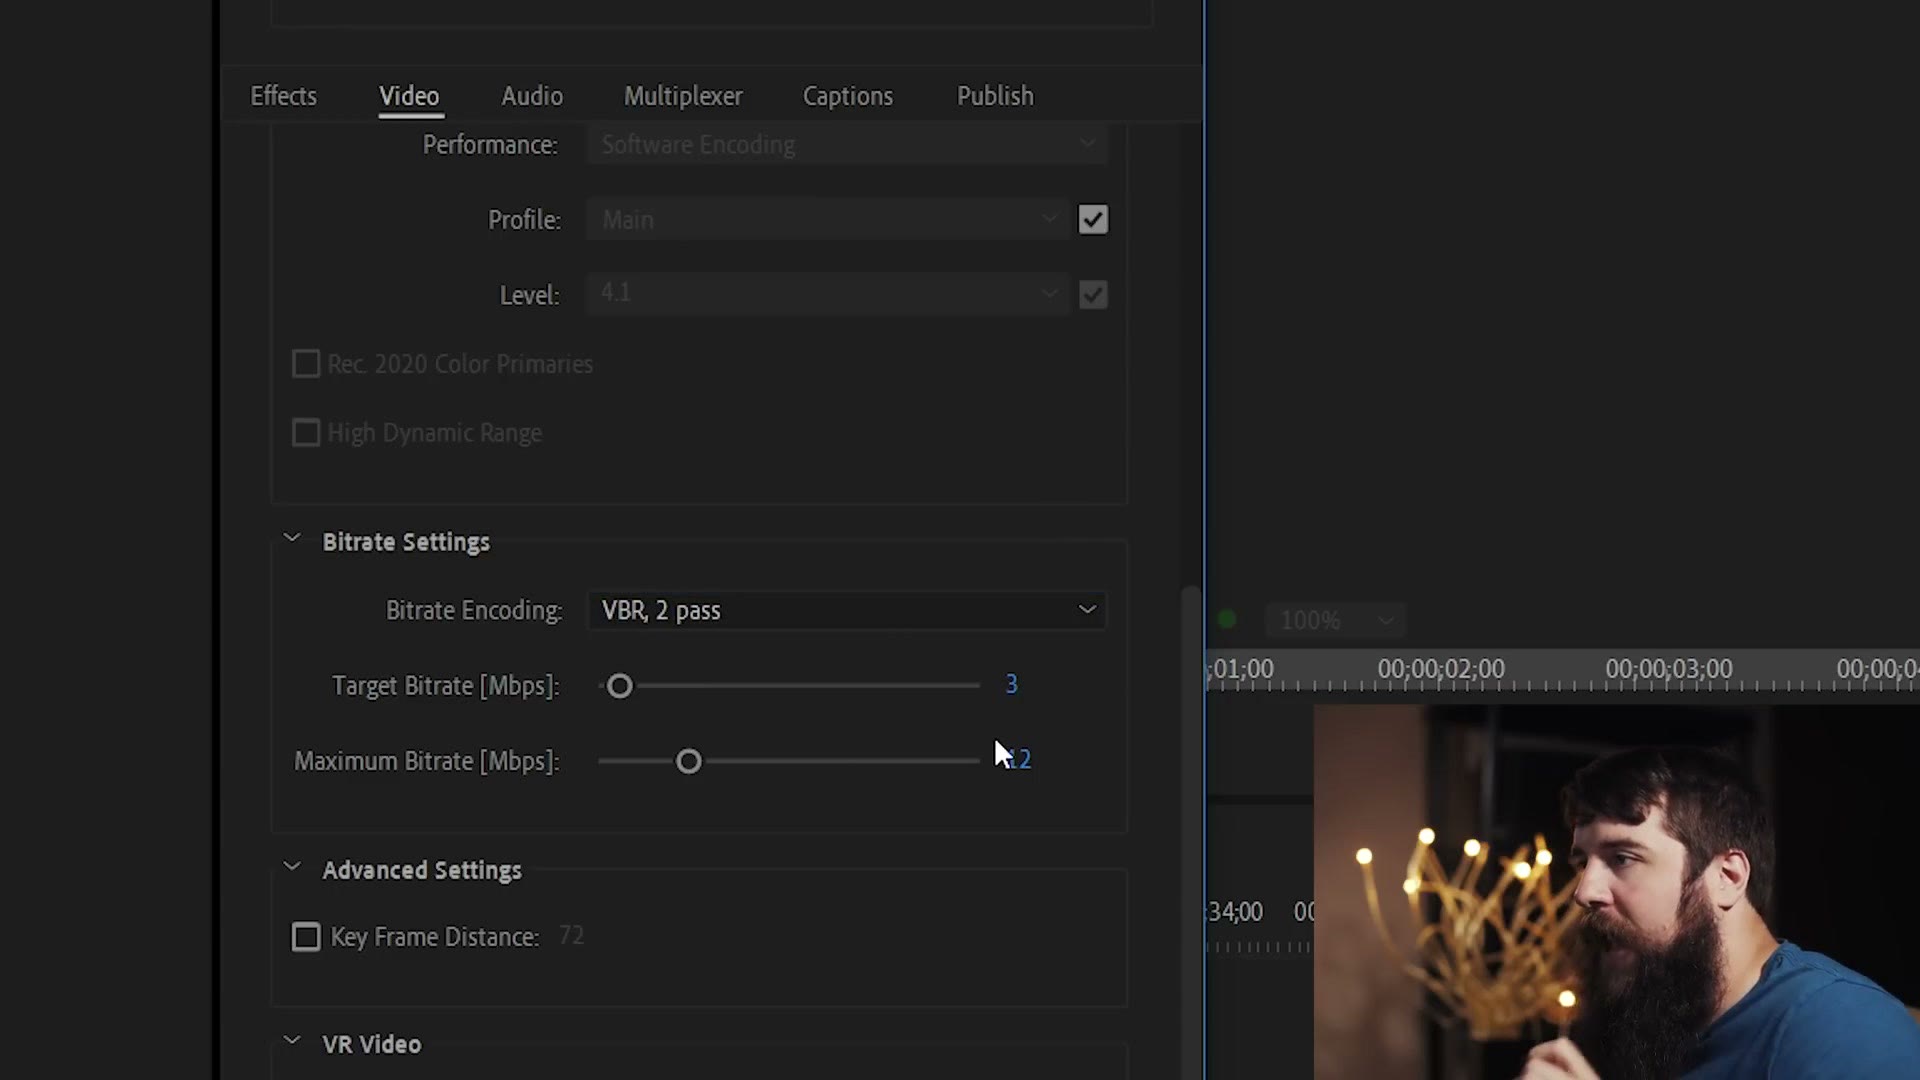
Set Bitrate Encoding to VBR, 2 pass, target bitrate to 3 and maximum to 4. If you want the fuller explanation of why those numbers, I’ve written it up in my Instagram export settings guide.
On the Audio tab: AAC, 48000 Hz, stereo, quality high, bitrate 320kbps. My example was a drone clip with no music so it didn’t matter, but those are the settings if yours has audio.
Last box, tick Use Maximum Render Quality.
Then save all of it. Click the small arrow next to Preset, choose Save Preset, and call it “IG Stories 480×852 29.97fps” so you can find it in a long list later. Now it’s one click from the dropdown every time.
Click Export, or click Queue to hand it to Adobe Media Encoder if you’d rather keep working in Premiere while it renders.
Getting It Onto Your Phone
You now need the file on your phone without losing quality. On a Mac, AirDrop and you’re done. On a PC like mine, that isn’t an option, so use a file syncing service. Dropbox and Google Drive both have free accounts, so this costs nothing.
I use Google Drive. Make a folder called Instagram, drag the file in from your computer and let it upload. Then open the Drive app on your phone, find the file, tap the three dot menu, choose Send a Copy, then Save Video. It lands in your camera roll. Open Instagram, pick it, post it.
Voila. Your video is on your Story at the best quality Instagram will allow.
I’ve made a lot of other videos about exporting for maximum quality out of Premiere, and there’s a whole playlist of them if you want to go further.