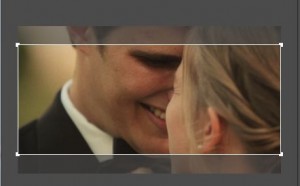
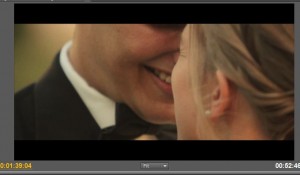
If you watch a movie in a theater, you are most likely seeing it in the 2:35:1 aspect ratio, also known as Cinemascope or Anamorphic. I became enamored with the 2:35:1 aspect ratio this Summer and ever since have output most of my videos in this format. It not only adds a “movie” look to whatever you’ve shot, it also allows you to more precisely edit your video to make sure the audience’s eyes focus on exactly what you want.
The following is a quick and simple tutorial on how you can use Cinemascope with Adobe Premiere Pro. I use Premiere Pro CC but this should work for pretty much any other editing software such as Final Cut Pro, Final Cut X, Edius, Avid, Sony Vegas Pro, etc. With that said, let us begin the photo and text tutorial:
1. First off you will need to download my “Croplines” PSD and PNG templates.
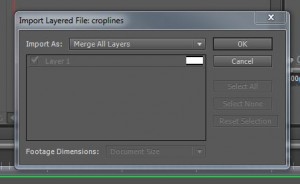
2. Import the croplines PSD file into Premiere Pro and select the “merge all layers” dialogue box.
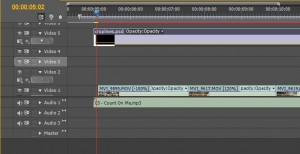
3. Drag your PSD file into your sequence and make it the top track of your footage. Make sure it stays above everything else. This way you can make sure you always know how your footage will look when you export it.
4. Lock your track so that you cannot edit it. Locking the track will help when you are changing what portion of your videos are viewable behind the cropped bars of the PSD.
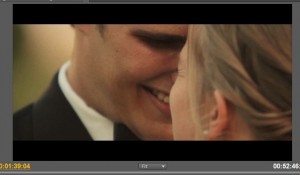
5. Import and edit your footage. As you edit your footage you may notice that your new cropped look is cutting off an important portion of the footage, the actor’s eyes in the photo example.
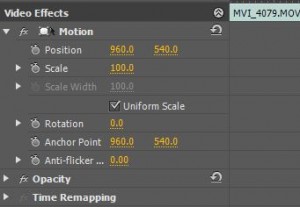
6. Move your footage behind the cropped lines by selecting each individual clip and selecting the “motion” arrow and changing the “vertical” numbers of the “Position” (this number is by default 540 when you are editing 1080p HD video). Increase the number if you would like to move the clip down and decrease the number if you would like it to go up. Make sure you do not increase the number above 680 or decrease it below 400 because if you do it will no longer be hidden behind the croplines and your video will not look uniform.
7. Once you have edited your video file and followed step 6 to move each of your clips to exactly where you want them vertically, you are ready to export. Exporting is rather simple with slight differences depending on what you plan to do with the video.
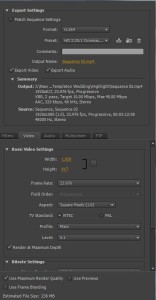
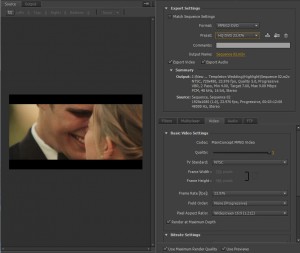
Online: When exporting for streaming or viewing on a computer such a YouTube, Vimeo, etc. you will want to click the “eye” on the “croplines” track and make it invisible. Then you will go to File>Export Media and create a custom render setting using h.264 at 1920×817. This will just result in a squished video if you do not set the export to crop the video file as well.
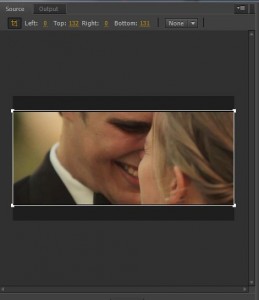
Under the “source” tab in the top, left click the crop button and change it to “Top: 132, Bottom: 131” – leave the Left and Right at 0. This will crop your video in the same way as using the croplines did but will result in it being an exact fit. For some reason if you leave the croplines on your videos on vimeo, it will have extremely small black bars visible on the top and bottom if you do not do this. Theoretically you could just do this and not bother with using the “croplines” PSD file as a track in your editing but then you would miss out on it as a guideline to help you figure out what is visible in your shots.
DVD and Blu-Ray: For DVD and Blu-Ray, export as you would normally with the croplines visible. Whatever resolution you export at, the croplines will be visible and work to create a 2:35:1 aspect ratio for your footage. Note: In some cases when burning DVDs, specifically with Adobe Encore, I have run into an issue where the footage would overflow the edges of the croplines, creating a weird effect where the viewer could tell that the croplines were just a layer in the footage. To fix this, when I am editing and planning on rendering specifically to DVD, I select the “croplines” track in Premiere Pro after importing it into the sequence, and select “motion>scale” and change the scale from “100.0” to “101.0.” This prevents this footage overflow effect where it is visible at the edges of the croplines.
That’s all! After rendering, enjoy the video you’ve created in the 2:35:1 Cinemascope/Anamorphic format! Please feel free to post a comment letting me know what you think of this tutorial and if you have any questions or suggestions.
If this tutorial helped you out, you might be interest in the other tutorials I have created for all aspects of video production. Or maybe you’re looking for royalty free music you can use with your YouTube and Vimeo videos?

