Here is how to setup the custom buttons, function menu, mode dial, and custom menu for FAST filmmaking with the Sony a7S III and FX3! These “Run & Gun” settings will put everything you need at your fingertips, meaning you essentially never have to dive deep into the menus.
If you missed part one, it will show you how to setup every single menu item to film as fast as possible. Watch it here!
Here is how I have my Sony a7S III menus setup for filming weddings and other events in the “Run & Gun” style of filmmaking. Meaning: quick setup times, near-instantaneous changing of frame rates and resolution, & rapid dialing in of settings like white balance, aperture, and ISO. And because the Sony FX3 has the same menu, this video applies to it as well!
This will be a two-part series because I don’t want to just tell you what settings I use; I also want to tell you why I chose them. This video dives deep into the menus and tells you how to access what you need and ignore what you don’t.
Part two will show you how to set up the camera’s custom menu, buttons, function menu, and mode dial, which will keep you from essentially NEVER needing to dive into the menus ever again! You’ll be able to change all your settings with one or two button presses, which is ideal for fast filmmaking. Watch Part 2!
I’ve always loved being able to see thumbnail previews of my video clips in Windows 10. But when I upgraded to a 10-bit camera, those video previews disappeared, leaving only VLC traffic cones in their place.
Here’s how to fix this issue and enable thumbnail previews for 10 bit videos in Windows 10 for FREE!
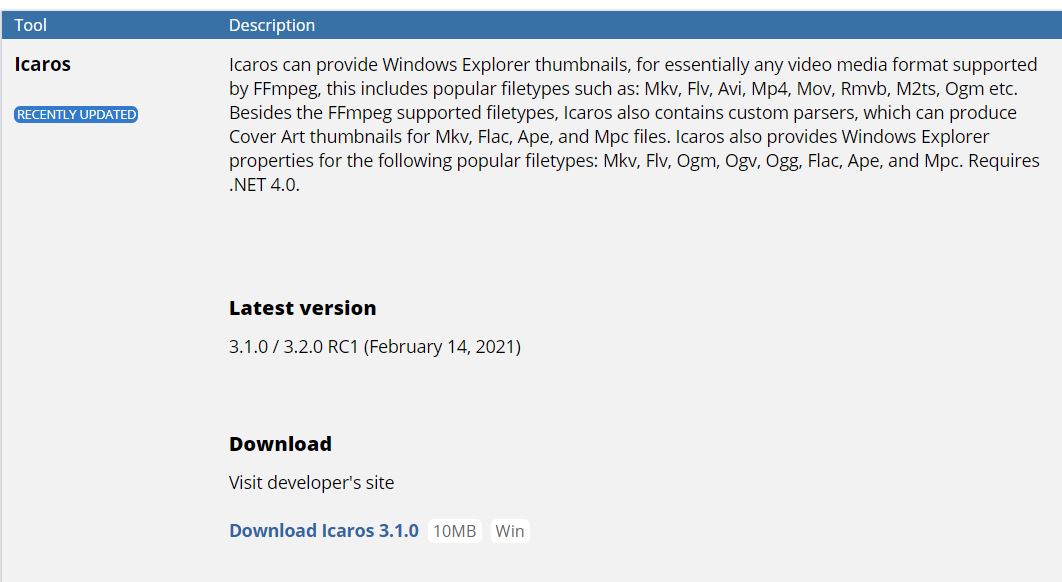
Start by downloading and installing the free thumbnail tool, Ikaros.
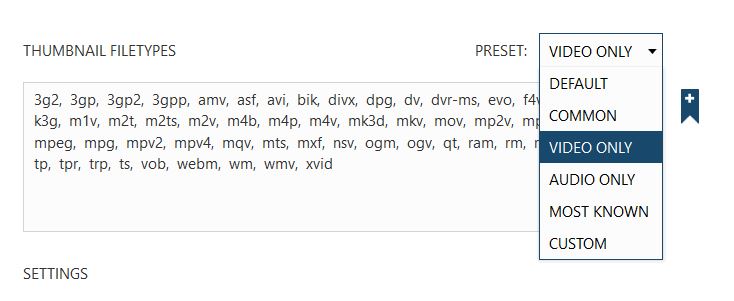
After you have installed it, open Icaros, click the dropdown menu next to PRESET, and select “Video Only”. Then press Yes in the dialogue box that opens.
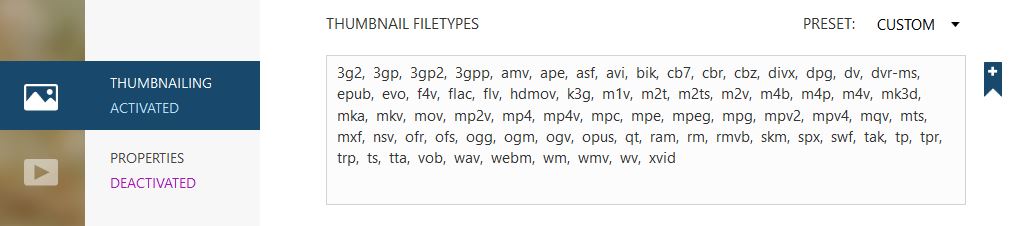
Lastly, click the magenta text on the left that says “DEACTIVATED”. This will switch Icaros on and the text will then read “ACTIVATED”.
That’s all you have to do! Navigate to your 10-bit video file and you should now see a thumbnail preview image where the video file placeholder image was located! As a bonus, are you having difficulty playing back your 10-bit footage? Read my tutorial on how to playback 10-bit video in Windows 10.
You just bought a camera that shoots 10-bit footage, but when you copy that footage to Windows 10, you can’t play it back! Even when you use VLC Media Player which normally plays anything you throw at it, the program freezes, or plays back incredibly choppy footage.
Here’s how to fix this issue and playback your 10-bit videos smoothly, for FREE!
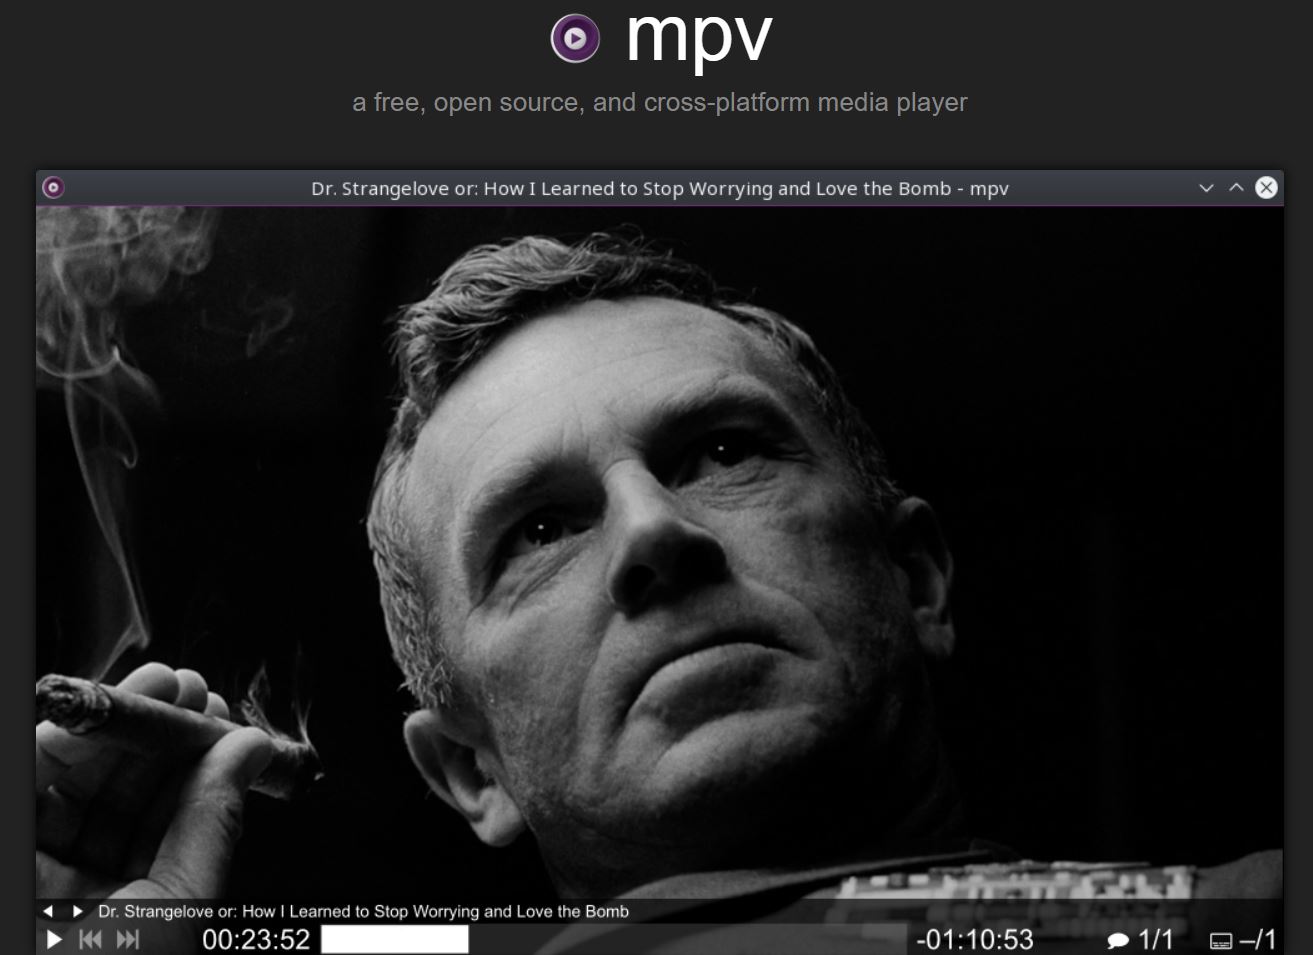
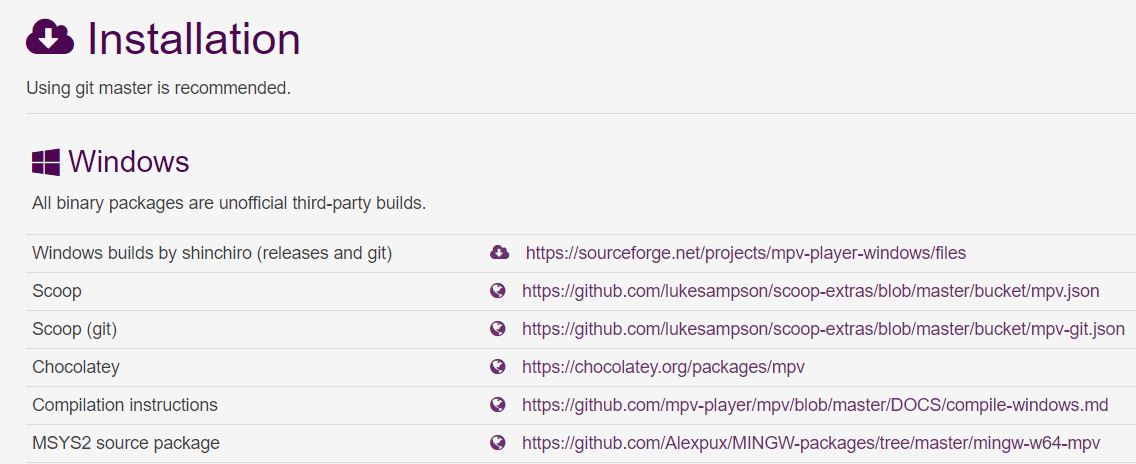
To start, while I love VLC Media Player, I’ve found that it has fallen short when it comes to playing back 4K 10-bit video files like the ones that I record with my Sony a7Siii. Instead, I’m going to recommend that you download and install the free MPV Media Player.
Click “Installation” at the bottom of the page.
Then click the link next to “Windows builds by shinchiro”.
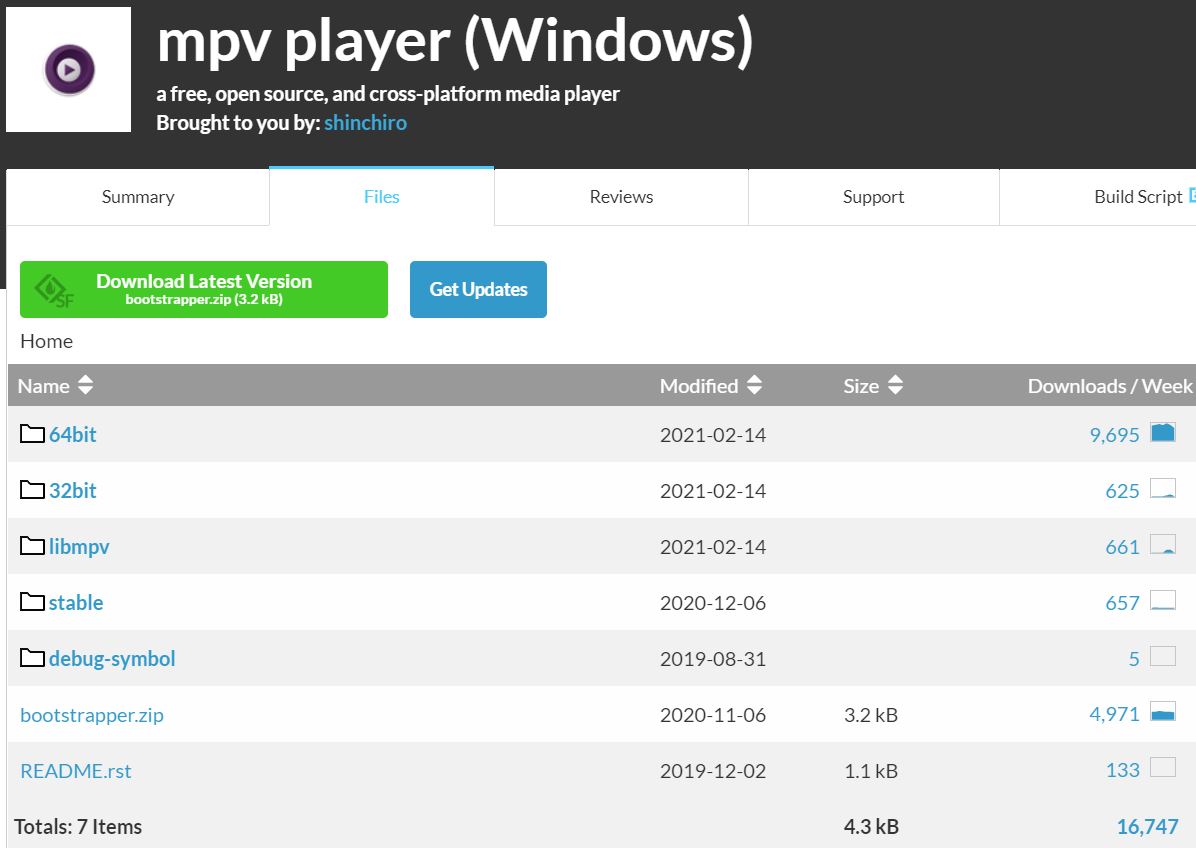
Don’t be overwhelmed by the amount of options available here. Click the folder labeled “stable” which will bring you down the download links for the stable version of the software.
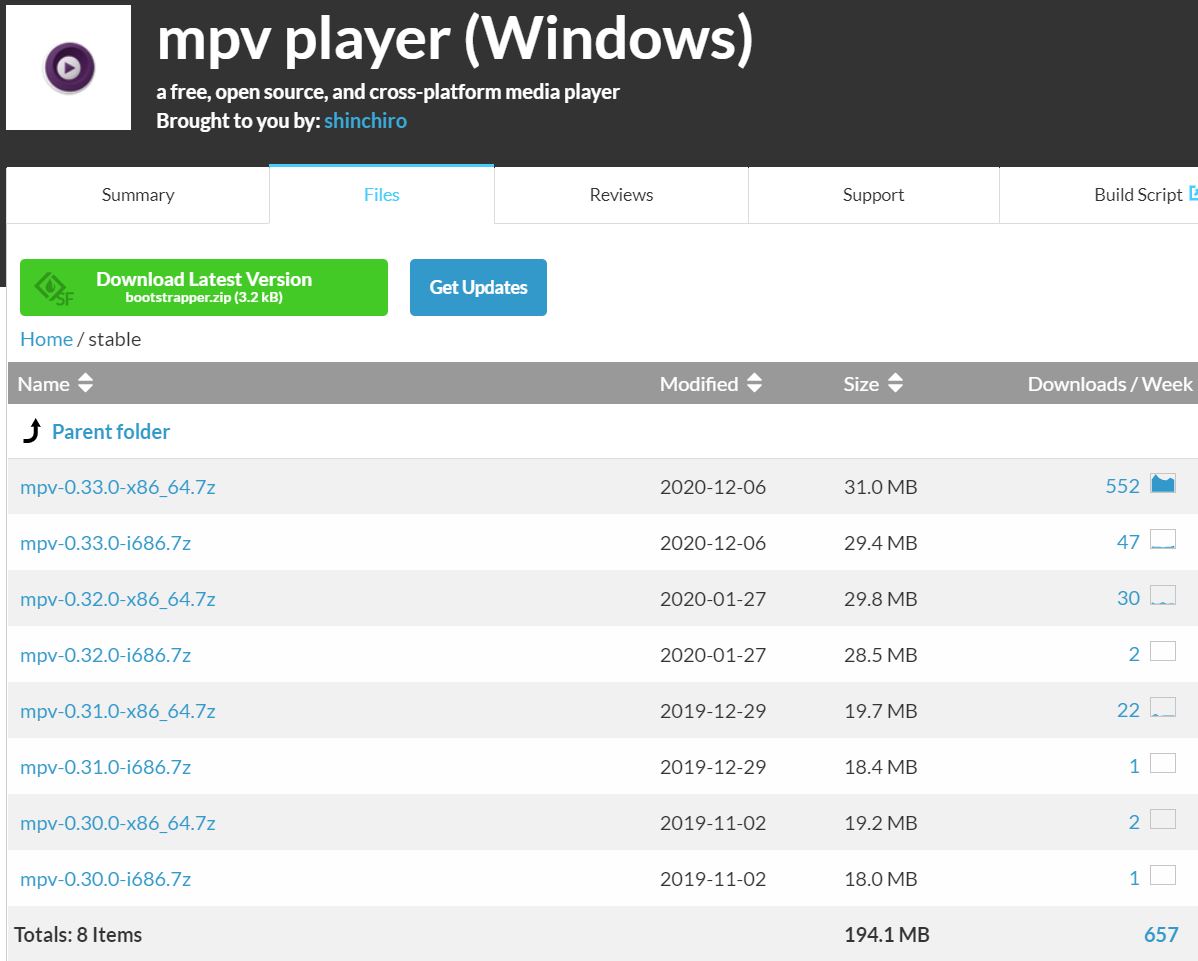
Click the “mpv-0.33.0-x86_64.7z” link to download the program. Note: At the time of writing this blog, this is the latest version of the MPV Player program, but it may be on a newer version when you are reading this. If so, as long as you download the top link that has “x86_64” in the filename you should be good to go.
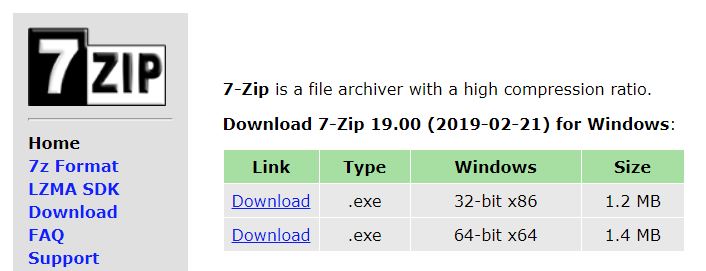
The MPV program is downloaded in the compressed 7-Zip format (which is why the file ends with .7z). To extract the program, you will need to download the free 7-Zip program. Download the 64-bit x64 version.
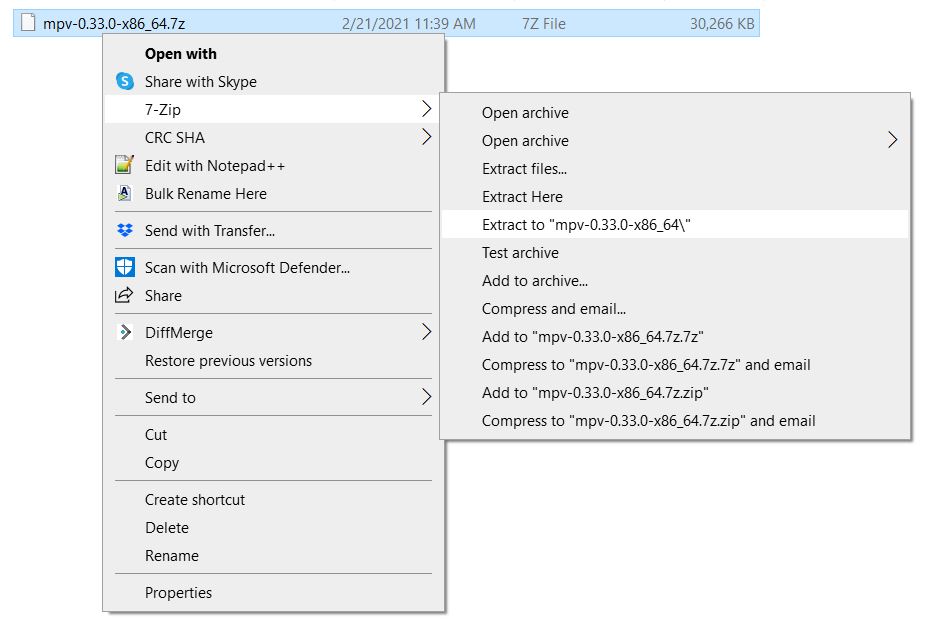
Next, right click on the “mpv-0.33.0-x86_64.7z” file > 7-Zip > Extract to “mpv-0.33.0-x86_64\”. This will create a new folder labeled “mpv-0.33.0-x86_64”, and inside that folder you will find the mpv.exe program file.
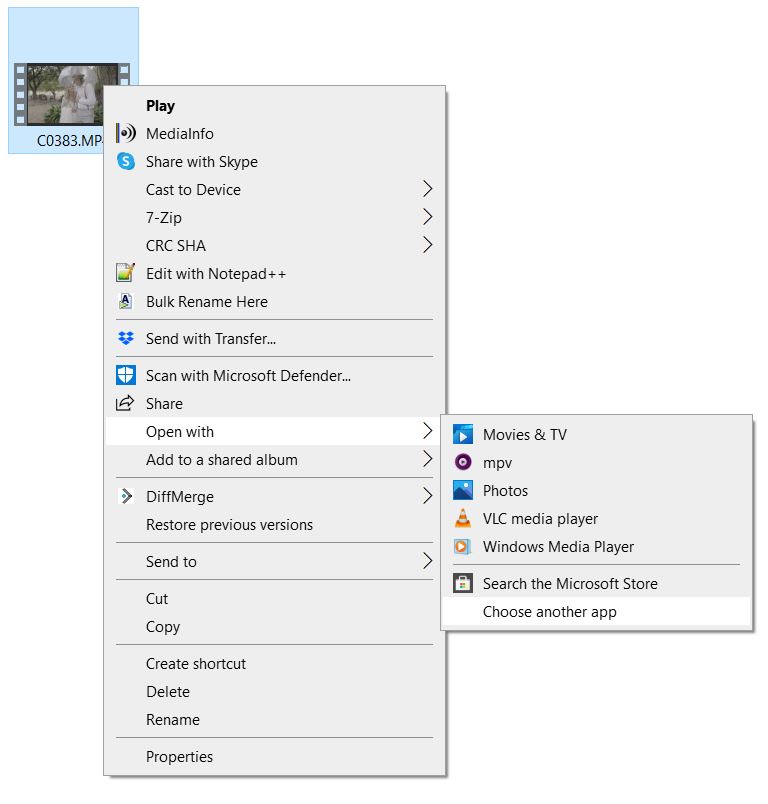
Almost done! Navigate to your 10-bit video file that won’t play, right click on it, and select Open With > Choose another app. In the window that appears, scroll to the bottom and click “More Apps”, then scroll to the bottom again and click “Look for another app on this PC”. Navigate to where you saved the mpv.exe file, select it, and click open.
Your video will now open and playback smoothly in MPV Media Player!
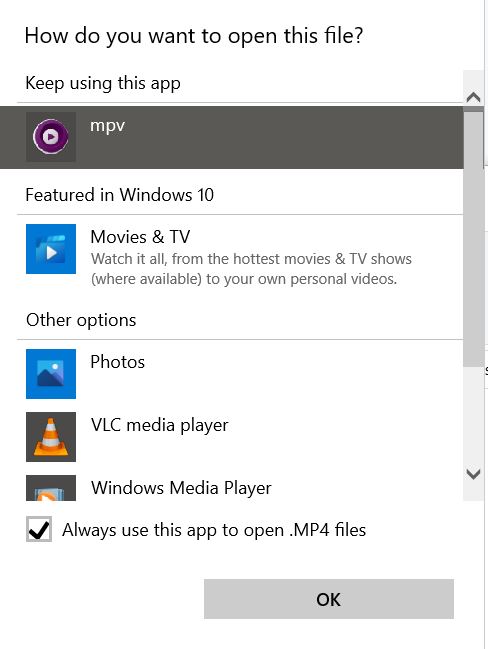
Last step! Right click on the video file again, go to Open with > Choose another app. Then select “mpv” from the list and check the box that says “Always use this app to open .MP4 files” (or .MOV/.MXF etc). Click Ok!
That’s it! Your 10-bit video files will now automatically open with the MPV video player and playback smoothly.
Now here’s another bonus fix for you. Do your video files not have thumbnail previews? Read my blog post for how fix that issue!
The Tascam DR-10L has been my go-to audio recorder recommendation for wedding filmmakers. But the Zoom F2 is coming for its crown! In this head to head comparison, I will tell you whether the DR-10L or F2 is best for wedding filmmakers.
The Zoom F2 and F2-BT field recorders pack revolutionary audio technology into a tiny package that is almost perfect for wedding filmmakers. Here is my Zoom F2 and F2-BT review!